Lab – Android Development Environment · Part 1 – Setting Up Android Studio. In this part you...
34
Lab – Android Development Environment Setting up the ADT, Creating, Running and Debugging Your First Application Objectives: Familiarize yourself with the Android Development Environment Important Note: This class has many students with a wide range of previous experience. Some students are fairly new to object-oriented programming (OOP). Some have OOP experience, but are new to Android. Still others have some Android experience already, and want to just freshen up their knowledge. Because of this, I’m not expecting that everyone can finish this entire lab. I suggest that you set a time limit for yourself, say 1 hour. Work through what you can in that time and then stop and take a break. If you later feel that you have some more time for this Lab, then repeat the process. Again – don’t feel that you need to finish everything in this lab. That’s not the goal here. Specifically, if you are fairly new to programming, you should try to complete Parts 1 – 4 below. If you are familiar with programming and programming environments, you should try to complete parts 1 – 6 below. This lab contains the following Parts. 1. Set up Android Studio. 2. Create a new Android application. 3. Create an Android Virtual Device and start the Android Emulator. 4. Run the application you created in Part 2. 5. Import an application project. 6. Debug an Android application. Additional helpful information can be found on the Android Developer website: • https://developer.android.com/studio/index.html • https://developer.android.com/training/basics/firstapp/creating-project.html • https://developer.android.com/studio/run/managing-avds.html • https://developer.android.com/training/basics/firstapp/running-app.html
Transcript of Lab – Android Development Environment · Part 1 – Setting Up Android Studio. In this part you...

Lab–AndroidDevelopmentEnvironmentSettinguptheADT,Creating,RunningandDebuggingYourFirstApplication
Objectives:FamiliarizeyourselfwiththeAndroidDevelopmentEnvironment
ImportantNote:Thisclasshasmanystudentswithawiderangeofpreviousexperience.Somestudentsarefairlynewtoobject-orientedprogramming(OOP).SomehaveOOPexperience,butarenewtoAndroid.StillothershavesomeAndroidexperiencealready,andwanttojustfreshenuptheirknowledge.
Becauseofthis,I’mnotexpectingthateveryonecanfinishthisentirelab.Isuggestthatyousetatimelimitforyourself,say1hour.Workthroughwhatyoucaninthattimeandthenstopandtakeabreak.IfyoulaterfeelthatyouhavesomemoretimeforthisLab,thenrepeattheprocess.Again–don’tfeelthatyouneedtofinisheverythinginthislab.That’snotthegoalhere.
Specifically,ifyouarefairlynewtoprogramming,youshouldtrytocompleteParts1–4below.Ifyouarefamiliarwithprogrammingandprogrammingenvironments,youshouldtrytocompleteparts1–6below.
ThislabcontainsthefollowingParts.
1. SetupAndroidStudio.2. CreateanewAndroidapplication.3. CreateanAndroidVirtualDeviceandstarttheAndroidEmulator.4. RuntheapplicationyoucreatedinPart2.5. Importanapplicationproject.6. DebuganAndroidapplication.
AdditionalhelpfulinformationcanbefoundontheAndroidDeveloperwebsite:
• https://developer.android.com/studio/index.html• https://developer.android.com/training/basics/firstapp/creating-project.html• https://developer.android.com/studio/run/managing-avds.html• https://developer.android.com/training/basics/firstapp/running-app.html

Part1–SettingUpAndroidStudio.InthispartyouwilldownloadandinstallAndroidStudiowhichwillbetheIntegratedDevelopmentEnvironment(IDE)usedforthiscourse.Forthepurposesofthisdocument,weinstalledAndroidStudioversion2.3.3(thecurrentlateststablereleaseasof9/1/2017)onaMacrunningSierra.Allscreenshotscorrespondtothatenvironment.
1. DownloadAndroidStudiofromhttps://developer.android.com/studio/index.html.Clickon‘DownloadAndroidStudio’.
2. Opentheexecutablefileandroid-studio-<xxx>.3. Oncethesetuploads,youwillseetheWelcomeScreen.
4. Click‘Next>’ontheWelcomeScreen.5. Whenchoosingcomponents,ensureallofthecheckboxesarecheckedinforeachcomponentto
install.Onceyouaredone,click‘Next>’.6. AgreetotheAndroidStudioandtheIntelHAXMLicenseAgreementsafterreadingthem.7. Verifytheinstalllocationsmeettheinstallationrequirementsandclick‘Next>’.8. Youmayormaynotseetheemulatorsetupsettings,justclick‘Next>’afterselectingtheRAM
size.

9. Finally,click‘Install’.Youwillseewhichoperationsarecurrentlyrunningintheinstallationprocessandaprogressbardisplayingtheirprogress.
10. Oncetheinstallationprocessisfinishedclick‘Next>’.
11. AndroidStudioisnowsetup.Checkon‘StartAndroidStudio’andclick‘Finish’.12. YouwillseetheCompleteInstallationscreenbelow.13. IfyouhadapreviousversionofAndroidStudioinstalledprior,thencheckeitherthefirstof
secondradiobox.Otherwise,checkthelastradioboxandhit‘OK’.

14. AsAndroidStudiostarts,thesplashscreenwillappear.
15. Afterthesplashscreenyoumayseesomeadditionalsetupoperationsrun,suchasdownloadingcomponents.
16. Onceitisfinished,click‘Finish’.

17. WelcometoAndroidStudio!Inthenextpartwewillstartourfirstproject.

Part2–CreatingANewProjectInthispartyouwillcreateasimpleAndroidapplicationthatdisplaysthewords,"HelloWorld!"
1. AttheWelcomeScreen,clickon‘StartanewAndroidStudioproject’.
2. Entertheapplicationname‘MyFirstApp’andnotewheretheprojectislocated.TheAndroidStudioProjectsfolderisthedefaultlocationfornewprojects.

3. Selectwhichdevicesyouwouldlikeyourapptorunon.Fornowwewillbeworkingwith‘PhoneandTablet’.MakesuretosettheMinimumSDKversiontoAPI21forthiscourse.
4. Select‘BlankActivity’fromthe‘CreateNewProject’dialogboxandclick‘Next’.
5. Inthenextwindow,leaveallthesettingsasdefault,andthenclickFinish.6. AndroidStudiowillnowcreatetheprojectandbuildit.

7. YoumayseeasecurityalertifyouareonWindows,click‘Allowaccess’tocontinue.
8. OncetheAndroidStudioIDEfullyloads,youwillseethescreenbelow.Ifyouseetextratherthanthelayoutdesignermakesurethe‘Design’tabisselected.

9. TheopeningscreenistheDesignViewoftheactivity_main.xmlfile.Youcanalreadyseethewords“HelloWorld!”ontheApp’sUserInterface.
10. IfyouclickontheTexttabyoucanseethelayoutfileunderlyingtheuserinterface.
11. Toviewthebackingcodeforthisactivity,doubleclickon‘MainActivity’insideoftheProjectdirectorytree.Thisfileislocatedin:‘java’>‘com.example.<user_name>.myfirstapp’>‘MainActivity’.
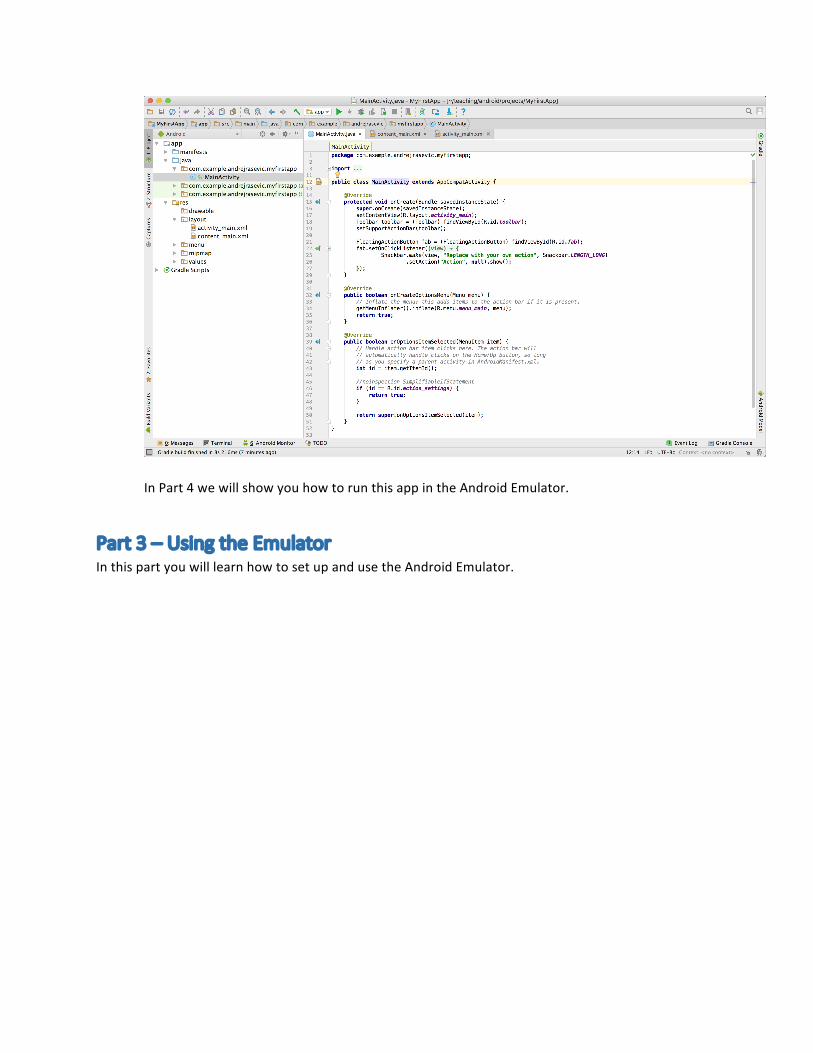
InPart4wewillshowyouhowtorunthisappintheAndroidEmulator.
Part3–UsingtheEmulatorInthispartyouwilllearnhowtosetupandusetheAndroidEmulator.

1. FirststartuptheAndroidVirtualDeviceManager.YoucandothatbyselectingTools>Android>AVDManagerfromtheAndroidStudiomenubar.
2. Anewdialogboxwillpopup.
3. Click"CreateVirtualDevice"tocreateanewAndroidVirtualDevice(AVD).

4. Anotherdialogboxwillpopupdisplayingvariouspre-madeAVDtemplates.Selectwhicheverdeviceyouwouldliketoemulateandclick‘Next’.Forexample,selecttheNexus5.
5. SelecttheappropriateSystemImageforthevirtualmachine.Toallowuserswithlimitedcomputermemorytoparticipate,alloftheclassprojectswillbetestedagainstAPIlevel21.Ifyouhaven’tdownloadedthatalready,makesuretodownloaditnow,byclickingonthe“Download”link.


6. OncetheDownloadisfinished,click‘Finish’.
7. Click‘Next’onceyouhavereturnedtothepreviousscreen.8. Youcankeepallofthedefaultselectionsinthenextscreenandhit‘Finish’.

9. Nowclickonthegreen‘Play’icontostarttheemulator,afterclickingonityoucanclosethe
AndroidVirtualDeviceManager.
10. Astheemulatorstartsup,youwillseeaprogressdialogappearinAndroidStudio.11. Next,theemulatorwillappearandstartitsbootsequence.
Afterthedevicehasbooted,theemulatorwillbereadyforuserinteraction.

Part4–RunningYourFirstAppInthispartyouwilllearnhowtoruntheapplicationyoucreatedinPart2intheAndroidEmulator.
1. Therearetwowaystoruntheapp.
Method1:ReturntoAndroidStudioandsimplyclickonthe“Run‘app’”Button(Shortcut:Windows-Shift+F10,Mac-Ctrl+R)
Method2:ReturntoAndroidStudioandselectRun>Run‘app’.
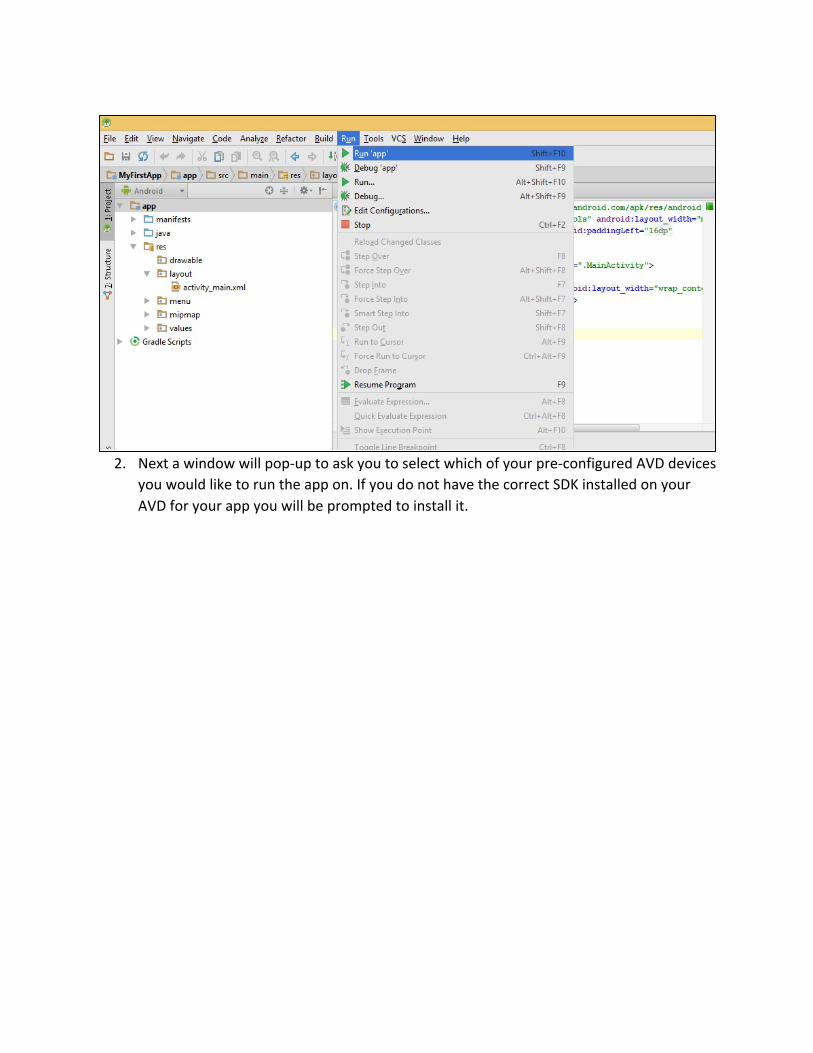
2. Nextawindowwillpop-uptoaskyoutoselectwhichofyourpre-configuredAVDdevicesyouwouldliketoruntheappon.IfyoudonothavethecorrectSDKinstalledonyourAVDforyourappyouwillbepromptedtoinstallit.

3. IntheGradleConsolepanel,belowtheeditorwindow,youwillseeoutputindicatingthattheapplicationisbeingloadedontotheAndroidEmulator.
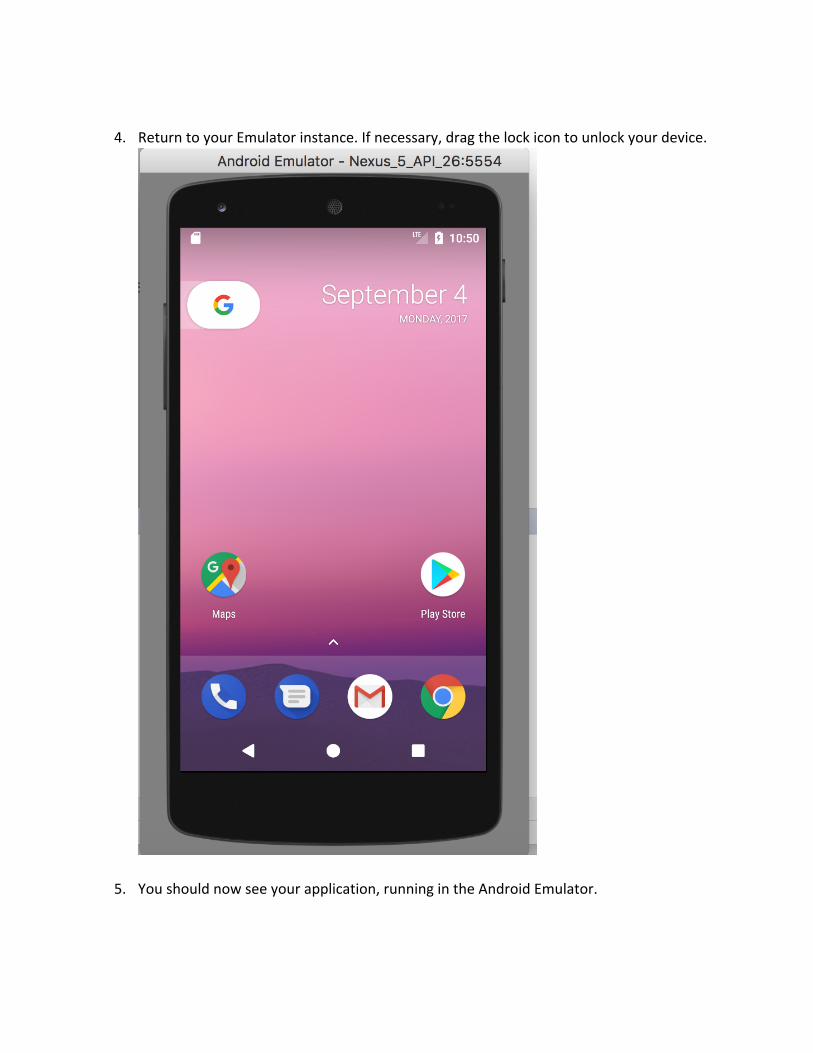
4. ReturntoyourEmulatorinstance.Ifnecessary,dragthelockicontounlockyourdevice.
5. Youshouldnowseeyourapplication,runningintheAndroidEmulator.


Part5–ImportingandRunninganExistingApplicationInthispartyou’lllearntoimportapre-existingapplicationintoAndroidStudioandthenrunit.
1. TheAnswerapplicationexistsinthecoursesourcecoderepository.
2. ReturntoAndroidStudio.SelectOpenanExistingAndroidStudioProjectfromthemenubar.NoteallthecourseexampleapplicationshavebeenbuiltwithAndroidStudio.
3. Next,inthedialogboxthatappears,browseandselecttheProjectthatyouwantto
import.Forthisexample,select“TheAnswer”fromwhereyouclonedtheCMSC436SampleCoderepositoryinyourlocalenvironment.
ThenpressOKButton

KeepalldefaultsettingsandpressFinishButton.
4. Atthispointtheapplicationshouldappearintheprojectwindowontheleftsideof
theIDE.

5. SelectRun>Run‘app’fromthetoolbar.
6. TheAndroidEmulatorwillnowopenupandruntheexampleapplication.

Part6–DebuggingInthispartofthelabyouwilllearnhowtousetheAndroidStudiodebuggertodebugtheTheAnswerapplicationyouimportedinPart5.
1. Double-clicktheTheAnswer.javafileunderapp>src>main>java>course.examples.theanswer
2. Onthisscreen,clickthehighlightedareanexttotheline:
"intval=findAnswer();"

3. Anewbreakpointwillbeplacedatthatline,indicatedbythesmallcirclethatnowappearsinthehighlightedorangeareatotheleftofthetext.
4. Next,presstheDebugbuttonintheToolbartostartdebuggingtheapplication
(Shortcut:Windows-Shift+F9,Mac-CTRL+D).

SimilartoStep2inPart4,afteryouseetheBUILDSUCCESSFULmessage,adialogboxwillpopupaskingyoutochooseadevice.
5. Ifyoudonothavearunningdevice,youcanchooseanemulatortolaunch.Thesystemwillstartanemulatorandruntheappinit.

6. YourEmulatorshouldloadtheAppandstopbeforethewords,“Theanswertolife……",aredisplayedonthescreen.YoucanseetheDebugWindowappearsnexttoRunnow.ClickonittoshowDebugwindow.
7. Nowthattheappisstopped,youcanexaminetheapp’sstateandstepthroughthe
app’sexecutionusingthefollowingbuttonsappearinginthemenubar.1–ResumeProgram(F9) 7–StepOut(Shift+F8)2–PauseProgram 3–Stop(Ctrl+F2)4–StepOver(F8)5–StepInto(F7)6–ForceStepInto(Alt+Shift+F7)
1
2
3
4 5 6 7
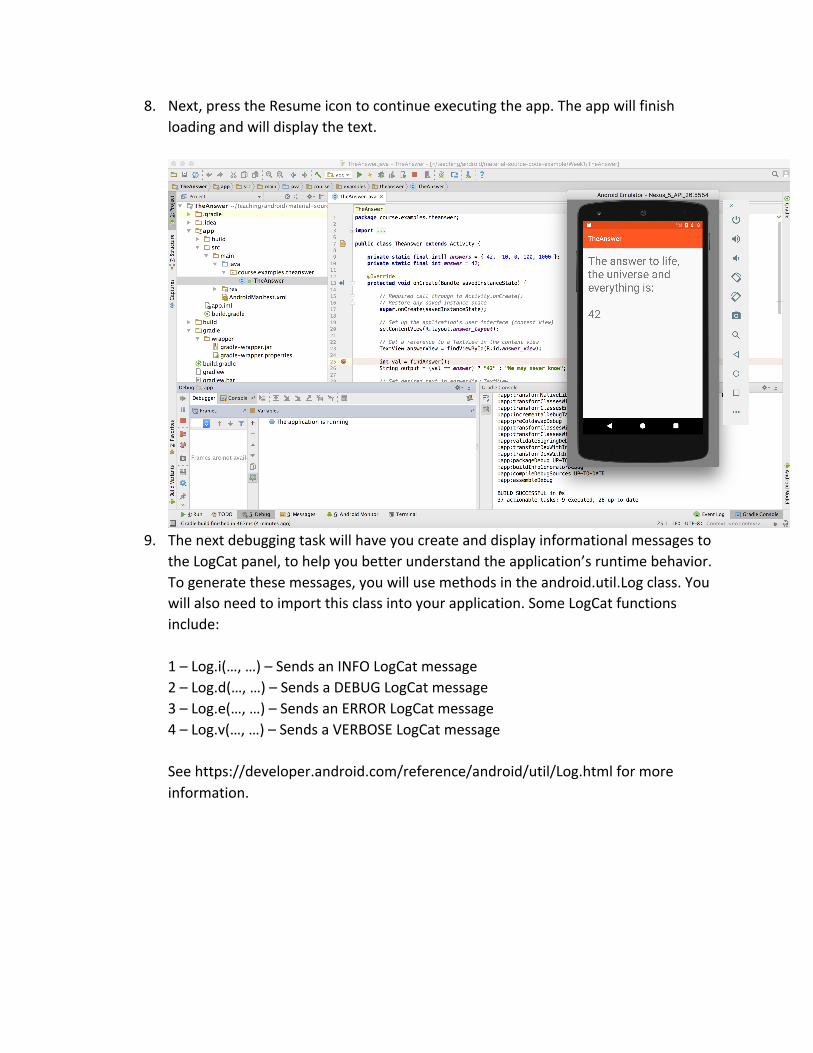
8. Next,presstheResumeicontocontinueexecutingtheapp.Theappwillfinishloadingandwilldisplaythetext.
9. Thenextdebuggingtaskwillhaveyoucreateanddisplayinformationalmessagesto
theLogCatpanel,tohelpyoubetterunderstandtheapplication’sruntimebehavior.Togeneratethesemessages,youwillusemethodsintheandroid.util.Logclass.Youwillalsoneedtoimportthisclassintoyourapplication.SomeLogCatfunctionsinclude:1–Log.i(…,…)–SendsanINFOLogCatmessage2–Log.d(…,…)–SendsaDEBUGLogCatmessage3–Log.e(…,…)–SendsanERRORLogCatmessage4–Log.v(…,…)–SendsaVERBOSELogCatmessageSeehttps://developer.android.com/reference/android/util/Log.htmlformoreinformation.
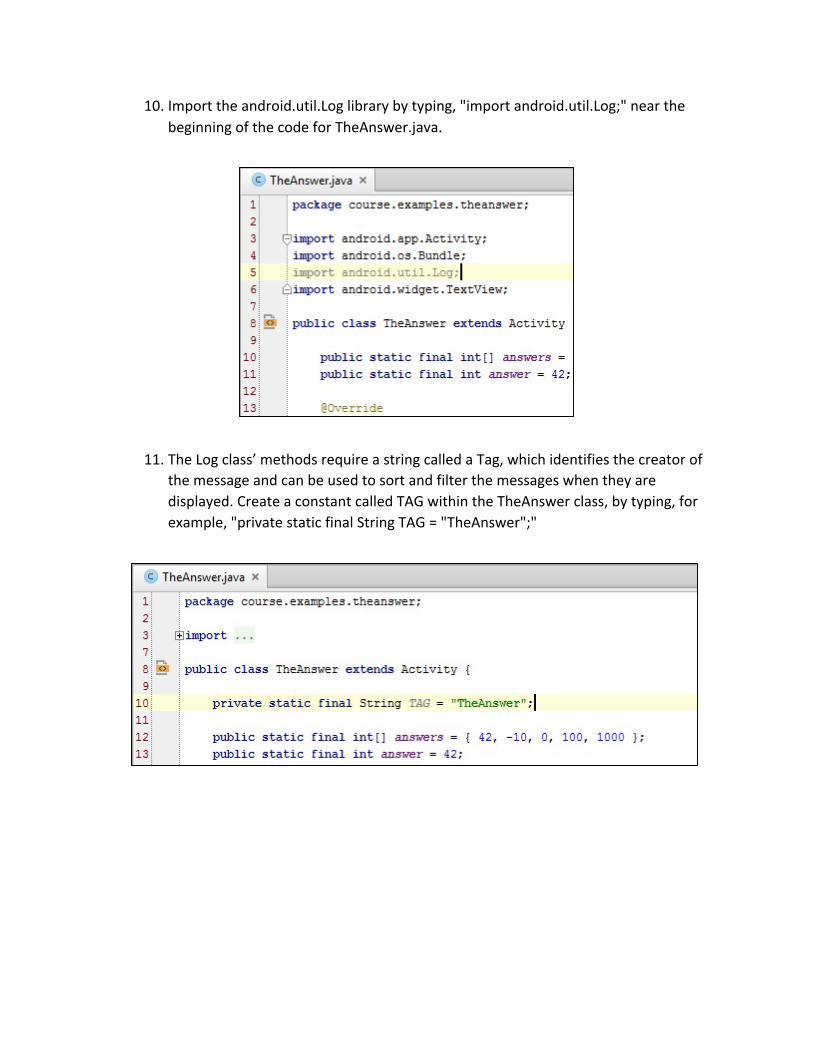
10. Importtheandroid.util.Loglibrarybytyping,"importandroid.util.Log;"nearthebeginningofthecodeforTheAnswer.java.
11. TheLogclass’methodsrequireastringcalledaTag,whichidentifiesthecreatorofthemessageandcanbeusedtosortandfilterthemessageswhentheyaredisplayed.CreateaconstantcalledTAGwithintheTheAnswerclass,bytyping,forexample,"privatestaticfinalStringTAG="TheAnswer";"

12. UsetheLog.i()functiontocreateandoutputalogmessage.Justbeforethelinethatstarts,"intval=…"typeinanewline:"Log.i(TAG,"Printingtheanswertolife");"
13. Saveyourchanges.

14. Runtheapplication.(SeePart4formoredetailsonRunningApp).
15. Oncetheappisrunning,opentheLogCatpanelatthebottom.LookfordropdownmenuandselectEditFilterConfiguration.
16. Enter"TheAnswer"inLogTagandhitOK.
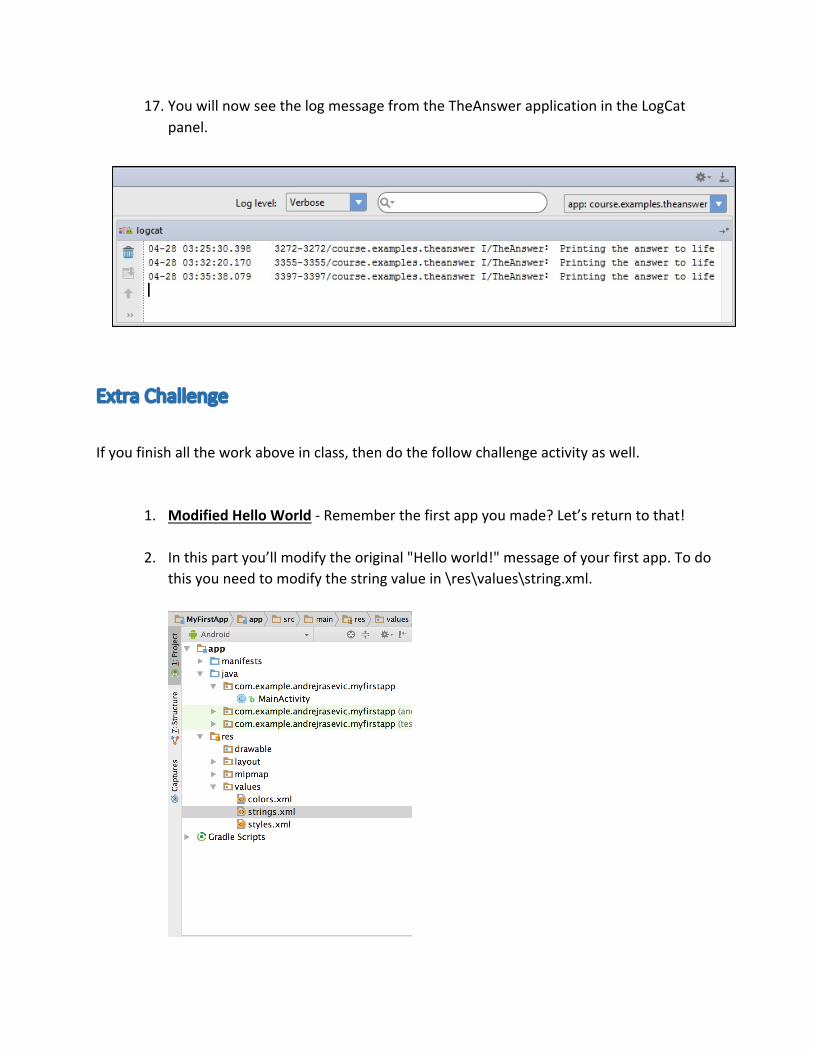
17. YouwillnowseethelogmessagefromtheTheAnswerapplicationintheLogCatpanel.
ExtraChallenge
Ifyoufinishalltheworkaboveinclass,thendothefollowchallengeactivityaswell.
1. ModifiedHelloWorld-Rememberthefirstappyoumade?Let’sreturntothat!
2. Inthispartyou’llmodifytheoriginal"Helloworld!"messageofyourfirstapp.Todothisyouneedtomodifythestringvaluein\res\values\string.xml.

3. Addanotherstringelementwiththetext:“Mynameis<your_name>!”.
4. Nowgototheactivity_main.xmlfileinsideofres/layout.EdittheTextViewelement
soitreferencesthehello_worldstringelementyoujustcreatedinthepreviousstep.

5. Nowruntheappandseethechange!
Formoreinformation,takealookat:https://developer.android.com/guide/topics/resources/string-resource.html
6. NowaddsupportforanotherlanguagesuchasSpanish!Todothis,you’llneedtocreateanappropriatestringfile,runyourapp,changetheemulatorinstance’sdefaultlanguagetoSpanish,andthenreruntheapp.YourSpanishstring,couldbe:"HolaMundo!Mellamo[yourname]."Formoreinformation,takealookat:https://developer.android.com/training/basics/supporting-devices/languages.html