
CSE 5236: Android Studio Tipsweb.cse.ohio-state.edu/~champion.17/5236/AndroidStudioTips.pdf · CSE...
2
CSE 5236: Android Studio Tips Instructor: Adam C. Champion Autumn 2015 Semester Note: This document assumes you have installed the Oracle JDK and Android Studio; install them if you haven’t already done so. Android Studio is very CPU- and memory-intensive; builds can take a few minutes. If feasible, please add more RAM, an SSD, or both to your laptop (but backup your data first in case anything goes wrong). 1 Appearance: Now launch Android Studio. Click on Configure, then Preferences. Select Appear- ance & Behavior, then Appearance. You should see a dialog like the one in Fig. 1. Figure 1: Android Studio Appearance Prefer- ences Figure 2: Android Studio SDK Manager (Pref- erences) I recommend deselecting Animate windows (unless you have a fast machine) and selecting Show memory indicator so Android Studio’s memory use is visible. Make sure Show tool window bars and Show tool window numbers are both checked so you can select tool windows easily (e.g., Project, Structure, Android). If you have a widescreen monitor, check Widescreen tool window layout. Android SDK: Now select Appearance & Behavior, System Settings, and Android SDK (in that order). Make sure you click Show package details. You should see a dialog like that in Fig. 2. There are numerous Android SDK packages that you can install, but you do not need to install all of them. Install at least one Android 5.x, 4.x, and 2.x SDK as well as Google Play services and Google repository (scroll to the bottom of the dialog). System images are provided for various ISAs (such as ARM, x86, and MIPS) and types of devices (such as autos, TVs, wearables). System images are very large and most of them are not needed for this course. I recommend installing only ARM system images for Android and Google APIs as many mobile devices use the ARM ISA. Downloading all these packages takes a long time. (Alternatively, clicking Launch standalone SDK manager will bring up a separate SDK manager process for installing packages.) 1 https://sites.google.com/a/android.com/tools/tech-docs/configuration shows Android Studio configuration notes. 1
Transcript of CSE 5236: Android Studio Tipsweb.cse.ohio-state.edu/~champion.17/5236/AndroidStudioTips.pdf · CSE...

CSE 5236: Android Studio TipsInstructor: Adam C. Champion
Autumn 2015 Semester
Note: This document assumes you have installed the Oracle JDK and Android Studio; install themif you haven’t already done so. Android Studio is very CPU- and memory-intensive; builds cantake a few minutes. If feasible, please add more RAM, an SSD, or both to your laptop (but backupyour data first in case anything goes wrong).1
Appearance: Now launch Android Studio. Click on Configure, then Preferences. Select Appear-ance & Behavior, then Appearance. You should see a dialog like the one in Fig. 1.
Figure 1: Android Studio Appearance Prefer-ences
Figure 2: Android Studio SDK Manager (Pref-erences)
I recommend deselecting Animate windows (unless you have a fast machine) and selecting Showmemory indicator so Android Studio’s memory use is visible. Make sure Show tool window barsand Show tool window numbers are both checked so you can select tool windows easily (e.g.,Project, Structure, Android). If you have a widescreen monitor, check Widescreen tool windowlayout.
Android SDK: Now select Appearance & Behavior, System Settings, and Android SDK (in thatorder). Make sure you click Show package details. You should see a dialog like that in Fig. 2.There are numerous Android SDK packages that you can install, but you do not need to install allof them. Install at least one Android 5.x, 4.x, and 2.x SDK as well as Google Play services andGoogle repository (scroll to the bottom of the dialog). System images are provided for variousISAs (such as ARM, x86, and MIPS) and types of devices (such as autos, TVs, wearables). Systemimages are very large and most of them are not needed for this course. I recommend installingonly ARM system images for Android and Google APIs as many mobile devices use the ARM ISA.Downloading all these packages takes a long time. (Alternatively, clicking Launch standalone SDKmanager will bring up a separate SDK manager process for installing packages.)
1https://sites.google.com/a/android.com/tools/tech-docs/configuration shows Android Studioconfiguration notes.
1
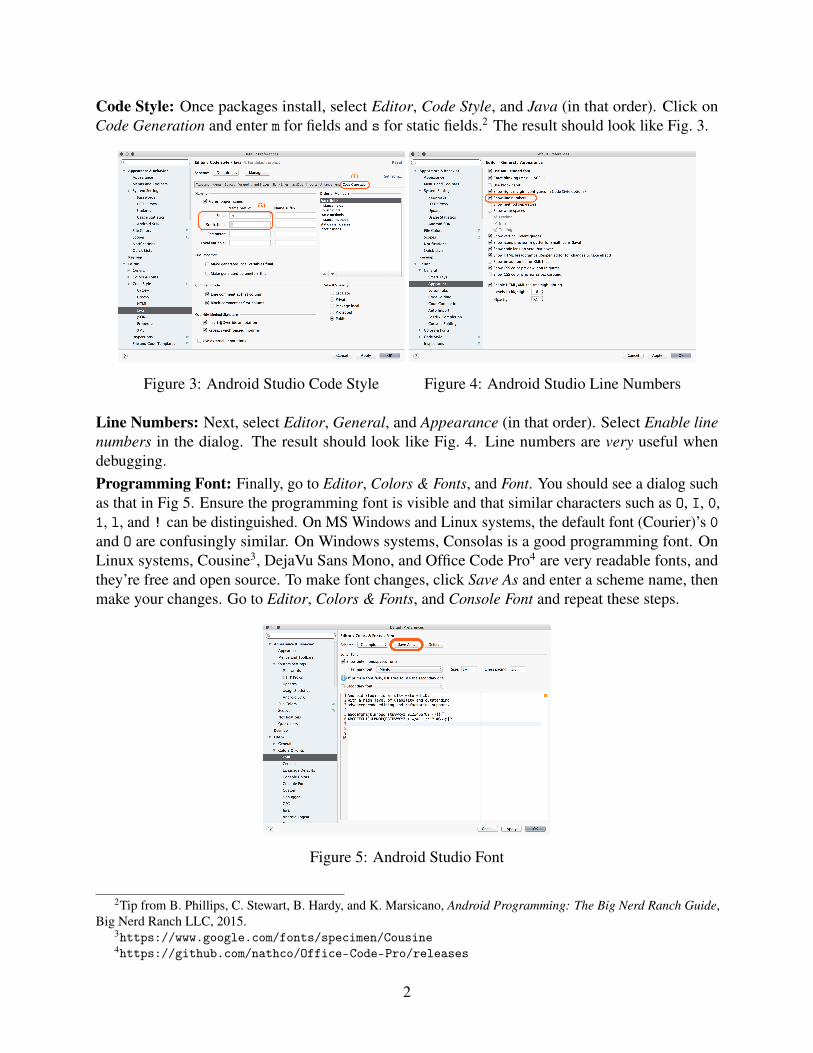
Code Style: Once packages install, select Editor, Code Style, and Java (in that order). Click onCode Generation and enter m for fields and s for static fields.2 The result should look like Fig. 3.
Figure 3: Android Studio Code Style Figure 4: Android Studio Line Numbers
Line Numbers: Next, select Editor, General, and Appearance (in that order). Select Enable linenumbers in the dialog. The result should look like Fig. 4. Line numbers are very useful whendebugging.Programming Font: Finally, go to Editor, Colors & Fonts, and Font. You should see a dialog suchas that in Fig 5. Ensure the programming font is visible and that similar characters such as O, I, 0,1, l, and ! can be distinguished. On MS Windows and Linux systems, the default font (Courier)’s 0and O are confusingly similar. On Windows systems, Consolas is a good programming font. OnLinux systems, Cousine3, DejaVu Sans Mono, and Office Code Pro4 are very readable fonts, andthey’re free and open source. To make font changes, click Save As and enter a scheme name, thenmake your changes. Go to Editor, Colors & Fonts, and Console Font and repeat these steps.
Figure 5: Android Studio Font
2Tip from B. Phillips, C. Stewart, B. Hardy, and K. Marsicano, Android Programming: The Big Nerd Ranch Guide,Big Nerd Ranch LLC, 2015.
3https://www.google.com/fonts/specimen/Cousine4https://github.com/nathco/Office-Code-Pro/releases
2