Introduction to Microsoft Word 2019 Training
124
Introduction to Microsoft Word 2019 Training with examples and hands-on exercises WEBUCATOR
Transcript of Introduction to Microsoft Word 2019 Training
Introduction toMicrosoft Word 2019
Training
with examples andhands-on exercises
WEBUCATOR
Copyright © 2021 by Webucator. All rights reserved.
No part of this manual may be reproduced or used in any manner without written permissionof the copyright owner.
Version: 1.1.2
The Author
Margaux Judge
Margaux Judge has worked as an e-learning editor and instructional designer for over tenyears, writing and editing a wide variety of courses, from technical topics to soft skills. Shehas a Bachelor's degree in English and Textual Studies from Syracuse University and aMaster's degree in Television Writing from Boston University.
Class Files
Download the class files used in this manual athttps://static.webucator.com/media/public/materials/classfiles/WRD2019.1-1.1.2.zip.
Errata
Corrections to errors in the manual can be found athttps://www.webucator.com/books/errata/.
Table of Contents
LESSON 1. Creating a Microsoft Word Document...........................................................1Starting Microsoft Word...........................................................................................................1Creating a Document................................................................................................................2Saving a Document...................................................................................................................2Importing a File........................................................................................................................4The Status Bar..........................................................................................................................6Closing a Document..................................................................................................................6
Exercise 1: Create a Microsoft Word Document.............................................................8LESSON 2. The Ribbon..................................................................................................11
Tabs........................................................................................................................................11Groups....................................................................................................................................14Commands.............................................................................................................................17
Exercise 2: Exploring the Ribbon..................................................................................19LESSON 3. The Backstage view (The File Menu)..........................................................21
Introduction to the Backstage view........................................................................................21Opening a Document..............................................................................................................22
Exercise 3: Open a Document......................................................................................24New Documents and Word Templates...................................................................................26
Exercise 4: Write a Thank You Letter Using a Template Letter......................................30Configuring Documents to Print.............................................................................................32
Exercise 5: Print a Document.......................................................................................35Adding Your Name to Microsoft Word...................................................................................36Adding Values to Document Properties.................................................................................37Working with Autosaved Versions of Documents..................................................................39
LESSON 4. The Quick Access Toolbar...........................................................................41Quick Access Toolbar..............................................................................................................41Adding Common Commands..................................................................................................42Adding Additional Commands with the Customize Dialog Box..............................................42Adding Ribbon Commands or Groups....................................................................................43Placement...............................................................................................................................44
Exercise 6: Customize the Quick Access Toolbar...........................................................46
Table of Contents | i
LESSON 5. Formatting Microsoft Word Documents.......................................................49Selecting Text..........................................................................................................................49Selecting Fonts.......................................................................................................................50
Exercise 7: Working with Fonts....................................................................................55Working with Lists..................................................................................................................56
Exercise 8: Working with Lists......................................................................................62Inserting a Hyperlink in a Document......................................................................................64
Exercise 9: Inserting a Hyperlink..................................................................................66Using Styles............................................................................................................................68
Exercise 10: Applying and Creating Custom Styles.......................................................72Using Themes.........................................................................................................................74Using the Ruler.......................................................................................................................75
Exercise 11: Using Tabs................................................................................................77Setting Margins......................................................................................................................79
Exercise 12: Setting Margins........................................................................................84LESSON 6. Editing Documents......................................................................................87
Find.........................................................................................................................................87Find and Replace....................................................................................................................89Find and Replace Tips.............................................................................................................92Appending Text to a Document..............................................................................................93
Exercise 13: Using Find and Replace............................................................................95Using the Clipboard................................................................................................................96
Exercise 14: Using the Clipboard................................................................................100LESSON 7. Finalizing Microsoft Word Documents.......................................................103
Adding Page Numbers..........................................................................................................103Exercise 15: Adding Page Numbers............................................................................106
Headers and Footers............................................................................................................108Exercise 16: Using Headers and Footers.....................................................................113
Checking Spelling and Grammar..........................................................................................116Exercise 17: Checking Spelling and Grammar.............................................................119
ii | Table of Contents
LESSON 1Creating a Microsoft Word Document
Topics Covered
Starting Microsoft Word.
Creating a document.
Saving a document.
Closing a document.
The Status Bar.
Introduction
In this lesson, you will learn to start Microsoft Word and to create, save, and close aMicrosoft Word document.You will also learn about the Status Bar.
❋
1.1. Starting Microsoft Word
To start Microsoft Word (see screenshot below):
1. Click the Start menu.
2. Select Word.
LESSON 1: Creating a Microsoft Word Document | 1
❋
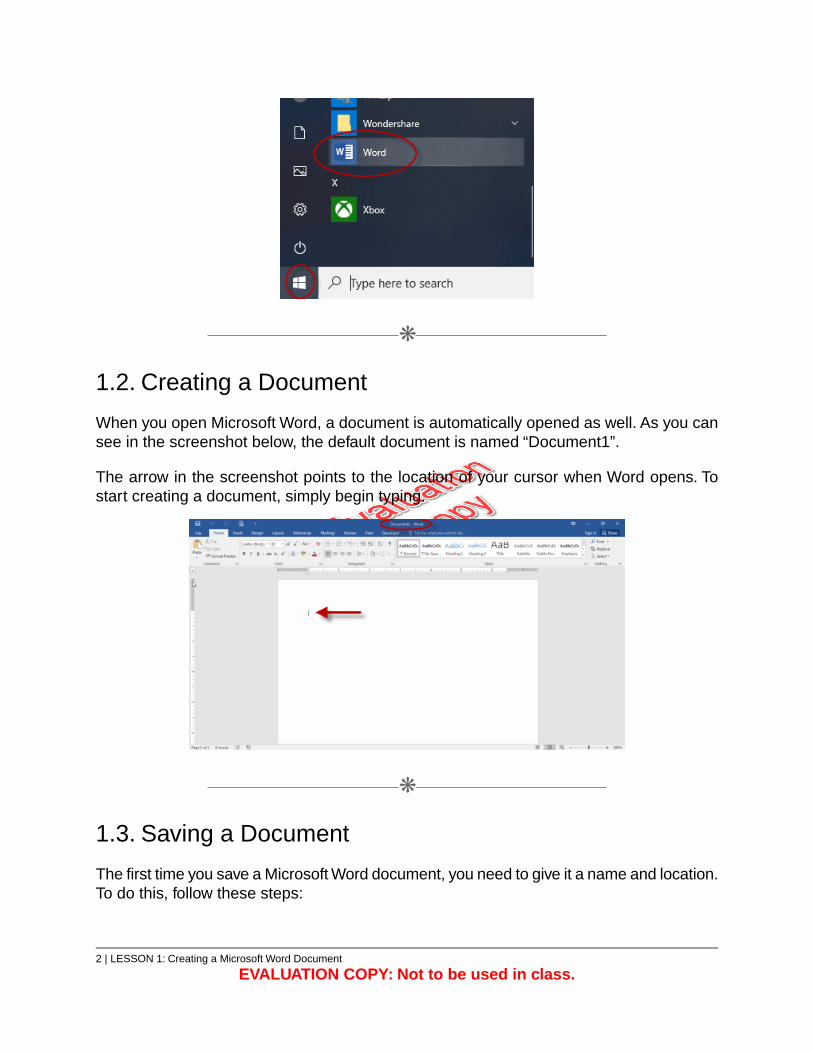
1.2. Creating a Document
When you open Microsoft Word, a document is automatically opened as well. As you cansee in the screenshot below, the default document is named “Document1”.
The arrow in the screenshot points to the location of your cursor when Word opens. Tostart creating a document, simply begin typing.
❋
1.3. Saving a Document
The first time you save a Microsoft Word document, you need to give it a name and location.To do this, follow these steps:
2 | LESSON 1: Creating a Microsoft Word Document
EVALUATION COPY: Not to be used in class.

1. From the File menu, select Save As.
2. Double-click This PC to save the file to your computer.
3. Selecting Save As opens up a dialog box in which you can see:
A. The document location, or where on your computer Word will save yourdocument.You can select a new location by clicking the arrows.
B. The file name. Note that this is highlighted as Microsoft Word expects youto choose your own name for the document. Simply begin typing to do so.
LESSON 1: Creating a Microsoft Word Document | 3
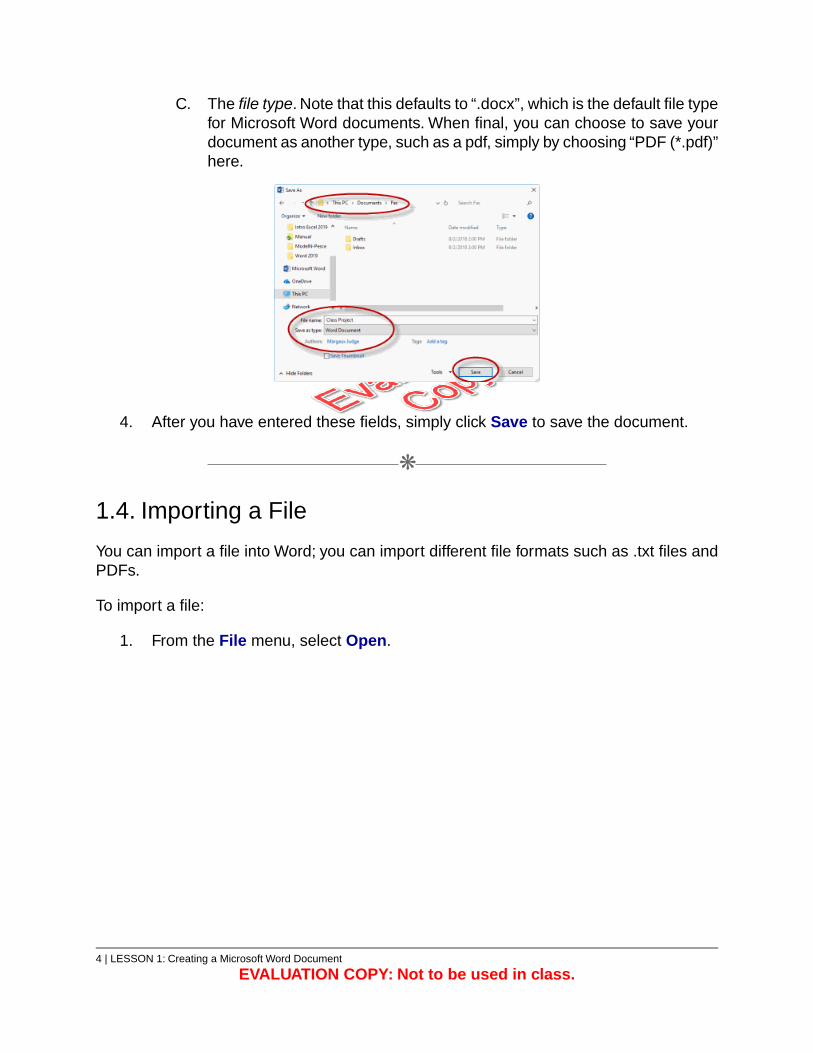
C. The file type. Note that this defaults to “.docx”, which is the default file typefor Microsoft Word documents. When final, you can choose to save yourdocument as another type, such as a pdf, simply by choosing “PDF (*.pdf)”here.
4. After you have entered these fields, simply click Save to save the document.
❋
1.4. Importing a File
You can import a file into Word; you can import different file formats such as .txt files andPDFs.
To import a file:
1. From the File menu, select Open.
4 | LESSON 1: Creating a Microsoft Word Document
EVALUATION COPY: Not to be used in class.
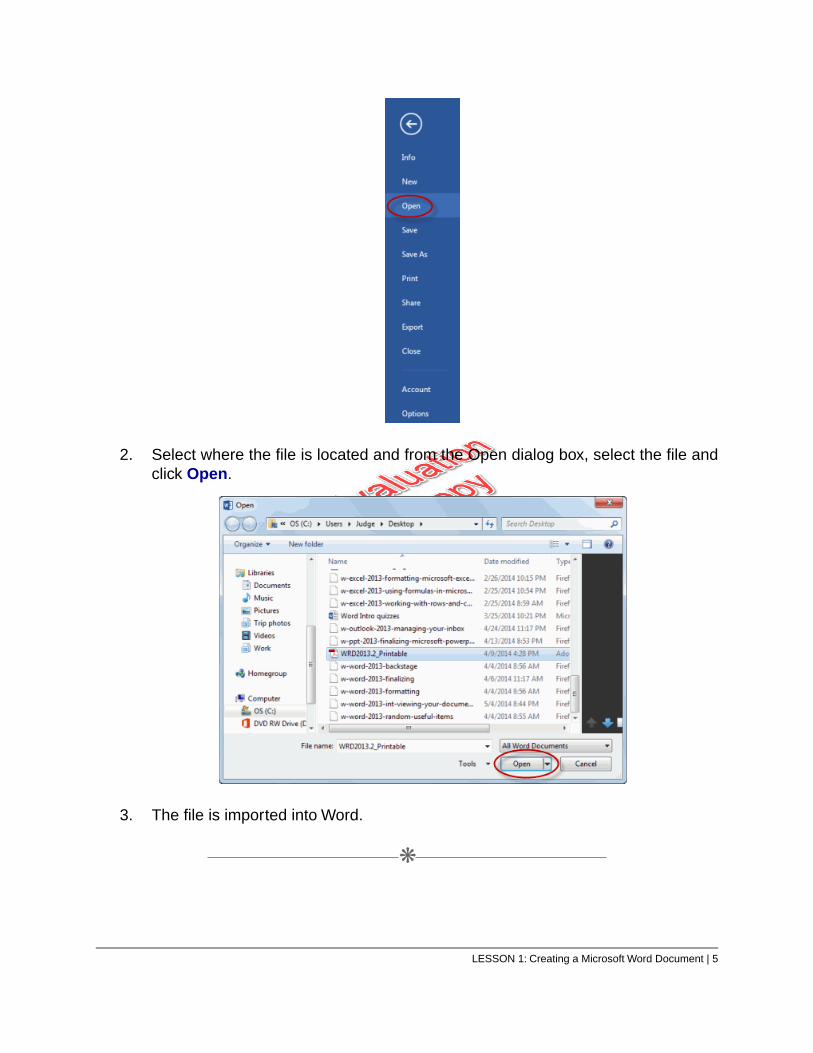
2. Select where the file is located and from the Open dialog box, select the file andclick Open.
3. The file is imported into Word.
❋
LESSON 1: Creating a Microsoft Word Document | 5
1.5. The Status Bar
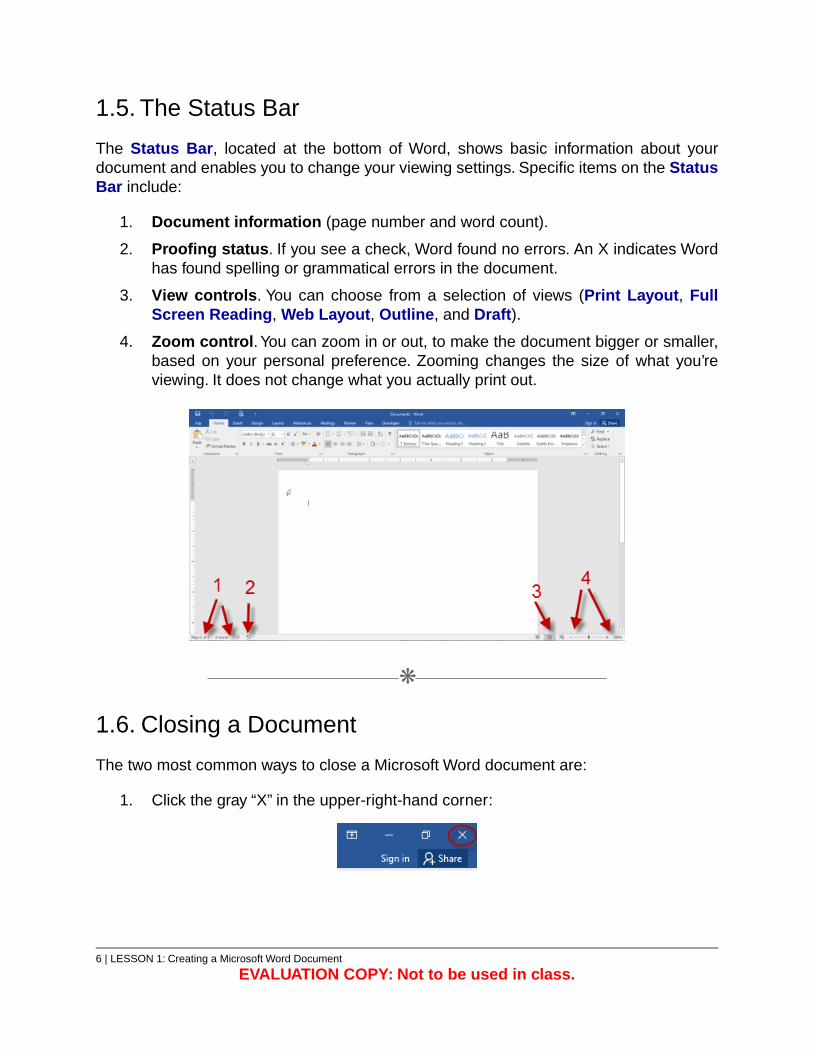
The Status Bar, located at the bottom of Word, shows basic information about yourdocument and enables you to change your viewing settings. Specific items on the StatusBar include:
1. Document information (page number and word count).
2. Proofing status. If you see a check, Word found no errors. An X indicates Wordhas found spelling or grammatical errors in the document.
3. View controls. You can choose from a selection of views (Print Layout, FullScreen Reading, Web Layout, Outline, and Draft).
4. Zoom control. You can zoom in or out, to make the document bigger or smaller,based on your personal preference. Zooming changes the size of what you’reviewing. It does not change what you actually print out.
❋
1.6. Closing a Document
The two most common ways to close a Microsoft Word document are:
1. Click the gray “X” in the upper-right-hand corner:
6 | LESSON 1: Creating a Microsoft Word Document
EVALUATION COPY: Not to be used in class.
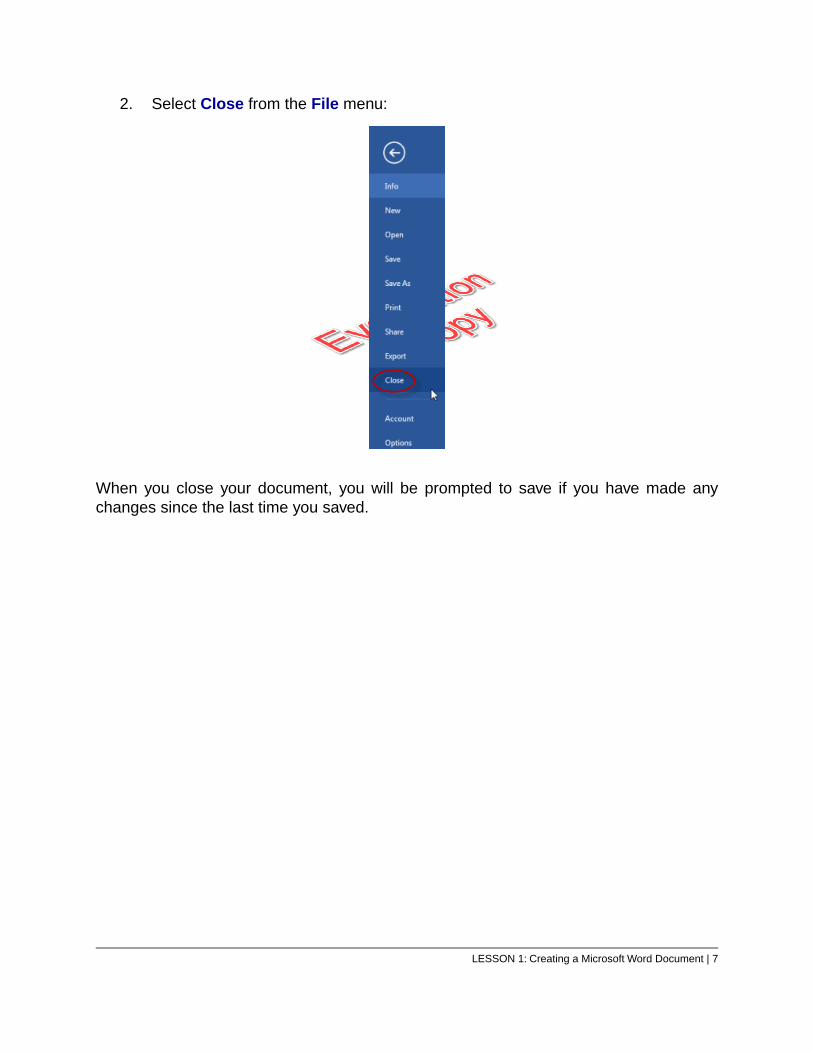
2. Select Close from the File menu:
When you close your document, you will be prompted to save if you have made anychanges since the last time you saved.
LESSON 1: Creating a Microsoft Word Document | 7
Exercise 1: Create a Microsoft WordDocument 5 to 10 minutes
In this exercise, you will create, save, and close a Microsoft Word document. If you currentlyhave Microsoft Word open, please close it before starting the exercise.
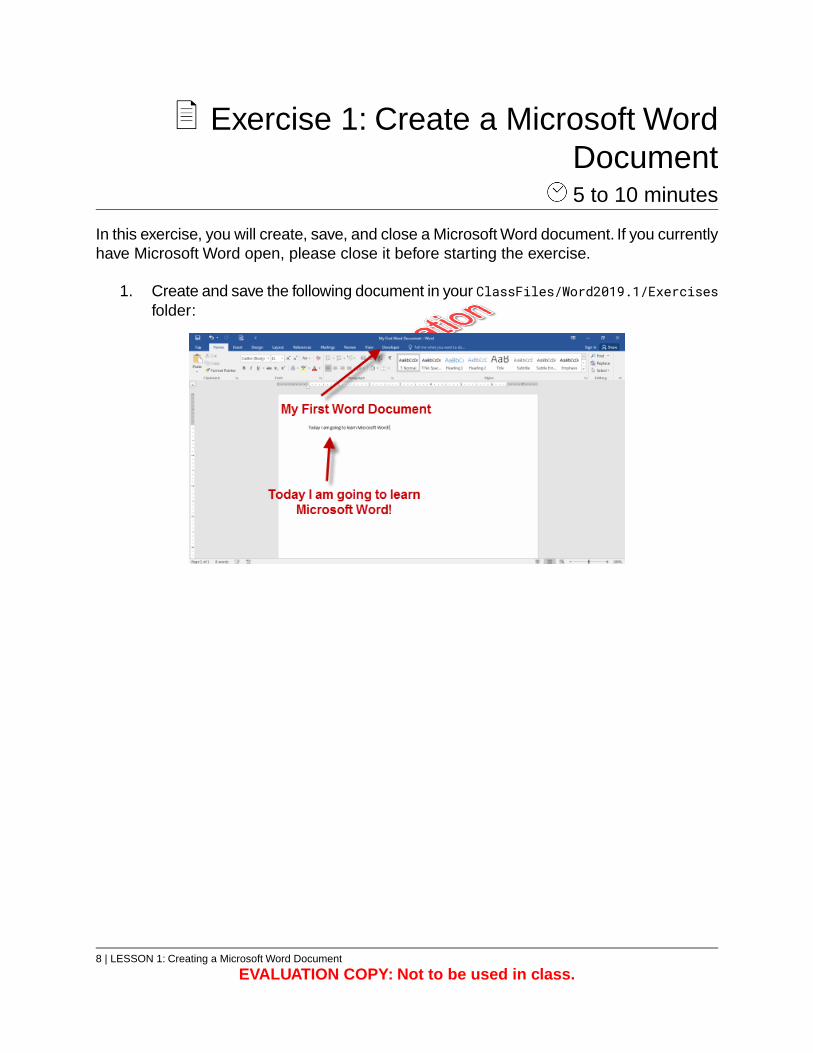
1. Create and save the following document in your ClassFiles/Word2019.1/Exercisesfolder:
8 | LESSON 1: Creating a Microsoft Word Document
EVALUATION COPY: Not to be used in class.

LESSON 1: Creating a Microsoft Word Document | 9
Solution
1. From the Start Menu, select Word.
2. Type “Today I am going to learn Microsoft Word!”
3. Click File > Save As:
A. Navigate to ClassFiles/Word2019.1/Exercises.
B. File name: type “My First Word Document”.
C. Save as type: select “Word document (*.docx)” if it is not already selected.
4. Click File > Close.
Conclusion
In this lesson, you have learned how to create and save Microsoft Word documents.
10 | LESSON 1: Creating a Microsoft Word Document
EVALUATION COPY: Not to be used in class.
LESSON 2The Ribbon
Topics Covered
Tabs.
Groups.
Commands.
Introduction
The Ribbon is the display you see at the top of the Microsoft Word window. It is yourprimary interface with Word. It allows you to access most of the commands available toyou in Word. The Ribbon is composed of three parts: Tabs, Groups, and Commands.
In this lesson, you will learn about tabs, groups, and commands, and to find them on thedifferent tabs on the ribbon.
❋
2.1. Tabs
Microsoft Word is a powerful program that is used to create many different types ofdocuments, including articles, letters, books, contracts, marketing documents, and muchmore. Microsoft Word has hundreds of commands for working with documents. To makeit easier for users to find the specific commands they are looking for, commands areorganized onto nine main tabs:
1. Home. The Home tab includes commands for formatting documents.
2. Insert. Use the Insert tab to insert pages, tables, pictures, links, headers andfooters, custom text and symbols, and more.
3. Design. Use the Design tab to set document formatting and page backgrounds.
4. Layout. Use the Layout tab to change your margins, add columns, change thepage orientation, and more.
5. References. Use the References tab to add a table of contents, add footnotes,add a bibliography, and more.
LESSON 2: The Ribbon | 11

6. Mailings. Use the Mailings tab to create labels, start a mail merge, and more.
7. Review. Use the Review tab to check spelling and grammar, track and accept orreject changes, compare documents, and more.
8. View. Use the View tab to change your document view, show the Ruler ornavigation pane, zoom in or out, and more.
9. Help. Use the Help tab to view Help documents, provide feedback, take training,or contact Microsoft customer support.
Note that the File menu is not the same as a tab.The File menu takes you to the Backstageview, where you manage, rather than make changes to, your document. The Backstageview is covered in the next lesson.
Tool Tabs
In addition to the main tabs, there are numerous tool tabs which include less commonlyused commands. Individual tool tabs are covered in detail in our intermediate and advancedMicrosoft Word classes. For now you should know:
That they exist. Some of the most commonly used tool tabs are:
SmartArt
Chart
Drawing
Picture
Table
Header & Footer
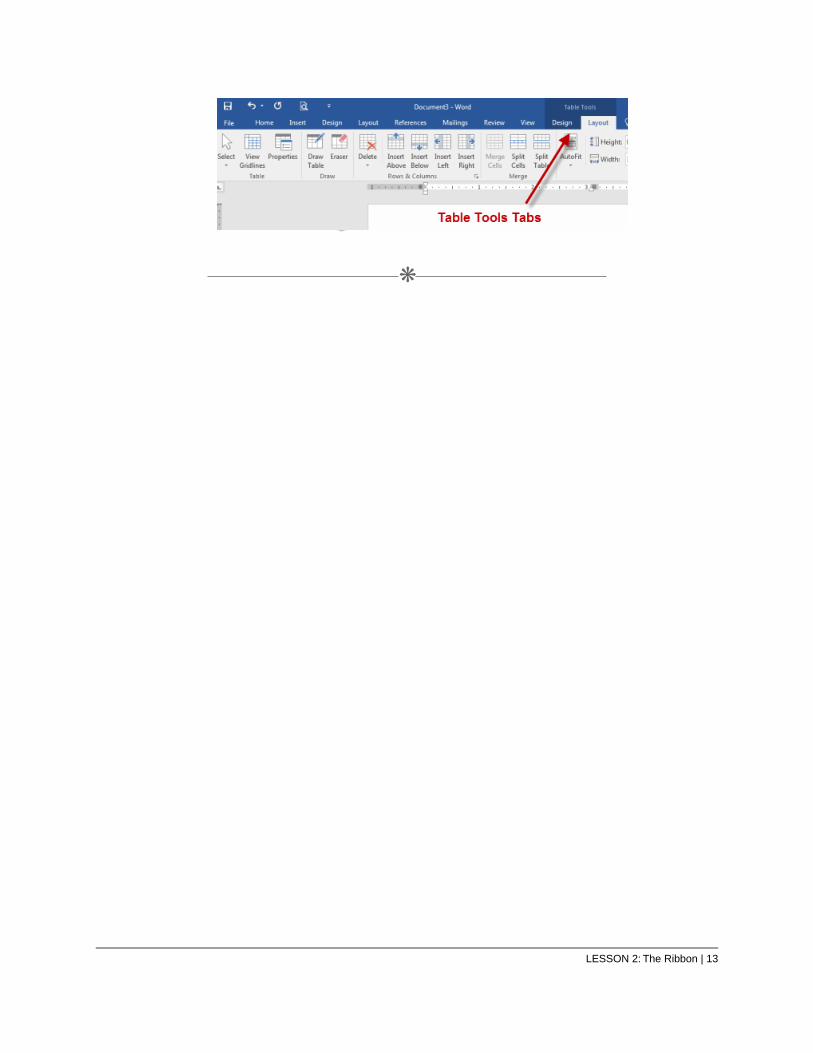
That they will appear when you select commands that have related tool tabs.For example, when you insert a table, two table-specific tool tabs (Design andLayout) will appear:
12 | LESSON 2: The Ribbon
EVALUATION COPY: Not to be used in class.
❋
LESSON 2: The Ribbon | 13
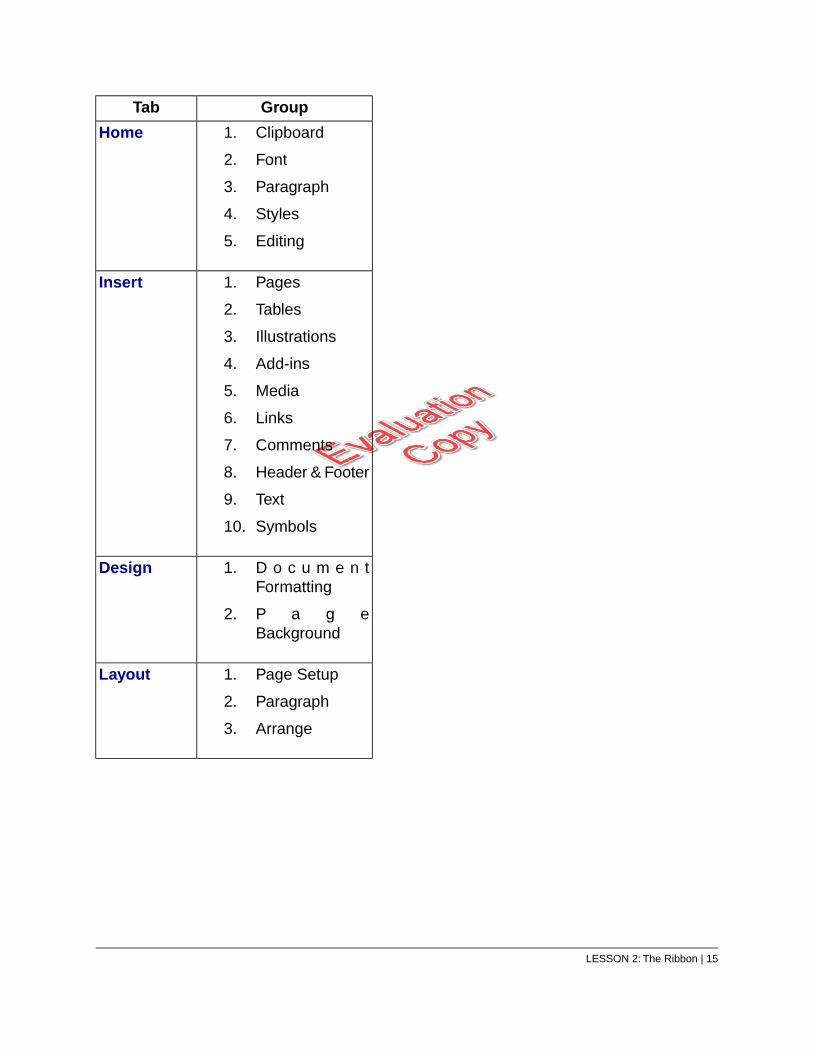
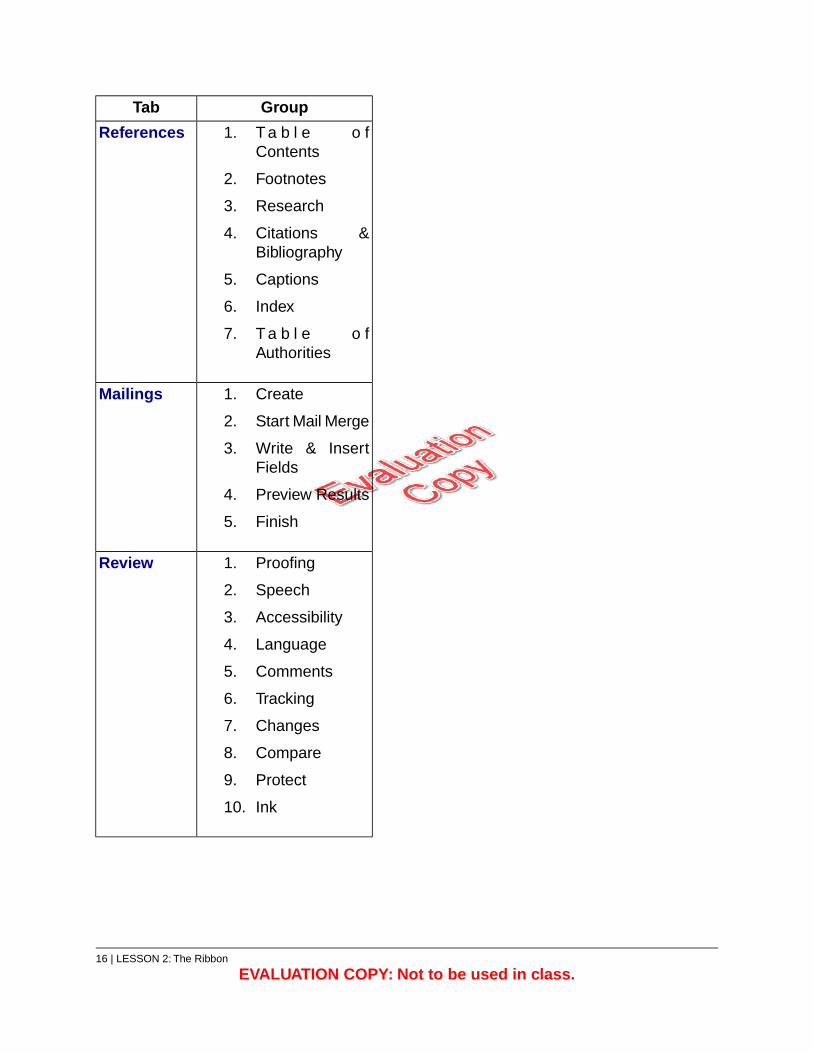
2.2. Groups
To further organize the many commands available in Microsoft Word, commands areorganized in groups on each tab. Each group contains three or more related commands.The following table lists the groups found on each tab:
14 | LESSON 2: The Ribbon
EVALUATION COPY: Not to be used in class.
GroupTab
Home 1. Clipboard
2. Font
3. Paragraph
4. Styles
5. Editing
Insert 1. Pages
2. Tables
3. Illustrations
4. Add-ins
5. Media
6. Links
7. Comments
8. Header & Footer
9. Text
10. Symbols
Design 1. D o c u m e n tFormatting
2. P a g eBackground
Layout 1. Page Setup
2. Paragraph
3. Arrange
LESSON 2: The Ribbon | 15
GroupTab
1. T a b l e o fContents
2. Footnotes
3. Research
4. Citations &Bibliography
5. Captions
6. Index
7. T a b l e o fAuthorities
References
1. Create
2. Start Mail Merge
3. Write & InsertFields
4. Preview Results
5. Finish
Mailings
1. Proofing
2. Speech
3. Accessibility
4. Language
5. Comments
6. Tracking
7. Changes
8. Compare
9. Protect
10. Ink
Review
16 | LESSON 2: The Ribbon
EVALUATION COPY: Not to be used in class.
GroupTab
1. Views
2. Immersive
3. Page Movement
4. Show
5. Zoom
6. Window
7. Macros
8. Sharepoint
View
1. HelpHelp
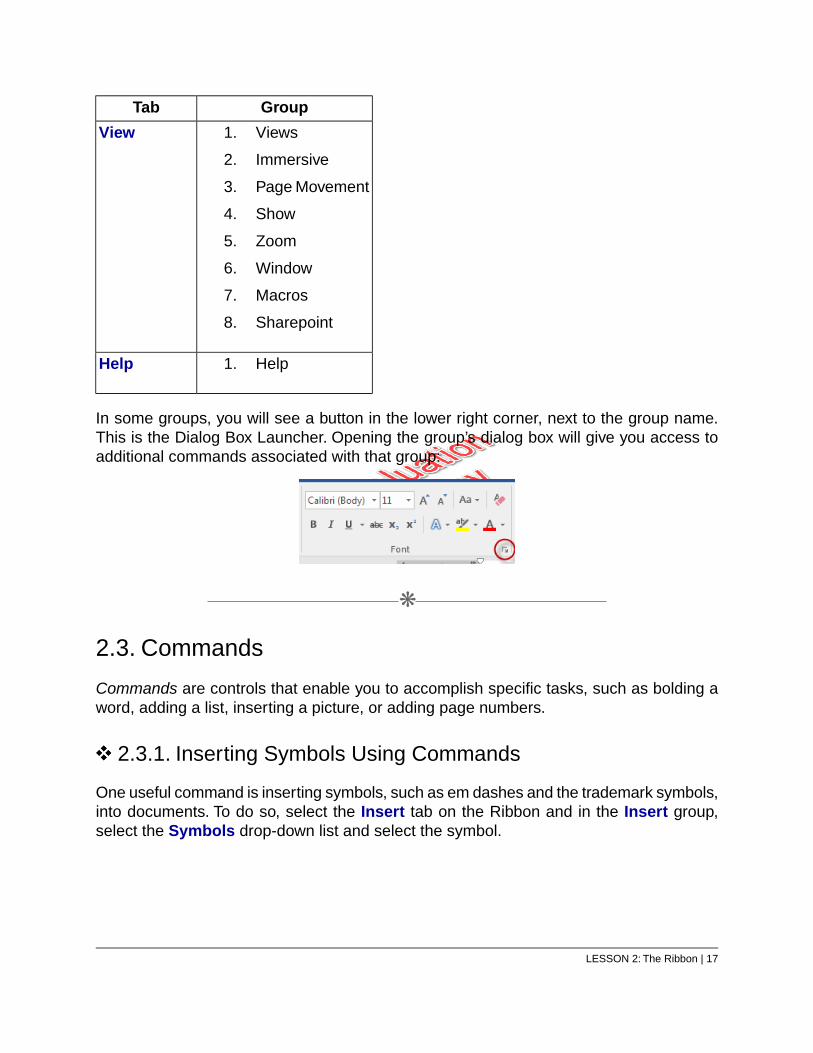
In some groups, you will see a button in the lower right corner, next to the group name.This is the Dialog Box Launcher. Opening the group’s dialog box will give you access toadditional commands associated with that group:
❋
2.3. Commands
Commands are controls that enable you to accomplish specific tasks, such as bolding aword, adding a list, inserting a picture, or adding page numbers.
2.3.1. Inserting Symbols Using Commands
One useful command is inserting symbols, such as em dashes and the trademark symbols,into documents. To do so, select the Insert tab on the Ribbon and in the Insert group,select the Symbols drop-down list and select the symbol.
LESSON 2: The Ribbon | 17
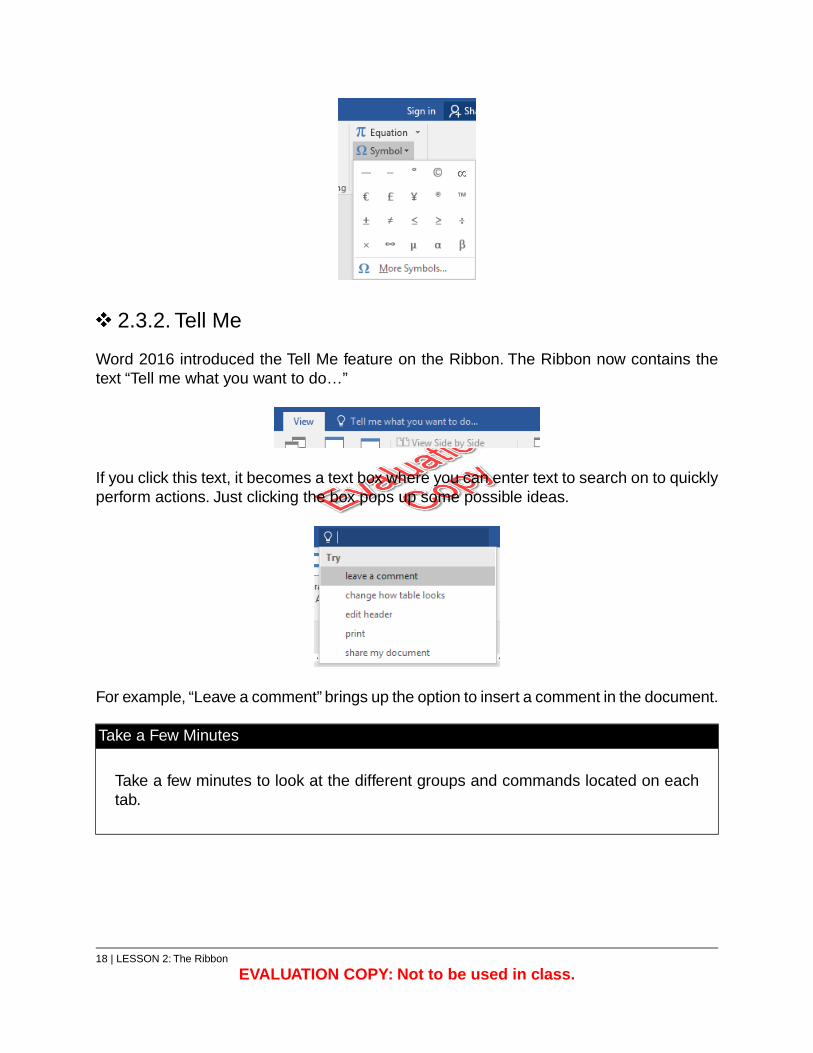
2.3.2. Tell Me
Word 2016 introduced the Tell Me feature on the Ribbon. The Ribbon now contains thetext “Tell me what you want to do…”
If you click this text, it becomes a text box where you can enter text to search on to quicklyperform actions. Just clicking the box pops up some possible ideas.
For example, “Leave a comment” brings up the option to insert a comment in the document.
Take a Few Minutes
Take a few minutes to look at the different groups and commands located on eachtab.
18 | LESSON 2: The Ribbon
EVALUATION COPY: Not to be used in class.

Exercise 2: Exploring the Ribbon 15 to 25 minutes
In this exercise, you will explore the Ribbon to answer the following questions:
1. How many tabs are there?
2. How many groups are there on the View tab?
3. Which tab contains the most commonly used groups and commands?
4. What is another name for the File menu?
5. On what tab are the following groups found:
A. Start Mail Merge
B. Views
C. Header & Footer
D. Page Setup
E. Tracking
F. Footnotes
G. Paragraph
6. On what tabs and groups are the following commands found?
A. Font Color
B. New Window
C. Mark Citation
D. Spelling & Grammar
E. Start Mail Merge
F. Page Break
G. Margins
LESSON 2: The Ribbon | 19
Solution
If your installation of Microsoft Word has been customized, some of your answers maydiffer.
1. How many tabs are there? Answer: 9
2. How many groups are there on the View tab? Answer: 8
3. Which tab contains the most commonly used groups and commands? Answer:Home
4. What is another name for the File menu? Answer: the Backstage view
5. On which tab are the following groups found:
A. Start Mail Merge - Answer: Mailings
B. Views - Answer: View
C. Header & Footer - Answer: Insert
D. Page Setup - Answer: Layout
E. Tracking - Answer: Review
F. Footnotes - Answer: References
G. Paragraph - Answer: Home
6. On what tabs and groups are the following commands found?
A. Font Color - Answer: Home > Font
B. New Window - Answer: View > Window
C. Mark Citation - Answer: References > Table of Authorities
D. Spelling & Grammar - Answer: Review > Proofing
E. Start Mail Merge - Answer: Mailings > Start Mail Merge
F. Page Break - Answer: Insert > Pages
G. Margins - Answer: Layout > Page Setup
Conclusion
In this lesson, you learned about tabs, groups, and commands and which groups andcommands are on which tabs.
20 | LESSON 2: The Ribbon
EVALUATION COPY: Not to be used in class.

LESSON 3The Backstage view (The File Menu)
Topics Covered
Backstage view.
Opening a Microsoft Word document.
Starting a new Microsoft Word document.
Templates.
Printing.
Personalizing your copy of Microsoft Word.
Introduction
This lesson starts off with an introduction to Microsoft Word’s Backstage view. You willthen learn to open a new Word document and start creating it.You will also learn to createa Word document using a template, to print a Word document, and to personalize yourcopy of Microsoft Word.
❋
3.1. Introduction to the Backstage view
The Ribbon, covered in the prior lesson, is where you find all the commands necessaryto make changes to your documents. Clicking the tabs in the Ribbon changes the set ofcommands available to you while you work in your document.
After clicking the File menu, you can no longer see your document or the Ribbon. Instead,you see what Microsoft calls the Backstage view. This is where you:
1. Manage your current document and other documents (Save, Open, Close, Print,etc.).
2. See information about your current document (Location, Size, Number of Pagesand Words, Author, etc.).
LESSON 3: The Backstage view (The File Menu) | 21

3. Manage your Word settings and options (Display, AutoCorrect options, customizethe Ribbon, etc.)
Many of the features of the Backstage view are covered in our intermediate and advancedMicrosoft Word classes. Only those that are essential to working with Microsoft Word arecovered in this class.
❋
3.2. Opening a Document
There are two ways to open a Microsoft Word Document from the Backstage view:
1. Select Open from the File menu.
2. From the Open section, select the location of the document. If it is on the computer,double-click My PC. In the dialog box that opens up, navigate to the file you want
22 | LESSON 3: The Backstage view (The File Menu)
EVALUATION COPY: Not to be used in class.
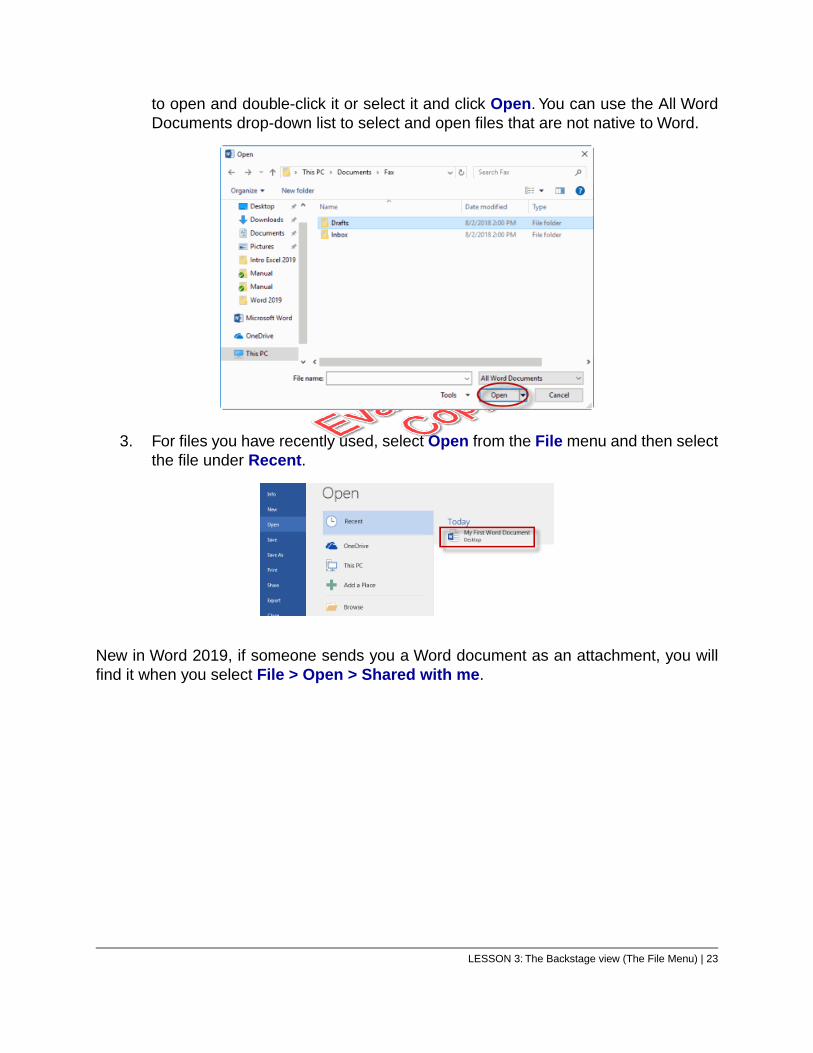
to open and double-click it or select it and click Open. You can use the All WordDocuments drop-down list to select and open files that are not native to Word.
3. For files you have recently used, select Open from the File menu and then selectthe file under Recent.
New in Word 2019, if someone sends you a Word document as an attachment, you willfind it when you select File > Open > Shared with me.
LESSON 3: The Backstage view (The File Menu) | 23

Exercise 3: Open a Document 5 to 10 minutes
In this exercise, you will practice opening Microsoft Word documents from the File menu.
1. Using the File menu, open My First Word Document.docx from theWord2019.1/Exercises folder.
2. Close My First Word Document.docx.
3. Open My First Word Document.docx from the File menu, using a different methodthan you used the first time.
4. Close My First Word Document.docx.
24 | LESSON 3: The Backstage view (The File Menu)
EVALUATION COPY: Not to be used in class.

LESSON 3: The Backstage view (The File Menu) | 25
Solution
1. File > Open
A. File > Open
B. Double-click My PC.
C. Navigate to Word2019.1/Exercises.
D. Select My First Word Document.docx and click the Open button.
2. File > Recent
A. File > Open > Recent.
B. Click the My First Word Document.docx document.
❋
3.3. New Documents and Word Templates
When creating a new Microsoft Word document, you can choose between creating a blankdocument or creating your document from an existing template.
Creating a New Blank Document
To create a new blank document:
1. From the File menu, select New.
2. Click Blank document.
26 | LESSON 3: The Backstage view (The File Menu)
EVALUATION COPY: Not to be used in class.
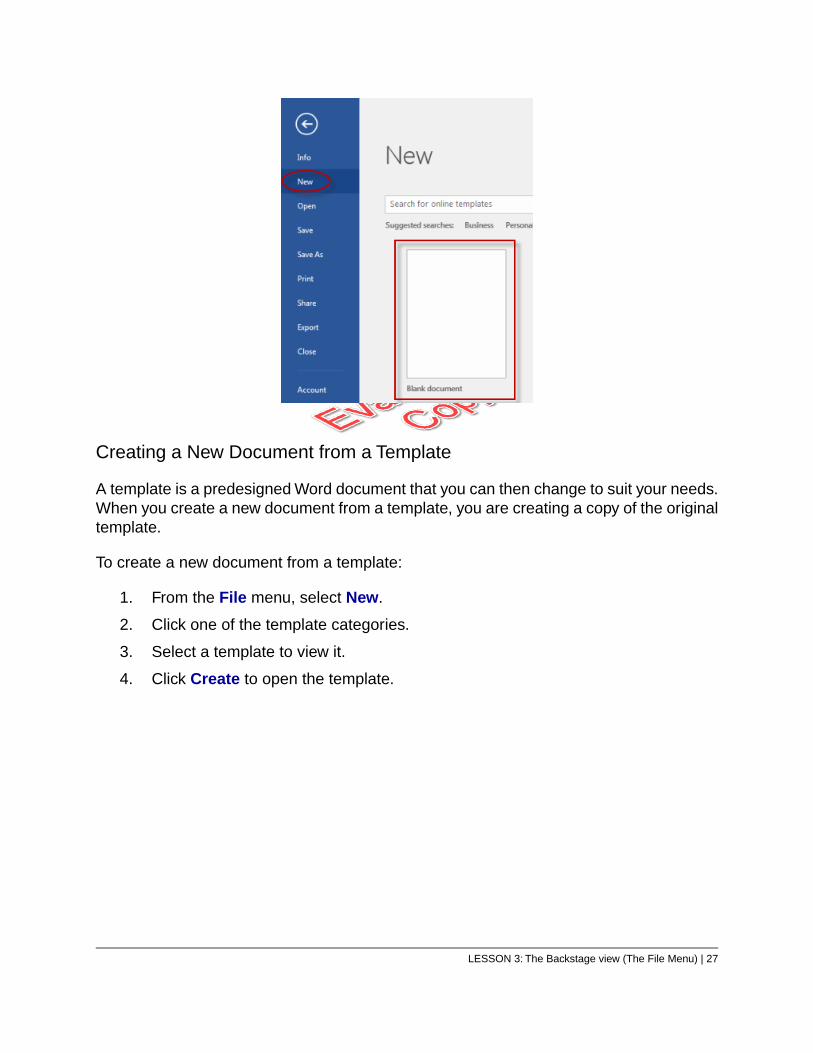
Creating a New Document from a Template
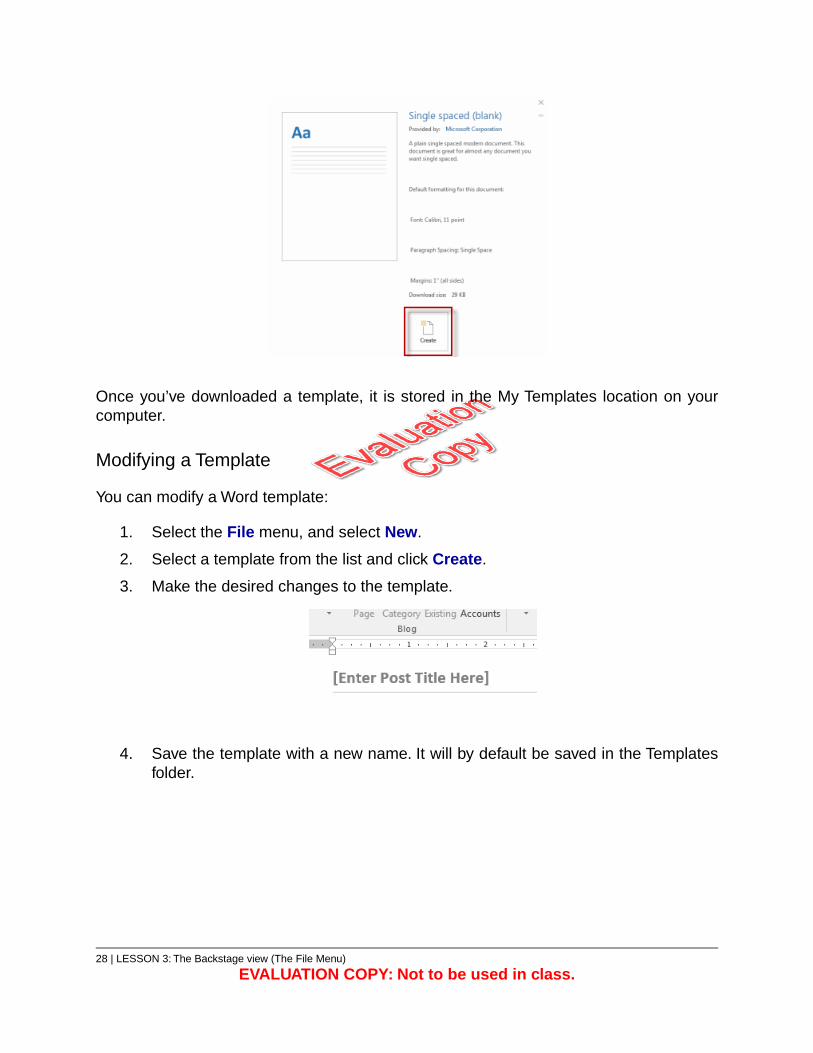
A template is a predesigned Word document that you can then change to suit your needs.When you create a new document from a template, you are creating a copy of the originaltemplate.
To create a new document from a template:
1. From the File menu, select New.
2. Click one of the template categories.
3. Select a template to view it.
4. Click Create to open the template.
LESSON 3: The Backstage view (The File Menu) | 27
Once you’ve downloaded a template, it is stored in the My Templates location on yourcomputer.
Modifying a Template
You can modify a Word template:
1. Select the File menu, and select New.
2. Select a template from the list and click Create.
3. Make the desired changes to the template.
4. Save the template with a new name. It will by default be saved in the Templatesfolder.
28 | LESSON 3: The Backstage view (The File Menu)
EVALUATION COPY: Not to be used in class.

LESSON 3: The Backstage view (The File Menu) | 29

Exercise 4:Write a Thank You Letter Usinga Template Letter
5 to 15 minutes
In this exercise, you will create a new document using a Microsoft template.
1. Locate an Office.com template to use to write a personal letter to a friend thankinghim or her for a gift.
2. Download the template.
3. Replace the content of the template’s text place holders with your name andaddress, and a friend’s name and address.You may also need to replace the bodyportion of the letter.
4. Save the document as Thank you letter.docx in your Word2019.1/Exercisesfolder.
5. Leave the file open as we will be using it in future exercises.
30 | LESSON 3: The Backstage view (The File Menu)
EVALUATION COPY: Not to be used in class.

LESSON 3: The Backstage view (The File Menu) | 31
Solution
1. From the File menu, select New.
2. Use the search for online templates box to search for a thank you letter.
3. Select one of the letters and click Create to download and open the template.
4. Replace the template content with your name and address and a friend’s nameand address as well as a message in the body area.
5. Click File > Save As:
A. Navigate to the Word2019.1/Exercises folder.
B. File name: type “Thank you letter”.
C. Save as type: select “Word document (*.docx).”
D. If a dialog box appears asking you if you want to save changes to thedocument template, click No.
❋
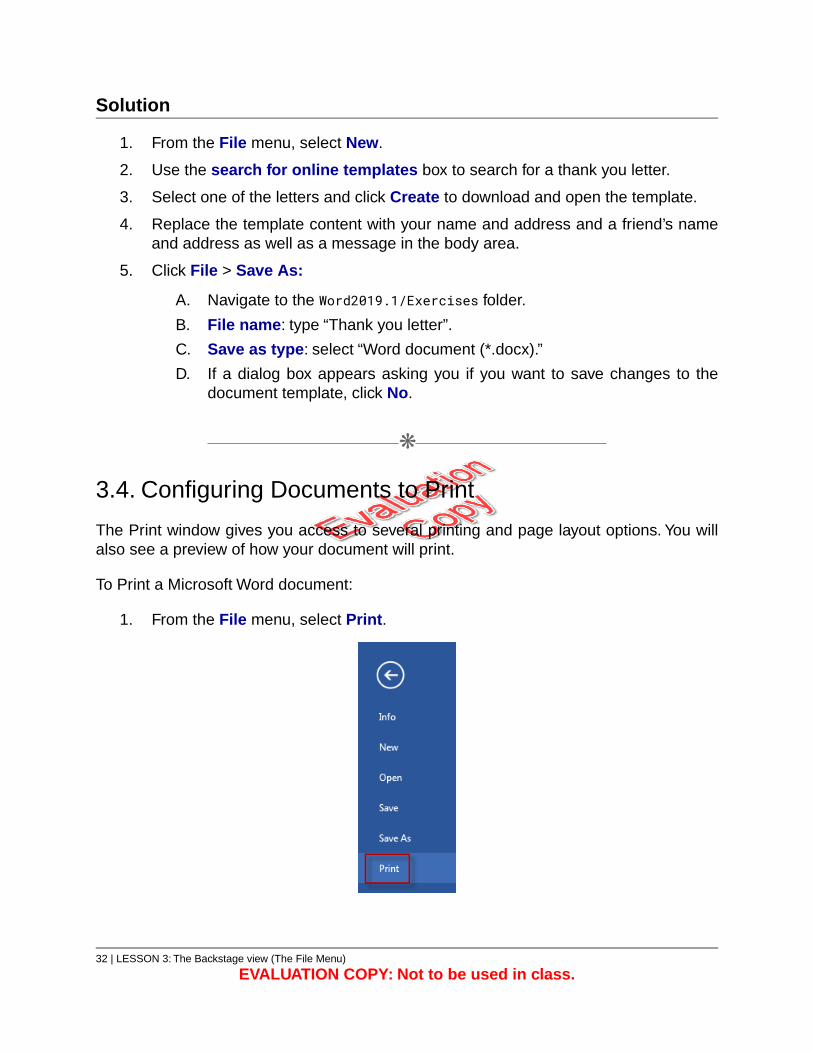
3.4. Configuring Documents to Print
The Print window gives you access to several printing and page layout options. You willalso see a preview of how your document will print.
To Print a Microsoft Word document:
1. From the File menu, select Print.
32 | LESSON 3: The Backstage view (The File Menu)
EVALUATION COPY: Not to be used in class.

2. Choose your print options (number of copies, printer, etc.) and click the Printbutton.
3.4.1. Print Document Sections
You can choose to print only document sections, instead of an entire document.
To print document sections, on the Print page in Backstage view, under Settings, selectthe first drop-down list, and then select Custom Print and specify the pages.
LESSON 3: The Backstage view (The File Menu) | 33
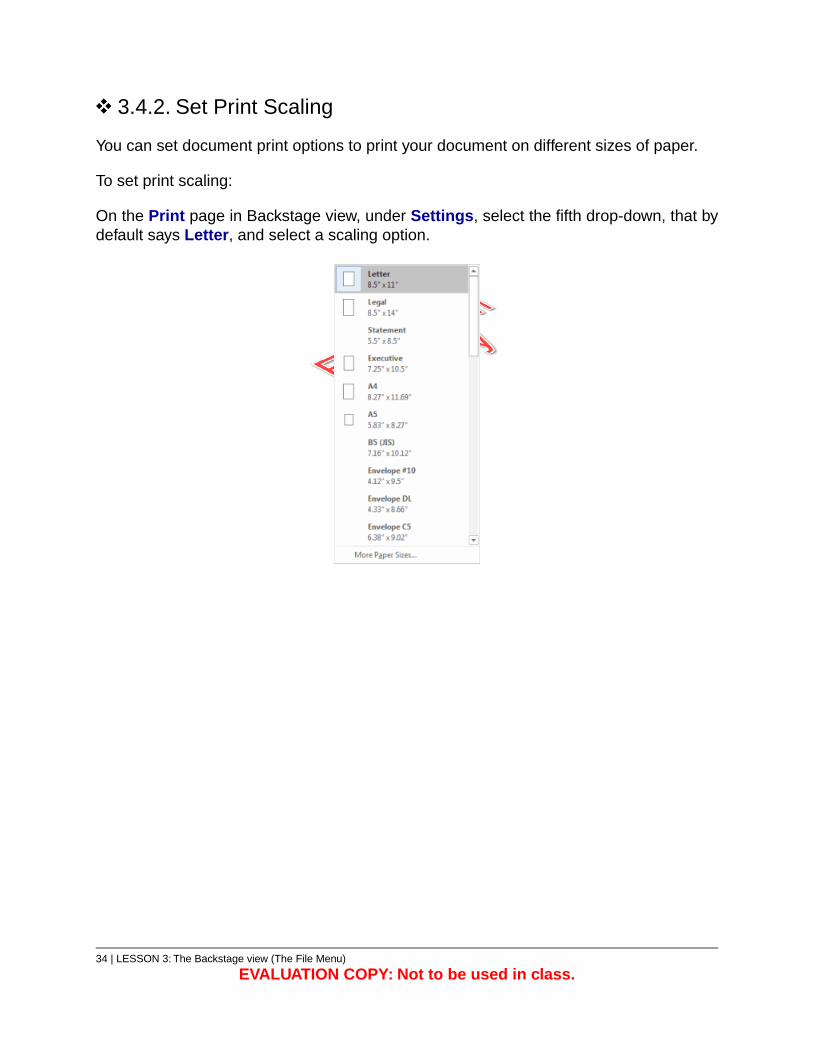
3.4.2. Set Print Scaling
You can set document print options to print your document on different sizes of paper.
To set print scaling:
On the Print page in Backstage view, under Settings, select the fifth drop-down, that bydefault says Letter, and select a scaling option.
34 | LESSON 3: The Backstage view (The File Menu)
EVALUATION COPY: Not to be used in class.
Exercise 5: Print a Document 5 to 10 minutes
In this exercise, you will print the letter you created in the last exercise. You will need tohave a printer connected to successfully complete this exercise.
1. Using the File menu, print the thank you letter you created in the last exercise.
LESSON 3: The Backstage view (The File Menu) | 35
Solution
1. Select File > Print.
2. Select your printer.
3. Select any additional options you want.
4. Click the Print button.
❋
3.5. Adding Your Name to Microsoft Word
You can add your name and initials to Microsoft Word. When you do so, the informationis used throughout the Microsoft Office products. Word uses this information for trackingchanges and assigning comments and for prefilling data used by some of the built-intemplates (e.g., the Agency Letter template under Sample Templates).
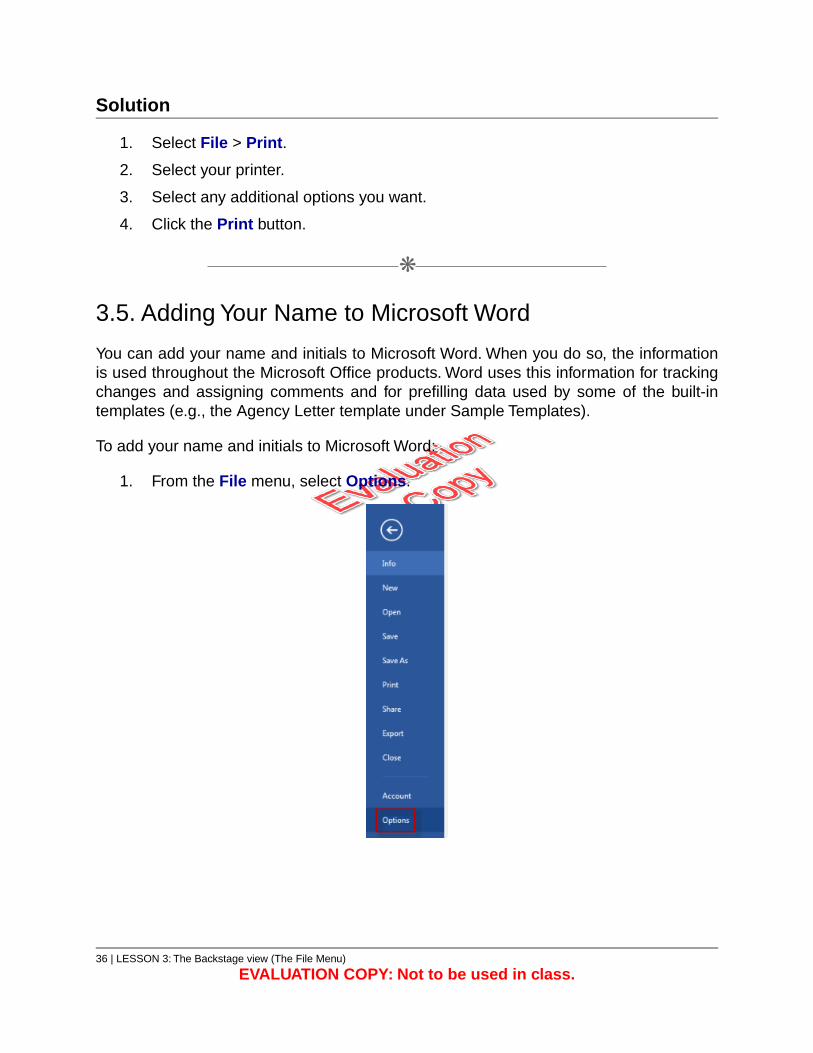
To add your name and initials to Microsoft Word:
1. From the File menu, select Options.
36 | LESSON 3: The Backstage view (The File Menu)
EVALUATION COPY: Not to be used in class.
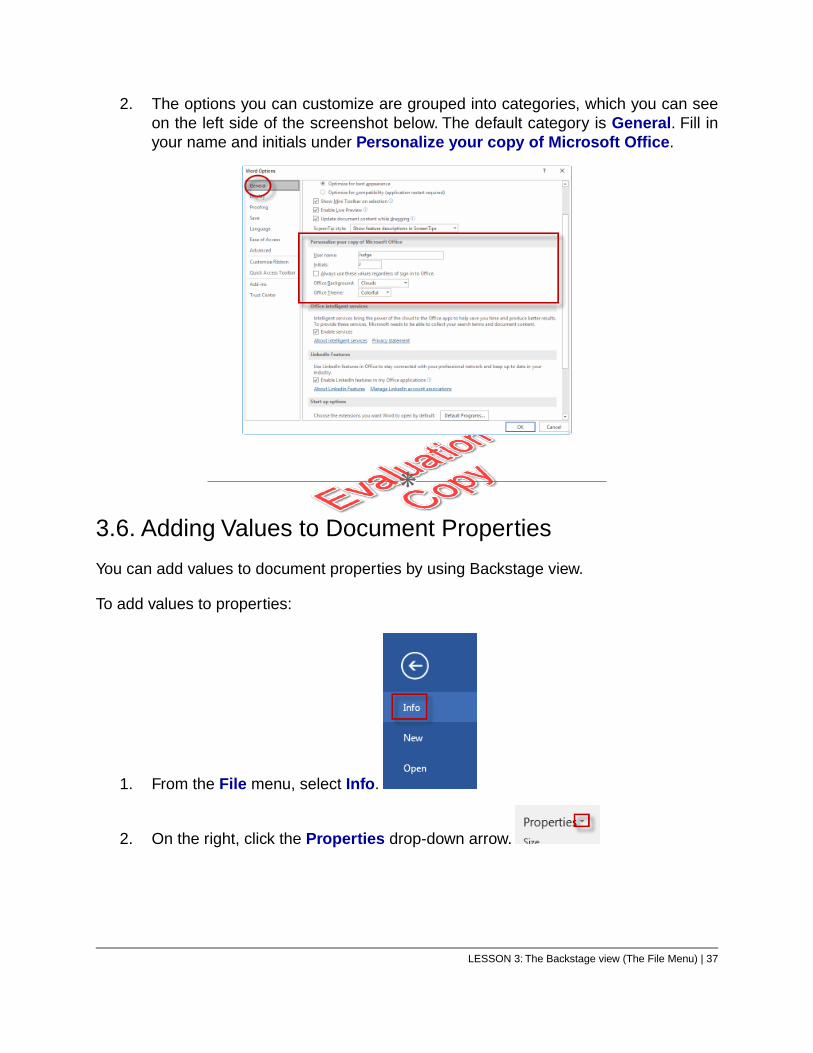
2. The options you can customize are grouped into categories, which you can seeon the left side of the screenshot below. The default category is General. Fill inyour name and initials under Personalize your copy of Microsoft Office.
❋
3.6. Adding Values to Document Properties
You can add values to document properties by using Backstage view.
To add values to properties:
1. From the File menu, select Info.
2. On the right, click the Properties drop-down arrow.
LESSON 3: The Backstage view (The File Menu) | 37
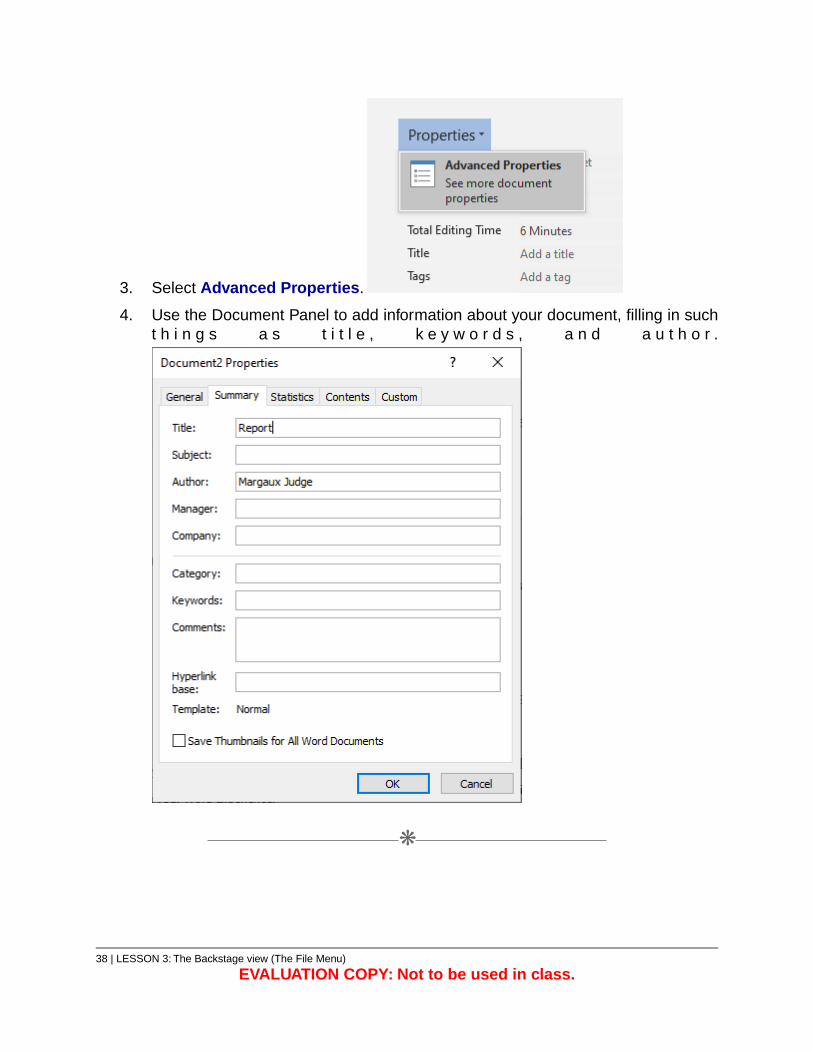
3. Select Advanced Properties.
4. Use the Document Panel to add information about your document, filling in sucht h i n g s a s t i t l e , k e y w o r d s , a n d a u t h o r .
❋
38 | LESSON 3: The Backstage view (The File Menu)
EVALUATION COPY: Not to be used in class.
3.7. Working with Autosaved Versions of Documents
Word automatically saves documents as you work with them. You can manage theseautosaved versions from Backstage view.
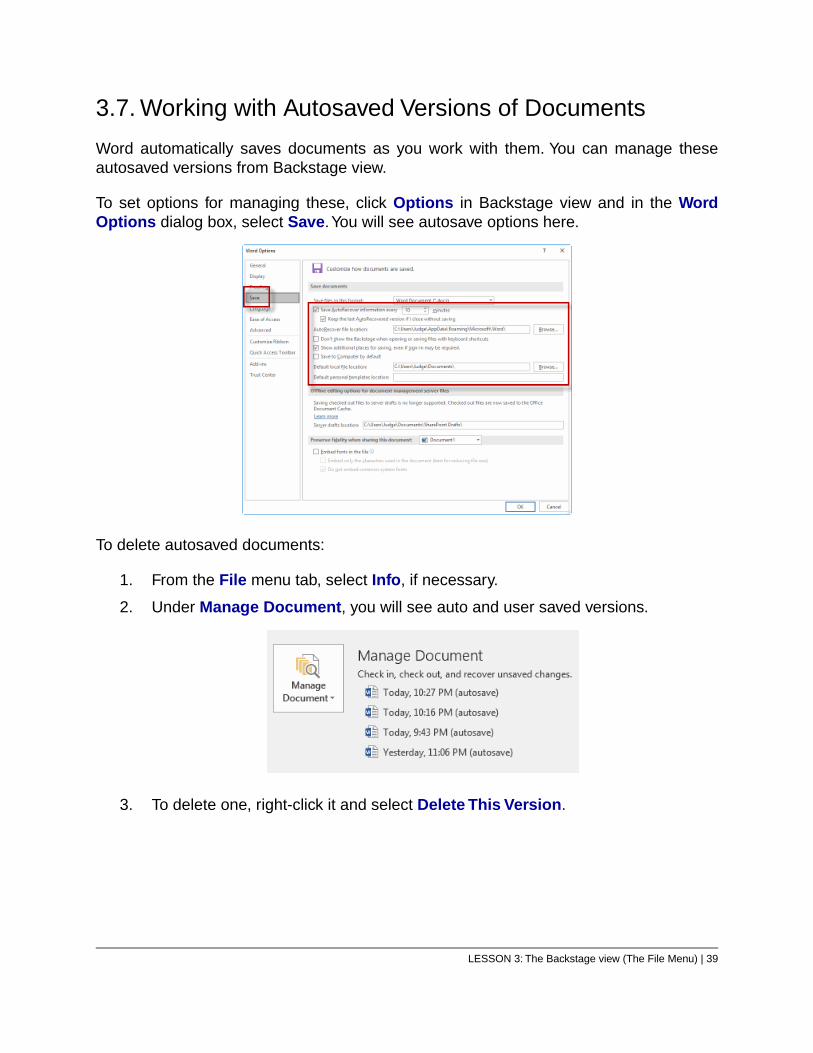
To set options for managing these, click Options in Backstage view and in the WordOptions dialog box, select Save.You will see autosave options here.
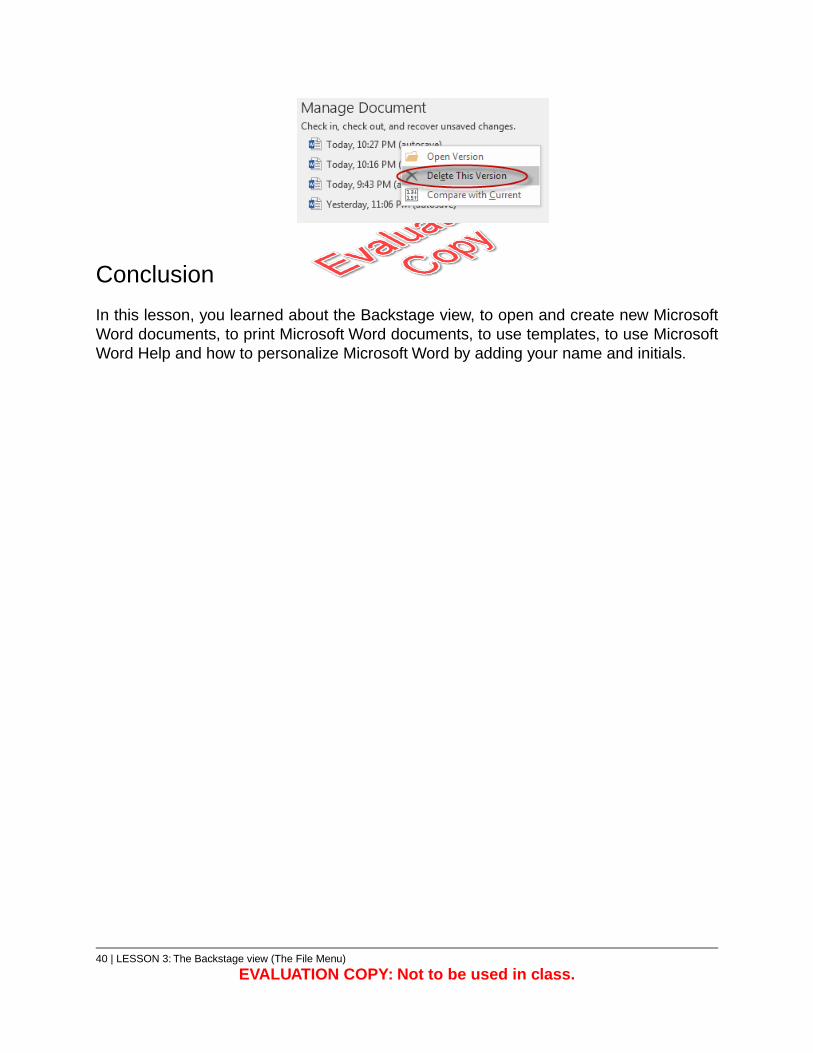
To delete autosaved documents:
1. From the File menu tab, select Info, if necessary.
2. Under Manage Document, you will see auto and user saved versions.
3. To delete one, right-click it and select Delete This Version.
LESSON 3: The Backstage view (The File Menu) | 39
Conclusion
In this lesson, you learned about the Backstage view, to open and create new MicrosoftWord documents, to print Microsoft Word documents, to use templates, to use MicrosoftWord Help and how to personalize Microsoft Word by adding your name and initials.
40 | LESSON 3: The Backstage view (The File Menu)
EVALUATION COPY: Not to be used in class.

LESSON 4The Quick Access Toolbar
Topics Covered
The Quick Access Toolbar.
Introduction
In this lesson, you will learn to add common commands to the Quick Access Toolbarand to move the Quick Access Toolbar.
❋
4.1. Quick Access Toolbar
The Quick Access Toolbar is a small toolbar which includes commonly used commandsand is always accessible. By default, the Quick Access Toolbar is located in the top-leftcorner of Microsoft Word.
By default, the Quick Access Toolbar includes four commands:
1. Save. Click Save to save your document.
2. Undo. Click Undo to undo the action you last performed.
LESSON 4: The Quick Access Toolbar | 41

Click the drop-down arrow to the right of Undo to undo multiple actionsat the same time.
A.
3. Redo. Click Redo to repeat the action you last performed.
4. Print Preview and Print. Click Print Preview and Print to open the Print optionsin Backstage view.
❋
4.2. Adding Common Commands
To add commonly used commands to the Quick Access Toolbar:
1. Click the drop-down arrow on the far right of the Quick Access Toolbar.
2. Select a command from the list that appears:
❋
4.3. Adding Additional Commands with the Customize DialogBox
To add additional commands to the Quick Access Toolbar:
1. Click the drop-down arrow on the far right of the Quick Access Toolbar.
2. Select More Commands… toward the bottom of the list that appears.
42 | LESSON 4: The Quick Access Toolbar
EVALUATION COPY: Not to be used in class.
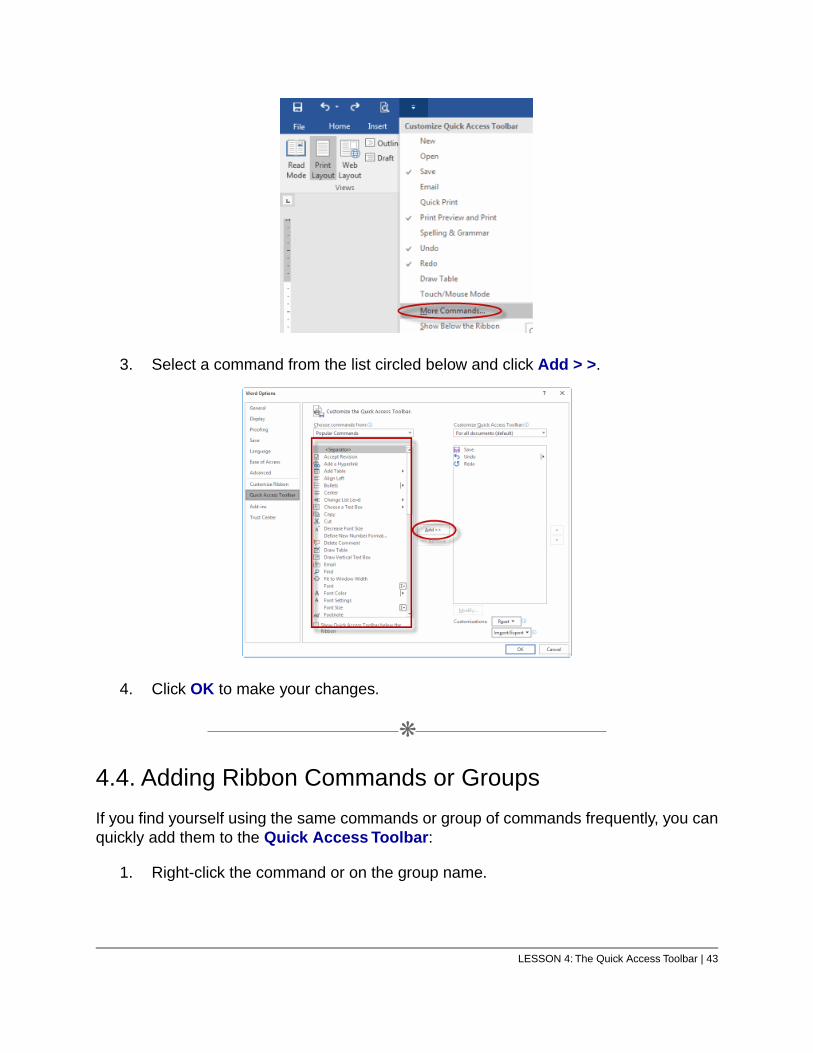
3. Select a command from the list circled below and click Add > >.
4. Click OK to make your changes.
❋
4.4. Adding Ribbon Commands or Groups
If you find yourself using the same commands or group of commands frequently, you canquickly add them to the Quick Access Toolbar:
1. Right-click the command or on the group name.
LESSON 4: The Quick Access Toolbar | 43

2. Select Add to Quick Access Toolbar:
❋
4.5. Placement
You can choose to keep the Quick Access Toolbar in the top-left corner of MicrosoftWord or move it below the Ribbon.To move the Quick Access Toolbar below the Ribbon:
1. Click the drop-down arrow on the far right of the Quick Access Toolbar.
2. Select Show Below the Ribbon.
3. To move it back, click the drop-down arrow again and select Show Above theRibbon.
44 | LESSON 4: The Quick Access Toolbar
EVALUATION COPY: Not to be used in class.

LESSON 4: The Quick Access Toolbar | 45
Exercise 6: Customize the Quick AccessToolbar
15 to 25 minutes
In this exercise, you will customize the Quick Access Toolbar.
1. Add the following commands to the Quick Access Toolbar:
A. New
B. Open
C. Quick Print
D. Paste
E. Find
2. Remove Find from the Quick Access Toolbar.
3. Move the Quick Access Toolbar below the Ribbon.
46 | LESSON 4: The Quick Access Toolbar
EVALUATION COPY: Not to be used in class.

LESSON 4: The Quick Access Toolbar | 47
Solution
1. To add commands to the Quick Access Toolbar:
A. New: click the drop-down arrow to the right of the Quick Access Toolbarand check New.
B. Open: click the drop-down arrow to the right of the Quick Access Toolbarand check Open.
C. Quick Print: click the drop-down arrow to the right of the Quick AccessToolbar and check Quick Print.
D. Paste: click the drop-down arrow to the right of the Quick Access Toolbarand select More Commands…. Highlight Paste in the left column andclick Add > >.
E. Find: click the drop-down arrow to the right of the Quick Access Toolbarand select More Commands…. Highlight Find in the left column and clickAdd > >.
2. To remove Find from the Quick Access Toolbar:
A. Click the drop-down arrow to the right of the Quick Access Toolbar andselect More Commands…. Highlight Find in the right column and click< < Remove.
3. To move the Quick Access Toolbar below the Ribbon:
A. Click the drop-down arrow to the right of the Quick Access Toolbar andselect Show Below the Ribbon.
B. Optional: to move the Quick Access Toolbar back above the Ribbon,click the drop-down arrow to the right of the Quick Access Toolbar andselect Show Above the Ribbon.
Conclusion
In this lesson, you learned to customize the Quick Access Toolbar.
48 | LESSON 4: The Quick Access Toolbar
EVALUATION COPY: Not to be used in class.
LESSON 5Formatting Microsoft Word Documents
Topics Covered
Fonts.
Lists.
Hyperlinks.
Styles.
Themes.
The Ruler.
Setting margins.
Introduction
In this lesson, you will learn to add, remove, and change fonts, to work with lists, to addhyperlinks, to apply styles, to use themes, to use the Ruler, and to set margins withinMicrosoft Word.
❋
5.1. Selecting Text
You need to select text to be able to apply formatting to that text. Among the ways to selecttext:
1. Click and drag with your mouse.
2. Double-click a word to select the word.
3. Triple-click in a paragraph to select the paragraph.
4. Click and drag in the document’s Selection Area in the left margin.
❋
LESSON 5: Formatting Microsoft Word Documents | 49
5.2. Selecting Fonts
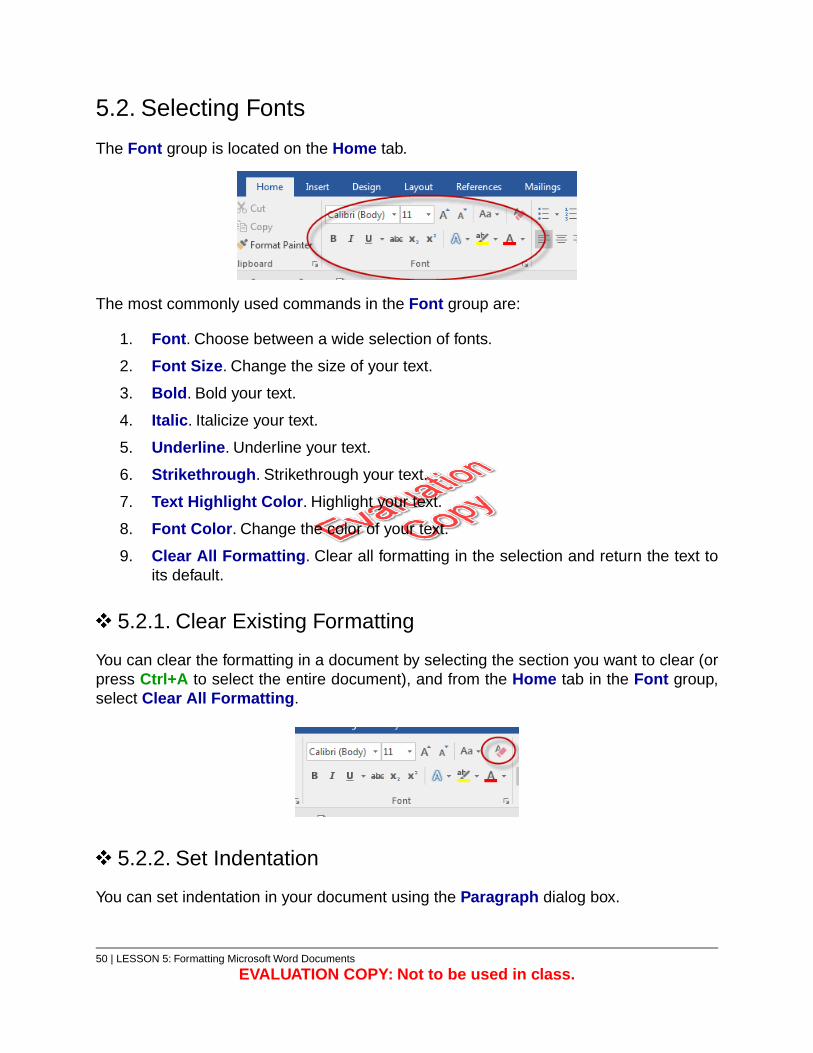
The Font group is located on the Home tab.
The most commonly used commands in the Font group are:
1. Font. Choose between a wide selection of fonts.
2. Font Size. Change the size of your text.
3. Bold. Bold your text.
4. Italic. Italicize your text.
5. Underline. Underline your text.
6. Strikethrough. Strikethrough your text.
7. Text Highlight Color. Highlight your text.
8. Font Color. Change the color of your text.
9. Clear All Formatting. Clear all formatting in the selection and return the text toits default.
5.2.1. Clear Existing Formatting
You can clear the formatting in a document by selecting the section you want to clear (orpress Ctrl+A to select the entire document), and from the Home tab in the Font group,select Clear All Formatting.
5.2.2. Set Indentation
You can set indentation in your document using the Paragraph dialog box.
50 | LESSON 5: Formatting Microsoft Word Documents
EVALUATION COPY: Not to be used in class.
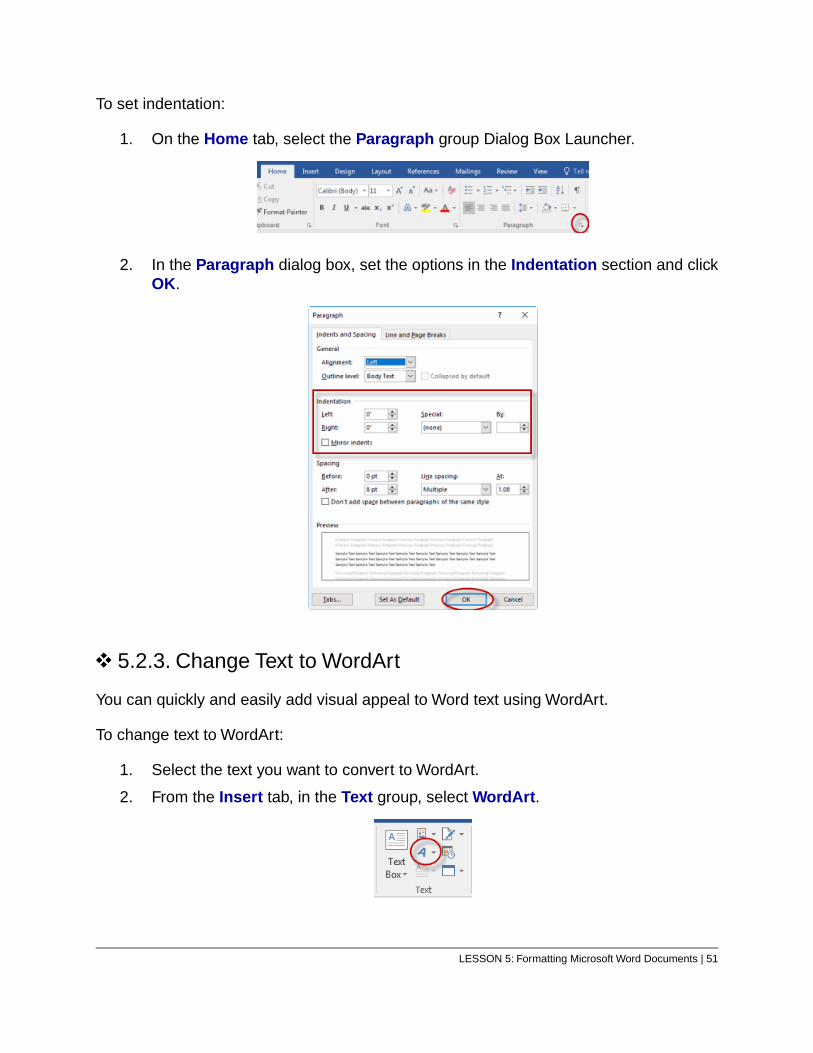
To set indentation:
1. On the Home tab, select the Paragraph group Dialog Box Launcher.
2. In the Paragraph dialog box, set the options in the Indentation section and clickOK.
5.2.3. Change Text to WordArt
You can quickly and easily add visual appeal to Word text using WordArt.
To change text to WordArt:
1. Select the text you want to convert to WordArt.
2. From the Insert tab, in the Text group, select WordArt.
LESSON 5: Formatting Microsoft Word Documents | 51
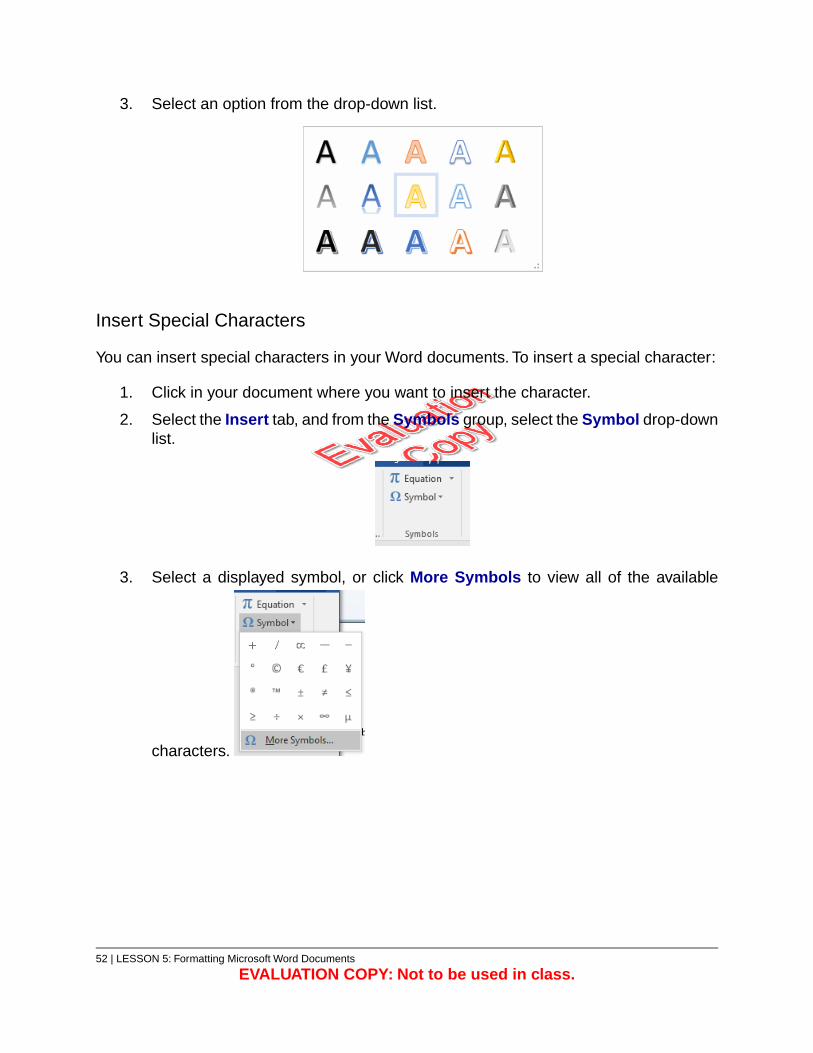
3. Select an option from the drop-down list.
Insert Special Characters
You can insert special characters in your Word documents. To insert a special character:
1. Click in your document where you want to insert the character.
2. Select the Insert tab, and from the Symbols group, select the Symbol drop-downlist.
3. Select a displayed symbol, or click More Symbols to view all of the available
characters.
52 | LESSON 5: Formatting Microsoft Word Documents
EVALUATION COPY: Not to be used in class.
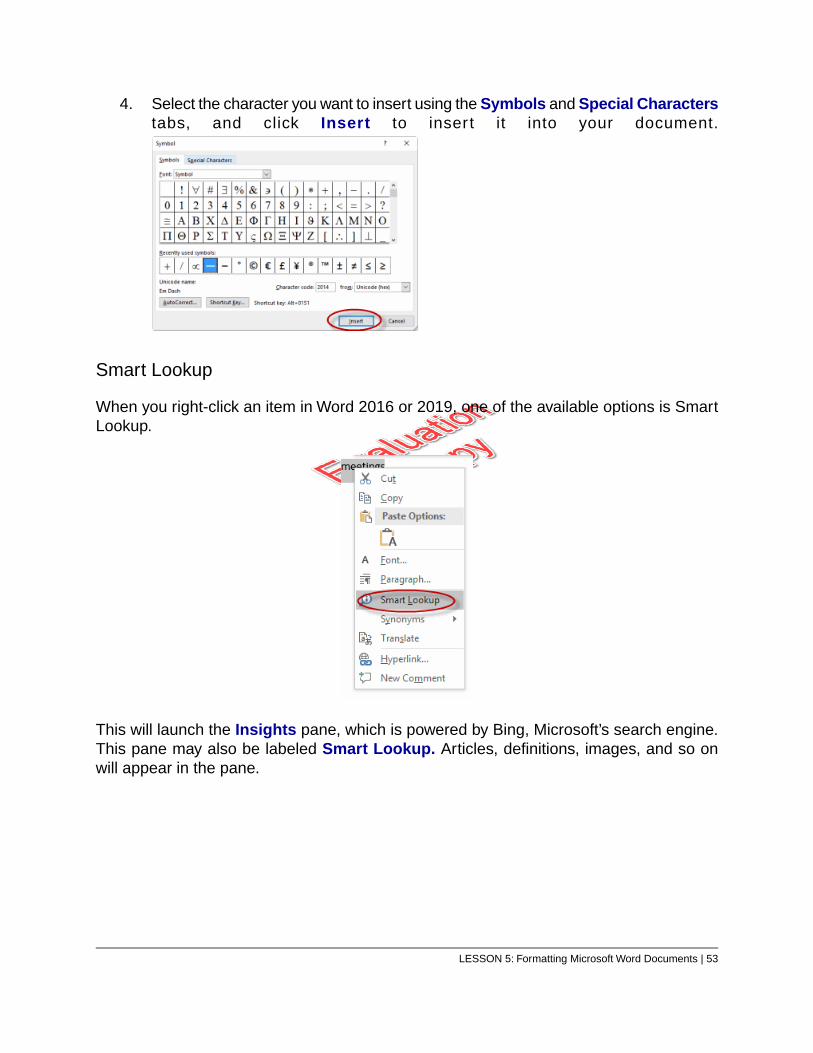
4. Select the character you want to insert using the Symbols and Special Characterstabs, and click Insert to inser t it into your document.
Smart Lookup
When you right-click an item in Word 2016 or 2019, one of the available options is SmartLookup.
This will launch the Insights pane, which is powered by Bing, Microsoft’s search engine.This pane may also be labeled Smart Lookup. Articles, definitions, images, and so onwill appear in the pane.
LESSON 5: Formatting Microsoft Word Documents | 53
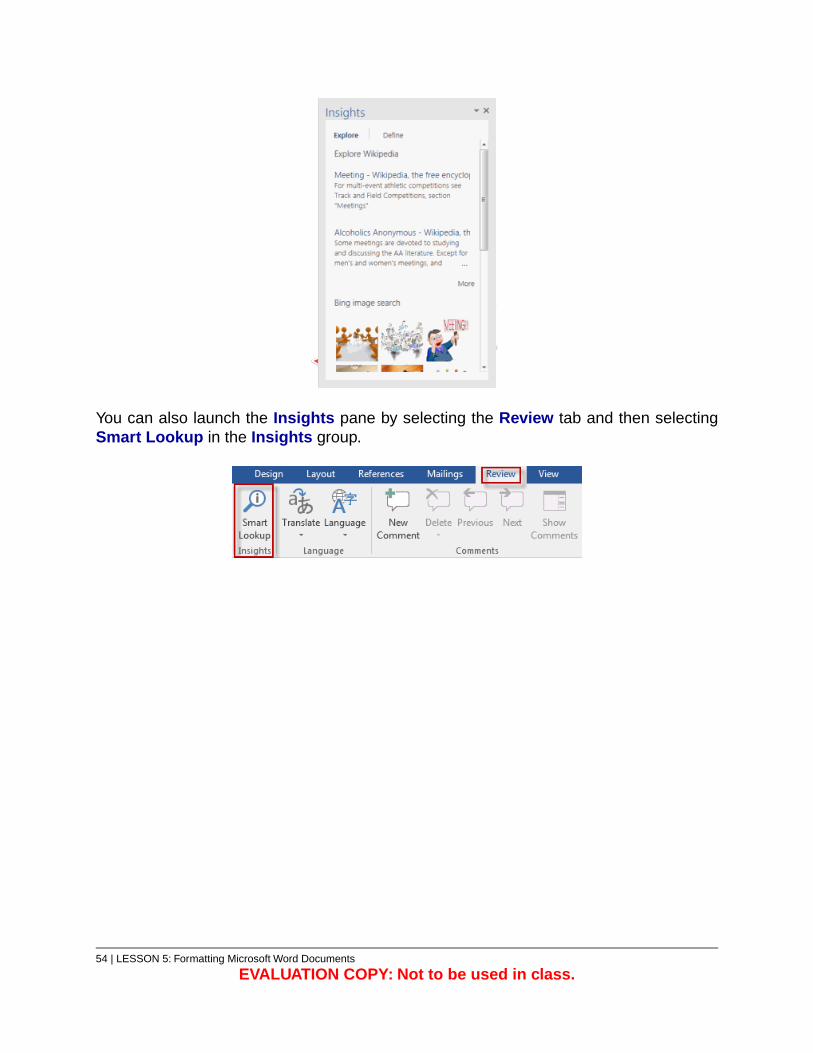
You can also launch the Insights pane by selecting the Review tab and then selectingSmart Lookup in the Insights group.
54 | LESSON 5: Formatting Microsoft Word Documents
EVALUATION COPY: Not to be used in class.
Exercise 7: Working with Fonts 5 to 15 minutes
In this exercise, you will change the font, text size, effects, and color of the text in the thankyou letter you created in a prior exercise.
1. Bold your name and increase the text size to 20.
2. Italicize your address.
3. Change the text color of the date to red.
4. Underline the greeting line.
5. Add a Text Effect to “Sincerely.”
LESSON 5: Formatting Microsoft Word Documents | 55
Solution
1. Bold your name and increase the text size to 20.
A. Highlight your name.
B. In the Font group, click Bold.
C. In the Font group, click the text size drop-down box and select 20.
2. Italicize your address.
A. Highlight your address.
B. In the Font group, click Italic.
3. Change the text color of the date to red.
A. Highlight the date.
B. In the Font group, click the font color drop-down box and red.
4. Underline the greeting line.
A. Highlight the greeting line.
B. In the Font group, click Underline.
5. Add a text effect to “Sincerely”.
A. Highlight “Sincerely.”
B. In the Font group, click Text Effects and choose an effect.
❋
5.3. Working with Lists
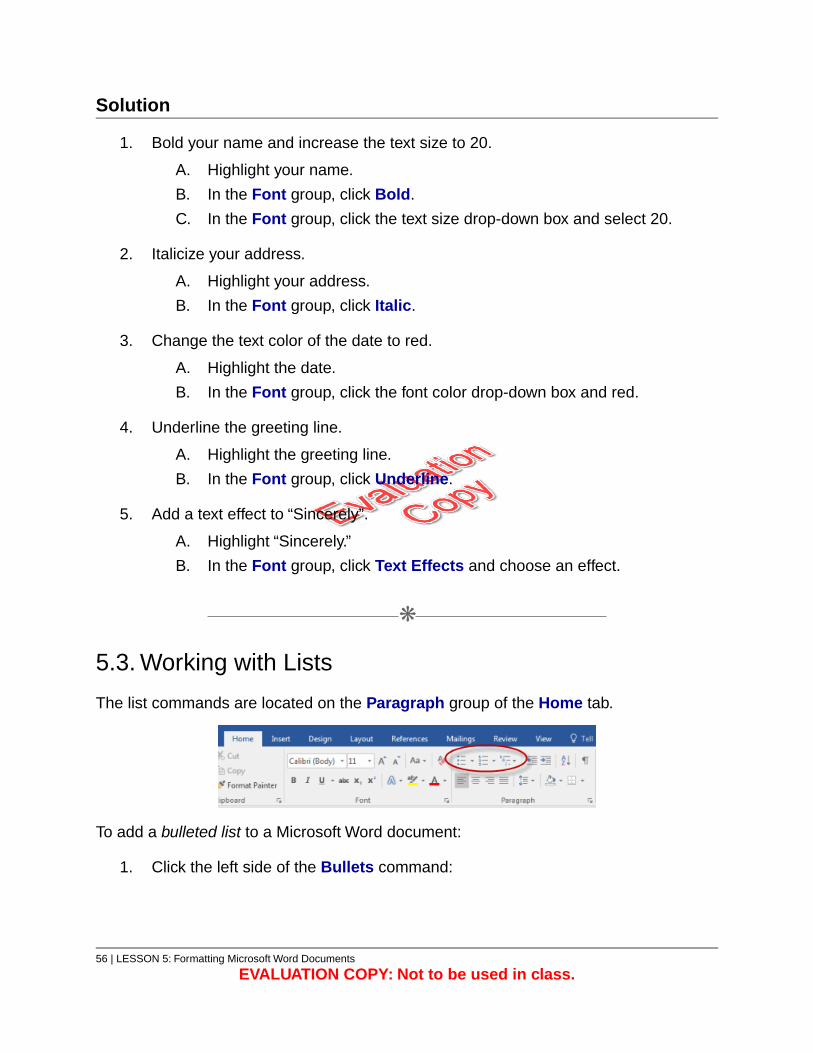
The list commands are located on the Paragraph group of the Home tab.
To add a bulleted list to a Microsoft Word document:
1. Click the left side of the Bullets command:
56 | LESSON 5: Formatting Microsoft Word Documents
EVALUATION COPY: Not to be used in class.
2. Begin typing.
3. Press the Enter key to add additional bullets.
4. Press the Enter key twice to get out of list mode.
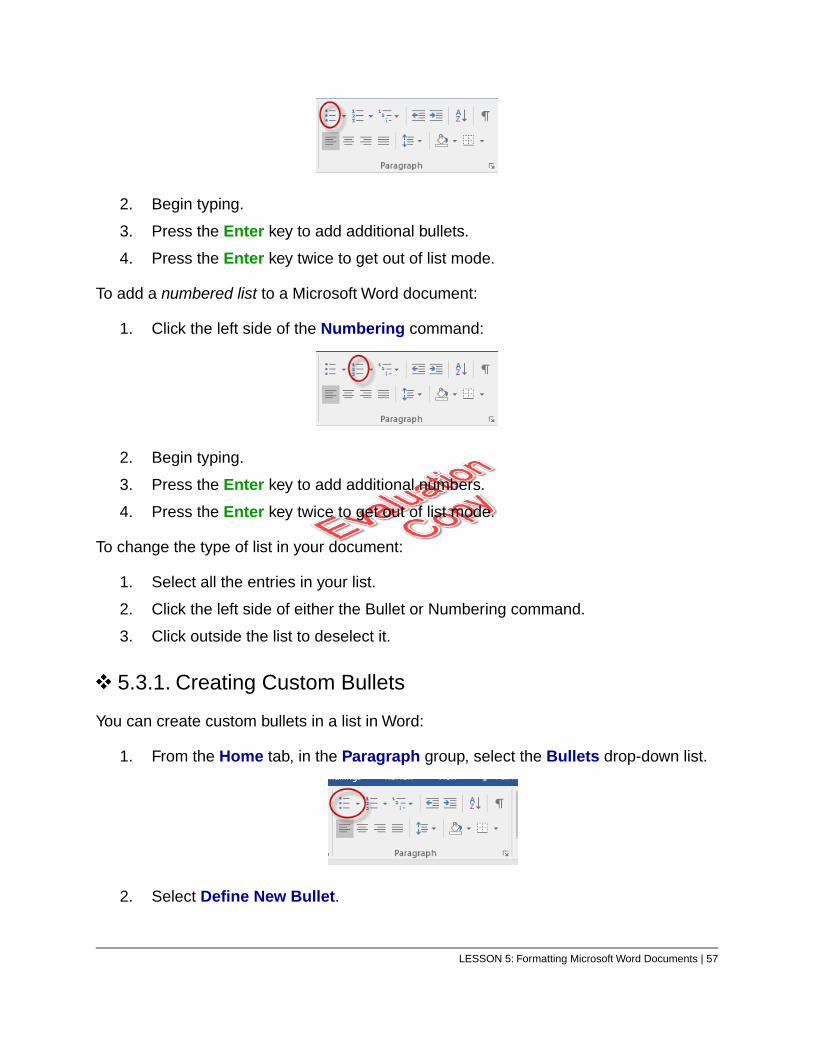
To add a numbered list to a Microsoft Word document:
1. Click the left side of the Numbering command:
2. Begin typing.
3. Press the Enter key to add additional numbers.
4. Press the Enter key twice to get out of list mode.
To change the type of list in your document:
1. Select all the entries in your list.
2. Click the left side of either the Bullet or Numbering command.
3. Click outside the list to deselect it.
5.3.1. Creating Custom Bullets
You can create custom bullets in a list in Word:
1. From the Home tab, in the Paragraph group, select the Bullets drop-down list.
2. Select Define New Bullet.
LESSON 5: Formatting Microsoft Word Documents | 57

3. Select a bullet character and alignment options, and click OK.
4. The custom bullet is inserted.
5.3.2. Modifying List Indentation
To modify a list’s indentation:
1. Select the list.
2. From the Home tab, in the Paragraph group, select the Decrease Indent orIncrease Indent option.
58 | LESSON 5: Formatting Microsoft Word Documents
EVALUATION COPY: Not to be used in class.
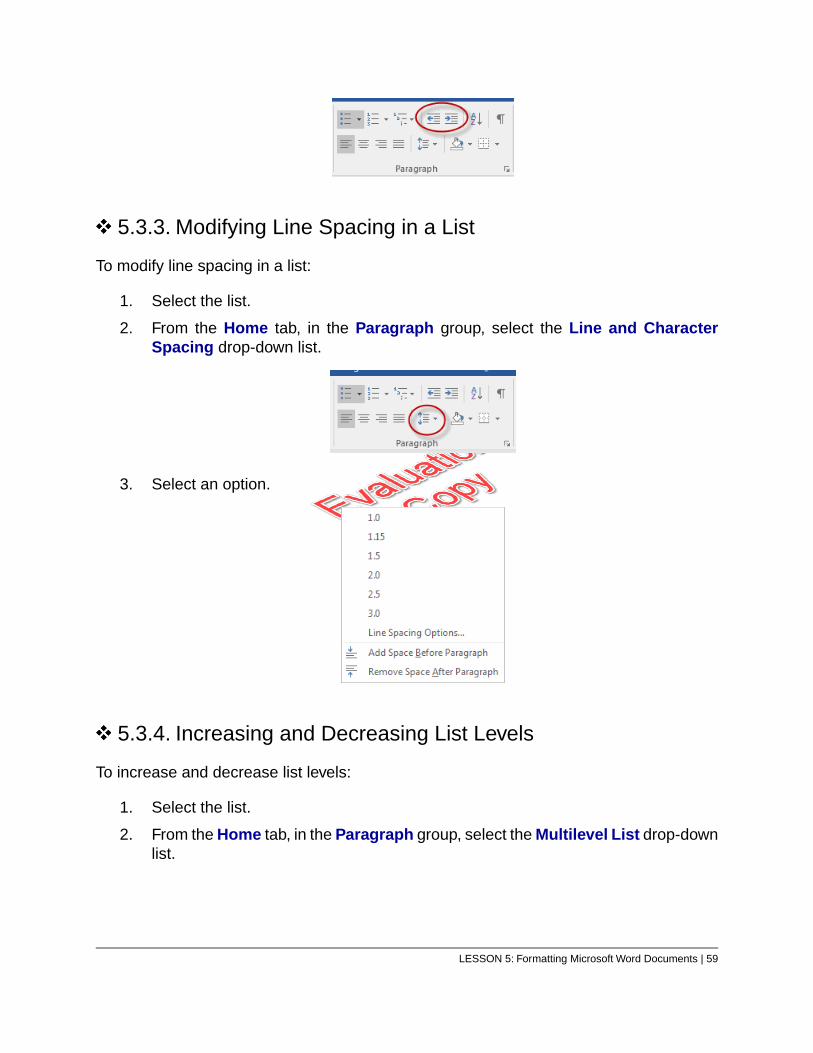
5.3.3. Modifying Line Spacing in a List
To modify line spacing in a list:
1. Select the list.
2. From the Home tab, in the Paragraph group, select the Line and CharacterSpacing drop-down list.
3. Select an option.
5.3.4. Increasing and Decreasing List Levels
To increase and decrease list levels:
1. Select the list.
2. From the Home tab, in the Paragraph group, select the Multilevel List drop-downlist.
LESSON 5: Formatting Microsoft Word Documents | 59
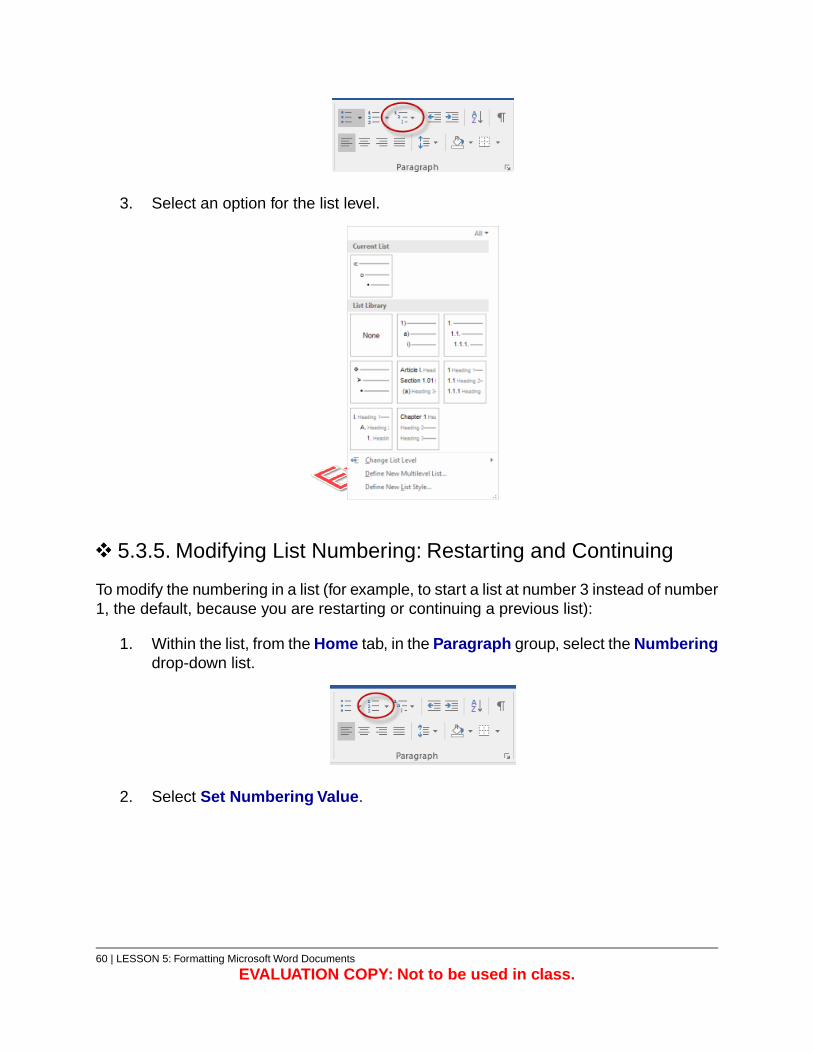
3. Select an option for the list level.
5.3.5. Modifying List Numbering: Restarting and Continuing
To modify the numbering in a list (for example, to start a list at number 3 instead of number1, the default, because you are restarting or continuing a previous list):
1. Within the list, from the Home tab, in the Paragraph group, select the Numberingdrop-down list.
2. Select Set Numbering Value.
60 | LESSON 5: Formatting Microsoft Word Documents
EVALUATION COPY: Not to be used in class.
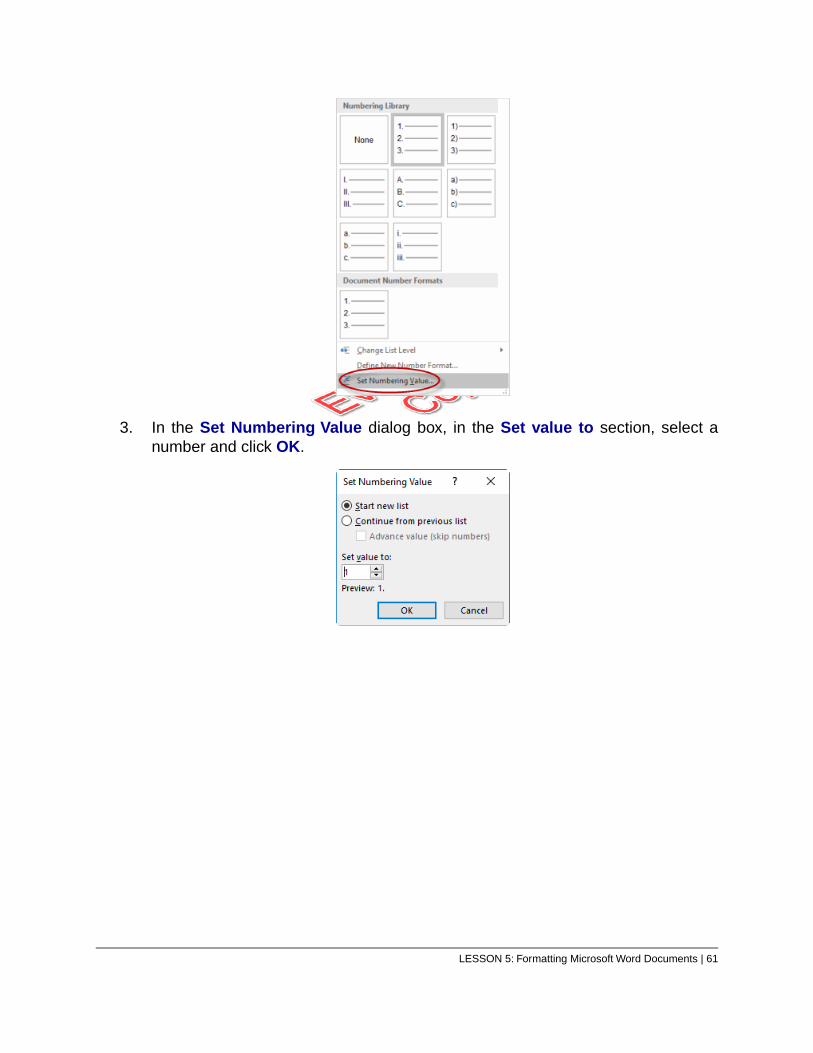
3. In the Set Numbering Value dialog box, in the Set value to section, select anumber and click OK.
LESSON 5: Formatting Microsoft Word Documents | 61
Exercise 8: Working with Lists 5 to 15 minutes
In this exercise, you will add a bulleted list and then change it to a numbered list. If Thankyou letter.docx is not open, open it from your Word2019.1/Exercises folder.
1. In the letter, add the following sentence at the end of the letter: “P.S. The bouquetincludes so many flowers:.”
2. Add a bulleted list of your favorite flowers.
3. Change the bulleted list to a numbered list.
62 | LESSON 5: Formatting Microsoft Word Documents
EVALUATION COPY: Not to be used in class.

LESSON 5: Formatting Microsoft Word Documents | 63
Solution
1. Place your cursor at the end of the letter and type “P.S. The bouquet includes somany flowers:.” Press Enter.
2. Click the Bullets command in the Paragraph group and then type the name of aflower, press the Enter key, type the number of another flower, press the Enterkey, etc.
3. Select the bulleted text and click the Numbering command in the Paragraphgroup.
❋
5.4. Inserting a Hyperlink in a Document
You can insert a hyperlink in a Word document. The hyperlink can link to a web page,document, file, email address, or even a place in the document or a different document.
To add a hyperlink in a document:
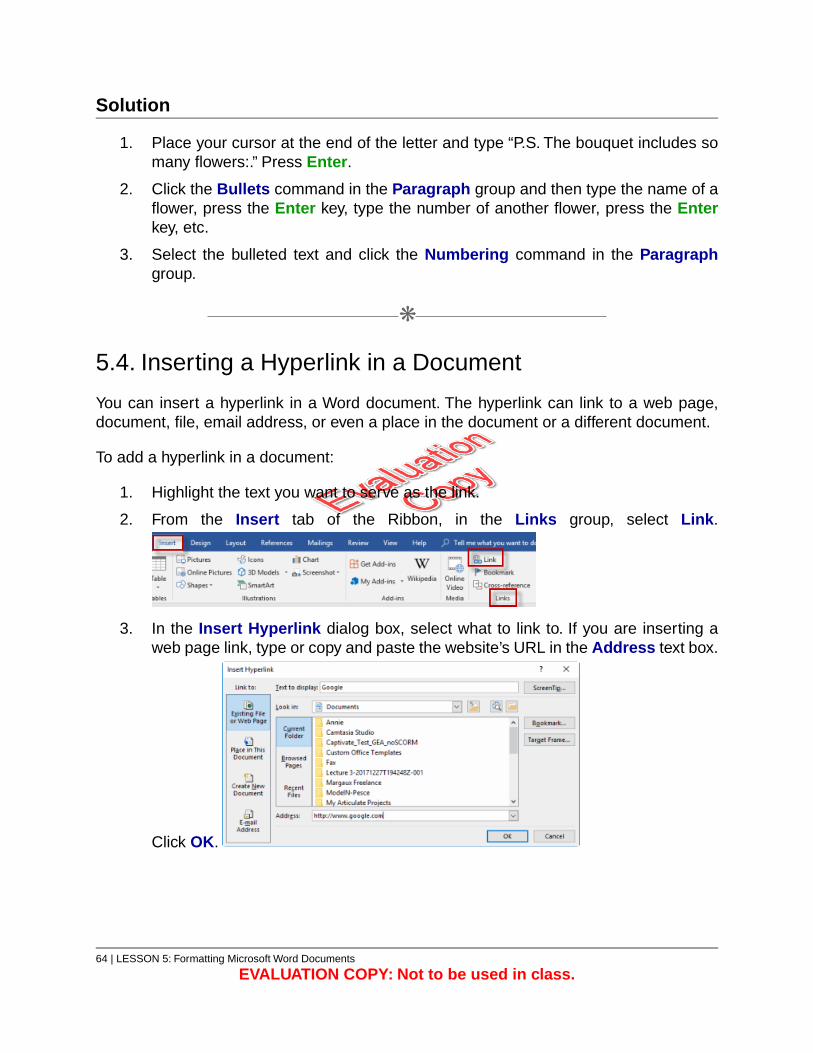
1. Highlight the text you want to serve as the link.
2. From the Insert tab of the Ribbon, in the Links group, select Link.
3. In the Insert Hyperlink dialog box, select what to link to. If you are inserting aweb page link, type or copy and paste the website’s URL in the Address text box.
Click OK.
64 | LESSON 5: Formatting Microsoft Word Documents
EVALUATION COPY: Not to be used in class.
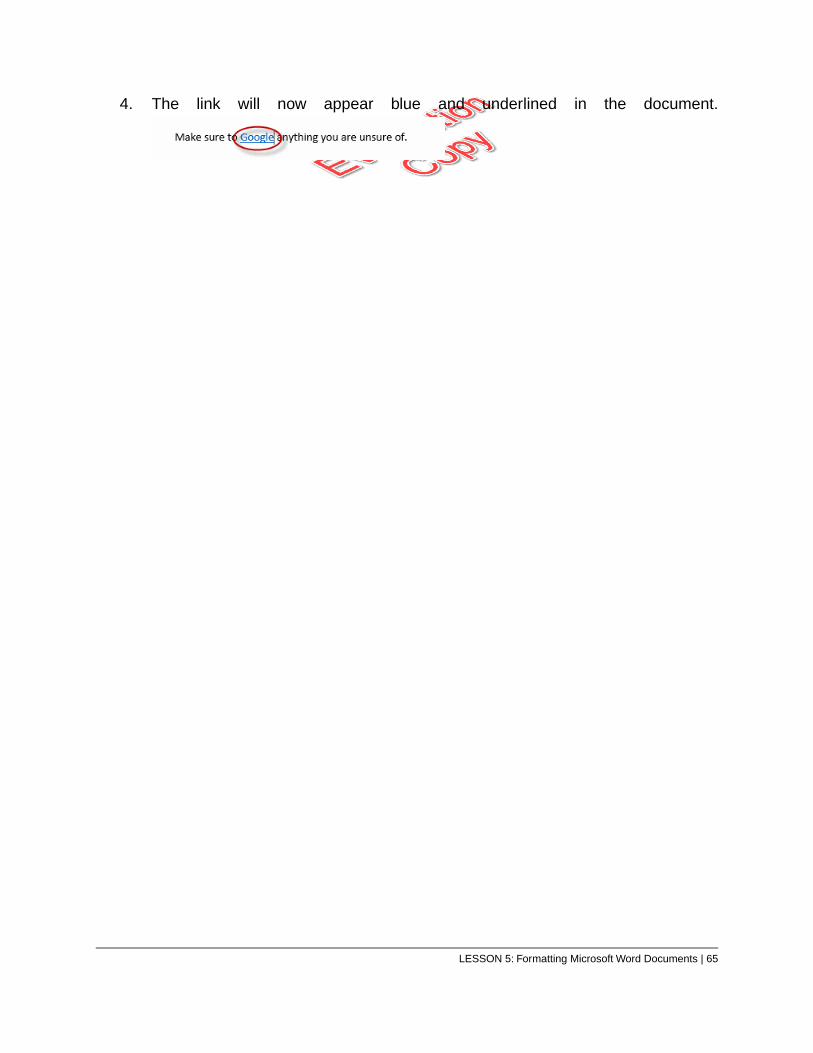
4. The link will now appear blue and underlined in the document.
LESSON 5: Formatting Microsoft Word Documents | 65
Exercise 9: Inserting a Hyperlink 5 to 10 minutes
In this exercise, you will insert a hyperlink to a web page in a document. Open Webucator.docx from your Word2019.1/Exercises folder.
1. Make the word “Webucator” in the first sentence a hyperlink towww.webucator.com.
66 | LESSON 5: Formatting Microsoft Word Documents
EVALUATION COPY: Not to be used in class.

LESSON 5: Formatting Microsoft Word Documents | 67
Solution
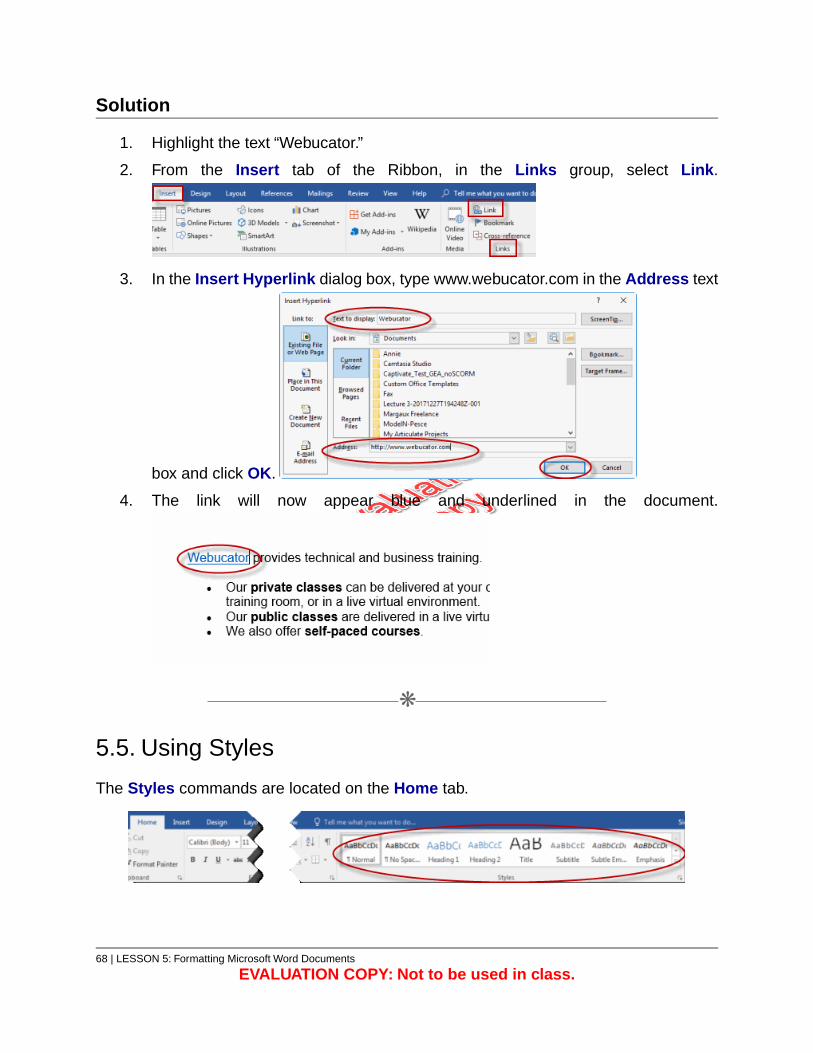
1. Highlight the text “Webucator.”
2. From the Insert tab of the Ribbon, in the Links group, select Link.
3. In the Insert Hyperlink dialog box, type www.webucator.com in the Address text
box and click OK.
4. The link will now appear blue and underlined in the document.
❋
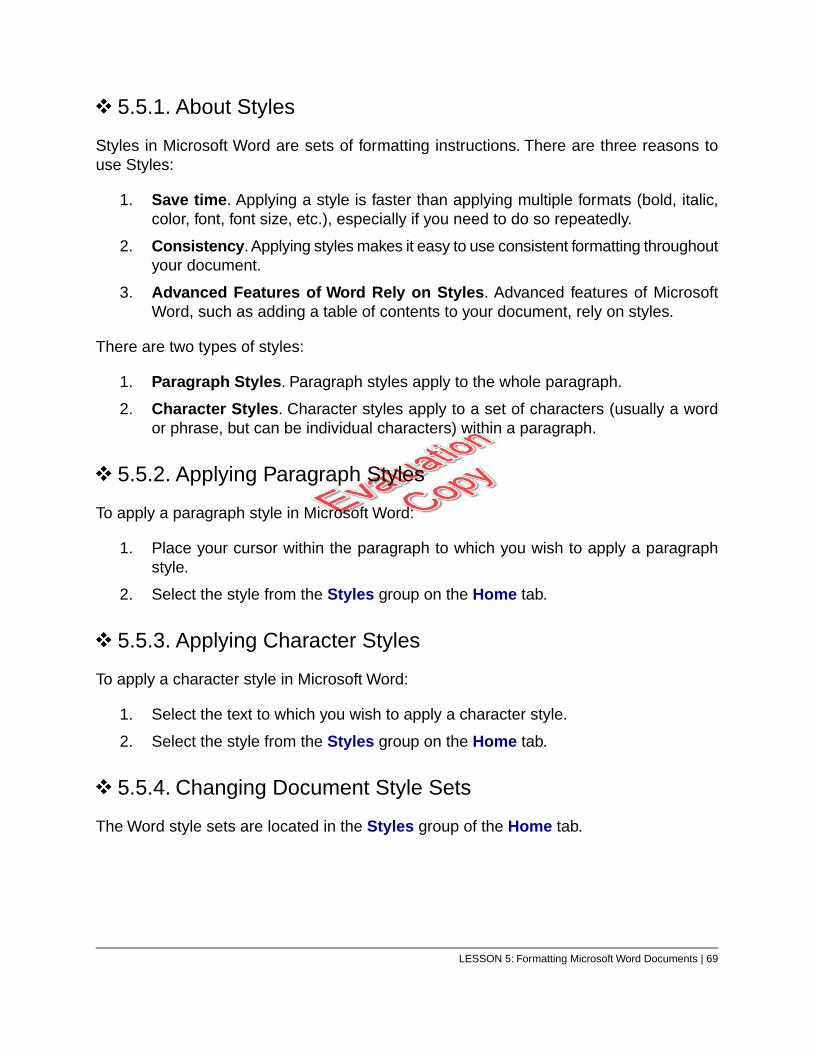
5.5. Using Styles
The Styles commands are located on the Home tab.
68 | LESSON 5: Formatting Microsoft Word Documents
EVALUATION COPY: Not to be used in class.
5.5.1. About Styles
Styles in Microsoft Word are sets of formatting instructions. There are three reasons touse Styles:
1. Save time. Applying a style is faster than applying multiple formats (bold, italic,color, font, font size, etc.), especially if you need to do so repeatedly.
2. Consistency. Applying styles makes it easy to use consistent formatting throughoutyour document.
3. Advanced Features of Word Rely on Styles. Advanced features of MicrosoftWord, such as adding a table of contents to your document, rely on styles.
There are two types of styles:
1. Paragraph Styles. Paragraph styles apply to the whole paragraph.
2. Character Styles. Character styles apply to a set of characters (usually a wordor phrase, but can be individual characters) within a paragraph.
5.5.2. Applying Paragraph Styles
To apply a paragraph style in Microsoft Word:
1. Place your cursor within the paragraph to which you wish to apply a paragraphstyle.
2. Select the style from the Styles group on the Home tab.
5.5.3. Applying Character Styles
To apply a character style in Microsoft Word:
1. Select the text to which you wish to apply a character style.
2. Select the style from the Styles group on the Home tab.
5.5.4. Changing Document Style Sets
The Word style sets are located in the Styles group of the Home tab.
LESSON 5: Formatting Microsoft Word Documents | 69
To change style sets, simply click to select a new style and apply it.
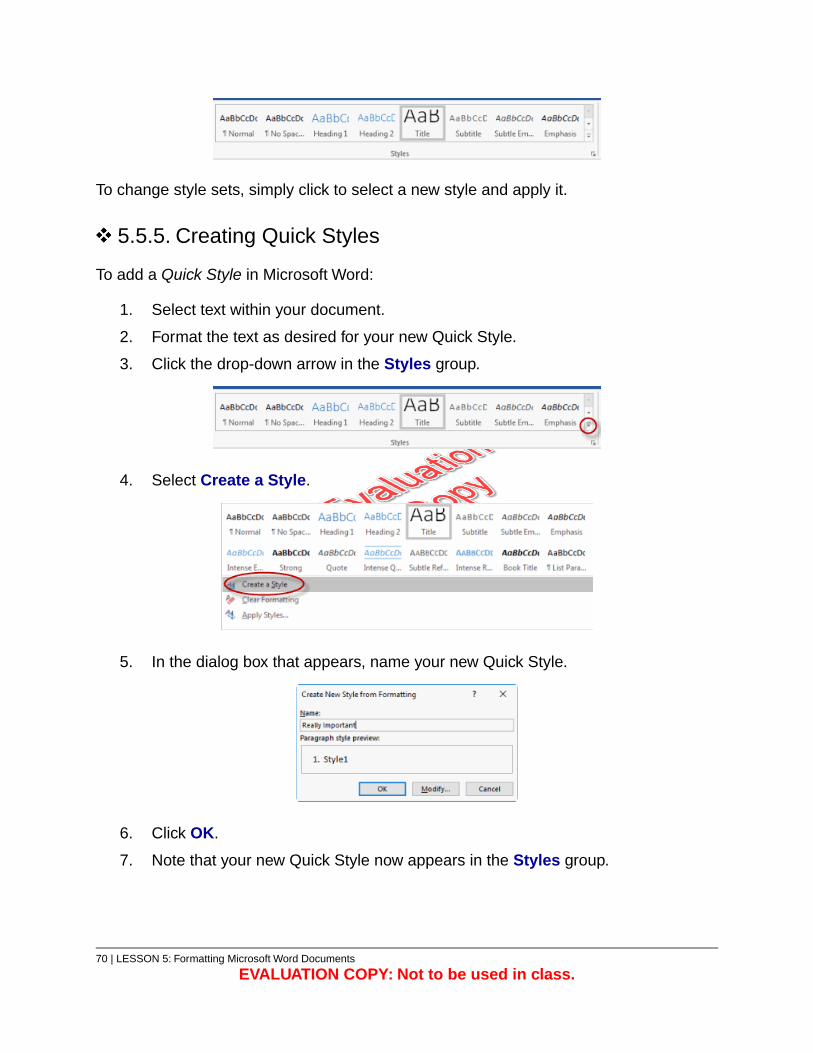
5.5.5. Creating Quick Styles
To add a Quick Style in Microsoft Word:
1. Select text within your document.
2. Format the text as desired for your new Quick Style.
3. Click the drop-down arrow in the Styles group.
4. Select Create a Style.
5. In the dialog box that appears, name your new Quick Style.
6. Click OK.
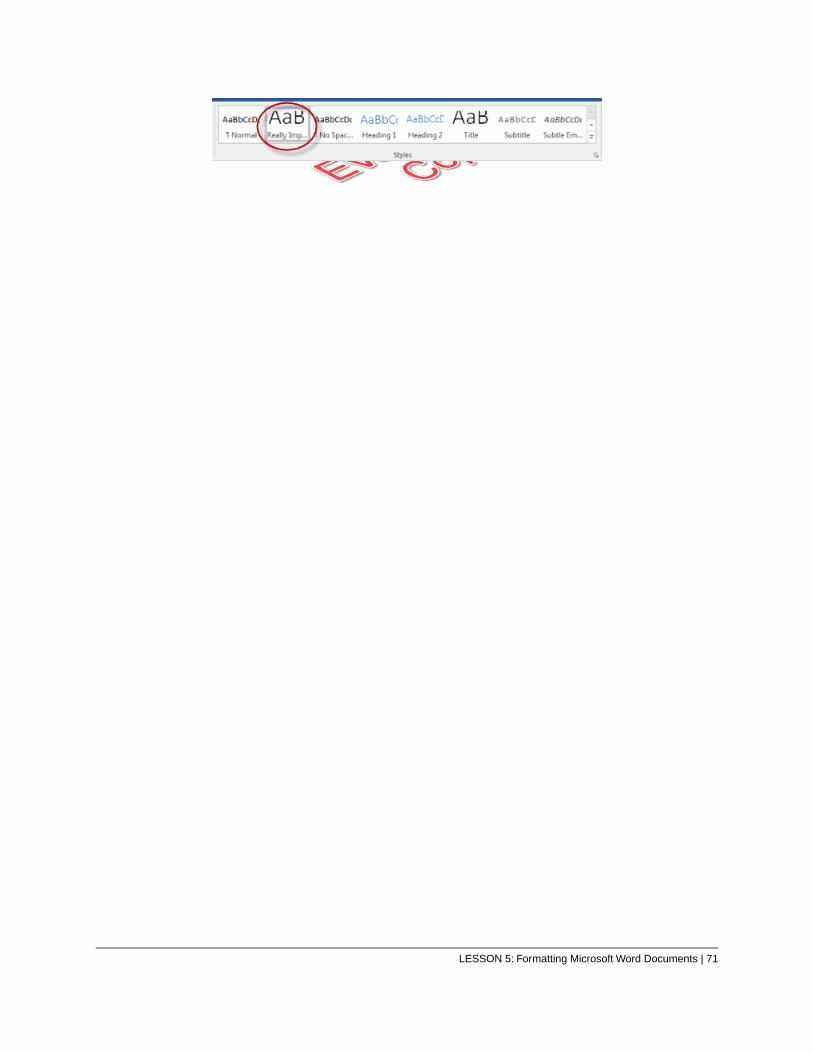
7. Note that your new Quick Style now appears in the Styles group.
70 | LESSON 5: Formatting Microsoft Word Documents
EVALUATION COPY: Not to be used in class.
LESSON 5: Formatting Microsoft Word Documents | 71

Exercise 10: Applying and CreatingCustom Styles
15 to 25 minutes
In this exercise, you will improve the look, feel and readability of an existing document byapplying styles to it.You will also create a custom style for use in this and other documents.Open Plants in my yard.docx (in the Word2019.1/Exercises folder) for use in this exercise.
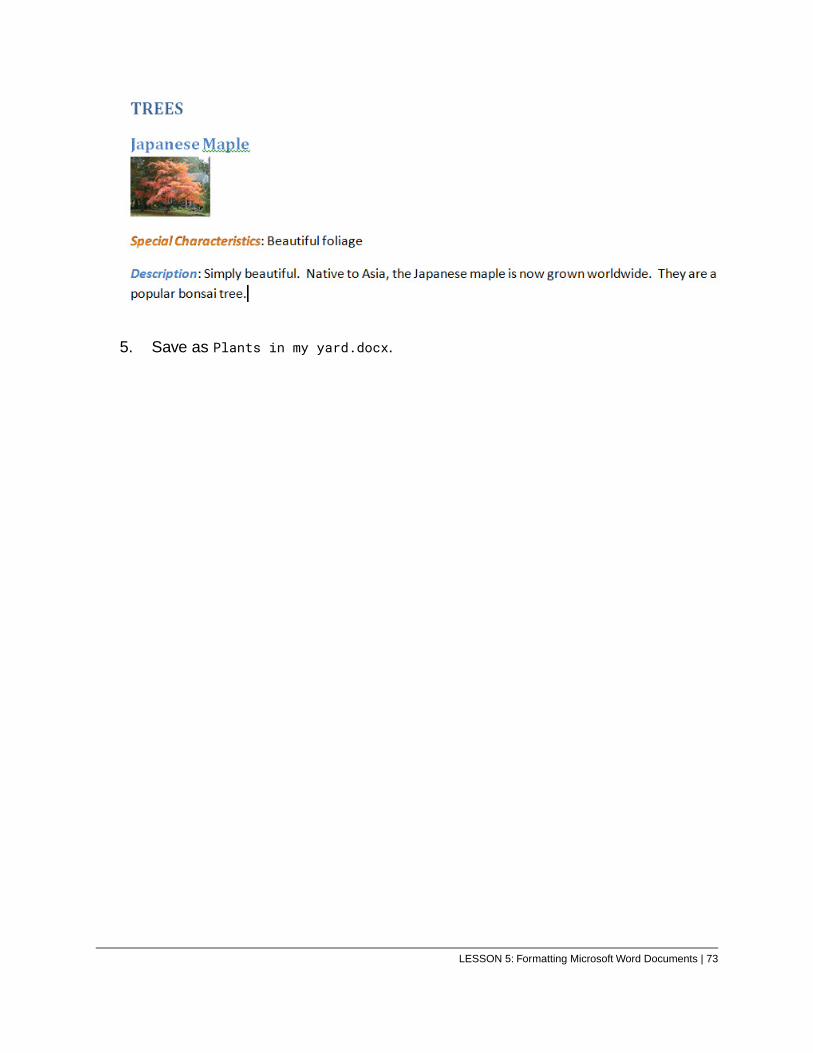
1. Apply the Heading 1 style to the three main sections of this document: trees,perennials, ground covers.
2. Apply the Heading 2 style to all plant names (there are 12).
3. Apply the Intense Emphasis style to “Special characteristics” and “Description”throughout the document.Your document should now appear as shown below:
4. Create a new Quick Style using a text effect. Name it “My First Style” and applyit to “Special Characteristics” throughout the document. Your document might(depending on the text effect you chose) now appear as shown below:
72 | LESSON 5: Formatting Microsoft Word Documents
EVALUATION COPY: Not to be used in class.
5. Save as Plants in my yard.docx.
LESSON 5: Formatting Microsoft Word Documents | 73

Solution
1. Place your cursor in the same line as the word “TREES” and click Heading 1 inthe Styles group. Repeat for “PERENNIALS” and “GROUND COVERS”.
2. Place your cursor in the same line as “Japanese Maple” and click Heading 2 inthe Styles group. Repeat for all plant names.
3. Select the words “Special characteristics” and “Description” throughout thedocument and click Intense Emphasis in the Styles group.
4. There are multiple steps to this solution:
A. Select an instance of “Special characteristics.”
B. Click Text Effects in the Font group on the Home tab and select an effect.
C. Click the More drop-down button in the Styles group and select Createa New Style.
D. Type “My First Style” as the name of the style and click Modify.
E. Make any additional changes you want to make to this style.
F. Click OK.
G. Select the other instances of “Special Characteristics” and click My FirstStyle in the Styles group.
5. Click File > Save:
A. Navigate to Word2019.1/Exercises.
B. File name: type “Plants in my yard.”
C. Save as type: select Word document (*.docx) if it is not already selected.
❋
5.6. Using Themes
You can use themes in Word to customize the look of your documents. Themes includespecific fonts, colors, and effects.
To add a theme to your document:
74 | LESSON 5: Formatting Microsoft Word Documents
EVALUATION COPY: Not to be used in class.
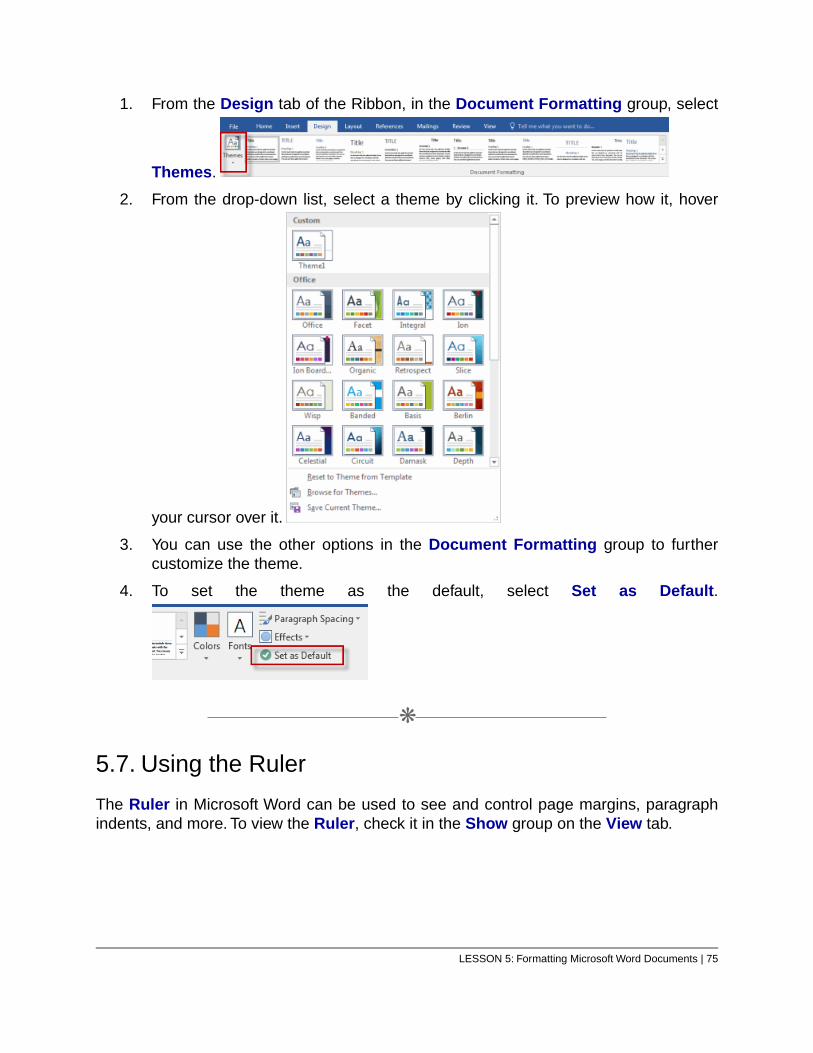
1. From the Design tab of the Ribbon, in the Document Formatting group, select
Themes.
2. From the drop-down list, select a theme by clicking it. To preview how it, hover
your cursor over it.
3. You can use the other options in the Document Formatting group to furthercustomize the theme.
4. To set the theme as the default, select Set as Default.
❋
5.7. Using the Ruler
The Ruler in Microsoft Word can be used to see and control page margins, paragraphindents, and more. To view the Ruler, check it in the Show group on the View tab.
LESSON 5: Formatting Microsoft Word Documents | 75
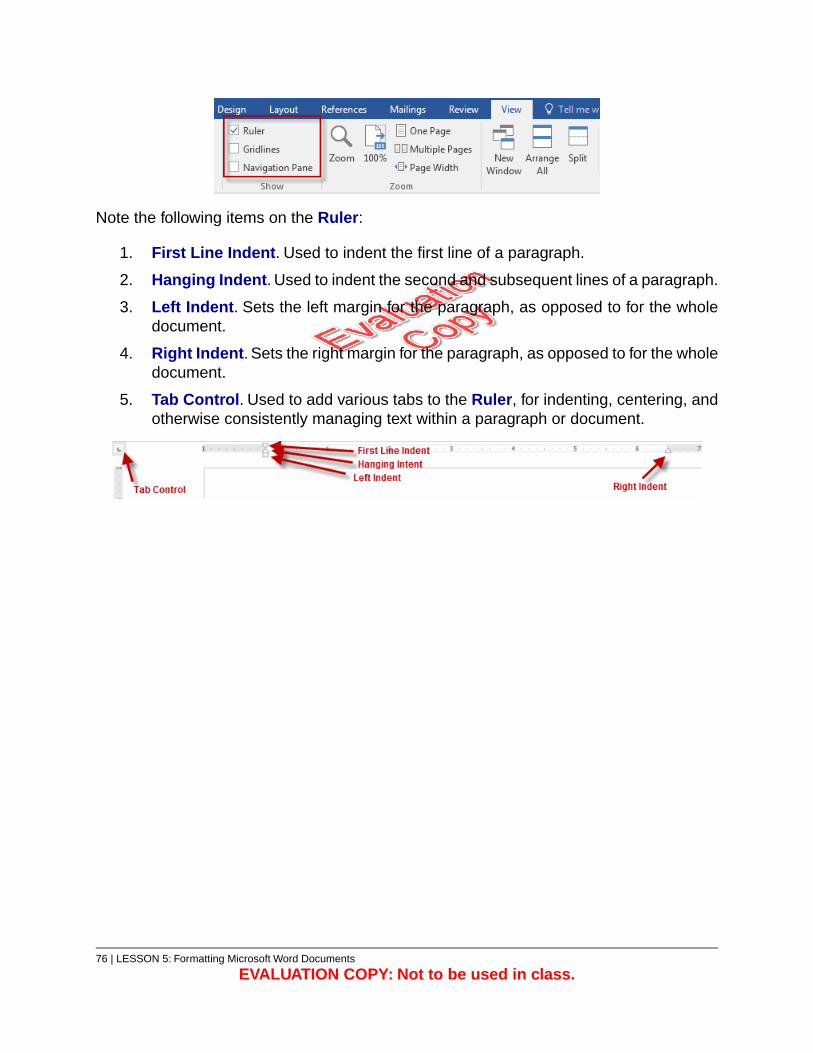
Note the following items on the Ruler:
1. First Line Indent. Used to indent the first line of a paragraph.
2. Hanging Indent. Used to indent the second and subsequent lines of a paragraph.
3. Left Indent. Sets the left margin for the paragraph, as opposed to for the wholedocument.
4. Right Indent. Sets the right margin for the paragraph, as opposed to for the wholedocument.
5. Tab Control. Used to add various tabs to the Ruler, for indenting, centering, andotherwise consistently managing text within a paragraph or document.
76 | LESSON 5: Formatting Microsoft Word Documents
EVALUATION COPY: Not to be used in class.
Exercise 11: Using Tabs 15 to 25 minutes
In this exercise, you will show and hide the Ruler and use tabs and the Ruler to changethe alignment of text in a document.
1. Display the Ruler. If it is already showing, hide it and then display it again.
2. Change the alignment of the paragraphs in Ruler Exercise1.docx (in theWord2019.1/Exercises folder) per the instructions in the document.
LESSON 5: Formatting Microsoft Word Documents | 77
Solution
1. Select the View tab. In the Show group, check/uncheck Ruler.
2. There are multiple steps to this solution:
A. Left Indent
i. Place the cursor in the paragraph.
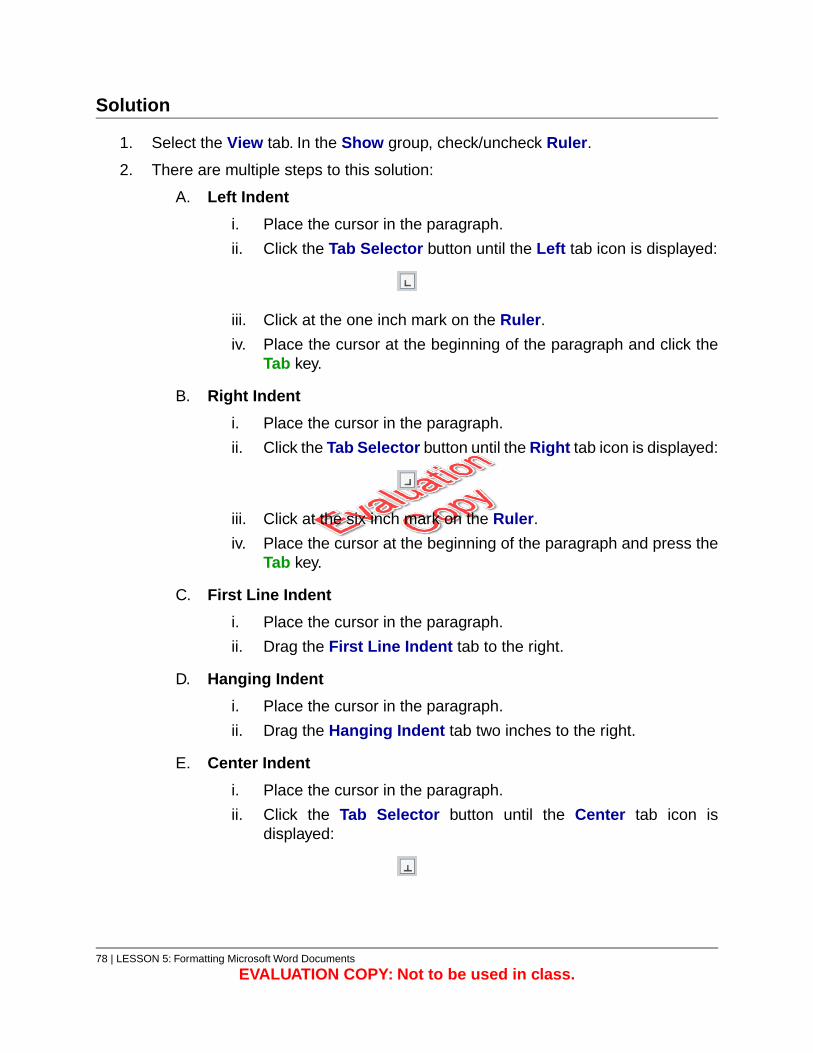
ii. Click the Tab Selector button until the Left tab icon is displayed:
iii. Click at the one inch mark on the Ruler.
iv. Place the cursor at the beginning of the paragraph and click theTab key.
B. Right Indent
i. Place the cursor in the paragraph.
ii. Click the Tab Selector button until the Right tab icon is displayed:
iii. Click at the six inch mark on the Ruler.
iv. Place the cursor at the beginning of the paragraph and press theTab key.
C. First Line Indent
i. Place the cursor in the paragraph.
ii. Drag the First Line Indent tab to the right.
D. Hanging Indent
i. Place the cursor in the paragraph.
ii. Drag the Hanging Indent tab two inches to the right.
E. Center Indent
i. Place the cursor in the paragraph.
ii. Click the Tab Selector button until the Center tab icon isdisplayed:
78 | LESSON 5: Formatting Microsoft Word Documents
EVALUATION COPY: Not to be used in class.
iii. Click at the 3.25 inch mark on the Ruler.
iv. Place cursor at beginning of paragraph and press the Tab key.
F. Bar Tab
i. Place the cursor in the paragraph.
ii. Click the Tab Selector button until the Bar tab icon is displayed:
iii. Click at the 3.25 inch mark on the Ruler.
iv. Click the Tab Selector button until the Right tab icon is displayed:
v. Click at the 6.5 inch mark on the Ruler.
vi. Place the cursor before “that” and press the Tab key.
G. Decimal Tab
i. Select all four numbers.
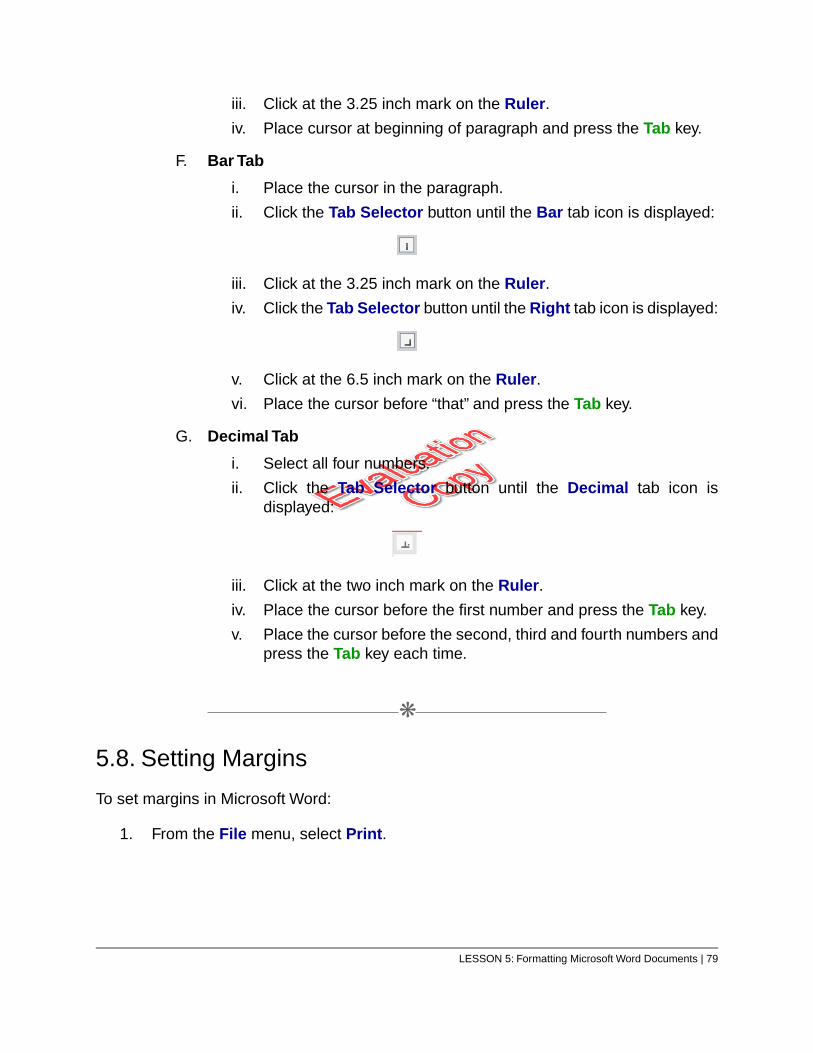
ii. Click the Tab Selector button until the Decimal tab icon isdisplayed:
iii. Click at the two inch mark on the Ruler.
iv. Place the cursor before the first number and press the Tab key.
v. Place the cursor before the second, third and fourth numbers andpress the Tab key each time.
❋
5.8. Setting Margins
To set margins in Microsoft Word:
1. From the File menu, select Print.
LESSON 5: Formatting Microsoft Word Documents | 79
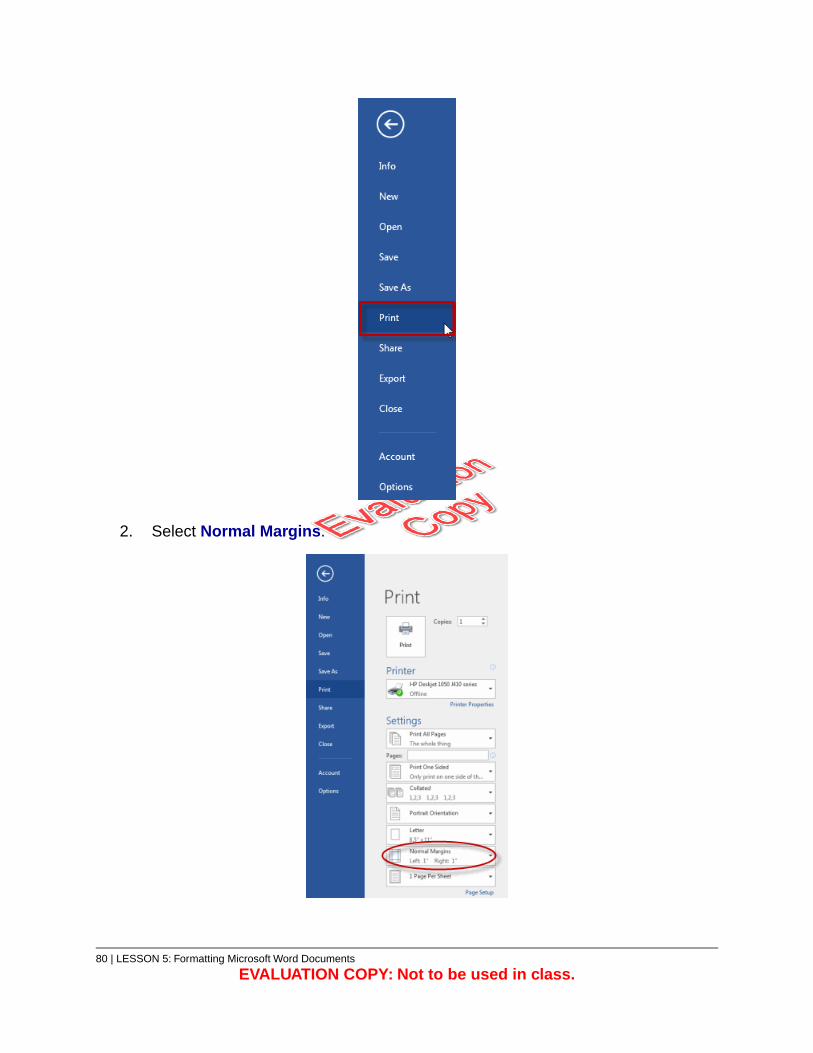
2. Select Normal Margins.
80 | LESSON 5: Formatting Microsoft Word Documents
EVALUATION COPY: Not to be used in class.
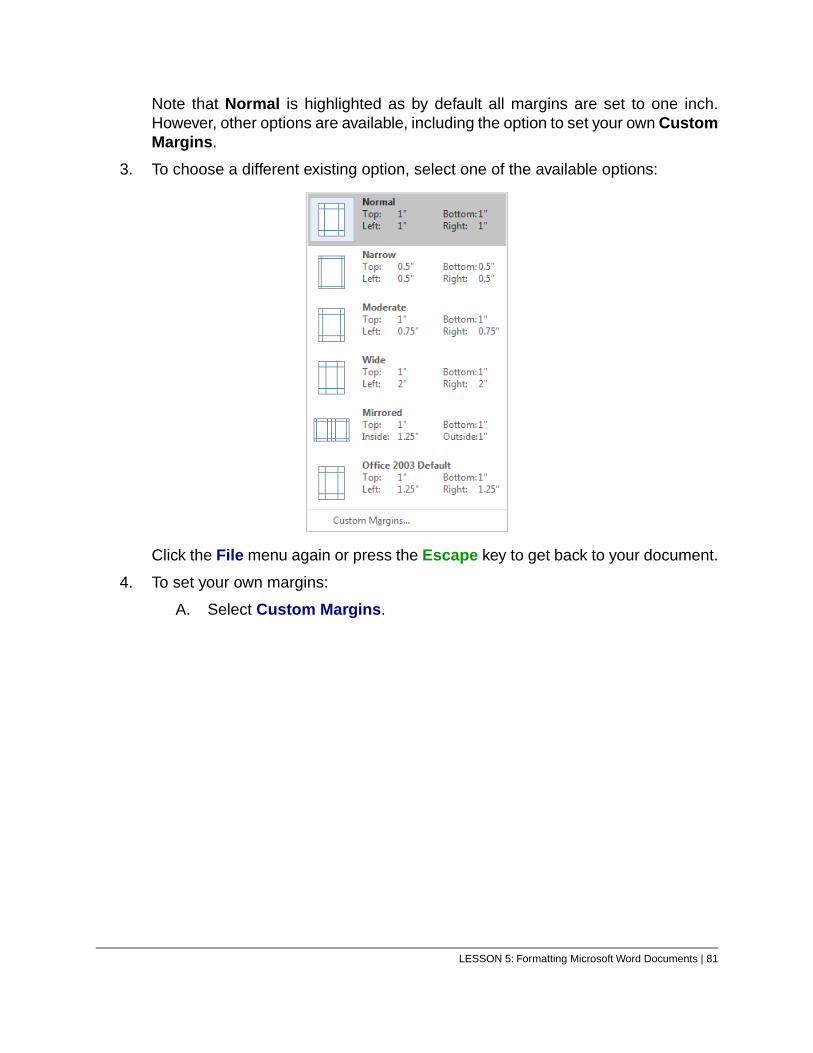
Note that Normal is highlighted as by default all margins are set to one inch.However, other options are available, including the option to set your own CustomMargins.
3. To choose a different existing option, select one of the available options:
Click the File menu again or press the Escape key to get back to your document.
4. To set your own margins:
A. Select Custom Margins.
LESSON 5: Formatting Microsoft Word Documents | 81
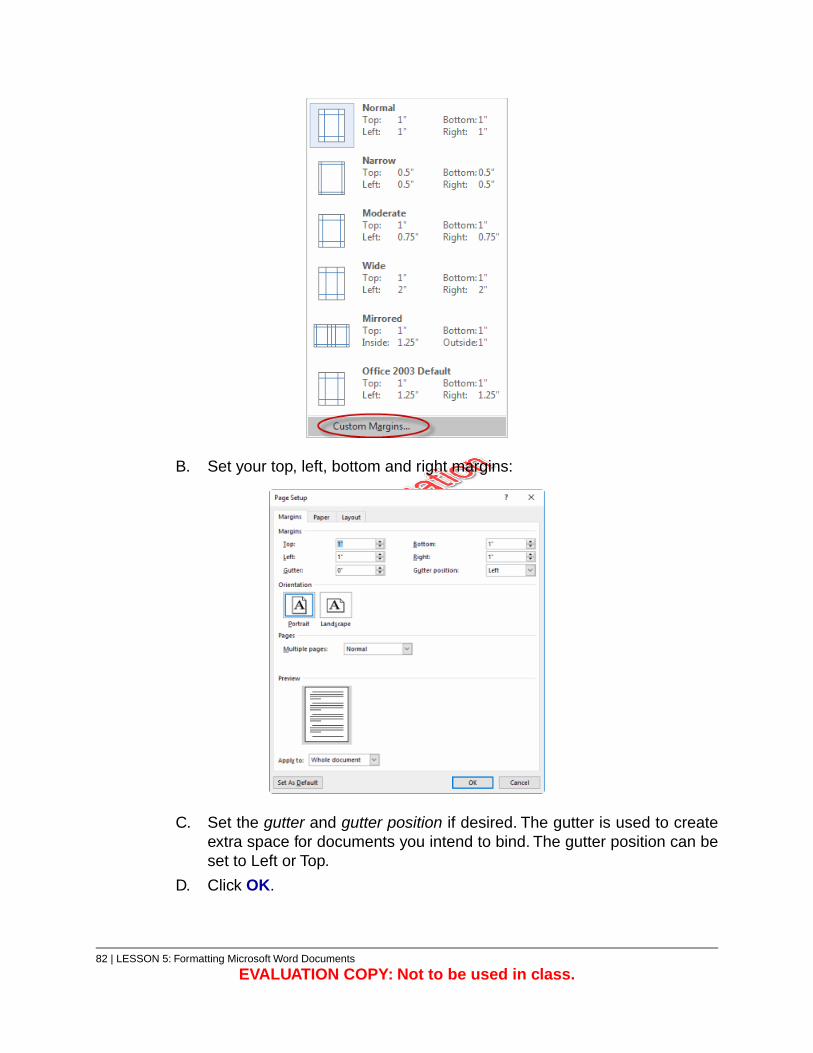
B. Set your top, left, bottom and right margins:
C. Set the gutter and gutter position if desired. The gutter is used to createextra space for documents you intend to bind. The gutter position can beset to Left or Top.
D. Click OK.
82 | LESSON 5: Formatting Microsoft Word Documents
EVALUATION COPY: Not to be used in class.
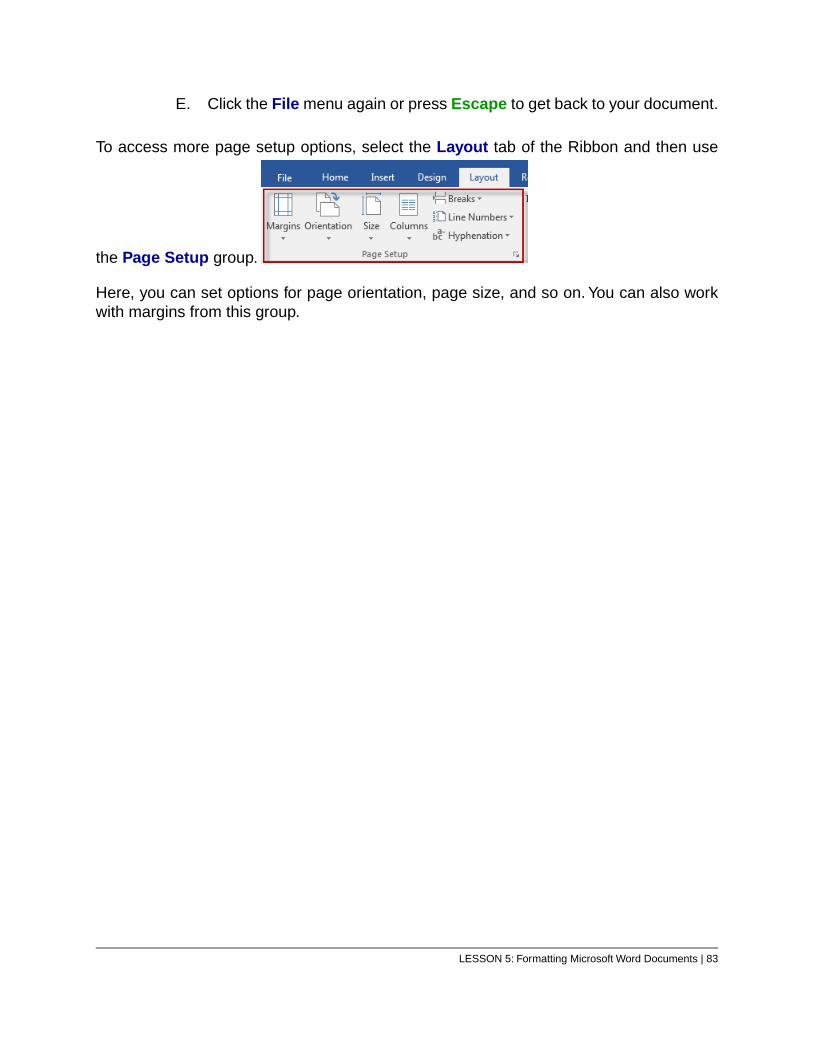
E. Click the File menu again or press Escape to get back to your document.
To access more page setup options, select the Layout tab of the Ribbon and then use
the Page Setup group.
Here, you can set options for page orientation, page size, and so on. You can also workwith margins from this group.
LESSON 5: Formatting Microsoft Word Documents | 83
Exercise 12: Setting Margins 5 to 15 minutes
In this exercise, you will change the margins in an existing document. Open or go to Plantsin my yard.docx (in the Word2019.1/Exercises folder) for use in this exercise.
1. Reset the margins of this document as follows:
A. Top: 1.25"
B. Bottom: 1.25"
C. Left: 1"
D. Right: 1"
2. Add half an inch to the left margin in case you want to bind this document.
84 | LESSON 5: Formatting Microsoft Word Documents
EVALUATION COPY: Not to be used in class.

LESSON 5: Formatting Microsoft Word Documents | 85

Solution
1. From the Layout tab, select Margins, then Custom Margins, then set the margins.
2. Make sure Gutter position is “Left” and then increase the Gutter to .5."
Conclusion
In this lesson, you learned to add, remove, and change fonts, to use bulleted and numberedlists, to add a hyperlink to a document, to use styles to quickly and consistently formatyour documents, to add themes to documents, to use the Ruler and to set and changethe margins in your documents.
86 | LESSON 5: Formatting Microsoft Word Documents
EVALUATION COPY: Not to be used in class.
LESSON 6Editing Documents
Topics Covered
Find
Find and Replace.
Cut, Copy, and Paste.
Format Painter.
Introduction
In this lesson, you will learn to use Find and Find and Replace to search for and to quicklyreplace words or phrases with other words or phrases in a document. You will also learnto use the Cut, Copy, Paste and Format Painter commands to edit documents.
❋
6.1. Find
Use the Find command to find instances of words or phrases within a document. To usethe Find command:
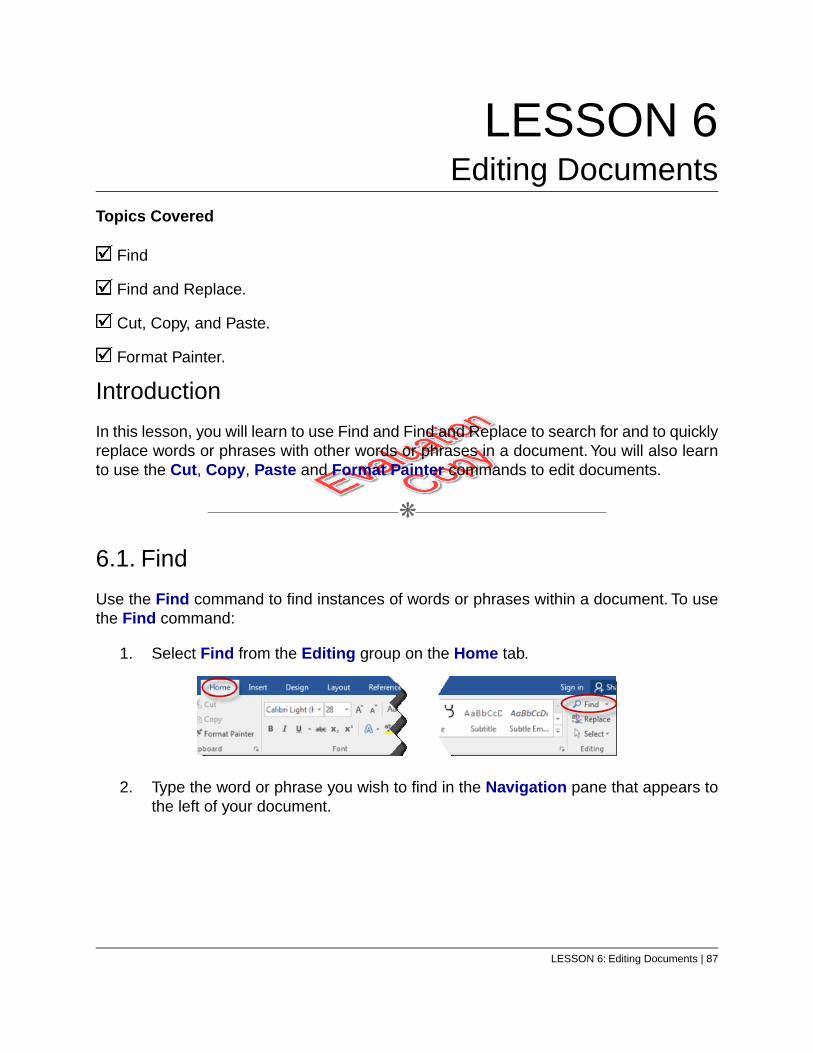
1. Select Find from the Editing group on the Home tab.
2. Type the word or phrase you wish to find in the Navigation pane that appears tothe left of your document.
LESSON 6: Editing Documents | 87

3. Every instance of the word or phrase you type is both highlighted in the documentand listed in the Navigation pane.
4. Use the up and down arrows (triangles) in the Navigation pane to move betweenthe search results.
88 | LESSON 6: Editing Documents
EVALUATION COPY: Not to be used in class.

❋
6.2. Find and Replace
Use the Replace command to find instances of words or phrases within a document andreplace them with other words or phrases. To use the Replace command:
1. Select Replace from the Editing group on the Home tab.
2. In the Find and Replace dialog box that appears, enter both the word or phraseyou wish to find and the word or phrase you wish to replace it with.
3. Click:
A. Replace to replace the highlighted selection.
B. Replace All to replace all search results with the new text.
LESSON 6: Editing Documents | 89
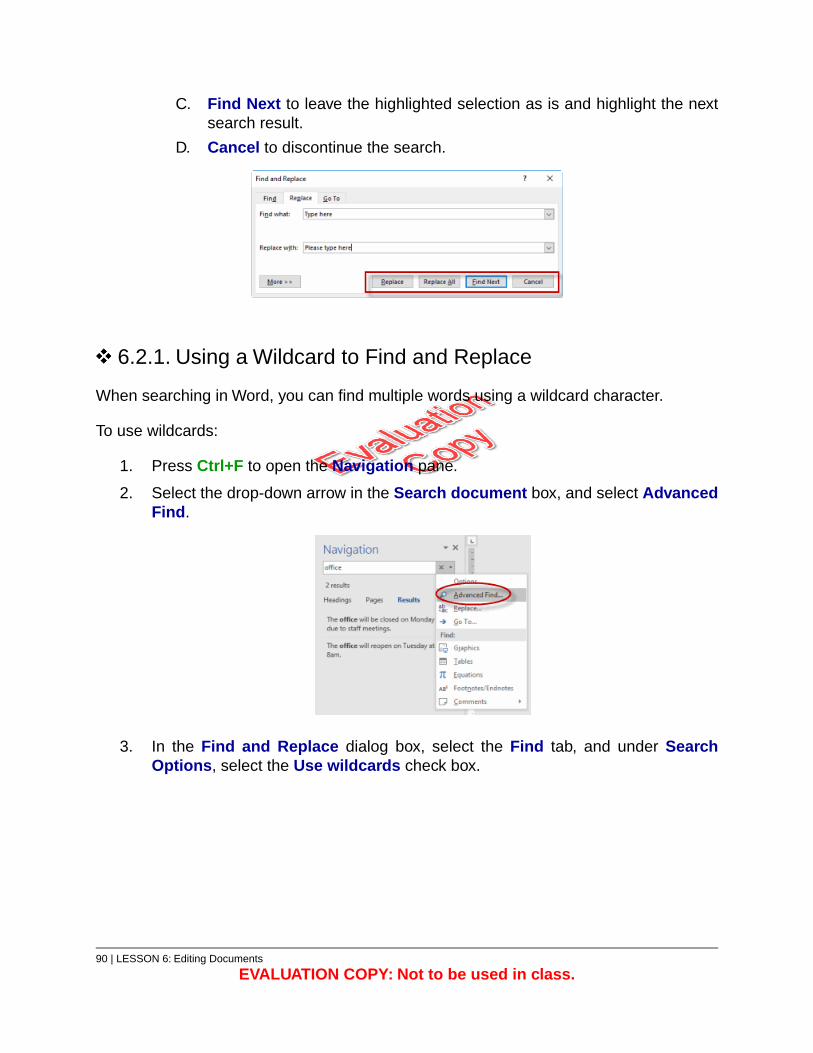
C. Find Next to leave the highlighted selection as is and highlight the nextsearch result.
D. Cancel to discontinue the search.
6.2.1. Using a Wildcard to Find and Replace
When searching in Word, you can find multiple words using a wildcard character.
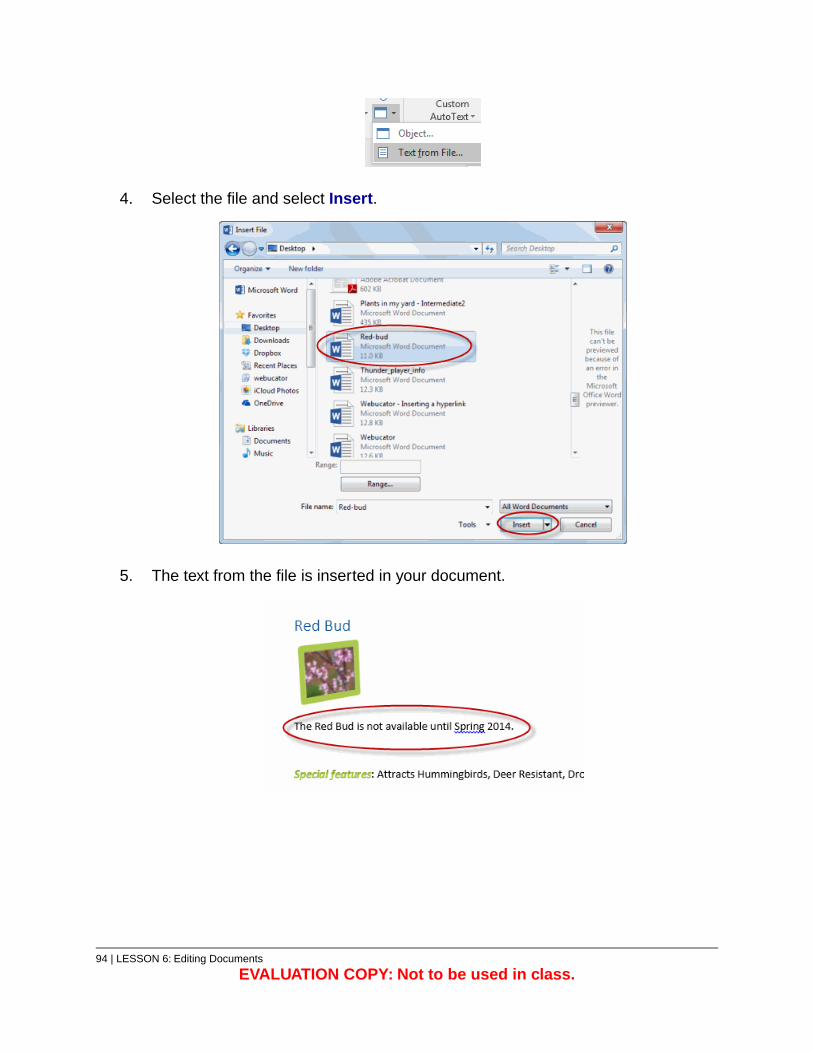
To use wildcards:
1. Press Ctrl+F to open the Navigation pane.
2. Select the drop-down arrow in the Search document box, and select AdvancedFind.
3. In the Find and Replace dialog box, select the Find tab, and under SearchOptions, select the Use wildcards check box.
90 | LESSON 6: Editing Documents
EVALUATION COPY: Not to be used in class.

4. Click the Replace tab. Type in the Find and Replace text boxes. Use an asteriskas the wildcard character. For example, to find all text between and including twoinstances of the word “the”, type “the*the”. Then click Find Next or Replace tomove through the found items.
❋
LESSON 6: Editing Documents | 91

6.3. Find and Replace Tips
One useful Find and Replace tip is how to remove blank paragraphs. This would occurwhen Enter is pressed twice. In a document with paragraph marks showing, this wouldlook like below:
To quickly find and replace this issue, in the Find and Replace dialog box, find ^p^p andreplace it with ^p.
Another thing you can do with Find and Replace is to change formatting. To do so, whenin the Find and Replace dialog box, on either the Find or Replace tab, select Format.
92 | LESSON 6: Editing Documents
EVALUATION COPY: Not to be used in class.

Select the formatting feature you want to search for, and specify options in the dialog boxthat is displayed.
❋
6.4. Appending Text to a Document
You can easily append text from a different file into a Word document.
To append text to a Word document:
1. Position the cursor in your document where you want to append the text.
2. Select the Insert tab, and from the Text group, select Object.
3. Select Text from File from the drop-down list.
LESSON 6: Editing Documents | 93
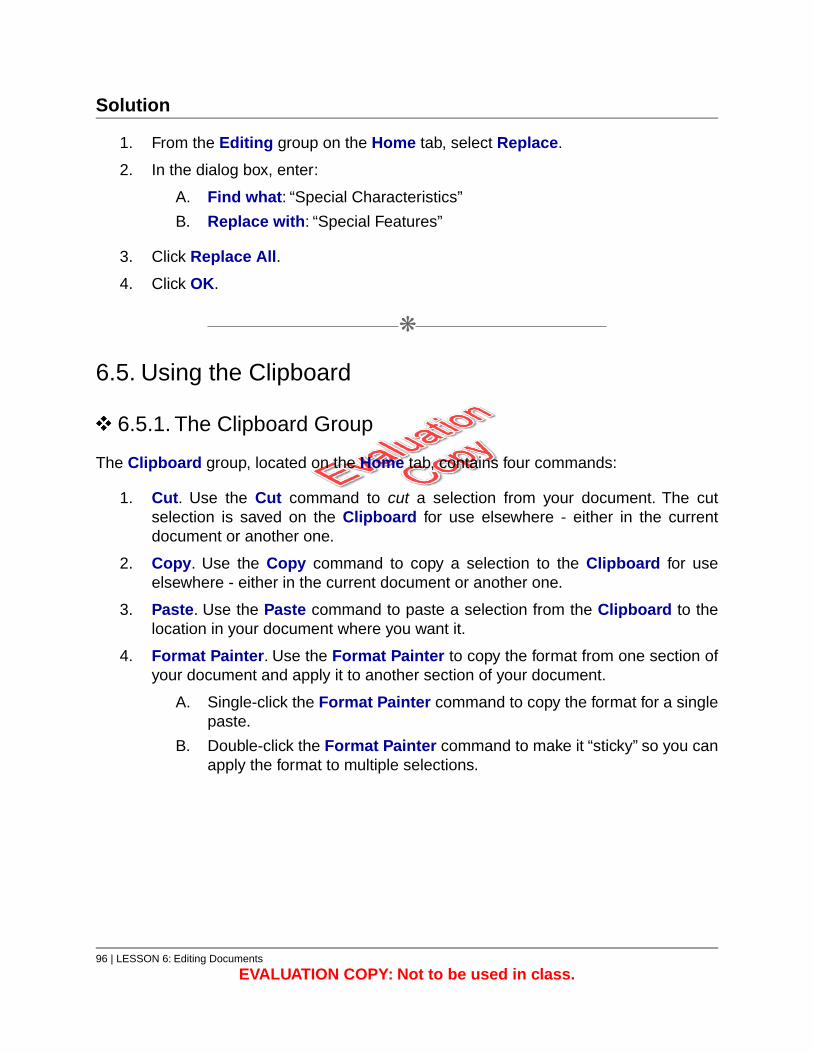
4. Select the file and select Insert.
5. The text from the file is inserted in your document.
94 | LESSON 6: Editing Documents
EVALUATION COPY: Not to be used in class.
Exercise 13: Using Find and Replace 5 to 15 minutes
In this exercise you will find and replace text in a document. Open or go to Plants in my
yard.docx (in the Word2019.1/Exercises folder) for use in this exercise.
1. Use Find and Replace to change the words “Special Characteristics” to “SpecialFeatures” throughout the document.
LESSON 6: Editing Documents | 95
Solution
1. From the Editing group on the Home tab, select Replace.
2. In the dialog box, enter:
A. Find what: “Special Characteristics”
B. Replace with: “Special Features”
3. Click Replace All.
4. Click OK.
❋
6.5. Using the Clipboard
6.5.1. The Clipboard Group
The Clipboard group, located on the Home tab, contains four commands:
1. Cut. Use the Cut command to cut a selection from your document. The cutselection is saved on the Clipboard for use elsewhere - either in the currentdocument or another one.
2. Copy. Use the Copy command to copy a selection to the Clipboard for useelsewhere - either in the current document or another one.
3. Paste. Use the Paste command to paste a selection from the Clipboard to thelocation in your document where you want it.
4. Format Painter. Use the Format Painter to copy the format from one section ofyour document and apply it to another section of your document.
A. Single-click the Format Painter command to copy the format for a singlepaste.
B. Double-click the Format Painter command to make it “sticky” so you canapply the format to multiple selections.
96 | LESSON 6: Editing Documents
EVALUATION COPY: Not to be used in class.
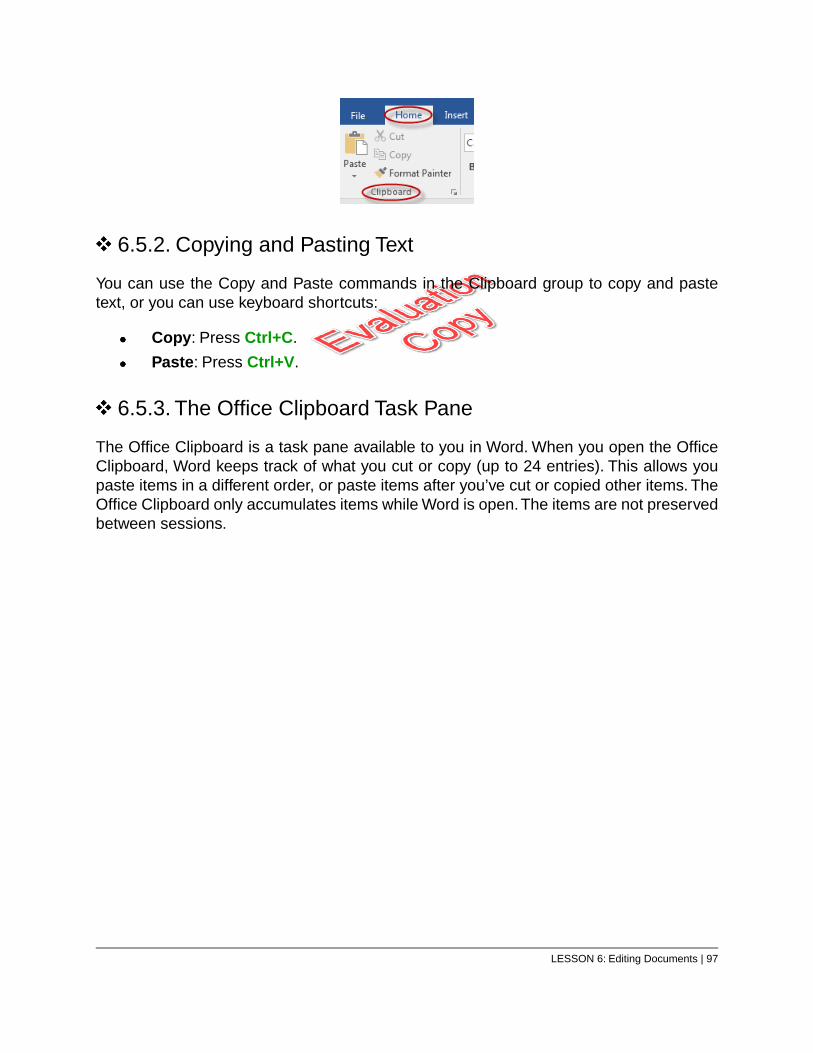
6.5.2. Copying and Pasting Text
You can use the Copy and Paste commands in the Clipboard group to copy and pastetext, or you can use keyboard shortcuts:
Copy: Press Ctrl+C.
Paste: Press Ctrl+V.
6.5.3. The Office Clipboard Task Pane
The Office Clipboard is a task pane available to you in Word. When you open the OfficeClipboard, Word keeps track of what you cut or copy (up to 24 entries). This allows youpaste items in a different order, or paste items after you’ve cut or copied other items. TheOffice Clipboard only accumulates items while Word is open.The items are not preservedbetween sessions.
LESSON 6: Editing Documents | 97
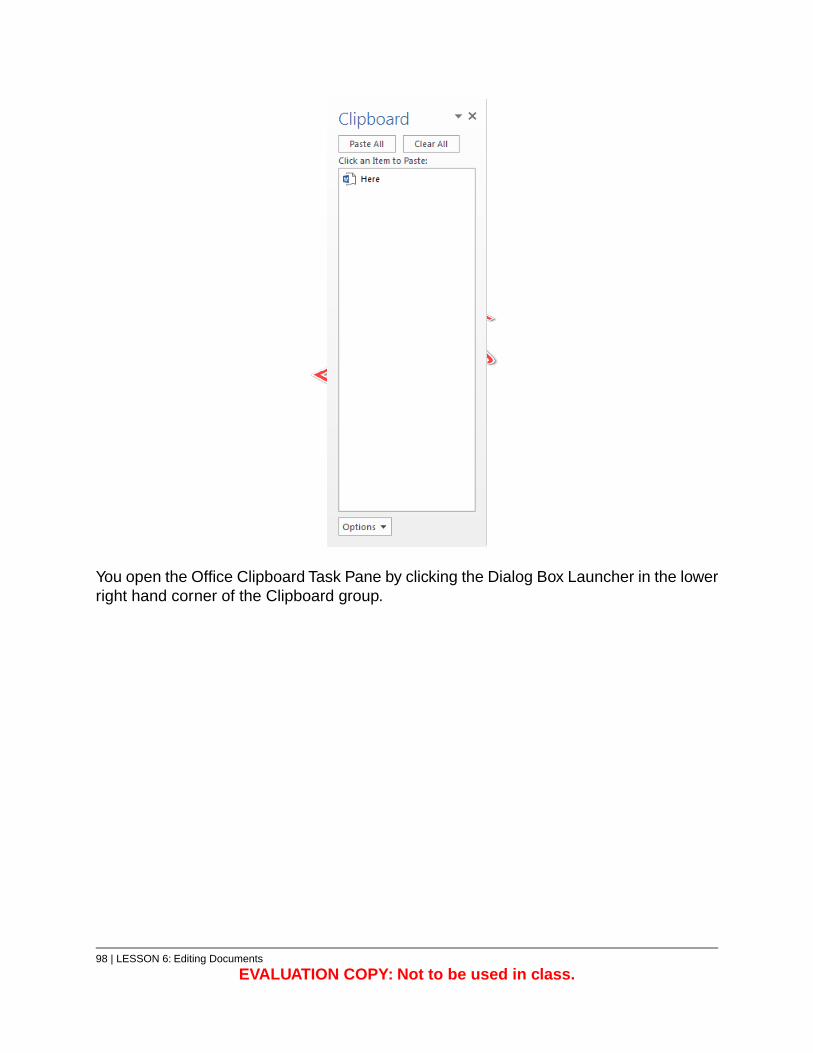
You open the Office Clipboard Task Pane by clicking the Dialog Box Launcher in the lowerright hand corner of the Clipboard group.
98 | LESSON 6: Editing Documents
EVALUATION COPY: Not to be used in class.

LESSON 6: Editing Documents | 99
Exercise 14: Using the Clipboard 5 to 15 minutes
In this exercise, you will practice using all the controls on the Clipboard. Open or go toPlants in my yard.docx (in the Word2019.1/Exercises folder) for use in this exercise.
1. One of the special features of the Japanese Maple is “Beautiful foliage.” This alsohappens to be a special feature of Red Buds and Bleeding Hearts. Use Copy andPaste to add “Beautiful foliage” as a special feature of these two plants.
2. Underline “Description” under Japanese Maple and then use the Format Painterto copy this formatting to all other instances of “Description”. Tip: remember todouble-click Format Painter so you don’t have to re-select it repeatedly.
3. It turns out that not everyone agrees that Bleeding Hearts have beautiful foliage,but everyone agrees that Lilacs do. Use Cut and Paste to remove “Beautifulfoliage” as a special feature of Bleeding Hearts and add it as a special feature ofLilacs.
100 | LESSON 6: Editing Documents
EVALUATION COPY: Not to be used in class.

LESSON 6: Editing Documents | 101
Solution
1. There are multiple steps to this solution:
A. Select “Beautiful foliage” under Japanese Maple.
B. From the Clipboard group on the Home tab, select Copy.
C. Scroll down to the special features section of Red Buds, type “, ” after thelast special feature and then click Paste. Repeat this step for BleedingHearts.
2. Underline “Description” under Japanese Maple, then double-click the FormatPainter command, and then click “Description” under each plant.
3. There are multiple steps to this solution:
A. Select “Beautiful foliage” under Bleeding Hearts.
B. From the Clipboard group on the Home tab, select Cut.
C. Scroll up to the special features section of Lilacs, type “, ” after the lastspecial feature and then click Paste.
Conclusion
In this lesson, you learned to use the Find command to locate information in your document,to use Find and Replace to replace words or phrases in your documents with other wordsor phrases, and to edit documents using the Cut, Copy, Paste and Format Paintercommands.
102 | LESSON 6: Editing Documents
EVALUATION COPY: Not to be used in class.
LESSON 7Finalizing Microsoft Word Documents
Topics Covered
Page numbers.
Custom headers and footers.
Spell checking.
Grammar checking.
Introduction
In this lesson, you will learn to add page numbers, to customize headers and footers, andto find and correct spelling and grammar mistakes.
❋
7.1. Adding Page Numbers
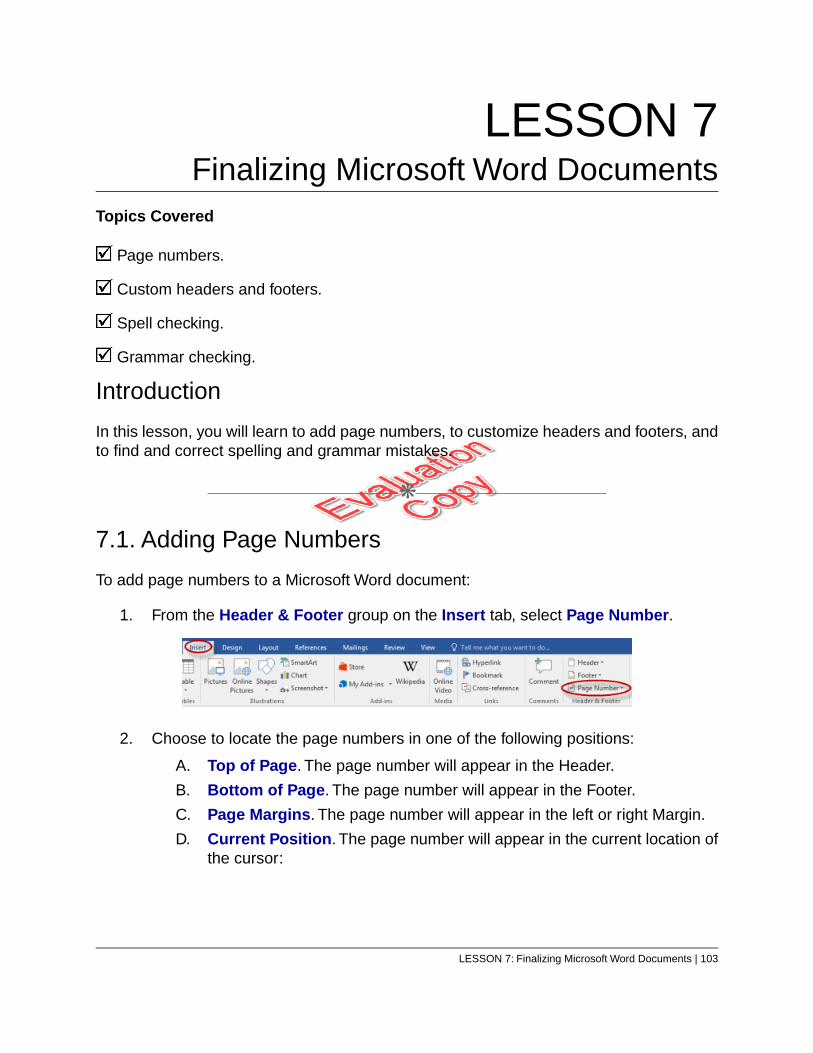
To add page numbers to a Microsoft Word document:
1. From the Header & Footer group on the Insert tab, select Page Number.
2. Choose to locate the page numbers in one of the following positions:
A. Top of Page. The page number will appear in the Header.
B. Bottom of Page. The page number will appear in the Footer.
C. Page Margins. The page number will appear in the left or right Margin.
D. Current Position. The page number will appear in the current location ofthe cursor:
LESSON 7: Finalizing Microsoft Word Documents | 103
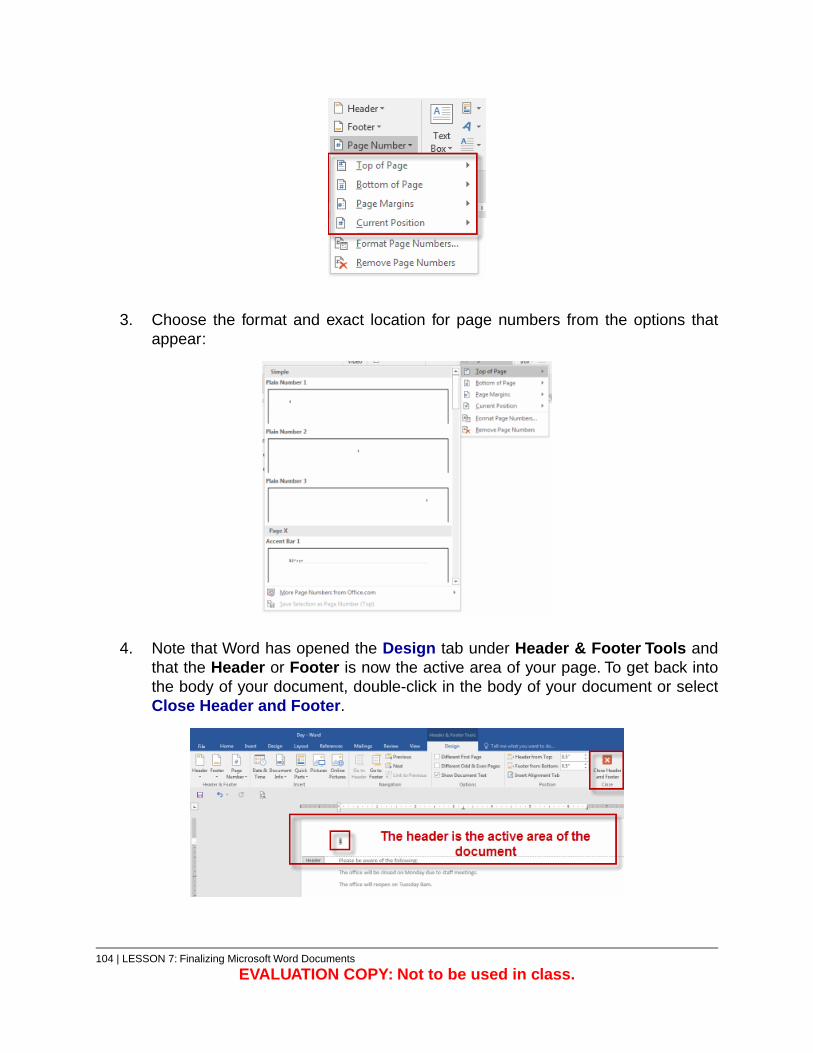
3. Choose the format and exact location for page numbers from the options thatappear:
4. Note that Word has opened the Design tab under Header & Footer Tools andthat the Header or Footer is now the active area of your page. To get back intothe body of your document, double-click in the body of your document or selectClose Header and Footer.
104 | LESSON 7: Finalizing Microsoft Word Documents
EVALUATION COPY: Not to be used in class.
Deleting or Editing Page Numbers
Note: To delete or customize existing page numbers, double-click the number in theHeader, Footer or Margin, and then make the changes you wish to make. Changesyou make on one page will affect every page in the document.
LESSON 7: Finalizing Microsoft Word Documents | 105
Exercise 15: Adding Page Numbers 5 to 15 minutes
In this exercise, you will add, move, customize and remove page numbers from a document.If you don’t have it open, open Plants in my yard.docx for use in this exercise.
1. Add page numbers to the bottom center of the document.
2. Format page numbers to include dashes on either side of the number.
3. Move the page numbers to the top left of the document.
4. Remove the page numbers from the document.
106 | LESSON 7: Finalizing Microsoft Word Documents
EVALUATION COPY: Not to be used in class.

LESSON 7: Finalizing Microsoft Word Documents | 107

Solution
1. To add page numbers to the bottom center of the document:
A. On the Insert tab, in the Header & Footer group, click Page Number.
B. Scroll over Bottom of Page and then select Plain Number 2.
2. To format page numbers to include dashes on either side of the number:
A. Double-click in the Footer to make it active.
B. Enter dashes before and after the page number.
3. To move the page numbers to the top left of the document:
A. Delete the existing page numbers by selecting the page number on anypage and deleting it.
B. On the Insert tab, in the Header & Footer group, click Page Number.
C. Scroll over Top of Page and then select Plain Number 1.
4. To remove the page numbers from the document:
A. On the Insert tab, in the Header & Footer group, click Page Number.
B. Click Remove Page Numbers.
❋
7.2. Headers and Footers
To add text or graphics to the top or bottom of the pages in your document, add a headeror footer. Changes made in the header and footer will appear on every page in yourdocument.
To add a header or footer to your document:
1. From the Header & Footer group on the Insert tab, select Header or Footer:
2. Select one of the Header or Footer templates from the options that appear:
108 | LESSON 7: Finalizing Microsoft Word Documents
EVALUATION COPY: Not to be used in class.
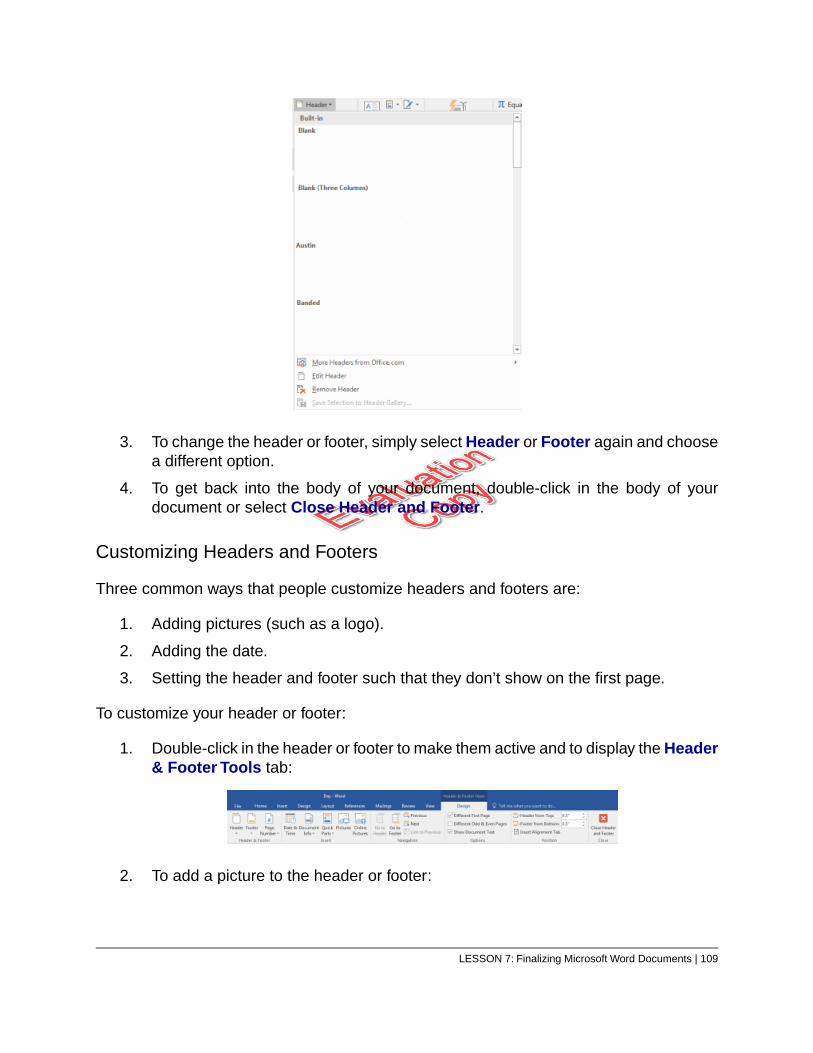
3. To change the header or footer, simply select Header or Footer again and choosea different option.
4. To get back into the body of your document, double-click in the body of yourdocument or select Close Header and Footer.
Customizing Headers and Footers
Three common ways that people customize headers and footers are:
1. Adding pictures (such as a logo).
2. Adding the date.
3. Setting the header and footer such that they don’t show on the first page.
To customize your header or footer:
1. Double-click in the header or footer to make them active and to display the Header& Footer Tools tab:
2. To add a picture to the header or footer:
LESSON 7: Finalizing Microsoft Word Documents | 109
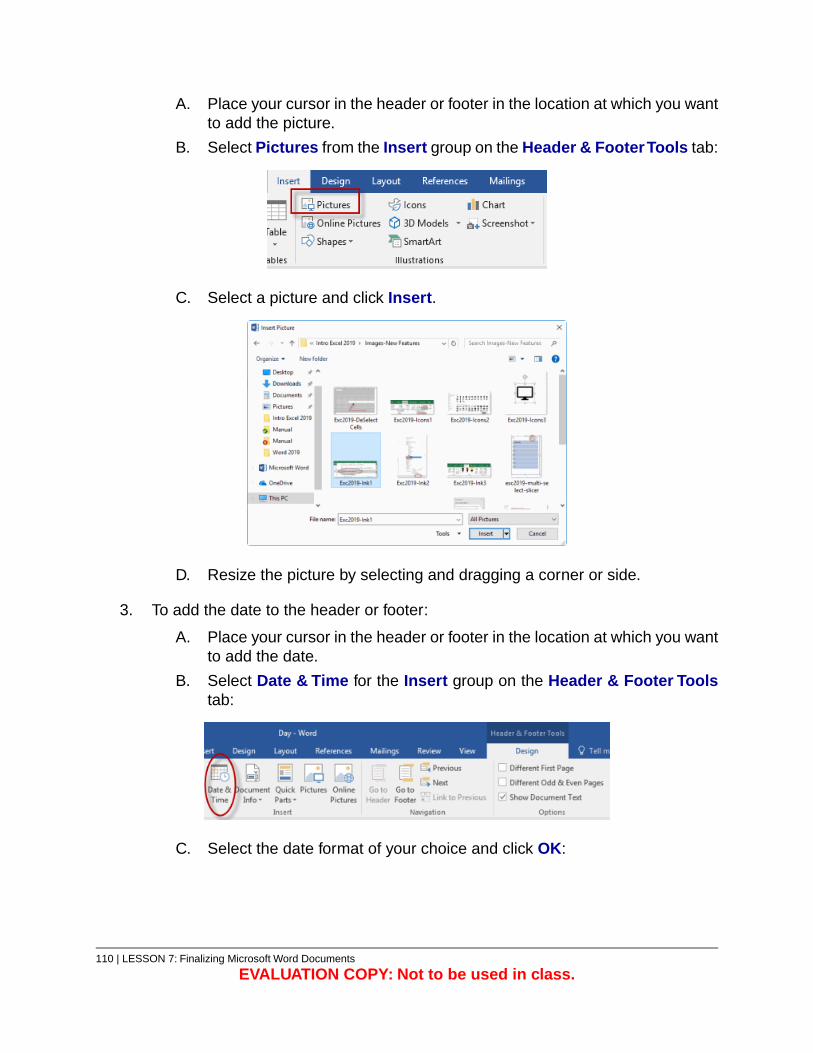
Place your cursor in the header or footer in the location at which you wantto add the picture.
A.
B. Select Pictures from the Insert group on the Header & Footer Tools tab:
C. Select a picture and click Insert.
D. Resize the picture by selecting and dragging a corner or side.
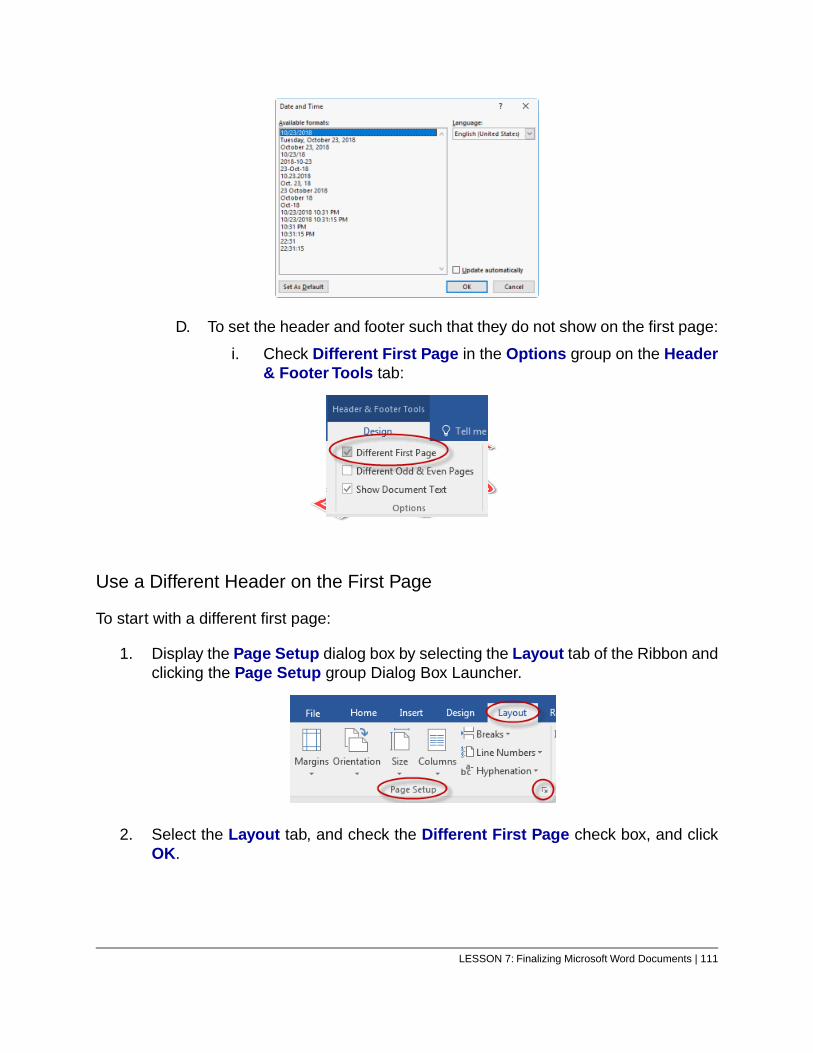
3. To add the date to the header or footer:
A. Place your cursor in the header or footer in the location at which you wantto add the date.
B. Select Date & Time for the Insert group on the Header & Footer Toolstab:
C. Select the date format of your choice and click OK:
110 | LESSON 7: Finalizing Microsoft Word Documents
EVALUATION COPY: Not to be used in class.
D. To set the header and footer such that they do not show on the first page:
i. Check Different First Page in the Options group on the Header& Footer Tools tab:
Use a Different Header on the First Page
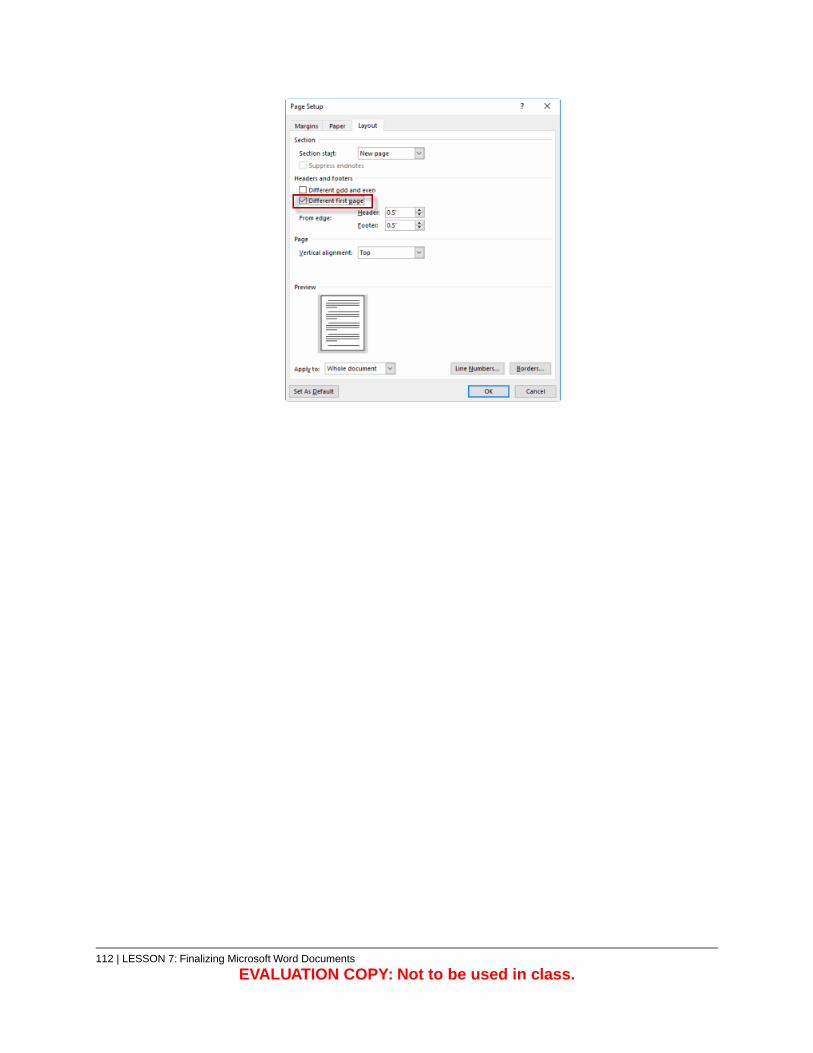
To start with a different first page:
1. Display the Page Setup dialog box by selecting the Layout tab of the Ribbon andclicking the Page Setup group Dialog Box Launcher.
2. Select the Layout tab, and check the Different First Page check box, and clickOK.
LESSON 7: Finalizing Microsoft Word Documents | 111
112 | LESSON 7: Finalizing Microsoft Word Documents
EVALUATION COPY: Not to be used in class.
Exercise 16: Using Headers and Footers 15 to 25 minutes
In this exercise, you will add a custom header and footer to a document and then edit it.Open or go to Plants in my yard.docx (in the Word2019.1/Exercises folder) for use inthis exercise.You will also need the file Plantsmen logo.gif, which is in the same folder.
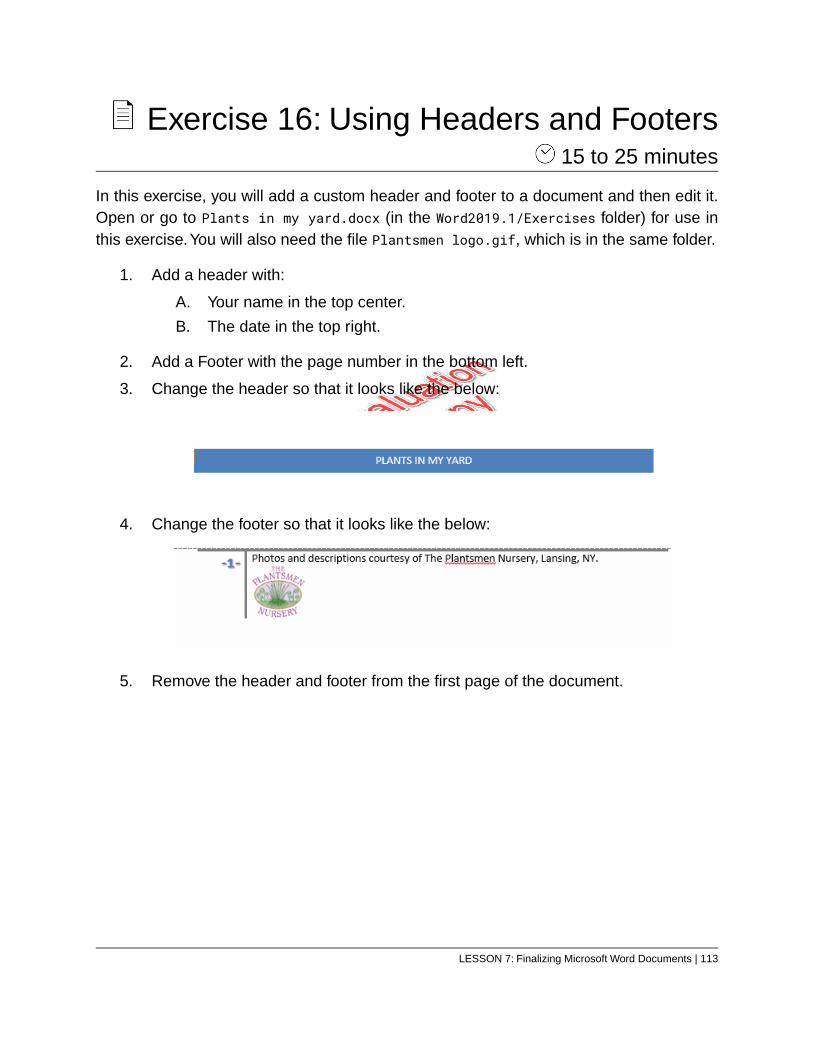
1. Add a header with:
A. Your name in the top center.
B. The date in the top right.
2. Add a Footer with the page number in the bottom left.
3. Change the header so that it looks like the below:
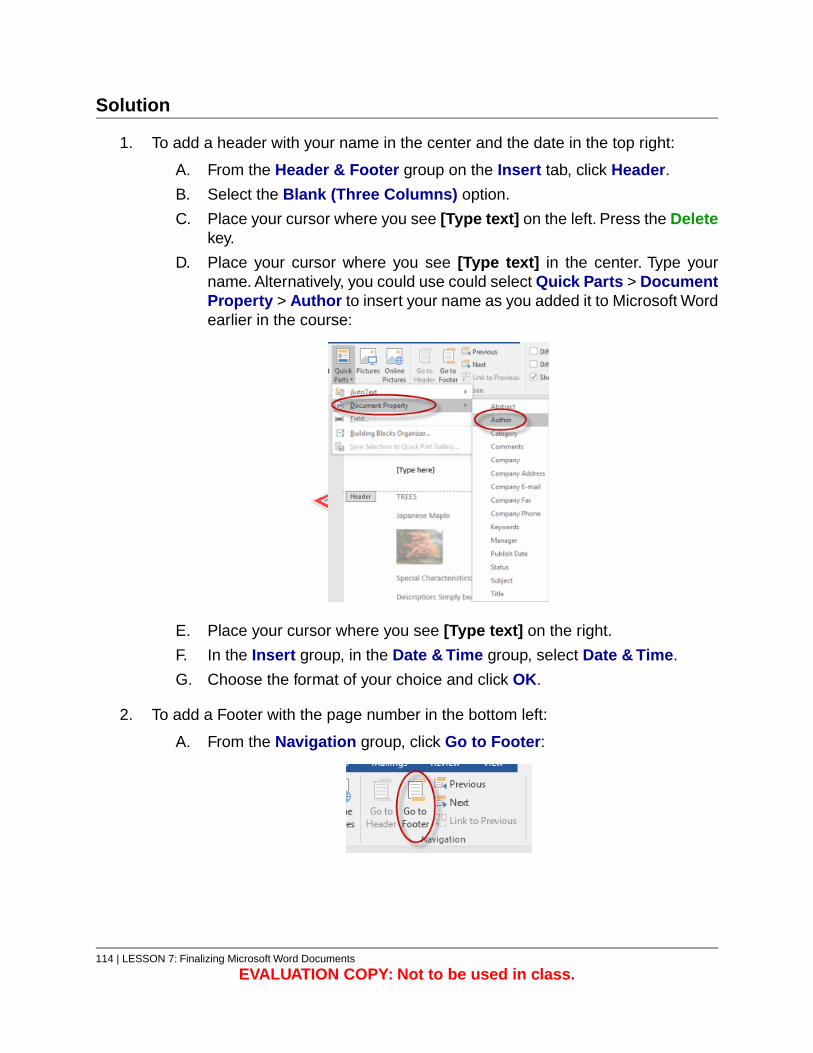
4. Change the footer so that it looks like the below:
5. Remove the header and footer from the first page of the document.
LESSON 7: Finalizing Microsoft Word Documents | 113
Solution
1. To add a header with your name in the center and the date in the top right:
A. From the Header & Footer group on the Insert tab, click Header.
B. Select the Blank (Three Columns) option.
C. Place your cursor where you see [Type text] on the left. Press the Deletekey.
D. Place your cursor where you see [Type text] in the center. Type yourname. Alternatively, you could use could select Quick Parts > DocumentProperty > Author to insert your name as you added it to Microsoft Wordearlier in the course:
E. Place your cursor where you see [Type text] on the right.
F. In the Insert group, in the Date & Time group, select Date & Time.
G. Choose the format of your choice and click OK.
2. To add a Footer with the page number in the bottom left:
A. From the Navigation group, click Go to Footer:
114 | LESSON 7: Finalizing Microsoft Word Documents
EVALUATION COPY: Not to be used in class.

If you don’t see the Navigation group, then you probably aren’t in theHeader & Footer Tools tab anymore. In this case, select Page Numberfrom the Header & Footer group on the Insert tab and skip the next step.
B. Click Page Number from the Header & Footer group.
C. Scroll over Bottom of Page and select Plain Number 1.
3. To change the header per the instructions:
A. From the Navigation group, click Go to Header:
If you don’t see the Navigation group, then you probably aren’t in theHeader & Footer Tools tab anymore. In this case, select Header fromthe Header & Footer group on the Insert tab and skip the next step.
B. Click Header from the Header & Footer group.
C. Select the Banded option.
D. Type “Plants in My Yard”.
4. To change the footer per the instructions:
A. From the Navigation group, click Go to Footer.
B. Click Footer from the Header & Footer group.
C. Select the Blank option.
D. Click to the right of the vertical bar and type “Photos and descriptionscourtesy of The Plantsmen Nursery, Lansing, NY.”
E. Press the Enter key.
F. From the Insert group, click Pictures.
G. Navigate to and select the file Plantsmen logo.gif (in theWord2019.1/Exercises folder).
H. Make the file smaller by grabbing one of the corners and dragging in.
5. To remove the header and footer from the first page of the document:
A. Double-click in the header and footer area on any page of the document.
LESSON 7: Finalizing Microsoft Word Documents | 115
B. From the Options group select Different First Page.
❋
7.3. Checking Spelling and Grammar
To check your document for spelling and grammar mistakes:
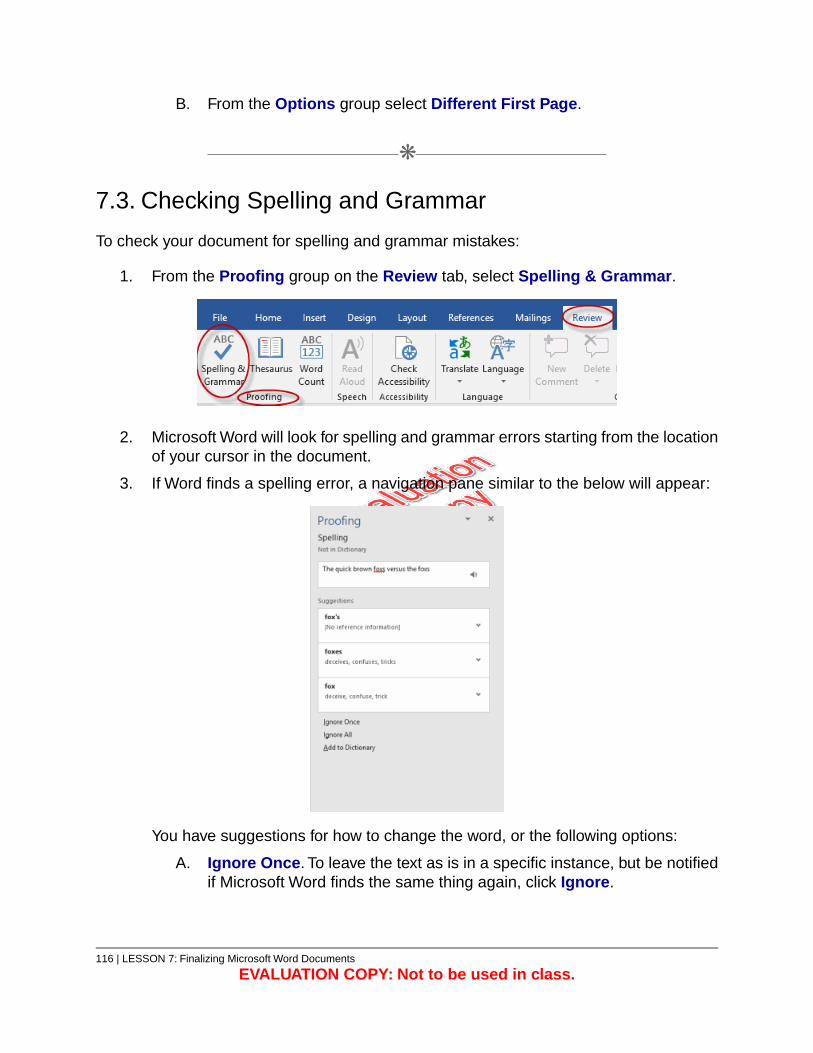
1. From the Proofing group on the Review tab, select Spelling & Grammar.
2. Microsoft Word will look for spelling and grammar errors starting from the locationof your cursor in the document.
3. If Word finds a spelling error, a navigation pane similar to the below will appear:
You have suggestions for how to change the word, or the following options:
A. Ignore Once. To leave the text as is in a specific instance, but be notifiedif Microsoft Word finds the same thing again, click Ignore.
116 | LESSON 7: Finalizing Microsoft Word Documents
EVALUATION COPY: Not to be used in class.

B. Ignore All.To leave the text as is in this and future instances, click IgnoreAll.
C. Add to Dictionary. Adding a word to your dictionary will prevent MicrosoftWord from ever noting this word as being misspelled again.
4. If Word finds a grammar error, a dialog box similar to the below will appear:
You have suggestions on how to change the issue, or the following options:
A. Ignore Once. To leave the text as is in a specific instance, but be notifiedif Microsoft Word finds the same thing again, click Ignore.
B. Don’t check for this issue. To no longer have Word flag this issue.
C. At the bottom of the pane, you will see an explanation of the grammarerror that Word has detected.
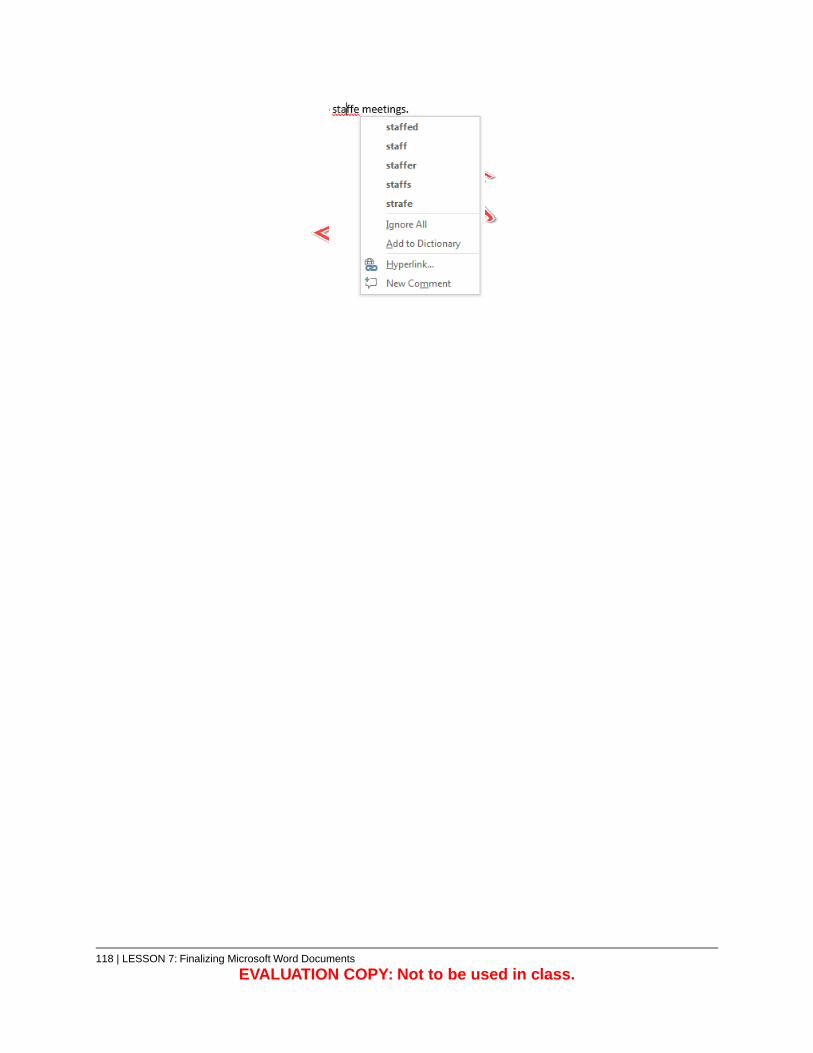
A useful feature when checking spelling and grammar is Word’s AutoCorrect feature.When Word indicates a word in a document may be misspelled or incorrect, with a squiggleunder it, you can right-click the word to see suggestions. If a suggestion is correct, simplyselect it to replace the word.
LESSON 7: Finalizing Microsoft Word Documents | 117
118 | LESSON 7: Finalizing Microsoft Word Documents
EVALUATION COPY: Not to be used in class.
Exercise 17: Checking Spelling andGrammar
5 to 15 minutes
In this exercise, you will check a document for spelling and grammar mistakes. Open orgo to Plants in my yard.docx (in the Word2019.1/Exercises folder) for use in this exercise.
1. Check the document for spelling and grammar mistakes.
LESSON 7: Finalizing Microsoft Word Documents | 119
Solution
1. To check the document for spelling and grammar mistakes:
A. Move your cursor to the top left of the document.
B. From the Proofing group on the Review tab, select Spelling & Grammar.
C. Correct errors by selecting a suggestion. For plant names not recognizedby the dictionary, select Ignore Once, Ignore All, or Add to Dictionary.
D. Note that while grammar is handled in the same way as spelling, it isimportant to consider grammar selections rather than just accepting all ofthem. Unlike spelling, grammar is not always a matter of right and wrong.
Conclusion
In this lesson, you learned to add page numbers to documents, to add custom headersand footers and to use the Spelling & Grammar command to find and correct errors inyour documents.
120 | LESSON 7: Finalizing Microsoft Word Documents
EVALUATION COPY: Not to be used in class.


![[MS-OFFDI]: Microsoft Office File Format Documentation … · 2017-09-19 · Microsoft Word 97 Microsoft Word 2000 Microsoft Word 2002 Microsoft Office Word 2003 Microsoft Office](https://static.fdocuments.us/doc/165x107/5edde022ad6a402d66691993/ms-offdi-microsoft-office-file-format-documentation-2017-09-19-microsoft-word.jpg)