Importing Merit Contacts to Office 365 Step 1:
21
Importing Merit Contacts to Office 365 Transferring your contacts from the Merit Mail system to your new Office 365 account can be cumbersome and difficult due to differences in the way that the two systems store data. Several pieces of data must be manually edited with Excel in order for them to cleanly import into Office 365, and several items may not import at all. Note: It you do not have many Merit contacts it is advisable to re-create them manually. However, if you wish decide to import your contacts there are three steps to follow: 1. Login your Merit account and use the export function to create a data file of your contacts 2. Using Excel or a text editor prepare the file for Office 365 3. Upload the file into Office 365 It is important to note that the exporting and importing of contact groups (contact groups are distribution lists that have been created by the user) is not supported and any lists you may have created will need to be re- created manually. Instructions for re-creating contact groups will be available in a separate document. Step 1: Exporting Contacts from Merit * NOTE: In the pictures below Internet Explorer 8 and the advanced version (AJAX) of the Merit Email system will be used to illustrate the steps. Other browsers will work as does Merit’s standard version (the standard version is a different interface for the email system designed to work faster on older computers) However, there will be differences in the appearance of the mail system and the location of the controls to export your data. If possible use Internet Explorer (IE) and the AJAX interface to do this process* Begin by accessing the Internet and navigating to the login page for your Marygrove Merit Mail account. 1. On the login screen enter your username and password in the appropriate boxes. Below where you have entered you username and password you will see a box labeled “Version”. Click on this box and from the drop-down list of options select “Advanced (AJAX)”. Page 1 of 21 2/6/2013 file://Z:\support\Importing_Merit_Contacts_to_Office_365.htm
Transcript of Importing Merit Contacts to Office 365 Step 1:
Importing Merit Contacts to Office 365
Transferring your contacts from the Merit Mail system to your new Office 365 account can be cumbersome and difficult due
to differences in the way that the two systems store data. Several pieces of data must be manually edited with Excel in order
for them to cleanly import into Office 365, and several items may not import at all.
Note: It you do not have many Merit contacts it is advisable to re-create them manually. However, if you wish decide to
import your contacts there are three steps to follow:
1. Login your Merit account and use the export function to create a data file of your contacts
2. Using Excel or a text editor prepare the file for Office 365
3. Upload the file into Office 365
It is important to note that the exporting and importing of contact groups (contact groups are distribution lists
that have been created by the user) is not supported and any lists you may have created will need to be re-
created manually. Instructions for re-creating contact groups will be available in a separate document.
Step 1: Exporting Contacts from Merit
* NOTE: In the pictures below Internet Explorer 8 and the advanced version (AJAX) of the Merit Email system will be used to
illustrate the steps. Other browsers will work as does Merit’s standard version (the standard version is a different interface for
the email system designed to work faster on older computers) However, there will be differences in the appearance of the
mail system and the location of the controls to export your data. If possible use Internet Explorer (IE) and the AJAX interface
to do this process*
Begin by accessing the Internet and navigating to the login page for your Marygrove Merit Mail account.
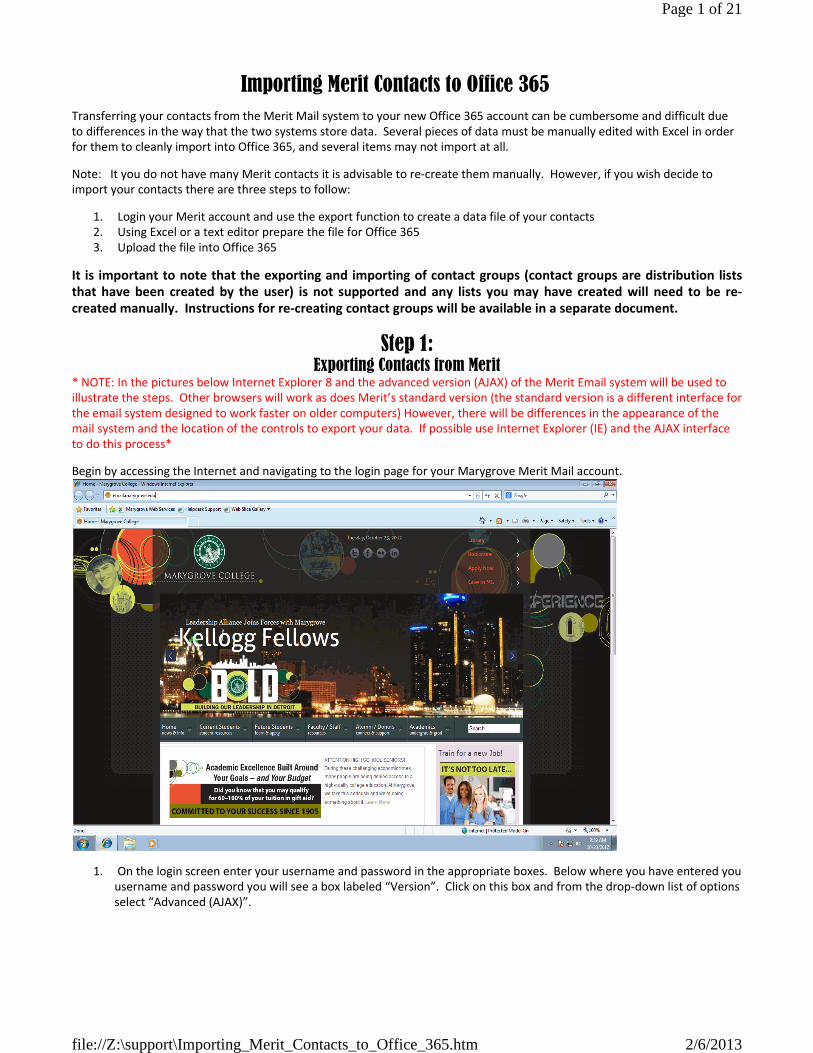
1. On the login screen enter your username and password in the appropriate boxes. Below where you have entered you
username and password you will see a box labeled “Version”. Click on this box and from the drop-down list of options
select “Advanced (AJAX)”.
Page 1 of 21
2/6/2013file://Z:\support\Importing_Merit_Contacts_to_Office_365.htm

2. After verifying that you have entered your user name and password and that you have selected the Advanced (AJAX)
option from the “Version” menu, click on the “Log In” button to launch Merit Mail.
3. Once your email box has opened you will need to click on the “Preferences” tab located near the top left of your
email screen.
Page 2 of 21
2/6/2013file://Z:\support\Importing_Merit_Contacts_to_Office_365.htm

4. Once the Preferences tab has opened you will need to select the Import/Export option from the list at the left of the
screen.
Page 3 of 21
2/6/2013file://Z:\support\Importing_Merit_Contacts_to_Office_365.htm
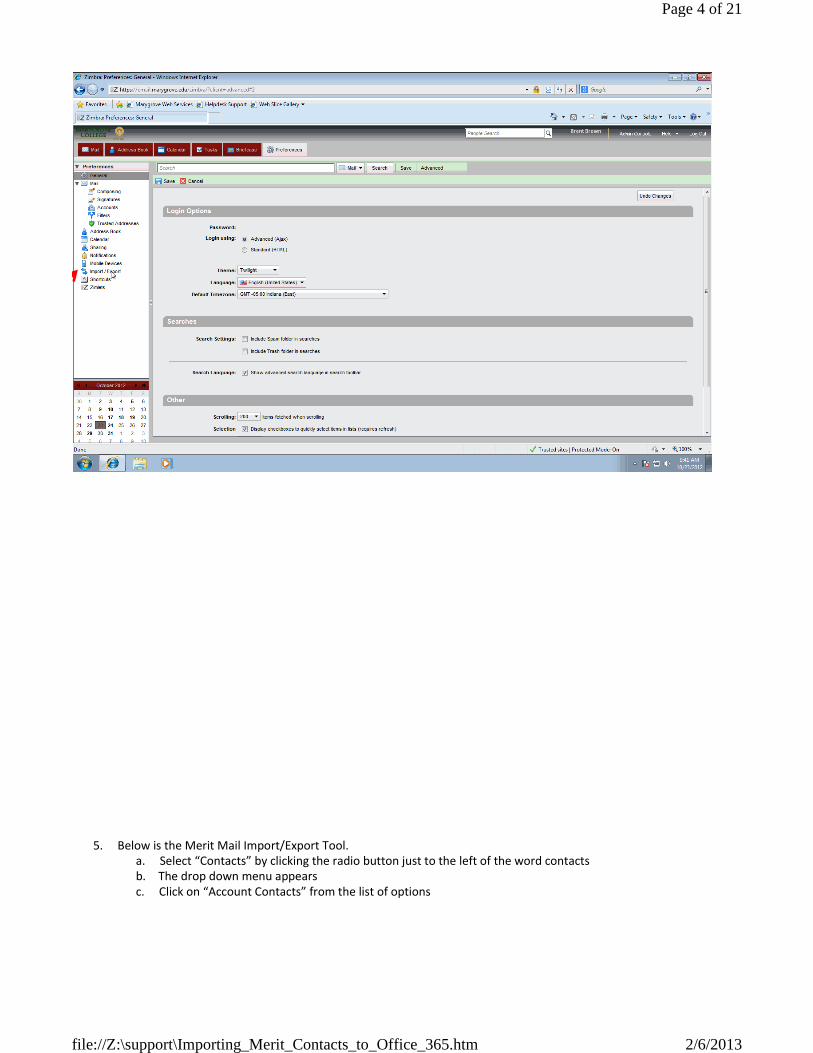
5. Below is the Merit Mail Import/Export Tool.
a. Select “Contacts” by clicking the radio button just to the left of the word contacts
b. The drop down menu appears
c. Click on “Account Contacts” from the list of options
Page 4 of 21
2/6/2013file://Z:\support\Importing_Merit_Contacts_to_Office_365.htm

6. Now that Contacts has been selected and Account Contacts chosen as the proper format, you will need to specify the
source of the items that are to be exported.
a. Below the box where you selected Outlook Contacts is a button titled “Source.”
b. Click on this button where it says “All Folders”
Page 5 of 21
2/6/2013file://Z:\support\Importing_Merit_Contacts_to_Office_365.htm

7. Clicking on the “All Folders” button will bring up a box where you will need to choose the folder to be exported.
a. Select the “Contacts” folder.
Page 6 of 21
2/6/2013file://Z:\support\Importing_Merit_Contacts_to_Office_365.htm
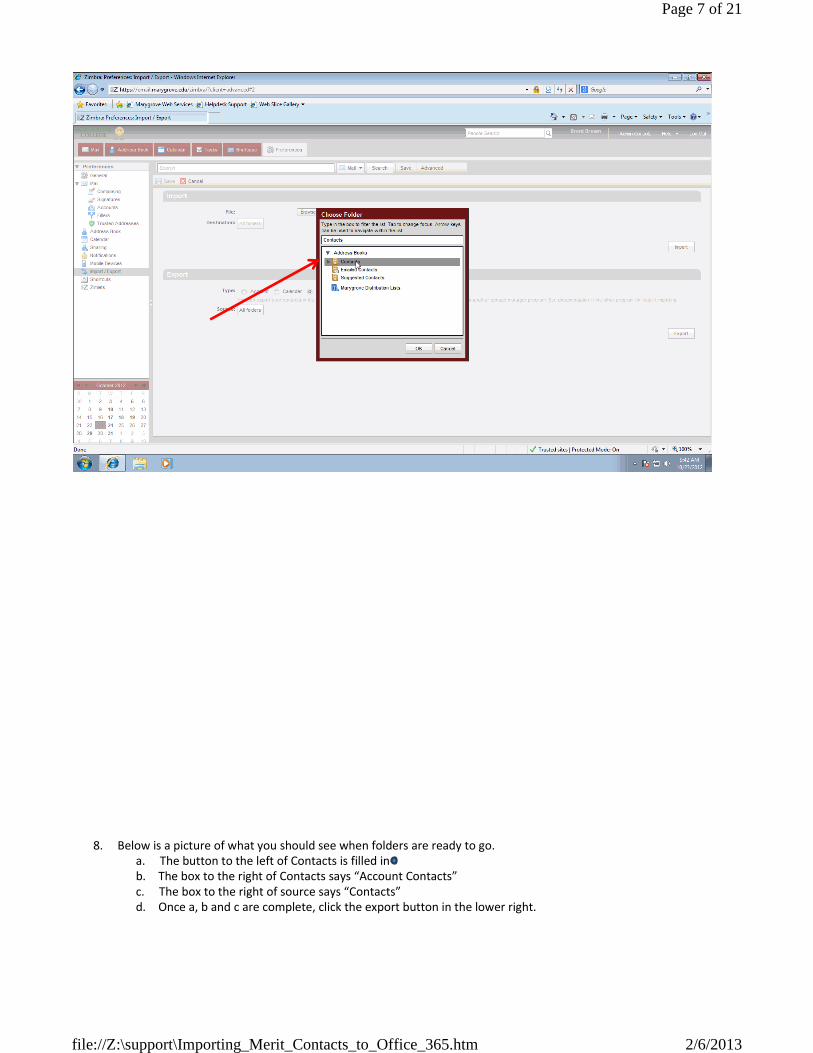
8. Below is a picture of what you should see when folders are ready to go.
a. The button to the left of Contacts is filled in
b. The box to the right of Contacts says “Account Contacts”
c. The box to the right of source says “Contacts”
d. Once a, b and c are complete, click the export button in the lower right.
Page 7 of 21
2/6/2013file://Z:\support\Importing_Merit_Contacts_to_Office_365.htm
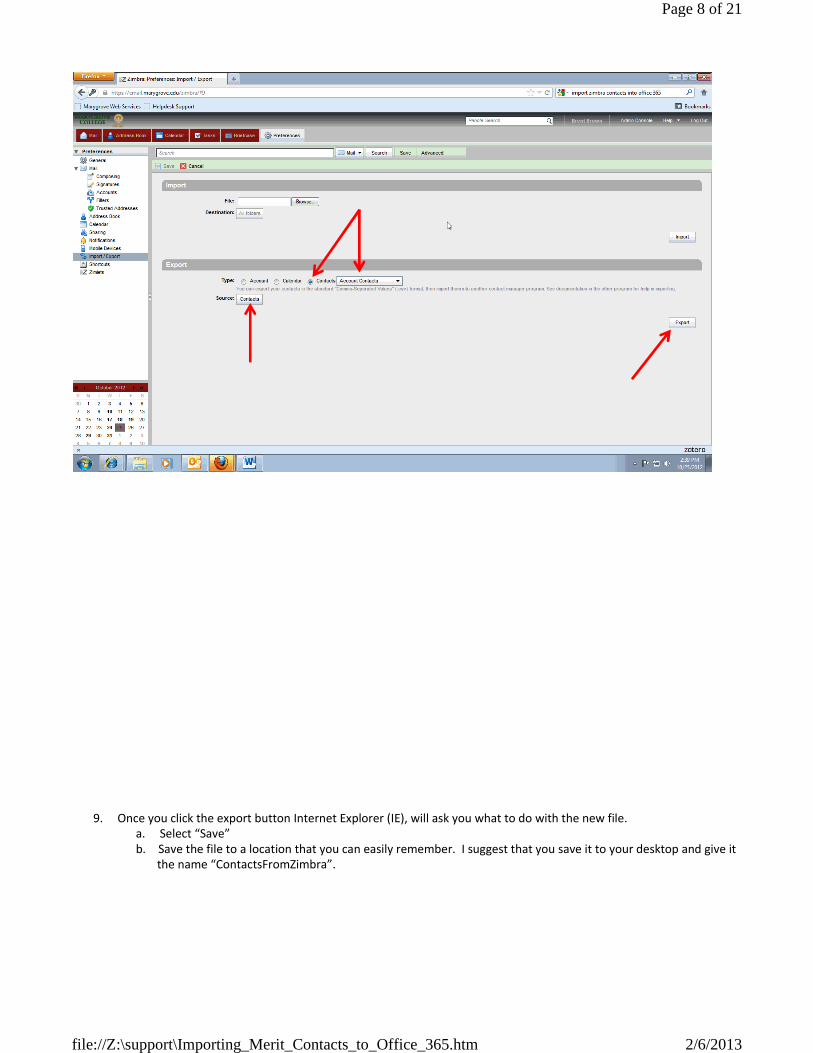
9. Once you click the export button Internet Explorer (IE), will ask you what to do with the new file.
a. Select “Save”
b. Save the file to a location that you can easily remember. I suggest that you save it to your desktop and give it
the name “ContactsFromZimbra”.
Page 8 of 21
2/6/2013file://Z:\support\Importing_Merit_Contacts_to_Office_365.htm

10. At this point you have now exported your contacts from Merit and are ready to take that data and make it ready to
upload to Office 365.
Step 2: Preparing the File for Outlook
The file that was created by Merit in the export process (Step 1) contains all of the contact data from your contacts folder.
However, there significant differences between the way that Office 365 and Merit name the various pieces of contact
information. Also Merit only exports the data fields that contain actual data, so there is a good chance that not all of the fields
discussed below will appear in the file you exported. Lastly, some fields exported from Merit do not have and Office 365
equivalent. Those items will not be lost after the import, but will show up in a notes field as part of the imported contact.
Changes made to you exported file should be make with Excel.
1. Begin by opening up the file you downloaded on your Desktop entitled “ContactsFromZimbra” from Merit with Excel.
It should open up into a simple looking spreadsheet.
Page 9 of 21
2/6/2013file://Z:\support\Importing_Merit_Contacts_to_Office_365.htm

a. All of the data about your contacts is contained in this spreadsheet, but it is not formatted correctly for
Outlook. Below is a listing of the changes that need to be made to this document so that Office 365 will
import the data as cleanly as possible.
Page 10 of 21
2/6/2013file://Z:\support\Importing_Merit_Contacts_to_Office_365.htm

2. Please note that because Merit only exports data fields that have information in them. Your file may have none, or
only a few of the items listed below. You do not need to add any fields, nor do you need to remove any.
Note: You only need to make changes to the column headers in row 1 if that piece of information is part of your
spreadsheet.
The changes you need to make are:
a. Change Office to Office Location
b. Change AssistantPhone to Assistant’s Phone
c. Change CallbackPhone to Callback
d. Change CarPhone to Car Phone
e. Change CompanyPhone to Company Main Phone
f. Change Email to E-mail
g. Change Email2 to E-mail2
h. Change Email3 to E-mail3
i. Change HomeFax to Home Fax
j. Change HomePhone to Home Phone
k. Change NameSuffix to Suffix
l. Change OtherCity to Other City
m. Change OtherCountry to Other Country
n. Change OtherFax to Other Fax
o. Change OtherPhone to Other Phone
p. Change OtherPostalCode to Other Postal Code
q. Change OtherState to Other State
r. Change OtherStree to Other Street
s. Change WorkCity to Business City
t. Change WorkCountry to Business Country
u. Change WorkFax to Business Fax
v. Change WorkPhone to Business Phone
w. Change WorkPostalCode to Business Postal Code
x. Change WorkState to Work State
y. Change WorkStreet to Business Street
3. Once you have made the changes you will want to use the File menu in excel to “Save As” so that you can save this
changed document to a new file.
Page 11 of 21
2/6/2013file://Z:\support\Importing_Merit_Contacts_to_Office_365.htm
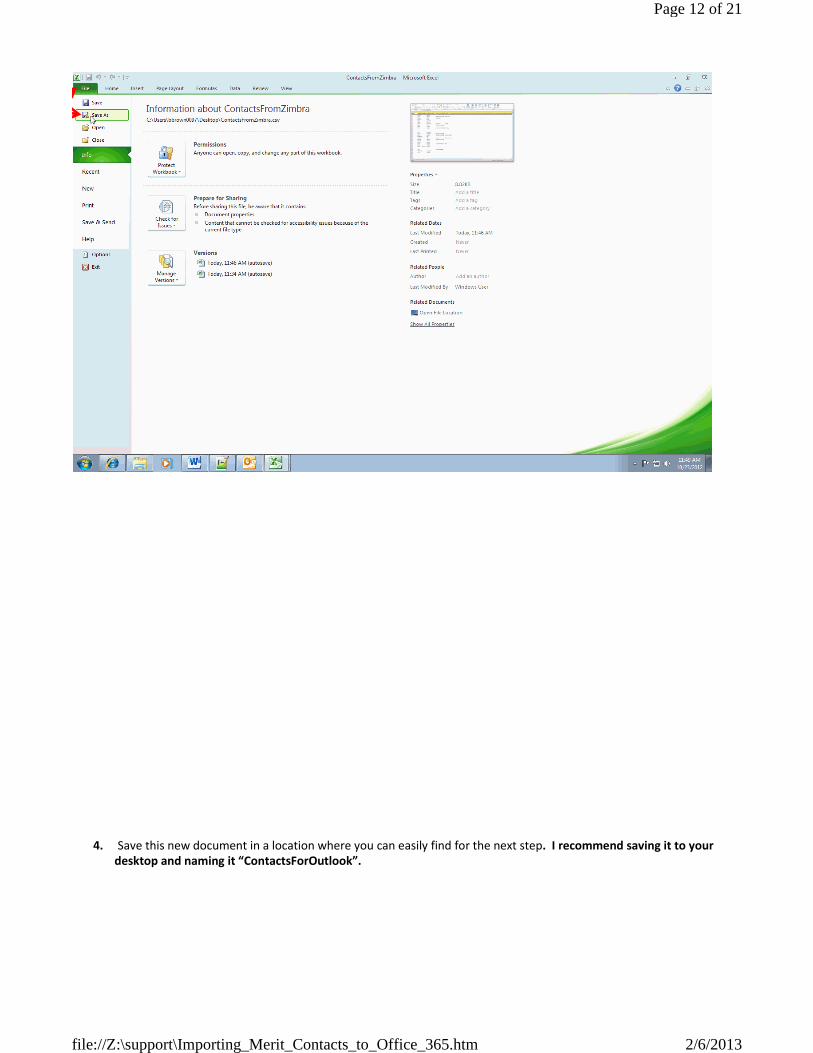
4. Save this new document in a location where you can easily find for the next step. I recommend saving it to your
desktop and naming it “ContactsForOutlook”.
Page 12 of 21
2/6/2013file://Z:\support\Importing_Merit_Contacts_to_Office_365.htm

5. Excel will give you the warning below when you click on the ”Save” button.
NOTE: Do not worry about the warning as it is only for informational purposes and is not important to this process.
a. Click on the “Yes” button and Excel will save the document.
b. After the document is saved, the file is ready to be imported into Outlook.
Page 13 of 21
2/6/2013file://Z:\support\Importing_Merit_Contacts_to_Office_365.htm

Step 3: Importing Contacts into Office 365
1. To start the import process, begin by doing the following:
a. Open Internet Explorer on your Computer
b. Open a web browser to https://login.microsoftonline.com
c. Login into your Office 365 Account
Page 14 of 21
2/6/2013file://Z:\support\Importing_Merit_Contacts_to_Office_365.htm
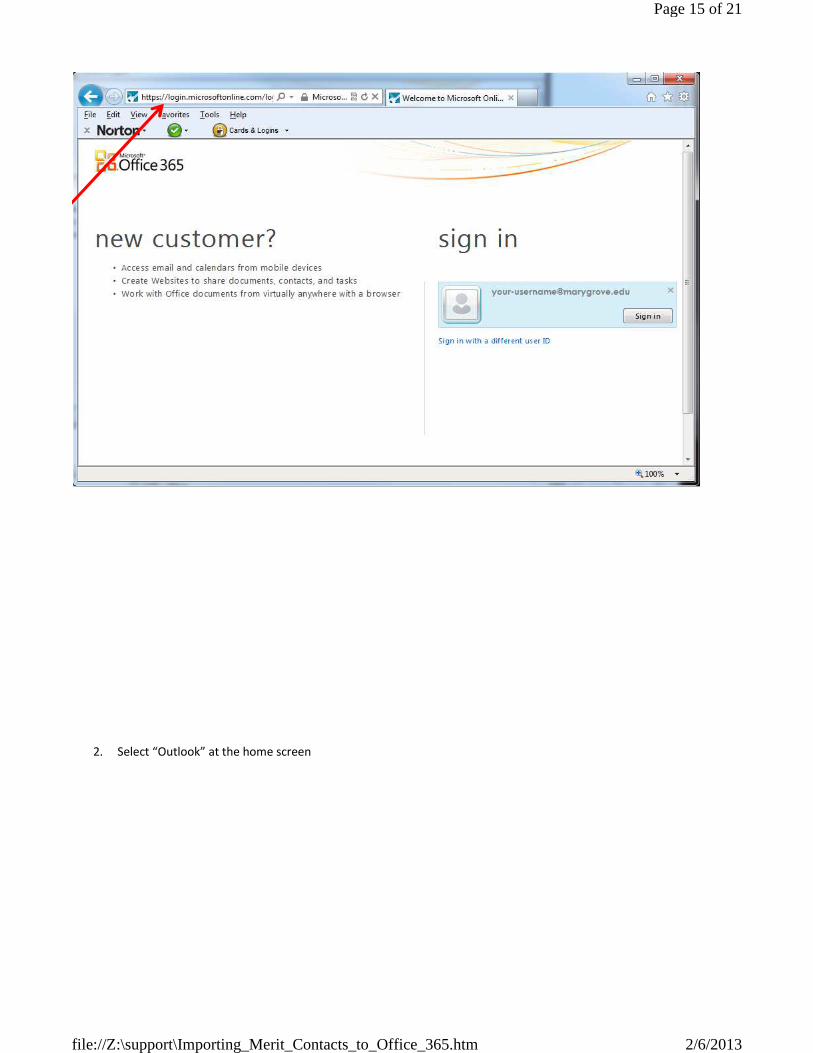
2. Select “Outlook” at the home screen
Page 15 of 21
2/6/2013file://Z:\support\Importing_Merit_Contacts_to_Office_365.htm
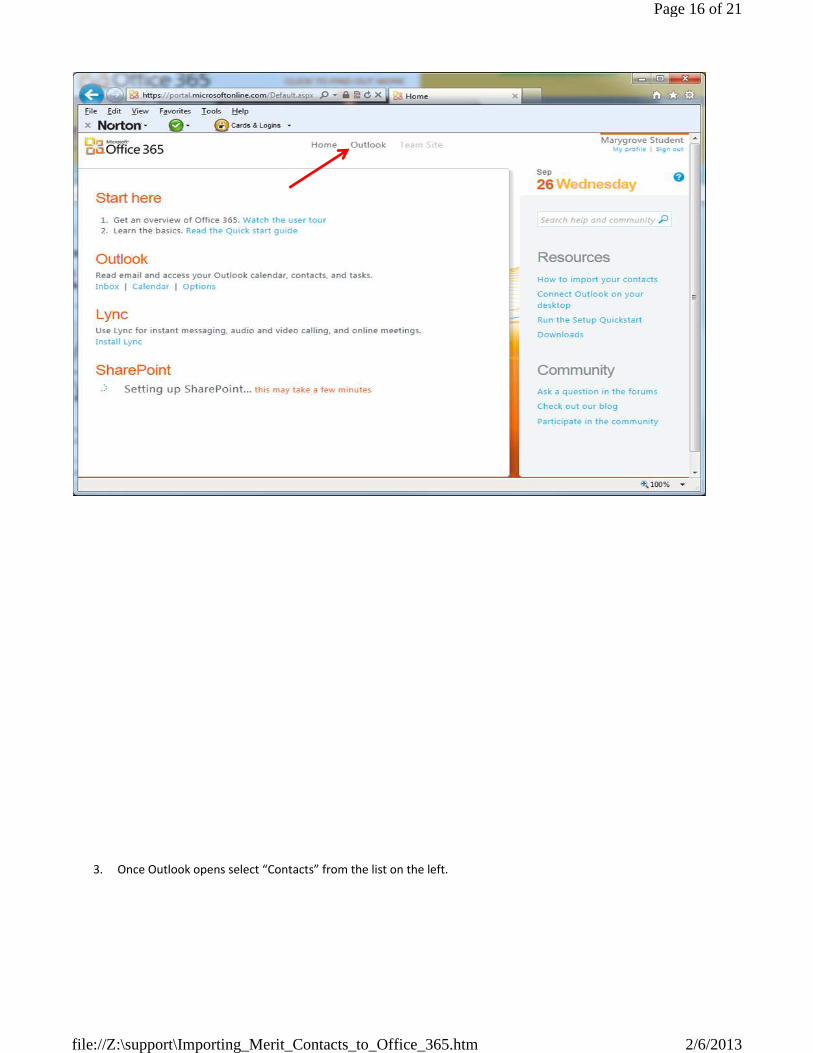
3. Once Outlook opens select “Contacts” from the list on the left.
Page 16 of 21
2/6/2013file://Z:\support\Importing_Merit_Contacts_to_Office_365.htm
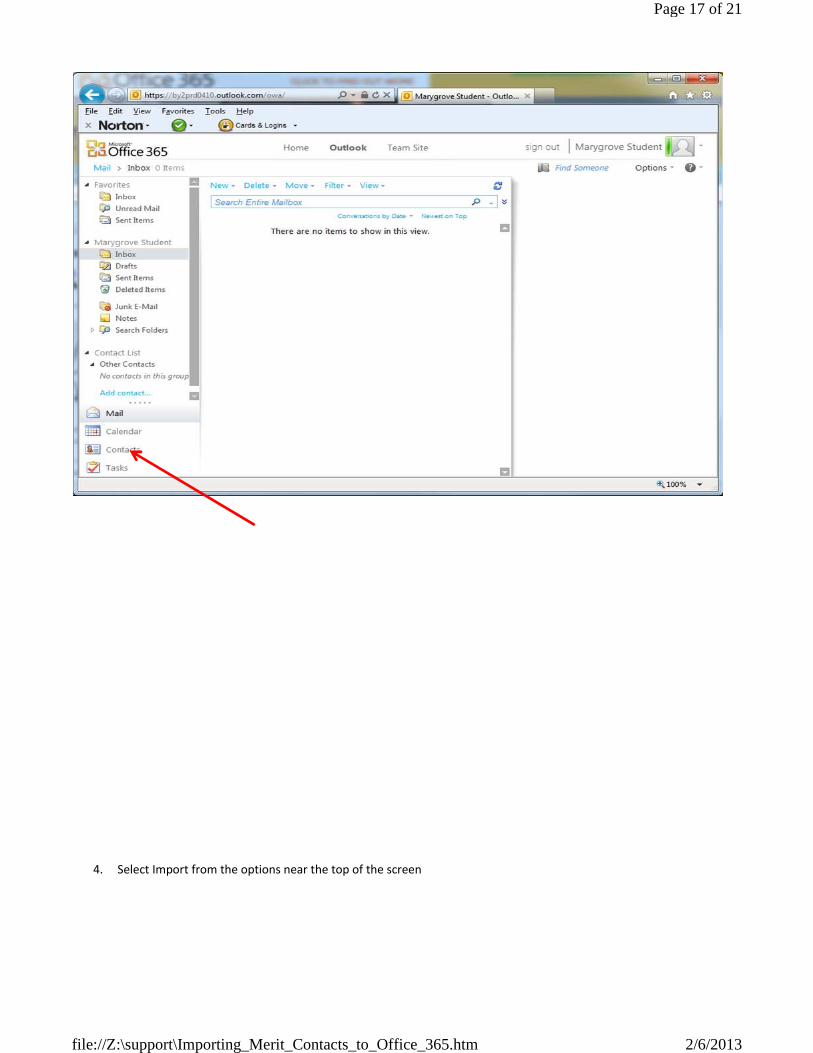
4. Select Import from the options near the top of the screen
Page 17 of 21
2/6/2013file://Z:\support\Importing_Merit_Contacts_to_Office_365.htm

5. Office 365 will launch a new window for the import process.
a. Click on the “Browse” button
b. Select the file you created in step 2
c. Click “Next”
Page 18 of 21
2/6/2013file://Z:\support\Importing_Merit_Contacts_to_Office_365.htm

6. Office 365 will process the file for a few moments
Page 19 of 21
2/6/2013file://Z:\support\Importing_Merit_Contacts_to_Office_365.htm

7. Once the Office 365 has finished processing the file click “Finish”
Page 20 of 21
2/6/2013file://Z:\support\Importing_Merit_Contacts_to_Office_365.htm
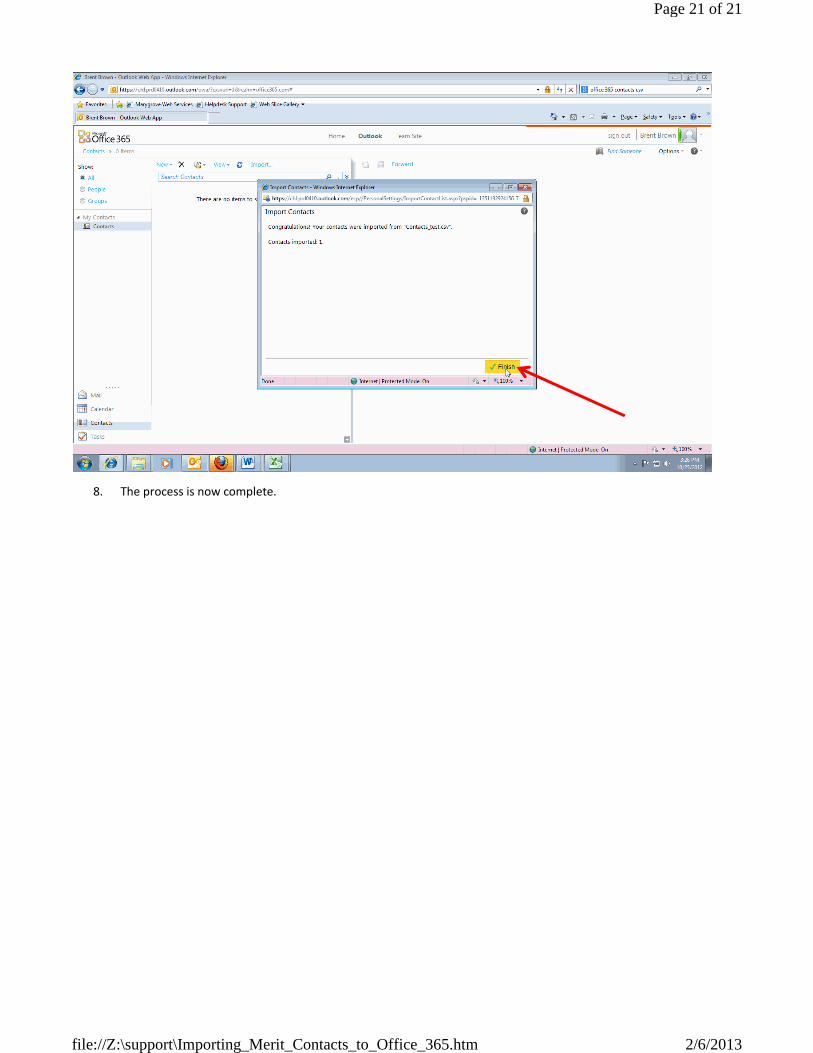
8. The process is now complete.
Page 21 of 21
2/6/2013file://Z:\support\Importing_Merit_Contacts_to_Office_365.htm