How to use trello for beginners 2017 melvinreceno themagnificent
184
Trello images were downloaded from the official Trello website. https://trello.com/
-
Upload
melvin-receno -
Category
Education
-
view
56 -
download
4
Transcript of How to use trello for beginners 2017 melvinreceno themagnificent

Trello images were downloaded from the official Trello website.https://trello.com/
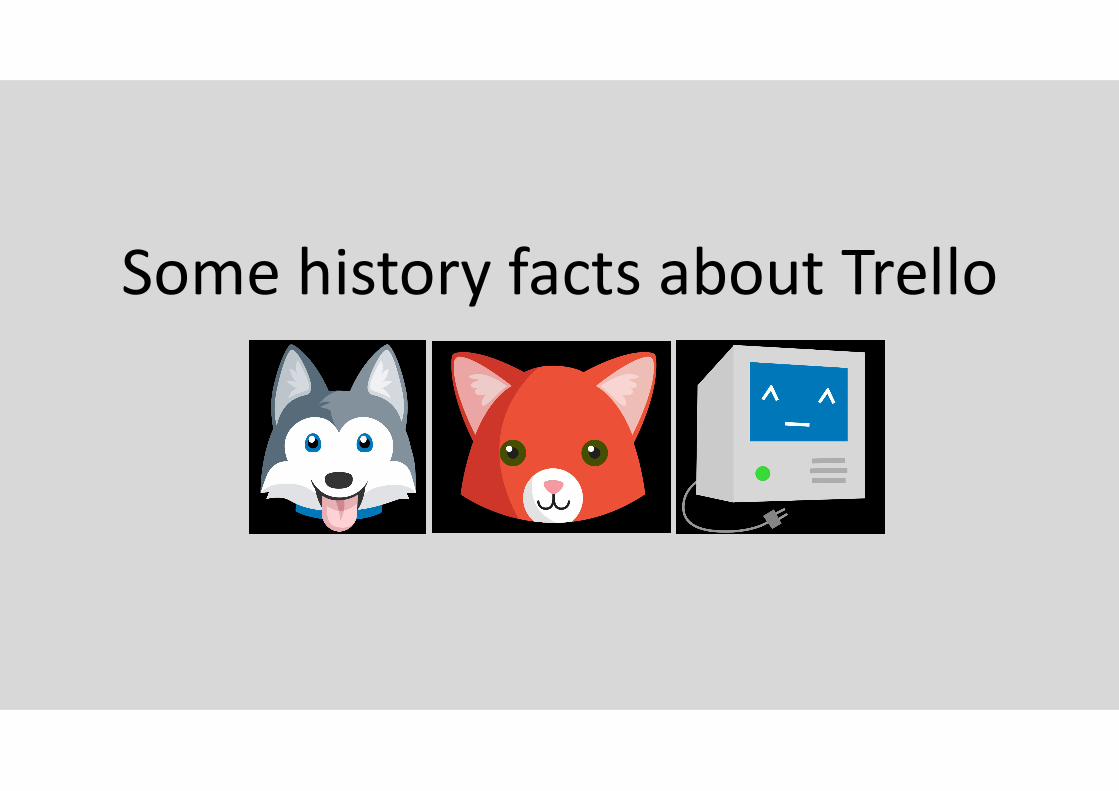
Some history facts about Trello

Trello was developed to solve high-level planning issues and was initially named Trellis.

Trello was launched in September of 2011 as a web app
and an Iphone app.

In summer of 2012 Taco became the official Trello spokes-husky.
In May 2015, Trello goes international.

In early 2017, Trello was acquired by Atlassian, to begin its next
chapter in empowering teams all over the world.

Most importantly Trello is a FUN, FREE, EASY, FLEXIBLE and VISUAL way to manage your projects and
organize anything. (Party’s Included)

The Trello basic tutorial flowchart
Boards
CREATE
Lists Cards

Let’s sign-up for a Trello account, and get that out of our way…

Go to your favorite browser.

Key in “Trello.com” in the search bar.Then press “enter” on your keyboard.

We are now taken to the Trello page.

This is the “Sign Up – It’s Free” button.

Click “Sign Up – It’s Free”.

The “Create a Trello Account” page is shown.

Type your “Name”
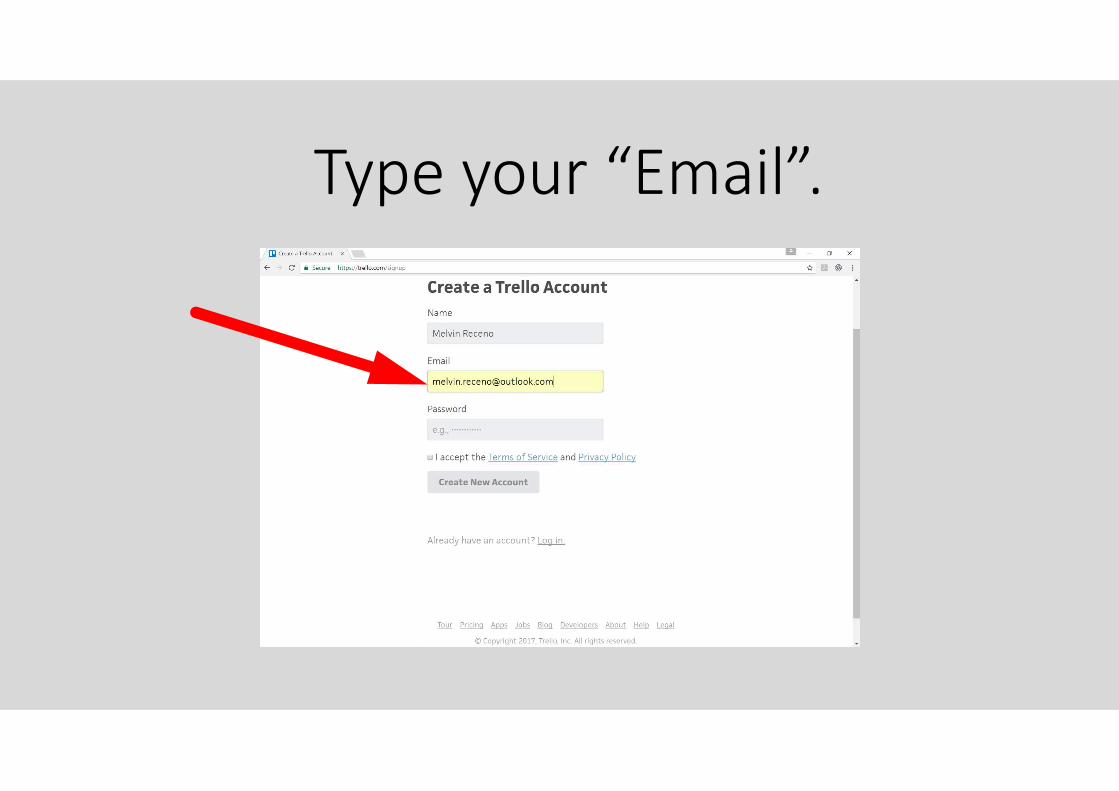
Type your “Email”.

Type a new “Password”.
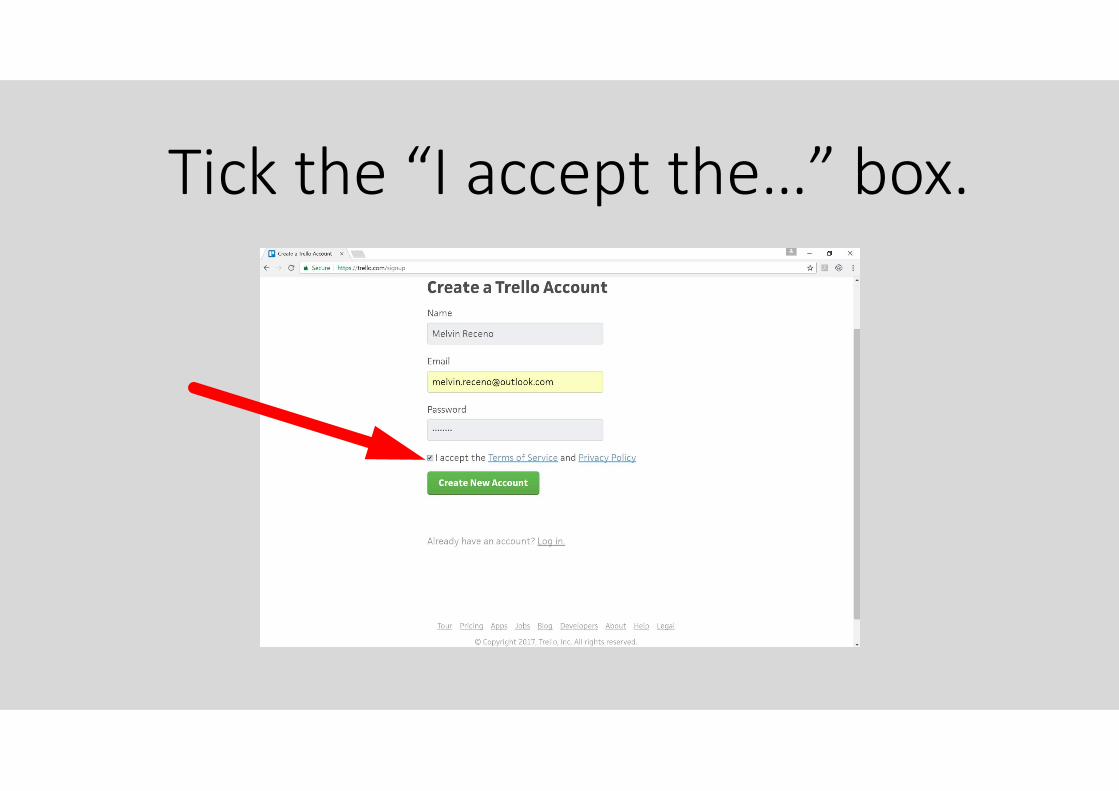
Tick the “I accept the…” box.

Click “Create New Account”.
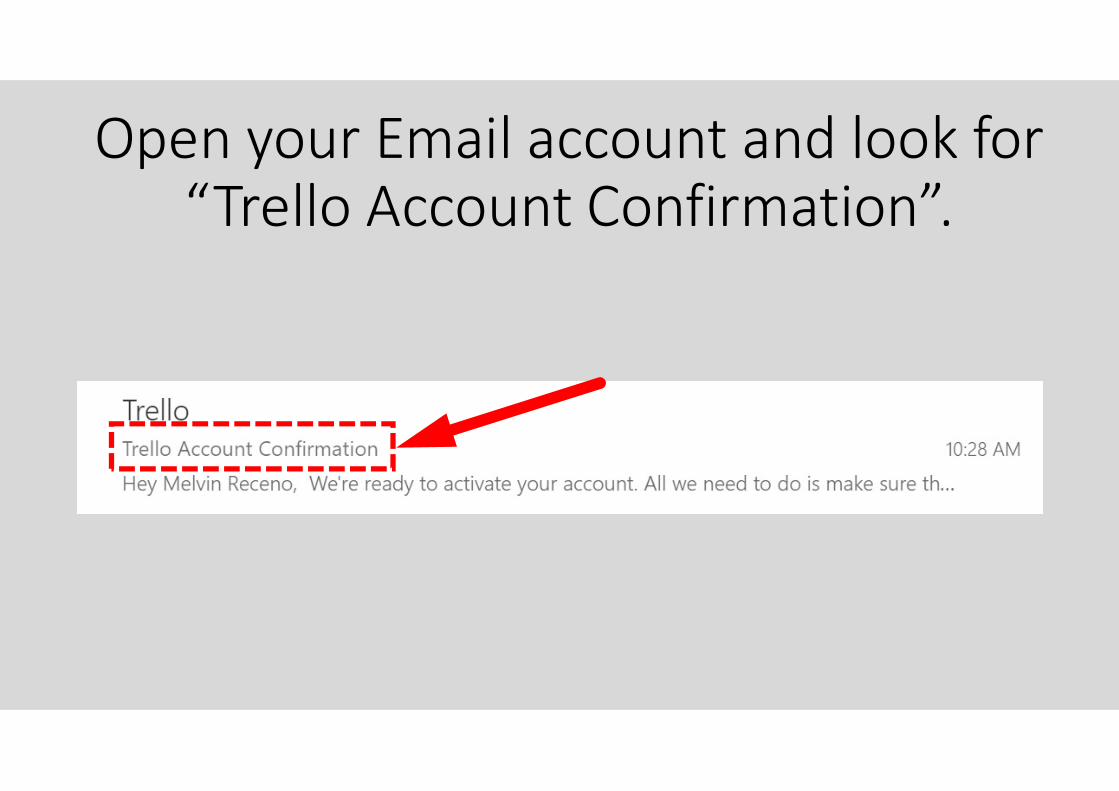
Open your Email account and look for “Trello Account Confirmation”.
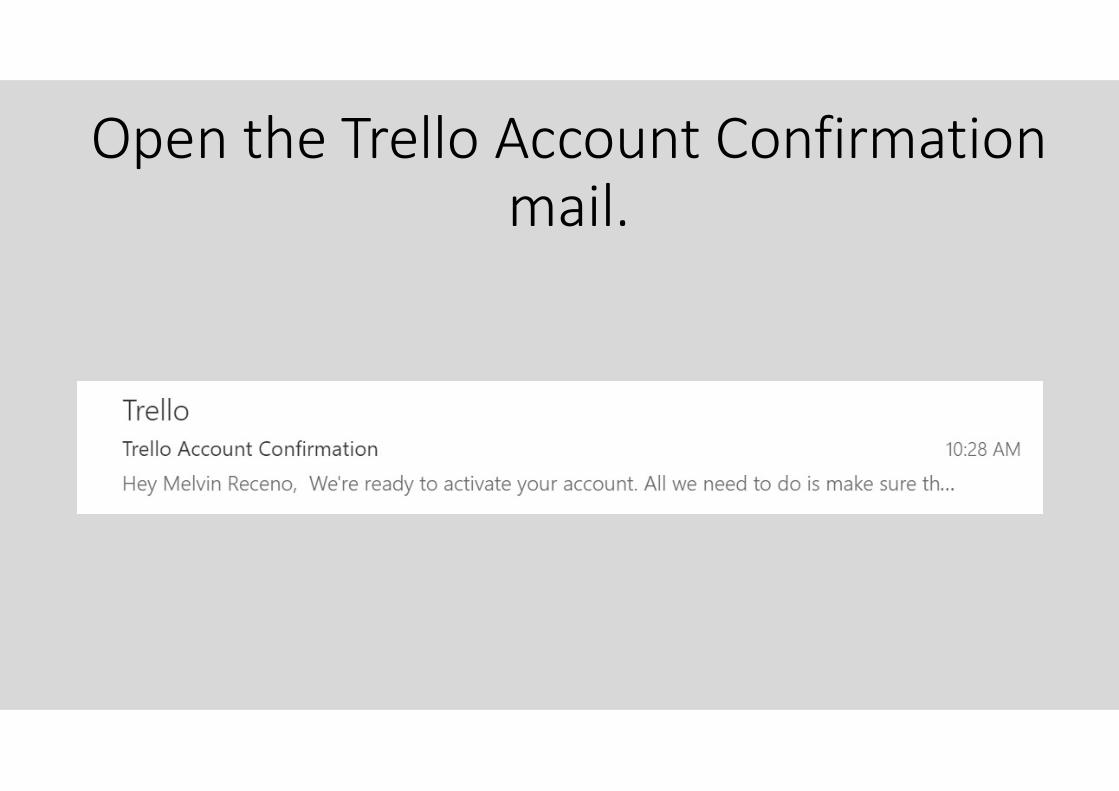
Open the Trello Account Confirmation mail.

This screen appears.

Click “Verify Address”

And we are taken to your “New Trello Account”.

.

Now we have created an account.
Boards
CREATE
Lists Cards

So what are boards, lists and cards?
Boards
CREATE
Lists Cards

A board contains your lists and cards.
Image from http://brodzinski.com/wp-content/uploads/portfolio-kanban-board-4.png

A column is one list.
Image from http://brodzinski.com/wp-content/uploads/portfolio-kanban-board-4.png

A list contains several cards.
Image from http://brodzinski.com/wp-content/uploads/portfolio-kanban-board-4.png

Another example of a board with lists and cards.
Image from www.eurocharts.co.uk

A sample Kanban board. Originated from Toyota to manage team tasks.
Image from http://plan.io/blog/post/143525683993/kanban-boards-the-psychology-of-cards

KANBAN is a Japanese word meaning Visual Signal or Cards.
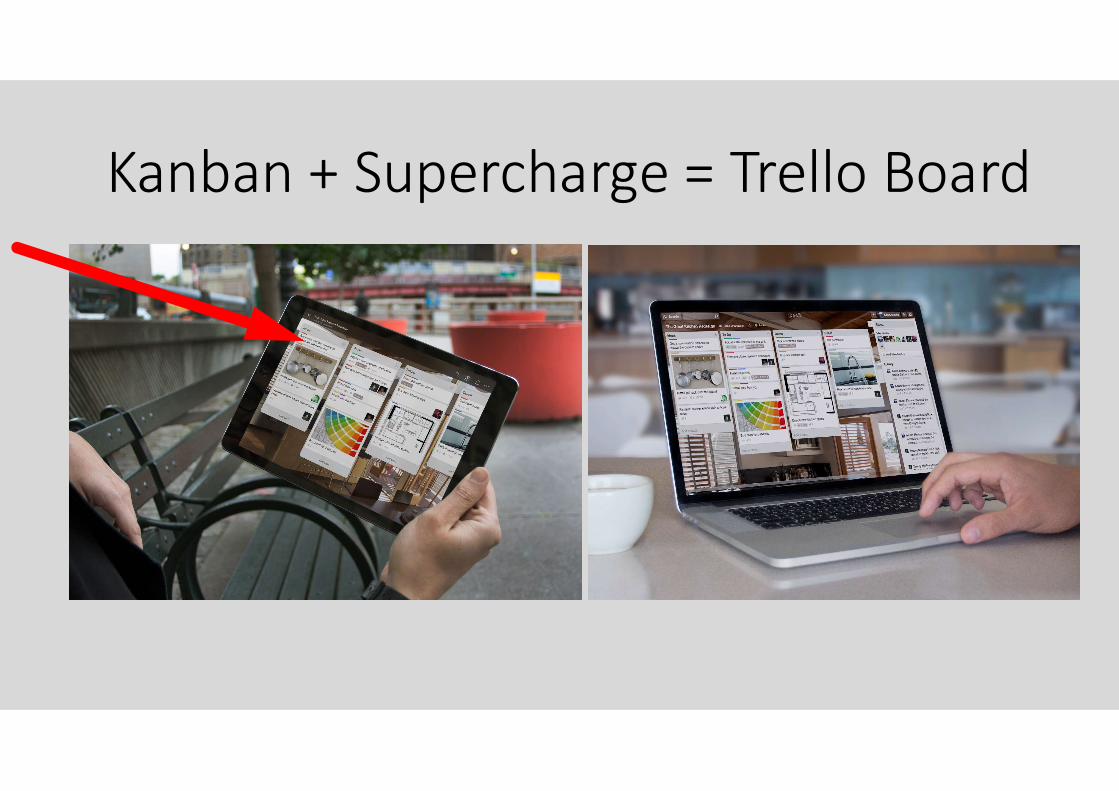
Kanban + Supercharge = Trello Board

Now let’s dive in and manage a task using Trello.

Let’s say you want to organize a family reunion.
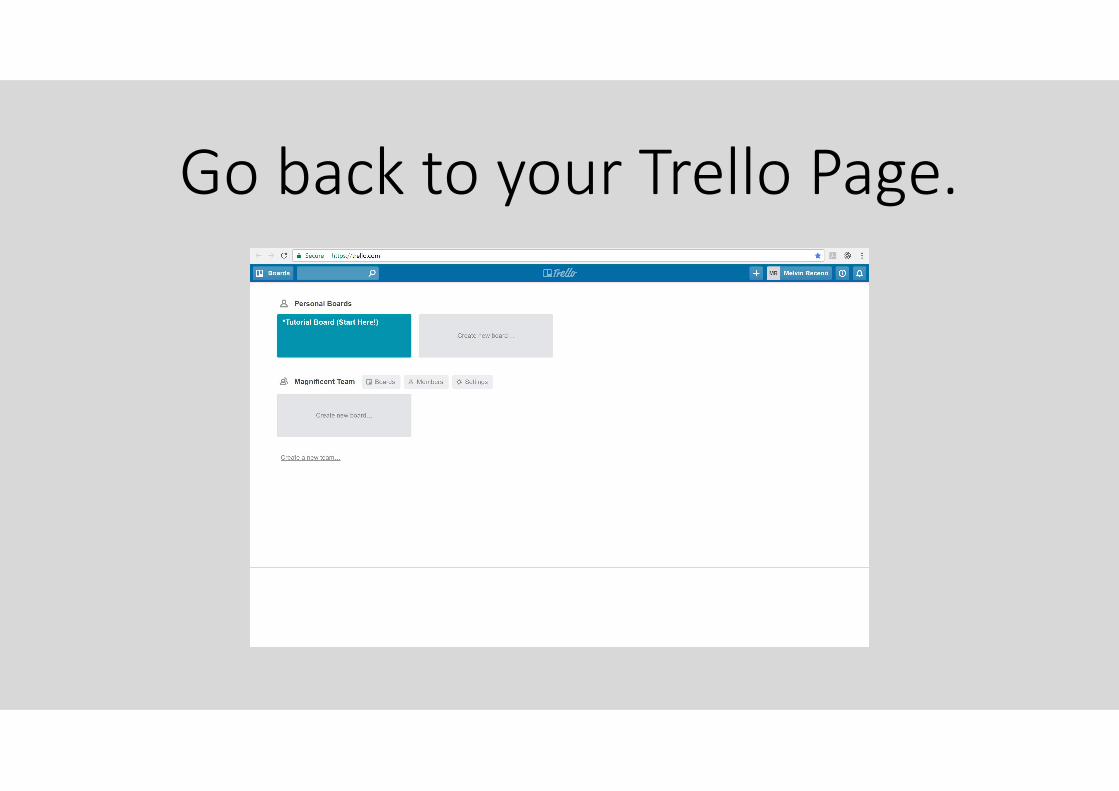
Go back to your Trello Page.

Click “create a new board”.

Title and team screen appears.

For title type “Family Reunion 2017”.

For team select “none” for now.

Click “Create”.

Your Family Reunion board is created.
Now let’s add lists in your board.

To add a list you can key in your list names here.

Click “Save”.

Here I have added three lists.Resources, To do list and Ongoing.

To add another list click here.

Type “Done”.

Click “Save”
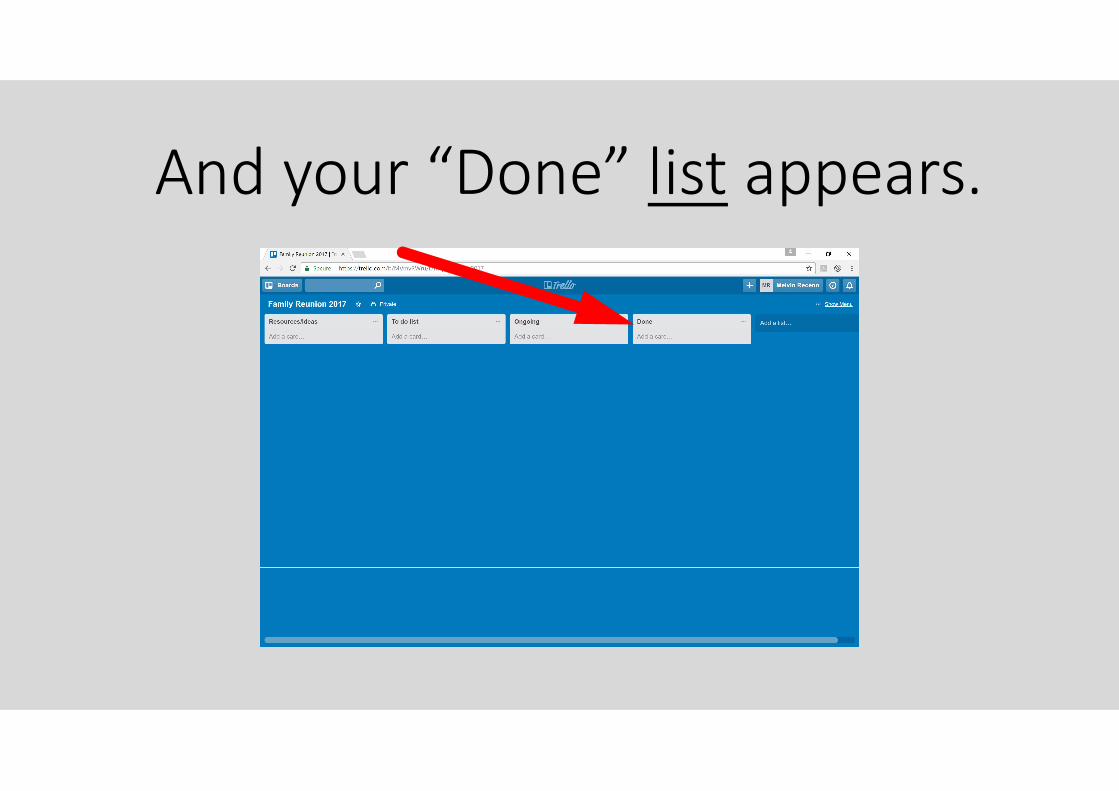
And your “Done” list appears.

Now let’s add cards in your lists.

Click on “Add a card”

Type a “name” for your first card.

I typed “Taal Vista Hotel” under the resources/ideas list.

Click “Add”.

Taal Vista Hotel was saved as your first card under your resources/ideas list.

To add more just type the next card name on the next card.

I typed “Cely’s Catering Services”.

And click “Add” again.

Cely’s Catering Services is now added as the next card.

You can type in as much cards as you like as fresh ideas come in…

To put a card under the to do list.

Click add a card and type in the name of the new card under to do list.

Click “Add” and follow the same process.

Type in all the items you need to do…

I’ve listed quite a few…

Cards we have started can be moved from the to do list to the ongoing list…

By simply dragging the card to the ongoing list.

You can drag as many as you like depending on…
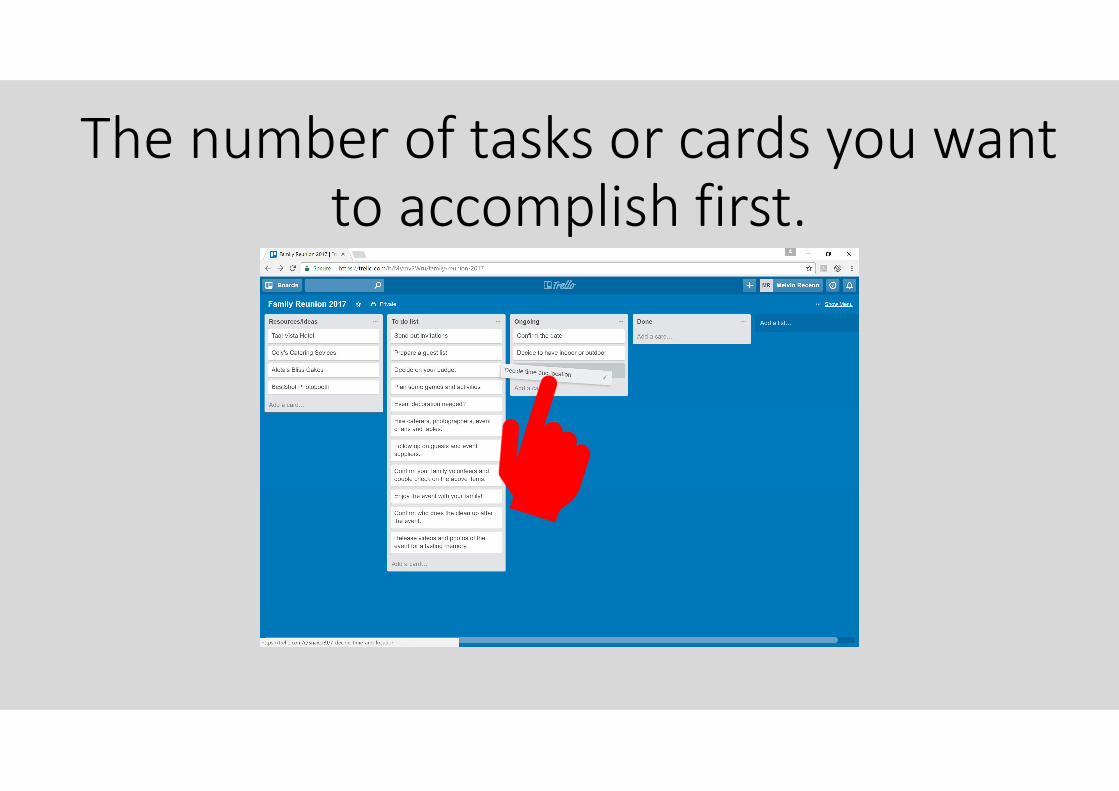
The number of tasks or cards you want to accomplish first.

Once you have accomplished a task or card.

You can drag it to the Done list.
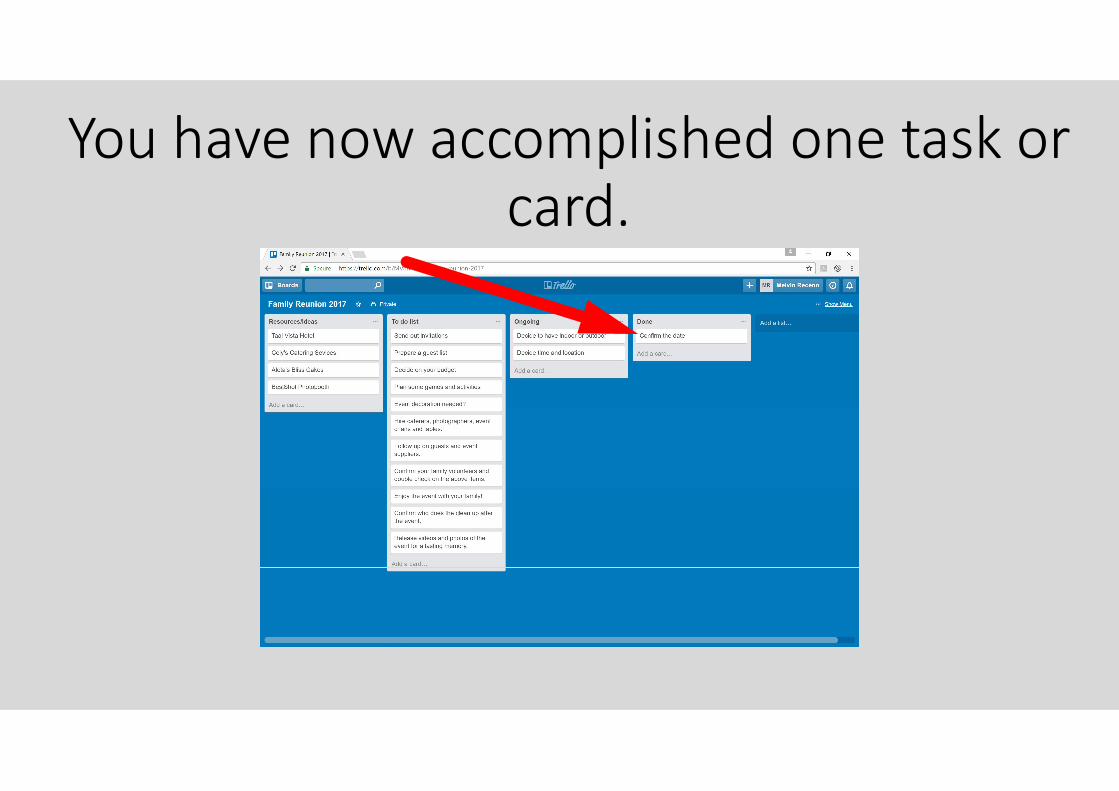
You have now accomplished one task or card.

We have now finished with the basic tutorial.
Boards
CREATE
Lists Cards

Now for the cool stuff!

To do some re-arranging just drag a list or a card.

We can move lists by dragging them.
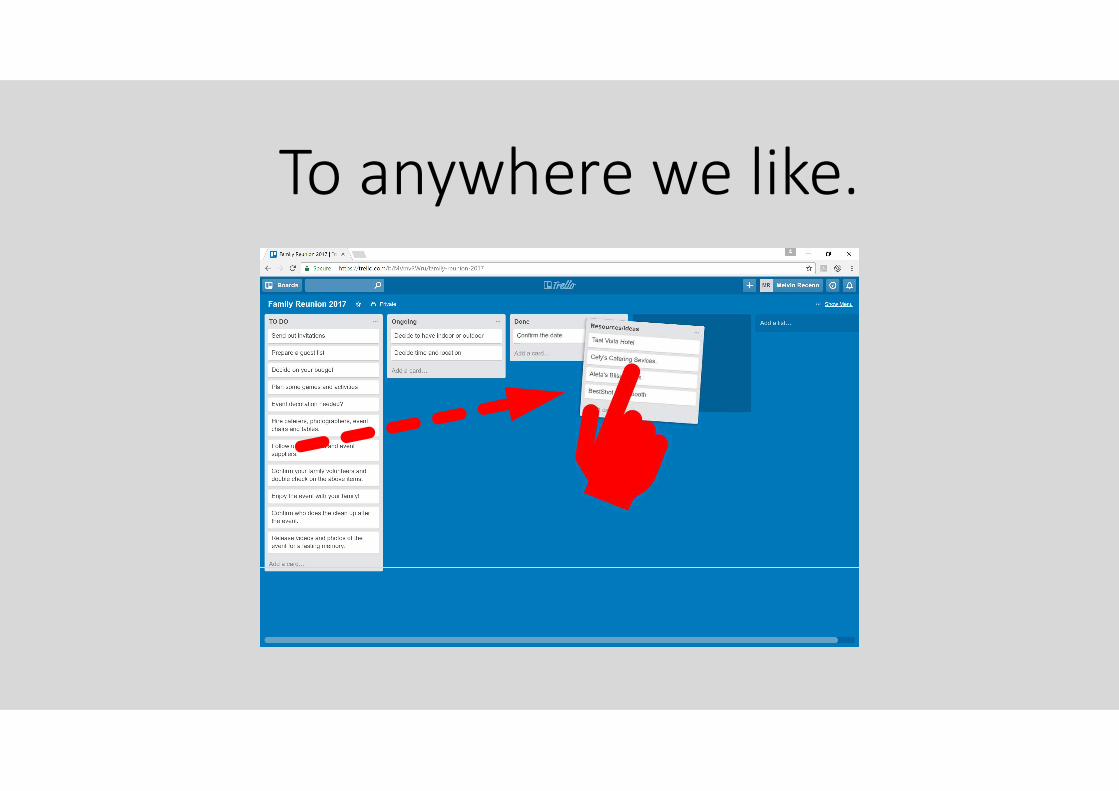
To anywhere we like.

We can re-arrange the cards in the list by dragging them…

To the position we like.

If you need more people to help you implement the tasks…add
members!

We can add members by clicking“Show Menu”.
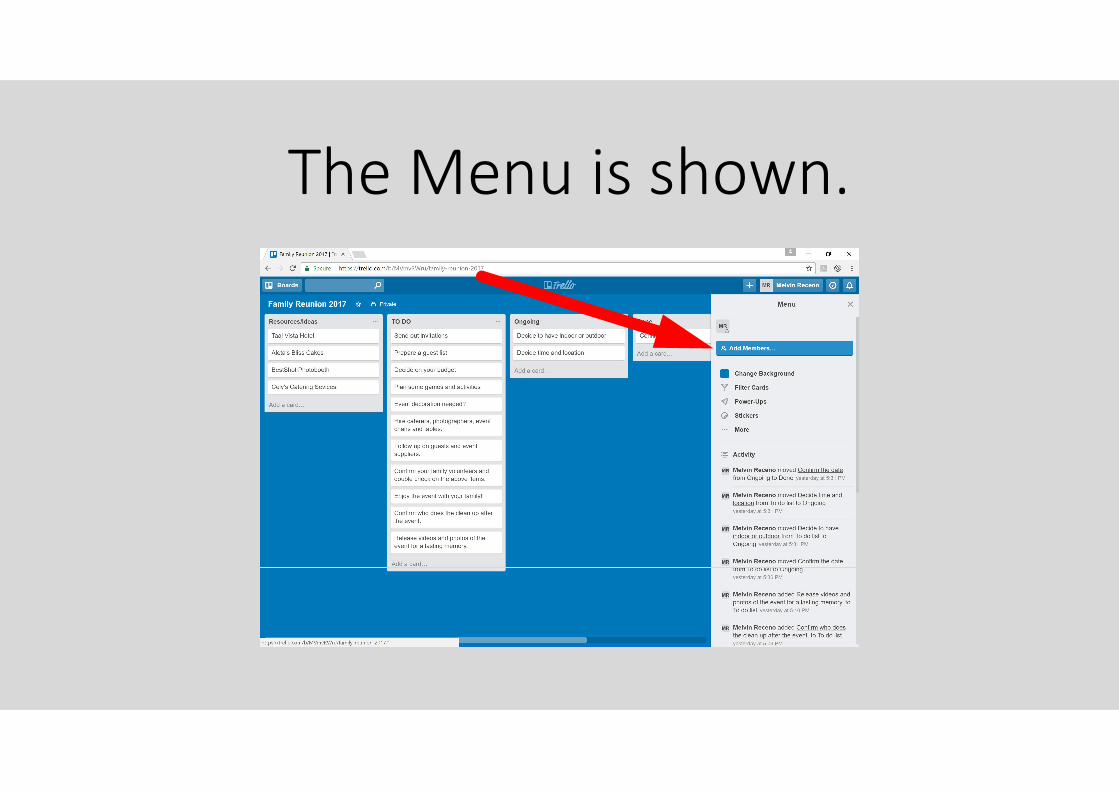
The Menu is shown.
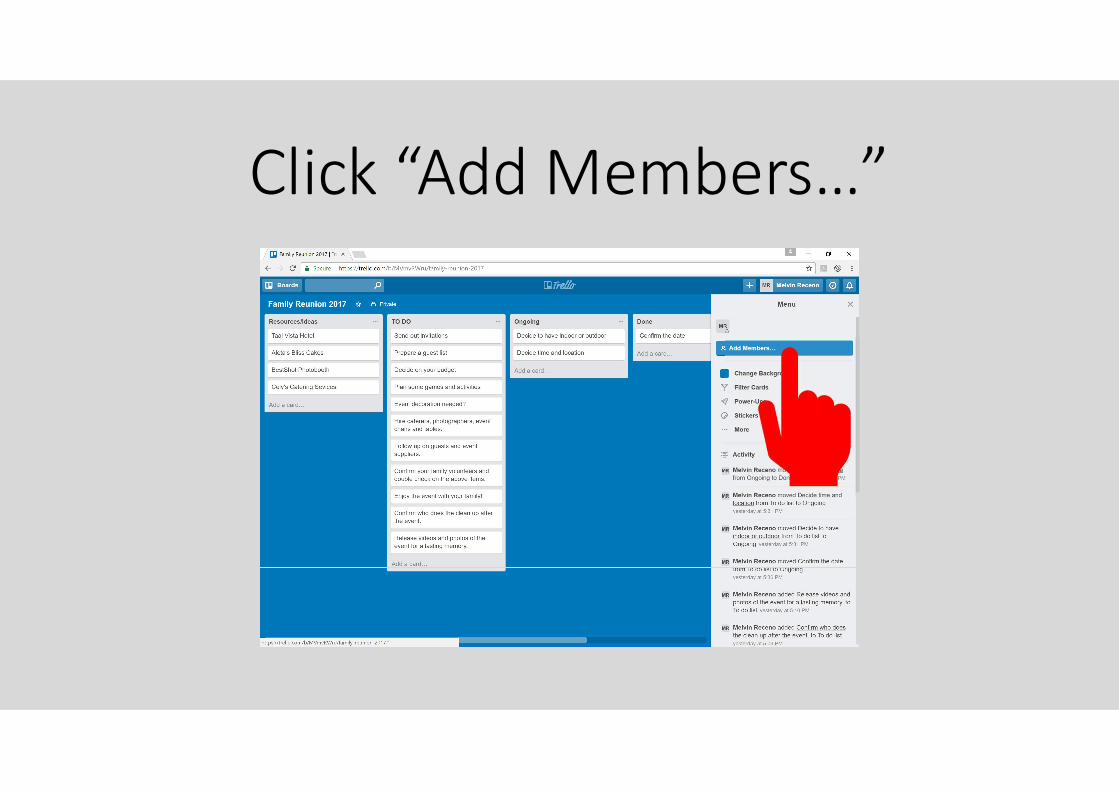
Click “Add Members…”

Members drop down menu is shown.

Click the member name that you wish to add..

Or type their email address and an invite will be sent to them to join Trello.

A new member was added or invited.

We can change a members “permissions”.

By clicking on its avatar. In this case “E”.

A drop down menu is shown.

Click on “Change permissions”…

Types of permissions are shown.

You can give “Admin” permission to a member by clicking, so he/she…

Can help you manage the project when you are away.
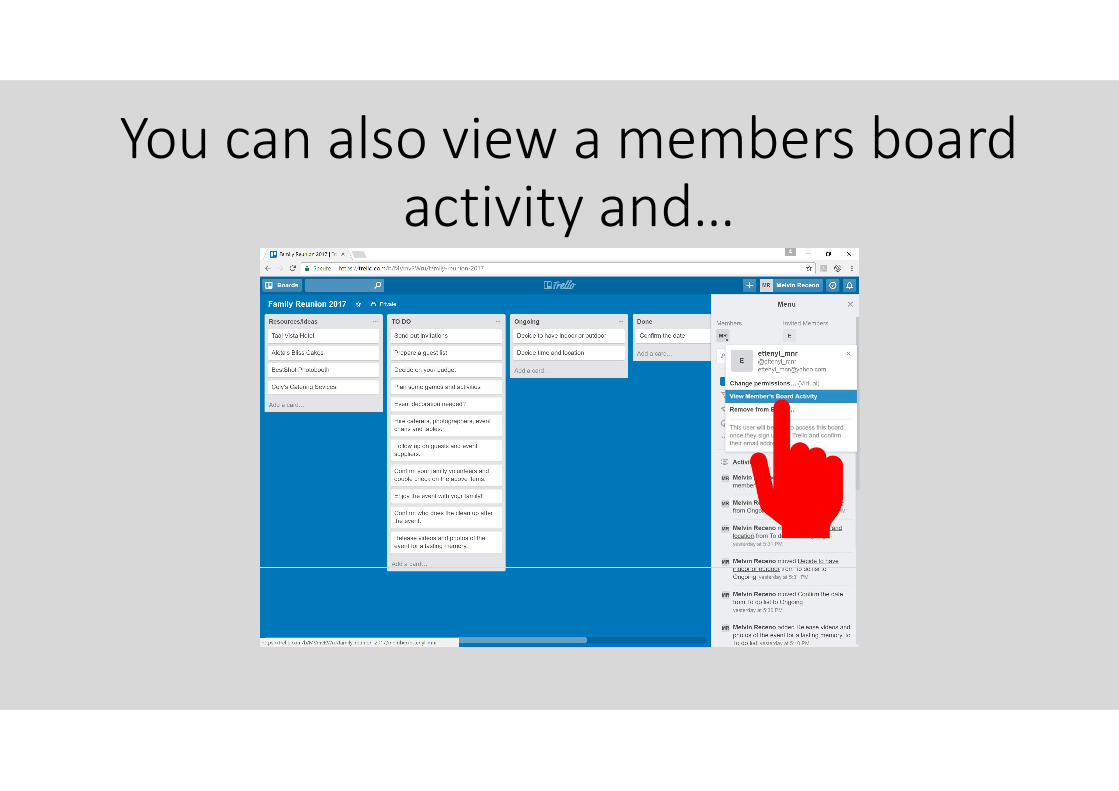
You can also view a members board activity and…

Remove a member from the board.

To assign a member to a task or card …

You can drag their avatar to a card…

Their avatar is then shown on the card.

You can assign a member to different cards…

You can also assign yourself the same way…

Another way to assign yourself a card…

Is by hovering your cursor over the card and pressing your spacebar…

Your avatar is added to the card.Try it!

You can also add members by clicking on a card.
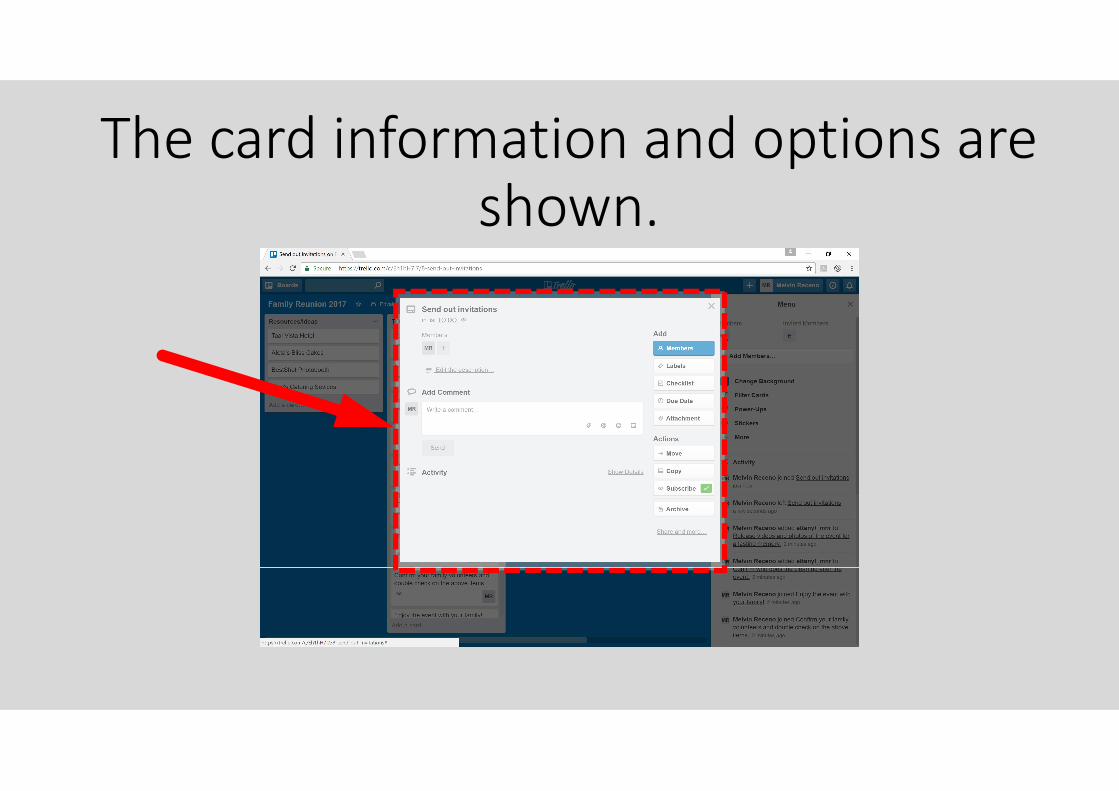
The card information and options are shown.

Click “Members”...

And the member list is shown.
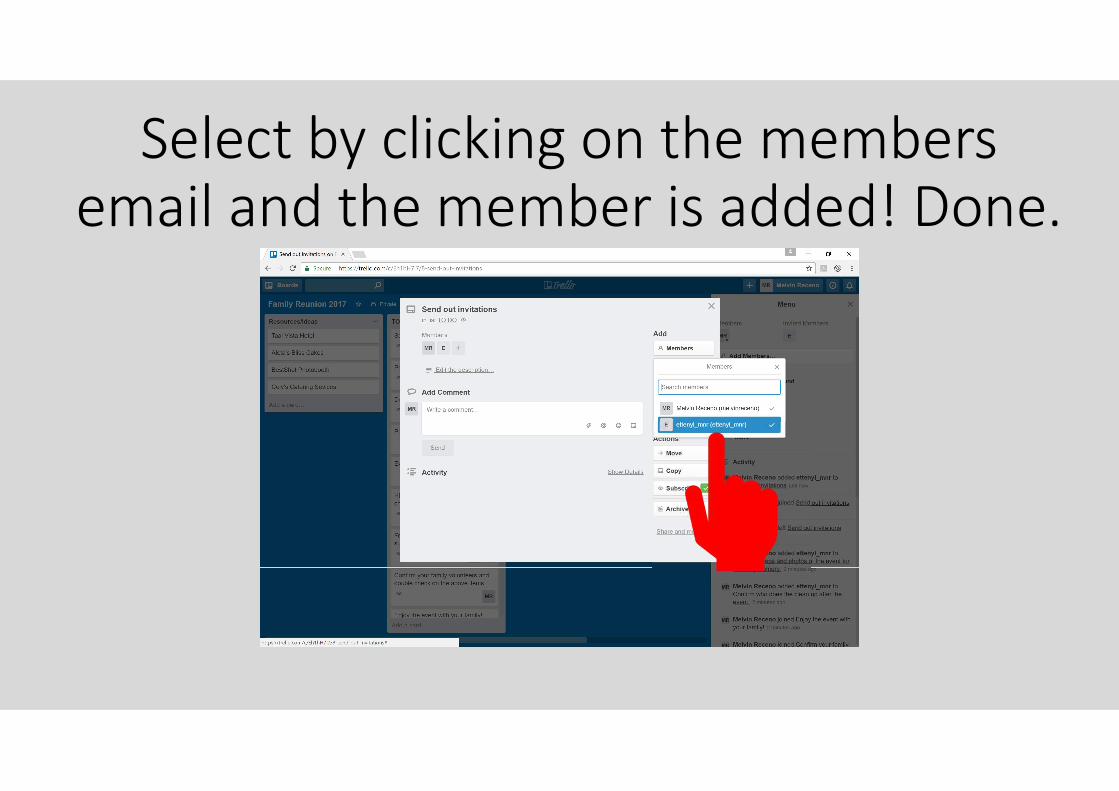
Select by clicking on the members email and the member is added! Done.

When you drag a card with many members…

All the members are notified that it has been moved!

What else is in a card?

Now lets checkout what types of information a card can contain.

Remember the information in the card is shown by clicking on the card…

We can add a description by clicking on “Edit the description”.

Type in the description in the box.

And then click “Save”.

The description is then added in the card. “Use an invitation card”.

We can add a checklist by clicking on the checklist button.

The checklist box is shown.

Type in the checklist item,“Canva Card”…

Then click “Add”.

The checklist item is then shown in the card.

We can add more checklist items as we like.

Just click “Add” after typing each item.

The checklist items are shown with tick boxes.

Once you have done an item you can tick the box and its progress is shown.

When all the items are ticked the progress indicator turns green.

We can add a due date by clicking the “Due Date” button.

A calendar is shown.

You can select the due date by clicking on your desired date. Try“28”.

And then click “Save”
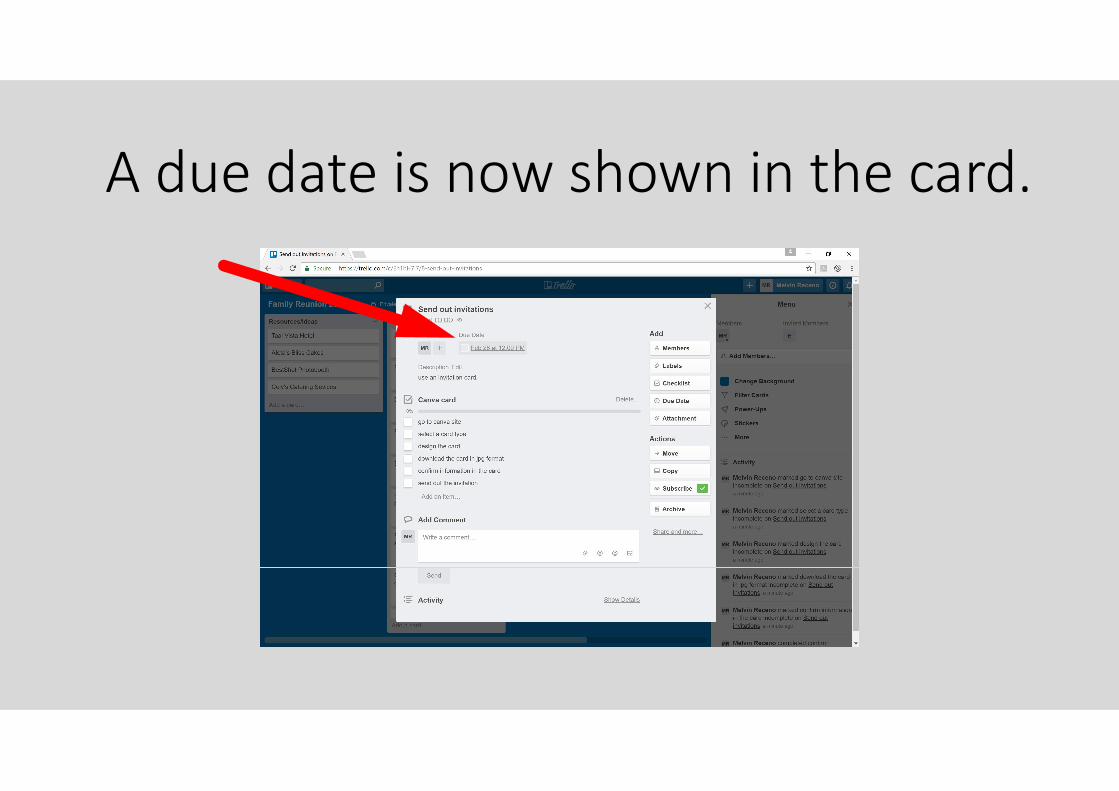
A due date is now shown in the card.

You can change the due date by clicking on the date…

And selecting a new calendar date.

Then click “Save”.

And a new due date is shown in your card.

You can also assign a due date for each card by hovering your pointer/cursor…

On top of the card and then pressing “D” on your keyboard.

The calendar is then shown.

Click on your desired date and click “Save”

A due date is now shown on your “Prepare a guest list” card.

If you put in a due date, Trello will send a notification to all the card members 24hrs before it is
due!

We can add a file in a card by clicking on the “Attachment” button.
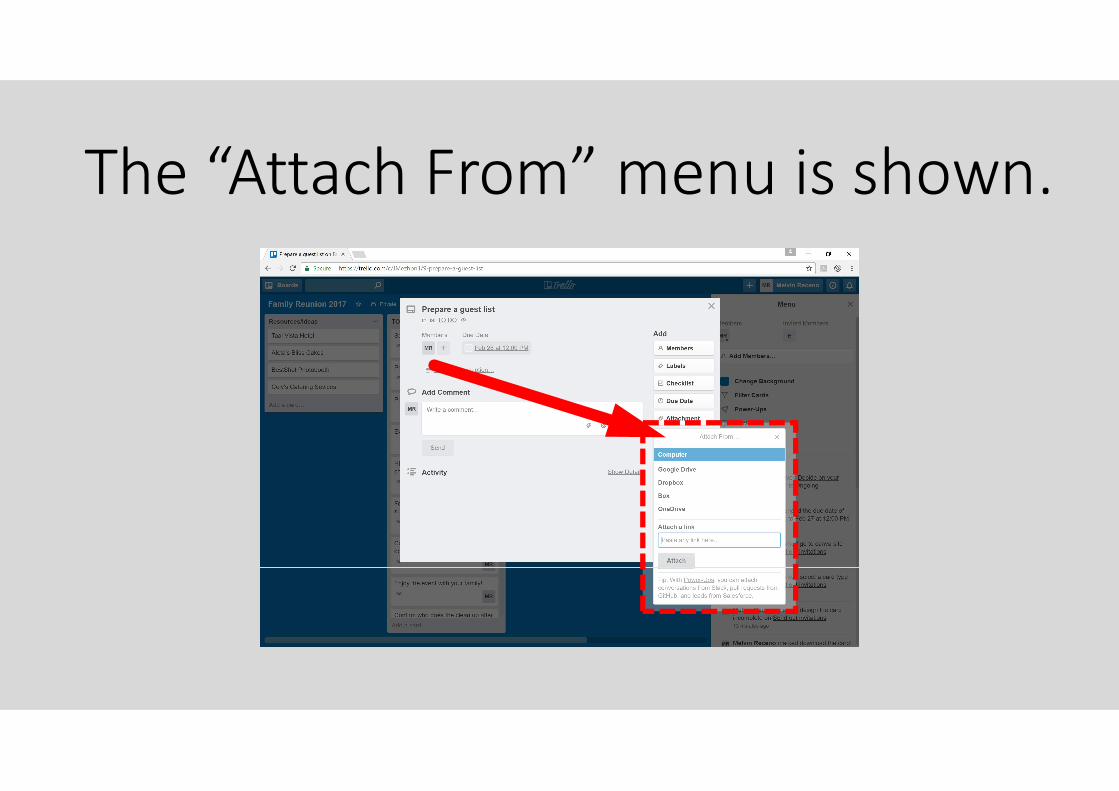
The “Attach From” menu is shown.

Select “Computer” to attach a file from your computer.

Select the file by clicking on it…

Click “Open”.

And the file is uploaded into the card.

You can also add a comment to a card…

If you type “@ + member”, he/ she will be notified of your comment.

Example type: type @ettenyl_mnr…

Add your comment: “Please help me verify if the list is complete”.

Click “Send”.

The “Activity” list records this action and shows that the member is notified.

Another way of attaching a file into your card…

Is by dragging the file directly to the card.

I am dragging a file into the “prepare a guest list” card…
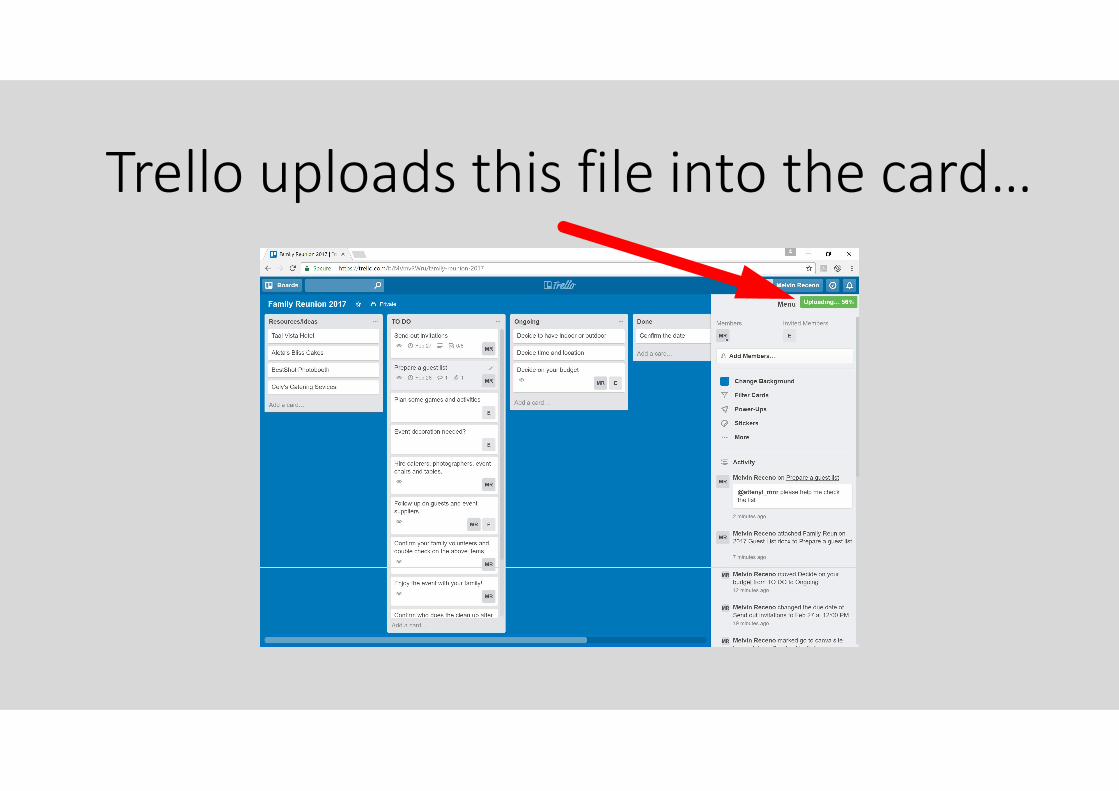
Trello uploads this file into the card…

A “picture” file is now attached on the card.

I’ve added a few more pictures to make it more colorful. Try it!

To add more visual effect let us add some card “Labels”.

Click on the “Label” button.

The label menu is shown.

Click on edit to assign a name to the color label.

Type a label name, “Guests”…

And click “Save”.

The “Guests” label is now updated.

Click on “Guests” and this label is applied to this card.

The card shows the label Guests.

You can name more labels…

And apply them to each card.
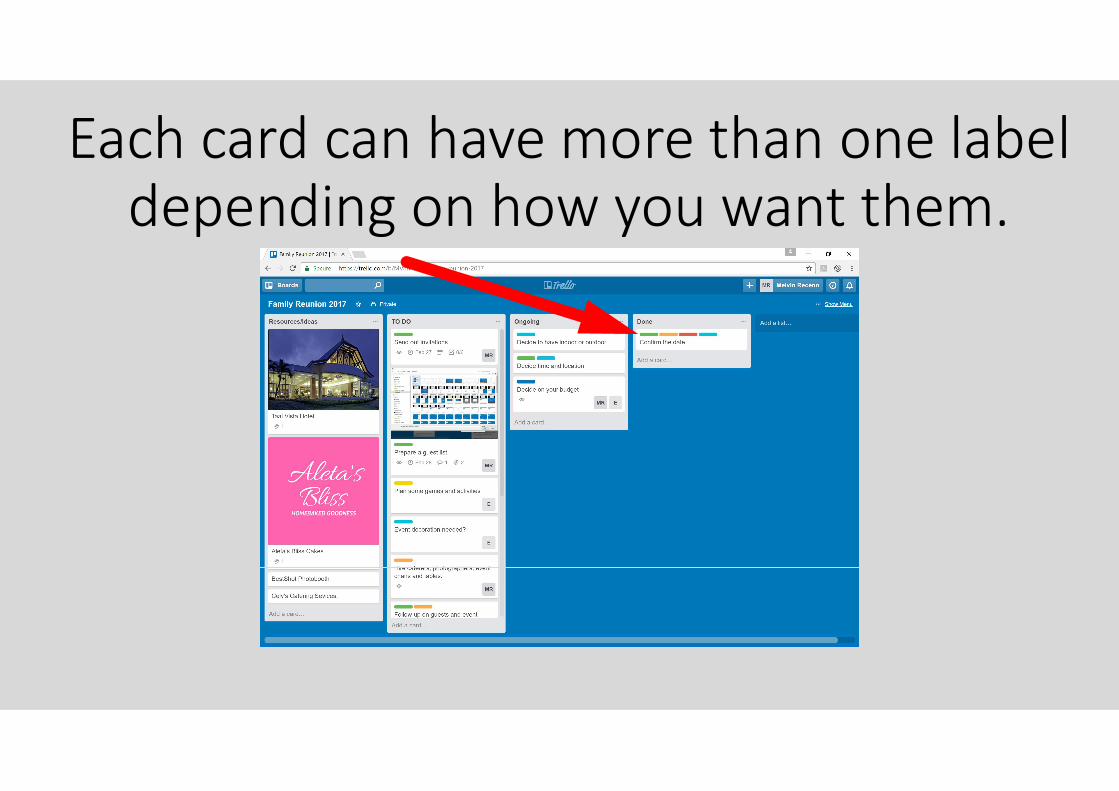
Each card can have more than one label depending on how you want them.

This card shows four labels associated with it.

I guess everyone needs to know when your event will be.

We have migrated from a Kanban board to a Trello board!

Where every member of your team can contribute to a project
wherever they are.

I hope this tutorial has shown you how easy it is to use Trello and how you can unleash your
creativity and make each project a blast!

So Sign Up – It’s Free

www.canva.com