How to Create Multi-Product Ads With Facebook Power Editor
51
FACEBOOK MULTI-PRODUCT ADS HOW TO CREATE WITH POWER EDITOR www.AdomasBaltagalvis.com
-
Upload
adomas-baltagalvis -
Category
Marketing
-
view
1.854 -
download
5
Transcript of How to Create Multi-Product Ads With Facebook Power Editor

FACEBOOK MULTI-PRODUCT ADSHOW TO CREATE
WITH POWER EDITOR
www.AdomasBaltagalvis.com
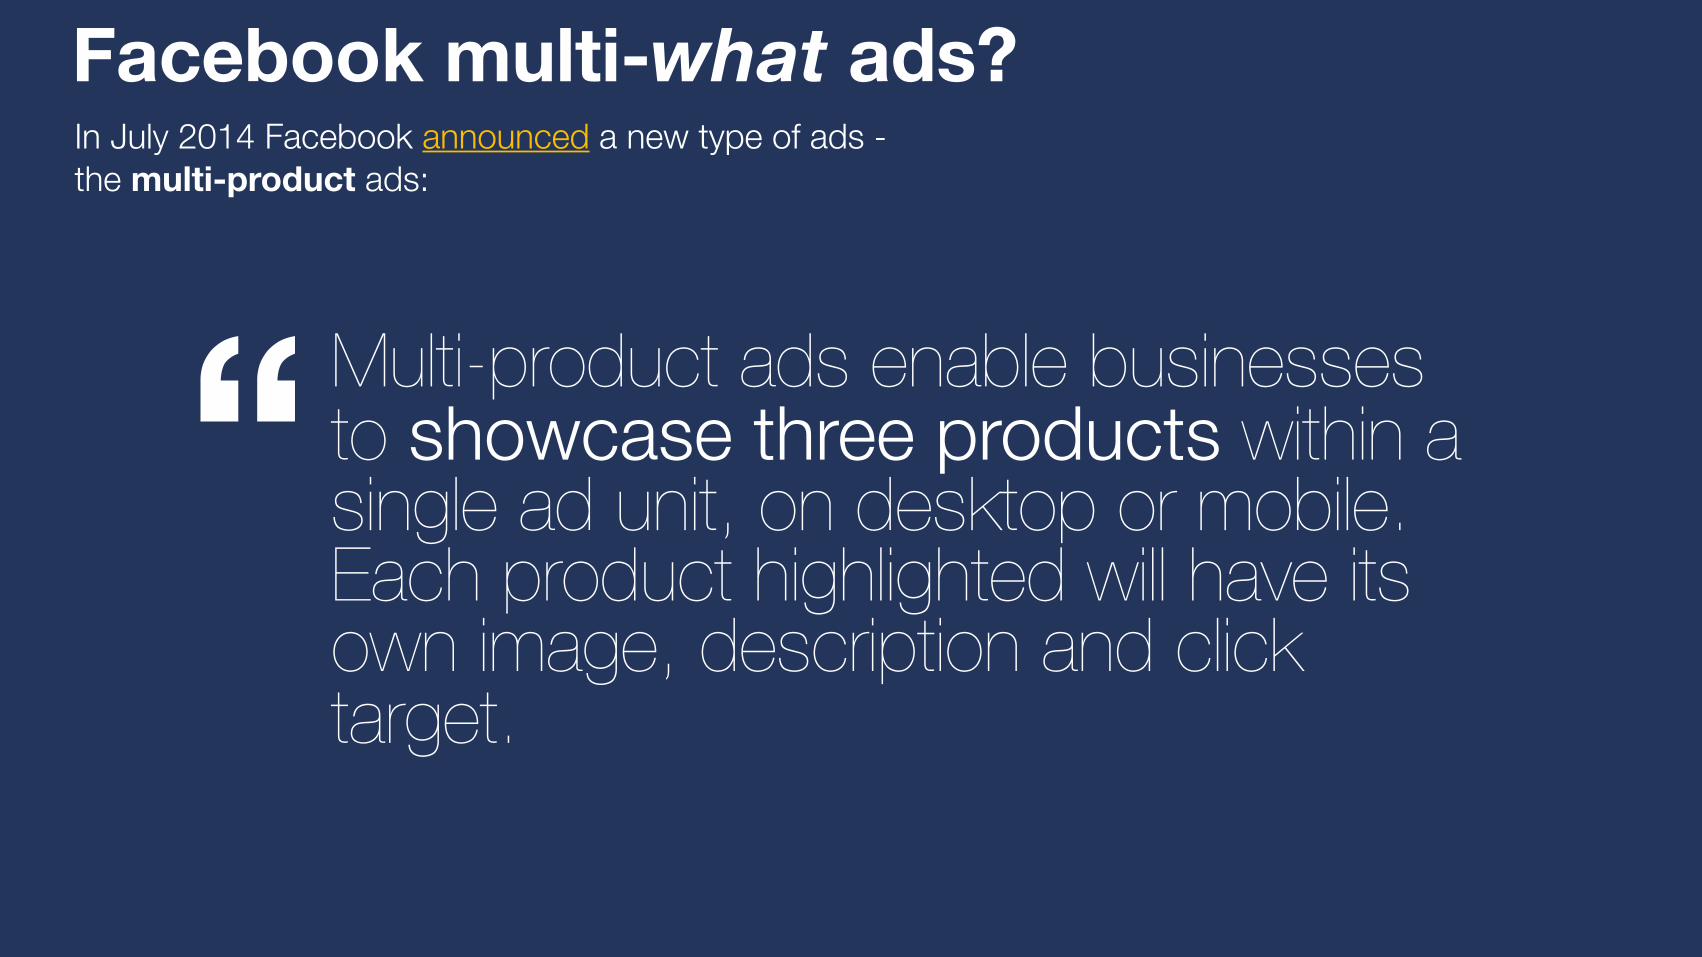
Facebook multi-what ads?In July 2014 Facebook announced a new type of ads - the multi-product ads:
Multi-product ads enable businesses to showcase three products within a single ad unit, on desktop or mobile. Each product highlighted will have its own image, description and click target.
“

Example of multi-product ad:
Text
Image
Headline
LinkDescription
Desktop News Feed:

Example of multi-product ad:
Text
Image
Headline
LinkDescription
Desktop News Feed: Mobile News Feed:

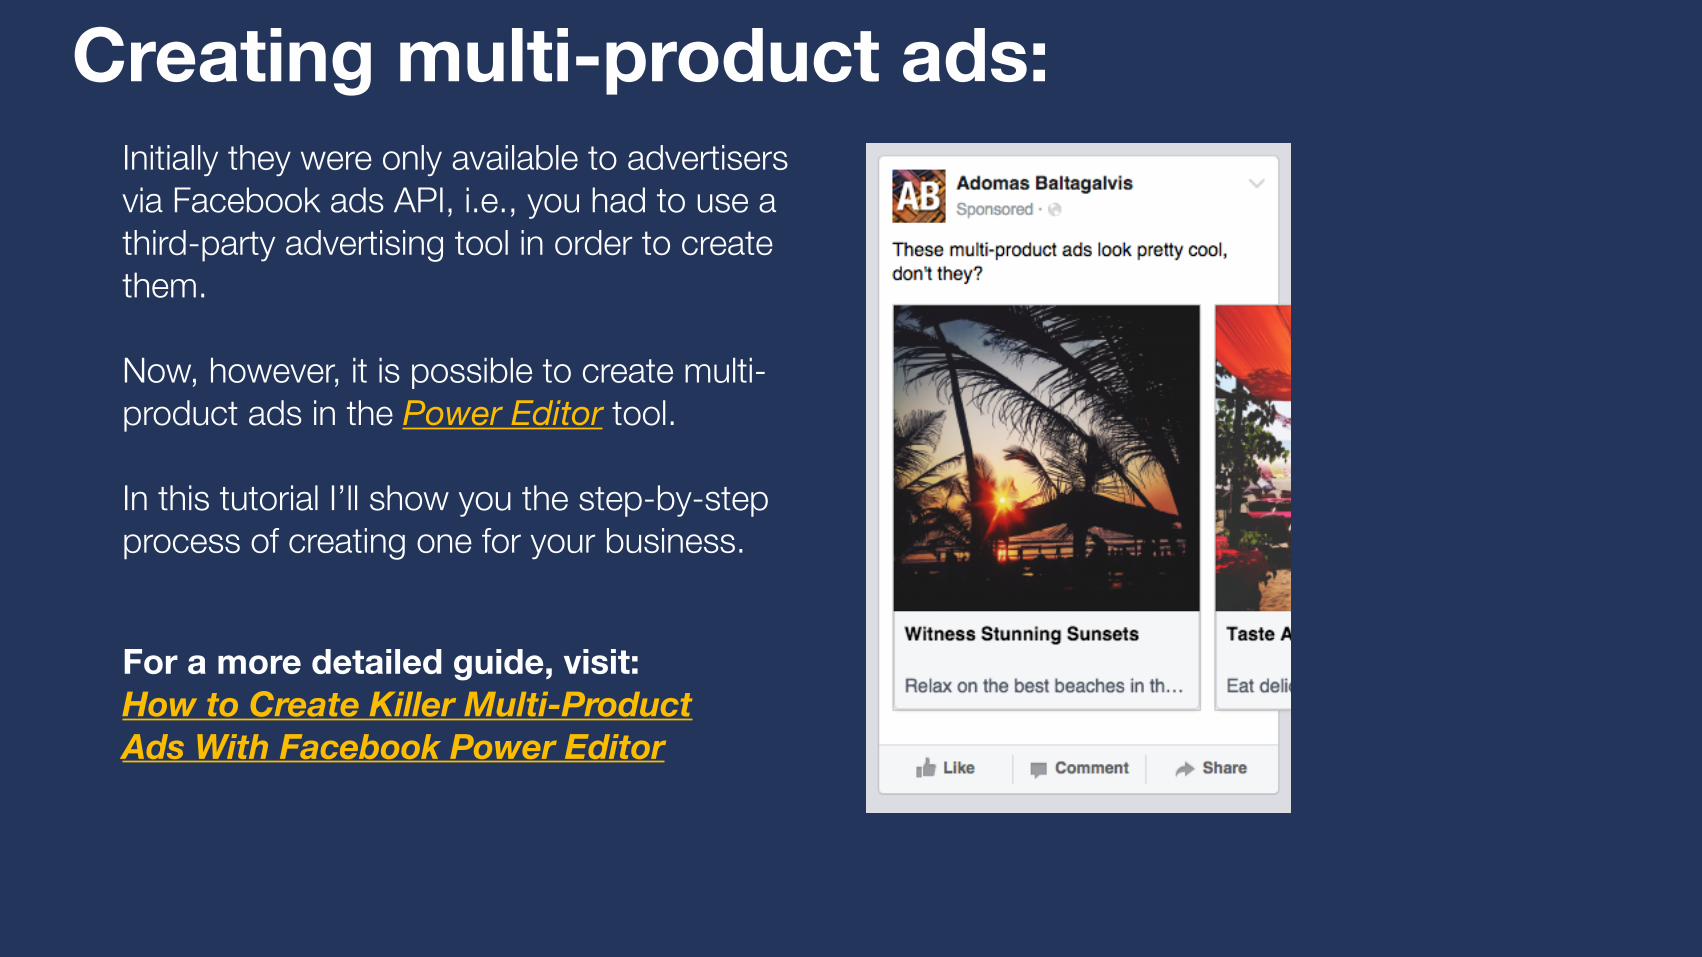
Initially they were only available to advertisers via Facebook ads API, i.e., you had to use a third-party advertising tool in order to create them.
Now, however, it is possible to create multi-product ads in the Power Editor tool.
In this tutorial I’ll show you the step-by-step process of creating one for your business.
Creating multi-product ads:
For a more detailed guide, visit: How to Create Killer Multi-Product Ads With Facebook Power Editor

POWER EDITOR

Open Power EditorVisit https://www.facebook.com/ads/manage/powereditor/ to open Power Editor (only works on Google Chrome browser).

1. Click Download to Power Editor
Download to Power Editor

1. Click Download to Power Editor
2. Select your Ad Account and click Download
Download to Power Editor

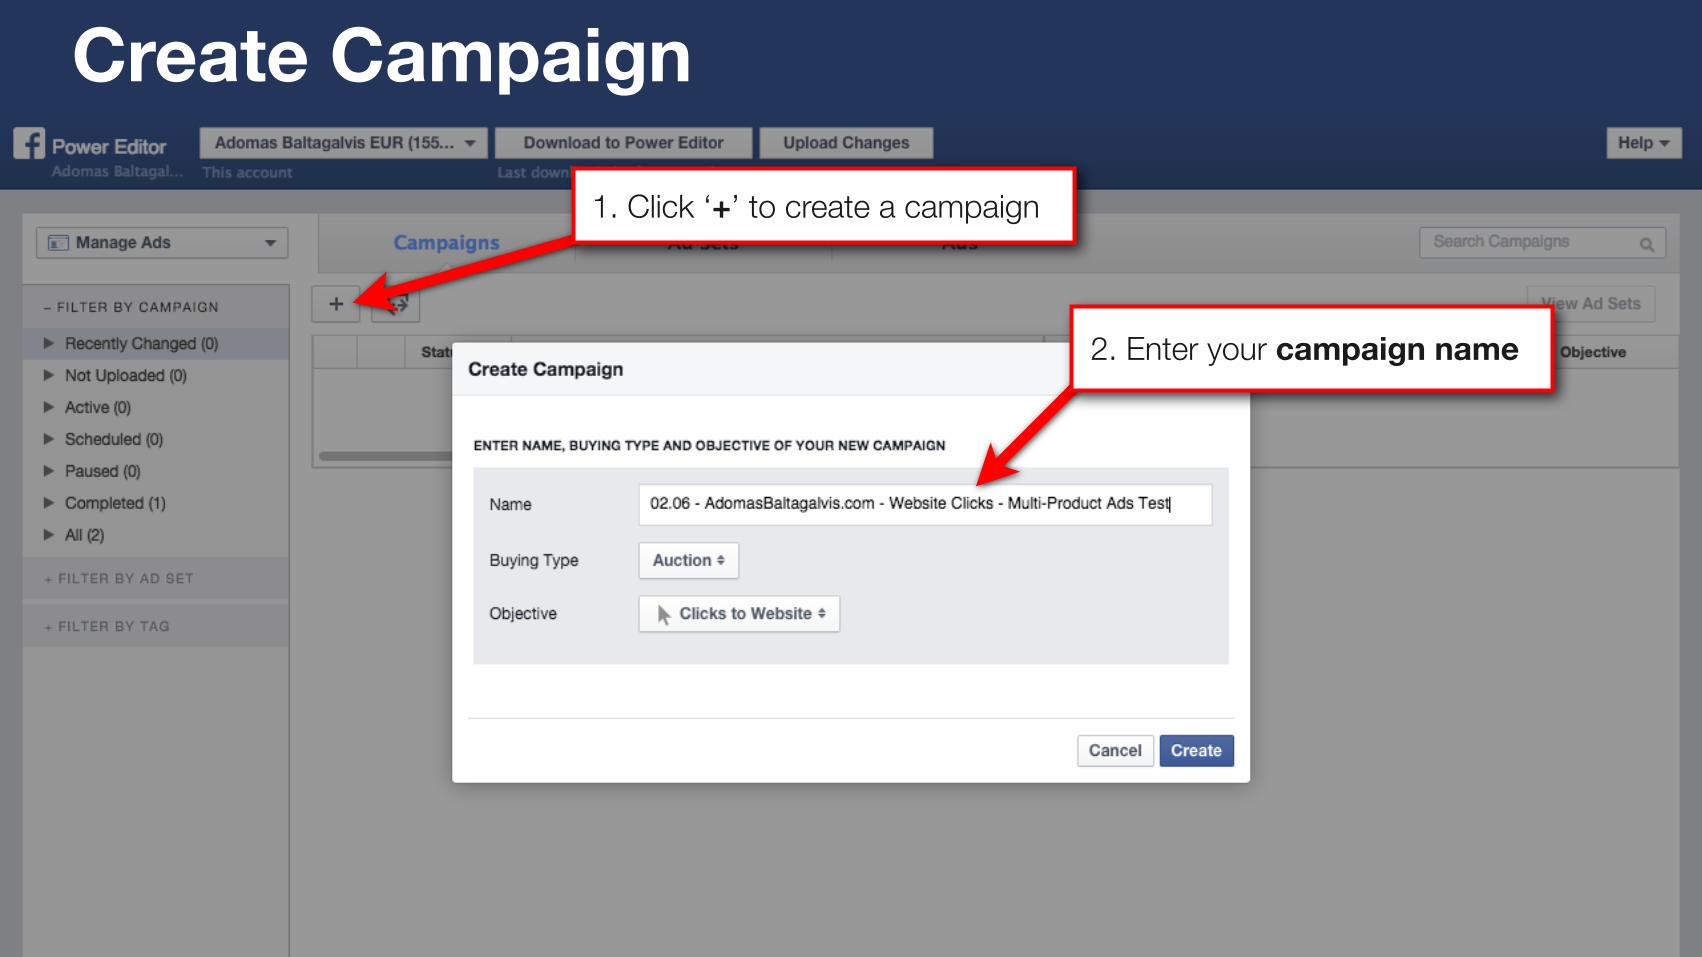
CAMPAIGNS

1. Click ‘+’ to create a campaign
Create Campaign
1. Click ‘+’ to create a campaign
2. Enter your campaign name
Create Campaign

1. Click ‘+’ to create a campaign
2. Enter your campaign name
3. Choose Clicks to Website or Website Conversions objective, hit Create and move to the Ad Sets tab
Create Campaign
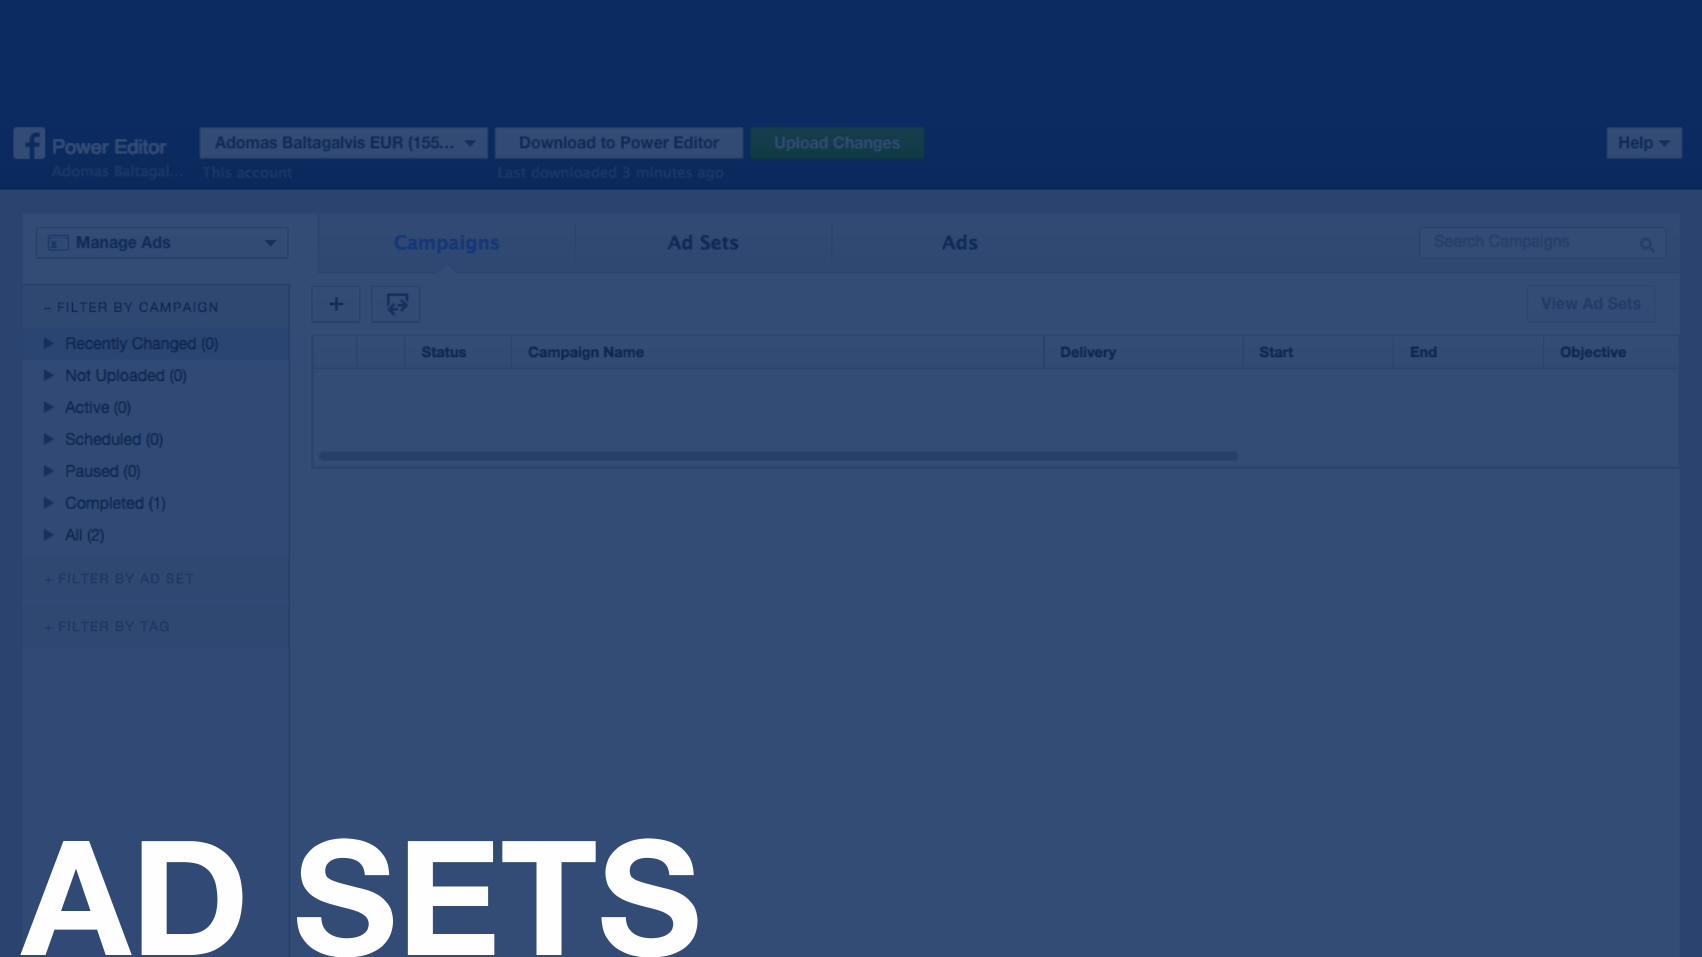
AD SETS
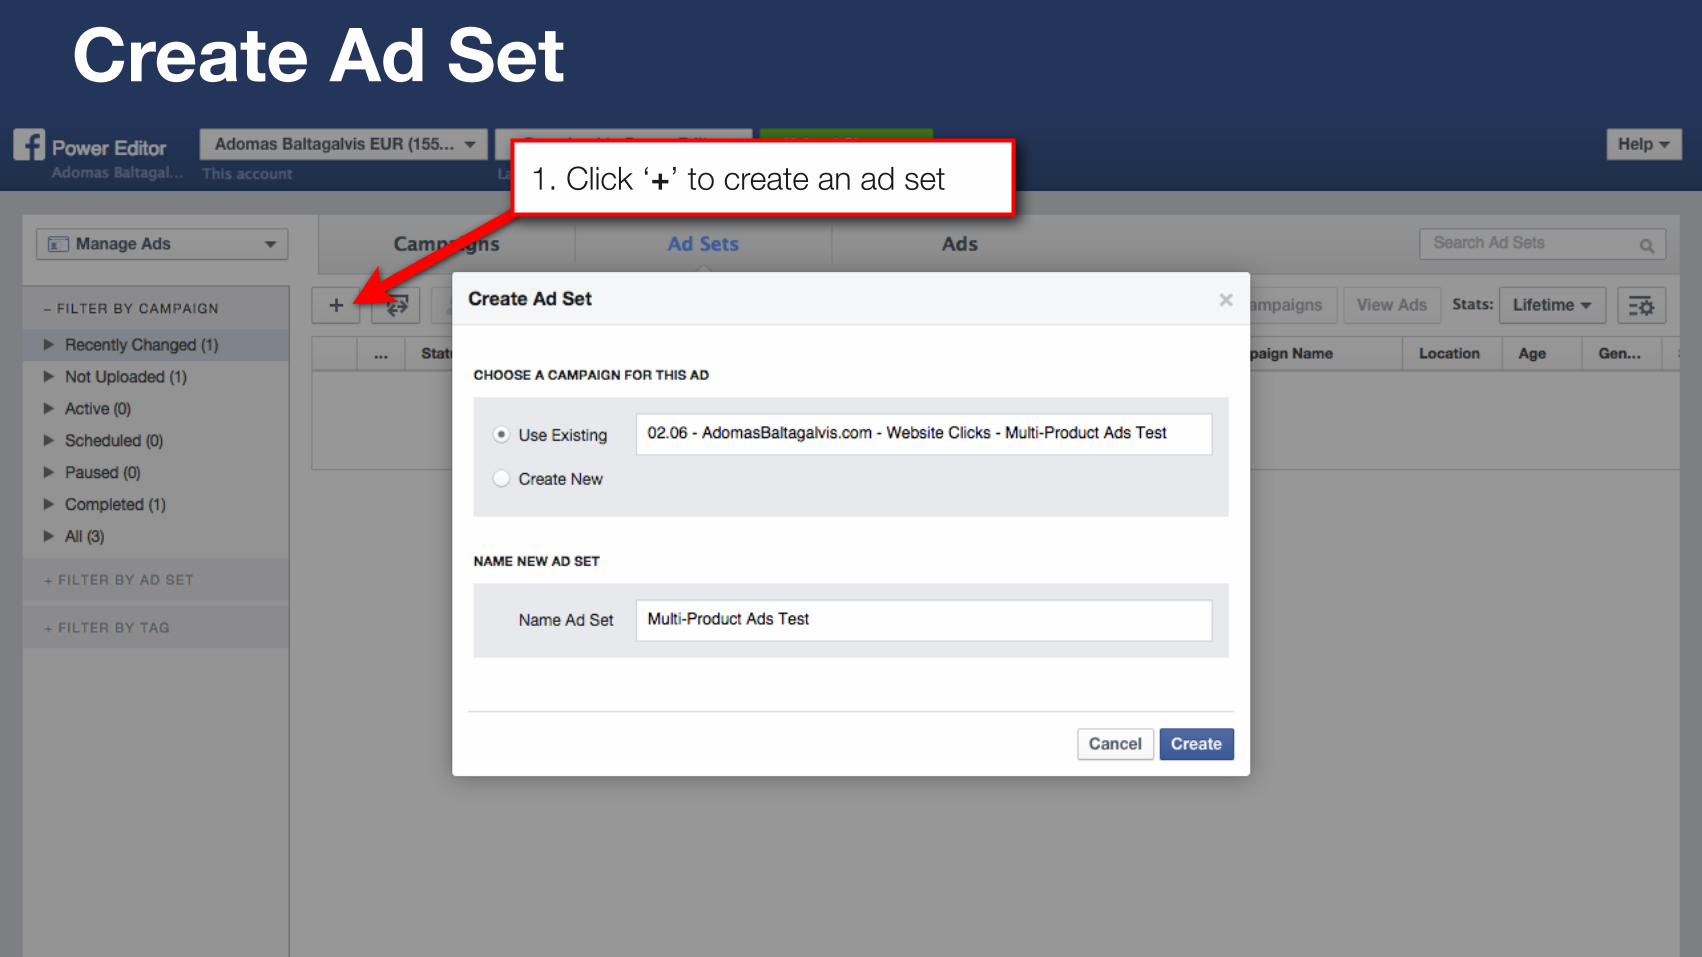
1. Click ‘+’ to create an ad set
Create Ad Set

1. Click ‘+’ to create an ad set
2. Enter your ad set name and click Create
Create Ad Set
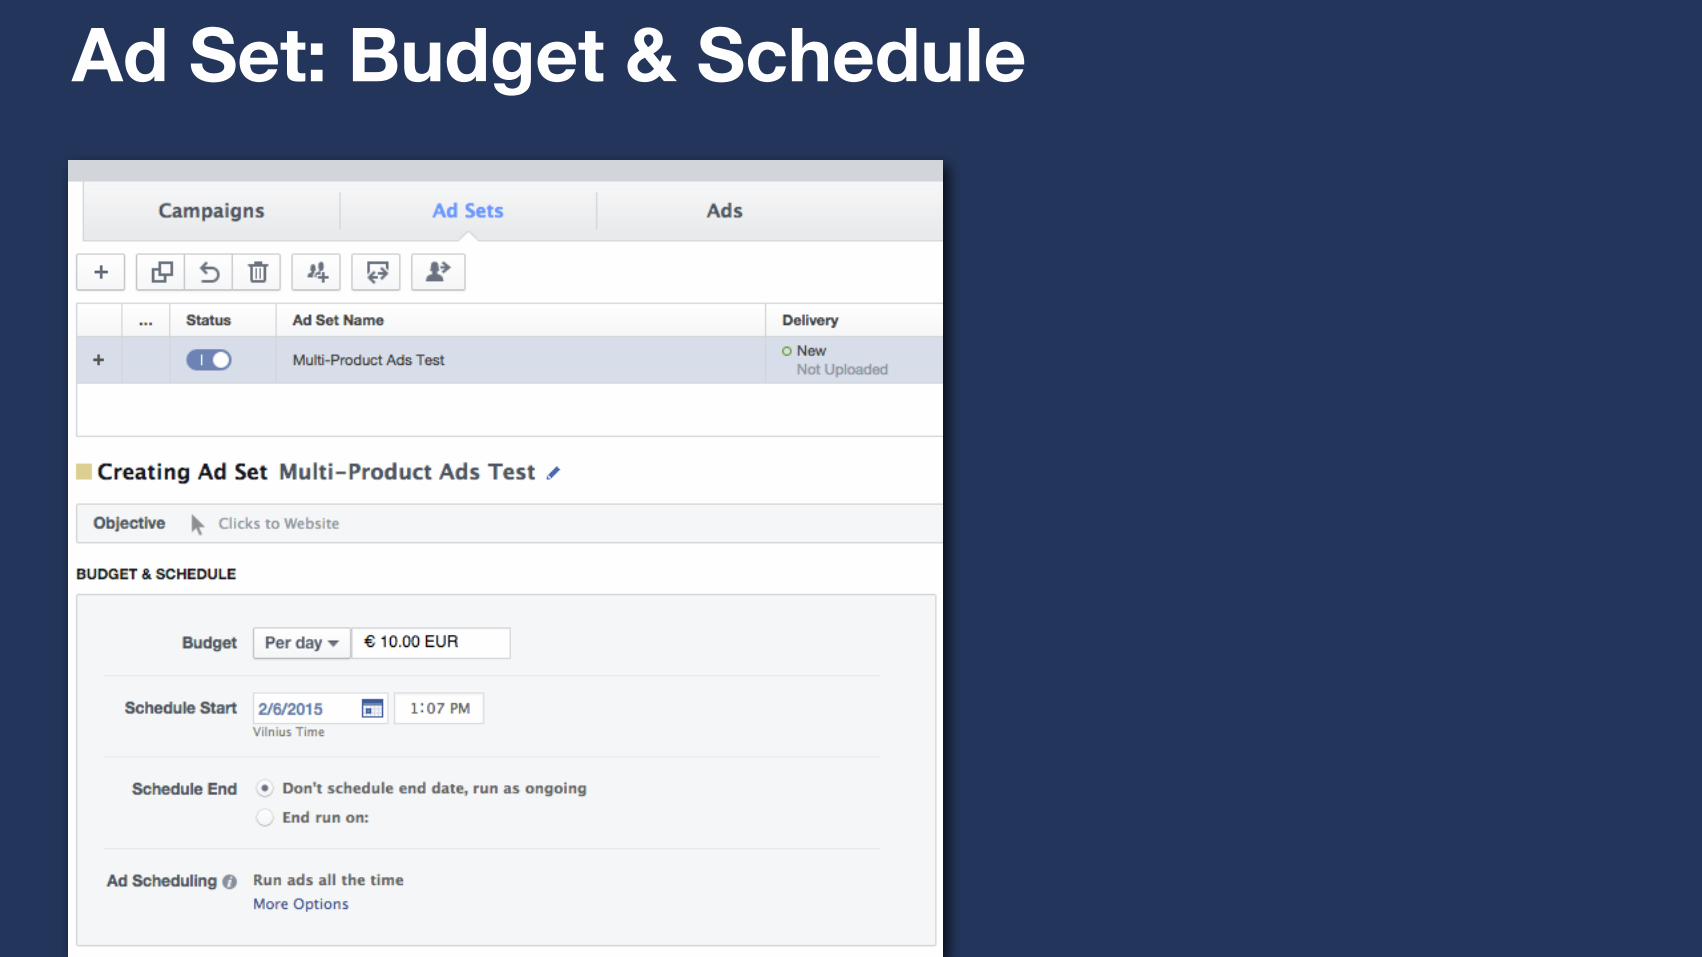
Ad Set: Budget & Schedule

1. Specify the budget (Per day or Lifetime)
Ad Set: Budget & Schedule

1. Specify the budget (Per day or Lifetime)
2. Set the schedule for the ad set: you can set a start and an end date, or leave it to run as ongoing
Ad Set: Budget & Schedule

1. Specify the budget (Per day or Lifetime)
2. Set the schedule for the ad set: you can set a start and an end date, or leave it to run as ongoing
3. Optional: you can set specific hours and days of the week for the ads to be active on with Ad Scheduling
Ad Set: Budget & Schedule

1. Click Edit Audience to choose your target audience
Ad Set: Audience

1. Click Edit Audience to choose your target audience
2. Specify all the targeting details in the new window that appears
Ad Set: Audience

1. Select the placement(s) where you want your ads to appear: Mobile News Feed, Desktop News Feed, Desktop Right Column and/or Partner Mobile Apps*.
*You can only choose Partner Mobile Apps together with the Mobile News Feed placement.
Ad Set: Placement

1. Choose your bidding type.
The default option is the so-called Optimized Cost Per Impression (oCPM) - Facebook would optimize your ads based on the objective you chose at the beginning.
You would be charged for impressions (how many times the ad was displayed).
Ad Set: Optimization & Pricing

You can choose CPC or CPM bidding type from the drop-down list.
Ad Set: Optimization & Pricing

ADS

1. Click ‘+’ do create an ad
Create Ad

1. Click ‘+’ do create an ad
2. Enter your ad name and click Create
Create Ad

1. Choose your Facebook page
Create Ad
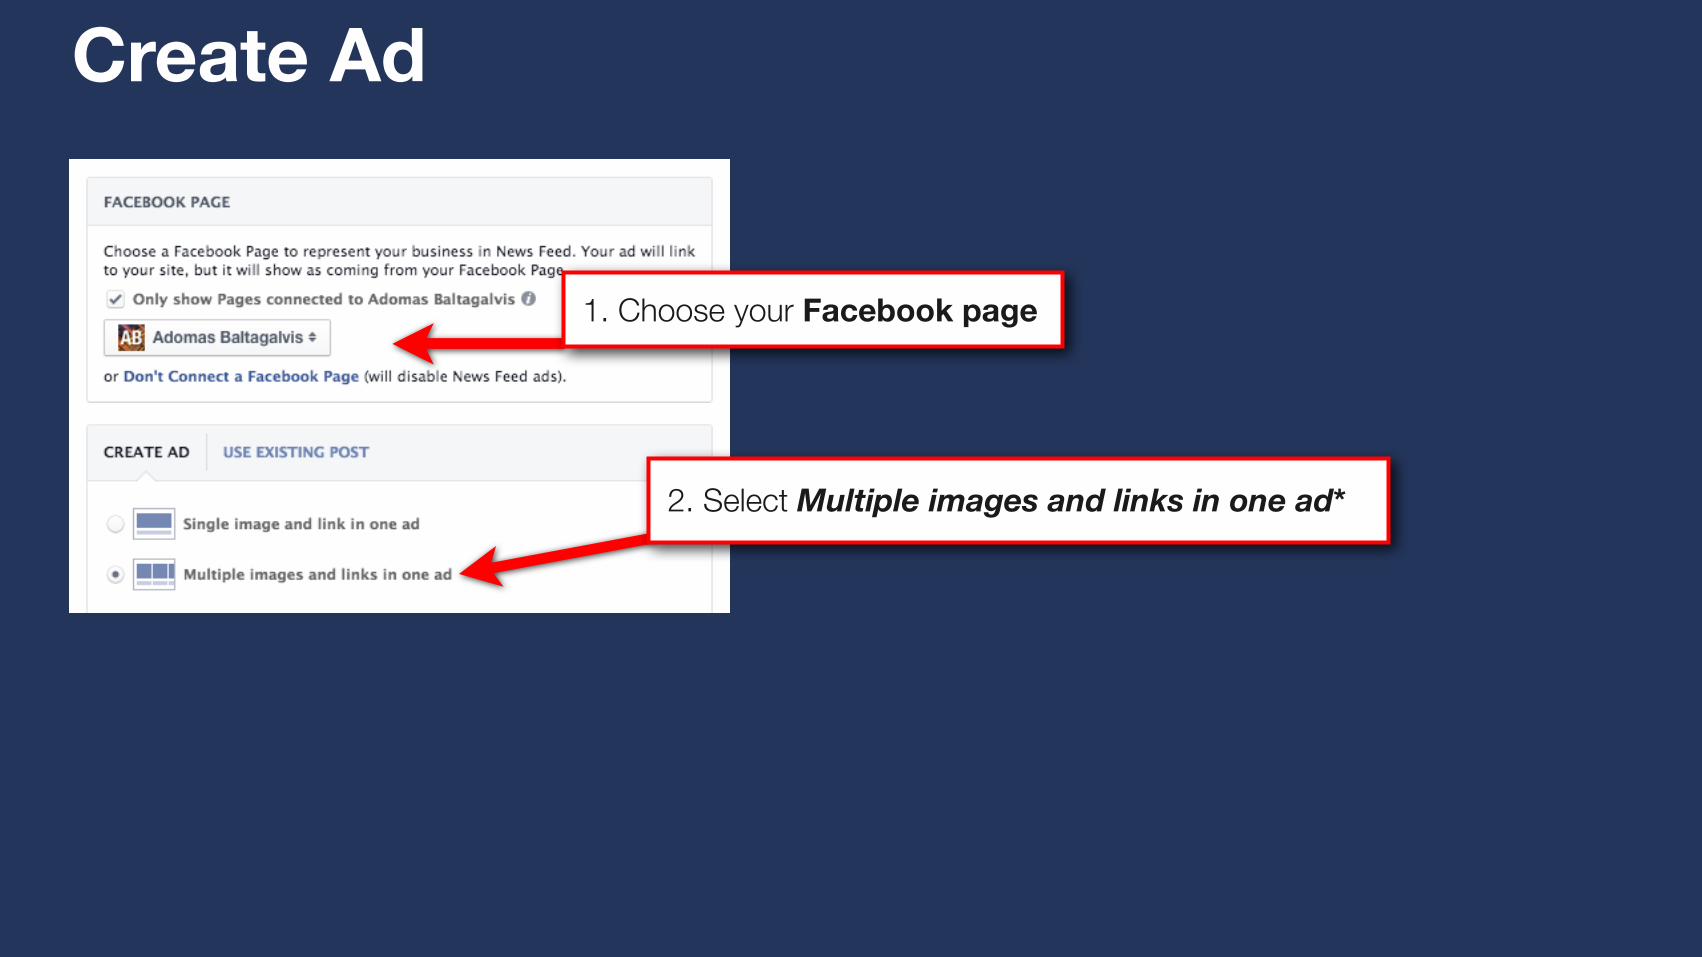
2. Select Multiple images and links in one ad*
1. Choose your Facebook page
Create Ad

2. Select Multiple images and links in one ad*
1. Choose your Facebook page
Create Ad
* If you don’t see it there, multi-product ads might not be available to you yet - feel free to get in touch for any help.

Create Ad
1. Enter the post text

Create Ad
2. Enter the destination URL
1. Enter the post text

Create Ad
2. Enter the destination URL
3. Enter the headline and link description (optional)
1. Enter the post text

Create Ad
2. Enter the destination URL
3. Enter the headline and link description (optional)
4. Choose an image (optional), recommended size: 600x600px. Facebook will automatically load an image from the URL otherwise.
1. Enter the post text
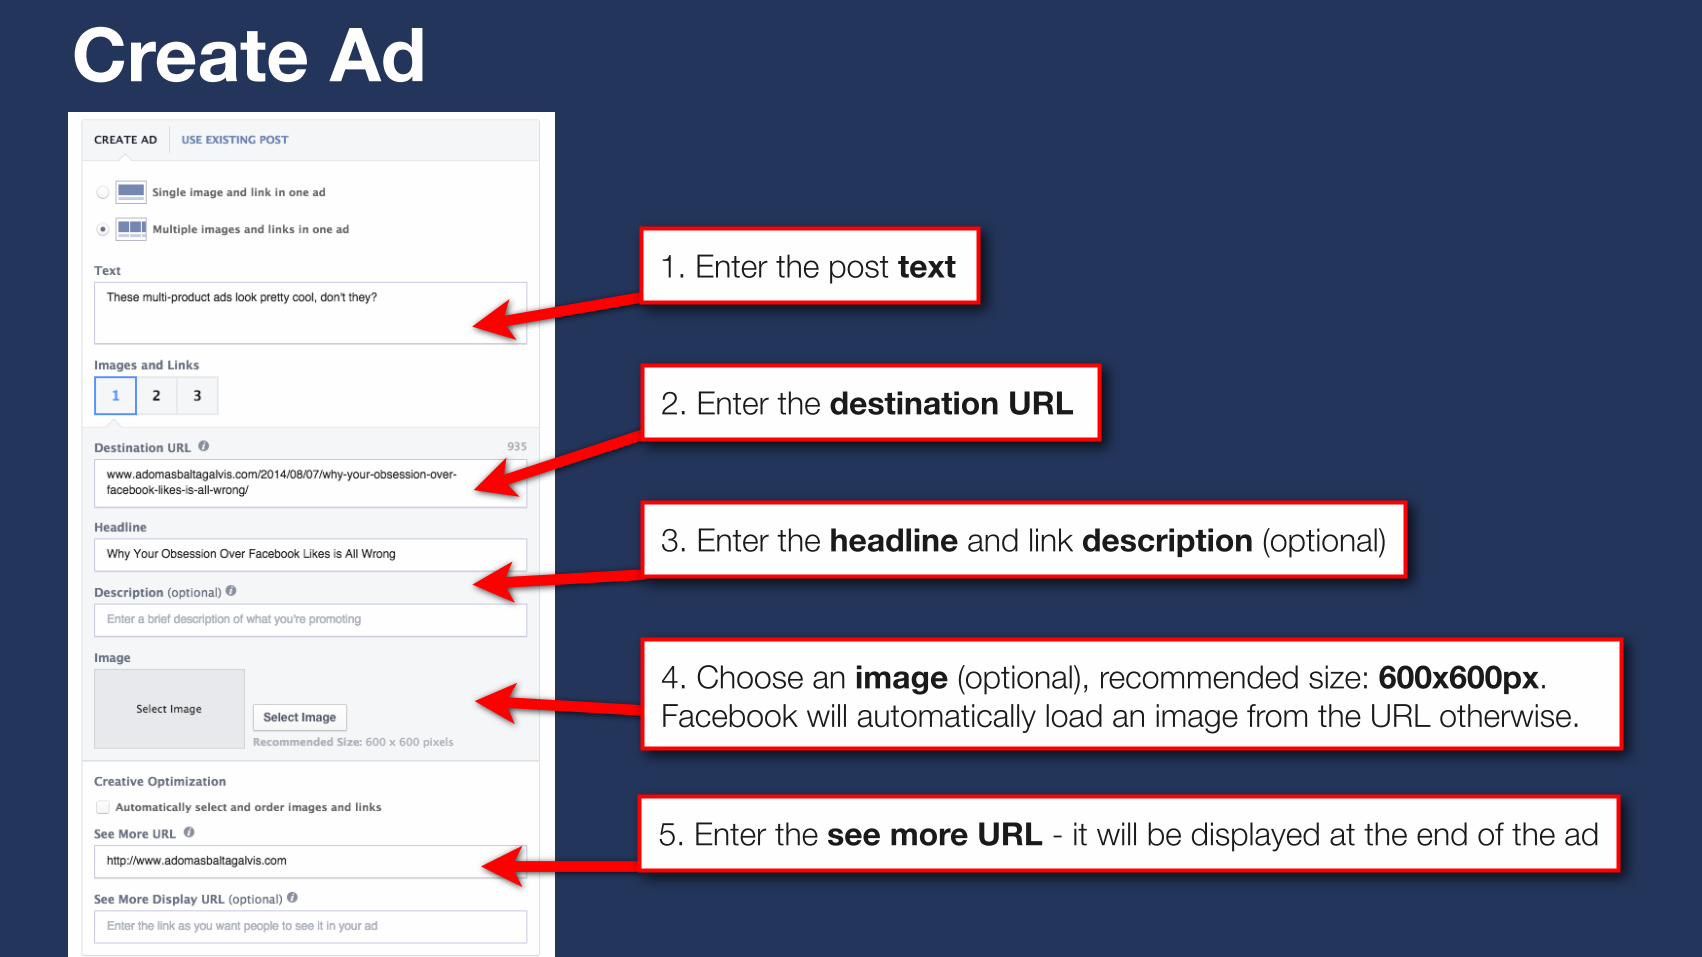
Create Ad
2. Enter the destination URL
3. Enter the headline and link description (optional)
4. Choose an image (optional), recommended size: 600x600px. Facebook will automatically load an image from the URL otherwise.
5. Enter the see more URL - it will be displayed at the end of the ad
1. Enter the post text
6. Move to 2nd and 3rd links, repeat

Tracking (optional)1. Enter URL Tags (e.g. UTM parameters) for additional tracking precision

Tracking (optional)
2. Select an existing Conversion Pixel or create a new one (it has to be added to a conversion page, such as /thanks)
1. Enter URL Tags (e.g. UTM parameters) for additional tracking precision

Example #1:

Example #1:
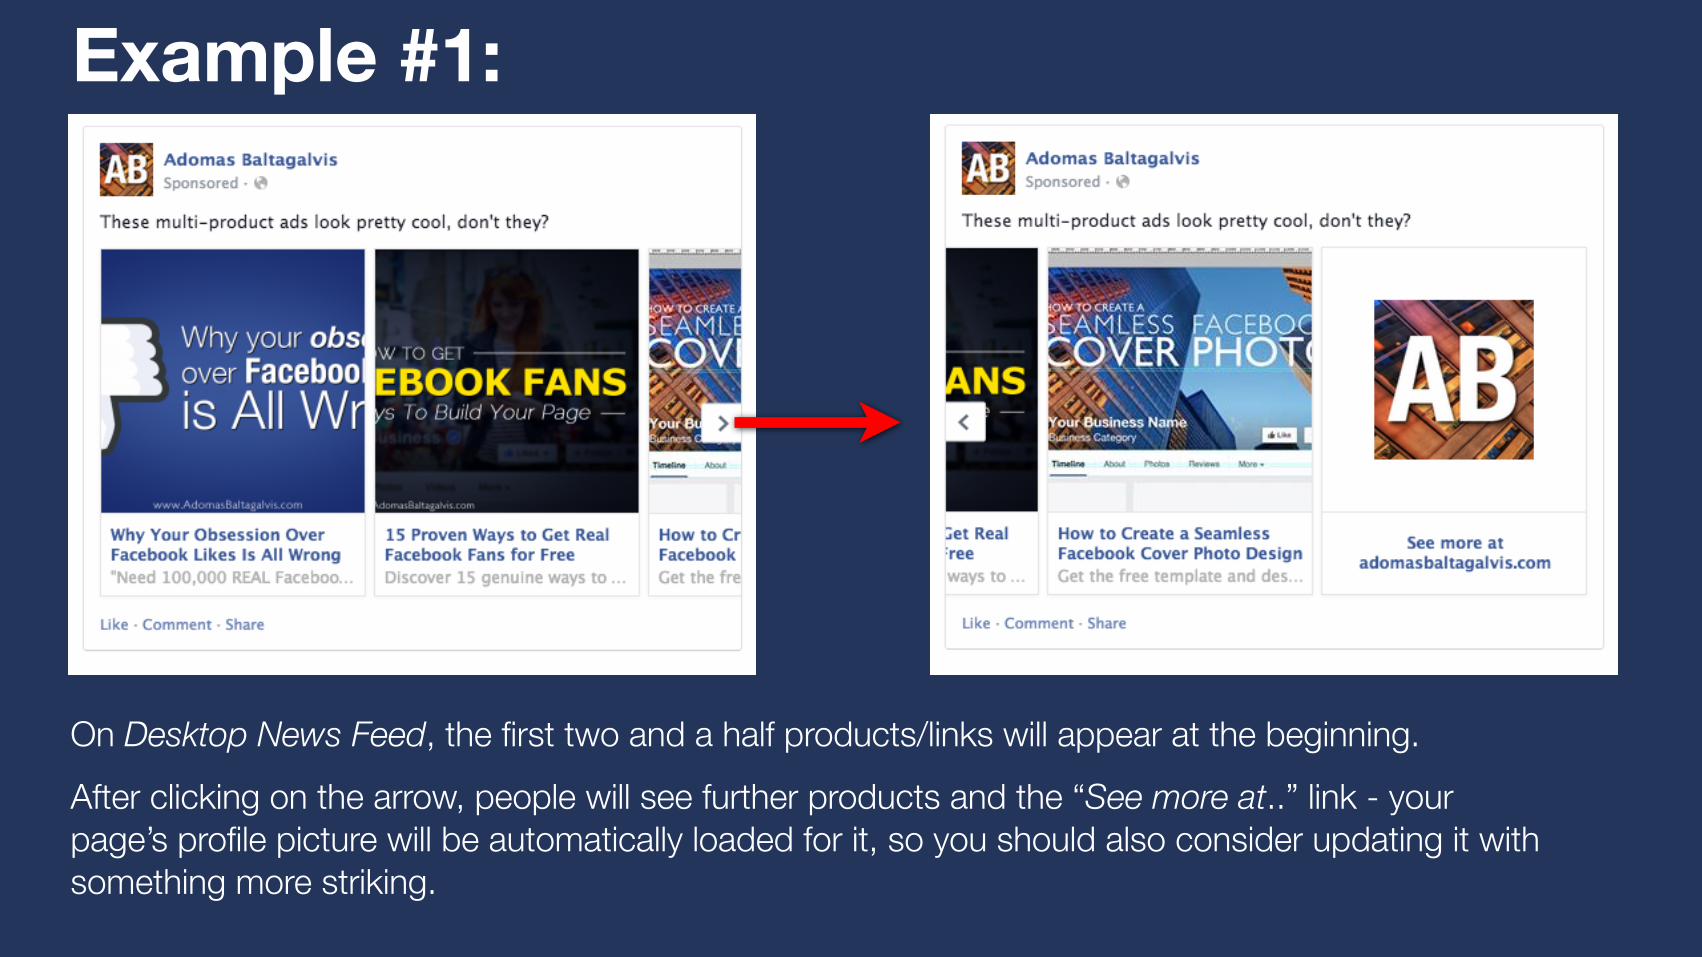
Example #1:
On Desktop News Feed, the first two and a half products/links will appear at the beginning. After clicking on the arrow, people will see further products and the “See more at..” link - your page’s profile picture will be automatically loaded for it, so you should also consider updating it with something more striking.
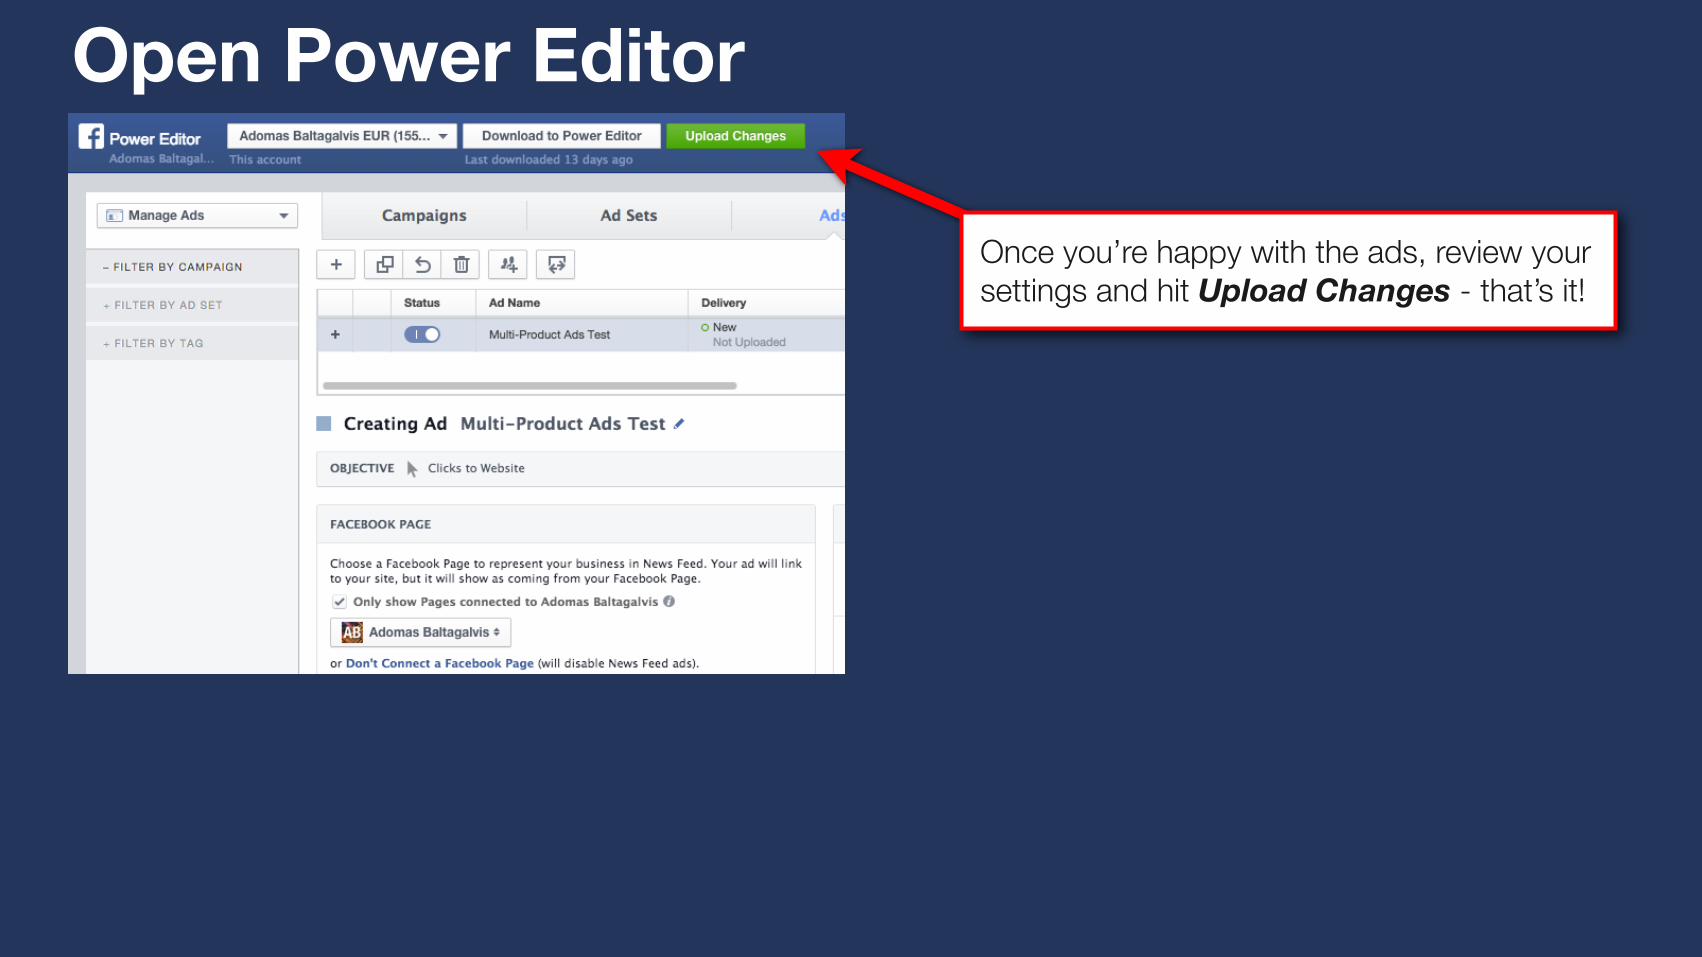
Open Power Editor
Once you’re happy with the ads, review your settings and hit Upload Changes - that’s it!

As you can see, the ads will look much better if you select squared images that are at least 600x600px in dimensions.
Example #2: Desktop News Feed

Example #2: Mobile News Feed
On mobile devices the user will have to swipe left to see further links. Again, squared images look much better than those that were automatically loaded from the pages.

BEYOND

20% Text Rule:
Sadly, the ad in this example will not be approved - the images contain more than 20% of text, which is against Facebook advertising rules. That might be a problem with a lot of automatically populated images, so you will need to select new images for your ads to be approved.

Creative Examples #1:Use multi-product ads to showcase products from the same category to get more ad engagement:

Creative Examples #2:Show the actual benefits of using your products of services with sequential storytelling:

THE END
That’s it! I hope you found this tutorial useful.If you have any questions or comments, feel free
to let me know!
You can find me at:• www.AdomasBaltagalvis.com • @adomasb •
Cheers,A.B.