Frequently Asked Questions - Andrea Miniatures 039I TEXTOS ESP.pdf · for constructing & painting...
43
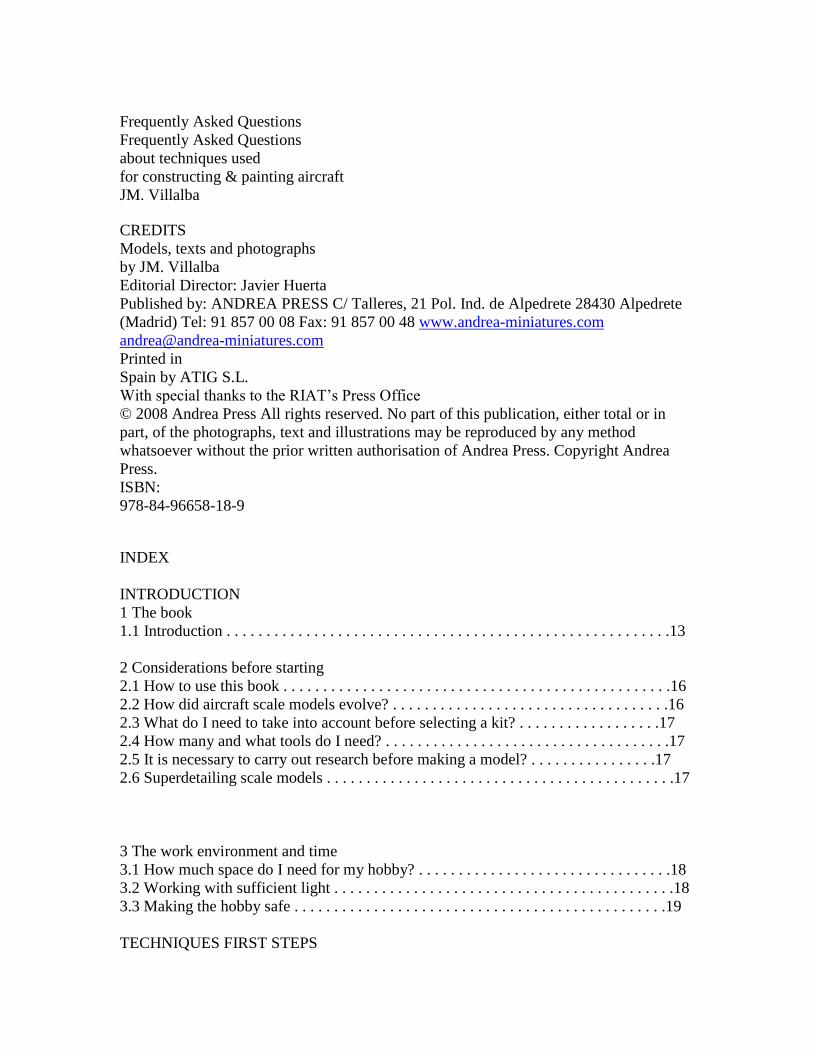
Frequently Asked Questions Frequently Asked Questions about techniques used for constructing & painting aircraft JM. Villalba CREDITS Models, texts and photographs by JM. Villalba Editorial Director: Javier Huerta Published by: ANDREA PRESS C/ Talleres, 21 Pol. Ind. de Alpedrete 28430 Alpedrete (Madrid) Tel: 91 857 00 08 Fax: 91 857 00 48 www.andrea-miniatures.com [email protected] Printed in Spain by ATIG S.L. With special thanks to the RIAT’s Press Office © 2008 Andrea Press All rights reserved. No part of this publication, either total or in part, of the photographs, text and illustrations may be reproduced by any method whatsoever without the prior written authorisation of Andrea Press. Copyright Andrea Press. ISBN: 978-84-96658-18-9 INDEX INTRODUCTION 1 The book 1.1 Introduction . . . . . . . . . . . . . . . . . . . . . . . . . . . . . . . . . . . . . . . . . . . . . . . . . . . . . . . .13 2 Considerations before starting 2.1 How to use this book . . . . . . . . . . . . . . . . . . . . . . . . . . . . . . . . . . . . . . . . . . . . . . . . .16 2.2 How did aircraft scale models evolve? . . . . . . . . . . . . . . . . . . . . . . . . . . . . . . . . . . .16 2.3 What do I need to take into account before selecting a kit? . . . . . . . . . . . . . . . . . .17 2.4 How many and what tools do I need? . . . . . . . . . . . . . . . . . . . . . . . . . . . . . . . . . . . .17 2.5 It is necessary to carry out research before making a model? . . . . . . . . . . . . . . . .17 2.6 Superdetailing scale models . . . . . . . . . . . . . . . . . . . . . . . . . . . . . . . . . . . . . . . . . . . .17 3 The work environment and time 3.1 How much space do I need for my hobby? . . . . . . . . . . . . . . . . . . . . . . . . . . . . . . . .18 3.2 Working with sufficient light . . . . . . . . . . . . . . . . . . . . . . . . . . . . . . . . . . . . . . . . . . .18 3.3 Making the hobby safe . . . . . . . . . . . . . . . . . . . . . . . . . . . . . . . . . . . . . . . . . . . . . . .19 TECHNIQUES FIRST STEPS
Transcript of Frequently Asked Questions - Andrea Miniatures 039I TEXTOS ESP.pdf · for constructing & painting...
Frequently Asked Questions
Frequently Asked Questions
about techniques used
for constructing & painting aircraft
JM. Villalba
CREDITS
Models, texts and photographs
by JM. Villalba
Editorial Director: Javier Huerta
Published by: ANDREA PRESS C/ Talleres, 21 Pol. Ind. de Alpedrete 28430 Alpedrete
(Madrid) Tel: 91 857 00 08 Fax: 91 857 00 48 www.andrea-miniatures.com
Printed in
Spain by ATIG S.L.
With special thanks to the RIAT’s Press Office
© 2008 Andrea Press All rights reserved. No part of this publication, either total or in
part, of the photographs, text and illustrations may be reproduced by any method
whatsoever without the prior written authorisation of Andrea Press. Copyright Andrea
Press.
ISBN:
978-84-96658-18-9
INDEX
INTRODUCTION
1 The book
1.1 Introduction . . . . . . . . . . . . . . . . . . . . . . . . . . . . . . . . . . . . . . . . . . . . . . . . . . . . . . . .13
2 Considerations before starting
2.1 How to use this book . . . . . . . . . . . . . . . . . . . . . . . . . . . . . . . . . . . . . . . . . . . . . . . . .16
2.2 How did aircraft scale models evolve? . . . . . . . . . . . . . . . . . . . . . . . . . . . . . . . . . . .16
2.3 What do I need to take into account before selecting a kit? . . . . . . . . . . . . . . . . . .17
2.4 How many and what tools do I need? . . . . . . . . . . . . . . . . . . . . . . . . . . . . . . . . . . . .17
2.5 It is necessary to carry out research before making a model? . . . . . . . . . . . . . . . .17
2.6 Superdetailing scale models . . . . . . . . . . . . . . . . . . . . . . . . . . . . . . . . . . . . . . . . . . . .17
3 The work environment and time
3.1 How much space do I need for my hobby? . . . . . . . . . . . . . . . . . . . . . . . . . . . . . . . .18
3.2 Working with sufficient light . . . . . . . . . . . . . . . . . . . . . . . . . . . . . . . . . . . . . . . . . . .18
3.3 Making the hobby safe . . . . . . . . . . . . . . . . . . . . . . . . . . . . . . . . . . . . . . . . . . . . . . .19
TECHNIQUES FIRST STEPS
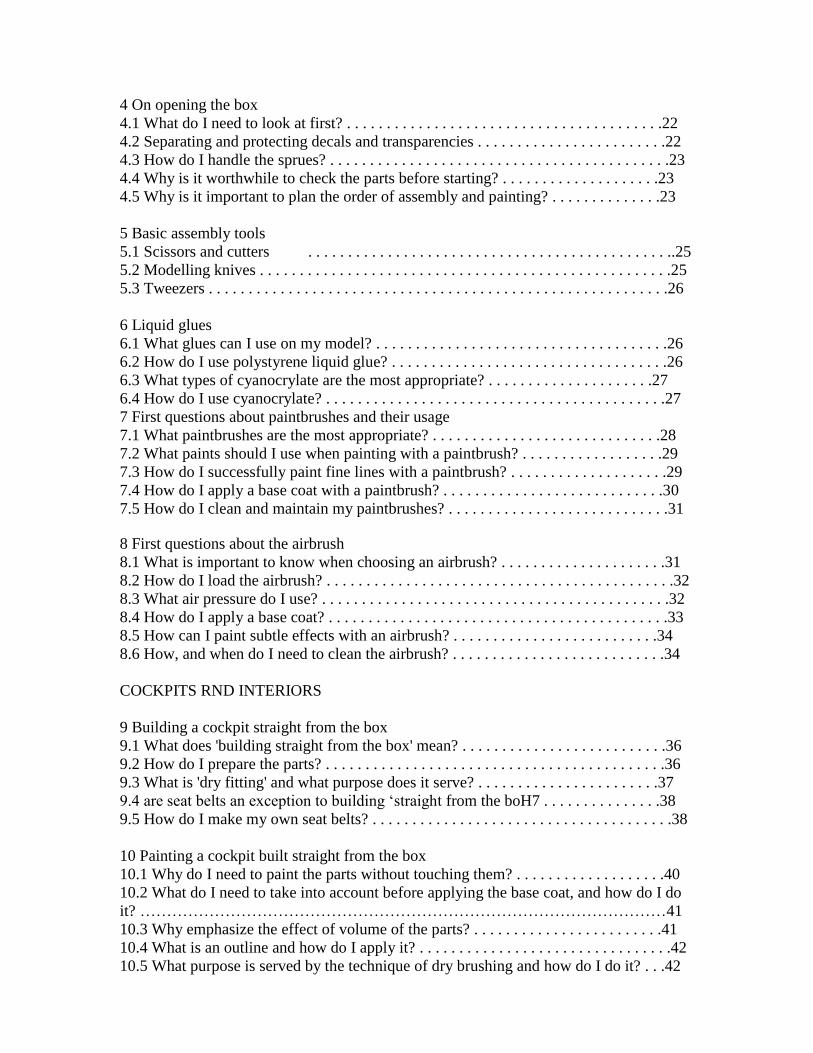
4 On opening the box
4.1 What do I need to look at first? . . . . . . . . . . . . . . . . . . . . . . . . . . . . . . . . . . . . . . . .22
4.2 Separating and protecting decals and transparencies . . . . . . . . . . . . . . . . . . . . . . . .22
4.3 How do I handle the sprues? . . . . . . . . . . . . . . . . . . . . . . . . . . . . . . . . . . . . . . . . . . .23
4.4 Why is it worthwhile to check the parts before starting? . . . . . . . . . . . . . . . . . . . .23
4.5 Why is it important to plan the order of assembly and painting? . . . . . . . . . . . . . .23
5 Basic assembly tools
5.1 Scissors and cutters . . . . . . . . . . . . . . . . . . . . . . . . . . . . . . . . . . . . . . . . . . . . . ..25
5.2 Modelling knives . . . . . . . . . . . . . . . . . . . . . . . . . . . . . . . . . . . . . . . . . . . . . . . . . . . .25
5.3 Tweezers . . . . . . . . . . . . . . . . . . . . . . . . . . . . . . . . . . . . . . . . . . . . . . . . . . . . . . . . . .26
6 Liquid glues
6.1 What glues can I use on my model? . . . . . . . . . . . . . . . . . . . . . . . . . . . . . . . . . . . . .26
6.2 How do I use polystyrene liquid glue? . . . . . . . . . . . . . . . . . . . . . . . . . . . . . . . . . . .26
6.3 What types of cyanocrylate are the most appropriate? . . . . . . . . . . . . . . . . . . . . .27
6.4 How do I use cyanocrylate? . . . . . . . . . . . . . . . . . . . . . . . . . . . . . . . . . . . . . . . . . . .27
7 First questions about paintbrushes and their usage
7.1 What paintbrushes are the most appropriate? . . . . . . . . . . . . . . . . . . . . . . . . . . . . .28
7.2 What paints should I use when painting with a paintbrush? . . . . . . . . . . . . . . . . . .29
7.3 How do I successfully paint fine lines with a paintbrush? . . . . . . . . . . . . . . . . . . . .29
7.4 How do I apply a base coat with a paintbrush? . . . . . . . . . . . . . . . . . . . . . . . . . . . .30
7.5 How do I clean and maintain my paintbrushes? . . . . . . . . . . . . . . . . . . . . . . . . . . . .31
8 First questions about the airbrush
8.1 What is important to know when choosing an airbrush? . . . . . . . . . . . . . . . . . . . . .31
8.2 How do I load the airbrush? . . . . . . . . . . . . . . . . . . . . . . . . . . . . . . . . . . . . . . . . . . . .32
8.3 What air pressure do I use? . . . . . . . . . . . . . . . . . . . . . . . . . . . . . . . . . . . . . . . . . . . .32
8.4 How do I apply a base coat? . . . . . . . . . . . . . . . . . . . . . . . . . . . . . . . . . . . . . . . . . . .33
8.5 How can I paint subtle effects with an airbrush? . . . . . . . . . . . . . . . . . . . . . . . . . .34
8.6 How, and when do I need to clean the airbrush? . . . . . . . . . . . . . . . . . . . . . . . . . . .34
COCKPITS RND INTERIORS
9 Building a cockpit straight from the box
9.1 What does 'building straight from the box' mean? . . . . . . . . . . . . . . . . . . . . . . . . . .36
9.2 How do I prepare the parts? . . . . . . . . . . . . . . . . . . . . . . . . . . . . . . . . . . . . . . . . . . .36
9.3 What is 'dry fitting' and what purpose does it serve? . . . . . . . . . . . . . . . . . . . . . . .37
9.4 are seat belts an exception to building ‘straight from the boH7 . . . . . . . . . . . . . . .38
9.5 How do I make my own seat belts? . . . . . . . . . . . . . . . . . . . . . . . . . . . . . . . . . . . . . .38
10 Painting a cockpit built straight from the box
10.1 Why do I need to paint the parts without touching them? . . . . . . . . . . . . . . . . . . .40
10.2 What do I need to take into account before applying the base coat, and how do I do
it? ………………………………………………………………………………………41
10.3 Why emphasize the effect of volume of the parts? . . . . . . . . . . . . . . . . . . . . . . . .41
10.4 What is an outline and how do I apply it? . . . . . . . . . . . . . . . . . . . . . . . . . . . . . . . .42
10.5 What purpose is served by the technique of dry brushing and how do I do it? . . .42
10.6 What purpose is served using washes, and how do I do it? . . . . . . . . . . . . . . . . .43
10.7 How do I paint a cockpit side panel step by step? . . . . . . . . . . . . . . . . . . . . . . . . .44
10.8 How do I paint a seat? . . . . . . . . . . . . . . . . . . . . . . . . . . . . . . . . . . . . . . . . . . . . . . .46
10.9 How do I make an instrument panel using decals? . . . . . . . . . . . . . . . . . . . . . . . . .48
11 assembly of a cockpit with multi-media elements
11.1 What is a cockpit with multi-media elements? . . . . . . . . . . . . . . . . . . . . . . . . . . .49
11.2 What precautions do I need to take with resin parts? . . . . . . . . . . . . . . . . . . . . . . . .50
11.3 How do I clean resin parts? . . . . . . . . . . . . . . . . . . . . . . . . . . . . . . . . . . . . . . . . . . .50
11.4 How do I prepare the model before fitting the resin parts? . . . . . . . . . . . . . . . . . .52
11.5 How do I cut, handle and attach photo etched parts? . . . . . . . . . . . . . . . . . . . . . .54
12 Painting a cockpit fitted with multi-media elements
12.1 What special care do I need to take with a cockpit containing fragile parts? . . .55
12.2 How do I paint an instrument panel that includes photo etched metal? . . . . . . . .56
12.3 How do I paint a cockpit containing multi-media elements . . . . . . . . . . . . . . . . . .57
12.4 How do I paint a modern aircraft seat made of resin? . . . . . . . . . . . . . . . . . . . . . .60
13 Painting the wheel wells
13.1 How do I paint and weather the wheel wells? . . . . . . . . . . . . . . . . . . . . . . . . . . . .62
14 assembling and detailing engines
14.1 How do I clean up the engines without damaging the detail? . . . . . . . . . . . . . . . .65
14.2 How do I detail an engine? . . . . . . . . . . . . . . . . . . . . . . . . . . . . . . . . . . . . . . . . . . .66
15 Painting engines
15.1 How do I paint a radial engine? . . . . . . . . . . . . . . . . . . . . . . . . . . . . . . . . . . . . . . .67
RSSEMBLY RND TRERTMENT OF SURFRCES
16 Joined panels and surfaces
16.1 How do I eliminate a panel line or a surface scratch? . . . . . . . . . . . . . . . . . . . . . .70
16.2 Why repeat the rivets? . . . . . . . . . . . . . . . . . . . . . . . . . . . . . . . . . . . . . . . . . . . . . .71
16.3 How do I make a rivet with a serrated ring tool? . . . . . . . . . . . . . . . . . . . . . . . . . .71
16.4 How do I make a rivet with a needle? . . . . . . . . . . . . . . . . . . . . . . . . . . . . . . . . . . .72
16.5 How do I close a fuselage join? . . . . . . . . . . . . . . . . . . . . . . . . . . . . . . . . . . . . . . . .73
16.6 What is putty and how do I use it? . . . . . . . . . . . . . . . . . . . . . . . . . . . . . . . . . . . . .74
16.7 How do I sand and what are the best sandpapers? . . . . . . . . . . . . . . . . . . . . . . . .75
16.8 What do I use to scribe panel lines? . . . . . . . . . . . . . . . . . . . . . . . . . . . . . . . . . . . .76
16.9 How do I cut flying surfaces to create an effect of motion? . . . . . . . . . . . . . . . . .77
PRINTING TECHNIQUES
17 Protecting pre-painted areas
17.1 How do I apply a mask to protect a pre-painted area? . . . . . . . . . . . . . . . . . . . . . . ..81
17.2 How do I seal the mask? . . . . . . . . . . . . . . . . . . . . . . . . . . . . . . . . . . . . . . . . . . . . .81
17.3 What precautions do I need to take with the mask? . . . . . . . . . . . . . . . . . . . . . . .82
18 Before applying paint
18.1 References for authentic colours . . . . . . . . . . . . . . . . . . . . . . . . . . . . . . . . . . . . . . .82
18.2 How do I choose the appropriate paints? . . . . . . . . . . . . . . . . . . . . . . . . . . . . . . . .82
18.3 Why is it important to avoid handling already painted areas? . . . . . . . . . . . . . . . . ..83
18.4 To avoid handling, where do I begin painting the model? . . . . . . . . . . . . . . . . . . . .83
19 Masks for delineating outlines and edges
19.1 What types of edges can I obtain using different masks? . . . . . . . . . . . . . . . . . . . ..84
19.2 How do I apply a mask to get a hard edge? . . . . . . . . . . . . . . . . . . . . . . . . . . . . . .84
19.3 How do I apply a mask to get a semi-hard edge? . . . . . . . . . . . . . . . . . . . . . . . . . . .85
19.4 How do I apply a mask to get a soft edge? . . . . . . . . . . . . . . . . . . . . . . . . . . . . . . .86
20 Airbrushing from a distance
20.1 How do I make a stain or fleck? . . . . . . . . . . . . . . . . . . . . . . . . . . . . . . . . . . . . . . .87
20.2 How do I make a fine or blurred line? . . . . . . . . . . . . . . . . . . . . . . . . . . . . . . . . . . .88
21 Special finishes
21.1 How do I paint a simulated wood surface? . . . . . . . . . . . . . . . . . . . . . . . . . . . . . . .88
21.2 How do I paint a bare metal surface? . . . . . . . . . . . . . . . . . . . . . . . . . . . . . . . . . . .90
22 Panel lines
22.1 Why emphasize panel lines? . . . . . . . . . . . . . . . . . . . . . . . . . . . . . . . . . . . . . . . . . .92
22.2 How do I emphasize the lines with a pencil? . . . . . . . . . . . . . . . . . . . . . . . . . . . . .93
22.3 How do I emphasize the lines with a paintbrush? . . . . . . . . . . . . . . . . . . . . . . . . . .93
22.4 How do I emphasize the lines with an airbrush? . . . . . . . . . . . . . . . . . . . . . . . . . .94
23 Shadows and highlights on the external paint
23.1 What are shadows and highlights on scale model painting and what function do they
fulfill? . . . . . . . . . . . . . . . . . . . . . . . . . . . . . . . . . . . . . . . . . . . . . . . . . . . . . . . . . . . . . . . . 95
23.2 How do I apply shadows and highlights? . . . . . . . . . . . . . . . . . . . . . . . . . . . . . . . . .95
23.3 What is pre-shading? . . . . . . . . . . . . . . . . . . . . . . . . . . . . . . . . . . . . . . . . . . . . . . . .97
24 Scratches and bare patches
24.1 What is the difference between a scratch and a bare patch and in what areas can I
reproduce them? . . . . . . . . . . . . . . . . . . . . . . . . . . . . . . . . . . . . . . . . . . . . . . . . . . . . . . . . . .
. . . . . . . . . . . . . . . . . . . . . . . . . . . . . . . . . . . . . . . . . . . . . . . . . . . . . . . . . . . . . . . . . . 97
24.2 How do I reproduce scratches and bare patches? . . . . . . . . . . . . . . . . . . . . . . . . . .98
25 Oil and fluid stains
25.1 Where should I reproduce oil and fluid stains? . . . . . . . . . . . . . . . . . . . . . . . . . . . .99
25.2 How can I simulate oil and fluid stains? . . . . . . . . . . . . . . . . . . . . . . . . . . . . . . . . .99
26 Exhaust stains
26.1 Where should I simulate exhaust stains? . . . . . . . . . . . . . . . . . . . . . . . . . . . . . . . .99
26.2 How do I paint exhaust stains? . . . . . . . . . . . . . . . . . . . . . . . . . . . . . . . . . . . . . . .100
27 Varnish
27.1 What kinds of varnishes are there and how do I use one? . . . . . . . . . . . . . . . . . .100
27.2 How do I apply a varnish base? . . . . . . . . . . . . . . . . . . . . . . . . . . . . . . . . . . . . . . .100

DECRLS RND PRINTING NRTIONRL INSIGNIR
28 Decals
28.1 Decals and decal setting solutions . . . . . . . . . . . . . . . . . . . . . . . . . . . . . . . . . . . . .101
28.2 Why cut out a decal and how do I do it? . . . . . . . . . . . . . . . . . . . . . . . . . . . . . . .101
28.3 How do I separate a decal from the carrier film? . . . . . . . . . . . . . . . . . . . . . . . . .102
28.4 How do I apply a decal? . . . . . . . . . . . . . . . . . . . . . . . . . . . . . . . . . . . . . . . . . . . .104
28.5 How do I attach a decal to a painted surface? . . . . . . . . . . . . . . . . . . . . . . . . . . .104
28.6 How do I keep a decal invisible when it cannot be cut? . . . . . . . . . . . . . . . . . . .105
29 Painting national insignia and numbers
29.1 When do I paint national insignia and numbers? . . . . . . . . . . . . . . . . . . . . . . . . .105
29.2 What process do I follow when painting a national insignia or numbers? . . . . . .106
30 Graphics of painting
30.1 Graphic of painting the upper surfaces . . . . . . . . . . . . . . . . . . . . . . . . . . . . . . . . .109
30.2 Graphic of painting the undersides . . . . . . . . . . . . . . . . . . . . . . . . . . . . . . . . . . . .110
FINRL FINISH
31 Parts to be assembled at the end
31.1 What parts do I paint and assemble separately, and for what reason? . . . . . . . .111
32 Propellers
32.1 How do I paint and weather propellers? . . . . . . . . . . . . . . . . . . . . . . . . . . . . . . .111
33 Exhaust
33.1 How do I paint the exhaust on in-line engines? . . . . . . . . . . . . . . . . . . . . . . . . . .114
33.2 How do I paint the exhaust on radial engines? . . . . . . . . . . . . . . . . . . . . . . . . . . .116
34 Landing gear
34.1 How do I clean a landing gear leg? . . . . . . . . . . . . . . . . . . . . . . . . . . . . . . . . . . . .117
34.2 How do I detail a landing gear leg? . . . . . . . . . . . . . . . . . . . . . . . . . . . . . . . . . . . .117
34.3 How do I paint a landing gear leg? . . . . . . . . . . . . . . . . . . . . . . . . . . . . . . . . . . . .119
34.4 How do I replace the tyre tread? . . . . . . . . . . . . . . . . . . . . . . . . . . . . . . . . . . . . .120
34.5 How do I create the effect of weight on a tyre? . . . . . . . . . . . . . . . . . . . . . . . . .121
34.6 How do I paint a tyre? . . . . . . . . . . . . . . . . . . . . . . . . . . . . . . . . . . . . . . . . . . . . . .122
34.7 How do I paint the tyre tread? . . . . . . . . . . . . . . . . . . . . . . . . . . . . . . . . . . . . . . .123
34.8 How do I get ready to paint the landing gear bay doors? . . . . . . . . . . . . . . . . . . .125
35 Cannons and machineguns
35.1 How do I hollow out the barrel of a cannon or machinegun? . . . . . . . . . . . . . . . .126
35.2 How do I paint a cannon or machinegun? . . . . . . . . . . . . . . . . . . . . . . . . . . . . . . .127
35.3 How do I paint additional armament? . . . . . . . . . . . . . . . . . . . . . . . . . . . . . . . . . .129
36 Navigation lights
36.1 How can I make navigation lights? . . . . . . . . . . . . . . . . . . . . . . . . . . . . . . . . . . . .132
37 Transparencies
37.1 How do I prepare transparencies? . . . . . . . . . . . . . . . . . . . . . . . . . . . . . . . . . . . . .135
37.2 How do I cut a transparency to open the cockpit? . . . . . . . . . . . . . . . . . . . . . . . .135
37.3 How do I mask a transparency? . . . . . . . . . . . . . . . . . . . . . . . . . . . . . . . . . . . . . . .137
37.4 How do I paint a transparency? . . . . . . . . . . . . . . . . . . . . . . . . . . . . . . . . . . . . . . .137
37.5 How do I prepare a vacuum-formed transparency? . . . . . . . . . . . . . . . . . . . . . . .138
37.6 How do I attach a transparency? . . . . . . . . . . . . . . . . . . . . . . . . . . . . . . . . . . . . . .139
38 aerials and rigging
38.1 What materials can I use to make an aerial or rigging? . . . . . . . . . . . . . . . . . . . .140
38.2 How do I prepare a model before attaching rigging? . . . . . . . . . . . . . . . . . . . . . .142
38.3 How do I make an aerial wire? . . . . . . . . . . . . . . . . . . . . . . . . . . . . . . . . . . . . . . .143
39 Finishing the scale model
39.1 advice on presenting and preserving a scale model . . . . . . . . . . . . . . . . . . . . . . .144
GALLERY. . . . . . . . . . . . . . . . . . . . . . . . . . . . . . . . . . . . . . . . . . . . . . . . . . . . . . . . . . . .145
INTRODUCTION
P-51U MUSTHNG Photo JM Villalba
1. THE BOOK
1.1 Introduction
My first contact with scale models occurred in the toy section of a large store one Saturday afternoon: they were Airfix kits, and I still clearly recall the hypnotic effect that the box top artwork had on me.
In those days, Airfix classified each scale model by series on the basis of their individual difficulty rating, starting with 1 and
increasing according to size, complexity and number of parts. I very much wanted to buy one of the Halifax or B-24 kits, but my meager budget would only allow me to buy a 1:72 scale Messerschmitt Bf 109 from Series 1. This was packed in a transparent blister
around a box, with the latter bearing a magnificent drawing of the aircraft in action.
Until the appearance of Airfix scale kits, the only available models of aircraft were the ones you cut out of cardboard and stuck together, or toys, either in plastic or cast white metal; the plastic models, on the other hand, brought with them the possibility of
learning the history of each aircraft, they were in a definite scale and could be authentically decorated and, most important, it made
possible the opportunity of having at home a replica made by oneself of those aircraft that, until then, had only been seen in encyclopedias and the Sunday movies.
From that moment, I remember that any money I saved was used to buy plastic kits.
So, little by little, kits from the likes of Matchbox, Heller and Monogram followed the arrival of Airfix, and with them the enthusiastic introduction of the hobby across the whole of Spanish society. This soon resulted in the appearance of the first specialist shops and
with them came new challenges, such as painting. It must be remembered that up to then the goal had been to complete a scale model
by assembling the parts as quickly as possible without getting too much glue in the wrong places. The arrival of the first tins of Humbrol was as exciting as it was frustrating; the rush to see the scale model finished resulted in it often ending up in the scrap box.
Fortunately, my overriding passion for scale models helped me to even overcome the painting phase and to finally have some com-
pleted scale models that afforded me the confidence to move on to the next ones. Eventually, the old ‘trial and error’ school gave me better control over the painting, so much so that I arrived at the stage of making the airbrush the next step.
Almost in the same way as I had encountered Airfix kits, one day a book about aircraft scale models appeared in my usual shop. Titled ‘On Plastic Wings’ and written by the world famous Belgian modeler and kit manufacturer, Francois Verlinden, this publication
revealed some magnificently realized scale aircraft models and, in addition, brought with it numerous ideas of how to make my
models even more realistic. I devoured the book in just a few hours, trying to absorb every ounce of its content, and in a few weeks it had a well-worn appearance from the intense use it was subjected to. Today, it resides on my shelf along with other books that
definitively changed my way of viewing the art of making aircraft models.
The arrival of competitions gave me the possibility of teaching others about how I went about constructing my scale models, while also making friends with those who share the same passion for the hobby. These were the times when cockpits were constructed from
plastic cut from any available containers, usually of cleaning products, transparencies were polished with toothpaste and photo etched
parts were unheard of. One day, the appearance of a photograph of one of my scale models in Model-making e Historia [Model-Making and History]
magazine provided me with the greatest incentive to further improve my technique. Then, with my first articles having been published,
the possibility arose of my joining the technical team of the magazine Todo Model Making, today titled Euromodelismo [General Model-Making and Euro Model Making, respectively]. It was this experience that allowed me to perfect my techniques and which
became the medium that today forms my life’s working base. Furthermore, looking back, it represented, without doubt, one of the
most pleasant interludes of my career. The growth of the model-making industry and the appearance of new kit manufacturers, along with the parallel rise of the after-market
accessories industry, in addition to new magazines and work opportunities, caused me to consider the possibility of combining my

other hobby, photography, in a professional manner and interweaving it with model-making. Next came the difficult, and life-
changing decision to give up writing for magazines to follow a solitary path. It is now over 30 years since Airfix first appeared in my life, and more than eight since I took the decision to dedicate myself inde-
pendently to photography and model making. For the moment, the story continues... Even after years of making scale models, when I
am asked my opinion of the hobby, I still say it is one of the best pastimes one can have. Making static scale aviation models, like that of cars and boats, etc, is a totally absorbing activity that bring with it immense satisfaction.
Model making provides us with the possibility of creating our own works of art; it constantly imposes its own challenges to improve
our technical skill while creating the capacity for observation and analysis that does not figure in many other hobbies. The constant search for information with which to improve, complete or become familiar with a particular aircraft creates a direct link
with the hobby through reading, reinforcing in a very important way the cultural aspect of the activity. More than a few model-makers
have, on the basis of gathering reference for making accurate scale models, turned themselves into historians; I sincerely believe that not many hobbies can boast this effect.
With regard to personal relations, model making also favours the establishment of clubs and associations where modelers can get to
know others engaged in the hobby. In addition, the advent of the Internet brought with it an expansion of the hobby along with an almost limitless interchange of information, with Web pages, forums and blogs making us aware of ideas and techniques that probably
we would otherwise never be exposed to.
Digital photography, another means of high-speed communication, makes it easy to teach everyone about the evolution of a scale model. All these things combine to afford us the possibility of receiving information and advice during the construction of a specific
model. There is no doubt that the Internet has given us the further possibility of creating a global community of modelers.
One further point that the hobby has in its favour is the potentially low cost of pursuing it. Admittedly, this point can be controversial
as it is often dependent on the modelers’ situation, both financial and geographic, and with the comparatively recent appearance of
after-market accessories for enhancing a particular scale model, one may find oneself paying a final price that will appear high.
However, as with all things, each of us will view this from different viewpoints, so that the final valuation becomes relative. It is my opinion that the hobby is not expensive if compared with other activities or pastimes. While a cinema or concert ticket may
cost less than a scale model with accessories, how many hours of diversion are offered by the construction and painting of the scale
model? Indeed, how much satisfaction and how many memories will it bring us when we see it year after year in the cabinet? So, if looked at from this viewpoint it can be considered an eminently accessible hobby.
F-16
Photo JM Villalba
Another controversial question is, ‘What is the best scale?’ My personal belief is that no scale is better than another; there are model-
makers who deprive themselves of the possibility of making a given model simply because it is not in ‘their scale’, thus making it a
barrier that cannot be crossed. However, I think that if the model-maker's first commandment is “I will have fun”, then the difference in scales need not be a problem.
Indeed, in my cabinet I have models of various scales sharing the same space, and I can only say that I enjoyed in equal measure
making everything, be it an Grumman Avenger in 1/48 or a Messerschmitt Bf109 in 1/72. It is undoubtedly true that the larger size of an aircraft that is available in different scales may allow the inclusion of more details.
Then again, even this is perhaps an outdated idea from when an empty cockpit was difficult to add extra detail. Today, however, one
has only to look through the aftermarket parts catalogues to see the vast range of accessories available that will enable us to convert a 1/72 aircraft kit with few parts into a spectacular, award-winning scale model.
But our hobby, controversy aside, also has its problems. That which is most evident is trying to attract new adherents from among the
young. It seems so difficult trying to get a 12-year-old to understand that it is better to sit at a table to sand, glue together and paint a model for several hours than to sit at a
games console and pilot virtual aircraft or to develop digital personalities.
Our hobby is damaged by a mistaken idea that others see us as producers of scale replicas of machines of war while obscuring the technical, historical and cultural aspects.
Paradoxically, the violence produced by model making is nil in comparison to that stemming from some of the video games used daily
for much less time. It is incumbent on us, through our ability to share and make others understand the hobby, that new generations realize that it can be
both more fun and more eminently more gratifying to be able create something that is your own and which encompasses part of your
personality than to live in a world that ends when you attain the highest score and then disconnect the console.
2. CONSIDERATIONS BEFORE STARTING
2.1 How to use this book?
During the development of this book, I have tried to have the order of questions presented in such a way as to follow an ordered
sequence of assembly and painting that corresponds to a methodology in common use among model-makers, so that each question and
answer correlates to a projected course of progress in the construction and painting of a model aircraft.
For example, the first questions concern a model’s interior, its assembly and painting, and then progresses to how to close the fuselage and mount the wings, how to paint and age the model, and finally how to add the decals and complement it with additional details.
However, it is likely that this structure cannot be followed for all scale models because certain constructions or painting processes may
require a different method that would alter the sequence of application of the different steps.
With regard to the photographs appearing in the book, I must confess that, of course, the development of the actual techniques were
carried out on the work table, not against a blue background; the blue background is simply for aesthetics. Nevertheless, that said, the positioning of the airbrush and paintbrushes and their distances from the surfaces have been made as realistic as possible within the
limits dictated by photographic techniques. Finally, I wish to add that in no case do I claim to suggest that the techniques explained in
this book are the only ones or, indeed, the best ones, neither do I claim to be their author or discoverer. They are simply the ones used by me and which have produced good results for me and are, therefore, those that I wish to teach in graphic form so as to share them
with model-makers unfamiliar with them.
As for my skill with this work, this will depend entirely on whether this book proves useful to you, the modeler, or if some new
model-maker joins our community. If this happens then my efforts will have been worthwhile.
2.2 How did aircraft scale models evolve?
The pioneering manufacturing companies, such as Airfix, Matchbox, Heller, Monogram, etc, producing scale aircraft models offered the fledgling model-maker the comparatively inexpensive possibility of enjoying at home, in reduced form, those fascinating flying
machines. Those of us who started in the hobby around this time assembling those kits were used to spartan cockpits, panels in relief
and the fluctuating quality of the decal sheets. Fortunately for the hobby, today’s advanced production techniques applied to scale plastic models has resulted in it being possible to
assemble a kit using only the parts supplied in the box and having a super-detailed model as an end product. Extremely fine, incisively
etched panel lines, complete cockpits that need no additional detailing, hollow machine gun barrels, movable control surfaces as separate parts and top quality decals, are common in the latest generation kits.
Personally, I believe that this is wonderful. However, all this should not make us look upon, say, a 1980s Monogram kit, correctly
assembled and painted, as a lesser-valued scale model.
2.3 What do I need to take into account before selecting a kit?
Before choosing any model, it should first be assessed whether the kit about to be purchased is compatible with the free time one is able to dedicate to it. It is all too common to overhear modelers decrying the fact that a kit bought months ago is barely started and
still languishes in the box. This being because there are too many parts and insufficient free time has diminished the motivation that
was so strong on the day of purchase.
Many would-be modelers who end up abandoning the hobby do so out of frustration brought on by the inability to complete a model.
So, it is important to assess the possibilities offered by our available free time. Thus, affordable projects can be chosen that will
provide more in terms of amusement and fun than disillusionment, thus improving our link with the hobby and allowing us to progressively tackle more complex projects.
When buying a kit in advance for future assembly, it has to be taken into account whether it is a model from an established
manufacturers catalogue list or from a limited series from, say, a ‘cottage industry’ short run manufacturer. If it is the latter case, it is best to purchase a kit of a model of an aircraft that has a particular appeal, otherwise it is sure to disappear and not be available when
you are ready to work on it.
2.4 How many and what tools do I need?
If one is of the belief that model making requires high expenditure for tools and not doing so is an obstacle to developing the hobby, it is an erroneous one. Starting in this hobby does not require complicated and costly tools, indeed just some side-cutter pliers, a set of
good tweezers, model knives, scissors and paintbrushes are sufficient to allow us to start and finish a scale model. Also, these tools
last a long time! The largest investment any would-be modeler will have to make is an airbrush and compressor. While it is advisable not to skimp on
the cost of an airbrush, the matter of an air supply can be addressed in more affordable items, such as diaphragm compressors or
compressed air containers. For the first scale models I painted with an airbrush I used as an air source an inner tube filled with a pedal pump. Over time, other tools can be purchased on the basis of your criteria of what can simplify a given task or as a help in developing
more complex techniques.
2.5 It is necessary to carry out research before making a model?
Any model can be constructed perfectly well just by following the instructions included in the box. However, research allows us to
complement our hobby with knowledge of the aircraft’s history, its technology and its function. In addition, by comparing scale models with actual aircraft, we can determine their pros and cons, thus improving our observation
skills.
The different criteria that appear will also be the result of discussions that constantly increase our knowledge, thus enriching the hobby.
2.6 Superdetailing scale models After-market resin detailing kits, photo etched parts and decal sheets that are different from those supplied with the kit allow us to
realize a personalized version of our model or assist us in solving a particular detailing problem(s) that would otherwise occupy too
much of our time. The after-market detailing industry has grown significantly in recent years. This is good, as the growth of this add-on activity will
undoubtedly contribute to the hobby attracting new fans, thus allowing it to expand and endure.
3. THE WORK ENVIRONMENT AND TIME
3.1 How much space do I need for my hobby? I believe that, unlike other hobbies such as building radio controlled flying models or wooden sailing or power boats, the development
of static model making does not require too much space. In my case, the work table and the various tools that I use are all concentrated
in a small corner of my home, and a space such as this is more than sufficient if our priority does not turn to building a model such as the 1/48 scale B36....
Static model making is also a reasonably ‘clean’ hobby, that is, if we are careful with the paint overspray from the airbrush. The area
around the workbench will remain comparatively clean and tidy thus ensuring that we remain part of family life.
3.2 Working with sufficient light
One of the more important topics to take into consideration is the light source. There are modelers who prefer to use 'daylight' bulbs, which work at a temperature that allows them to emit a colour close to that of natural light. It has to be considered whether these lights
are ideal for constructing and painting scale models, if the possibility is taken into account that when the scale model is completed it
will be displayed in a house or other indoor areas that is lit by bulbs that tend not to emit natural light, thus giving the further
possibility that the colours that have been applied to the scale model under our ‘natural light’ source will appear differently. 100Watt lamps that emit white light work quite well. Any colours applied under this light will not vary over much when a model is later viewed
under the customary light in our homes or when they are displayed in competitions where the exhibition areas may be illuminated
using neon, halogen, etc, light sources.
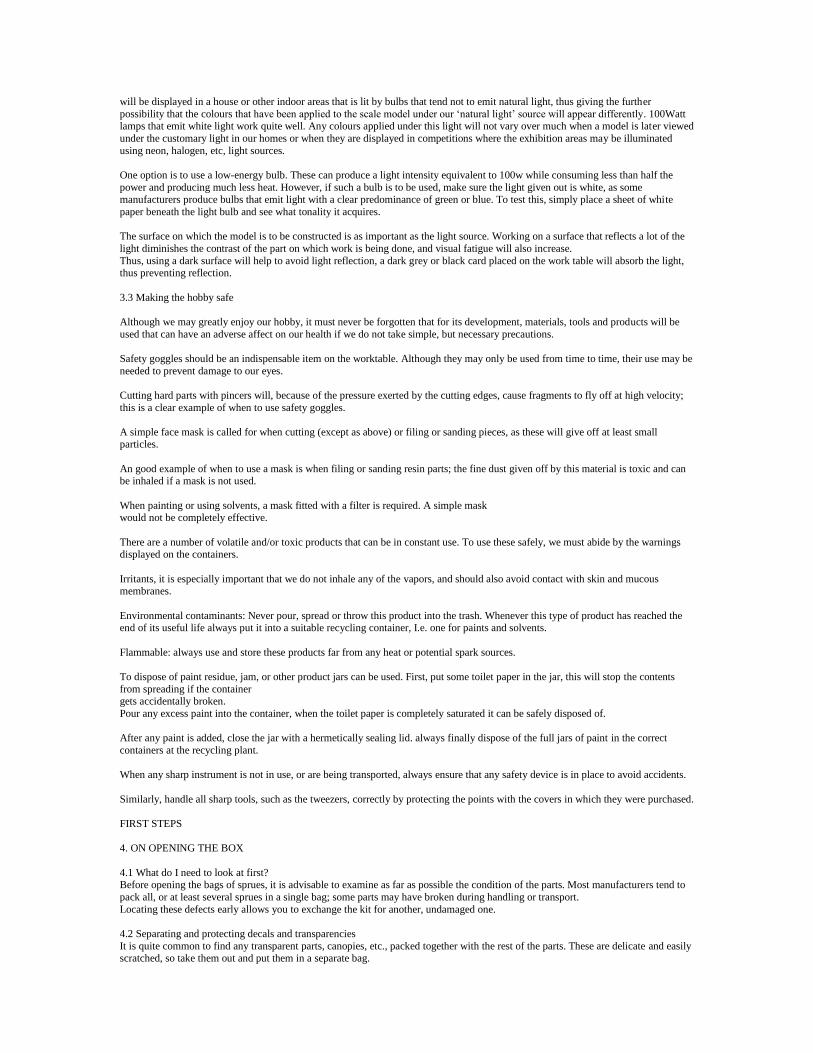
One option is to use a low-energy bulb. These can produce a light intensity equivalent to 100w while consuming less than half the
power and producing much less heat. However, if such a bulb is to be used, make sure the light given out is white, as some manufacturers produce bulbs that emit light with a clear predominance of green or blue. To test this, simply place a sheet of white
paper beneath the light bulb and see what tonality it acquires.
The surface on which the model is to be constructed is as important as the light source. Working on a surface that reflects a lot of the
light diminishes the contrast of the part on which work is being done, and visual fatigue will also increase.
Thus, using a dark surface will help to avoid light reflection, a dark grey or black card placed on the work table will absorb the light, thus preventing reflection.
3.3 Making the hobby safe
Although we may greatly enjoy our hobby, it must never be forgotten that for its development, materials, tools and products will be
used that can have an adverse affect on our health if we do not take simple, but necessary precautions.
Safety goggles should be an indispensable item on the worktable. Although they may only be used from time to time, their use may be
needed to prevent damage to our eyes.
Cutting hard parts with pincers will, because of the pressure exerted by the cutting edges, cause fragments to fly off at high velocity;
this is a clear example of when to use safety goggles.
A simple face mask is called for when cutting (except as above) or filing or sanding pieces, as these will give off at least small particles.
An good example of when to use a mask is when filing or sanding resin parts; the fine dust given off by this material is toxic and can be inhaled if a mask is not used.
When painting or using solvents, a mask fitted with a filter is required. A simple mask would not be completely effective.
There are a number of volatile and/or toxic products that can be in constant use. To use these safely, we must abide by the warnings displayed on the containers.
Irritants, it is especially important that we do not inhale any of the vapors, and should also avoid contact with skin and mucous membranes.
Environmental contaminants: Never pour, spread or throw this product into the trash. Whenever this type of product has reached the end of its useful life always put it into a suitable recycling container, I.e. one for paints and solvents.
Flammable: always use and store these products far from any heat or potential spark sources.
To dispose of paint residue, jam, or other product jars can be used. First, put some toilet paper in the jar, this will stop the contents
from spreading if the container gets accidentally broken.
Pour any excess paint into the container, when the toilet paper is completely saturated it can be safely disposed of.
After any paint is added, close the jar with a hermetically sealing lid. always finally dispose of the full jars of paint in the correct
containers at the recycling plant.
When any sharp instrument is not in use, or are being transported, always ensure that any safety device is in place to avoid accidents.
Similarly, handle all sharp tools, such as the tweezers, correctly by protecting the points with the covers in which they were purchased.
FIRST STEPS
4. ON OPENING THE BOX
4.1 What do I need to look at first? Before opening the bags of sprues, it is advisable to examine as far as possible the condition of the parts. Most manufacturers tend to
pack all, or at least several sprues in a single bag; some parts may have broken during handling or transport.
Locating these defects early allows you to exchange the kit for another, undamaged one.
4.2 Separating and protecting decals and transparencies
It is quite common to find any transparent parts, canopies, etc., packed together with the rest of the parts. These are delicate and easily scratched, so take them out and put them in a separate bag.

A self-sealing bag will protect the transparencies from being scratched or discoloured
until they are required.
Decal sheet are also often left unprotected in the bottom of the box.
The large bags that held the sprues can be used to keep the decal sheets safe. If left out, they can easily get damaged or wet while the
model is being constructed.
4.3 How do I handle the sprues?
Sprues holding the individual parts, some of them very delicate, can be fragile. If handled roughly, they can be easily broken.
To avoid any possibility of breakage, carefully hold the sprues by the outer edges.
4.4 Why is it worthwhile to check the parts before starting?
By checking each part before starting, a clear idea can be obtained of what we are going to work with. By so doing, we will realize
what parts require more work in the way of cleaning up or, perhaps, further detailing. Using this information, we can then start to calculate the time required to assemble the model, thus making it easier to plan the work.
4.5 Why is it important to plan the order of assembly and painting?
The first step is to do the riveting. Nt this stage, if any parts are damaged and there are no spares, there is only one alternative... put it
in the bin and buy another kit.
Next, with the riveting completed, fit and paint the interior details.
Early planning of the assembly sequence and subsequent painting will help to complete the scale model in a reasonable time. Also,
planned assembly and painting will prevent the parts from being incorrectly assembled, or having to re-touch the paint because it has been handled too much. This sort of activity unnecessarily increases the time spent on the model and makes the process overlong, so
much so that making the model no longer seems fun and, in many cases can cause the modeler to abandon the project.
Not all scale models can be planned in the same way; it all depends on the type of process the individual modeler wishes to develop. Generally, the modeler needs to begin with the more complicated processes, such out cutting flying surfaces or adding rivets, as these
may include the breaking of parts causing the work to stop. However, for standard planning, it is best to start with the interior, fitting
and painting all the parts constituting it. Next, proceed to the closing the fuselage, attaching the wings, and tailplane. With the fuselage and wings completed and attached, work can begin on the general painting. Once this has been done, the aircraft can
be completed with the addition of any accessory parts that have been purchased separately.
As an example, let us look at the complete process of assembling and painting a Bf 109.
Make ready and glue all the parts that require additional work, for example lowering the flaps, and positioning the ailerons.
Mask off all the pre-painted surfaces and clean the remaining areas before beginning the process of general painting.
Continue by painting the wheel wells and the undersides while holding the model with ‘bubble wrap’ to avoid damaging the, already painted upper sides.
Painting the fuselage requires that the model be handled quite a lot, so carry out the whole process while holding it by the wingtips.
Now, paint one wing while holding the model by the other one that, at this point, has yet been painted. Inevitably, painting the
remaining wing requires that the model has to be handled. So, hold it by the already painted other wing using ‘bubble wrap’. By doing this, necessary handling of the model’s painted areas will be kept to a minimum.
After applying a coat of varnish, followed by the decals and another coat of varnish, the work of general painting is complete.
Prepare and paint all accessory parts separately, as this simplifies the work.
Finally, complete the model by adding all the elements that have been worked separately.
5. BASIC ASSEMBLY TOOLS
5.1 Scissors and cutters
Miniature scissors and cutters are basic assembly tools. Cutters are supplied with either fine tips for straight cuts or others for curved
cuts. Together with a set of side cutters, these are indispensable tools on the worktable.
Specially designed side cutters, or snips for removing parts from the sprue are used by placing the cutters’ flat side against the part to be removed. By doing this, the part will be
separated cleanly from the sprue.
Scissors with fine tips are used for cutting thin wire, plastic sheet, sandpaper, etc.
Scissors for curved cuts are very useful for cutting individual decals from a large decal sheets, making belts, etc.
5.2 Modelling knives

Modeling knives with either a straight or curved blade are tools that are used continually. The curved bladed knives, or scalpels
usually have a surgical origin. Bs such, they are extremely sharp and great care must be taken while both using and storing them.
The straight-edged scalpel is used for cutting, but also for removing mould lines by scraping in areas where sandpaper won’t reach.
Curve-bladed scalpels will cut easily with a little pressure if the blade is new. They do not tear the plastic.
To maintain knives in good condition, place them in a bag of silica gel. This will absorb any humidity, preventing any rust forming.
5.3 Tweezers
The points of good quality tweezers should have points that come together without a gap. This prevents the part from slipping or jumping out. Flat-headed tweezers can also be used and, for reaching hard to get at areas, curved points ones are very useful.
6. LIQUID GLUES
6.1 What glues can I use on my model?
The glues most commonly used are those that have been specifically designed for gluing plastic, polystryrene cement, and the cyanoacrylates, or so-called superglues in their different guises. As seen in the following sections, all these products must be used with
caution.
6.2 How do I use polystyrene liquid glue?
Polystyrene liquid glues are extremely useful for assembling plastic models. Although they do not dry as quickly as superglue, they operate by actually melting the plastic making a sort of weld, when dry the joints have a much greater strength. When using them, it is
important to realize, that if too much is applied it will dissolve the plastic and ruin any work. So, they need then to be used sparingly.
There are a number of liquid polystyrene glue manufacturers, many of which come with an application bush included. However, if it
does not have one you will need to use a paintbrush with acrylic bristles.
As this product dissolves plastic, it is useful for sealing parts.
When used very sparingly, joints can be glued while also maintaining a visible join line for later painting as a panel line.
6.3 What types of cyanoacrylate are the most appropriate? There are many cyanoacrylate (superglue) products and, although each may have its own characteristics, it can be said that, in general,
they are all classified by texture, capillary action (fine), liquid (medium) and gel (thick).
Medium viscosity liquid superglues dry almost immediately; they allow for little or no corrections but are good for obtaining very
solid joints. The fast, or capillary texture variety are even more viscous and dry even faster; they are ideal for gluing parts with
movement in the join, as the capillary action ensures that they penetrate into those joints.
Gel, or thick superglues dry more slowly, thus making it possible to correct the position of the parts for a few seconds. They are ideal
for gluing photo etched parts and small pieces. Also very good for filling small gaps.
To maintain superglues, it is advisable to keep them upright, thus preventing the glue from drying in, and blocking the nozzle. Nlso,
keep them away from direct light.
6.4 How do I use cyanoacrylate?
Superglues are adhesives that must be used with caution as they will glue materials, including human skin, within seconds and can cause serious injury. In addition, the vapours emitted are irritants.
To avoid running any risk, the best advice is to use them in small amounts that can be kept in a small receptacle.
A small plastic box with an easily replaced cardboard base will serve to handle the superglue with less risk.
To apply a drop of superglue, first cut a bit of acetate from the glue’s blister pack.
Place the acetate inside the box so that it serves as a base.
Then, squeeze a drop onto the acetate.
For applying small quantities of glue, use a tool made from a length of stretched sprue.
For applying a larger quantity, use a knife blade.
If a white halo appears around the drop, this is an indication that the cyan element in the glue has evaporated, signaling that it has lost
its effectiveness. The transparent acetate is a
wonderful indicator of the state of the product.
7. FIRST QUESTIONS ABOUT PAINTBRUSHES AND THEIR USAGE
7.1 What paintbrushes are the most appropriate? For the best results, high quality paintbrushes are needed. This rules out brushes with plastic bristles or with bristles that fall out
easily.
For painting with enamels it is best to use paintbrushes with acrylic bristles, as these are more resistant to the solvents use for cleaning
them. However, when painting with acrylics or watercolours it is always advisable to use the best quality sable brushes.
Flat paintbrushes are more suitable for applying base coats.
With respect to dry brushing metallic paints, it is advisable to use the same one every time as however much it is cleaned, metal
particles will always remain in the bristles.
No:0 paintbrushes, and other fine ones do not hold very much paint, so they should only be used for painting small details. For
outlining or painting individual panels it is best to use a thicker paintbrush with a good point that is able to carry more paint. In the photo can be seen a no:2 paintbrush that has a point as thin as the no:0.
For painting very small details a No:0 paintbrush, or even smaller, can be used.
A high quality No:1 or No:2 paintbrush can be used for almost anything as their greater paint carrying ability allow for extended use.
When purchasing one, it is important to make sure the point is undamaged.
7.2 What paints should I use when painting with a paintbrush?
Acrylic and water paints are best for brush painting as they spread easily and cover well. One of their best characteristic is that any
retouching is hardly noticeable, after a few hours left to dry, a retouch will just have a softer finish.
That said, tamiya-type acrylic paints are difficult to apply with a paintbrush, so using them in this way is to be avoided. Humbrol enamels, on the other hand, can be applied quite well with a paintbrush. These usually cover very well with just one coat and, although
retouching may be more noticeable, after waiting three or four hours until they are completely dry, the final finish becomes quite hard.
7.3 How do I successfully paint fine lines with a paintbrush?
Learning to paint fine acrylic lines with a paintbrush can be extremely useful, especially when being used to apply the techniques for panels and outlining. However, this technique requires practice, so it is advisable to experiment and practice to perfect the technique to
obtain satisfactory results.
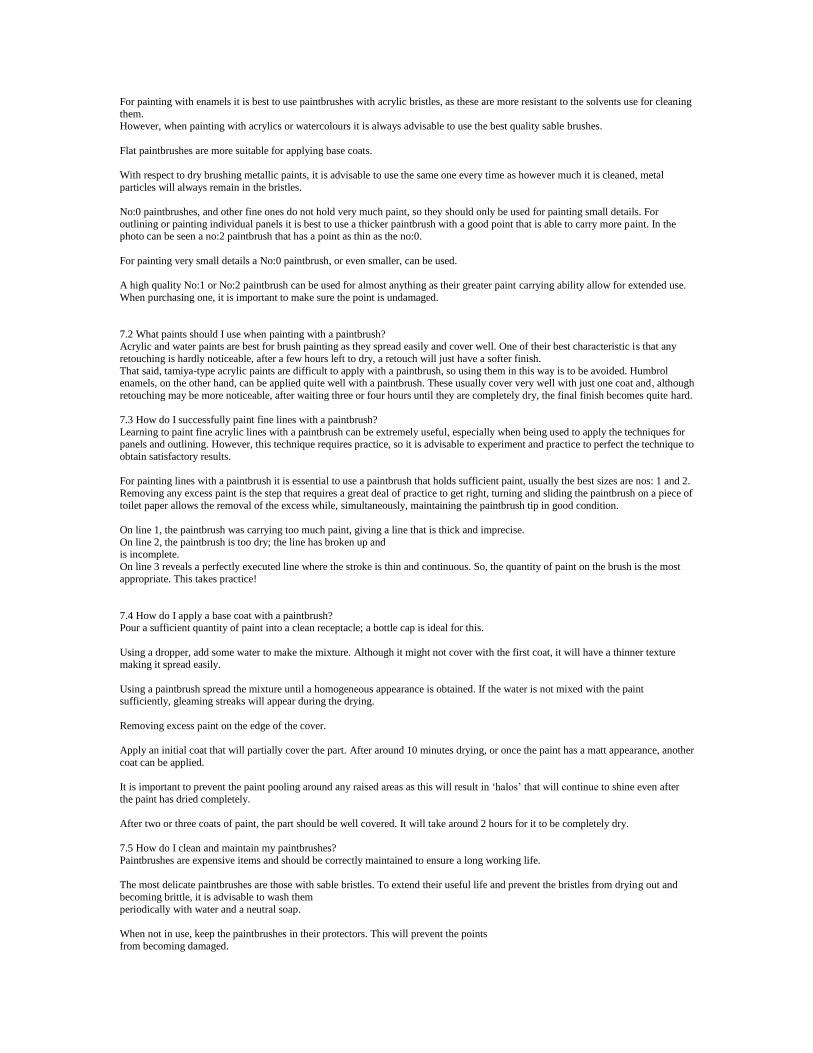
For painting lines with a paintbrush it is essential to use a paintbrush that holds sufficient paint, usually the best sizes are nos: 1 and 2.
Removing any excess paint is the step that requires a great deal of practice to get right, turning and sliding the paintbrush on a piece of
toilet paper allows the removal of the excess while, simultaneously, maintaining the paintbrush tip in good condition.
On line 1, the paintbrush was carrying too much paint, giving a line that is thick and imprecise.
On line 2, the paintbrush is too dry; the line has broken up and is incomplete.
On line 3 reveals a perfectly executed line where the stroke is thin and continuous. So, the quantity of paint on the brush is the most
appropriate. This takes practice!
7.4 How do I apply a base coat with a paintbrush? Pour a sufficient quantity of paint into a clean receptacle; a bottle cap is ideal for this.
Using a dropper, add some water to make the mixture. Although it might not cover with the first coat, it will have a thinner texture making it spread easily.
Using a paintbrush spread the mixture until a homogeneous appearance is obtained. If the water is not mixed with the paint sufficiently, gleaming streaks will appear during the drying.
Removing excess paint on the edge of the cover.
Apply an initial coat that will partially cover the part. After around 10 minutes drying, or once the paint has a matt appearance, another
coat can be applied.
It is important to prevent the paint pooling around any raised areas as this will result in ‘halos’ that will continue to shine even after
the paint has dried completely.
After two or three coats of paint, the part should be well covered. It will take around 2 hours for it to be completely dry.
7.5 How do I clean and maintain my paintbrushes?
Paintbrushes are expensive items and should be correctly maintained to ensure a long working life.
The most delicate paintbrushes are those with sable bristles. To extend their useful life and prevent the bristles from drying out and
becoming brittle, it is advisable to wash them
periodically with water and a neutral soap.
When not in use, keep the paintbrushes in their protectors. This will prevent the points
from becoming damaged.
8. FIRST QUESTIONS ABOUT THE AIRBRUSH 8.1 What is important to know when choosing an airbrush?
When deciding to buy an airbrush, you should not only take into account its modeling applications but also assess its construction. An
airbrush is a tool that will be used for a long time and, to keep it operating well, will need dismantling many times. One that is manufactured entirely from metal will guarantee a long life for its components.
Another factor to be taken into account is the specific application for which the airbrush has been designed. Some leading
manufacturers produce airbrushes for illustration work and have not designed their tools for the modeling applications of metallic enamels or varnishes. In consequence, their use in model making is somewhat limited.
What is required is an 'all-terrain' airbrush, that is one that will not be affected by different paints and solvents. One made entirely of metal will, of course, be the most durable.
If the airbrush selected uses a number of heads for different stroke thicknesses, it will possess greater flexibility in just one tool.
To prevent damage to the heads and paint needles, store them safely and protected inside a dedicated container.
8.2 How do I load the airbrush?
The airbrush cup or bottle quite often has a mark indicating the maximum upper level for the paint. If it is filled above that line, we
risk spilling the paint even by carrying out the actions associated with spraying.
The first liquid introduced into the paint container needs to be a drop or two of the solvent that is to be used with the chosen paint. If
undiluted paint is introduced directly into the cup or bottle, it could enter the suction tube and clog it.
Put the paint into the paint cup or bottle with a paintbrush.
To obtain the correct mixture, the next step is to add the appropriate amount of solvent.
Still using the same paintbrush, stir the paint until a homogeneous mixture is obtained. Before starting on the actual model, first
airbrush some paint on a practice surface, keeping in mind that the first drops will be solvent that will pass through the suction tube.
8.3 What air pressure do I use?
For airbrushing, air pressure is a very important factor. Insufficient pressure causes application failures that, in turn, makes using this
incredibly useful tool all that much more difficult. As with using a paintbrush, constant practice with the airbrush is essential because there are innumerable combinations of pressure and
texture.
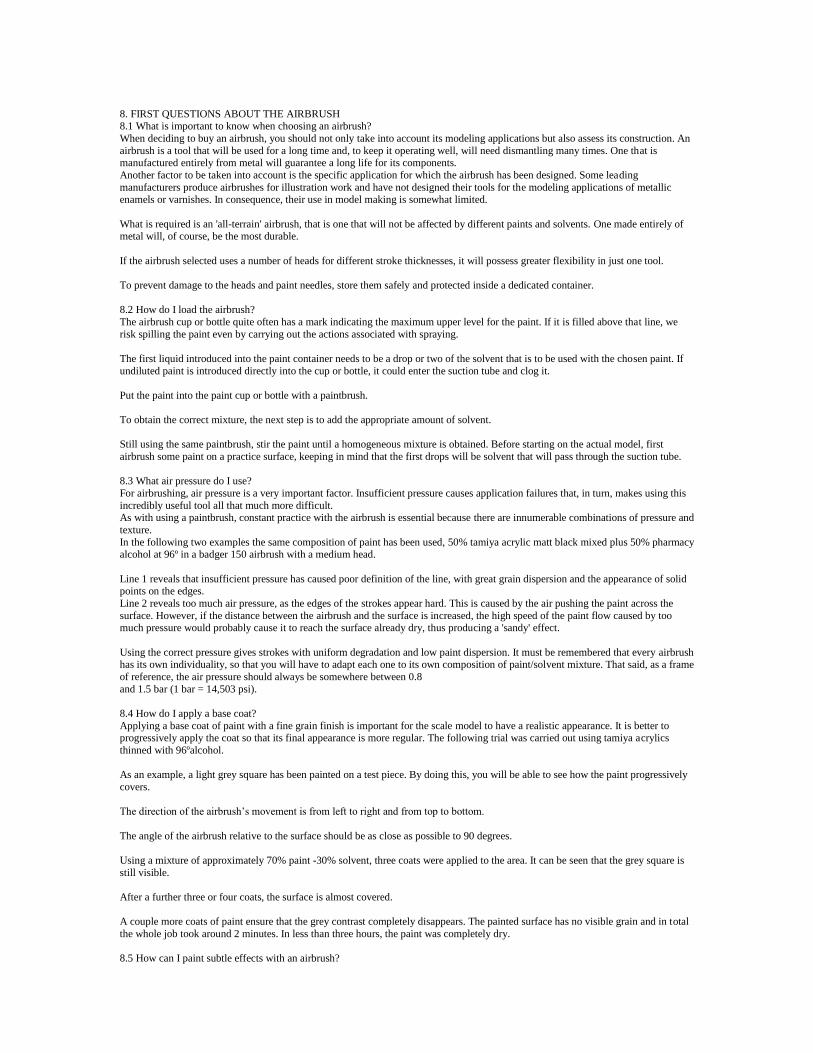
In the following two examples the same composition of paint has been used, 50% tamiya acrylic matt black mixed plus 50% pharmacy alcohol at 96º in a badger 150 airbrush with a medium head.
Line 1 reveals that insufficient pressure has caused poor definition of the line, with great grain dispersion and the appearance of solid points on the edges.
Line 2 reveals too much air pressure, as the edges of the strokes appear hard. This is caused by the air pushing the paint across the
surface. However, if the distance between the airbrush and the surface is increased, the high speed of the paint flow caused by too much pressure would probably cause it to reach the surface already dry, thus producing a 'sandy' effect.
Using the correct pressure gives strokes with uniform degradation and low paint dispersion. It must be remembered that every airbrush has its own individuality, so that you will have to adapt each one to its own composition of paint/solvent mixture. That said, as a frame
of reference, the air pressure should always be somewhere between 0.8
and 1.5 bar (1 bar = 14,503 psi).
8.4 How do I apply a base coat?
Applying a base coat of paint with a fine grain finish is important for the scale model to have a realistic appearance. It is better to progressively apply the coat so that its final appearance is more regular. The following trial was carried out using tamiya acrylics
thinned with 96ºalcohol.
As an example, a light grey square has been painted on a test piece. By doing this, you will be able to see how the paint progressively
covers.
The direction of the airbrush’s movement is from left to right and from top to bottom.
The angle of the airbrush relative to the surface should be as close as possible to 90 degrees.
Using a mixture of approximately 70% paint -30% solvent, three coats were applied to the area. It can be seen that the grey square is
still visible.
After a further three or four coats, the surface is almost covered.
A couple more coats of paint ensure that the grey contrast completely disappears. The painted surface has no visible grain and in total
the whole job took around 2 minutes. In less than three hours, the paint was completely dry.
8.5 How can I paint subtle effects with an airbrush?
Airbrushing fine, blurred lines will result in soft shadows and produce tarnish effects on scale models. The trial was carried out using
tamiya acrylics and alcohol in a badger 150 with a medium head.
When painting with very small quantities it is advisable to place the solvent in the container first. By doing this, greater control is
maintained over the mixture. To achieve this sort type of effect the amount of paint required should be a small brushstroke, with the container being filled with
solvent up to the mark.
Practising on a trial surface before painting the actual part will help to perfect your technique before applying it. In the photograph, the
distance between airbrush and surface is correct.
To successfully obtain this effect, the air pressure should be set at 1-1.5 bar. Bt 1bar the dispersion, and thus the line thickness will be
greater; at 1.5bar the dispersion will be lower and the corresponding line thinner. With a fine line head and needle, the lines can be made even thinner.
8.6 How, and when do I need to clean the airbrush? Cleaning the airbrush is a necessary task if you want this tool to continue operating at its optimum efficiency. So, the airbrush should
be cleaned regularly, for example whenever there is a colour change, if the paint begins to build-up in the diffuser, and particularly at
the end of each days’ use. This will prevent any paint residue building up inside the tubes.
When dismantling the head be careful not to lose the small sealing washer.
Always extract the needle forwards to prevent any paint residue from being deposited inside the airbrush.
Complete the removal of the needle by removing it from the front of the airbrush.
Clean the needle on a piece of paper soaked in solvent, while being careful not to bend it or damage the tip.
For cleaning the airbrush’s interior, do so with a curled piece of paper.
A toothbrush is very useful for cleaning the airbrush tubes.
Before cleaning the suction tube, soak the toothbrush in solvent.
In the same way, clean the airbrush’s front tube.
Another area that requires regular cleaning is the paint deposit tube; the toothbrush also comes in useful here.
If the paint has dried hard inside, or on the parts, soak them in solvent for a few hours.
COCKPITS AND INTERIORS
9. BUILDING A COCKPIT STRAIGHT FROM THE BOX
9.1 What does 'building straight from the box' mean?
Building ‘straight from the box’ indicates that the model has been built without any complementary after-market parts or any scratch built parts by the modeler. In fact, nothing that was not included in the kit.
Many of today's model kits include plastic parts for creating a cockpit that would once have been considered super-detailing.
Generally, it is sufficient to just clean the parts or fine-tune some to obtain an excellent cockpit. 9.2 How do I prepare the parts?
Using a curved blade to avoid tearing the plastic, remove any ‘flash’ or remaining sprue on the part after it has been cut from the
sprue. With a piece of 800-grain sandpaper fixed to a small wood strip, lightly sand the surface to level it.
To eliminate any casting ‘flash’ on small parts, scrape them carefully with the edge of a straight scalpel blade.
Generally, cockpit seats tend to be too thick. To thin the plastic and get a more realistic looking seat, sandpaper the outside of this part.
Cleaning and thinning some parts will enhance the realistic look of the finished model.
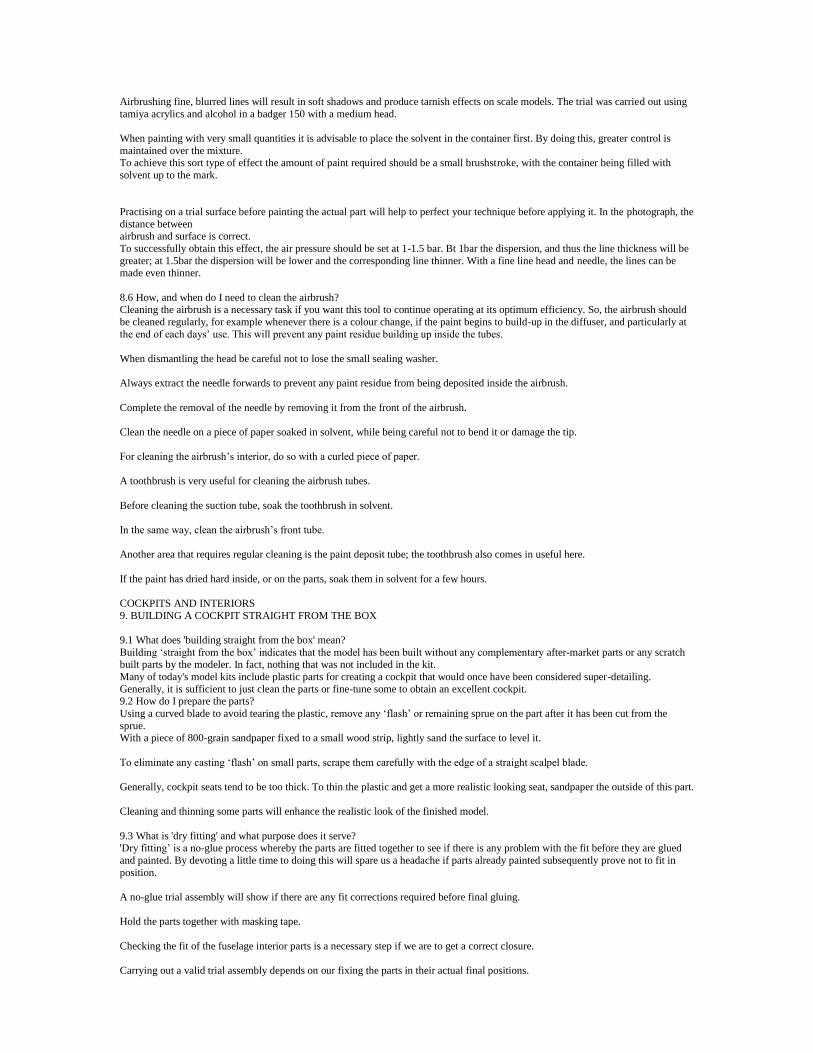
9.3 What is 'dry fitting' and what purpose does it serve? 'Dry fitting’ is a no-glue process whereby the parts are fitted together to see if there is any problem with the fit before they are glued
and painted. By devoting a little time to doing this will spare us a headache if parts already painted subsequently prove not to fit in
position.
A no-glue trial assembly will show if there are any fit corrections required before final gluing.
Hold the parts together with masking tape.
Checking the fit of the fuselage interior parts is a necessary step if we are to get a correct closure.
Carrying out a valid trial assembly depends on our fixing the parts in their actual final positions.

Cockpit sides are usually the most difficult internal parts to make fit correctly so that the fuselage sides can be closed.
When closing the fuselage, carefully check that no parts hinder the process.
9.4 Are seat belts an exception to building ‘straight from the box’?
Seat belts are one of the more obvious details that tend to be missing in kits. After all, including a decal would take up little space! This detail is so obvious that many ipms chapters provide for it in their rules of participation for competitions in the category of build-
ing ‘straight from the box’.
Unfortunately, some of the more modern kit manufacturers still fail to resolve this problem. I recall, with some smugness, that many of the old monogram kits had superb belts etched on their seats.
So, making and including belts is surely a detail for completing excellent, realistic cockpits that can be made ‘straight from the box’.
9.5 How do I make my own seat belts?
Lead sheet, found in craft shops or even around bottle tops, is easy to cut and mould. the ideal thickness is 0.1-0.2 mm.
For making the buckles, 0.15 mm thickness copper wire can be used.
Using a new straight scalpel blade, a steel rule and a little pressure, thin strips of lead sheet can be cut.
Taking the width of the belt as a reference, double the copper wire using the tips of the tweezers to make the buckle.
Close the buckle with the tweezers and cut off any excess wire.
Double over the end of the belt, pressing with the tweezers to trap the buckle. after positioning one buckle at the end, position another in the belt’s centre.
With a plastic pointer, place a drop of superglue onto the rear of the seat.
Then glue the belt with this drop and wait a few minutes until it dries.
Double over the belt and glue it at the front.
Complete the seat by adding the remaining belts.
10. PAINTING A COCKPIT BUILT STRAIGHT FROM THE BOX
10.1 Why do I need to paint the parts without touching them? It is very important not to touch the parts while painting them, as we do not want to get finger marks by handling them while they are
being painted. In the case of small parts, attaching them to a piece of adhesive tape or on one end of a plastic strip will make it easier
to paint them.
Wrap a length of plastic strip with masking tape,after the first rotation turn the adhesive tape so that the adhesive side is uppermost.
Now, position the part that is to be painted on the adhesive.
With the part on the adhesive, it can be handled without actually being touched.
When painting small parts, glue them to a length of plastic strip that can be cut from the kit’s sprues. First, apply a drop of superglue
to a hidden area of the part, and it can then be held with impunity.
To prevent tweezers scratching parts that have already been painted put some electric cable sheathing on the tips.
Avoid damaging the parts by holding them in the covered tips.
‘Bubble wrap’ used in packaging is very useful for holding parts without marking them.
To release the parts from the supporting plastic strip, it just needs to be gently twisted; the drop of superglue used to hold the part will
easily break away.
10.2 What do I need to take into account before applying the base coat, and how do I do it?
When ready to apply the base coat, first take into account what treatments are to follow. Techniques, such as dry brushing require a solid coat to work on to avoid leaving any edges uncovered over which the paintbrush will be passed.
Also, if washes are to be applied, ensure that the base coat is impervious to any solvent that might be used. An enamel paint base coat
can be damaged with an oil wash, as oils contain solvents that are also used to dilute enamels. Applying a solid, compatible base coat is an important step that must always be taken into account.
In model making, various techniques are used to simulate this effect. In some cases, it might appear that the effect has been overdone, however it needs to taken into account that, once the fuselage has been closed, the small parts will receive very little light, so that any
possible excess will be compensated.
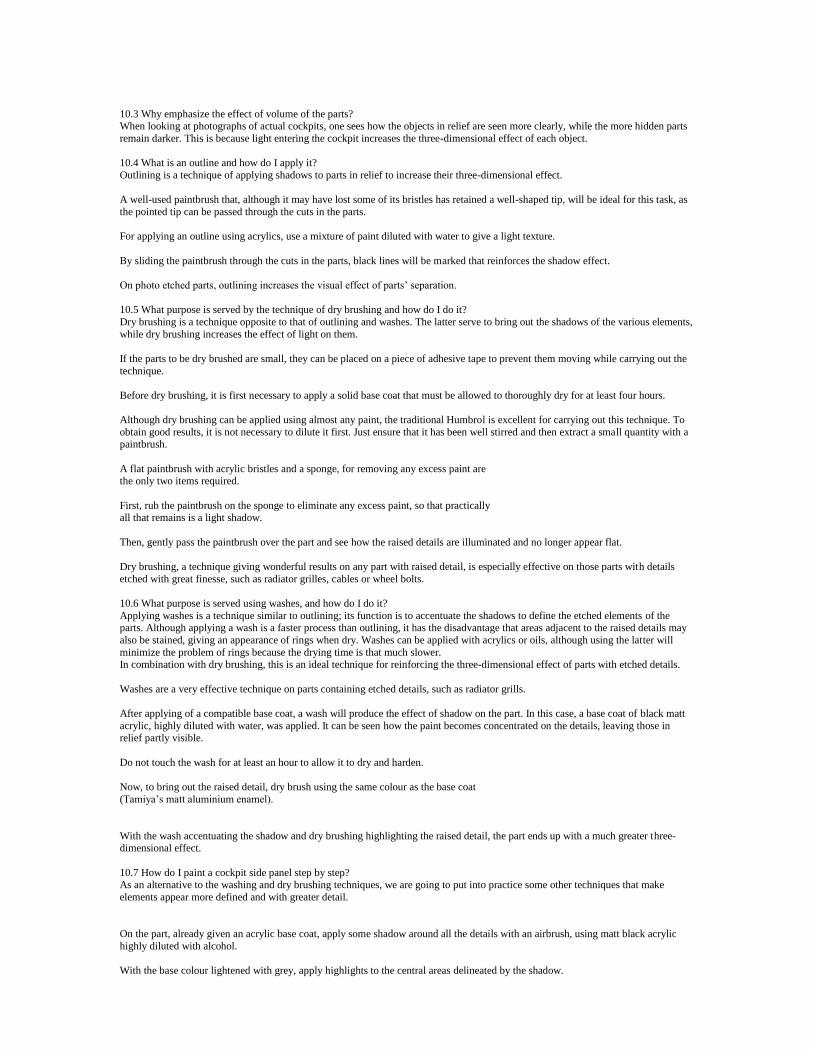
10.3 Why emphasize the effect of volume of the parts? When looking at photographs of actual cockpits, one sees how the objects in relief are seen more clearly, while the more hidden parts
remain darker. This is because light entering the cockpit increases the three-dimensional effect of each object.
10.4 What is an outline and how do I apply it?
Outlining is a technique of applying shadows to parts in relief to increase their three-dimensional effect.
A well-used paintbrush that, although it may have lost some of its bristles has retained a well-shaped tip, will be ideal for this task, as
the pointed tip can be passed through the cuts in the parts.
For applying an outline using acrylics, use a mixture of paint diluted with water to give a light texture.
By sliding the paintbrush through the cuts in the parts, black lines will be marked that reinforces the shadow effect.
On photo etched parts, outlining increases the visual effect of parts’ separation.
10.5 What purpose is served by the technique of dry brushing and how do I do it?
Dry brushing is a technique opposite to that of outlining and washes. The latter serve to bring out the shadows of the various elements,
while dry brushing increases the effect of light on them.
If the parts to be dry brushed are small, they can be placed on a piece of adhesive tape to prevent them moving while carrying out the
technique.
Before dry brushing, it is first necessary to apply a solid base coat that must be allowed to thoroughly dry for at least four hours.
Although dry brushing can be applied using almost any paint, the traditional Humbrol is excellent for carrying out this technique. To
obtain good results, it is not necessary to dilute it first. Just ensure that it has been well stirred and then extract a small quantity with a paintbrush.
A flat paintbrush with acrylic bristles and a sponge, for removing any excess paint are the only two items required.
First, rub the paintbrush on the sponge to eliminate any excess paint, so that practically all that remains is a light shadow.
Then, gently pass the paintbrush over the part and see how the raised details are illuminated and no longer appear flat.
Dry brushing, a technique giving wonderful results on any part with raised detail, is especially effective on those parts with details
etched with great finesse, such as radiator grilles, cables or wheel bolts.
10.6 What purpose is served using washes, and how do I do it?
Applying washes is a technique similar to outlining; its function is to accentuate the shadows to define the etched elements of the parts. Although applying a wash is a faster process than outlining, it has the disadvantage that areas adjacent to the raised details may
also be stained, giving an appearance of rings when dry. Washes can be applied with acrylics or oils, although using the latter will
minimize the problem of rings because the drying time is that much slower. In combination with dry brushing, this is an ideal technique for reinforcing the three-dimensional effect of parts with etched details.
Washes are a very effective technique on parts containing etched details, such as radiator grills.
After applying of a compatible base coat, a wash will produce the effect of shadow on the part. In this case, a base coat of black matt
acrylic, highly diluted with water, was applied. It can be seen how the paint becomes concentrated on the details, leaving those in relief partly visible.
Do not touch the wash for at least an hour to allow it to dry and harden.
Now, to bring out the raised detail, dry brush using the same colour as the base coat
(Tamiya’s matt aluminium enamel).
With the wash accentuating the shadow and dry brushing highlighting the raised detail, the part ends up with a much greater three-dimensional effect.
10.7 How do I paint a cockpit side panel step by step? As an alternative to the washing and dry brushing techniques, we are going to put into practice some other techniques that make
elements appear more defined and with greater detail.
On the part, already given an acrylic base coat, apply some shadow around all the details with an airbrush, using matt black acrylic
highly diluted with alcohol.
With the base colour lightened with grey, apply highlights to the central areas delineated by the shadow.

Using a fine tipped paintbrush, paint all the parts black.
To increase the effect of highlights on the black-painted parts, apply a very light grey by sliding the paintbrush along the edges of the
parts. Don’t worry about getting clean lines at the start, as the acrylic can be retouched later without leaving any trace.
First, paint the wires black; later they will be painted with their actual colour, but only on the top.
Continue with this painting process, using the same technique on all the remaining details.
By outlining, shadows will be reinforced on the smallest details.
Lighten the edges using the base colour mixed with white.
To add extra realism to the parts, apply some scratches.
The upper areas of the side consoles are more exposed to rubbing; to simulate where paint has been rubbed off, apply small touches of
Tamiya’s matt aluminium enamel.
To reduce the shine of the bare patches and thus integrate them into the paint, apply a little wash of highly diluted natural brown
acrylic shadow to them.
This process of painting the panels makes the etched details stand out even more and makes them look as though the details are raised.
10.8 How do I paint a seat? After lightly gluing the seat to a piece of plastic sprue, give it a base coat of tamiya acrylic paint.
Next, outline the belts using water-diluted matt black acrylic.
After outlining, apply some shadow with an airbrush using alcohol-diluted matt black.
On the central areas, airbrush the effects of light using the base coat paint lightened.
For the best result, add a touch of light grey or light green to the original mixture.
Being careful to avoid spoiling the outline, painting the colour on the belts with a paintbrush.
To simulate the belt seams, apply a central line using very dark grey paint.
Using the belts’ base colour, paint transverse lines across the belt, cutting through the central dark grey line, to get a broken line.
Apply the same process on the lower part of the belts.
To paint the belt buckles, use Tamiya matt aluminium.
Finally, highlight the edges.
The seat is now finished and ready to be installed in the cockpit.
10.9 How do I make an instrument panel using decals?
Some kit manufacturers include a decal sheet for the main instrument panel. This decal is designed to be placed on a panel that has the
various components are in raised detail. To obtain a realistic result, the following process can be used:
After the part has been fixed to a plastic outline with adhesive tape; paint it with the base coat.
As this colour will have to be retouched quite a bit, give it a thin coat of black acrylic over the black base so that any retouching will
not be visible.
Using the side of the paintbrush, apply some colour to the raised panel details.
Using various tones of grey, the panel details can be completed.
Using some different colours I.e red, yellow, etc, paint the panel switches.
To prevent the decal fixing solutions from damaging the paint, first apply a coat of matt varnish.
Now, cut the instrument panel from the decal sheet.
Using a curved blade cut the dials individually from the sheet (to keep them in the correct order and to avoid losing any, they can
attached to adhesive tape).
Using a paintbrush carefully place each dial in its appropriate hollow, fixing it with micro sol liquid.
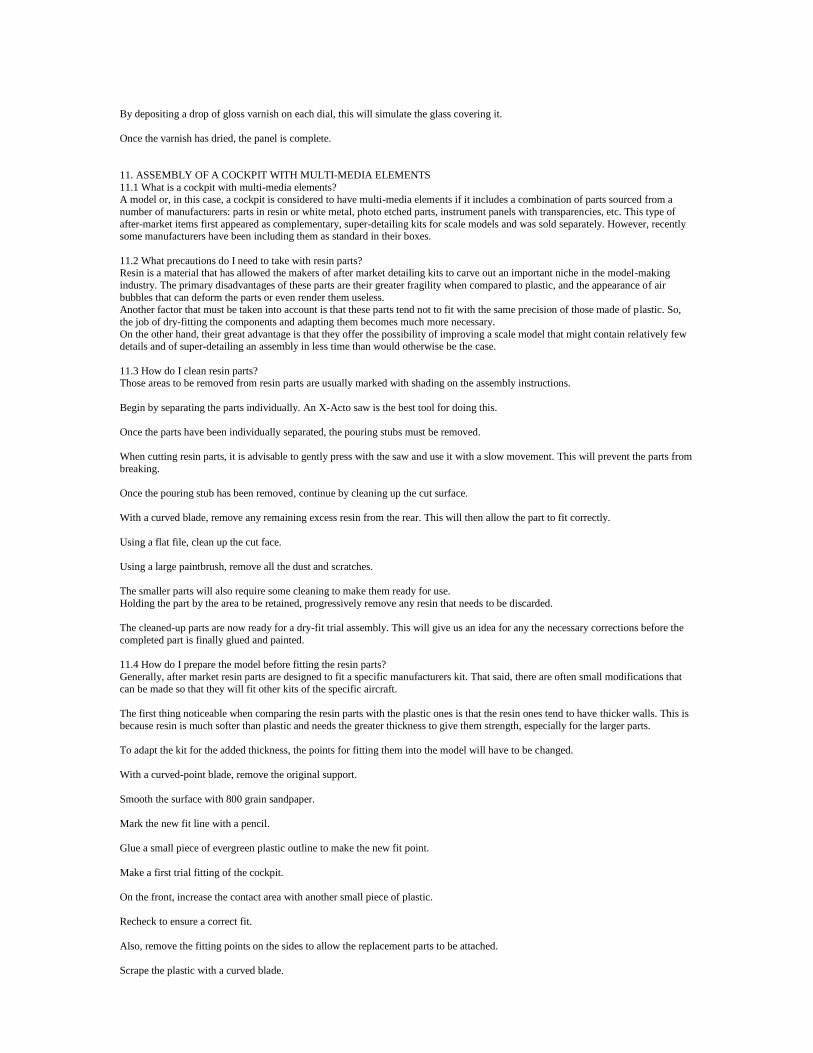
By depositing a drop of gloss varnish on each dial, this will simulate the glass covering it.
Once the varnish has dried, the panel is complete.
11. ASSEMBLY OF A COCKPIT WITH MULTI-MEDIA ELEMENTS
11.1 What is a cockpit with multi-media elements? A model or, in this case, a cockpit is considered to have multi-media elements if it includes a combination of parts sourced from a
number of manufacturers: parts in resin or white metal, photo etched parts, instrument panels with transparencies, etc. This type of
after-market items first appeared as complementary, super-detailing kits for scale models and was sold separately. However, recently some manufacturers have been including them as standard in their boxes.
11.2 What precautions do I need to take with resin parts? Resin is a material that has allowed the makers of after market detailing kits to carve out an important niche in the model-making
industry. The primary disadvantages of these parts are their greater fragility when compared to plastic, and the appearance of air
bubbles that can deform the parts or even render them useless. Another factor that must be taken into account is that these parts tend not to fit with the same precision of those made of plastic. So,
the job of dry-fitting the components and adapting them becomes much more necessary.
On the other hand, their great advantage is that they offer the possibility of improving a scale model that might contain relatively few
details and of super-detailing an assembly in less time than would otherwise be the case.
11.3 How do I clean resin parts? Those areas to be removed from resin parts are usually marked with shading on the assembly instructions.
Begin by separating the parts individually. An X-Acto saw is the best tool for doing this.
Once the parts have been individually separated, the pouring stubs must be removed.
When cutting resin parts, it is advisable to gently press with the saw and use it with a slow movement. This will prevent the parts from
breaking.
Once the pouring stub has been removed, continue by cleaning up the cut surface.
With a curved blade, remove any remaining excess resin from the rear. This will then allow the part to fit correctly.
Using a flat file, clean up the cut face.
Using a large paintbrush, remove all the dust and scratches.
The smaller parts will also require some cleaning to make them ready for use.
Holding the part by the area to be retained, progressively remove any resin that needs to be discarded.
The cleaned-up parts are now ready for a dry-fit trial assembly. This will give us an idea for any the necessary corrections before the
completed part is finally glued and painted.
11.4 How do I prepare the model before fitting the resin parts?
Generally, after market resin parts are designed to fit a specific manufacturers kit. That said, there are often small modifications that
can be made so that they will fit other kits of the specific aircraft.
The first thing noticeable when comparing the resin parts with the plastic ones is that the resin ones tend to have thicker walls. This is
because resin is much softer than plastic and needs the greater thickness to give them strength, especially for the larger parts.
To adapt the kit for the added thickness, the points for fitting them into the model will have to be changed.
With a curved-point blade, remove the original support.
Smooth the surface with 800 grain sandpaper.
Mark the new fit line with a pencil.
Glue a small piece of evergreen plastic outline to make the new fit point.
Make a first trial fitting of the cockpit.
On the front, increase the contact area with another small piece of plastic.
Recheck to ensure a correct fit.
Also, remove the fitting points on the sides to allow the replacement parts to be attached.
Scrape the plastic with a curved blade.
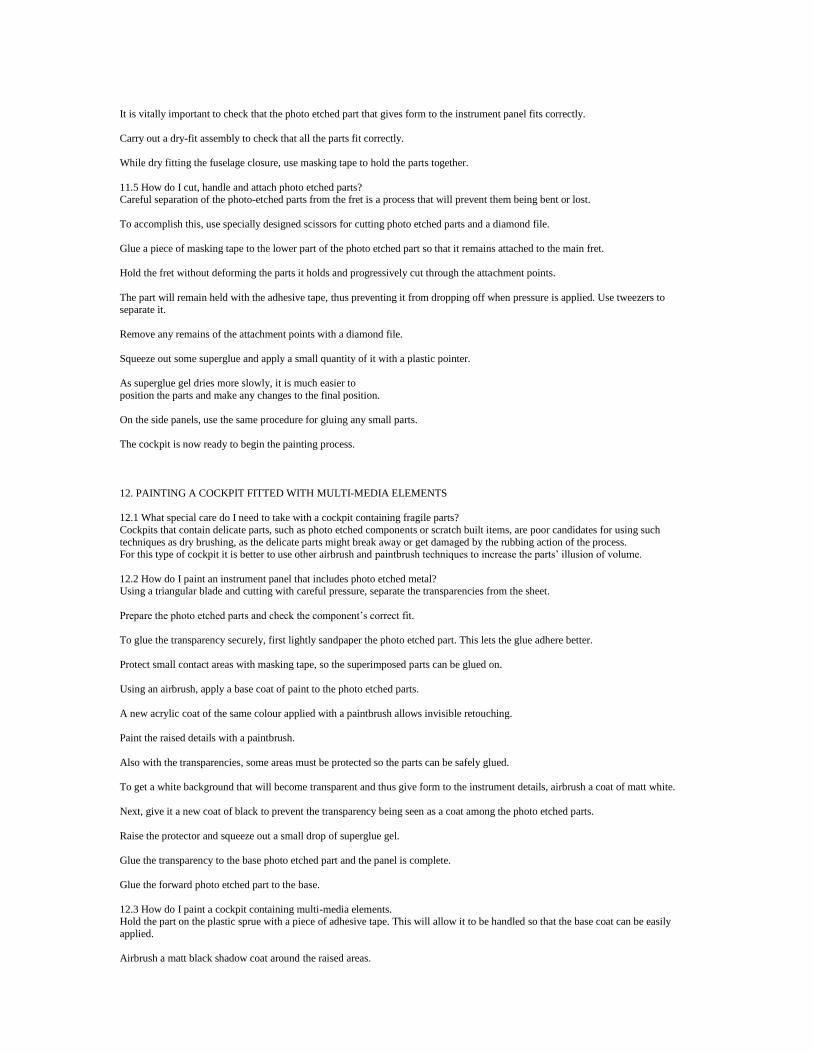
It is vitally important to check that the photo etched part that gives form to the instrument panel fits correctly.
Carry out a dry-fit assembly to check that all the parts fit correctly.
While dry fitting the fuselage closure, use masking tape to hold the parts together.
11.5 How do I cut, handle and attach photo etched parts? Careful separation of the photo-etched parts from the fret is a process that will prevent them being bent or lost.
To accomplish this, use specially designed scissors for cutting photo etched parts and a diamond file.
Glue a piece of masking tape to the lower part of the photo etched part so that it remains attached to the main fret.
Hold the fret without deforming the parts it holds and progressively cut through the attachment points.
The part will remain held with the adhesive tape, thus preventing it from dropping off when pressure is applied. Use tweezers to separate it.
Remove any remains of the attachment points with a diamond file.
Squeeze out some superglue and apply a small quantity of it with a plastic pointer.
As superglue gel dries more slowly, it is much easier to
position the parts and make any changes to the final position.
On the side panels, use the same procedure for gluing any small parts.
The cockpit is now ready to begin the painting process.
12. PAINTING A COCKPIT FITTED WITH MULTI-MEDIA ELEMENTS
12.1 What special care do I need to take with a cockpit containing fragile parts?
Cockpits that contain delicate parts, such as photo etched components or scratch built items, are poor candidates for using such
techniques as dry brushing, as the delicate parts might break away or get damaged by the rubbing action of the process. For this type of cockpit it is better to use other airbrush and paintbrush techniques to increase the parts’ illusion of volume.
12.2 How do I paint an instrument panel that includes photo etched metal? Using a triangular blade and cutting with careful pressure, separate the transparencies from the sheet.
Prepare the photo etched parts and check the component’s correct fit.
To glue the transparency securely, first lightly sandpaper the photo etched part. This lets the glue adhere better.
Protect small contact areas with masking tape, so the superimposed parts can be glued on.
Using an airbrush, apply a base coat of paint to the photo etched parts.
A new acrylic coat of the same colour applied with a paintbrush allows invisible retouching.
Paint the raised details with a paintbrush.
Also with the transparencies, some areas must be protected so the parts can be safely glued.
To get a white background that will become transparent and thus give form to the instrument details, airbrush a coat of matt white.
Next, give it a new coat of black to prevent the transparency being seen as a coat among the photo etched parts.
Raise the protector and squeeze out a small drop of superglue gel.
Glue the transparency to the base photo etched part and the panel is complete.
Glue the forward photo etched part to the base.
12.3 How do I paint a cockpit containing multi-media elements. Hold the part on the plastic sprue with a piece of adhesive tape. This will allow it to be handled so that the base coat can be easily
applied.
Airbrush a matt black shadow coat around the raised areas.

Next, highlight it using some lightened base colour.
Apply some outline to reinforce the effect of the parts’ separation.
Using a fine tipped paintbrush, paint the seatbelts’ base colour.
Add some detail to the seatbelt, including the seam.
Using matt aluminium, decorate the seatbelt buckles.
Highlight the buckles by painting the edges with a lighter tone.
In the same way, paint the cables and other small items.
Glue on the remaining parts that were painted separately earlier and this will complete the cockpit.
Use masking tape to protect the contact areas in the lower part of the fuselage.
Mask off the adjacent areas to reduce the cockpit part.
Paint a base coat the same colour as the cockpit.
After waiting for everything to dry, remove the protective masking tape.
Using a plastic pointer, apply a small quantity of superglue gel.
Fix the cockpit sides. With the background painted the same colour, it will prevent the plastic being visible.
Use thin superglue to fix the main part, the capillary action of this ultra-runny glue will ensure that it reaches all the parts.
Glue in the front instrument panel and the cockpit is complete.
12.4 How do I paint a modern aircraft seat made of resin?
Modern aircraft seats have so many details that they are almost complete scale models in themselves.
After gluing the seat onto a handling stick, give it a coat of base colour.
With the base coat of medium grey, apply any shadowing with dark grey rather than black. This will prevent any hard contrasts.
With the handling stick glued to the seat base it allows the best angles to be adopted when applying paint.
The seat quilting is painted in a green tone.
Accentuate the volume of the seatbelts by outlining them with black.
Using the airbrush, apply some highlights on the quilting.
Paint lines with a paintbrush to simulate the creases on the quilting.
Give the seatbelts a coat of base colour.
Complete the seatbelts by painting details to simulate texture and metal parts.
Using the same base colour as the quilting, paint the pouches on the sides.
Outline the pouch details in black.
The labels are paint brushed on. First, give them a coat of the bottle’s base colour. To make realistic labels, first paint one line and
then cut across it with the base colour in very fine transverse strokes. By doing this the small squares that will
resemble lines of text.
Add the instruction labels to the bottle and start to bring out the seat side details
by highlighting where necessary using a paintbrush.
After painting the metal details, the seat is complete.
Finally, paint the seat ejection mechanism separately.
On the rear, the details have been painted using the outlining technique shown earlier and apply highlights, both with a paintbrush.
The seat model that has been used for this chapter is an aires resin 1:32 scale aces II seat.

13. PAINTING THE WHEEL WELLS 13.1 How do I paint and weather the wheel wells?
To paint the wheel wells of this Bf 109, begin by applying a coat of base colour to the aircraft’s undersides.
Once this coat is dry, precisely mask off the edges of the bays.
Using small pieces of masking tape gradually expand the area covered so that there is no danger of spoiling the base colour.
With an airbrush, apply the base colour to the interior of the bays.
After allowing the base colour to dry for around three hours, accentuate the edges of the raised details using an hb lead pencil. The
pencil lines will act as an outliner, thereby reinforcing the effect of shadow. In this case, it is better to use a pencil rather than a
paintbrush, as the details are hard to reach.
Using matt black, add some shadowing to the lines that were made using the pencil.
The airbrush will eliminate any shine pencil’s lead, while creating an effect very like that of outlining with a paintbrush.
Between the shadowed areas, apply some highlights using some lightened base colour.
Retouch the edges with the lightened base colour. To get the best result with the paintbrush, a mixture was made of equal parts acrylic
paint.
As a final step, some small bare patches were added in the well’s interior. After removing the masks, this process was complete. Rs
the base colour of the aircraft’s undersides has already been painted in this area, it does not need to be covered with any masking.
If the wheel wells were supplied as independent parts, techniques can be developed for painting them that will reach the details with
greater ease.
First, paint the base coat and wait for it to harden.
For working on the cables and wiring, first paint them black.
While doing this, if the yellow tone is accidentally overpainted it can be retouched using a paintbrush and a similar acrylic mixture.
As the base coat is light, use very dark grey for shadowing. Doing this will hide all traces of retouching.
Only paint the top of the cables and wiring by doing this, the black base will act as an outliner and the cable will appear thinner and more in scale.
Apply the lightened base colour mixture to the raised details, such as the rivets.
The work of shadowing and the effects of the highlights makes the wheel ell details show increased relief.
14. ASSEMBLING AND DETAILING ENGINES
14.1 How do I clean up the engines without damaging the detail?
Eliminating mould lines that usually appear on a radial engine helps to ensure that will have a more realistic final appearance. Inevitably, a mould line will appear on the delicate cylinder head cooling fins, thus complicating the removal process.
Removing these mould lines will require some 800-grain sandpaper. This can be found in most ironmongers and is somewhat harder than the Tamiya one and better for this process.
A flat file and a paintbrush for removing any dust are the other tools required.
Slide the edge of the sandpaper between the blades and gently remove the mould line.
The sandpaper edges quickly wear out. When it does, simply cut off a few millimetres with the scissors.
Use the paintbrush to remove any sanding residue from between the blades.
Retouch the cylinder heads with the flat file.
Eliminate any striations made by the file with the sandpaper.
For the next processes, the engine will need to be held on a handling stick.
By applying some polystyrene liquid glue, any small scratches remaining between the blades can be removed and it will soften the shapes.
Bs with the cylinders, use the liquid glue to improve the surfaces.using the point of a blade, remove the mould lines from the valve gear pushrods.
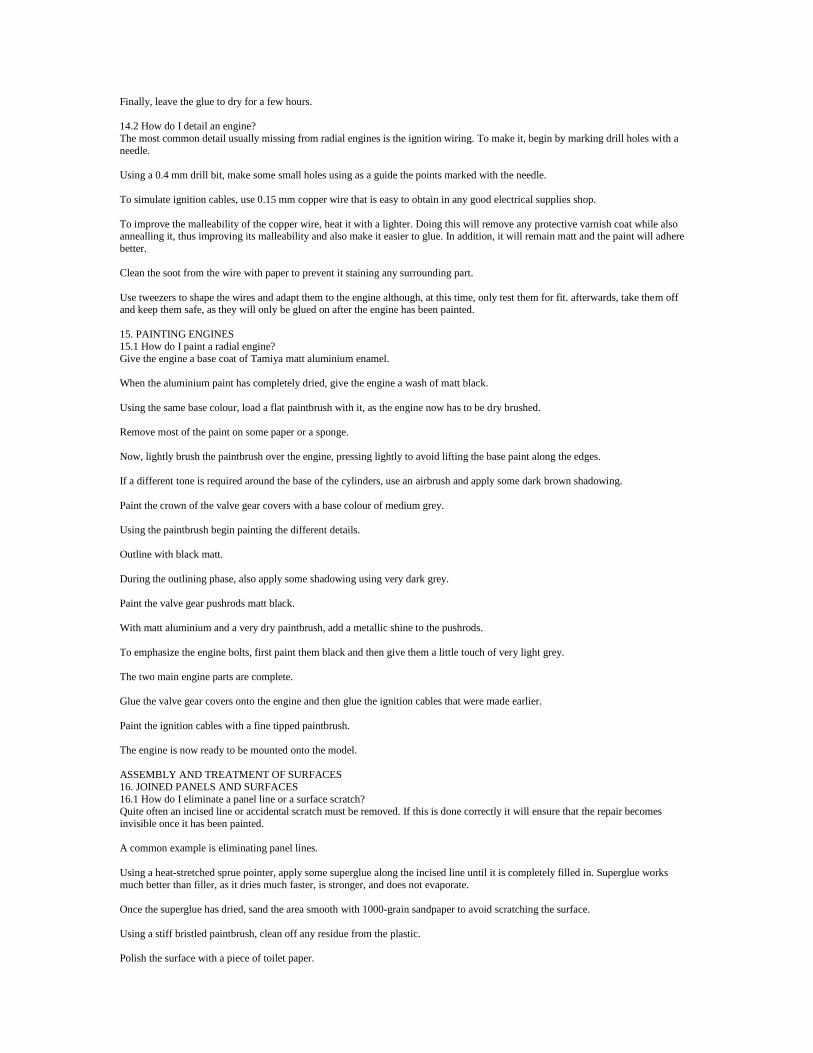
Finally, leave the glue to dry for a few hours.
14.2 How do I detail an engine?
The most common detail usually missing from radial engines is the ignition wiring. To make it, begin by marking drill holes with a
needle.
Using a 0.4 mm drill bit, make some small holes using as a guide the points marked with the needle.
To simulate ignition cables, use 0.15 mm copper wire that is easy to obtain in any good electrical supplies shop.
To improve the malleability of the copper wire, heat it with a lighter. Doing this will remove any protective varnish coat while also annealling it, thus improving its malleability and also make it easier to glue. In addition, it will remain matt and the paint will adhere
better.
Clean the soot from the wire with paper to prevent it staining any surrounding part.
Use tweezers to shape the wires and adapt them to the engine although, at this time, only test them for fit. afterwards, take them off and keep them safe, as they will only be glued on after the engine has been painted.
15. PAINTING ENGINES
15.1 How do I paint a radial engine?
Give the engine a base coat of Tamiya matt aluminium enamel.
When the aluminium paint has completely dried, give the engine a wash of matt black.
Using the same base colour, load a flat paintbrush with it, as the engine now has to be dry brushed.
Remove most of the paint on some paper or a sponge.
Now, lightly brush the paintbrush over the engine, pressing lightly to avoid lifting the base paint along the edges.
If a different tone is required around the base of the cylinders, use an airbrush and apply some dark brown shadowing.
Paint the crown of the valve gear covers with a base colour of medium grey.
Using the paintbrush begin painting the different details.
Outline with black matt.
During the outlining phase, also apply some shadowing using very dark grey.
Paint the valve gear pushrods matt black.
With matt aluminium and a very dry paintbrush, add a metallic shine to the pushrods.
To emphasize the engine bolts, first paint them black and then give them a little touch of very light grey.
The two main engine parts are complete.
Glue the valve gear covers onto the engine and then glue the ignition cables that were made earlier.
Paint the ignition cables with a fine tipped paintbrush.
The engine is now ready to be mounted onto the model.
ASSEMBLY AND TREATMENT OF SURFACES
16. JOINED PANELS AND SURFACES
16.1 How do I eliminate a panel line or a surface scratch?
Quite often an incised line or accidental scratch must be removed. If this is done correctly it will ensure that the repair becomes
invisible once it has been painted.
A common example is eliminating panel lines.
Using a heat-stretched sprue pointer, apply some superglue along the incised line until it is completely filled in. Superglue works much better than filler, as it dries much faster, is stronger, and does not evaporate.
Once the superglue has dried, sand the area smooth with 1000-grain sandpaper to avoid scratching the surface.
Using a stiff bristled paintbrush, clean off any residue from the plastic.
Polish the surface with a piece of toilet paper.
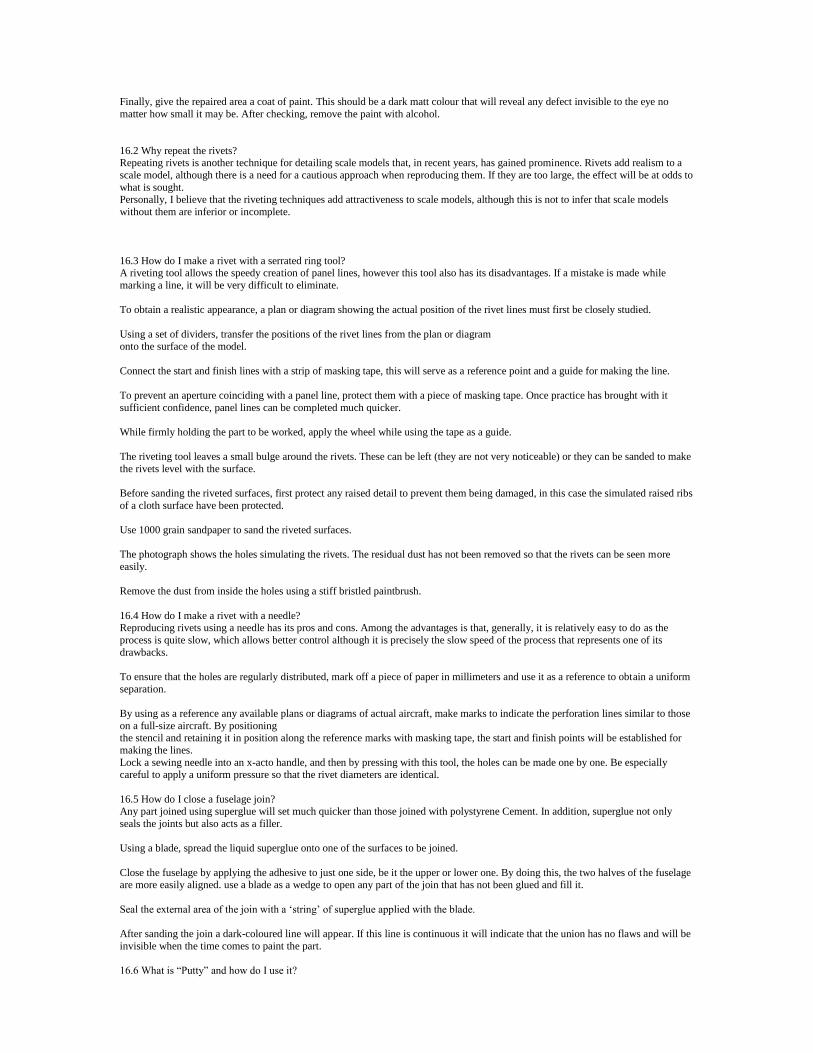
Finally, give the repaired area a coat of paint. This should be a dark matt colour that will reveal any defect invisible to the eye no
matter how small it may be. After checking, remove the paint with alcohol.
16.2 Why repeat the rivets? Repeating rivets is another technique for detailing scale models that, in recent years, has gained prominence. Rivets add realism to a
scale model, although there is a need for a cautious approach when reproducing them. If they are too large, the effect will be at odds to
what is sought. Personally, I believe that the riveting techniques add attractiveness to scale models, although this is not to infer that scale models
without them are inferior or incomplete.
16.3 How do I make a rivet with a serrated ring tool? A riveting tool allows the speedy creation of panel lines, however this tool also has its disadvantages. If a mistake is made while
marking a line, it will be very difficult to eliminate.
To obtain a realistic appearance, a plan or diagram showing the actual position of the rivet lines must first be closely studied.
Using a set of dividers, transfer the positions of the rivet lines from the plan or diagram
onto the surface of the model.
Connect the start and finish lines with a strip of masking tape, this will serve as a reference point and a guide for making the line.
To prevent an aperture coinciding with a panel line, protect them with a piece of masking tape. Once practice has brought with it
sufficient confidence, panel lines can be completed much quicker.
While firmly holding the part to be worked, apply the wheel while using the tape as a guide.
The riveting tool leaves a small bulge around the rivets. These can be left (they are not very noticeable) or they can be sanded to make
the rivets level with the surface.
Before sanding the riveted surfaces, first protect any raised detail to prevent them being damaged, in this case the simulated raised ribs
of a cloth surface have been protected.
Use 1000 grain sandpaper to sand the riveted surfaces.
The photograph shows the holes simulating the rivets. The residual dust has not been removed so that the rivets can be seen more
easily.
Remove the dust from inside the holes using a stiff bristled paintbrush.
16.4 How do I make a rivet with a needle? Reproducing rivets using a needle has its pros and cons. Among the advantages is that, generally, it is relatively easy to do as the
process is quite slow, which allows better control although it is precisely the slow speed of the process that represents one of its
drawbacks.
To ensure that the holes are regularly distributed, mark off a piece of paper in millimeters and use it as a reference to obtain a uniform
separation.
By using as a reference any available plans or diagrams of actual aircraft, make marks to indicate the perforation lines similar to those
on a full-size aircraft. By positioning the stencil and retaining it in position along the reference marks with masking tape, the start and finish points will be established for
making the lines.
Lock a sewing needle into an x-acto handle, and then by pressing with this tool, the holes can be made one by one. Be especially careful to apply a uniform pressure so that the rivet diameters are identical.
16.5 How do I close a fuselage join?
Any part joined using superglue will set much quicker than those joined with polystyrene Cement. In addition, superglue not only
seals the joints but also acts as a filler.
Using a blade, spread the liquid superglue onto one of the surfaces to be joined.
Close the fuselage by applying the adhesive to just one side, be it the upper or lower one. By doing this, the two halves of the fuselage are more easily aligned. use a blade as a wedge to open any part of the join that has not been glued and fill it.
Seal the external area of the join with a ‘string’ of superglue applied with the blade.
After sanding the join a dark-coloured line will appear. If this line is continuous it will indicate that the union has no flaws and will be
invisible when the time comes to paint the part.
16.6 What is “Putty” and how do I use it?

Putty, or filler is a product that is perhaps one of the most useful in the modelers’ armoury. It allows us to fill holes, correct moulding
flaws, repair defective joints, etc. Mr. Surfacer liquid putty is sold in a number of different textures and is ideal for filling small joins as it can be easily applied with a paintbrush.
For practice, let us correct a blemish on a circular moulding, this defect is quite common on scale models.
Using a curved blade, take a small quantity of putty directly from the tube.
Spread the putty onto the blemish until it has been completely covered. Bs this product evaporates as it dries, the process might have
to be repeated to cover the blemish completely.
After waiting around two hours for the putty to dry, sand it with 800 grain sandpaper moistened with water to remove any excess putty
and level the surface.
The blemish will be invisible under any subsequent painting.
Mr. Surfacer liquid putty is applied using an acrylic bristled paintbrush. Bs with the previously described putty, this one also evaporates so it is necessary to wait until the first coat dries before applying the next one.
Once dry, sand the surface using the same process.
Use alcohol to clean the paintbrush.
16.7 How do I sand and what are the best sandpapers?
High quality sandpapers can be found in any good ironmongers, however if the very
best is required, there are some excellent sets available from Tamiya.
Bs a precaution, and before starting a sanding job on an area of any scale model containing parts already worked on, they will have to be protected to prevent damage caused by the plastic dust mixed with water left by the sandpaper.
Dipping 800 grain or higher sandpaper in water will allow work without leaving deep scratches on the surface. Put the sandpaper into some water and then remove most of the moisture onto a piece of paper, leaving the sanding side of the paper slightly damp.
When sanding a flat surface, first sand in the direction of the join line and then alternate with transverse movements. This will get the job done much faster.
When sanding a curved surface it is better to sand only with transverse movements to avoid creating flat areas on the join.
The residue of plastic mixed with water serves to indicate the state of the panel lines.
For removing the plastic dust, use a stiff bristled paintbrush.
16.8 What do I use to scribe panel lines? After sanding, some of the panel lines will have disappeared. To re-scribe them, tools such as needles and scribers must be used.
A needle is better for replacing a curved line, whereas the scriber works very well for straight lines.
When scribing with a needle it is better to apply just a little pressure at the start to obtain the initial curve.
Once the initial curve has been established, it can be deepened by applying a little more pressure.
When scribing with the needle, small ridges will appear on both sides that will need to be removed with sandpaper.
Stencils are a necessary item for precise scribing. A 0.2mm thick tin sheet, cut into small sections, will easily bend round or over most surfaces and serve as a stencil.
For curved shapes, bend the tin stencil and hold it steady with masking tape.
As with the needle, it is better to first press slightly and progressively obtain the line.
After scribing the lines, smooth the surface with sandpaper.
16.9 How do I cut flying surfaces to create an effect of motion?
Separating flying surfaces, such as ailerons, flaps, rudders and elevators, and repositioning them in a different position is a process that
adds realism to a scale model. Begin by removing the surface with a new triangular blade.
Slide the blade gently along the etched line that delineates the surface.
Making progressive passes will progressively deepen the cut, working from both sides
until the cut is nearly through.
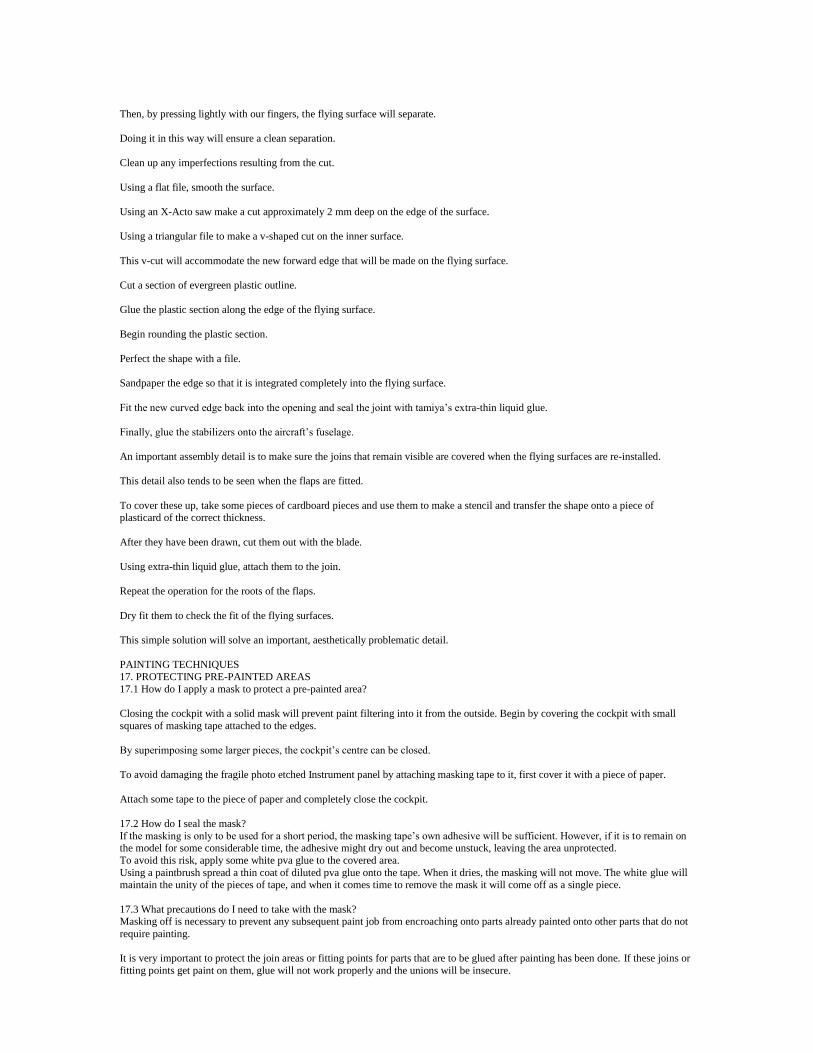
Then, by pressing lightly with our fingers, the flying surface will separate.
Doing it in this way will ensure a clean separation.
Clean up any imperfections resulting from the cut.
Using a flat file, smooth the surface.
Using an X-Acto saw make a cut approximately 2 mm deep on the edge of the surface.
Using a triangular file to make a v-shaped cut on the inner surface.
This v-cut will accommodate the new forward edge that will be made on the flying surface.
Cut a section of evergreen plastic outline.
Glue the plastic section along the edge of the flying surface.
Begin rounding the plastic section.
Perfect the shape with a file.
Sandpaper the edge so that it is integrated completely into the flying surface.
Fit the new curved edge back into the opening and seal the joint with tamiya’s extra-thin liquid glue.
Finally, glue the stabilizers onto the aircraft’s fuselage.
An important assembly detail is to make sure the joins that remain visible are covered when the flying surfaces are re-installed.
This detail also tends to be seen when the flaps are fitted.
To cover these up, take some pieces of cardboard pieces and use them to make a stencil and transfer the shape onto a piece of plasticard of the correct thickness.
After they have been drawn, cut them out with the blade.
Using extra-thin liquid glue, attach them to the join.
Repeat the operation for the roots of the flaps.
Dry fit them to check the fit of the flying surfaces.
This simple solution will solve an important, aesthetically problematic detail.
PAINTING TECHNIQUES
17. PROTECTING PRE-PAINTED AREAS
17.1 How do I apply a mask to protect a pre-painted area?
Closing the cockpit with a solid mask will prevent paint filtering into it from the outside. Begin by covering the cockpit with small
squares of masking tape attached to the edges.
By superimposing some larger pieces, the cockpit’s centre can be closed.
To avoid damaging the fragile photo etched Instrument panel by attaching masking tape to it, first cover it with a piece of paper.
Attach some tape to the piece of paper and completely close the cockpit.
17.2 How do I seal the mask?
If the masking is only to be used for a short period, the masking tape’s own adhesive will be sufficient. However, if it is to remain on the model for some considerable time, the adhesive might dry out and become unstuck, leaving the area unprotected.
To avoid this risk, apply some white pva glue to the covered area.
Using a paintbrush spread a thin coat of diluted pva glue onto the tape. When it dries, the masking will not move. The white glue will maintain the unity of the pieces of tape, and when it comes time to remove the mask it will come off as a single piece.
17.3 What precautions do I need to take with the mask? Masking off is necessary to prevent any subsequent paint job from encroaching onto parts already painted onto other parts that do not
require painting.
It is very important to protect the join areas or fitting points for parts that are to be glued after painting has been done. If these joins or
fitting points get paint on them, glue will not work properly and the unions will be insecure.

18. BEFORE APPLYING PAINT 18.1 References for authentic colours.
Much of a model’s realism is obtained by being painted in the same colour as that found on the full size aircraft. A number of
publications are available containing actual examples of the colours and these allow us to compare the paints used. The publications providing us with this important tool include the federal standard, monogram editions, etc. The internet is also an important colour
source but it must be remembered that the colours themselves are conditioned by what the monitor screen is able to reproduce.
18.2 How do I choose the appropriate paints?
Today, manufacturers of paints for scale models tend to produce two distinct product lines, enamels and acrylics, with each type
having its fans and detractors. I believe that each modeler must experiment and decide what type of paint suits his/her and gives the best result.
Personally, except for metallic colours, I prefer acrylics. The gunze sangyo range includes colours whose references are based on
accepted colour norms such as rlm or federal standard. A disadvantage of these is that some of the colours are only produced in gloss or semi-gloss finishes, that somewhat complicates their use.
Tamiya’s acrílica range does not have a wide range of referenced colours, but the fineness of their grain makes them my favorite;
diluted with common 96º-pharmacy alcohol, they allow the creation of very subtle paint effects. Both types of paint are toxic, which makes imperative the use of a mask when painting.
18.3 Why is it important to avoid handling already painted areas?
Intensive handling of areas already painted can damage the paint, with glossy areas appearing in the wrong places or even becoming
scratched. There are a number of ways of handling a model and also avoid damaging the paint. Latex gloves are useful, but using them can be inconvenient and the paint bases do not always leave the surfaces in the best condition. B simple method is to use a handle
made from a piece of plastic ‘bubble wrap’. This is a quilted material and resists slipping, so that the scale model can be held securely
without damaging the paint.
By holding the model by its wingtips, the lengthy process of painting can be easily carried out, moving the model around as required without any danger of it being dropped.
18.4 To avoid handling, where do I begin painting the model? Usually, the fuselage is the part of the model that requires the most time painting. This part is also the hardest to airbrush in a
comfortable position. I believe that painting the fuselage first is the best way forward as, by handling the model by the wing tips, it can
be easily turned and moved as much as required.
To prevent the appearance of a demarcation line between those areas that have been painted and those that require painting, always
paint to a specific panel line.
While painting the undersides, hold the model by the top of the fuselage, which has not yet been painted. The bubble wrap will
prevent any dirt or sweat from our hands from getting onto the model.
On completion of the lower central part, begin painting the rest of the fuselage, holding the model held its wing tips.
19. MASKS FOR DELINEATING OUTLINES
AND EDGES
19.1 What types of edges can I obtain using different masks? The types of edges that can be achieved using different masks are hard, semi-hard and soft.
Delineating the colours of this german splinter camouflage has been done by gluing the mask directly onto the surface thereby creating hard lines.
The diffused delineation lines of the undulating camouflage on this Spitfire has been made using masks that allow some of the paint spray to pass underneath, thus creating a semi-hard edge.
On this avenger, the lines of delineation were made by holding the airbrush away from the surface. The spray delineating the colours
is full, thus creating a soft edge.
19.2 How do I apply a mask to get a hard edge? To obtain an edge that is clean, narrow and ‘hard’, first lay down a thin strip of masking tape, which can be adapted to the surfaces
undulations and curves.
To prevent the paint leaking under or around the mask, extend the masked area using small pieces of tape and overlap the first strips.
Add more, larger pieces to enlarge the masked area.
To prevent the base colour showing through use a solid colour undercoat, such as grey. By using this colour, those shades that cover
poorly, such as yellow and red, will fix better.
Airbrush the yellow tone and let it dry for a couple of hours before removing the mask.
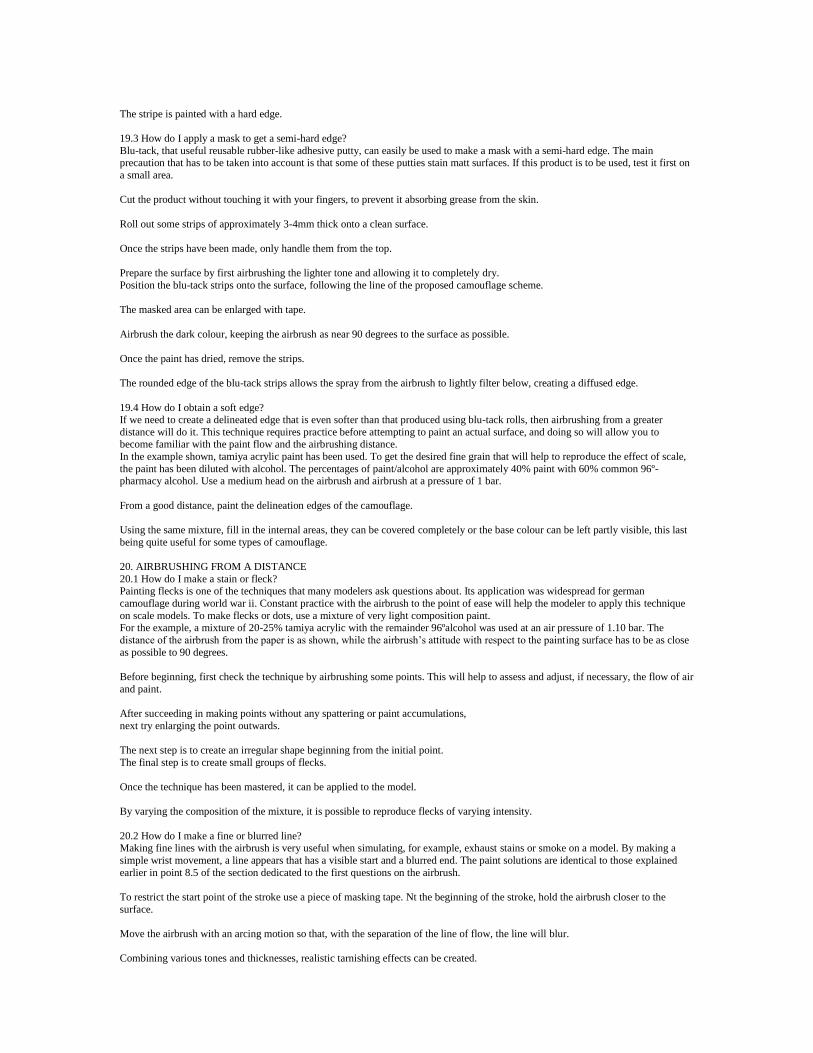
The stripe is painted with a hard edge.
19.3 How do I apply a mask to get a semi-hard edge?
Blu-tack, that useful reusable rubber-like adhesive putty, can easily be used to make a mask with a semi-hard edge. The main precaution that has to be taken into account is that some of these putties stain matt surfaces. If this product is to be used, test it first on
a small area.
Cut the product without touching it with your fingers, to prevent it absorbing grease from the skin.
Roll out some strips of approximately 3-4mm thick onto a clean surface.
Once the strips have been made, only handle them from the top.
Prepare the surface by first airbrushing the lighter tone and allowing it to completely dry.
Position the blu-tack strips onto the surface, following the line of the proposed camouflage scheme.
The masked area can be enlarged with tape.
Airbrush the dark colour, keeping the airbrush as near 90 degrees to the surface as possible.
Once the paint has dried, remove the strips.
The rounded edge of the blu-tack strips allows the spray from the airbrush to lightly filter below, creating a diffused edge.
19.4 How do I obtain a soft edge? If we need to create a delineated edge that is even softer than that produced using blu-tack rolls, then airbrushing from a greater
distance will do it. This technique requires practice before attempting to paint an actual surface, and doing so will allow you to become familiar with the paint flow and the airbrushing distance.
In the example shown, tamiya acrylic paint has been used. To get the desired fine grain that will help to reproduce the effect of scale,
the paint has been diluted with alcohol. The percentages of paint/alcohol are approximately 40% paint with 60% common 96º-pharmacy alcohol. Use a medium head on the airbrush and airbrush at a pressure of 1 bar.
From a good distance, paint the delineation edges of the camouflage.
Using the same mixture, fill in the internal areas, they can be covered completely or the base colour can be left partly visible, this last
being quite useful for some types of camouflage.
20. AIRBRUSHING FROM A DISTANCE
20.1 How do I make a stain or fleck? Painting flecks is one of the techniques that many modelers ask questions about. Its application was widespread for german
camouflage during world war ii. Constant practice with the airbrush to the point of ease will help the modeler to apply this technique
on scale models. To make flecks or dots, use a mixture of very light composition paint. For the example, a mixture of 20-25% tamiya acrylic with the remainder 96ºalcohol was used at an air pressure of 1.10 bar. The
distance of the airbrush from the paper is as shown, while the airbrush’s attitude with respect to the painting surface has to be as close
as possible to 90 degrees.
Before beginning, first check the technique by airbrushing some points. This will help to assess and adjust, if necessary, the flow of air
and paint.
After succeeding in making points without any spattering or paint accumulations,
next try enlarging the point outwards.
The next step is to create an irregular shape beginning from the initial point.
The final step is to create small groups of flecks.
Once the technique has been mastered, it can be applied to the model.
By varying the composition of the mixture, it is possible to reproduce flecks of varying intensity.
20.2 How do I make a fine or blurred line? Making fine lines with the airbrush is very useful when simulating, for example, exhaust stains or smoke on a model. By making a
simple wrist movement, a line appears that has a visible start and a blurred end. The paint solutions are identical to those explained
earlier in point 8.5 of the section dedicated to the first questions on the airbrush.
To restrict the start point of the stroke use a piece of masking tape. Nt the beginning of the stroke, hold the airbrush closer to the
surface.
Move the airbrush with an arcing motion so that, with the separation of the line of flow, the line will blur.
Combining various tones and thicknesses, realistic tarnishing effects can be created.

21. SPECIAL FINISHES
21.1 How do I paint a simulated wood surface? Creating a visual effect that resembles wood is a technique that will be put into practice
when painting World War I aircraft. The fuselage section is the best area for practicing on.
Airbrush a wood base colour using tamiya acrylics. The base mixture used is matt yellow with a small percentage of red to create an
orange tone. To add subtlety to this first
mixture, a small quantity of brown can also be added.
Take a piece of greaseproof paper somewhat larger than the surface that has been given a coat of base colour. Then, cut an irregular
line along the upper edge.
Glue the paper mask to the area, holding it in place with masking tape.
After increasing the percentage of brown in the base mixture, prepare an alcohol-diluted mixture, the approximate percentage of paint
should be around 30-35%.
Practice the line on a piece of paper.
Airbrush the edge of the mask.
Remove the mask and assess the effect of the first line, which should look like wood grain.
For subsequent lines, move the mask a few millimeters to right or left so that each line is not exactly the same as the previous one.
After a number of lines have been painted, re-cut the edge of the mask to create a slightly new pattern.
Proceed in this way until the panel is completed.
Finally, remove the masks and view the result. To paint the whole fuselage and create a more complex chromatic effect, try slightly
varying the base colour and the contrast of the lines.
21.2 How do I paint a bare metal surface?
Applying metallic paints requires that the surface to be painted must be free of defects, as even the smallest mark or scratch will remain visible even after it had been painted.
Masking metal surfaces can cause the paint to lift when removed. To reduce this problem, try to keep the masking tape’s contact
surface as small as possible. Planning the application of metallic paint is paramount, as metal finishes deteriorate much more if over-handled.
Use 1500 grain, or higher, sandpaper to remove any small surface blemishes or scratches.
Lightly sand all the surfaces, first with 1500 grain and then with 2000 grain sandpapers. Indeed, on every model, carry out this
procedure after the model has been assembled, glued and the joins sanded.
Using a thick paintbrush, remove any residue from sanding operation that has accumulated in the panel lines.
Apply the chrome silver, R-11, in the same way as applying a base coat; the mixture proportions are 70% paint with the remainder
being the enamel solvent
from the same manufacturer as the paint.
Allow the paint to dry for approximately two hours.
Retrace the panel lines using diluted acrylic.
While marking the panel lines, if the paint strays outside the line use a cotton bud to remove it.
Metallic paints are especially sensitive to masking; the pigments quite often come away
with the mask even when the paint is dry.
By painting with highly diluted acrylic colours on a natural metal finish transparencies can be created. Using white will lighten while
using black will darken, whereas using blue and brown will create tints that simulate the colours on those panels that are close to a heat source such as engine exhausts.
To minimize the effect of masking over the base paint, use paper and attach it to the model’s surface with small strips of masking tape. By doing this, it will reduce the adhesive surface area in contact with the paint.
Adjust the strip of masking tape to the panel lines; the paper will increase the area of any masking.

Using a highly diluted paint mixture, similar to that used for blurred lines and, in this case, white paint to airbrush the panel with an
homogeneous coat to lighten the panel.
Allow the paint to dry and remove the mask.
If the transparency dries too matt, after it is completely dry it can be shined by gently
rubbing it with a little cotton swab.
Repeat the procedure using diluted black to create a darkened surface.
By combining the colours of the transparencies, panels of several brightness’s and shades can be created.
By following this procedure, the natural metal surfaces take on the appearance similar to that of a full-size aircraft. The tonal
variations are produced by differences in alloys, repairs or the effects of heat.
22. PANEL LINES
22.1 Why emphasize panel lines?
Emphasizing the panel lines on model aircraft is complementary to the overall painting process and adds realism to the model. Panels
may be highly emphasized, subtlety emphasized or not at all, and is a matter for the model maker’s personal choice. Personally, I
prefer to mark the panels and enjoy to the same degree whether I do it with subtleness or more intensively.
22.2 How do I emphasize the lines with a pencil? Emphasizing panel lines with a pencil prevents them from being darkened when completing the painting process. Emphasized panel
lines differentiate the surfaces, adding complexity to the model.
To emphasize with a pencil, use a lead size of 0.5 mm with a hardness of hb or lower, anything higher in the hb series have brighter
leads.
Sharpen the lead on a piece of 800 grain sandpaper, this allows it to be inserted inside the panel line.
This technique allows emphasis on panels that may be shallow or have a difficult shape.
This method is also appropriate for easily emphasizing the outline of any raised detail.
Bs the stroke can be easily controlled, it can be applied onto very small shapes where emphasizing with a paintbrush would be riskier.
22.3 How do I emphasize the lines with a paintbrush?
Emphasizing lines using a paintbrush and acrylics is a technique that requires somewhat more practice than doing it with a pencil, as the stroke has to be handled with more control to avoid spilling the paint and creating rings. Over panels painted in lighter colours,
brown shades can be used to mark the lines. With darker panels, use brown mixed with black.
The initial paint composition should contain approximately 40% paint and 60% water.
An example can be seen in the photograph.
The mixture used is a highly diluted one and the paintbrush is prepared in exactly the same way as for doing outlining.
Insert the paintbrush into the panel line where the highly diluted nature of the mixture will cause it to flow easily, quickly darkening the panel line.
When the base colour is black or another very dark colour, the process is simply reversed and a lighter line is created using grey.
This technique allows the combination of various tones as a function of the base colour and of the area where it is applied; for
example, in areas close to the engine, emphasis can be with a darker tone to differentiate permanent panels from the those that can be
removed for, say, maintenance.
22.4 How do I emphasize the lines with an airbrush? The technique of emphasizing panel lines using an airbrush is appropriate for reinforcing the effect of movement of the flying
surfaces. By applying the airbrush over a mask, a hard edge can be created to mark the line while, at the same time, a soft one is
created that can blur with a few strokes.
For applying this technique, use a very small quantity of acrylic paint and, for example, use very dark brown on lighter colours or
black on the darker ones.
The paper reveals the mixture’s composition.
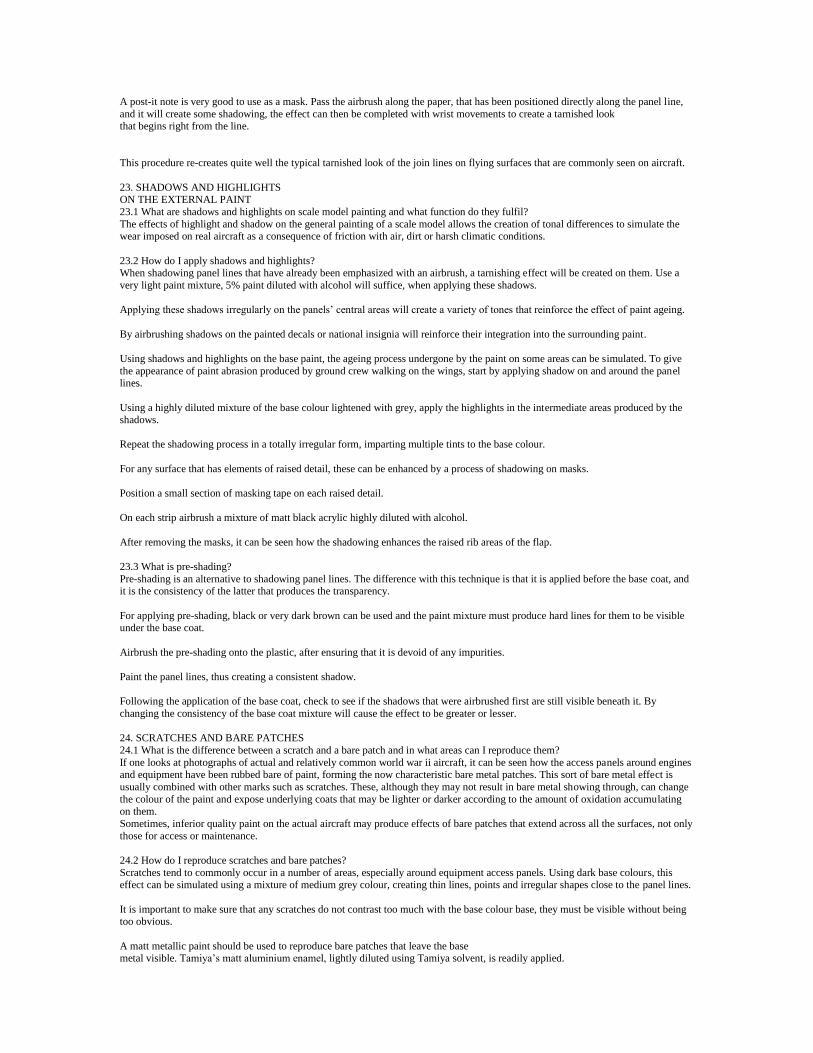
A post-it note is very good to use as a mask. Pass the airbrush along the paper, that has been positioned directly along the panel line,
and it will create some shadowing, the effect can then be completed with wrist movements to create a tarnished look that begins right from the line.
This procedure re-creates quite well the typical tarnished look of the join lines on flying surfaces that are commonly seen on aircraft.
23. SHADOWS AND HIGHLIGHTS ON THE EXTERNAL PAINT
23.1 What are shadows and highlights on scale model painting and what function do they fulfil?
The effects of highlight and shadow on the general painting of a scale model allows the creation of tonal differences to simulate the wear imposed on real aircraft as a consequence of friction with air, dirt or harsh climatic conditions.
23.2 How do I apply shadows and highlights? When shadowing panel lines that have already been emphasized with an airbrush, a tarnishing effect will be created on them. Use a
very light paint mixture, 5% paint diluted with alcohol will suffice, when applying these shadows.
Applying these shadows irregularly on the panels’ central areas will create a variety of tones that reinforce the effect of paint ageing.
By airbrushing shadows on the painted decals or national insignia will reinforce their integration into the surrounding paint.
Using shadows and highlights on the base paint, the ageing process undergone by the paint on some areas can be simulated. To give
the appearance of paint abrasion produced by ground crew walking on the wings, start by applying shadow on and around the panel lines.
Using a highly diluted mixture of the base colour lightened with grey, apply the highlights in the intermediate areas produced by the shadows.
Repeat the shadowing process in a totally irregular form, imparting multiple tints to the base colour.
For any surface that has elements of raised detail, these can be enhanced by a process of shadowing on masks.
Position a small section of masking tape on each raised detail.
On each strip airbrush a mixture of matt black acrylic highly diluted with alcohol.
After removing the masks, it can be seen how the shadowing enhances the raised rib areas of the flap.
23.3 What is pre-shading?
Pre-shading is an alternative to shadowing panel lines. The difference with this technique is that it is applied before the base coat, and it is the consistency of the latter that produces the transparency.
For applying pre-shading, black or very dark brown can be used and the paint mixture must produce hard lines for them to be visible under the base coat.
Airbrush the pre-shading onto the plastic, after ensuring that it is devoid of any impurities.
Paint the panel lines, thus creating a consistent shadow.
Following the application of the base coat, check to see if the shadows that were airbrushed first are still visible beneath it. By
changing the consistency of the base coat mixture will cause the effect to be greater or lesser.
24. SCRATCHES AND BARE PATCHES
24.1 What is the difference between a scratch and a bare patch and in what areas can I reproduce them?
If one looks at photographs of actual and relatively common world war ii aircraft, it can be seen how the access panels around engines and equipment have been rubbed bare of paint, forming the now characteristic bare metal patches. This sort of bare metal effect is
usually combined with other marks such as scratches. These, although they may not result in bare metal showing through, can change
the colour of the paint and expose underlying coats that may be lighter or darker according to the amount of oxidation accumulating
on them.
Sometimes, inferior quality paint on the actual aircraft may produce effects of bare patches that extend across all the surfaces, not only
those for access or maintenance.
24.2 How do I reproduce scratches and bare patches?
Scratches tend to commonly occur in a number of areas, especially around equipment access panels. Using dark base colours, this effect can be simulated using a mixture of medium grey colour, creating thin lines, points and irregular shapes close to the panel lines.
It is important to make sure that any scratches do not contrast too much with the base colour base, they must be visible without being too obvious.
A matt metallic paint should be used to reproduce bare patches that leave the base metal visible. Tamiya’s matt aluminium enamel, lightly diluted using Tamiya solvent, is readily applied.

Spread the bare patches randomly, creating irregular shapes around the access areas.
To reduce any shine on the bare patches and to integrate them into the model’s overall tone, apply a wash with the point of the
paintbrush on each bare patch; a dark brown tone diluted with lots of water will produce the desired effect.
After the wash has been applied, see how the shine on the bare patches has now been reduced and they have become homogenized
with the paint and don’t stand out too much.
25. OIL AND FLUID STAINS
25.1 Where should I reproduce oil and fluid stains? Oil, hydraulic fluid, and fuel stains are produced when an aircraft begins to leak, and they all do in one way or another. These liquids
make their way onto the aircraft’s surface and then assume shapes dictated by the aircraft’s passage through the air. These stains can
be imitated so that our model will have an operational appearance.
25.2 How can I simulate oil and fluid stains?
For creating the distinctive shapes of leaking fluids, highly diluted acrylic colours are used, in a mixture similar to, or lighter than that used for a wash. It is important that, in this instance, the paintbrush must be almost devoid of paint to prevent it from spreading and
creating rings. If it is done in this way, the stroke produced will be almost transparent. The colours used are black and some shades of
brown; these can be combined to create more realistic effects.
By first spreading the paintbrush bristles by pressing them onto some paper to remove any excess paint, very thin and parallel lines
can then be produced. Old paintbrushes are very good for applying this technique.
26. EXHAUST STAINS
26.1 Where should I simulate exhaust stains? The action of combustion in a piston engine generates a great deal of exhaust smoke that also tends to contain a fair amount of oil.
This mixture is dragged along any adjacent aircraft surfaces by the airflow and generates the characteristic staining that can be seen on the sides or undersides of the aircraft.
If the engines are installed in the wings, the exhaust will be blown over their surfaces, creating a quite odd coloured effect.
26.2 How do I paint exhaust stains?
By taking the Bf189 as an example, the exhaust staining can be painted with a start point being the hollow occupied by the exhaust.
The stain line will continue along the wing root and the fuselage.
Using a mixture of earth-brown acrylic paint diluted with alcohol in similar proportions to that used for thin or blurred lines, first mark
a relatively sharp line near the exhaust, making it lighter toward the end of the wing root.
Repeat the process for the brown line, creating a central black line right along the panel line.
27. VARNISH
27.1 What kinds of varnishes are there and how do I use one?
Just as with the paints, varnishes are available in both acrylic and enamel ranges. As with paints, it is recommended that they be practiced using the different products to discover which one is preferable for your particular needs.
Generally, it is best to use each varnish with the same manufacturers’ solvent, although there are cases where solvents, such as those
by marabú that yield better results when mixed with the modelmaster solvent. Unlike with paints, I prefer enamel varnishes, in particular those by the german maker, Marabú.
27.2 How do I apply a varnish base? Applying a varnish coat is a similar procedure to that for applying a base coat; to get a fine-grain finish it is better to give the surface a
number of passes with the airbrush, progressively covering the surface.
As for when to varnish and with what type of finish, there are many different combinations that can be used and various criteria to be followed.
A particularly common technique is to apply a gloss varnish coat after the model has been painted, with this serving as a base coat for
the decals. Once the decals have been applied, a new coat, which may be a matt or satin-finish, will be applied. This constitutes the model’s final finish.
The option I use is to apply a satin-finish coat as a base for positioning the decals. I first trim the decal carrier film to make them
invisible, position each one, and then, when the decaling is complete, apply an overall final finishing coat that may be a new satin or
matt coat.
The advantage of this technique is the avoidance of applying a gloss varnish coat that, generally, is thicker and harder to airbrush.
DECALS AND PAINTING NATIONAL INSIGNIA
28. DECALS
28.1 Decals and decal setting solutions Today, after market decal sheets are many and varied and they allow us to personalize our model using decorations other than those
included in the box. For ensuring the decals fit snugly onto the surface, there are a number of different setting solutions. Not all
manufacturers use the same chemical composition, so it is better to use each one sparingly and wait between one application and the next, as an excess of these liquids can literally dissolve a decal.
On the margins of the decal sheets, the printer places a number of crosses that are used to ensure the centering of each colour during the printing process. If these crosses have no different colour superimposed or off-centre lines, it indicates that the decal sheet is a
good quality one.

If a decal sheets possesses thick or excessively matt carrier film edges, this will indicate that the decal will be difficult adapt to the model’s surface. In this case, the procedure of closely trimming the carrier film and using a proprietary decal setting solution is highly
recommended.
28.2 Why cut out a decal and how do I do it?
A decal is removed from the sheet to make the carrier film invisible. Even if the model has been given a high gloss final coat, it is still
best to cut off as much of the carrier film as possible to allow the decal to appear part of the aircraft’s paint-work.
Using scissors or a blade separate the individual national insignia.
Using the triangular blade, remove the margins, thus eliminating the carrier film.
With the carrier film removed, integrating the decal is much easier.
To deal properly with a complicated shaped decal, cut it out and fix it to a piece of acetate.
With numbers or letters that have internal open shapes, I.e. U, p, b. Etc., it is not necessary to trim the transparent paper. Just slide a blade along the margins to remove only the carrier film.
Using the point of the blade, carefully lift the film.
With tweezers, remove the carrier film from inside the letter.
28.3 How do I separate a decal from the carrier film?
Holding the decal with tweezers, deposit it in a water-filled receptacle, leaving it to float on the surface.
After a short time, the paper backing will separate from the decal, indicating that it is ready.
With the tweezers remove the decal from the water and transfer it onto the model’s surface.
With letters and numbers, after removing the carrier film, the decals will become more fragile. To prevent them breaking up while being removed from the water, make a simple tool.
Make a spade-shaped tool from a length of plastic sprue and a piece of transparent acetate.
Using the tool, the decal can be easily picked out of the water and placed approximately in the position it will occupy. Bs the model’s
surface can be seen through the transparent acetate, it just needs a paintbrush to remove the decal from the tool before placing it on the model’s surface.
By using this procedure for cutting out decals, the numbers and letters will look as though they have been painted on the aircraft.
28.4 How do I apply a decal?
Using a completely clean paintbrush first apply a small quantity of water. In the case of a decal that is very stiff, a decal setting solution, such as micro sol, can be used to achieve a good result.
Pull the decal into its correct position, using a toothpick to avoid damaging it.
Once it has been placed into position, apply a small quantity of setting solution that will ensure the decal is properly integrated onto
the surface. If the decal is hard, repeat the operation after a few minutes has elapsed.
To make the decal adapt btter to the surface, insert some micro sol setting solution into the panel lines, the liquid will filter below the decal through capillary action and pull it snugly down over any raised detail.
28.5 How do I attach a decal to a painted surface? Even if setting solution has been used, a decal still may not adapt to panel lines on the surface. To rectify this and make the decal
integrate better, apply a small quantity of setting solution and then press gently with a needle.
After the decals are completely dry, redo the panel lines under them by using any of the different paneling methods. In this way, the
effect of Integrating the decals will be reinforced.
28.6 How do I keep a decal invisible when it cannot be cut?
Decal carrier films are impregnated with a powerful transparent adhesive. If a small quantity of this adhesive is diluted with a drop of
water and then deposited on a matt or satin-finish surface, when dry it will remain glossy. This property can be used to keep small decals invisible and fix them solidly onto the model’s surface.
Using a triangular blade and applying a little pressure, trim the carrier film as close as possible.
Using a paintbrush, place a drop of water to one of the margins of the sheet, diluting the glue that coats it.
Deposit the glue exactly onto the area where the decal should be placed.
After positioning the decal, a small quantity of micro sol setting solution will adapt it to the surface. Wait for it to dry. Then, remove
any glue residue using the paintbrush dampened with water. N coat of matt or matt-satin varnish will eliminate the shine and leave the decal seemingly invisible.
29. PAINTING NATIONAL INSIGNIA AND NUMBERS 29.1 When do I paint national insignia and numbers?
National insignia and number painting processes are called for when a different version of an aircraft not covered by the available
decal sheets is wanted, or when the painted surface contains details such as riveting that would be hidden by a decal. One basic element when painting national insignia is masking film. This material, found in art shops, is usually available with two levels of
adherence, low or high tack. The low tack film is more appropriate for use in model making, as the high tack sort may lift the base
coat when being removed. It is important to first test the film on a painted surface similar to that of the scale model, as some may leave adhesive residue on the
surface that will be difficult, if not impossible to remove.
29.2 What process do I follow when painting a national insignia or numbers? When painting a national insignia using a decal as a template first separate it from the sheet while retaining a margin of paper backing.
As work elements, use a piece of acetate sheet as a cutting base and a piece of masking film larger than the decal being used as a
template.
Place the decal onto the acetate sheet, fixing it with the masking film.
Cover the surface with another piece of masking film.
Use tweezers to avoid getting any sweat or other body oils on the adhesive.
Cut out the internal outline of the cross with a blade and a steel rule.
Lift the design with the point of a blade.
To avoid spoiling it, set aside the mask and attach it to the edge of the acetate.
Using the same procedure, trim the cross’s external outline, this will also give a mask for the second step.
Position the mask that forms the external outline of the cross on the model’s surface.
Enlarge the edges of the masks with tape.
Airbrush a coat of black over the masking while keeping the airbrush as close as possible to 90 degrees to the surface to prevent the air flow from lifting the mask and allowing
the paint to ‘creep’ under it.
After waiting for the paint to dry, position the mask for the cross’s internal outline.
To prevent it from moving, reinforce the fastening with pieces of masking tape.
Paint it white.
Once again, after waiting for it to dry and then, using tweezers remove the mask.
Next, remove the extended mask and then the mask proper.
The national insignia design is now painted and totally integrated into the surface.
If a drawing is to be used as a template, it can be traced onto greaseproof paper.
First, fix it onto an acetate sheet and then proceed in the same manner as previously described.
Applying the mask in a planned sequence, the decoration is complete.
30. GRAPHICS OF PAINTING
30.1 Graphic of painting the upper surfaces
1- Panel lines marked in black on the engine cowling.
2- Simulating gunsmoke residue using an airbrush.
3- Making scratches on access panels with grey paint.
4- Oil stains in and around the engine with black paint.
5- Rust on the exhaust using brown and black tones.
6- Delineating the edges of the soft camouflage.

7- Degrading the base colour with a lighter tone.
8- Panel lines painted on the national insignia.
9- Simulating oil stains on the flying surfaces’ joins.
10- Greasy marks on the walkways using black paint.
11- Bare patches on the walkways using metallic paint.
12- Bare patches around the access areas.
13- Scratches using grey paint.
14- Painted national insignia on the fuselage to leave the riveting visible.
15- Trimmed decals.
30.2 Graphic of painting the undersides
1- Accentuating the raised detail accentuated with pencil.
2- Base colour shaded with dark grey inside the areas that form the panel lines.
3- Panel lines marked out in dark brown using a paintbrush.
4- Tarnish with grey shadow on the flying surfaces.
5- The flying surface lines highlighted with airbrush and paintbrush.
6- Registers and panels marked on the decals.
7- Stains and spatters on the undercarriage doors. B- Simulating oil stains on the engine cowling with black paint.
9- Bare patches made with metallic paint.
10- Panel lines marked with black paint on the engine cowling.
11- Simulating rust with an airbrush.
12- Staining caused by leaking fluids using a paintbrush.
13- Stains and bare patches in the wheel wells.
14- Contrast of base colour with lightening tone and shadow.
15- Surface rivets.
FINAL FINISH
31. PARTS TO BE ASSEMBLED AT THE END 31.1 What parts do I paint and assemble separately, and for what reason?
The parts to be painted separately include such components as landing gear, propellers, etc.
This allows them to be worked on more conveniently and gives the modeler the ability to carry out work on them, such as detailing and painting that can be extensive despite the reduced handling of the model.
32. PROPELLERS 32.1 How do I paint and weather propellers?
To paint propellers supplied with separate blades, first attach each one to a stick for easier handling.
Airbrush the base colour.
With the base colour lightened with medium grey, apply designs to the blades’ forward edges, thus creating a weathering effect.
After separately painting the different parts, assemble the complete propeller.
When painting a ‘one-piece’ propeller, first attach it to a handling stick that can be bent after applying some heat.
Remove any excess part of the stick and put some masking tape on the end.
Insert the stick into the propeller fitting hole; the use of masking tape will keep the propeller held steady but will also allow a change
of position.
By doing this, the propeller can be kept in an optimum position while being painted.
To improve the adhesion of the yellow, first airbrush a base coat of medium grey.
Over the, now dry grey colour, apply the desired yellow.
While waiting for the yellow to harden, using a liquid mask solution, coat that part of the
propeller that will be painted in natural metal.
With a ruler, measure and cut equal lengths of masking tape.
Position the pieces of masking tape on the blade tips before covering the yellow.
Apply the black paint and remove the masking.
Using tweezers, remove the liquid masking that covered the propeller boss.
Next, protect the blades that have already been painted with masking tape.
Airbrush the propeller boss with Tamiya matt aluminium.
Apply a black acrylic wash over the boss details.
Once the wash has dried, dry brush the metallic base colour.
Remove the masking.
Using a paintbrush and medium grey paint, simulate some scratches on the blades.
To get a better visual effect of weathering, combine the scratches with bare patches using matt aluminium.
Position the decals and then fix and adapt them using micro sol solutions.
A coat of matt-satin varnish will complete the job.
33. EXHAUST 33.1 How do I paint the exhaust on in-line engines?
The moulding of model aircraft in-line exhausts parts tend to have breaks making it necessary to retouch them.
Sand the imperfections with some 800-grain sandpaper.
Clean up any ‘flash’ with a file.
For an exhaust that should have a weld line, this detail can be restored with a small strip of 0.1 mm plastic.
Seal the strip with liquid polystyrene cement.
Fix the part onto a handling stick to hold it while it is being painted.
Give it an airbrush coat of Tamiya matt aluminium enamel.
Give it a wash of tamiya matt brown mixed with black heavily diluted with alcohol.
Paint the area that should be hollow with matt black.
Using the paintbrush and light brown, paint the edges of the exhaust.
The highlight effect that has been painted along the edge of the exhaust and which contrasts with the black interior, imparts a visual
effect that gives the illusion of a hollow tube. Applying a quite intensive brown wash gives the exhaust a distinctive appearance.
33.2 How do I paint the exhaust on radial engines? First, attach the exhaust pipe to a plastic handling stick.
Airbrush a base coat of Tamiya matt aluminium.
Give it a dark brown wash.
Using an old paintbrush, add small stains of a diluted mixture of dark brown and black.
Paint the hollow interior of the pipe black.
Add a touch of light brown highlight around the edge of the pipe to reinforce the hollow effect.
The effects of the hot gases causing a scorched appearance when it is ejected is an important visual element of the model.
34. LANDING GEAR
34.1 How do I clean a landing gear leg? The most common defect on any cylindrical plastic, or metal part is the presence of a mould line. This must be removed if it is hoped
to get a realistic appearance.
Using a curved blade will prevent damage to the part when removing it from the sprue.
Scrape off the mould lines with the point of a triangular blade.
After removing the mould lines, the parts are ready for further detailing.

34.2 How do I detail a landing gear leg? Begin the detailing of the landing gear leg by preparing some 1 mm plasticard o replace the shock absorber scissor link.
Cut out the square shapes where the scissor links fit onto the legs.
Cut the parts to give them a triangular shape.
Glue on the parts with superglue.
The kit supplied shock absorber scissor links are usually quite thick. In the photograph the original can be compared with the scratch built one.
For hydraulic pipes, use a length of 0.3 mm copper wire.
Remove part of the insulation, retaining only a small portion that will serve to simulate
the flexible section of the piping.
Coil the retained part of insulation onto a metal cylinder.
Attach the leg to the handling stick.
Using a plastic pointer, apply small drops of superglue gel.
Position the wire on the undercarriage leg.
Add some clamps made of 0.1 mm aluminium sheet. This material is used to make caps and seals for many household food items.
While the clamps fulfill a detailing function, they also ensure that the wires simulating the hydraulic pipes remain glued in place.
After masking off the contact surfaces, the part is now ready to be painted.
34.3 How do I paint a landing gear leg? After attaching the part to a temporary handling stick, airbrush it with a base coat.
To get the effect of the different parts that go to make up the completed undercarriage leg, apply some outlining.
If you have not yet mastered the technique of outlining with a paintbrush, using a pencil will obtain a similar effect.
Highlight the raised detail by painting them with a mixture of paintbrush acrylics similar to the base tone but lightened with medium grey.
Paint the clamps with matt aluminium.
Paint the pipes medium grey but paint the flexible portion with a brown leather tone.
Accentuate the bolt heads by first painting them black and then adding a white highlight spot.
With the legs complete, remove the masks that have been covering the contact areas and the handling sticks.
34.4 How do I replace the tyre tread?
Using 800-grain sandpaper, remove any mould lines on the wheels.
While removing the mould line, part of the tyre’s tread detail will also be lost.
By using the edge of the sandpaper, the tyre tread can be recut.
34.5 How do I create the effect of weight on a tyre?
Reproducing the effect of weight on a tyre will make the model look much more realistic. While this technique can be applied to solid
plastic wheels, it cannot be carried out on wheels that are composed of two hollow halves.
Use a blade to scrape a flat area on the tyre.
Smooth the surface with a flat file.
Make sure that the flat surface that has been created is regular and not tilted.
A flat-headed screwdriver fitted with an insulated handle will be required to deform the tyre and make it bulge realistically.
Place the screwdriver on a non-flame heat source such as an iron. after around 7 or 8 minutes, press the screwdriver onto the tyre, taking care not to burn yourself.

The heat will deform the flat surface into a bulge on the bottom of the tyre, thus producing the desired effect.
34.6 How do I paint a wheel? Airbrush a black base coat.
With the tip of the paintbrush and using dark grey paint, accentuate the wheel’s internal detail.
Retouch the grey paint with black.
Cut a round mask to protect the wheel’s central rim.
Airbrush earth-brown paint around the mask. This will simulate the dust that accumulates around this area of the tyres.
Use tweezers to remove the mask and then view the effect.
Using the same brown mixture, airbrush the tyre tread to create a dusty effect.
Darken the tread with brown paint to give contrast.
Add a few metallic touches to those parts that can be dismantled.
Using just these simple painting techniques, the wheels will end up looking as though they have been in service.
34.7 How do I paint the tyre tread? Often when sanding the tyre to remove any mould lines, some, if not the entire tyre tread will also be lost.
Before starting to paint, cover the contact area of the part so the internal disc can be safely glued.
Airbrush the tyre with a coat of matt black acrylic.
Cut strips of Imm wide masking tape.
Position the strips of tape at equal intervals.
On the tyre’s upper part, airbrush a very thin coat of medium grey.
After the paint has dried, remove the strips.
To paint the wheel’s internal disc without handling them, attach them to handling sticks with masking tape.
Apply the base coat.
Emphasize the raised detail with a pencil.
Airbrush brown and black shading on the raised detail.
Accentuate the bolts with white paint.
Now, glue the disc to the wheel; the contrast generated by the grey that was painted on the tape strips creates a visual effect
resembling the raised tread.
34.8 How do I get ready to paint the landing gear bay doors?
The undercarriage doors have some mould ejector pin marks on them that look both unrealistic and aesthetically unappealing. These marks are usually in the most ‘hard-to-get-at’ places on the parts where sandpaper cannot reach or are close to some details that might
get damaged. To solve this problem, cover the ejector pin marks with made-to-measure pieces of plastic.
Place the part on some greaseproof paper, holding it in place with strips of tape.
Using the paper’s natural transparency, draw the internal areas of the part with a pencil.
Hollow out these areas with a blade.
Using the paper as a stencil, transfer the outline of the parts onto a sheet of 0.Imm thick plasticard.
Cut out the pieces with a sharp blade.
Now the pieces can be glued onto the doors to cover up the marks. As a fine adjustment, seal the joints with Tamiya extra-thin liquid
cement.
Use some filler to fill in the marks on the upper area of the part.
Once the filler has dried, sand it smooth with 1000-grain sandpaper.
After the injector pin marks have been eliminated, the parts are ready for painting.
Combining the already familiar techniques of airbrush and paintbrush, the raised detail
effect on the parts can be increased.
35. CANNONS AND MACHINEGUNS
35.1 How do I hollow out the barrel of a cannon or machinegun?
It is quite common to find that those parts representing cannon and machinegun barrels are not hollowed out. Drilling them out will give them a more realistic appearance.
Use a needle to mark the centre of each barrel, so that when it is drilled the centre of the hole is guaranteed to be correctly aligned.
The most fragile area of the drill bit is the line where the spiral begins. When inserting a bit into a handle or drill hole, be careful to
make sure that this area does not coincide with the point of pressure. Gently turning a 0.4 mm drill bit onto the centre point that was made with the needle, drill down around 1.5 mm.
If the opening is to be conical, trim the sides of the drill hole using the point of a triangular blade.
Using liquid glue, soften the scraped area on the inside of the hole.
After allowing the glue to dry, the barrel is now ready for painting.
Drilled barrels adds extra realism to scale models.
35.2 How do I paint a cannon or machinegun? Viewing photographs of cannon and machineguns on full-size aircraft shows how the black tone of these items has worn off. This
effect is produced by a number of causes, including handling, lubricants and heat.
A piece of plastic can be given a similar appearance by the judicious application of various techniques.
First, secure the parts in a handling stick. Ns pressure must be applied during painting, they need to held securely, so it is advisable to
drill a small hole in an area that will eventually be hidden.
Airbrush a base coat of Tamiya matt aluminium enamel.
Using black acrylic diluted with alcohol, apply a very thin coat of paint that does
not completely cover the part.
Leave the black paint coat to dry for at least two hours.
Using an absolutely clean, flat paintbrush, gently rub the gun barrel. The effect of the paintbrush’s bristles rubbing the black paint will remove it from along the edges and on any raised areas allowing the metallic base coat to show through.
It is not necessary to varnish the part; the eroding of the black paint by the paintbrush will also create differences in shine and give the part extra realism.
Another method that can be used to create a similar effect is the graphite technique. For this, the part must first be airbrushed with a base coat of matt black acrylic and allowed to dry for two hours.
Rubbing a soft 2b lead pencil onto a piece of sandpaper will result in a pile of graphite dust.
Impregnate a flat paintbrush with the graphite dust.
Shake any excess dust onto a piece of paper.
Apply the dust-impregnated paintbrush by gently rubbing it onto the part.
The graphite dust will adhere to the edges and raised detail, creating a metallic shine similar to how the barrels would appear in
reality. Bs with the earlier technique, it is better not to varnish in order to preserve the full range of shine.
35.3 How do I paint additional armament?
Scale models of modern aircraft carry a lot of the additional armament that is an important part of the final detailing. Given the large quantity of detail that these items carry, a good deal of additional time will have to be dedicated to completing this stage of the model.
As an example, let us illustrate the work required to detail and paint just one 1:72 scale gbu bomb from a hasegawa armament set.
Before starting, any residue left when the part was separated from the sprue by the side cutters must be cleaned up.
Using a curved blade, first level the surface.

The biggest drawback with these items
tends to be the over scale thickness of the fins.
Using the side cutters, remove three of the four original fins.
Then, using the remaining fin as a template, make a copy of it on a piece of greaseproof paper.
Now, remove the remaining fin and level the surface with the curved blade.
Sand the surface with 1000-grain sandpaper.
Join together the two halves of the bomb and seal the join with superglue.
Again using the sandpaper, smooth the join line.
To fix the new fins, mark the drill hole centres with a needle. For reference to
align each hole, use a strip of masking tape.
Drill the holes with a 0.4mm bit.
Using the blade, hollow out the fin’s form that was drawn onto the greaseproof paper.
Using the paper as a template, transfer the shape of the fins onto a piece of B.1mm thick plasticard.
Once the shapes have been marked onto the plasticard, cut them out with a sharp blade.
Before beginning to paint, test the alignment and fit of the new fins.
To paint the fins without handling them, fix them onto a plastic stick with masking tape.
Hold the bomb with a handling stick while applying the base colour, in this case Tamiya’s olive drab acrylic.
Airbrush the fins with the base colour. After the paint has dried, remove them from the tape, turn them over and paint the other side.
Outline the different parts of the bomb with black.
Shade the outlining with black paint highly diluted with alcohol.
Using the base colour lightened with light brown, airbrush broken lines that will create tints for the base paint to simulate ageing on
the item.
Mask off the central part of the bomb and paint the bomb’s guidance unit with light grey.
After further masking, paint the coloured details.
Finally, paint the small details to complete this phase.
Once the painting is complete, airbrush the bomb with a coat of satin varnish. Then, after allowing this coat to dry, apply the decals
and the detailing is complete.
To complete the bomb, give it a final coat of matt-satin varnish as this will integrate the decals and make them appear integral with the
paint.
36. NAVIGATION LIGHTS
36.1 How can I make navigation lights?
To reproduce bulb-type navigation lights, begin by cutting some small circular pieces from a tin sheet.
This metal’s natural shine is ideal for making this type of light.
Fix the pieces onto a handling stick with adhesive tape.
Place some drops of undiluted gloss varnish onto the pieces of tin with a paintbrush, Tamiya’s clear varnish is ideal for this.
Allow the first drop to dry for around three hours and then repeat the process. After doing this three or four times, a form similar to that of a bulb will have formed.
To give the lights some colour use Tamiya’s transparent colours.
Progressively apply the paint to prevent it going lumpy.
Using this technique allows us to make transparent or coloured lights.
The disc from the tin sheet that is being used as a base acts as a mirror that, under certain light conditions, creates an effect resembling
that of a luminescent lamp.
Once the lights have been completed, carefully separate them from the adhesive and attach them to the model with pva glue.
To create level navigation lights, another painting procedure is used based on superimposition of tones.
Begin by painting the navigation light area matt black.
Paint the centre of the matt black area with red heavily darkened with black, leaving a small edging of black around it to create a
grading of tone.
Now apply more red in the area that was painted dark red, thus creating another grading of tone.
Finally, paint a tiny red point highlighted with white, creating a last grading of tone.
Complete the light by applying a small drop of gloss varnish.
Before handling the part again, allow the gloss varnish to dry for at least two hours.
This technique produces very realistic results with level lights or when there are no clear parts available.
37. TRANSPARENCIES 37.1 How do I prepare transparencies?
The composition of the plastic of transparent pieces is usually much harder and, in consequence, more brittle. When removing the
transparency from the sprue or removing any flash from the part, apply as little pressure as possible as there is a fear that these fragile parts will crack or even break with no possibility of being repaired.
To remove the final remains of the sprue, it is best to use a curved blade and level the surface bit-by-bit.
Give a definitive shape to the part by lightly sanding it with 1000grade sandpaper.
If the transparent part has been scratched, Tamiya’s polishing compound is ideal for removing them.
Apply the compound with a micro-fibres chamois leather.
37.2 How do I cut a transparency to open the cockpit? Often a cockpit canopy is supplied as a single piece.
To cut it so that the model can be viewed with the cockpit open requires the following steps:
The primary problem with any transparency is that the opening’s demarcation lines are barely visible to guide the cut, it is advisable to
mark the line of separation of the canopy with two strips of masking tape, leaving a space between them of approximately 1.5mm.
Using the tape strips as a cutting reference, position a fine-toothed razor saw along the central space and then try to maintain the saw’s
inclination with respect to the part so that the cut remains straight.
To prevent the canopy cracking or even breaking, it is wise to gently move the saw while applying very little pressure with each
motion. Doing this, will result in a clean cut.
Using the point of the blade, remove any plastic residue from the cut line.
Level the surface with a flat file.
To achieve the final finish and eliminate any scratches caused by the file, use some 1000-grain sandpaper.
Finally, use a small brush to clean the transparency.
Using this process, the result will be an open canopy that can be glued to the model and which will give an uninterrupted view of the
cockpit interior.
37.3 How do I mask a transparency? To work on a transparency without touching it, first apply some Tamiya masking tape, with the sticky side facing outwards, onto the
end of a length of spare plastic sprue and mount the transparency on that. It is most important to use a new piece of tape so that there
is no danger of leaving any adhesive residue on the transparency.
To ensure that the masking tape adapts to the curved surfaces, first use 2mm wide strips.
Then, enlarge the surface of the masking with small squares of tape.
Use some micro mask liquid mask to protect the centre of the transparency.
Apply micro mask with a paintbrush; the consistency of the liquid will allow it to adhere to the surface.
In the first instance, it is best to apply a small quantity as, in excessive quantities, the liquid will slide over the surfaces. The process can be repeated after waiting about an hour for the first coat to dry.
Finally, enlarge the masking with tape to prevent the paint from creeping onto the internal area of the transparency.
37.4 How do I paint a transparency?
Begin the painting of the transparency by first applying a coat of paint the same colour as the cockpit interior. Now, apply a coat of the external colour. This will cover the first coat of paint that will then only be visible from the inside of the
transparency. In this way, a complicated double masking job is avoided that would otherwise be required to apply the transparency’s
internal colour. after the paint has dried, give it a coat of the same varnish that was used on the other surfaces of the model, thus obtaining the same tone as a final colour.
Using the point of the blade, remove the liquid masking. This product is ideal for masking transparencies, as it leaves neither marks nor residue.
For a final step, carefully remove the first strip of tape. It is best to wait until the paint has completely dried before removing the masking so that crisper edges are obtained.
Release the transparency from the handling stick, and it is now ready to be fixed to the model.
37.5 How do I prepare a vacuum-formed transparency?
R vacuum-formed transparency is a variant of the injected plastic type. These can be found in model kits supplied by short run manufacturers or may be acquired as replacements parts for other kits. These parts, although more difficult to handle than regular
transparencies, have the advantage of being much thinner than the plastic ones and will give the completed model a more realistic
scale effect.
To remove the transparency’s base, first edge it with a strip of masking tape.
Edging it with the tape gives a clear reference for the line of separation.
To make the transparency easy to handle without it deforming, first attach it to a cardboard base.
Begin by cutting the part with a triangular X-Bcto blade, pressing very gently so the cut line is progressively marked.
After several passes with the blade, the useful part of the transparency part can be separated with ease.
Using 1000 grain sandpaper, level the surface and remove any residue from the cut.
To paint a vacuum-formed transparency, use the same process for painting plastic transparencies as described earlier.
The primary advantage of a vacuum-formed transparency is the thinness of the plastic, which gives a better scale effect to the finished
model.
37.6 How do I attach a transparency?
Although superglue is the most versatile and quickest glue for attaching parts to a scale model, it is not good for attaching transparencies. The reasons have already been described in the chapter describing its use, as the vapours this product gives off as it
dries will stain the parts and damage the finish.
To safely attach any transparency it is better to use white pva glue that, although it dries much more slowly, does possess enough strength to hold these delicate parts.
Fill a container with pva glue and with a plastic pointer take a drop of glue.
For holding the transparencies without damaging the paint, put some small pieces of cable insulation onto the points of the tweezers.
Apply pva glue to the contact areas between the transparency and the model and after an hour the glue will have set and the
transparency held securely.
38. AERIALS AND RIGGING
38.1 What materials can I use to make an aerial or rigging?
Rigging are cables used on the old biplanes and monoplanes to increase structural strength. Reproducing these cables in scale models is a delicate, time-consuming process. There are various types of rigging, plaited cables,
solid steel, etc. For model-making simple materials for making rigging can be used, such as plastic, copper or steel wires.
The simplest material that can be used is heat-stretched plastic. This is obtained from the sprues that accompanied the parts of the
model. If the sprues happen to be metallic
black, the rigging produced with them will not require painting after being fixed, so the rigging process will be simplified.
Begin by cutting the sprue into approximately 5 cm lengths.
Using a lighter, apply heat to the length of sprue. It is best to swivel the sprue as it is being heated, this will prevent the appearance of
bubbles.
After a few seconds of heat, the bar will begin to bend as a consequence of gravity. This is the signal that the bar is soft enough to a
produce thin thread.
Now, gently pull both ends of the sprue and the central thread will become thinner. The more you pull, the thinner the resulting thread.
However, this process does take practice.
This procedure can, and will result in threads similar in thickness to, or thinner than a human hair.
To make a thicker rigging that will retain its tension, copper wire can be used. For 1/72 scale use 1 mm wire, for 1/48 use 1.5 mm wire.
For the example, 1.5 mm wire was used. After heating the wire to remove the varnish insulation, the wire was stretched using pliers. This was done with care to avoid breaking the wire. The final result was some perfectly straight lengths of wire that
had also been reduced in thickness to around 1.3mm.
Using the scissors for cutting photo etched parts, the parts of the wire that had been held in the jaws of the pliers were removed.
The lengths that remained were both stiff and thin enough to simulate the rigging as used on world war ii seaplanes.
Another very useful material is steel wire although cutting and attaching this type of wire is more difficult than using copper wire. Its
advantage is that it has a magnificent, high gloss finish which is very useful for rigging a biplane from the 1920s and 1930s.
To reduce the shine on these wires, lightly sand them with 1000-grain sandpaper. This will reduce the shine and make them more
appropriate on aircraft that have seen a great deal of service.
38.2 How do I prepare a model before attaching rigging? Preparing a model before attaching the rigging is paramount, as most aircraft models do not include any kind of hole for attaching the
wires.
Information on the correct positioning of the rigging is fundamental if the scale model is to look realistic. Fortunately, nowadays, most
manufacturers include instructions to guide us through this process.
After comparing the parts with the drawings, mark the position for the holes to be drilled
for attaching the rigging wires.
Using a needle to mark the drill hole centres.
Using a 0.4 mm size drill bit make the holes at the marked points. Drill the holes approximately 0.5 mm deep. This will allow sufficient depth for the wires to be safely and securely attached.
On this Hirco 2H 2, the rigging was made using stretched Plastic sprue. First, it was glued into drill holes using superglue gel. Once the glue had hardened, the wire was pulled taut and stuck in the small hollows between the structures and the wings. Wire sheathing
was used to simulate the tensors.
On the Curtiss P6, the rigging was made using stretched copper wire. Hs this material maintains its own tension, it is sufficient to cut
the lengths in half and glue them into the drill holes; once all of the rigging is placed, paint it with black acrylic using a paintbrush.
On the Grumman F3 F2, the rigging was made with sanded steel wire; as with the P6, superglue gel was used to hold it.
38.3 How do I make an aerial wire? The process of making a wire antenna is similar to that for rigging; the same materials can be used, although given the greater fineness
of an aerial, I prefer to use stretched sprue of various colours.
To simulate the insulation on an antenna, a drop of white paint is ideal. For the less experienced modelers, it is perhaps better to paint the insulation after gluing the first end of the antenna, because if it is painted after pulling the wire taut and do not control the pressure
of the paintbrush, it might break and the work will be ruined.
To attach an antenna, stretch a length of plastic sprue and glue it first at the most difficult point, this usually being the antenna mast.
Use a small rop of superglue gel as the adhesive. Once it is dry, the aerial insulation can be simulated with a droplet of undiluted white
paint.
After applying the white paint for the antenna insulation, place a small drop of superglue gel on the other attachment point, position
the wire and gently pull taut.
Once the superglue has dried, carefully cut off the excess with the curved blade.
39. FINISHING THE SCALE MODEL
39.1 advice on presenting and preserving a scale model
If the model is to be exhibited or entered into competition, it is best to do so after mounting it on a suitable base. These can be made of various materials depending on the model-maker’s taste. However, above all, the chosen base must be finished to the same high
standard as the model as all too often a fine model has been spoilt by mounting it on an unsuitable, or badly finished base.
One very important piece of advice is to always indicate, with a sign, whether the model is attached to the base or not, as the case may
be. By doing so, any judge who handles the model to study it will know how to avoid a devastating accident.
GALLERY
CBMEL F.1
EDUARD 1/48
F4U CORSAIR TAMIYA
1/48
A-7E CORSAIR II
FUJIMI
1/72
P-6 HAWK
CLASSIC AIRFRAMES
1/48
DH2 BLUE MAH
1/48
FOKKER DR.1 SCRATCHBUILD MODEL BASED ON DRAGON
1/48
HURRICANE MK.II C
HASEGAWA 1/48
F3-F1 ACCURATE MINIATURES
1/48
F-86F SABRE
HASEGAWA
1/48
D3A1 VAL
HASEGAWA 1/48
SPITFIRE MK.VB TAMIYA
1/48
MESSERSCHMITT BF 109 G
HASEGAWA
1/48
F-4B PHAMTOM II
HASEGAWA 1/72
TBM AVENGER
ACCURATE MINIATURES
1/48