DVD VIDEO PLAYER DVPDVP - p4c.philips.com file10 mW (VCD/CD) Beam divergence 60 degree 01-34...
34
8239 300 32131 DVD VIDEO PLAYER DVP 533K DVP 533K 01-34 DVP533K_78 19/03/2004, 2:55 PM 1
Transcript of DVD VIDEO PLAYER DVPDVP - p4c.philips.com file10 mW (VCD/CD) Beam divergence 60 degree 01-34...

8239 300 32131
DVD VIDEO PLAYER DVP 533KDVP 533K
01-34 DVP533K_78 19/03/2004, 2:55 PM1
8239 300 32131
AVISO IMPORTANTEPhilips Mexicana, S.A. de C.V. no se hace
responsable por daños o desperfectos causados por:– Maltrato, descuido o mal uso, presencia de
insectos o roedores (cucarachas, ratones etc.).– Cuando el aparato no haya sido operarado
de acuerdo con el instructivo del uso, fuera de los valores nominales y tolerancias de lastensiones (voltaje), frecuencia (ciclaje) dealimentación eléctrica y las características que deben reunir las instalaciones auxiliares.
– Por fenómenos naturales tales como:temblores, inundaciones, incendios, descargaseléctricas, rayos etc. o delitos causados porterceros (choques asaltos, riñas, etc.).
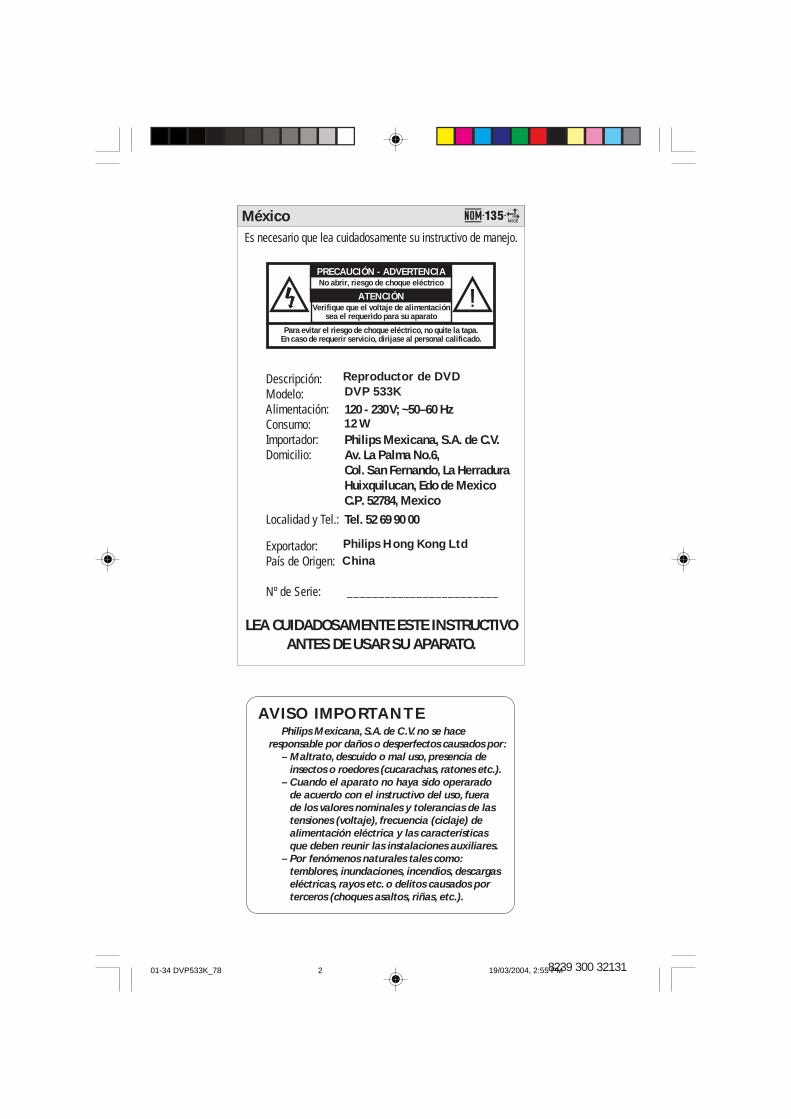
Es necesario que lea cuidadosamente su instructivo de manejo.
Descripción:Modelo:Alimentación: 120 - 230V; ~50–60 HzConsumo:Importador: Philips Mexicana, S.A. de C.V.Domicilio: Av. La Palma No.6,
Col. San Fernando, La HerraduraHuixquilucan, Edo de MexicoC.P. 52784, Mexico
Localidad y Tel.:
Tel. 52 69 90 00
Exportador:País de Origen:
Nº de Serie: ________________________
LEA CUIDADOSAMENTE ESTE INSTRUCTIVO ANTES DE USAR SU APARATO.
No abrir, riesgo de choque eléctrico
Verifique que el voltaje de alimentaciónsea el requerido para su aparato
ATENCIÓN
Para evitar el riesgo de choque eléctrico, no quite la tapa.En caso de requerir servicio, dirijase al personal calificado.
PRECAUCIÓN - ADVERTENCIA
México
DVP 533K
12 W
Reproductor de DVD
Philips Hong Kong LtdChina
01-34 DVP533K_78 19/03/2004, 2:55 PM2

8239 300 32131
Manufactured under license from DolbyLaboratories. “Dolby”, “Pro Logic” and thedouble-D symbol are trademarks of DolbyLaboratories.
This product incorporates copyrightprotection technology that is protected bymethod claims of certain U.S. patents andother intellectual property rights owned byMacrovision Corporation and other rightsowners. Use of this copyright protectiontechnology must be authorised byMacrovision Corporation, and is intendedfor home and other limited viewing usesonly unless otherwise authorised byMacrovision Corporation. Reverseengineering or disassembly is prohibited.
CAUTION(WARNING LOCATION: ON THEBACKPLATE OF THE SET)
NEVER MAKE OR CHANGECONNECTIONS WITH THEPOWER SWITCHED ON.
Laser safety
This unit employs a laser. Due to possibleeye injury, only a qualified service personshould remove the cover or attempt toservice this device.
NOTE:PICTURES SHOWN MAYBEDIFFERENT BETWEENCOUNTRIES.
LASERType Semiconductor laser
GaAlAsWave length 650 nm (DVD)
780 nm (VCD/CD)Output Power 7 mW (DVD)
10 mW (VCD/CD)Beam divergence 60 degree
01-34 DVP533K_78 19/03/2004, 2:55 PM3

8239 300 32131
General Information
For Customer Use:
Read carefully the information located atthe bottom of your DVD VIDEO playerand enter below the Serial No. Retain thisinformation for future reference.
Model No. DVP 533KSerial No. _______________
Environmental InformationAll unnecessary packaging has beenomitted. The packaging has been madeeasy to separate into three materials:cardboard (box), polystyrene foam(buffer) and polyethylene (bags, protectivefoam sheet).
Your DVD player consists of materialswhich can be recycled and reused ifdisassembled by a specialised company.Please observe the local regulationsregarding the disposal of packagingmaterials, exhausted batteries and oldequipment.
Important Note:Due to the numerous versions of newCD-Audio copy protection orenhanced CD-Audio protectionrecently available on certain discs,Philips is unable to guarantee thatthis DVD Player is fully compatiblewith such new discs. Should you havedifficulty playing any such CD-Audiodiscs, kindly refer them to your CD-Audio disc retailer.
‘CONSUMERS SHOULD NOTE THAT NOTALL HIGH DEFINITION TELEVISION SETSARE FULLY COMPATIBLE WITH THISPRODUCT AND MAY CAUSE ARTIFACTSTO BE DISPLAYED IN THE PICTURE. INCASE OF 525 OR 625 PROGRESSIVE SCANPICTURE PROBLEMS, IT IS RECOMMENDEDTHAT THE USER SWITCH THECONNECTION TO THE ‘STANDARDDEFINITION’ OUTPUT. IF THERE AREQUESTIONS REGARDING OUR TV SETCOMPATIBILITY WITH THIS MODEL 525pAND 625p DVD PLAYER, PLEASE CONTACTOUR CUSTOMER SERVICE CENTER.’
The apparatus shall not be exposed to drippingor splashing and that no objects filled withliquids, such as vases, shall be placed onapparatus.
01-34 DVP533K_78 19/03/2004, 2:55 PM4

En
gli
s hE
spa
ño
l
5
8239 300 32131
Index
English --------------------------------------- 6
Español ------------------------------------ 35
01-34 DVP533K_78 19/03/2004, 2:55 PM5

En
glish
6
8239 300 32131
IntroductionSupplied accessories ....................................... 7Care and safety information .......................... 7
ConnectionsConnecting TV .............................................. 8-9
Using Component Video jacks (Y Pb Pr) .. 8Using Composite Video jack (CVBS) ......... 8Using S-Video jack .......................................... 9Using an accessory RF modulator .............. 9
Connecting the power cord ........................ 10Optional : Connecting to an Audio System ............................................................................ 11
Stereo system has Dolby Pro Logic or Right/ Left Audio In jack ....................................... 11
Optional: Connecting Digital AV Receiver .............................................................................. 11
Receiver has a PCM, Dolby Digital, orMPEG2 decoder ............................................ 11
Functional OverviewFront and Rear Panels .................................. 12Remote Control ............................................ 13
Getting StartedStep 1: Inserting batteries into theRemote Control ............................................ 14
Using the Remote Control to operate thePlayer ............................................................... 14
Step 2: Setting up the TV .............................. 14Selecting the colour system thatcorresponds to your TV .............................. 15
Step 3: Setting language preference ........... 16Setting the OSD Language .......................... 16Setting the Audio, Subtitle and Disc menulanguage .......................................................... 16
Disc OperationsPlayable Discs ................................................. 17Playing discs ..................................................... 17Using the Disc Menu ..................................... 18Basic playback controls ........................... 18-20
Pausing playback ............................................ 18Selecting track/chapter ................................ 18Resuming playback from the last stoppedpoint ................................................................ 18Zoom .............................................................. 19Repeat ............................................................. 19Repeat A-B ..................................................... 19Slow Motion .................................................. 19Forward / Reverse Searching ..................... 19Time Search ................................................... 20
Special disc features ................................ 20-21Playing a Title ................................................. 20Camera Angle ................................................ 20Changing the Audio Language .................... 20Subtitles .......................................................... 20Preview Function .......................................... 21
Playing MP3/JPEG Picture CD ............... 21-22General Operation ....................................... 21Playback selection ......................................... 21Repeat ............................................................. 22Program playback ......................................... 22Fast forward / reverse ................................. 22
Special JPEG features .................................... 22Preview Function (JPEG) ............................. 22Zoom picture (JPEG) ................................... 22Playback with multi-angles (JPEG) ............. 22
Karaoke OperationsPlaying Karaoke discs .................................... 23
General Operation ....................................... 23Key setting ...................................................... 23Vocal ................................................................ 23Mode ............................................................... 23
System Menu OptionsBasic Operations ........................................... 24General Setup Page ....................................... 24
Program .......................................................... 24Screen Saver .................................................. 24
Audio Setup Page ..................................... 25-26Speaker Setup ................................................ 25Digital Audio Setup ....................................... 25Dolby Digital Setup ...................................... 26Equalizer ......................................................... 263D Processing ................................................ 27
Video Setup Page ..................................... 27-29TV Display ...................................................... 27Closed Captions ........................................... 28Angle Mark ..................................................... 28Progressive ..................................................... 28Smart Picture ................................................. 29Picture Setting ............................................... 29
Preference Page ........................................ 29-30Parental .................................................... 29-30Password ........................................................ 30Default ............................................................. 30
Specifications ...................................... 31
Troubleshooting ......................... 32–33
Glossary ......................................................................34
Contents
01-34 DVP533K_78 19/03/2004, 2:55 PM6

En
gli
s h
7
8239 300 32131
Supplied accessories
Remote Controlandtwo AA batteries
Introduction
Care and safety information● Power consumption
– Check that the operating voltageindicated on the typeplate (or beside thevoltage selector) is identical to the voltageof your local power supply. If not, pleaseconsult your dealer.– When the system is switched toStandby mode, it is still consuming power.To disconnect the system from the powersupply completely, remove the AC powerplug from the wall jack.
PREVIEWPREVIEW MUTEMUTE
VOCALVOCAL MODEMODEKARAOKEKARAOKE KEYKEY
● Avoid high temperatures, moisture,water and dust– Do not expose the player, batteries ordiscs to humidity, rain, sand or excessiveheat (caused by heating equipment ordirect sunlight.)
● Avoid condensation problem– The lens may cloud over when theplayer is suddenly moved from cold towarm surroundings, making it impossibleto play a disc. Leave the player in thewarm environment until the moistureevaporates.
● Do not block the vents– Do not operate the DVD Player in anenclosed cabinet, allow about 10 cm (4inches) of free space all around the playerfor adequate ventilation.
10 cm(4 inches)
10 cm(4 inches)
10 cm(4 inches)DVD Home Cinema System
PHILIPS
● Care of the cabinet– Use a soft cloth slightly moistened witha mild detergent solution. Do not use asolution containing alcohol, spirits,ammonia or abrasives.
● Finding a suitable location– Place the player on a flat, hard, andstable surface.
● Disc handling– To clean a CD, wipe it in astraight line from the centertowards the edge using a soft,lint-free cloth. A cleaningagent may damage the disc!– Write only on the printed side of aCDR(W) and only with a soft felt-tippedpen.– Handle the disc by its edge, do nottouch the surface.
Audio cable(white, red)
Video cable(yellow)
01-34 DVP533K_78 19/03/2004, 2:55 PM7

En
glish
8
8239 300 32131
Connections
Connecting TV
YVIDEO OUT
S-VIDEO OUT
COAXIAL
MAINS
DIGITAL OUT
L
R
AUDIO OUT
Pb
PrCOMPONENTVIDEO OUT
AUDIO IN
V (Pr/Cr)
U (Pb/Cb)
Y
S-VIDEOIN
VIDEO IN
COMPONENTVIDEO IN
AUDIO IN
V (Pr/Cr)
U (Pb/Cb)
Y
S-VIDEOIN
VIDEO IN
COMPONENTVIDEO IN
21
IMPORTANT!– You only need to make one videoconnection from the followingoptions, depending on thecapabilities of your TV system.– Connect the DVD system directlyto the TV.– Component Video connectionprovides highest picture quality.These options must be available onyour TV.
Using Component Video jack(Y Pb Pr)
1 Use the component video cables (red/blue/green) to connect the DVD Player’sY Pb Pr jacks to the correspondingComponent video input jacks (or labeledas Y Pb Pr or YUV) on the TV (cable notsupplied).
2 To hear the sound of this DVD Playerthrough your TV, use the audio cables(white/red) to connect AUDIO OUT (L/R) jacks of the DVD Player to thecorresponding AUDIO IN jacks on the TV(cable supplied).
YVIDEO OUT
S-VIDEO OUT
COAXIAL
MAINS
DIGITAL OUT
L
R
AUDIO OUT
Pb
PrCOMPONENTVIDEO OUT
AUDIO IN
V (Pr/Cr)
U (Pb/Cb)
Y
S-VIDEOIN
VIDEO IN
COMPONENTVIDEO IN
AUDIO IN
V (Pr/Cr)
U (Pb/Cb)
Y
S-VIDEOIN
VIDEO IN
COMPONENTVIDEO IN
21
Using Composite Video jacks(CVBS)
1 Use the composite video cable (yellow) toconnect the DVD Player’s CVBS (VIDEOOUT) jack to the video input jack (orlabeled as A/V In, Video In, Composite orBaseband) on the TV (cable supplied).
2 To hear the sound of this DVD Playerthrough your TV, use the audio cables(white/red) to connect AUDIO OUT (L/R) jacks of the DVD Player to thecorresponding AUDIO IN jacks on the TV(cable supplied).
01-34 DVP533K_78 19/03/2004, 2:55 PM8

En
gli
s h
9
8239 300 32131
Connections
YVIDEO OUT
S-VIDEO OUT
COAXIAL
MAINS
DIGITAL OUT
L
R
AUDIO OUT
Pb
PrCOMPONENTVIDEO OUT
AUDIO IN
V (Pr/Cr)
U (Pb/Cb)
Y
S-VIDEOIN
VIDEO IN
COMPONENTVIDEO IN
AUDIO IN
V (Pr/Cr)
U (Pb/Cb)
Y
S-VIDEOIN
VIDEO IN
COMPONENTVIDEO IN
21
IMPORTANT!– S-Video connection providesbetter picture quality. This optionmust be available on your TV.
Using S-Video jack
1 Use the S-video cable to connect theDVD system’s S-VIDEO OUT jack tothe S-Video input jack (or labeled as Y/Cor S-VHS) on the TV (cable not supplied).
2 To hear the sound of this DVD Playerthrough your TV, use the audio cables(white/red) to connect AUDIO OUT (L/R) jacks of the DVD Player to thecorresponding AUDIO IN jacks on the TV(cable supplied).
IMPORTANT!– If your TV only has a singleAntenna In jack (or labeled as 75ohm or RF In,) you will need an RFmodulator in order to view the DVDplayback on the TV. See yourelectronics retailer or contactPhilips for details on RF modulatoravailability and operations.
Using an accessory RF modulator
1 Use the composite video cable (yellow) toconnect the DVD Player’s CVBS (VIDEOOUT) jack to the video input jack on theRF modulator.
2 Use the RF coaxial cable (not supplied) toconnect the RF modulator to your TV’sRF jack.
YVIDEO OUT
S-VIDEO OUT
COAXIALDIGITAL OUT
L
R
AUDIO OUT
Pb
PrCOMPONENTVIDEO OUT
AUDIO IN
R LVIDEO
INTO TVANT IN
CH3 CH4
2
1
RF coaxial cable to TV
Back of RF Modulator(example only)
Antenna orCable TV signal
01-34 DVP533K_78 19/03/2004, 2:55 PM9

En
glish
10
8239 300 32131
Connections
YVIDEO OUT
S-VIDEO OUT
COAXIAL
MAINS
DIGITAL OUT AUDIO O
Pb
PrCOMPONENTVIDEO OUT
~ AC MAINS
AUDIO IN
V (Pr/Cr)
U (Pb/Cb)
Y
S-VIDEOIN
VIDEO IN
COMPONENTVIDEO IN
After everything is connectedproperly, plug in the AC power cordto the power outlet.Never make or change any connectionswith the power switched on.
When no disc is loaded, pressSTANDBY ON on the DVD Playerfront panel,“NO DISC” may appear on thedisplay panel.
EN/CLOSE STOP PLAY/PAUSE
Connecting the power cord
NO DISC
01-34 DVP533K_78 19/03/2004, 2:55 PM10

En
gli
s h
11
8239 300 32131
Stereo system has Dolby Pro Logicor Right / Left Audio In jack
1 Select one of the video connections(VIDEO IN, S-VIDEO IN or ComponentVideo (Y Pb Pr) jack depending on theoptions available on your TV.
2 Use the audio cables (white/red) toconnect AUDIO OUT (L/R) jacks ofthe DVD Player to the correspondingAUDIO IN jacks on the stereo system(cable supplied).
Connections
YVIDEO OUT
S-VIDEO OUT
COAXIALDIGITAL OUT
L
R
AUDIO OUT
Pb
PrCOMPONENTVIDEO OUT
AUDIO IN
STEREO
DIGITAL
OPTICAL
Optional: Connecting to anAudio System
Optional: Connecting Digital AVReceiver
YVIDEO OUT
S-VIDEO OUT
COAXIAL
MAINS
DIGITAL OUT
L
R
AUDIO OUT
Pb
PrCOMPONENTVIDEO OUT
AUDIO IN
COAXIAL
AV Receiver
Receiver has a PCM, Dolby Digital,or MPEG2 decoder
1 Select one of the video connectionsVIDEO IN, S-VIDEO IN or ComponentVideo (Y Pb Pr) jack depending on theoptions available on your TV.
2 Connect the COAXIAL jack of the DVDPlayer to the corresponding Digital AudioIn jack on your Receiver (cable notsupplied).
3 Set the DVD Player’s Digital Output toPCM-ONLY or ALL depending on thecapabilities of your Receiver (see page 25“Digital Output”).
Helpful Hint:– If the audio format of the Digital Outputdoes not match the capabilities of yourreceiver, the receiver will produce a strong,distorted sound or no sound at all.
01-34 DVP533K_78 19/03/2004, 2:55 PM11

En
glish
12
8239 300 32131
Functional Overview
Front and Rear Panels
Audio Out (Left/Right)– Connect to AUDIO inputs of an amplifier,
receiver or stereo system
Digital Out (Coaxial)– Connect to coaxial AUDIO input of a
digital audio equipment
Component Video Out (Y Pb Pr)– Connect to a TV with Y Pb Pr inputs
20:58:02
STANDBY-ON B– To switch the DVD Player to Standby
mode or ON
Disc tray
OPEN/CLOSE /– Open/Close the disc tray
2; PLAY/PAUSE– To start or interrupt playback
9 STOP– To stop playback
IR Sensor– Point the remote control towards this
sensor
Display– Shows the current status of the DVD
Player
YVIDEO OUT
S-VIDEO OUT
COAXIAL
MAINS
DIGITAL OUT
L
R
AUDIO OUT
Pb
PrCOMPONENTVIDEO OUT
Mains (AC Power Cord)– Connect to a standard AC outlet
S-Video Out– Connect to S-Video input of a TV
Video Out (CVBS)– Connect to CVBS Video input of a TV
Caution: Do not touch the inner pins of the jacks on the rear panel.Electrostatic discharge may cause permanent damage to the unit.
MIC– For connecting microphone
LEVEL– Microphone volume control
01-34 DVP533K_78 19/03/2004, 2:55 PM12

En
gli
s h
13
8239 300 32131
Functional Overview
Remote Control
PREVIEW MUTEMUTE
VOCAL MODEMODEKARAOKE KEY
RETURN / TITLE– To go back to previous menu /
show title menu
DISC MENU– Enters or exits the disc contents
menu– Switches on or off the playback
control mode (for VCD version2.0 only)
1 2 3 4– Selects an item in the menu/
fast forward/backward, slow forward/backward
OK– Acknowledge menu selection
S– To search or select previous
chapter or track
STOP ( 9 )– To stop playback
PLAY ( B )– To start playback
PAUSE ( ; )– To pause playback temporarily /
frame-by-frame playback
REPEAT– Selects various repeat modes
REPEAT (A-B)– Repeats playback a specific section
on a disc
PREVIEW– To preview the content of a track
or whole disc
MUTE– Disables or enables sound output
POWER B– To switch the DVD player to
standby mode or ON
0-9 numerical key pad– Selects numbered items in a
menu
DISPLAY– Displays information on TV
screen during playback
SYSTEM MENU– Access or exit DVD Player’s
system menu
T– To search or select next chapter
or track
SUBTITLE– To access subtitle language
system menu
ANGLE– Selects a DVD camera angle
ZOOM– Enlarge or reduce a picture on
the TV screen
AUDIO– To access audio language system
menu
KARAOKE– Display karaoke menu to set MIC
on or off
KEY– Display karaoke menu to set key
control
VOCAL– Choose audio channels or
karaoke methods
MODE– Display karaoke menu
01-34 DVP533K_78 19/03/2004, 2:55 PM13

En
glish
14
8239 300 32131
STOP
PREVIEWPREVIEW MUTEMUTE
Getting Started
Step 1: Inserting batteries intothe Remote Control
1
3
2
1 Open the battery compartment.
2 Insert two batteries type R06 or AA,following the indications (+-) insidethe compartment.
3 Close the cover.
Using the Remote Control tooperate the Player
1 Aim the Remote Controldirectly at the remotesensor (iR) on the frontpanel.
2 Do not put any objectsbetween the RemoteControl and the DVDPlayer while operating theDVD Player.
CAUTION!– Remove batteries if they areexhausted or if the Remote Controlis not being used for a long time.– Do not use old and new ordifferent types of batteries incombination.– Batteries contain chemicalsubstances, so they should bedisposed properly.
Step 2: Setting up the TV
IMPORTANT!Make sure you have completed allthe necessary connections. (Seepages 8-9 “Connecting TV”).
1 Turn on the TV and set to the correctvideo-in channel. You should see the bluePhilips DVD background screen on theTV.
➜ Usually these channels are between thelowest and highest channels and may becalled FRONT, A/V IN, or VIDEO. See yourTV manual for more details.➜ Or, you may go to channel 1 on yourTV, then press the Channel down buttonrepeatedly until you see the Video Inchannel.➜ Or, the TV Remote Control may have abutton or switch that chooses differentvideo modes.➜ Or, set the TV to channel 3 or 4 if youare using an RF modulator.
2 If you are using external equipment, (eg.audio system or receiver), turn it on andselect the appropriate input source forthe DVD Player output. Refer to theequipment owner’s manual for detail.
01-34 DVP533K_78 19/03/2004, 2:55 PM14

En
gli
s h
15
8239 300 32131
Getting Started
1 Press SYSTEM MENU.
2 Press 1 2 to select ‘Video Setup Page’.
3 Use the 1 2 3 4 keys on the RemoteControl to navigate in the menu.
Move to ‘TV Type’ and press 2.
PAL – Select this if the connected TV isPAL system. It will change the video signalof a NTSC disc and output in PAL format.
NTSC – Select this if the connected TVis NTSC system. It will change the videosignal of a PAL disc (VCD only) andoutput in NTSC format.
Multi – Select this if the connected TV iscompatible with both NTSC and PAL(multi-system). The output format will bein accordance with the video signal of thedisc.
4 Select an item and press OK.
Selecting the colour system thatcorresponds to your TV
This DVD Player is compatible with bothNTSC and PAL. In order for a DVD discto play on this Player, the colour system ofthe Disc, the TV and the DVD Playershould match.
- - Video Setup Page - -
Set TV Standard
TV Type PALTV Display NTSCClosed Captions MultiAngle Mark ProgressiveSmart PicturePicture Setting
Helpful Hint:– Before changing the current TVType setting, ensure that your TVsupports the ‘selected TV Type’ system.– Follow the instructions shown onthe TV to confirm the selection (ifany).– If there is not proper picture onyour TV, wait for 15 seconds for autorecover.
HINTS:(refer to the owner's manual
Changing to (selected TV Type)
1. Ensure your TV supports it.
2. If there is a blank screen on normal TV,
wait 15 seconds for auto recover
< > - Move OK - Select
CancelOK
Confirm again to use (selected TV Type)
If picture is good press OK on remote
TO GO BACK TO (Current TV Type):
1. Open tray
2. Press '3' Key
< > - Move OK - Select
CancelOK
To exit from the menuPress SYSTEM MENU or select ‘ExitSetup Menu’ and then press OK.
01-34 DVP533K_78 19/03/2004, 2:55 PM15

En
glish
16
8239 300 32131
Step 3: Setting languagepreferenceYou can select your own preferredlanguage settings.This DVD system willautomatically switch to the selectedlanguage whenever you load a disc. If thelanguage selected is not available on thedisc, the disc’s default language will beused instead. The OSD language in thesystem menu will remain once selected.
Setting the OSD Language
1 Press SYSTEM MENU.
2 Press 1 2 to select ‘General Setup’ page.
3 Use the 1 2 3 4 keys on the RemoteControl to navigate in the menu.
Move to ‘OSD Language’ and press 2.
4 Select a language and press OK.
To exit from the menuPress SYSTEM MENU or select ‘ExitSetup Menu’ and then press OK.
Setting the Audio, Subtitle and Discmenu language
- - Preference Page - -
Set Preference To English
Audio EnglishSubtitle ChineseDisc Menu JapaneseParental FrenchPassword GermanDefault Spanish Dutch Italian
1 Press STOP twice then, press SYSTEMMENU.
2 Press 1 2 to select ‘Preference Page’.
3 Press 3 4 to highlight the following in thePreference Page.– ‘Audio’ (disc’s soundtrack)– ‘Subtitle’ (disc’s subtitles)– ‘Disc Menu’ (disc’s menu)
4 Enter its submenu by pressing B.
5 Select a language and press OK.
6 Repeat steps 3~5 for other languagesettings.
To exit from the menuPress SYSTEM MENU or select ‘ExitSetup Menu’ and then press OK.
If you choose OTHERS in Audio,Subtitle or Disc Menu,
1 Press 3 4 to highlight ‘Others’.
2 Press OK and when you are asked toenter a language code (see ‘LanguageCode’ on page 65).
3 Input a language code by using thenumeric keypad (0-9).
4 Press OK to confirm.
Getting Started
01-34 DVP533K_78 19/03/2004, 2:56 PM16

En
gli
s h
17
8239 300 32131
Disc Operations
IMPORTANT!– Depending on the DVD or VIDEOCD, some operations may bedifferent or restricted.– Do not push on the disc tray orput any objects other than disc onthe disc tray. Doing so may causethe disc player malfunction.
Playable Discs
Your DVD Player will play:– Digital Versatile Discs (DVDs)– Video CDs (VCDs)– Super Video CDs (SVCDs)– Digital Versatile Discs + Recordable
(DVD+R)– Digital Versatile Discs + Rewritable
(DVD+RW)– Compact Discs (CDs)– CD Graphics– MP3 disc on CD-R(W):
–Maximum 30 characters display.–Supported sampling frequencies :
32 kHz, 44.1 kHz, 48 kHz–Supported Bit-rates : 32~256 kbps
variable bitrates– Picture (JPEG) files on CD-R(W):
– JPEG/ISO 9660 format.
Region CodesDVDs must be labelled for ALLregions or Region 4 in order toplay on this DVD system. Youcannot play discs that are labelledfor other regions.
Helpful Hint:– If you are having trouble playing acertain disc, remove the disc and try adifferent one. Improper formatted disc willnot play on this DVD Player.
ALL
IMPORTANT!If the inhibit icon (ø) appears on theTV screen when a button is pressed,it means the function is not availableon the current disc or at the currenttime.
Playing discs
1 Connect the power cords of the DVDPlayer and TV (and any optional stereo orAV receiver) to a power outlet.
2 Turn on the TV power and set to thecorrect Video In channel. (See page 14“Setting up the TV”).
3 Press STANDBY-ON on the DVD Playerfront panel.➜ You should see the blue Philips DVDbackground screen on the TV.
4 Press OPEN•CLOSE 0 button to openthe disc tray and load in a disc, then pressthe same button again to close the disctray.➜ Make sure the label side is facing up.For double-sided discs, load the side youwant to play facing up.
5 Playback will start automatically(depending on the disc type).➜ If a disc menu appears on the TV, see“Using the Disc Menu”.➜ If the disc is locked by parental control,you must enter your four-digit password.(See page 30).
6 At any time, simply press STOP to stopplayback.
4
01-34 DVP533K_78 19/03/2004, 2:56 PM17

En
glish
18
8239 300 32131
Disc Operations
Using the Disc MenuDepending on the disc, a menu mayappear on the TV screen once you loadthe disc.
To select a playback feature or item● Use the 1 2 3 4 or numeric keypad
(0-9) on the Remote Control, then pressPLAY B to start playback.
To access or exit from the menu● Press DISC MENU on the Remote
Control.
For VCD with Playback Control(PBC) feature (version 2.0 only)
PBC playback allows you to play VideoCDs interactively, following the menu onthe display.
● In stop mode, use the numeric keypad(0-9) to select a track and PBC will turnoff.➜ Playback will start automatically
● During playback, press DISC MENU;➜ If PBC was ON, it will switch to OFFand continue playback.➜ If PBC was OFF, it will switch to ONand return to menu screen.
● During playback, pressing RETURN/TITLE will return to the menu screen (ifPBC is on).
Basic playback controlsUnless otherwise stated, all operationsdescribed are based on the use ofRemote Control.
Pausing playback(DVD/VCD/CD/CD Graphics/MP3)
1 During playback, press PAUSE ;.➜ Playback will pause and sound will bemuted.
2 Press PAUSE ; again to select the nextpicture frame.
3 To return to normal playback, pressPLAY B.
Selecting track/chapter(DVD/VCD/CD/CD Graphics)
1 Press T briefly during playback to goto the next chapter/track
2 Press S to go to the previous track(VCD/CD/CD Graphics) or return to thebeginning of the current chapter (SVCD/DVD).
● Press S twice briefly to step back tothe previous chapter (SVCD/DVD).
3 To go directly to any chapter/track, enterthe chapter/track number using thenumerical keys (0-9).
Resuming playback from the laststopped point (DVD/VCD/CD/CDGraphics/MP3)
● In stop mode and when the disc has notbeen ejected, press PLAY B.
To cancel resume mode● In stop mode, press STOP 9 again.
01-34 DVP533K_78 19/03/2004, 2:56 PM18

En
gli
s h
19
8239 300 32131
Disc Operations
Repeat (DVD/SVCD/VCD/CD/CDGraphics)
● Press REPEAT continuously to choose aRepeat mode during playback.
REPEAT CHAPTER (DVD)– to repeat playback of the currentchapter.
REPEAT TRACK/TITLE (CD/CDGraphics/SVCD/VCD/DVD)– to repeat playback of the currenttrack (CD/CD Graphics/SVCD/VCD)/title(DVD).
REPEAT ALL– to repeat playback of all the disc andall the programmed tracks.
SHUFFLE– to repeat playback at random order.
REPEAT OFF– to cancel the repeat mode.
Helpful Hint:– REPEAT function is not available for VCD2.0 when PCB is on.
Repeat A-B (DVD/VCD/CD)
1 Press REPEAT A-B at your chosenstarting point.
2 Press REPEAT A-B again at your chosenend point.➜ The section A and B can be set onlywithin the same chapter/track.➜ The section will now repeat continuously.
3 To exit the sequence, press REPEAT A-B.
Forward / Reverse Searching(DVD/VCD/CD)
1 Press 1 2 during playback to select therequired speed: 2X, 4X, 8X, 16X or 32X(backward or forward).➜ Sound will be muted (DVD/VCD) orintermittent (CD).
2 To return to normal speed, press PLAY B.
Slow Motion (DVD/VCD)
1 Press 3 4 during playback to select therequired speed: 1/2, 1/4, 1/8 or 1/16(backward or forward).➜ Sound will be muted.
2 To return to normal speed, press PLAY B.
Helpful Hint:– Slow backward is not possible on VCDs.
Zoom (DVD/VCD/CD Graphics/JPEG)
Zooming allows you to enlarge or reducethe video image during playback.
1 Press ZOOM repeatedly to increase anddecrease the playback video image.
2 Press 1 2 3 4 to pan across the TVscreen.
01-34 DVP533K_78 19/03/2004, 2:56 PM19

En
glish
20
8239 300 32131
Disc Operations
Special disc features
Playing a Title (DVD)
1 Press DISC MENU.➜ The disc title menu appears on the TVscreen.
2 Use 341 2 keys or numeric keypad(0-9) to select a play option.
3 Press OK key to confirm.
Camera Angle (DVD)
● Press ANGLE repeatedly to selectdifferent desired angle.
Changing the Audio Language(DVD/VCD)
For DVD● Press AUDIO repeatedly to select
different audio languages.
Changing the Audio Channel
For VCD or CD Graphics● Press AUDIO to select the available
audio channels provided by the disc(STEREO, MONO LEFT, MONO RIGHTor MIX MONO).
Subtitles (DVD)
● Press SUBTITLE repeatedly to selectdifferent subtitle languages.
Time Search (DVD/VCD/CDGraphics)
The Time Search function allows you tostart playing at any chosen time on thedisc.
1 Press DISPLAY.
2 Press 3 4 to highlight time search box.➜ The on-screen display shows the totalplaying time of the title/chapter.
Bitrate 67 TT Elapsed 0:16:35Bitrate 67 TT Elapsed 0:16:35
TT Time TT Time 0:03:010:03:01
CH Time CH Time 0:01:080:01:08
Repeat Repeat OffOff
Time Disp. Time Disp. TT ElapsedTT Elapsed
MenuMenu
3 Use 2 keys to select an option.
4 Enter hours, minutes and seconds fromleft to right in the time edit box usingremote control numerical key pad.(e.g. 0:34:27)
For DVD➜ Title/Chapter Remain: displays theremaining time of the current title/chapter.➜ Title/Chapter Elapsed: displays theelapsed time of the current title/chapter.
For Super VCD , VCD or CDGraphics➜ Total/Single Remain: displays theremaining time of the current total/singletrack.➜ Total/Single Elapsed: displays theelapsed time of the current total/singletrack.
5 Press the DISPLAY key to confirm.➜ Playback starts from the selected timeon the disc.
01-34 DVP533K_78 19/03/2004, 2:56 PM20

En
gli
s h
21
8239 300 32131
Disc Operations
Playback selection
During playback, you can;
● Press S / T to select another file inthe current folder.
● Use 1 2 3 4 on the remote to rotate/flipthe picture files.
● Press ; repeatedly to pause/resumeplayback.
Preview Function
The preview function allows you to seethe content of the Tracks (6 tracks shownon screen at any one time).
1 Press PREVIEW.➜ The preview menu appears on the TVscreen.
Select Digest Type:
Title Digest
Chapter Digest
Title Interval
Chapter Interval
Select Digest Type:
Title Digest
Chapter Digest
Title Interval
Chapter Interval
Select Digest Type:
Track Digest
Disc Interval
Track Interval
Select Digest Type:
Track Digest
Disc Interval
Track Interval
2 Press 3 4 to select the PREVIEW type,then press OK.➜ The picture of each segment willappear on the screen.
A B C
D E F
(example for 6 thumbnail pictures display)
3 Press 3 4 1 2 to select a track and inputyour selected track number using thenumeric keypad (0-9), then press OK.➜ Playback will start automatically on theselected track.
● For CDDA (Musical CD)➜ Press PREVIEW to listen to the first10 seconds of each sound track in thedisc.
● For CD Graphics➜ Press PREVIEW to view and listen tothe first 10 seconds of each sound trackin the disc.
(DVD example) (Video CD example)
Playing MP3/JPEG Picture CD
IMPORTANT!You have to turn on your TV and set tothe correct Video In channel. (See page14 “Setting up the TV”).
General Operation
1 Load an MP3/JPEG Picture CD disc.➜ The data disc menu appears on the TVscreen.
2 Use 3 4 to select the folder and pressOK to open the folder.
00:37 03:50 128kbps
001/162
\MP3\
Song 1
Song 2
Song 3
Song 4
Song 5
MP3
MP3
MP3
MP3
MP3
3 Press 3 4 or use the numeric keypad(0-9) to highlight an option.
4 Press OK to confirm.➜ The playback will start from theselected file to the end of the folder.
01-34 DVP533K_78 19/03/2004, 2:56 PM21
En
glish
22
8239 300 32131
Program playback
● In Stop mode, press DISC MENUrepeatedly to toggle the menu betweenFolder and Filelist.
1 When Filelist is on the screen, press 3 4to select the files and press 2 to add thefiles to the playlist.
2 Press DISC MENU to display the playlist.
3 Press 1 to delete unwanted files from theplaylist.
Helpful Hint:– The disc reading time may exceed 10seconds due to large number of songscompiled onto the disc.
Fast forward / reverse (MP3)
● During playback, press 1 2 to fast forwardor reverse playback.
● To resume normal playback, press PLAYB.
Special JPEG features
Preview Function (JPEG)
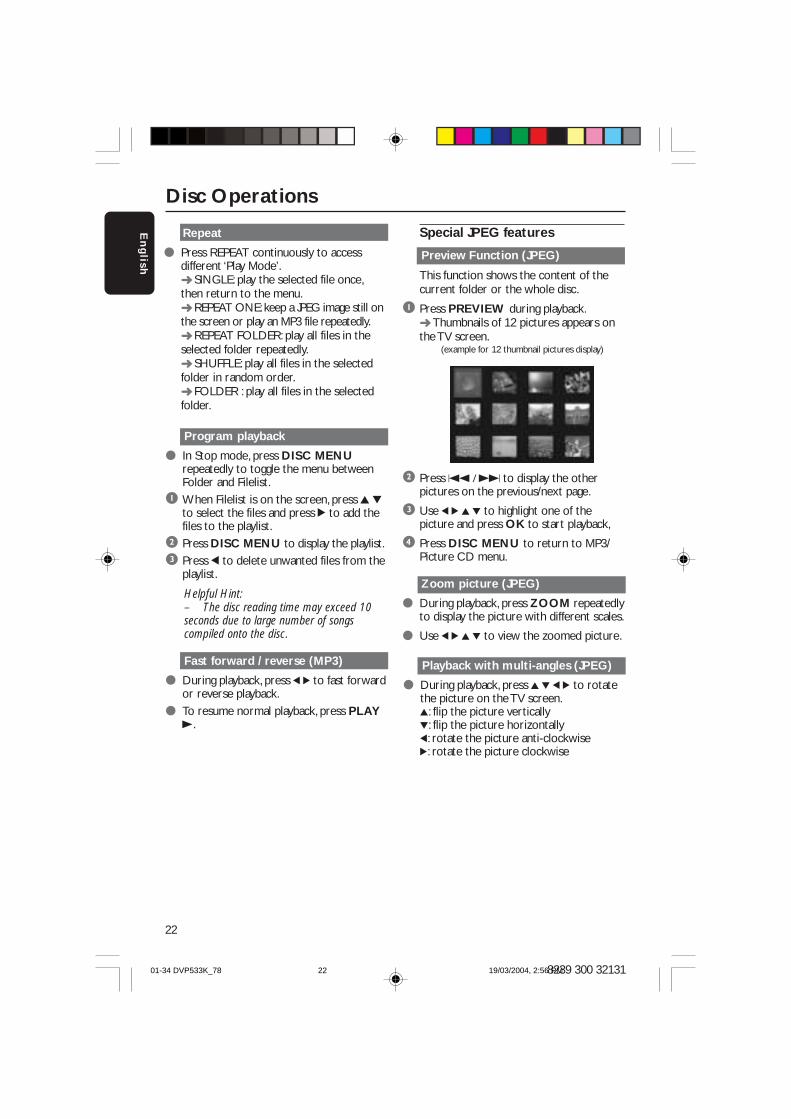
This function shows the content of thecurrent folder or the whole disc.
1 Press PREVIEW during playback.➜ Thumbnails of 12 pictures appears onthe TV screen.
(example for 12 thumbnail pictures display)
2 Press S / T to display the otherpictures on the previous/next page.
3 Use 1 2 3 4 to highlight one of thepicture and press OK to start playback,
4 Press DISC MENU to return to MP3/Picture CD menu.
Zoom picture (JPEG)
● During playback, press ZOOM repeatedlyto display the picture with different scales.
● Use 1 2 3 4 to view the zoomed picture.
Playback with multi-angles (JPEG)
● During playback, press 3 4 1 2 to rotatethe picture on the TV screen.3: flip the picture vertically4: flip the picture horizontally1: rotate the picture anti-clockwise2: rotate the picture clockwise
Repeat
● Press REPEAT continuously to accessdifferent ‘Play Mode’.➜ SINGLE: play the selected file once,then return to the menu.➜ REPEAT ONE: keep a JPEG image still onthe screen or play an MP3 file repeatedly.➜ REPEAT FOLDER: play all files in theselected folder repeatedly.➜ SHUFFLE: play all files in the selectedfolder in random order.➜ FOLDER : play all files in the selectedfolder.
Disc Operations
01-34 DVP533K_78 19/03/2004, 2:56 PM22

En
gli
s h
23
8239 300 32131
Playing Karaoke discs
IMPORTANT!You have to turn on your TV and set tothe correct Video In channel. (See page14 “Setting up the TV”).
General Operation
1 Connect a microphone (not supplied) toMIC on the side panel of the DVD player.
P PLAY/PAUSE
2 Press KARAOKE repeatedly.➜ ‘MIC ON/OFF’ appears on the TVscreen.
3 Load a karaoke disc and press PLAY B.
4 Adjust the microphone volume usingLEVEL button on the side panel of theDVD player.
Helpful Hint:– Before connecting the microphone, setthe microphone volume to the minimum levelto prevent howling.
Key setting
● This function allows you to adjust the keytone level to match with your vocal.
● Press KEY and use 1 2 to adjust thepitch to adopt your voice.
Vocal
● You can fade out the original vocal from akaraoke disc.
● Press VOCAL repeatedly to choosedifferent audio modes.
For DVD karaoke discs➜ AUDIO 1 VOCAL, AUDIO 2 VOCAL,NO VOCAL ASSIST, VOICE CANCEL.
For VCD karaoke discs➜ LEFT VOCAL, RIGHT VOCAL, NOVOCAL ASSIST, VOICE CANCEL
Mode
● Press MODE repeatedly to togglebetween ‘Vol’, ‘Echo’ or ‘Key’.
1 When ‘Vol’ is selected, press 1 2 to adjustthe vocal value between 0 and 20.
2 When ‘Echo’ is selected, press 1 2 toadjust the echo value between 0 and 20.
3 When ‘Key’ is selected, press 1 2 toadjust the pitch value between -16 and 16.
Karaoke Operations
01-34 DVP533K_78 19/03/2004, 2:56 PM23

En
glish
24
8239 300 32131
Basic Operations
1 Press SYSTEM MENU to enter theSetup Menu.
2 Press OK to enter the next levelsubmenu or confirm your selection.
3 Press 1 2 to enter the submenu orreturn to the previous menu.
4 Press 34 to highlight the desired menu.
To exit from the menuPress SYSTEM MENU or select ‘ExitSetup Menu’ and then press OK.➜ The settings will be stored in theplayer’s memory even if the player isswitched off.
General Setup Page
The options included in General Setuppage are: ‘Program’, ‘OSD Language’, and‘Screen Saver’.Follow the steps below:
- - General Setup Page - -
Go To General Setup Page
Program OSD Language Screen Saver
1 Press SYSTEM MENU to enter thesetup menu.
2 Press 1 2 to select the ‘General Setup’page.
System Menu Options
NOTE:Some of the features in the SystemMenu Options are described in“Getting Started”.
Program (not for Picture CD/MP3)
To select favourite tracks/chaptersplayback in preferred sequence.
Program:Chapter(01-12)
START NEXTExit
1 12
2 01
3
4
5
6
7
8
9
10
05
1 Use the numerical keypad (0-9) todirect input the tracks or chapters (singletrack number with digit ‘0’ in front, forexample ‘05’).
2 Move the cursor by pressing 3 4 1 2 toselect START.
3 Press OK to start playback.
Helpful Hint:– Program can only be selected when adisc is inserted in the DVD player.
Screen Saver
This function is used to turn the screensaver on or off.
- - General Setup Page - -
Screen Saver
Program OSD Language Screen Saver On Off
1 Press 34 to highlight ‘Screen Saver’.
2 Enter its submenu by pressing 2.
3 Move the cursor by pressing 34 tohighlight the selected item.➜ On: In STOP, PAUSE or No DISCmode, if no actions are performed about5 minutes, the screen saver will beactivated.➜ Off: Screen saver is disabled.
01-34 DVP533K_78 19/03/2004, 2:56 PM24

En
gli
s h
25
8239 300 32131
System Menu Options
Speaker Setup
The options included in Speaker Setupare: ‘Downmix’ and ‘D.R.C’.
1 Press the 34 keys to highlight an option.
2 Enter its submenu by pressing 2.
3 Move the cursor by pressing the 34 keysto highlight the selected item.
- - Speaker Setup Page - -
Set Downmix Mode
Downmix LT/RTD.R.C Stereo Virtual Surround
DownmixThis options allows you to set the stereoanalog output of your DVD Player.➜ LT/RT: Select this option if your DVDPlayer is connected to a Dolby Pro Logicdecoder.➜ Stereo: Select this option when outputdelivers sound from only the two frontspeakers.➜ Virtual Surround: Allows the DVDplayer to use virtual surround soundeffects.
D.R.C. (Dynamic Range Control)
Analogue sound dynamic rangecompression.➜ On: Audio with fully compresseddynamic range.➜ Off: Audio with uncompressed dynamicrange.➜ Auto: Select ‘Auto’ adjust the dynamiclevel automatically according to the discrecord.
Digital Audio Setup
The options included in Digital AudioSetup are: ‘Digital Output’ and ‘LPCMOutput’.
1 Press the 34 keys to highlight an option.
2 Enter its submenu by pressing 2.
3 Move the cursor by pressing the 34 keysto highlight the selected item.
- - Digital Audio Page - -
Setup SPDIF
Digital Output SPDIF OffLPCM Output All PCM Only
Digital OutputSet the Digital output according to youroptional audio equipment connection.➜ SPDIF Off: Turn off the SPDIF output.➜ All: If you have connected yourDIGITAL AUDIO OUT to a multi-channeldecoder/receiver.➜ PCM Only: Only if your receiver isnot capable of decoding multi-channelaudio.
Helpful Hint:– If DIGITAL OUTPUT is set to ‘All’, allaudio settings except MUTE are invalid.
LPCM Output
If you connect the DVD Player to a PCMcompatible receiver via the digitalterminals, such as coaxial or optical etc,you may need to adjust ‘LPCM Output’.Discs are recorded at a certain samplingrate. The higher the sampling rate, thebetter the sound quality.
➜ 48kHz: Playback a disc recorded at thesampling rate of 48kHz.➜ 96kHz: Playback a disc recorded at thesampling rate of 96kHz.
Helpful Hint:– LPCM Output can be selected only whenPCM Only is activated.
Audio Setup PageThe options included in Audio Setup pageare: ‘Speaker Setup’, ‘Digital Audio Setup’,‘Dolby Digital Setup’, ‘Equalizer’ and ‘3D’.
1 Press SYSTEM MENU.
2 Press 1 2 to select the ‘Audio Setup’ page.
01-34 DVP533K_78 19/03/2004, 2:56 PM25

En
glish
26
8239 300 32131
System Menu Options
Dolby Digital Setup
The options included in Dolby DigitalSetup are: ‘Dual Mono’ and ‘Dynamic’.
1 Press the 34 keys to highlight an option.
2 Enter its submenu by pressing 2.
3 Move the cursor by pressing the 34 keysto highlight the selected item.
- - Dolby Digital Setup - -
Dual Mono (1 + 1) Setup
Dual Mono StereoDynamic L-Mono R-Mono MIX-Mono
Dual MonoTo select the setting that matches thenumber of speaker you have connected.➜ Stereo: Left mono sound will sendoutput signals to Left speaker and Rightmono sound will send output signals toRight speaker.➜ L-Mono: Left mono sound will sendoutput signals to Left speaker and Rightspeaker.➜ R-Mono: Right mono sound will sendoutput signals to Left speaker and Rightspeaker.➜ Mix-Mono: Left and Right mixedmono sound will send output signals toLeft and Right speakers.
Dynamic
To optimise the dynamic sound outputhigh volume outputs are softened,enabling you to watch your favouritemovie without disturbing others.➜ The levels for dynamic selection:Full, 3/4, 1/2, 1/4 and Off.
Helpful Hint:– DTS surround audio output are notavailable in this DVD player.
Equalizer
The options included in Equalizer is: ‘SoundMode’.
1 Press the 34 keys to highlight an option.
2 Enter its submenu by pressing 2.
3 Move the cursor by pressing the 34 keysto highlight the selected item.
- - Equalizer Page - -
None
Sound Mode None Rock Pop Live Dance Techno Classic Soft
Sound ModeSelect Sound Mode that matches the typeof music you played. These preset SoundMode adjust the frequency bands of theaudio to enhance your favourite music.➜ None, Rock, Pop, Live, Dance,Techno, Classic and Soft
01-34 DVP533K_78 19/03/2004, 2:56 PM26

En
gli
s h
27
8239 300 32131
3D Processing
The options included in 3D Processing is:‘Reverb Mode’.
1 Press the 34 keys to highlight an option.
2 Enter its submenu by pressing 2.
3 Move the cursor by pressing the 34 keysto highlight the selected item.
- - 3D Processing Page - -
Reverb Mode
Reverb Mode Off Concert Living Room Hall Bathroom Cave Arena Church
Reverb ModeReverb mode provides a virtual surroundsound experience using just two speakers.➜ Off, Concert, Living Room, Hall,Bathroom, Cave, Arena and Church
Helpful Hint:– Reverb mode will be activated when‘Downmix’ is set to off.
Video Setup PageThe options included in Video Setup pageare: ‘TV Type’, ‘TV Display’, ‘ClosedCaptions’, ‘Angle Mark’, ‘Progressive’,‘Smart Picture’ and ‘Picture Setting’.
1 Press SYSTEM MENU.
2 Press 1 2 to select the ‘Video Setup’ page.
- - Video Setup Page - -
Go To Video Setup Page
TV Type TV DisplayClosed CaptionsAngle MarkProgressiveSmart PicturePicture Setting
TV Display
Set the aspect ratio of the DVD Playeraccording to the TV you have connected.
1 Press 34 to highlight ‘TV Display’.
2 Enter its submenu by pressing 2.
3 Move the cursor by pressing 34 tohighlight the selected item.
16:9
4:3Letter Box
4:3Pan Scan
16:9➜ If you have a wide-screen TV.
4:3 Letter Box➜ If you have a normal TV. In this case, awide picture with black bands on theupper and lower portions of the TVscreen will be displayed.
4:3 Pan Scan➜ If you have a normal TV and want bothsides of the picture to be trimmed orformatted to fit your TV screen.
System Menu Options
01-34 DVP533K_78 19/03/2004, 2:56 PM27

En
glish
28
8239 300 32131
System menu Options
Closed Captions
Closed captions are data that are hiddenin the video signal of some discs. Captionsare different from subtitles becausecaptions hearing are impaired by showingthe sound effects (e.g., “phone ringing”and “footsteps”), while subtitles do not.Before you select this function, pleaseensure that the disc contains closedcaptions information and your TV set alsohas this function.
1 Press 34 to highlight ‘Closed Captions’.
2 Enter its submenu by pressing 2.
3 Move the cursor by pressing 34 tohighlight the selected item.➜ On: Enable Closed Captions.➜ Off: Disable Closed Captions.
Angle Mark
Displays current angle setting informationon the right hand corner of the TV screenif available on the disc.
1 Press 34 to highlight ‘Angle Mark’.
2 Enter its submenu by pressing 2.
3 Move the cursor by pressing 34 tohighlight the selected item.➜ On: Enable Angle Mark.➜ Off: Disable the current angle settingdisplay.
Progressive
This feature is only applicable if you haveconnected this DVD Player to aProgressive Scan TV through the Y Pb Prjacks.
1 Press 34 to highlight ‘Progressive’.
2 Enter its submenu by pressing 2.
3 Move the cursor by pressing 34 tohighlight the selected item.➜ On: Enable Progressive Scan video.➜ Off: Disable Progressive Scan video.
Helpful Hint:– If a blank/distorted TV screenappears, wait for 15 seconds for autorecover.– Follow the instructions shown onthe TV to confirm the selection (ifany).
HINTS:(refer to the owner's manual)
ACTIVATING PROGRESSIVE:
1. Ensure your TV has progressive scan.
2. Connect with YPbPr(GBR) video cable.
3. If there is a blank screen on normal TV,
wait 15 seconds for auto recover.
CancelOK
< > - Move OK - Select
Confirm again to use progressive scan
If picture is good press OK on remote
TO DEACTIVATE PROGRESSIVE:
1. Open tray
2. Press '1' Key
CancelOK
< > - Move OK - Select
01-34 DVP533K_78 19/03/2004, 2:56 PM28
En
gli
s h
29
8239 300 32131
System Menu Options
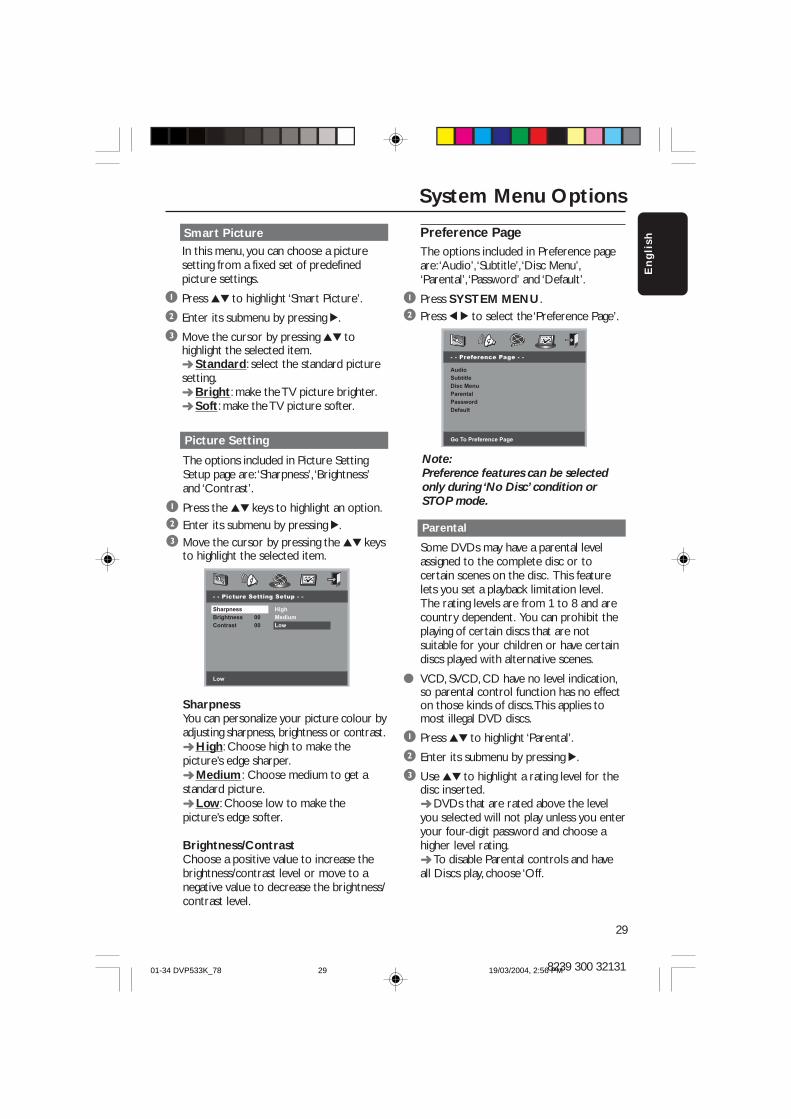
Picture Setting
The options included in Picture SettingSetup page are: ‘Sharpness’, ‘Brightness’and ‘Contrast’.
1 Press the 34 keys to highlight an option.
2 Enter its submenu by pressing 2.
3 Move the cursor by pressing the 34 keysto highlight the selected item.
- - Picture Setting Setup - -
Low
Sharpness HighBrightness 00 MediumContrast 00 Low
SharpnessYou can personalize your picture colour byadjusting sharpness, brightness or contrast.➜ High: Choose high to make thepicture’s edge sharper.➜ Medium: Choose medium to get astandard picture.➜ Low: Choose low to make thepicture’s edge softer.
Brightness/ContrastChoose a positive value to increase thebrightness/contrast level or move to anegative value to decrease the brightness/contrast level.
Preference PageThe options included in Preference pageare: ‘Audio’, ‘Subtitle’, ‘Disc Menu’,‘Parental’, ‘Password’ and ‘Default’.
1 Press SYSTEM MENU.
2 Press 1 2 to select the ‘Preference Page’.
- - Preference Page - -
Go To Preference Page
AudioSubtitleDisc MenuParentalPasswordDefault
Note:Preference features can be selectedonly during ‘No Disc’ condition orSTOP mode.
Parental
Some DVDs may have a parental levelassigned to the complete disc or tocertain scenes on the disc. This featurelets you set a playback limitation level.The rating levels are from 1 to 8 and arecountry dependent. You can prohibit theplaying of certain discs that are notsuitable for your children or have certaindiscs played with alternative scenes.
● VCD, SVCD, CD have no level indication,so parental control function has no effecton those kinds of discs. This applies tomost illegal DVD discs.
1 Press 34 to highlight ‘Parental’.
2 Enter its submenu by pressing 2.
3 Use 34 to highlight a rating level for thedisc inserted.➜ DVDs that are rated above the levelyou selected will not play unless you enteryour four-digit password and choose ahigher level rating.➜ To disable Parental controls and haveall Discs play, choose ‘Off.
Smart Picture
In this menu, you can choose a picturesetting from a fixed set of predefinedpicture settings.
1 Press 34 to highlight ‘Smart Picture’.
2 Enter its submenu by pressing 2.
3 Move the cursor by pressing 34 tohighlight the selected item.➜ Standard: select the standard picturesetting.➜ Bright: make the TV picture brighter.➜ Soft: make the TV picture softer.
01-34 DVP533K_78 19/03/2004, 2:56 PM29

En
glish
30
8239 300 32131
System Menu Options
Password
This feature is used for Parental Control.Enter your four digit password when ahint is displayed on the screen. The defaultpassword is 1009.
1 Press 34 to highlight ‘Password’.
2 Enter its submenu by pressing 2.
3 Press OK to open the ‘New Password’page.
Old Password
New Password
Confirm PWD
OK
4 Enter the existing 4-digit code.
5 Enter the new 4-digit code.
6 Enter the new 4-digit code a second timeto confirm.➜ The new 4 digit code will be take effect.
7 Press OK to exit.
Helpful Hints:– If the password has been changed, theparental and disc lock code will also bechanged.– The default password (1009) is alwaysactive even the password has been changed.
Parental - cont’d
Helpful Hint:– Some DVDs are not encoded with arating though the movie rating may beprinted on the Disc cover. The rating levelfeature does not work for such Discs.
Rating explanations
1 KID SAFE– Kids material; recommended especially forchildren and viewers of all ages.
2 G– General Audience; recommended as acceptablefor viewers of all ages.
3 PG– Parental Guidance suggested.
4 PG13– Material is unsuitable for children under age 13.
5-6 PG-R– Parental Guidance - Restricted; recommendedthat parents restrict children under 17 fromviewing or allow to view only when supervised bya parent or adult guardian.
7 NC-17– No children under age 17; not recommendedviewing for children under age 17.
8 ADULT– Mature material; should be viewed only byadults due to graphic sexual material, violence orlanguage.
OFF– It will play all discs.
Default
Setting the ‘Default’ function will reset alloptions and your personal settings to thefactory defaults and all your personalsettings will be erased.
1 Press 34 to highlight ‘Default’.
2 Highlight RESET by pressing 2.
3 Press OK to confirm selection.
Caution!– When this function is activated, allsettings will be reset to factorydefaults.
01-34 DVP533K_78 19/03/2004, 2:56 PM30

En
gli
s h
31
8239 300 32131
TV STANDARD (PAL/50Hz) (NTSC/60Hz)Number of lines 625 525Playback Multistandard (PAL/NTSC)
VIDEO PERFORMANCEDA Converter 12 bit, 54mHzComponent video Y: 1 Vpp into 75 ohmoutput (480i/p) PbPr: 0.7 Vpp into 75 ohmVideo Output 1Vpp — 75 ohmS-Video Output Y: 1Vpp — 75 ohm
C: 0.3 Vpp — 75 ohm
AUDIO FORMATDigital Mpeg compressed Digital
Dolby Digital 16, 20, 24 bitsPCM fs, 44.1, 48, 96 kHz
MP3(ISO 9660) 96, 112, 128, 256 kbps& variable bit rate fs, 32,44.1, 48 kHz
Analog Sound StereoDolby Surround-compatible downmix from Dolby Digitalmulti-channel sound
Specifications
AUDIO PERFORMANCEDA Converter 24 bit, 96kHzDVD fs 96 kHz 4Hz- 44kHz
fs 48 kHz 4Hz- 22kHzSVCD fs 48 kHz 4Hz- 22kHz
fs 44.1kHz 4Hz- 20kHzCD/VCD fs 44.1kHz 4Hz- 20kHzSignal-Noise (1kHz) > 90 dBDynamic range(1kHz) > 80 dBCrosstalk (1kHz) > 80 dBDistortion/noise (1kHz) > 80 dBMPEG MP3 MPEG Audio L3
CONNECTIONSY Pb Pr output (480i/p) Cinch 3x (green, blue, red)S-Video Output Mini DIN, 4 pinsVideo Output Cinch (yellow)Audio Output(L+R) Cinch (white/red)Digital Output 1 coaxial
IEC60958 for CDDA / LPCMIEC61937 for MPEG 1/2,Dolby Digital
CABINETDimensions (w x h x d) 360 x 43 x 285 mmWeight Approximately 2.0 kg
POWER CONSUMPTIONPower inlet 120-230V, 50-60HzPower consumption 12 WPower consumption in Standby mode < 1 W
Specifications subject to change without prior notice
01-34 DVP533K_78 19/03/2004, 2:56 PM31

En
glish
32
8239 300 32131
WARNINGUnder no circumstances should you try to repair the system yourself, as this willinvalidate the warranty. Do not open the system as there is a risk of electric shock.
If a fault occurs, first check the points listed below before taking the system for repair. Ifyou are unable to remedy a problem by following these hints, consult your dealer orPhilips for help.
Problem Solution
No power – Check if the AC power cord is properly connected.– Press the STANDBY ON on the front of the DVD
system to turn on the power.
No picture – Refer to your TV’s manual for correct Video Inchannel selection. Change the TV channel until yousee the DVD screen.
– Check if the TV is switched on.
Distorted picture – Sometimes a small amount of picture distortion mayappear depending on the disc being played back. Thisis not a malfunction.
Completely distorted picture or – Connect DVD Player directly to the TV.black/white picture with DVD – Make sure the disc is compatible with the DVD/
Player.– Ensure that the DVD Player’s TV Type is set to match
that of the Disc and your TV.
No sound or distorted sound – Adjust the volume.– Ensure to select stereo output on your disc (except
multichannel).– Check that the speakers are connected correctly.– Ensure that the DTS disc also supports Dolby Digital
output.
No audio at digital output – Check the digital connections.– Check if your receiver can decode MPEG-2 or DTS
and if not, please make sure the digital output is setto PCM.
– Check if the audio format of the selected audiolanguage matches your receiver capabilities.
Disc can’t be played – The DVD+R/CD-R must be finalized.– Ensure the disc label is facing up.– Check if the disc is defective by trying another disc.– If you have recorded a Picture CD or MP3 CD
yourself, ensure that your disc contains at least 10pictures or 5 MP3 tracks.
– Region code incorrect.
Picture freezes momentarily – Check the disc for fingerprints/scratches andduring playback clean with a soft cloth wiping from centre to edge.
No return to start-up screen when – Reset the unit by switching the player off, then ondisc is removed again.
Troubleshooting
01-34 DVP533K_78 19/03/2004, 2:56 PM32
En
gli
s h
33
8239 300 32131
Problem Solution
The player does not respond to – Aim the Remote Control directly at the sensorthe Remote Control on the front of the player.
– Reduce the distance to the player.– Replace the batteries in the Remote Control.– Re-insert the batteries with their polarities (+/–
signs) as indicated.
Buttons do not work – To completely reset the player, unplug the ACcord from the AC outlet for 5-10 seconds.
Player does not respond to some – Operations may not be permitted by the disc.operating commands during playback. Refer to the instructions of the disc jacket.
DVD Player cannot read – Use a commonly available cleaning CD/DVD toCDs/DVDs clean the lens before sending the DVD Player for
repair.
Menu items cannot be selected – Press STOP twice before selecting System Menu.– Depending on the disc availability, some menu items
cannot be selected.
If you are unable to remedy a problem by following these hints, consult your dealeror service center (HOTLINE).
Troubleshooting
01-34 DVP533K_78 19/03/2004, 2:56 PM33

En
glish
34
8239 300 32131
Analog: Sound that has not been turned intonumbers. Analog sound varies, while digitalsound has specific numerical values. Thesejacks send audio through two channels, the leftand right.Aspect ratio: The ratio of vertical andhorizontal sizes of a displayed image. Thehorizontal vs. vertical ratio of conventional TVs.is 4:3, and that of wide-screens is 16:9.AUDIO OUT Jacks: Jacks on the back ofthe DVD System that send audio to anothersystem (TV, Stereo, etc.).Bit Rate: The amount of data used to hold agiven length of music; measured in kilobits perseconds, or kbps. Or, the speed at which yourecord. Generally, the higher the bit rate, or thehigher the recording speed, the better thesound quality. However, higher bit rates usemore space on a Disc.Chapter: Sections of a picture or a musicpiece on a DVD that are smaller than titles. Atitle is composed of several chapters. Eachchapter is assigned a chapter number enablingyou to locate the chapter you want.Component Video Out Jacks: Jacks on theback of the DVD System that send high-qualityvideo to a TV that has Component Video Injacks (R/G/B, Y/Pb/Pr, etc.).Disc menu: A screen display prepared forallowing selection of images, sounds, subtitles,multi-angles, etc recorded on a DVD.Digital: Sound that has been converted intonumerical values. Digital sound is availablewhen you use the DIGITAL AUDIO OUTCOAXIAL or OPTICAL jacks. These jacks sendaudio through multiple channels, instead of justtwo channels as analog does.Dolby Digital: A surround sound systemdeveloped by Dolby Laboratories containing upto six channels of digital audio (front left andright, surround left and right, center andsubwoofer).JPEG: A very common digital still pictureformat. A still-picture data compression systemproposed by the Joint Photographic ExpertGroup, which features small decrease in imagequality in spite of its high compression ratio.MP3: A file format with a sound datacompression system. “MP3” is the abbreviationof Motion Picture Experts Group 1 (or MPEG-1) Audio Layer 3. By using MP3 format. oneCD-R or CD-RW can contain about 10 timesas much data volume as a regular CD can.
Multichannel: DVD is specified to have eachsound track constitute one sound field.Multichannel refers to a structure of soundtracks having three or more channels.Parental Control: A function of the DVD tolimit playback of the disc by the age of theusers according to the limitation level in eachcountry. The limitation varies from disc to disc;when it is activated, playback will be prohibitedif the software’s level is higher than the user-setlevel.PCM (Pulse Code Modulation): A systemfor converting analog sound signal to digitalsignal for later processing, with no datacompression used in conversion.Playback control (PBC): Refers to thesignal recorded on video CDs or SVCDs forcontrolling reproduction. By using menuscreens recorded on a Video CD or SVCD thatsupports PBC, you can enjoy interactive-typesoftware as well as software having a searchfunction.Progressive Scan: It displays all thehorizontal lines of a picture at one time, as asignal frame. This system can convert theinterlaced video from DVD into progressiveformat for connection to a progressive display.It dramatically increases the vertical resolution.Region code: A system for allowing discs tobe played back only in the region designatedbeforehand. This unit will only play discs thathave compatible region codes. You can find theregion code of your unit by looking on theproduct label. Some discs are compatible withmore than one region (or ALL regions).S-Video: Produces a clear picture by sendingseparate signals for the luminance and thecolor. You can use S-Video only if your TV hasS- video In jack.Title: The longest section of a picture ormusic feature on DVD, music, etc., in videosoftware, or the entire album in audio software.Each title is assigned a title number enablingyou to locate the title you want.VIDEO OUT jack: Jack on the back of theDVD System that sends video to a TV.
Glossary
01-34 DVP533K_78 19/03/2004, 2:56 PM34