


Languages
Pages
Legal


Installing Android Studio
1. Install Java JDK. The file I used is: (jdk-8u45-windows-x64.exe). 8u45-windows indicates the
version 8u45 for windows. Get the latest version. x64 indicates this is for 64 bit processors, x86
is the 32bit version.
The JDK may be downloaded here:
http://www.oracle.com/technetwork/java/javase/downloads/jdk8-downloads-2133151.html
2. Install Android Studio bundle. The file I used is: (android-studio-bundle-141.1903250-
windows.exe). Use the latest stable version.
Android Studio may be downloaded here:
https://developer.android.com/sdk/index.html
Follow the prompts to complete the installation. I used the default settings.

3. Allow Android Studio access to the network.
4. Select your desired UI theme.
5. Android Studio will download additional components. This will take several minutes.

6. Select “Configure/SDK Manager”
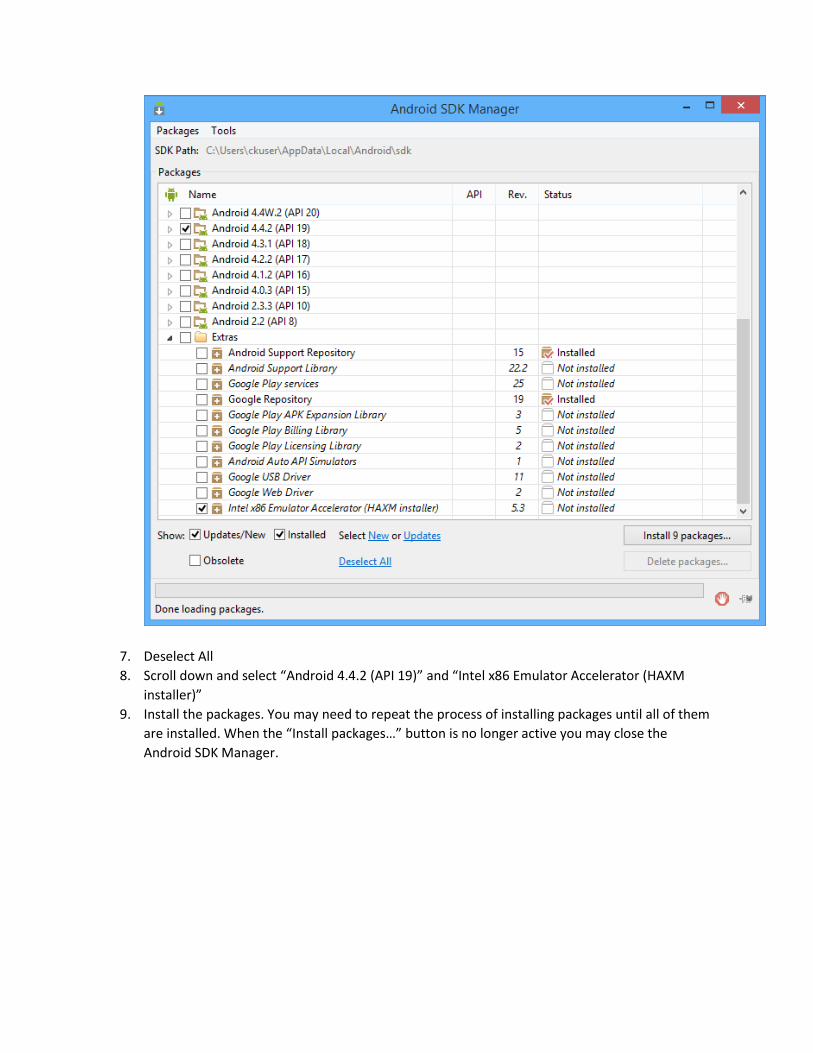
7. Deselect All
8. Scroll down and select “Android 4.4.2 (API 19)” and “Intel x86 Emulator Accelerator (HAXM
installer)”
9. Install the packages. You may need to repeat the process of installing packages until all of them
are installed. When the “Install packages…” button is no longer active you may close the
Android SDK Manager.

10. a. Start a new Android Studio project

11. a. You may change the Application name and Company Domain.
12. a. Select API 19 as the Minimum SDK.

13. a. Select Blank Activity
14. a. The default values are good.

15. a. The Windows Firewall may complain again. Allow access.

16. a. Select the AVD Manager from the toolbar at the top.
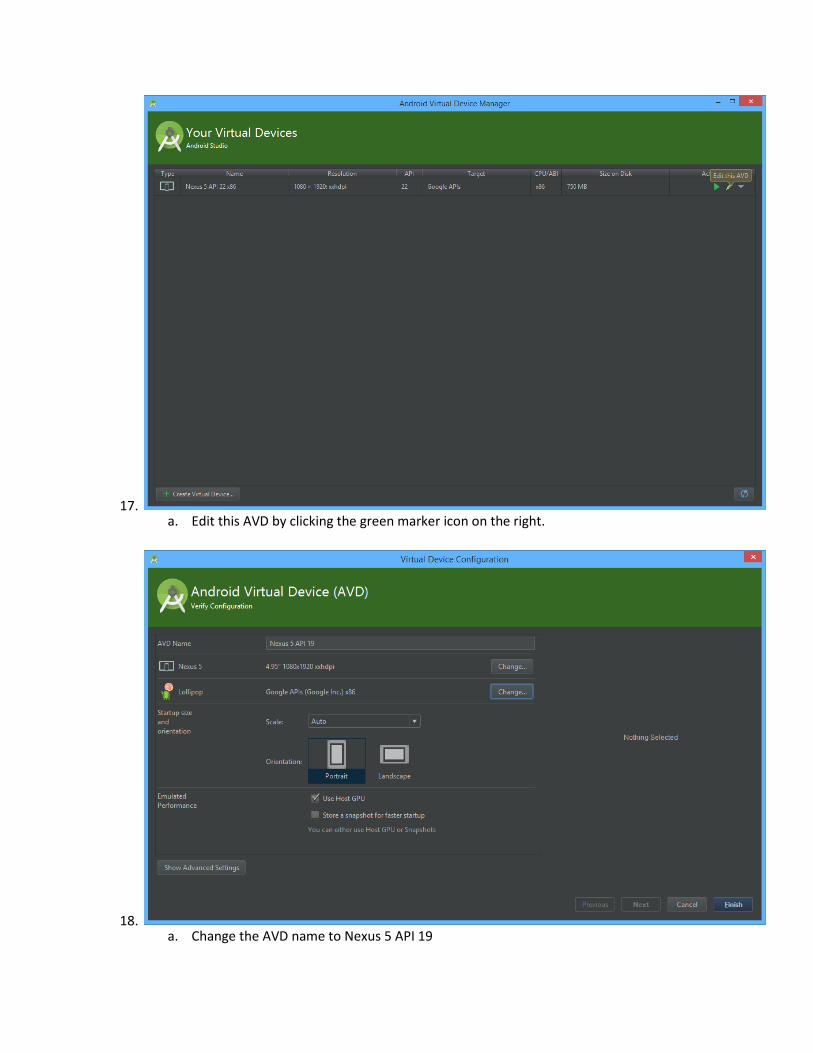
17. a. Edit this AVD by clicking the green marker icon on the right.
18. a. Change the AVD name to Nexus 5 API 19

b. Change the OS from Lollipop to KitKat
19. Change the Google API from Lollipop to KitKat API level 19.
a. The x86 virtual device run faster on a Windows system. If you have problems running it
then select armeabi-v7a Google APIs instead.
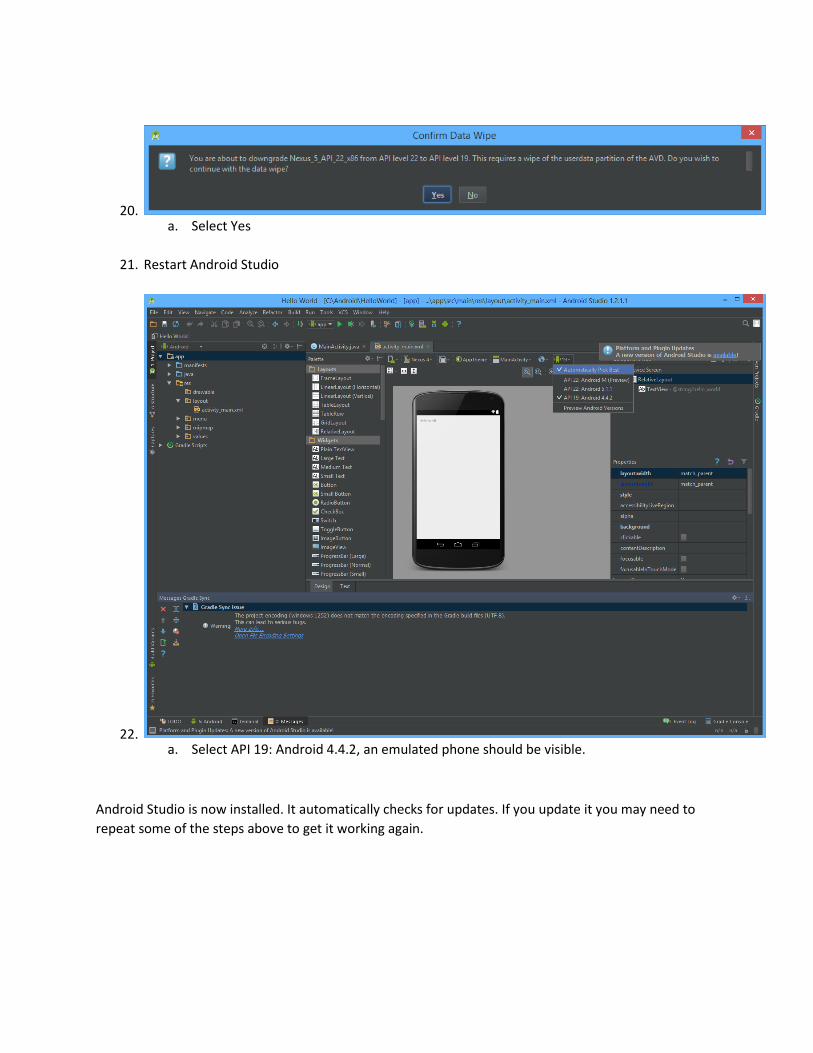
20. a. Select Yes
21. Restart Android Studio
22. a. Select API 19: Android 4.4.2, an emulated phone should be visible.
Android Studio is now installed. It automatically checks for updates. If you update it you may need to
repeat some of the steps above to get it working again.
Top Related