DWIN Android Developing Guide - AMP Display Android Developing Guide v2.0.pdf · In the process of...
28
DWIN Android Developing Guide Revision on March, 2014
Transcript of DWIN Android Developing Guide - AMP Display Android Developing Guide v2.0.pdf · In the process of...
DWIN Android Developing Guide
Revision on March, 2014
Professional, Creditable, Successful DWIN Android Developing Guide
Contents
1. Build The Java Environment ........................................................................................................................... 1
1.1 Install The JDK .......................................................................................................................................... 1
1.2 The Parameter Selection of The JDK ........................................................................................................ 1
1.3 Environment Variables Settings ................................................................................................................. 3
2. Build The Eclipse Development Environment and How to Use It ................................................................ 8
2.1 Eclipse Package Description ...................................................................................................................... 8
2.2 Develop Android Applications ................................................................................................................... 8
2.3 NDK Package Description ....................................................................................................................... 13
2.4 Build The NDK Environment .................................................................................................................. 13
3. Develop The DWIN Android Screen Based on The Eclipse development Environment ..................... 14
3.1 Connect to PC .......................................................................................................................................... 14
3.2 Debug DWIN Android Screen Online ..................................................................................................... 15
3.3 Run helloworld on DWIN Android Screen .............................................................................................. 17
4. Example of Serial Ports .......................................................................................................................................... 17
4.1 SerialAPIdemo Description ..................................................................................................................... 17
4.2 Import Source Code to Eclipse ................................................................................................................ 17
4.3 New Android Application through The Libs ............................................................................................ 21
5. Download Link of The Tools ................................................................................................................................. 26
Professional, Creditable, Successful DWIN Android Developing Guide
www.ampdisplay.com [email protected] 1
1. Build The Java Environment
Java is a programming language developed by Sun, being used in a distributed network environment. One feature of Java
language is cross-platform, which means that the program compiled in Java language can run on multiple operating
system platforms. This manual mainly introduces how to build the Java environment by taking the building process on
Win7 system platform as an example.
The software in use is jdk-7u45-windows-i586.exe, which can be downloaded at the
link: http://yunpan.cn/QNefnc4ajvSKU (Password: 0cc5)
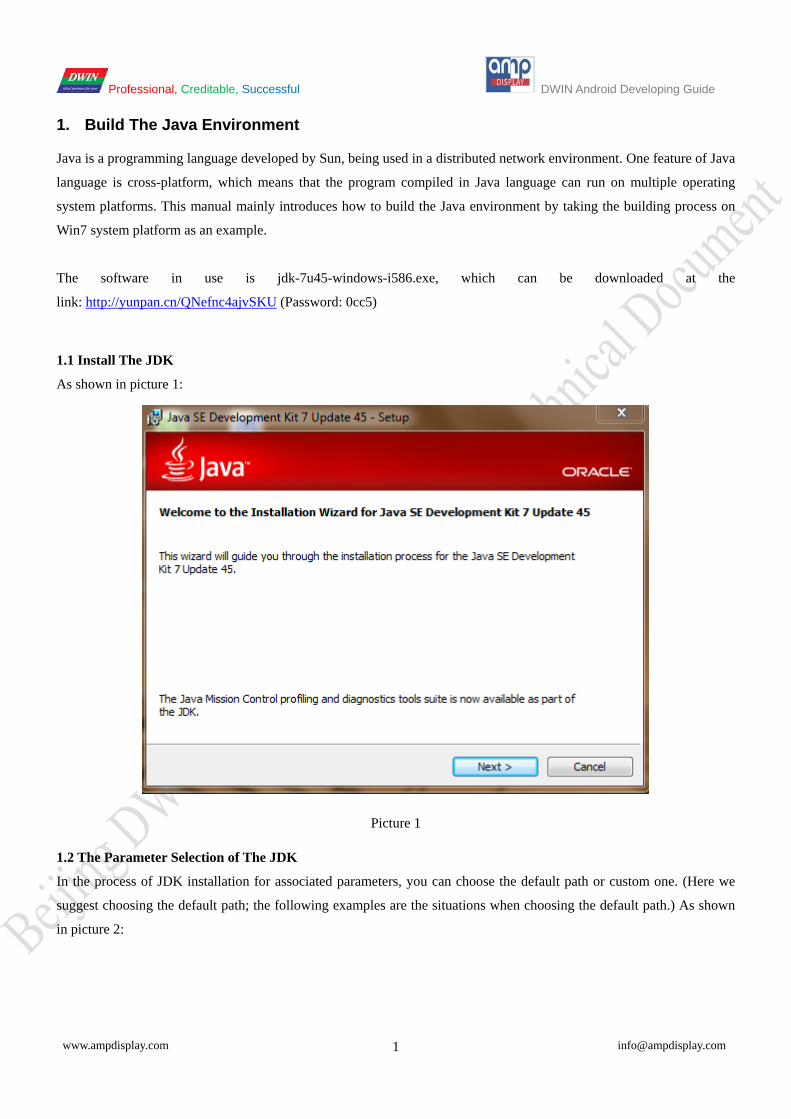
1.1 Install The JDK
As shown in picture 1:
Picture 1
1.2 The Parameter Selection of The JDK
In the process of JDK installation for associated parameters, you can choose the default path or custom one. (Here we
suggest choosing the default path; the following examples are the situations when choosing the default path.) As shown
in picture 2:

Professional, Creditable, Successful DWIN Android Developing Guide
www.ampdisplay.com [email protected] 2
Picture 2
Installation in progress as shown in picture 3 :
Picture 3
Professional, Creditable, Successful DWIN Android Developing Guide
www.ampdisplay.com [email protected] 3
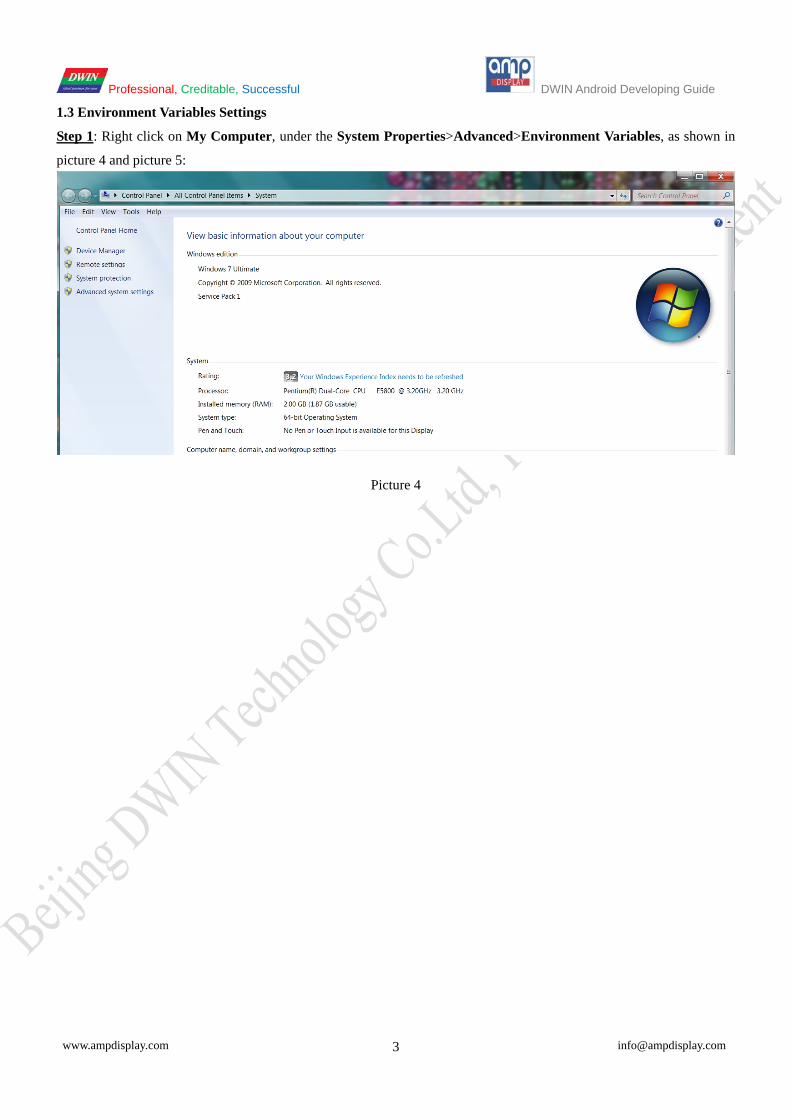
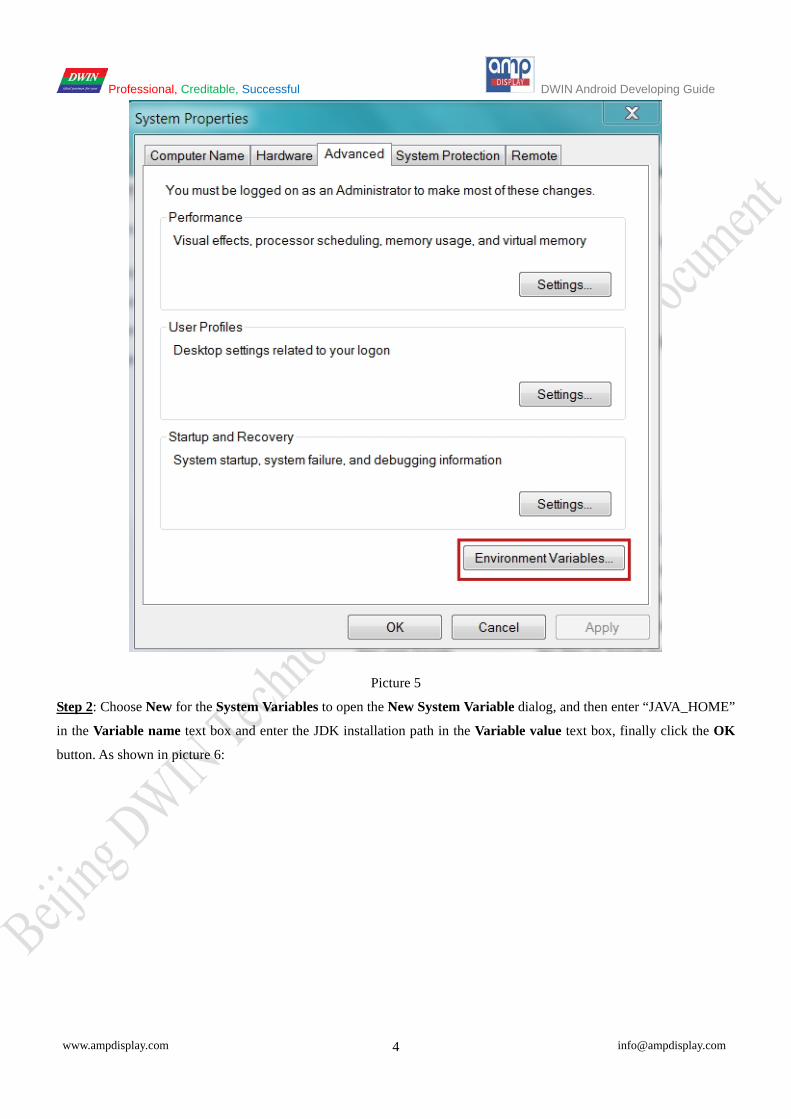
1.3 Environment Variables Settings
Step 1: Right click on My Computer, under the System Properties>Advanced>Environment Variables, as shown in
picture 4 and picture 5:
Picture 4
Professional, Creditable, Successful DWIN Android Developing Guide
www.ampdisplay.com [email protected] 4
Picture 5
Step 2: Choose New for the System Variables to open the New System Variable dialog, and then enter “JAVA_HOME”
in the Variable name text box and enter the JDK installation path in the Variable value text box, finally click the OK
button. As shown in picture 6:

Professional, Creditable, Successful DWIN Android Developing Guide
www.ampdisplay.com [email protected] 5
Picture 6
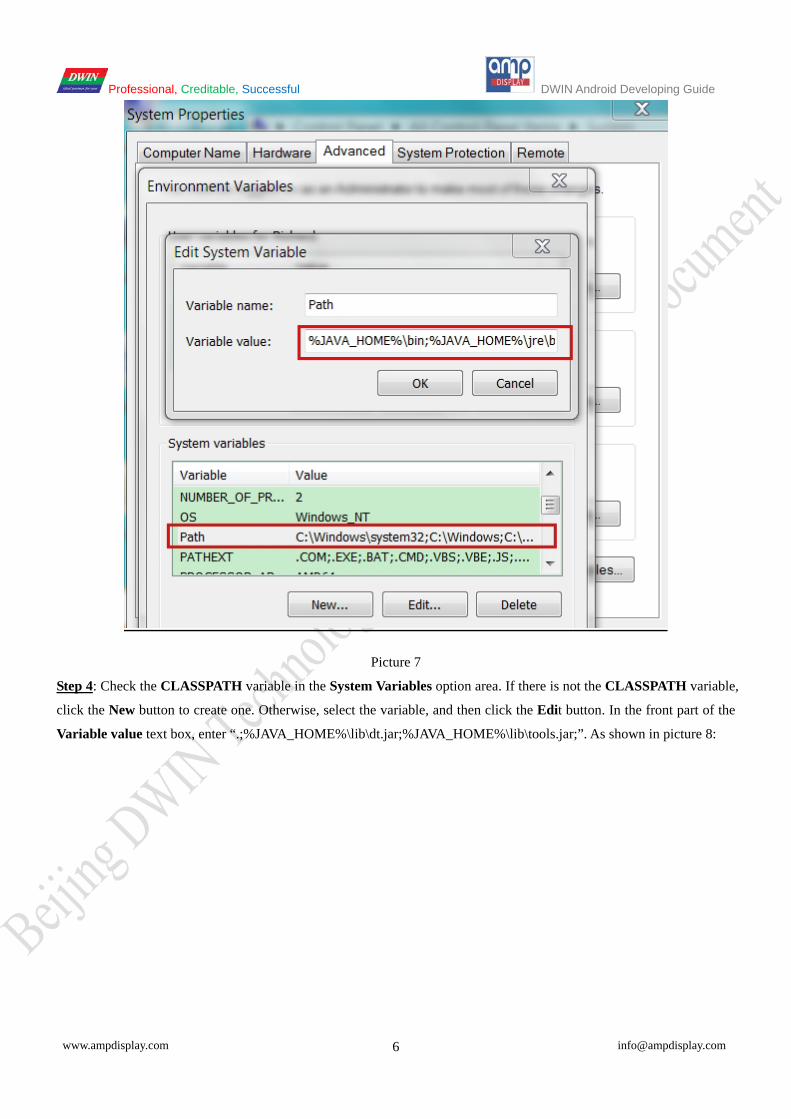
Step 3: Check the Path variable in the System Variables option area. If there is not the Path variable, click the New
button to create one. Or, select the variable, and then click the Edit button. In the front part of the Variable value text
box, enter “%JAVA_HOME%\bin;%JAVA_HOME%\jre\bin;” or “%JAVA_HOME%\bin;”. At last, click the OK button,
as shown in the picture 7:
Professional, Creditable, Successful DWIN Android Developing Guide
www.ampdisplay.com [email protected] 6
Picture 7
Step 4: Check the CLASSPATH variable in the System Variables option area. If there is not the CLASSPATH variable,
click the New button to create one. Otherwise, select the variable, and then click the Edit button. In the front part of the
Variable value text box, enter “.;%JAVA_HOME%\lib\dt.jar;%JAVA_HOME%\lib\tools.jar;”. As shown in picture 8:

Professional, Creditable, Successful DWIN Android Developing Guide
www.ampdisplay.com [email protected] 7
Picture 8
Step 5: Check out if configuration of Environment Vairable works. Please input “javac” in Command DOS Window,
appearance of Help info indicates proper settings.
Professional, Creditable, Successful DWIN Android Developing Guide
www.ampdisplay.com [email protected] 8
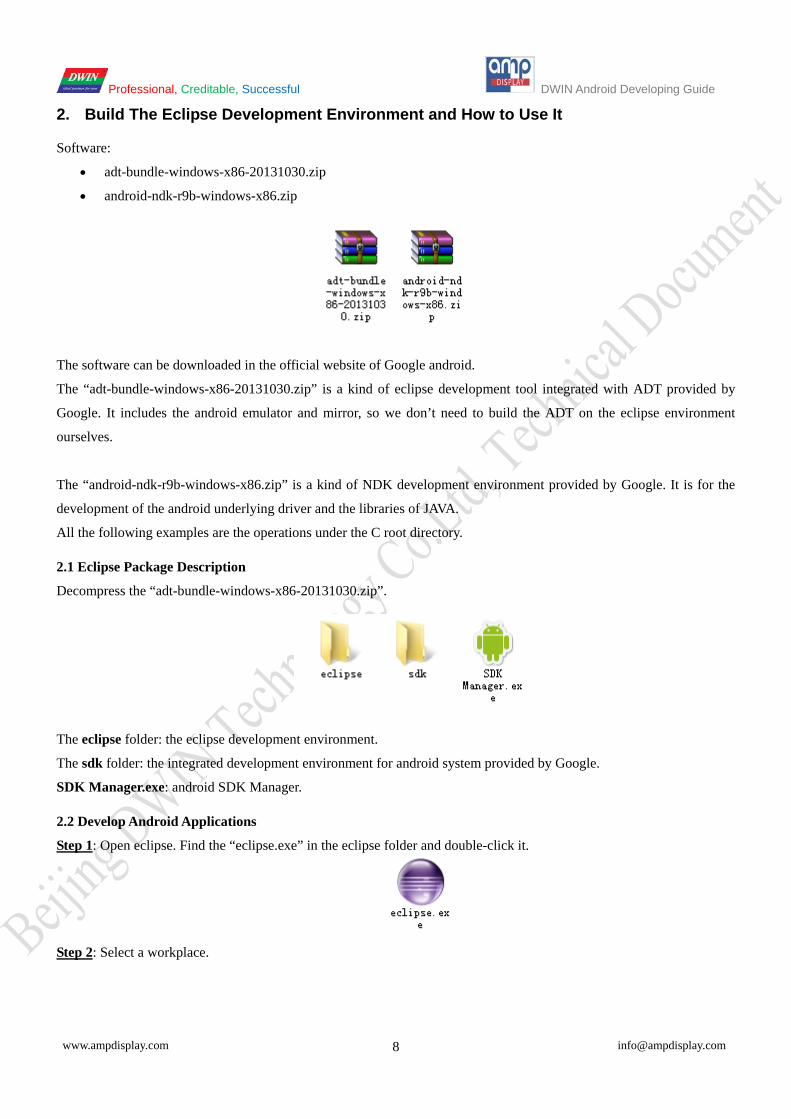
2. Build The Eclipse Development Environment and How to Use It
Software:
• adt-bundle-windows-x86-20131030.zip
• android-ndk-r9b-windows-x86.zip
The software can be downloaded in the official website of Google android.
The “adt-bundle-windows-x86-20131030.zip” is a kind of eclipse development tool integrated with ADT provided by
Google. It includes the android emulator and mirror, so we don’t need to build the ADT on the eclipse environment
ourselves.
The “android-ndk-r9b-windows-x86.zip” is a kind of NDK development environment provided by Google. It is for the
development of the android underlying driver and the libraries of JAVA.
All the following examples are the operations under the C root directory.
2.1 Eclipse Package Description
Decompress the “adt-bundle-windows-x86-20131030.zip”.
The eclipse folder: the eclipse development environment.
The sdk folder: the integrated development environment for android system provided by Google.
SDK Manager.exe: android SDK Manager.
2.2 Develop Android Applications
Step 1: Open eclipse. Find the “eclipse.exe” in the eclipse folder and double-click it.
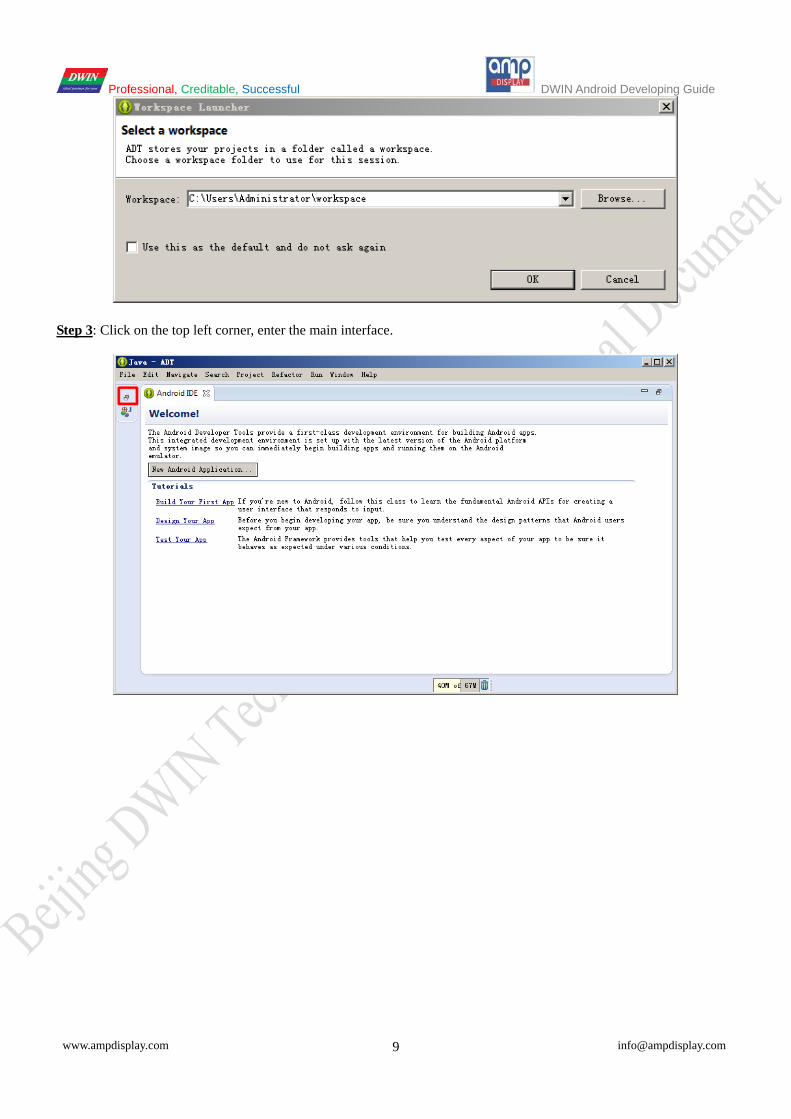
Step 2: Select a workplace.
Professional, Creditable, Successful DWIN Android Developing Guide
www.ampdisplay.com [email protected] 9
Step 3: Click on the top left corner, enter the main interface.
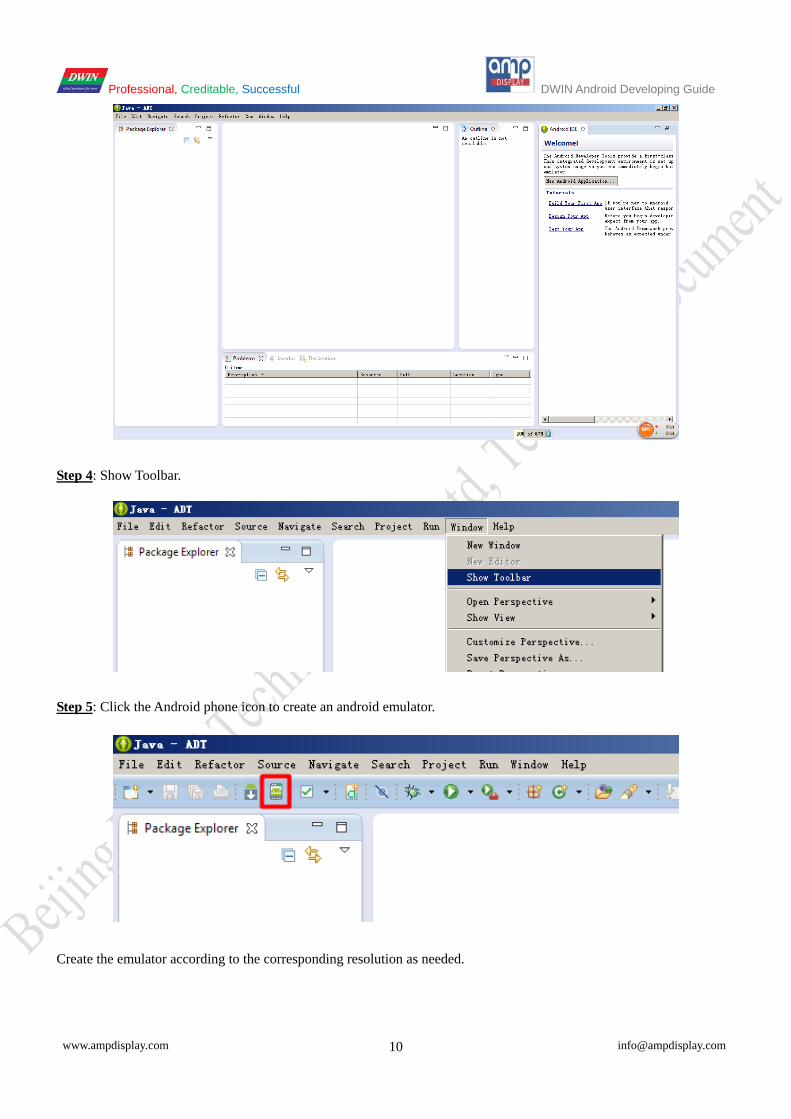
Professional, Creditable, Successful DWIN Android Developing Guide
www.ampdisplay.com [email protected] 10
Step 4: Show Toolbar.
Step 5: Click the Android phone icon to create an android emulator.
Create the emulator according to the corresponding resolution as needed.
Professional, Creditable, Successful DWIN Android Developing Guide
www.ampdisplay.com [email protected] 11
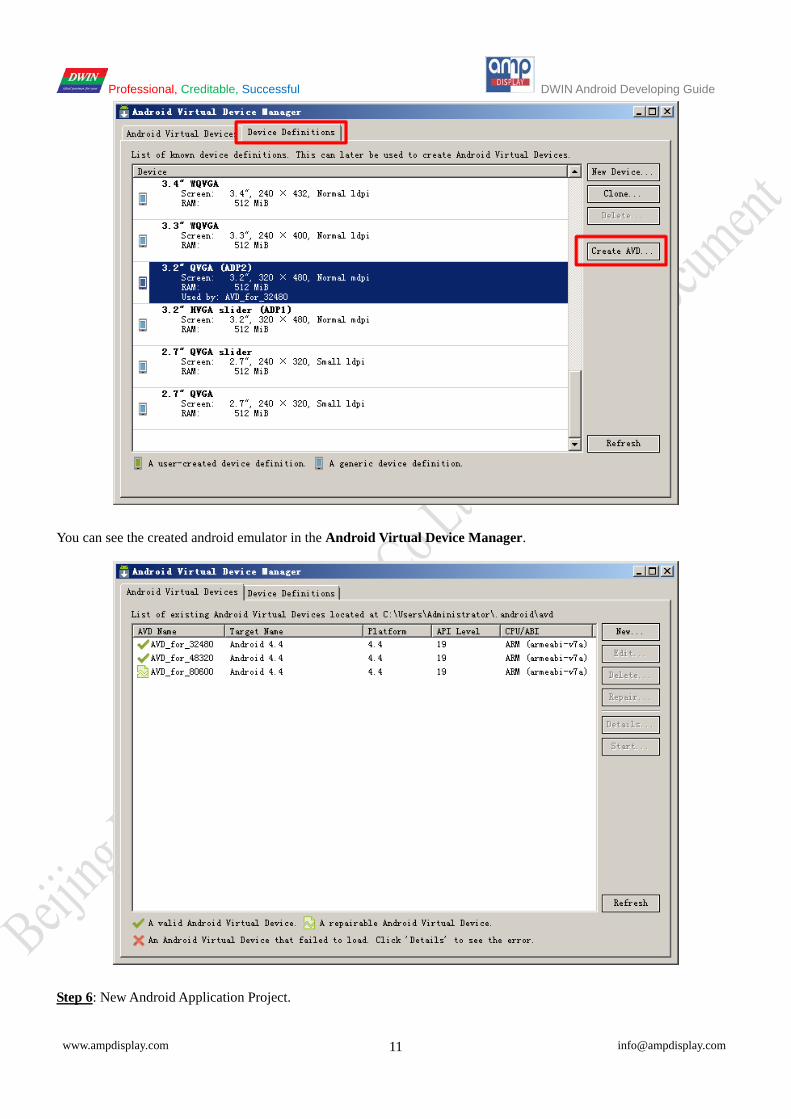
You can see the created android emulator in the Android Virtual Device Manager.
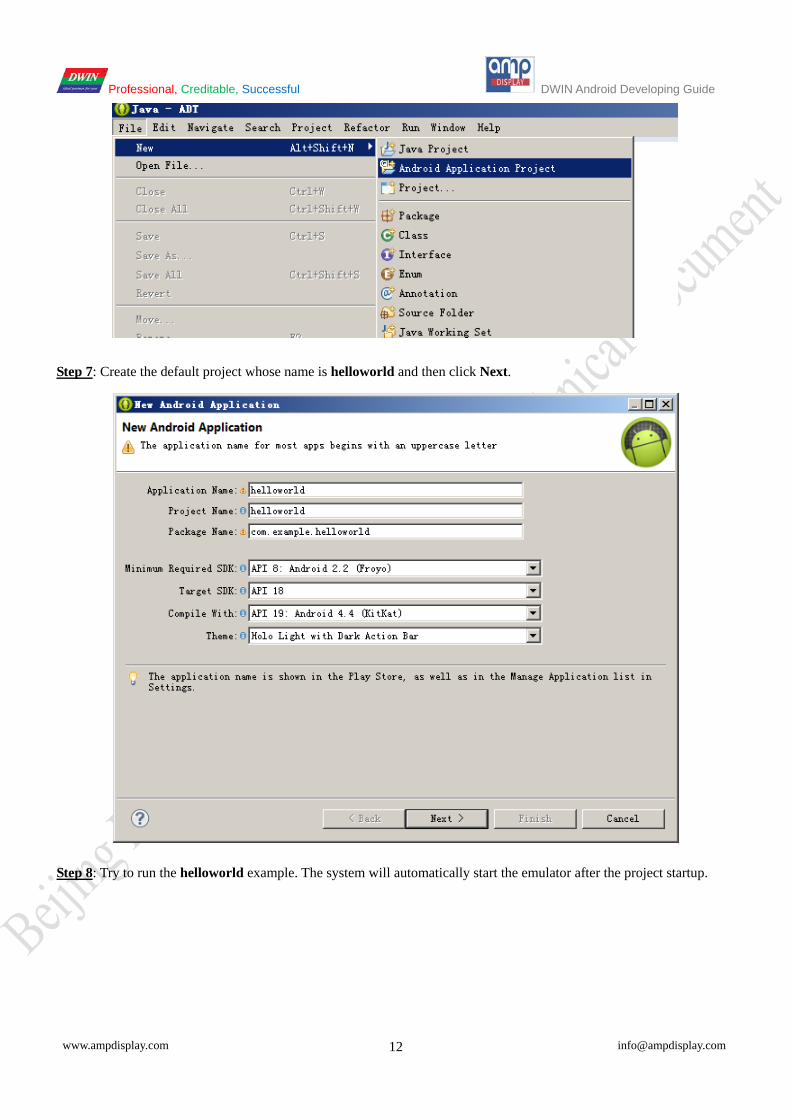
Step 6: New Android Application Project.
Professional, Creditable, Successful DWIN Android Developing Guide
www.ampdisplay.com [email protected] 12
Step 7: Create the default project whose name is helloworld and then click Next.
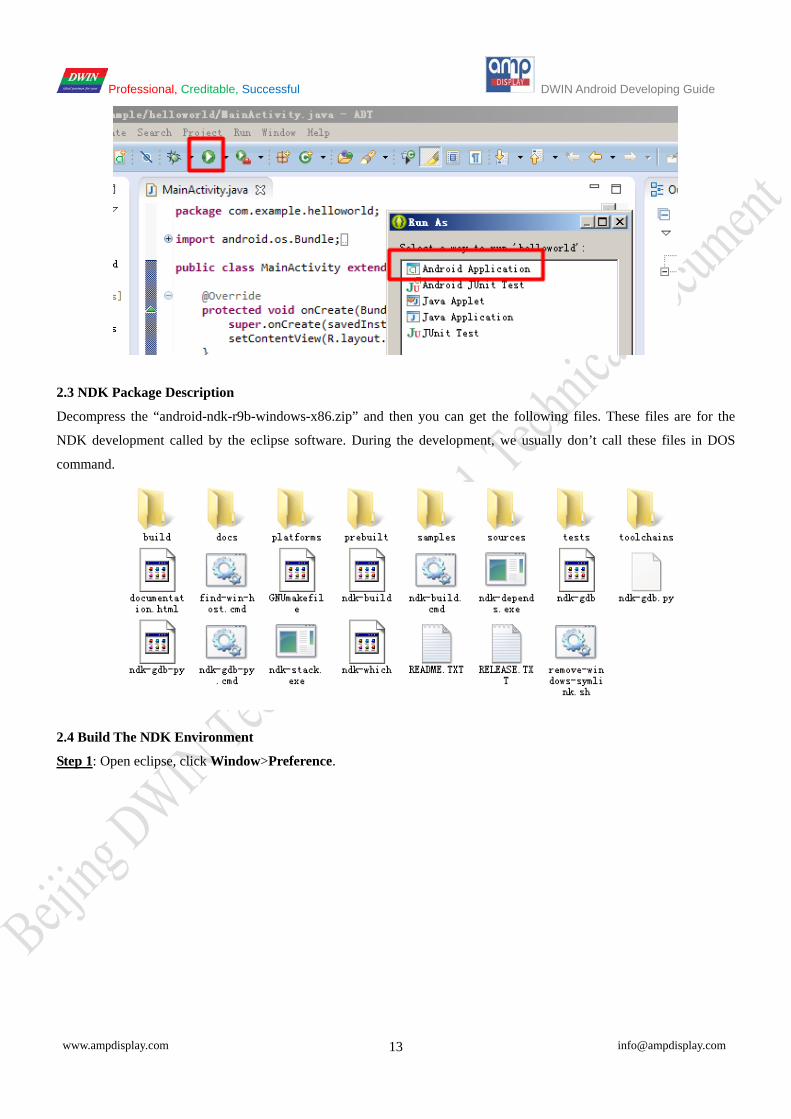
Step 8: Try to run the helloworld example. The system will automatically start the emulator after the project startup.
Professional, Creditable, Successful DWIN Android Developing Guide
www.ampdisplay.com [email protected] 13
2.3 NDK Package Description
Decompress the “android-ndk-r9b-windows-x86.zip” and then you can get the following files. These files are for the
NDK development called by the eclipse software. During the development, we usually don’t call these files in DOS
command.
2.4 Build The NDK Environment
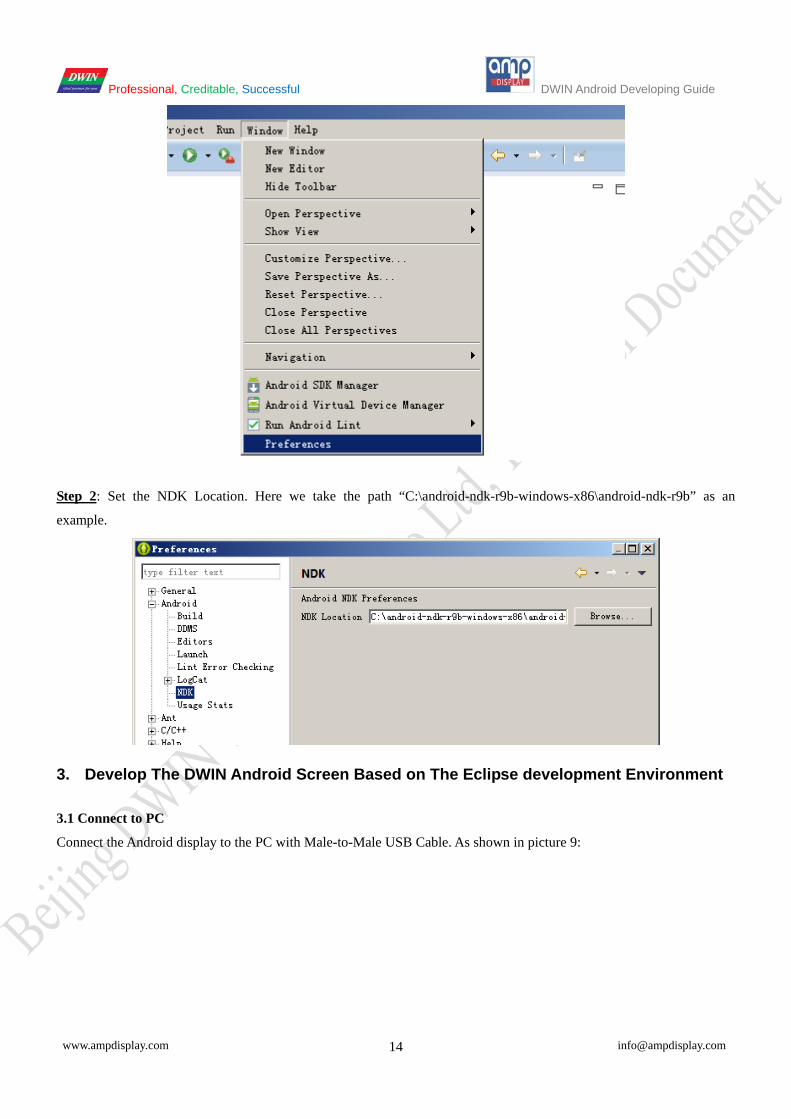
Step 1: Open eclipse, click Window>Preference.
Professional, Creditable, Successful DWIN Android Developing Guide
www.ampdisplay.com [email protected] 14
Step 2: Set the NDK Location. Here we take the path “C:\android-ndk-r9b-windows-x86\android-ndk-r9b” as an
example.
3. Develop The DWIN Android Screen Based on The Eclipse development Environment
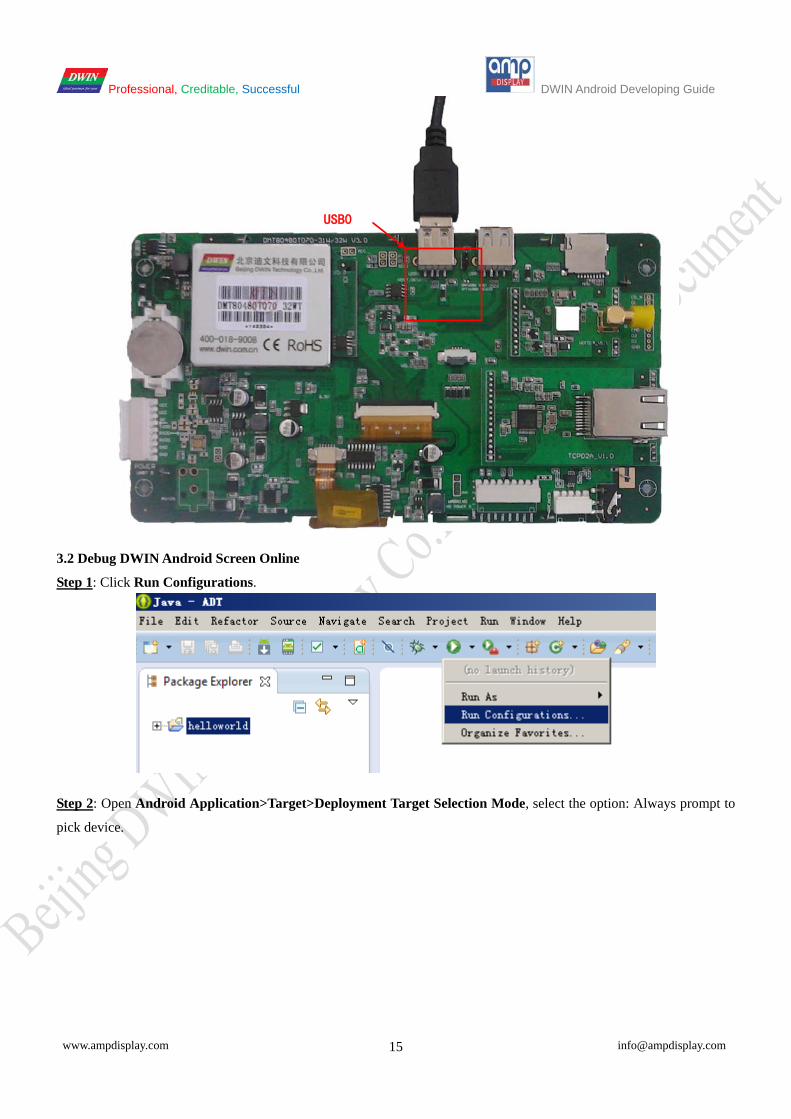
3.1 Connect to PC
Connect the Android display to the PC with Male-to-Male USB Cable. As shown in picture 9:
Professional, Creditable, Successful DWIN Android Developing Guide
www.ampdisplay.com [email protected] 15
3.2 Debug DWIN Android Screen Online
Step 1: Click Run Configurations.
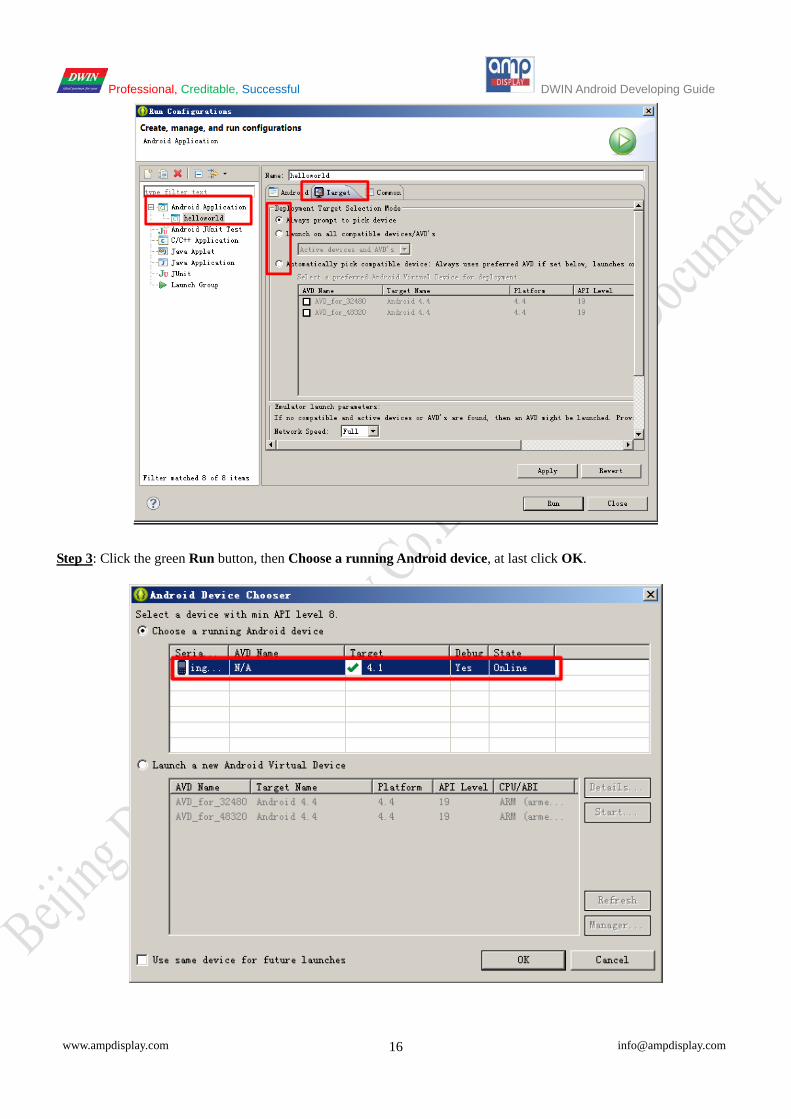
Step 2: Open Android Application>Target>Deployment Target Selection Mode, select the option: Always prompt to
pick device.
USB0
Professional, Creditable, Successful DWIN Android Developing Guide
www.ampdisplay.com [email protected] 16
Step 3: Click the green Run button, then Choose a running Android device, at last click OK.
Professional, Creditable, Successful DWIN Android Developing Guide
www.ampdisplay.com [email protected] 17
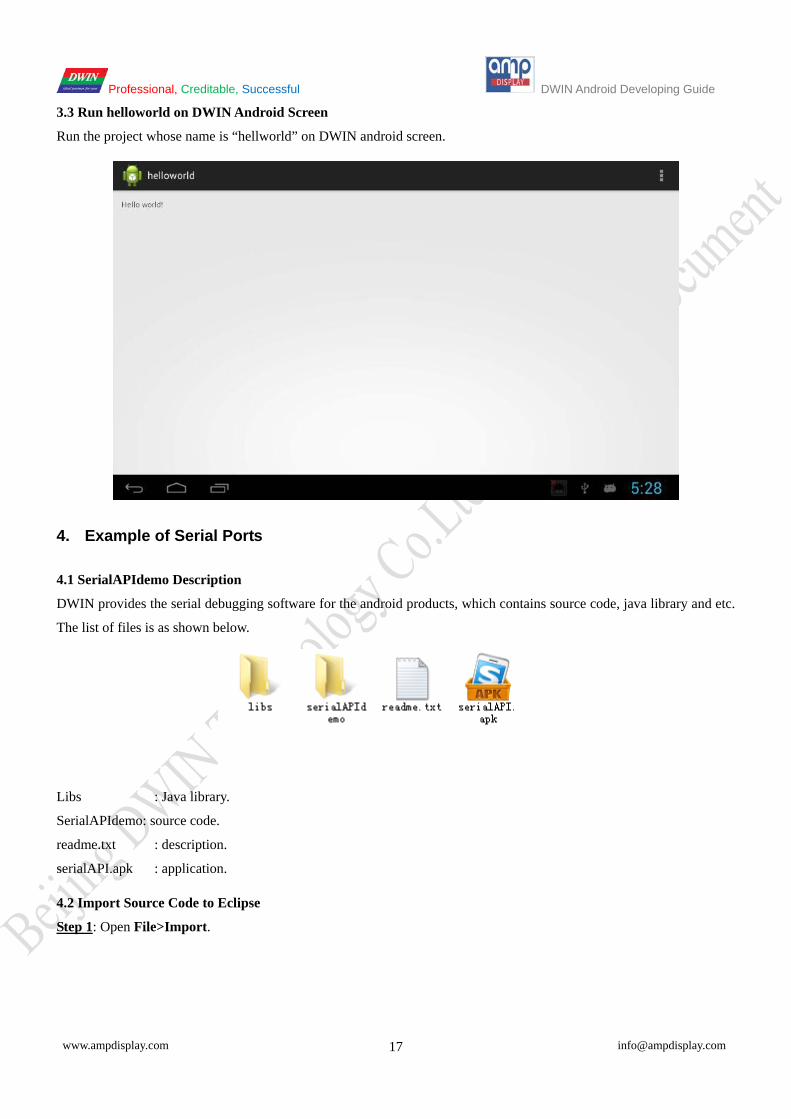
3.3 Run helloworld on DWIN Android Screen
Run the project whose name is “hellworld” on DWIN android screen.
4. Example of Serial Ports
4.1 SerialAPIdemo Description
DWIN provides the serial debugging software for the android products, which contains source code, java library and etc.
The list of files is as shown below.
Libs : Java library.
SerialAPIdemo: source code.
readme.txt : description.
serialAPI.apk : application.
4.2 Import Source Code to Eclipse
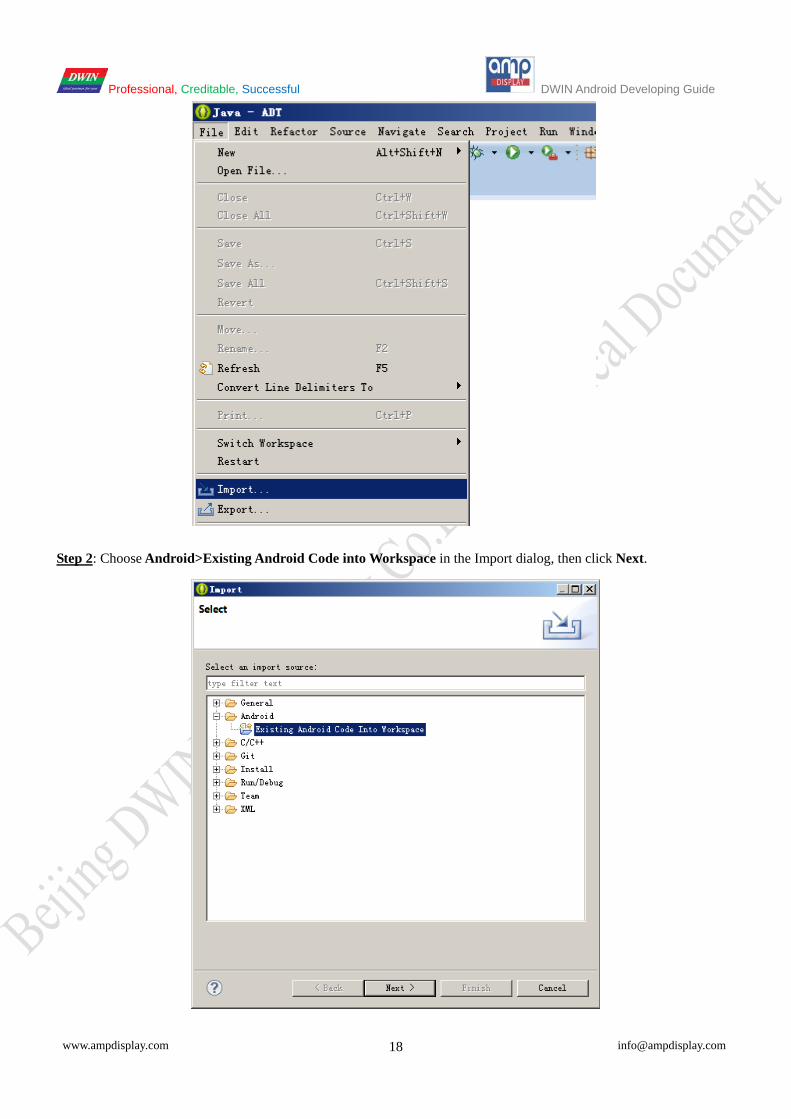
Step 1: Open File>Import.
Professional, Creditable, Successful DWIN Android Developing Guide
www.ampdisplay.com [email protected] 18
Step 2: Choose Android>Existing Android Code into Workspace in the Import dialog, then click Next.
Professional, Creditable, Successful DWIN Android Developing Guide
www.ampdisplay.com [email protected] 19
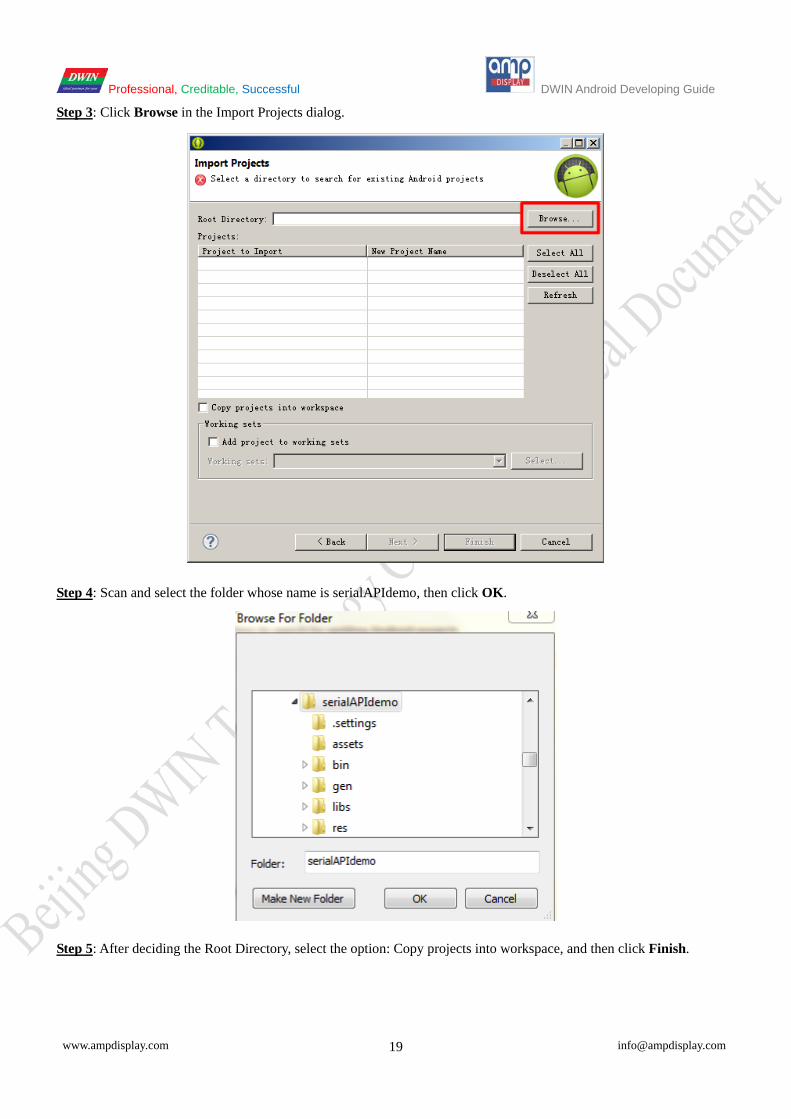
Step 3: Click Browse in the Import Projects dialog.
Step 4: Scan and select the folder whose name is serialAPIdemo, then click OK.
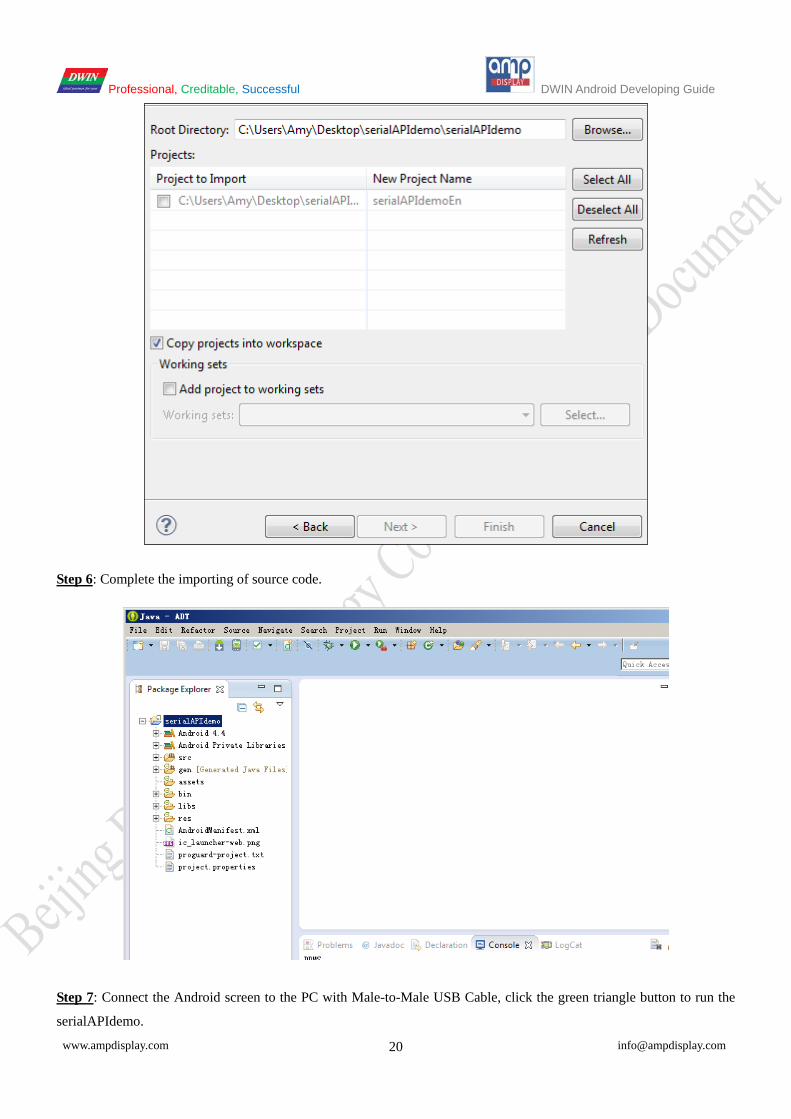
Step 5: After deciding the Root Directory, select the option: Copy projects into workspace, and then click Finish.
Professional, Creditable, Successful DWIN Android Developing Guide
www.ampdisplay.com [email protected] 20
Step 6: Complete the importing of source code.
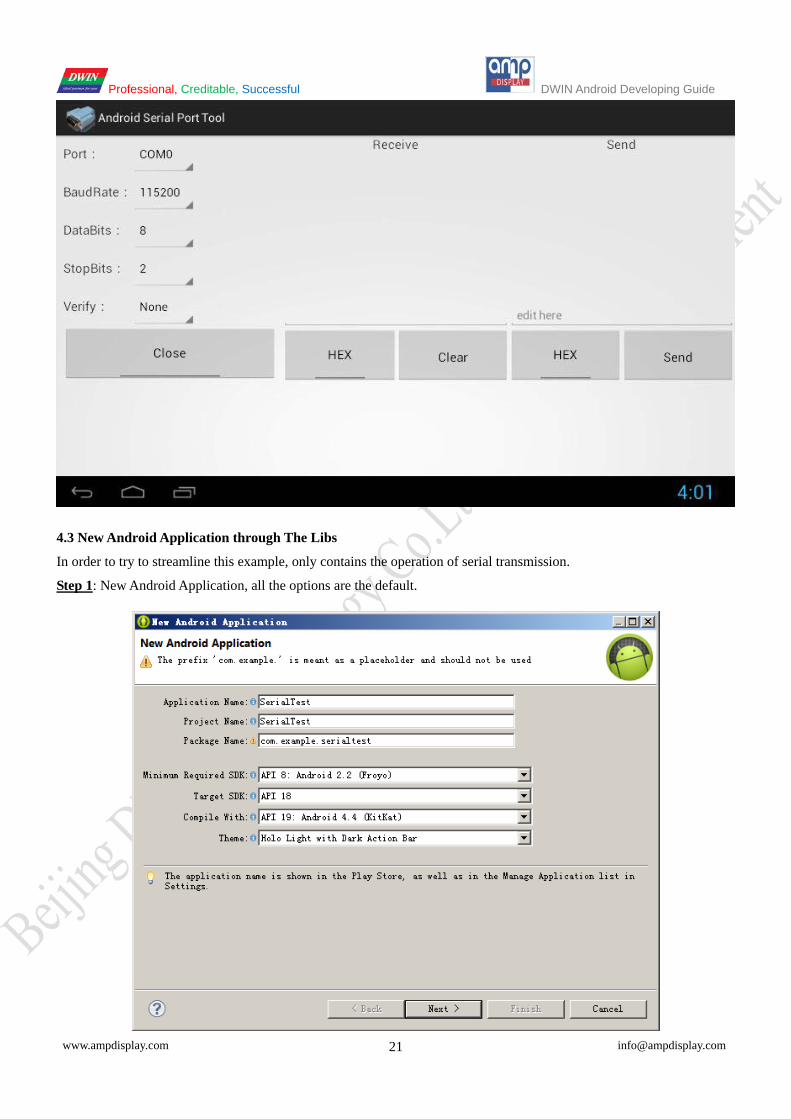
Step 7: Connect the Android screen to the PC with Male-to-Male USB Cable, click the green triangle button to run the
serialAPIdemo.
Professional, Creditable, Successful DWIN Android Developing Guide
www.ampdisplay.com [email protected] 21
4.3 New Android Application through The Libs
In order to try to streamline this example, only contains the operation of serial transmission.
Step 1: New Android Application, all the options are the default.
Professional, Creditable, Successful DWIN Android Developing Guide
www.ampdisplay.com [email protected] 22
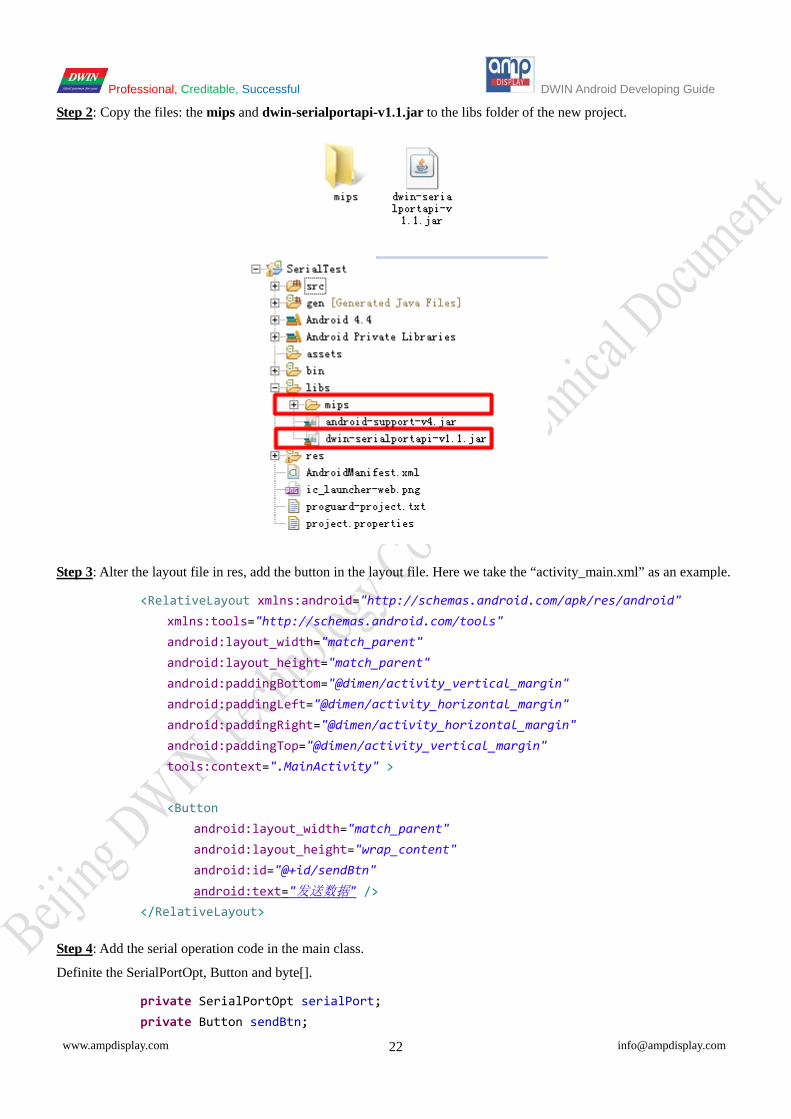
Step 2: Copy the files: the mips and dwin-serialportapi-v1.1.jar to the libs folder of the new project.
Step 3: Alter the layout file in res, add the button in the layout file. Here we take the “activity_main.xml” as an example.
<RelativeLayout xmlns:android="http://schemas.android.com/apk/res/android" xmlns:tools="http://schemas.android.com/tools" android:layout_width="match_parent" android:layout_height="match_parent" android:paddingBottom="@dimen/activity_vertical_margin" android:paddingLeft="@dimen/activity_horizontal_margin" android:paddingRight="@dimen/activity_horizontal_margin" android:paddingTop="@dimen/activity_vertical_margin" tools:context=".MainActivity" >
<Button android:layout_width="match_parent" android:layout_height="wrap_content" android:id="@+id/sendBtn" android:text="发送数据" /> </RelativeLayout>
Step 4: Add the serial operation code in the main class.
Definite the SerialPortOpt, Button and byte[].
private SerialPortOpt serialPort; private Button sendBtn;
Professional, Creditable, Successful DWIN Android Developing Guide
www.ampdisplay.com [email protected] 23
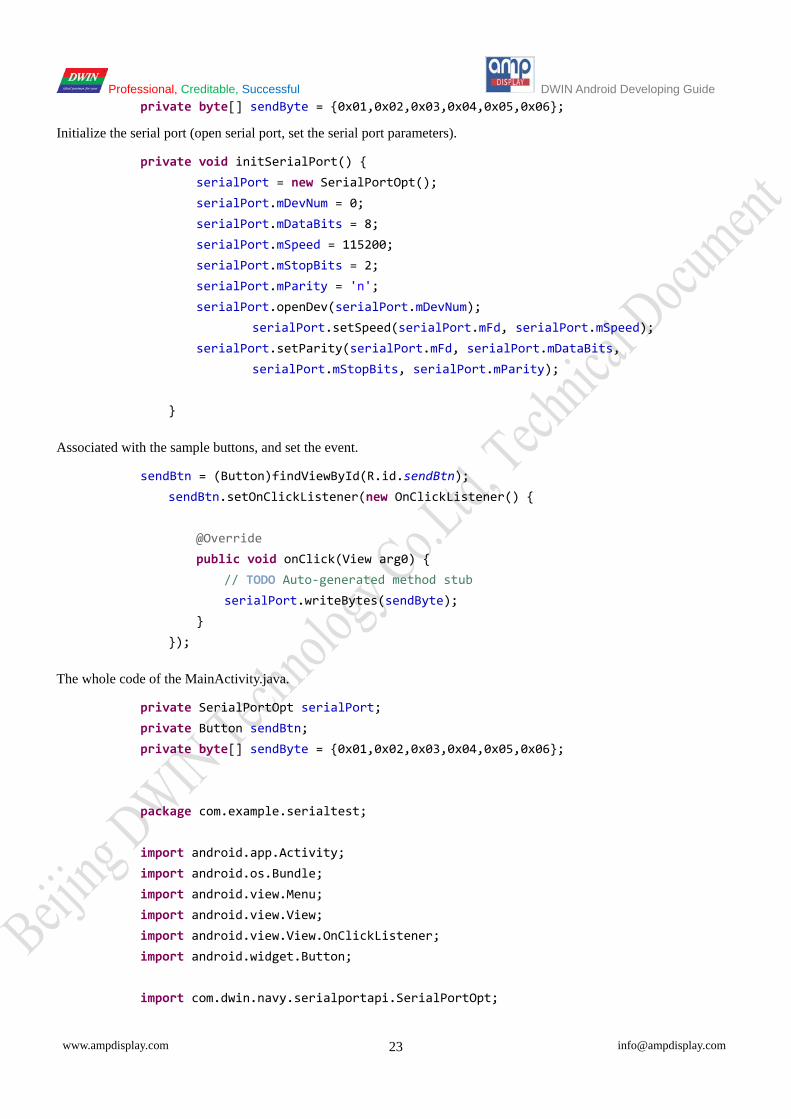
private byte[] sendByte = {0x01,0x02,0x03,0x04,0x05,0x06};
Initialize the serial port (open serial port, set the serial port parameters).
private void initSerialPort() { serialPort = new SerialPortOpt(); serialPort.mDevNum = 0; serialPort.mDataBits = 8; serialPort.mSpeed = 115200; serialPort.mStopBits = 2; serialPort.mParity = 'n'; serialPort.openDev(serialPort.mDevNum); serialPort.setSpeed(serialPort.mFd, serialPort.mSpeed); serialPort.setParity(serialPort.mFd, serialPort.mDataBits, serialPort.mStopBits, serialPort.mParity); }
Associated with the sample buttons, and set the event.
sendBtn = (Button)findViewById(R.id.sendBtn); sendBtn.setOnClickListener(new OnClickListener() { @Override public void onClick(View arg0) { // TODO Auto-generated method stub serialPort.writeBytes(sendByte); } });
The whole code of the MainActivity.java.
private SerialPortOpt serialPort; private Button sendBtn; private byte[] sendByte = {0x01,0x02,0x03,0x04,0x05,0x06};
package com.example.serialtest; import android.app.Activity; import android.os.Bundle; import android.view.Menu; import android.view.View; import android.view.View.OnClickListener; import android.widget.Button; import com.dwin.navy.serialportapi.SerialPortOpt;
Professional, Creditable, Successful DWIN Android Developing Guide
www.ampdisplay.com [email protected] 24
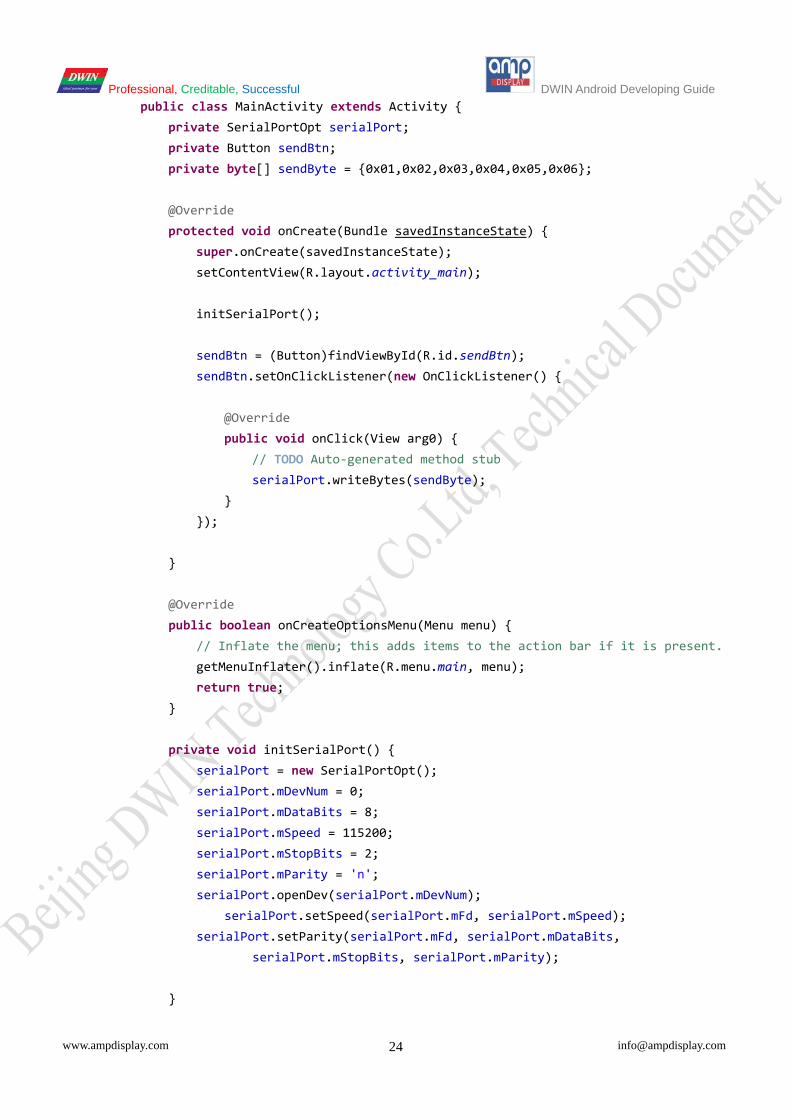
public class MainActivity extends Activity { private SerialPortOpt serialPort; private Button sendBtn; private byte[] sendByte = {0x01,0x02,0x03,0x04,0x05,0x06}; @Override protected void onCreate(Bundle savedInstanceState) { super.onCreate(savedInstanceState); setContentView(R.layout.activity_main); initSerialPort(); sendBtn = (Button)findViewById(R.id.sendBtn); sendBtn.setOnClickListener(new OnClickListener() { @Override public void onClick(View arg0) { // TODO Auto-generated method stub serialPort.writeBytes(sendByte); } }); } @Override public boolean onCreateOptionsMenu(Menu menu) { // Inflate the menu; this adds items to the action bar if it is present. getMenuInflater().inflate(R.menu.main, menu); return true; } private void initSerialPort() { serialPort = new SerialPortOpt(); serialPort.mDevNum = 0; serialPort.mDataBits = 8; serialPort.mSpeed = 115200; serialPort.mStopBits = 2; serialPort.mParity = 'n'; serialPort.openDev(serialPort.mDevNum); serialPort.setSpeed(serialPort.mFd, serialPort.mSpeed); serialPort.setParity(serialPort.mFd, serialPort.mDataBits, serialPort.mStopBits, serialPort.mParity); }

Professional, Creditable, Successful DWIN Android Developing Guide
www.ampdisplay.com [email protected] 25
Step 5: Run the example project.
Connect the Android screen to the PC with Type a Male to Type a Male USB cable via the USB 0 interface. Open the
SSCOM32 in the PC. Click the SEND button, the PC will receive the data. As shown below.
Professional, Creditable, Successful DWIN Android Developing Guide
www.ampdisplay.com [email protected] 26
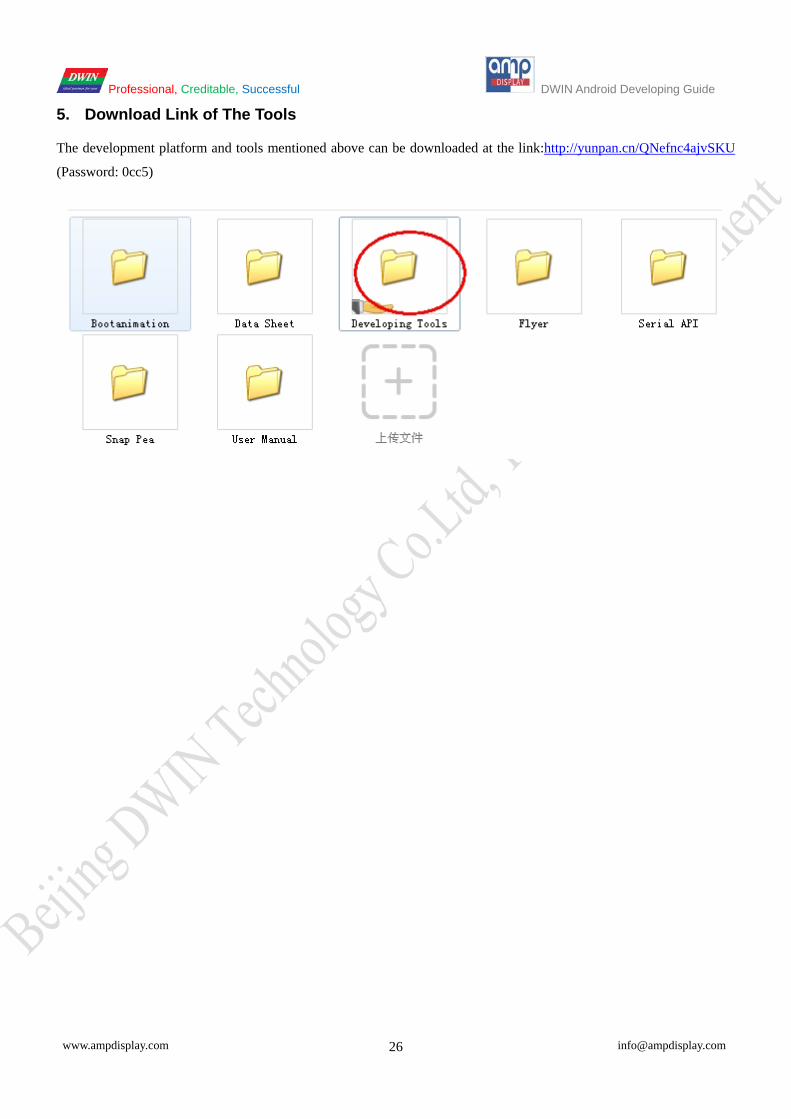
5. Download Link of The Tools
The development platform and tools mentioned above can be downloaded at the link:http://yunpan.cn/QNefnc4ajvSKU
(Password: 0cc5)