User Manual · PDF fileHOME This is your new sales automation home page, where you can manage...
38
FreeCRM.com User Manual v.1.1 Copyright ©2004 CRM ASP, Inc. All rights reserved
Transcript of User Manual · PDF fileHOME This is your new sales automation home page, where you can manage...

FreeCRM.com User Manual
v.1.1
Copyright ©2004 CRM ASP, Inc. All rights reserved

Table of Contents Welcome! .................................................................................................................................................................................... 3 HOME............................................................................................................................................................................................ 4
Message Board..................................................................................................................................................................... 5 POP Accounts........................................................................................................................................................................ 6 Resources .............................................................................................................................................................................. 6 Team View ............................................................................................................................................................................. 6 Import ..................................................................................................................................................................................... 7
Exporting data from Microsoft Outlook.................................................................................................................. 7 Exporting data from Palm Pilot ................................................................................................................................. 7 Exporting data from Act!............................................................................................................................................. 7 Exporting data from GoldMine .................................................................................................................................. 7 Exporting data from SalesForce.com ..................................................................................................................... 8
Export...................................................................................................................................................................................... 8 Sales Targets........................................................................................................................................................................ 8 Profile Setup ......................................................................................................................................................................... 8
Left Navigation ......................................................................................................................................................................... 8 Create an Event................................................................................................................................................................. 10
CALENDAR................................................................................................................................................................................ 10 COMPANY.................................................................................................................................................................................. 12
Create /Edit New Contact .............................................................................................................................................. 13 CONTACT .................................................................................................................................................................................. 13
Create / Edit Deal ............................................................................................................................................................. 13 DEAL ........................................................................................................................................................................................... 13 Create / Edit Task.................................................................................................................................................................. 14 TASK ........................................................................................................................................................................................... 14
Create / Edit Case ............................................................................................................................................................ 15 CASE........................................................................................................................................................................................... 15
Create / Edit Call............................................................................................................................................................... 17 CALL............................................................................................................................................................................................ 17
Create / Edit Email ........................................................................................................................................................... 19 EMAIL ......................................................................................................................................................................................... 19
Create Document .............................................................................................................................................................. 21 DOC............................................................................................................................................................................................. 21
Create / Edit Document Folder .................................................................................................................................... 22 Create / Edit Forms.......................................................................................................................................................... 23
FORM .......................................................................................................................................................................................... 23 REPORT...................................................................................................................................................................................... 29 SETUP......................................................................................................................................................................................... 30
Profile Setup ....................................................................................................................................................................... 31 Import ................................................................................................................................................................................... 32 Update Organization ........................................................................................................................................................ 33 Resources ............................................................................................................................................................................ 34 Regions ................................................................................................................................................................................. 35 Set Unavailable Time....................................................................................................................................................... 35 Set Availability by Region .............................................................................................................................................. 36 Update Login....................................................................................................................................................................... 36 Create / Edit Users ........................................................................................................................................................... 37 Setup Extended Fields .................................................................................................................................................... 37 Setup Field Sets ................................................................................................................................................................ 38

Welcome!
Thank you for using FreeCRM.com, the world’s first advertisement driven and subscription based CRM service and software solutions provider. This is our User’s Manual, which will assist you in using the hosted version of our software.
Our interface has been designed to make navigation and data entry as simple as possible. We have color-coded our menu items and our layout and design is simple and intuitive. Our system is a team sales and support tool, automating many procedures and providing a means of tracking sales and support issues in a collaborative environment.
The first step to using our software is customizing all of the settings and information for your particular business, which includes some decisions that you must make before using the software. We have developed a 10-step Quick Start Guide that is valuable for those of you who are already somewhat familiar with CRM software as a hosted service. Our system is very user friendly, those of you who are Internet savvy and use many web-based applications such as email or frequently use online auctions and e-commerce shops should be able to get up and going very, very quickly.
10 Step Quick Start Guide
1. Log in and click "Setup" on the top-right of the screen (the silver tab).
2. Choose "Update Organization" (3rd choice) and complete all of the information about your particular organization and then click Save.
3. Go back to setup and click "Update Profile" (1st option) -- this is where some very important parameters are set, including default currency, time zone, security access mode, look-and-feel and clock mode; click Save when finished and go back to Setup.
4. Use the "Regions" and "Set Unavailable Times" and "Availability by Region" if your organization is multi-location; save all of your changes and return to the setup menu.
5. Select "Create / Edit Users" -- add as many users as you like; be sure to choose unique user names; we suggest using email addresses as the user names. Also, you can designate managers / administrators for special users as you create them, the system defaults to creating standard users.
6. From the setup menu, choose "Setup Extended Fields" -- this allows you to customize company, contact and event / appointment records with specific information that pertains to your business.
7. Choose the last option, "Setup Field Sets" to customize products and deal records to match your specific business.
8. Click "POP Accounts" on the left-hand navigation; then click "New POP Account" and add as many POP accounts as you like by giving a title to the account (Account name), the email address, the host name or IP address of the server, and the username and password for the POP account. Click "Save" to record the POP account information.
9. Click "Import / Export" from the left-hand navigation to import CSV (comma separated text) files from Act, GoldMine, Microsoft Outlook, Palm, SalesForce, NetSuite, UpShot, SalesNet or any other application.
10. You may now start using the system; we suggest that you begin first by going to the "Sales Targets" section using the left-hand navigation and creating Sales Targets for your entire team.

HOME
This is your new sales automation home page, where you can manage your customer relationships and interact with your sales force.
First, go to Setup and add users to your account under Create / Edit users. Add as many as you want in our free version; professional users will be billed $9.95 / month per user.
You will see your calendar and a quick list of upcoming events for the week. You can also see your call list and any email campaigns if any are active.
There are quick links on the left side of the screen to the message board, which is a standard announcement and discussion page for your team members. Also, you may schedule calls, create a meeting, or create a quick company or contact.
You may also quickly import data from your Palm, Microsoft Outlook, or a number of other applications easily, including Act! and Goldmine. Simply choose the import feature and follow the easy steps provided. Please note that this may be a fee based feature that could require you to upgrade to the Professional version of our software or pay a fee.
Week 9 No events scheduled this week
«« February 2004 »»
Sun Mon Tue Wed Thu Fri Sat
1 2 3 4 5 6 7
8 9 10 11 12 13 14
15 16 17 18 19 20 21
22 23 24 25 26 27 28
29
Quick Create
Company:
Contact:
First Name:
Surname:
Create
Scheduled Calls Name Phone Options
Julias Martin 212-521-5127 call
Email Campaigns Name Template Subscribers Mailouts
New Great Offer
New User Template
1 0
A first step is to set up any POP email accounts you may have; this way, you can utilize all of the email functions.
On the left navigation bar are links to team resources, which are links to important web sites for your organization. Also, there is a link to view your Team and Sales Targets. Some of these features may be only visible to the administrator account of your organization.

Left Navigation
Default Company: no company loaded
«Shortlist
Messages
Custom Views
Schedule Call
Create Meeting
Call List
POP Accounts
Resources
Team View
Import
Export
Sales Targets
Profile Setup
History
XYZ Corp
Julias Martin
Default Company
The “Default Company” feature locks default company information for creating new contacts tasks, deals and other objects. To activate this feature, navigate to the Company tab and select a company by clicking on the link for the company name. You should then see the details for the company, and under “Default Company” you should now see this name shown; from this point on, creating a new contact, deal, task, case or other data items will default to this company.
Shortlist
The Shortlist feature allows for a quick list which is accessible at all times from a new left-hand window. To activate the shortlist, select the “FLAG” link from any list of companies, contacts, or any other item in the system. This creates a fast pick list of items from which you can now quickly navigate. You can deactivate the short list by toggling on and off using the left navigation button for Shortlist.
Message Board
Message Boards are provided where your team can communicate and leave each other important messages. Utilize the Message Boards to discuss issues or post notes concerning the general operation of your business. Click “New Message” to start a discussion thread. Other users may now choose to reply to the message that has been posted.

Custom Views
Custom views allow you to create different presentations of your data using extended search parameters. Simply create a custom view for your contacts and companies; select the fields that you want to see and give the custom view a title. After creating a custom view you can then utilize the extended search features on the Company and Contact sections. Simply click the Extended Search and then select a view to apply from the drop-down selection box. You may additionally select to filter on status or matching parameters in the name field.
Schedule Call
Schedule a call by first checking the box “Schedule this call for the date below, and create an event entry for it in my calendar”. Select a date and a time, and also choose a call script for the call. You may assign the call for a team member by selecting the drop-down box. The call can be an arbitrary contact and phone number, or alternatively you may select from the existing contacts and client lists using the lookup buttons on the respective fields. Notes for the call can also be recorded to assist in the future scheduled calls.
Create Meeting
Schedule a meeting event by choosing a name for the engagement and selecting your team members that will attend. Highlight the team members’ names in the left pane and click the Add button to add each team member to the right pane. As you select each team member, the right information pane will show if the resource is available for the event.
Call List
The call list is a link to scheduled calls for you and your team members. The call list is divided into two parts – a list of calls to be made and scheduled calls.
POP Accounts
The integrated POP email feature automates and integrates your most powerful online tool -- your very own email.
First you must have a POP3 account; enter your POP mail server and authentication information, give a title to the account and a description, and save your new POP account; you can aggregate an unlimited number of POP accounts.
Select "New POP Account" button to create the new POP account; enter the account name, email address, host server name or IP address, your username and password. You may also give a description of this POP mail account.
Select "Get" to view your POP mail. This account is integrated for outgoing correspondence and is not intended to replace your normal mail reader. You can view the last messages and
Resources
Resources are information links, which can be informational postings with instructions or any other free text, or resources can be hyperlinks. Create resources for marking quick links to partner sites, vendors, customer web sites, legal documents or any other kind of web resource.
Enter the type of link, either Hyperlink or Data types, a title or the URL. For a data resource, a large text box will be presented, allowing you to input your resource message for your team's instant access.
Team View
The team view is a top-down view of your team and their progress. Managers and administrators as well as other team members have instant access to the rest of the team, with contact information and other integrated features with event scheduling, document sharing and messaging.
From this view, you can quickly update and edit team member information. Simply click on the name of the team member to view their information and to create actions, or click on the Edit button to update any of the team member’s information.
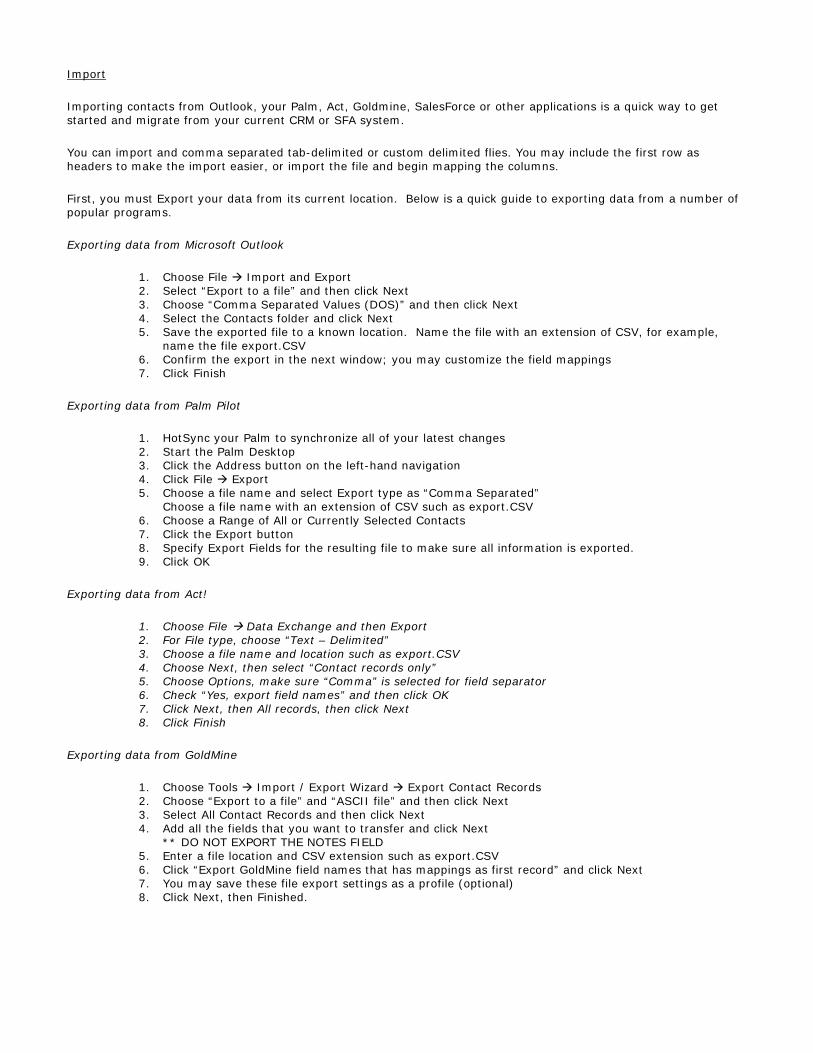
Import
Importing contacts from Outlook, your Palm, Act, Goldmine, SalesForce or other applications is a quick way to get started and migrate from your current CRM or SFA system.
You can import and comma separated tab-delimited or custom delimited flies. You may include the first row as headers to make the import easier, or import the file and begin mapping the columns.
First, you must Export your data from its current location. Below is a quick guide to exporting data from a number of popular programs.
Exporting data from Microsoft Outlook
1. Choose File Import and Export 2. Select “Export to a file” and then click Next 3. Choose “Comma Separated Values (DOS)” and then click Next 4. Select the Contacts folder and click Next 5. Save the exported file to a known location. Name the file with an extension of CSV, for example,
name the file export.CSV 6. Confirm the export in the next window; you may customize the field mappings 7. Click Finish
Exporting data from Palm Pilot
1. HotSync your Palm to synchronize all of your latest changes 2. Start the Palm Desktop 3. Click the Address button on the left-hand navigation 4. Click File Export 5. Choose a file name and select Export type as “Comma Separated”
Choose a file name with an extension of CSV such as export.CSV 6. Choose a Range of All or Currently Selected Contacts 7. Click the Export button 8. Specify Export Fields for the resulting file to make sure all information is exported. 9. Click OK
Exporting data from Act!
1. Choose File Data Exchange and then Export 2. For File type, choose “Text – Delimited” 3. Choose a file name and location such as export.CSV 4. Choose Next, then select “Contact records only” 5. Choose Options, make sure “Comma” is selected for field separator 6. Check “Yes, export field names” and then click OK 7. Click Next, then All records, then click Next 8. Click Finish
Exporting data from GoldMine
1. Choose Tools Import / Export Wizard Export Contact Records 2. Choose “Export to a file” and “ASCII file” and then click Next 3. Select All Contact Records and then click Next 4. Add all the fields that you want to transfer and click Next
** DO NOT EXPORT THE NOTES FIELD 5. Enter a file location and CSV extension such as export.CSV 6. Click “Export GoldMine field names that has mappings as first record” and click Next 7. You may save these file export settings as a profile (optional) 8. Click Next, then Finished.

Exporting data from SalesForce.com
1. Obtain export files “leads.csv” and/or “contacts.csv” from SalesForce.com 2. Import each file directly using the Import tool; you may have to remove duplicate records from the
two files
Export data form: Select your export options below. It is recommended to use a Tab delimited export for opening in MS Excel. The export will open in a new window. Export : Companies
Export as: Output to brow ser w indow (plain text)
Record delimiter : Tab delimited
Record Encapsulator : "
Row separator : Line Feed
Export
Export
Exporting data gives you a copy of all of the information contained within the CRM application. You may export all of the information tables including Companies, Contacts, a combined table of both, Deals, support Cases, Tasks and Calendar items.
First, choose which table you want to export, and select if you want the result to be displayed in the browser or automatically open the Microsoft Excel application. Next, choose a field delimiter such as tab-delimited or comma separated. You may then select a record encapsulator such as quotation marks (default) or any other character you choose; you may then select whether you want a line feed or a carriage return as a row separator.
Click the “Export” button and you will then have your data displayed, which you may save and manipulate as you wish.
Sales Targets
Sales targets are extremely important for tracking key measures by amount of units sold, revenue based goals, and customer service metrics. Create a target, and assign the type, whether it is by number of goods sold, number of customer support cases, or revenue-based goals. You can assign a timeframe in terms of months, quarters, or years, and assign multiple team members to the sales target that is created.
Profile Setup
Update Profile allows you to set a default currency, a time zone, and welcome text for your team. Administrators may then select if users can share information, if information is private, or if managers only can see private information. You can also select the default design look and feel using the skins selection box, a clock mode and the amount of history shown for user activity tracking. You may then designate start and end times for your work days and if you want to check schedules against a user's availability.

CALENDAR The Calendar is a monthly view of all of your important events, calls, tasks, or whatever you want to store and track. Simply point and click through the calendar to the date and time that you want, then schedule an event.
When viewing the monthly calendar, click on the date that you want to see or schedule and drill down to the exact details of each event. You should now see a running view of a single day with the hours on the left side, and a memo / entry field on the right. Find the time that you want to schedule an event, and give it a click.
Next you are presented with the Event information page. You must assign a title to the event, and then you can assign your team members as a single participant or multiple participants. As you add team members to the calendar, you will be given a notice as to the availability of your selection as it pertains to the schedule of each resource.
Next, pick the time that the event starts and ends. You may also designate if the event is confirmed via a yes / no radio button. The Email alert feature, when checked, will send an email invitation to all event attendees.
If the event is scheduled with a Contact or Client, use the lookup boxes to fill in this important information. In the location box, give the details and directions, if necessary so that everyone knows exactly where to meet and how to get there. In the notes field, enter any other important information for the event.
«« March 2004 »»
Sun Mon Tue Wed Thu Fri Sat
1 2 3 4 5 6
7 8 9 10 1 Events
11 12 13
14 15 16 17 18 19 20
21 22 23 24 25 26 27
28 29 30 31

Time Entry Wednesday 10-Mar-04
05:00 AM
06:00 AM
07:00 AM
08:00 AM
09:00 AM
10:00 AM
11:00 AM
12:00 PM 12:00 PM-01:00 PM : Sales Meeting
01:00 PM
02:00 PM
03:00 PM
04:00 PM
05:00 PM
06:00 PM
07:00 PM
08:00 PM
09:00 PM
10:00 PM
11:00 PM
Create an Event
Create your event by first giving a title, or name to this event. This is what will show up in the Monthly and Daily views and should be a short description that everyone will recognize.
Next, pick the team members that this event is assigned to using the Add and Remove features while selecting the names of your team members. As you add a team member, our application will check their schedules and see if they are available for the event.
Next, select the date and time that the event begins and ends using the simple pull-down boxes, first selecting the date, then the month, the year, hours and minutes for each.
A Confirmation radio button is provided to mark the likelihood of an event and if it has been approved by the customer or contact.
An Email alert can be sent out that will let the event participants know that this event has included them, and may serve as an official invitation to the event itself.
You can quickly use the Lookup buttons to assign this event to a Contact and Client, if this event is focused around a particular sales lead or customer.
Finally, include a description of the location and directions to the event, and any additional information in the Notes field. Don't forget to click the Save button on the bottom of the Event information page to make your event active.

Title Sales Meeting
From 10 March 2004 12 00All day event
To 10 March 2004 13 00Do not validate availability
Assigned to
Jenga MunjaviZalphod B
Confirmed Yes No
Email alert Check here to send an email to all attendees (including contact if available)
Reminders Remind before:Note:
Set a reminder for this event. The reminder will email you before the event, according to the time setting you set here. You can also attach a note to this reminder.
Contact
Client
Location Meeting Room C
Notes
Save
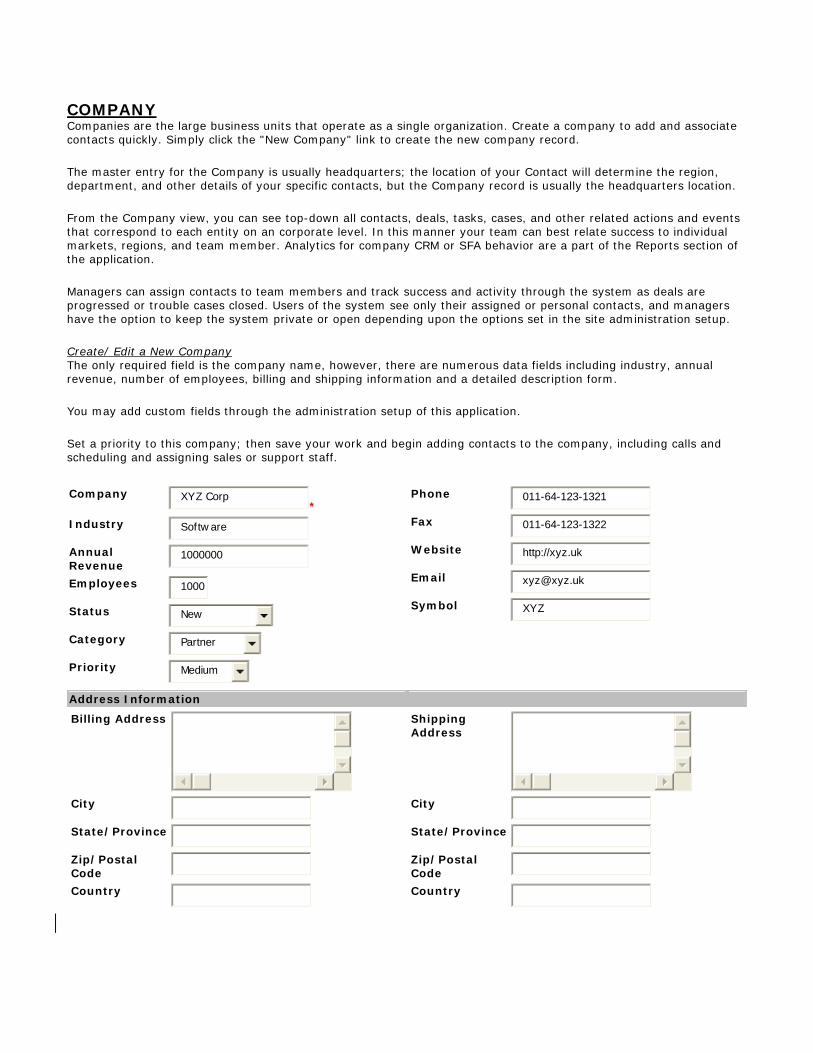
COMPANY Companies are the large business units that operate as a single organization. Create a company to add and associate contacts quickly. Simply click the "New Company" link to create the new company record.
The master entry for the Company is usually headquarters; the location of your Contact will determine the region, department, and other details of your specific contacts, but the Company record is usually the headquarters location.
From the Company view, you can see top-down all contacts, deals, tasks, cases, and other related actions and events that correspond to each entity on an corporate level. In this manner your team can best relate success to individual markets, regions, and team member. Analytics for company CRM or SFA behavior are a part of the Reports section of the application.
Managers can assign contacts to team members and track success and activity through the system as deals are progressed or trouble cases closed. Users of the system see only their assigned or personal contacts, and managers have the option to keep the system private or open depending upon the options set in the site administration setup.
Create/ Edit a New Company The only required field is the company name, however, there are numerous data fields including industry, annual revenue, number of employees, billing and shipping information and a detailed description form.
You may add custom fields through the administration setup of this application.
Set a priority to this company; then save your work and begin adding contacts to the company, including calls and scheduling and assigning sales or support staff.
Company XYZ Corp*
Industry Softw are
Annual Revenue
1000000
Employees 1000
Status New
Category Partner
Priority Medium
Phone 011-64-123-1321
Fax 011-64-123-1322
Website http://xyz.uk
Email [email protected]
Symbol XYZ
Address Information
Billing Address
City
State/Province
Zip/Postal Code
Country
Shipping Address
City
State/Province
Zip/Postal Code
Country

CONTACT Contacts are people's individual contact information; people who you want to track, be them sales leads, customers, vendors or whomever.
Contacts are tracked through the application via the Company that they are assigned to which you may have already created, or just contacts that you may want to track without any corporate identity if used as a customer service center. The nature of the relationship can then be created based upon the contact and company, establishing a number of options and features for converting this contact into a valuable sale or support issue.
Contacts are the individual members of a target group for sales or customer support, such as customers themselves. You may freely import contacts using any of the popular Palm, Microsoft Outlook, Act or GoldMine data; anything that will export a comma separated value (.CSV) file can be used to import all of your current contacts.
Create /Edit New Contact
You can add a new contact quickly, but try to first create the Company record for this contact. Enter the contact information including email address, instant messenger (IM) and network, and various shipping information. You may also enter a description and assign the contact to a particular email campaign.
Once created, your contacts become a vital piece of the CRM and SFA process, allowing you to track calls and email interactions, product support cases, deals and just about any other type of business process.
Contacts
Name Company City Phone Email Options
Jensa Maruregen [email protected] edit | flag | call list
Julias Martin 212-521-5127 edit | flag | call list | delete
Zalphod B [email protected] edit | flag | call list
DEAL Deal tracking insures that your pipeline is traceable by your whole team and management, so look like you are doing something and create some prospective deals to track the relationship.
Deals are usually created when you have started to discuss pricing and / or need to send out quotations or estimates. Converting a contact to a potential deal is the object of sales force automation, tracking the leads through the pipeline and managing the relationship, driving the potential customer to the eventual sale.
Deal tracking will assist your organization in forecasting and your sales staff in meeting their goals. Deals can be related to sales targets, which can be set using the left-navigation link and assigning targets using the quotas feature.
Create / Edit Deal
Creating deal items are important for tracking hot leads and future sales, customized with your pre-set sales targets and goals that you define.
Deals are usually associated with companies and contacts in the system, and are thus assigned. The title of the deal can be any short text description, plus there is a data field for a detailed description and follow-through plans in a next-step field. The product associated with the deal, the stage of the deal, it's closed or open status is all tracked.

TASK Tasks are short-term or long-term goals or to-dos. Simply click on "New Task" to create a new task assignment. Once created, tasks help you to track ambiguous targets and goals that may help you to close more deals or help your organization function more efficiently.
Tasks are general goals that are usually tied to operations functions, administration, accounting or other things that may not be directly related to a sales or support function. Use Tasks to generally track everything that you find yourself creating notes for or special, pet projects that have less defined objectives.
Tracking tasks, using call automation and tracking, management of your schedule and email are all resources and techniques that can help you increase your customer focus and to create a high-touch customer experience. Sales are directly related to the amount of care and attention your sales staff shows to your customers, and task tracking is one of the important ways to track activities and to create more opportunities; simply click "New Task" to create and open a new task, enter a title, deadline, status, estimated completion, deadline, and assign the task to a Company and Contact and add a description.
Create / Edit Task
Create a new task by first giving a title, or name to the task. This can be specific or somewhat of a gray area -- specific goals may be entered or a particular action, such as meet quarterly goals, finishes a report, etc., but tries to be specific.
Next, set a deadline for the task, and try to estimate how much of it has been completed as a percentage. You can then assign the task to yourself or one of your team members, and if the task is related to a particular customer or prospect, link it with the "Key Contact" and "Key Company" fields.
Finally, enter a detailed description of the task that will help to explain the focus and goals of the activity. This field may be updated regularly as you edit the task, changing the completion and description as you work to meet your goals.
Task No. 10001
Title Product CleanUp
Deadline 24 June 2004
Status Open
Completion % 10%
Owner
Assigned to Jenga Munjavi
Key Contact
Key Company
Description
We have only been planning

CASE Track customer support cases with a simple problem case tracker.
To get started, click "New Case" to open a new problem ticket.
Next, enter the name of this problem, the status, and the date closed. You may also change the owner of this case and assign a contact or company to the problem ticket.
Next, enter a detailed description of the case and save the record when you are finished.
Now that you have created a new trouble ticket, or case, your team members can now be assigned for resolution of the customer issue. Managers can create tasks and assign resources to the problem, and you can track the problem historically so that any other issues that occur can quickly be fixed using the same processes that you have established for resolution.
Click "New Case" to log a new customer problem or service issue. Give the case a title, assign a status, a closing date, and assign to a Company or Contact, then enter a description; it is that easy.
Create / Edit Case
Track customer support cases with a simple problem case tracker.
To get started, click "New Case" to open a new problem ticket.
Next, enter the name of this problem, the status, and the date closed. You may also change the owner of this case and assign a contact or company to the problem ticket.
Next, enter a detailed description of the case and save the record when you are finished.
Now you will have an open case record; you can use this to track calls and email, provide support literature, and create future meetings and events with your team members.
Case No.
10001
Title Investor Solicitation
Status Enquiring
State Open Closed
Close date
24 February 2004 7 30
Close date not set. To set a closing date, set the state field to Closed
Owner Zalphod B
Assigned to Jenga Munjavi
Contact
Key Company
Description

CALL Complete call scripting, scheduling and tracking is possible from the call screens. You can create call scripts that your sales agents can read and complete during a call, important information that you can capture for reporting and analytics that will help your organization better understand the customer.
First, create a call script, which is a mixture of text for your sales agents to read and also interactive questions and answers that are important to your sales. Create a call script for each of your major functions and also scripts for special activities.
You can schedule calls for yourself or other team members for a particular time and date, and then choose which companies and contacts that you would like to assign to the call. You can also enter in additional information that may assist your sales and customer service staff.
Track important call information and follow-up using reports to find contacts that may have gotten stuck in the deal pipeline. By using call automation, email campaigns, and task tracking, you will find that realizing more income and closing more sales is directly related to the amount of personal attention that is taken in keeping the customer relationship maintained.
Click "New Call" to start a call; you should have already created a Call Script, so assign a script to this new call. You may make the call now or schedule the call in the future; you may also schedule the call for another team member.
Schedule future call
Schedule this call to the date below, and create an event entry for it in my calendar
24 February 2004 7 30
Call Script Welcome New Account
Assigned to Jenga Munjavi
Select a contact or company to call, or enter a new name and phone number below.
Contact
Company
If the person or company you would like to call are not in your database, enter a new name and phone number below:
Name
Phone
Check this box if you would like to use this information to create a new contact in your database.
Notes
Save Save and start call now
Keyword Welcome New Account
Select Flag
Between 23 January 2004
and 23 January 2004
Search

Create / Edit Call
Click "New Call" to start a call; you should have already created a Call Script, so assign a script to this new call. You may make the call now or schedule the call in the future; you may also schedule the call for another team member. If you want the call to appear on the calendar, you must check this box to schedule the call.
Choose the day of the call; if the call is in the future, and you wish to schedule the call on the calendar, please remember to check the checkbox at the top of the call screen.
Calls may be assigned to team members, or you can log calls in the past by other team members as well. Contacts and Companies can be designated in the call using the appropriate Lookup feature. If the call is with persons who are not in the system, you may log a name and phone number. If this is new information that you would like to track, check the box below to create a new contact in the database. You may also write a note about the call.
On the right side of the Calls screen, there is a search feature for calls by keyword, call script, status (flag) and a date range. Under the call search options and on the right side of the screen is a box where active calls or upcoming calls are shown.
Call List
The call list is a summary of all upcoming scheduled calls. You may quickly access your call list using this link; the names of the persons to be called, their primary phone numbers, and the call button are displayed.
To begin the call, select “call” from the right side of the table for the particular call that you wish to begin. You will next be presented with the Call Info page.
The Call Info page will show all of the call statistics, and gives options to change status, schedule a follow-up call, restart the call and complete call tracking. The Call Script that is assigned to the call is also displayed so that it is easy to capture all of the information required for this activity. Remember to save the call information if you edit or add information to the call script.
Call Scripts
Call scripting is very important in automating your call activities; call scripts are custom question and answer sheets that you can collect specific information during a call and easily track all of the data.
First, give the script a name and a description and then select Save to begin building the call script. You may also load (edit) and delete existing call scripts from the main call script screen.
A call script may consist of instructions or questions and responses for the persons doing the calling and being called. A call script is composed of individual elements, which may be free-text, yes / no and multiple choice. The process for creating the call script is to enter a question and then to select the type of question on the form.

You can add entries by clicking Add. Click New to clear the form and create a new entry. Enter the question:
i.e. 'Do you currently utilize radio advertising?', 'How many employees do you have?'...
Select the type of question: Free Text
Add
Free text options:
Large text field | Maximum characters (leave blank for no limit)
Multiple choice options: You can add as many options as needed by clicking the Add button.
Option 1. This is your call script so far: Welcome New Account
1 Are you enjoying our software? Free Text edit | Del
When creating a free text field, there are options for the field to be large and may further be designated with a maximum number of characters.
For multiple choice options, an additional field will be displayed, first with option 1. Go ahead and click “Add” which will create the question and also display an additional option box. Clicking “Save” from this point on will store the changes and create additional option boxes. Clicking “New” will then move on to the next question for the call script.
EMAIL Add a POP email account or two, as many as you like; track sales leads through your very own email accounts. To take advantage of this feature, you must have an account with an ISP that supports POP3 mail.
Use you login information for remote viewing of your POP accounts. Using this feature will also allow you to mail-merge email messages and forms to your contacts or service cases.
You may add an unlimited number of POP accounts and aggregate some of your recent mail using this feature; however, this is not a mail application and is not intended to function as a mail reader and sending utility. POP accounts are utilized as a function of interactivity with customer records and cannot be used to read mail, but provides quick views of your latest messages with subject and time stamps.
POP Account: [email protected] |
Name [email protected] Host mail.zaphodb.uk
Email [email protected] Username zaphodb.uk
Owner Zalphod B Created at 24-Feb-04 07:01 AM
Last modified24-Feb-04 07:01 AM
Description zaphod POP account
Email Campaigns
Add a POP email account or two, as many as you like; track sales leads through your very own email accounts. To take advantage of this feature, you must have an account with an ISP that supports POP3 mail.
Use you login information for remote viewing of your POP accounts. Using this feature will also allow you to mail-merge email messages and forms to your contacts or service cases.
You may add an unlimited number of POP accounts and aggregate some of your recent mail using this feature; however, this is not a mail application and is not intended to function as a mail reader and sending utility. POP accounts are utilized as a function of interactivity with customer records and cannot be used to read mail, but provides quick views of your latest messages with subject and time stamps.

Email Templates
Fist, you must create email templates, which are like form letters which can be merged with data from the CRM database. Click the Templates option from the email tab to go to the main template editing screen. The form initially opens a new template, but if you have already created templates they are available on the right-side of the panel (you can load existing templates or delete).
Give the template a name, and select if this is an HTML email template or just a plain-text campaign. The Template body is the main body of the message. You can merge data from the database using the buttons provided as placeholders for the stored information: First Name, Surname, Date, and links to Unsubscribe or a link to a form. Forms are discussed later in this document
Email Template Name:
New User Template
Type:
Html template
Plain text template Template Body:
Link to a form
Dear [FIRSTNAME] [SURNAME],
Thank you for shopping w ith us this holiday -- w e appreciate your business and hope that you w ill comback for more great deals like this one!
Your order w ill arrive shortly, let us know if w e can help you in the future.
Save
Existing templates New User Template
Load Template
.
When you are finished creating an email template, choose Save. You should see the new email template appear in the right side panel as an existing template.
To begin with campaigns, choose “New Campaign” from the email tab. Give the campaign a title, and choose if this is a regular periodical mailing or just a one-time mail out. Next, select the template that you wish to be assigned to this mailing and also designate which POP email account will send the message.

Once finished, you will be presented with the email campaign detail page, where you can see all of the statistics for this campaign and the email template itself. From this menu you may send the email, edit the campaign or archive it for historical purposes.
Email Campaign: New Great Offer | | Name New Great Offer Type One time email
Template New User Template Template type Plain text
Pop Account [email protected]
Owner Zalphod B Total Mailout 0 mails sent
Subscribers0 subscribers Created at 24-Feb-04 07:02 AM
Last modified24-Feb-04 07:02 AM
Template Dear [FIRSTNAME] [SURNAME], Thank you for shopping with us this holiday -- we appreciate your business and hope that you will come back for more great deals like this one! Your order will arrive shortly; let us know if we can help you in the future.
Subscribing users to a campaign is easy – once you have completed all of these steps and created a campaign, you must go to each individual contact and assign them to the campaign. Go to a contact and edit the record; at the very bottom of the contact information page you will see the list of available email campaigns. Use the “SHIFT” key to select multiple campaigns, and then save the contact.
You should now see subscribers from the email campaign menu once you have assigned contacts to campaigns.
DOC
.
We provide a fully functional document and file repository, where you can include any typical electronic documents, stored on a shared, virtual system for access to your whole sales and support team. Store all of your important marketing material and assets, sales literature and pricing. All of your company information is instantly accessible.
1. Click "New Directory" and give the directory, or folder, a name, a description, and choose a parent folder, then click save.
2. Click the new folder's icon 3. Click "New Document" - give the name, description, version, and upload the file -- you may assign it to a
client or contact.
If you are browsing the directory tree, choosing "Root Folder" will get you up to the parent directory. You may quickly click through a number of folders to view your files; if you get lost you can always click "Browse" at the top of the page. Free version users have a limit of 5 megabytes of information stored of the shared document folders. Professional users have 100 megabytes of shared space for documents.
Create Document
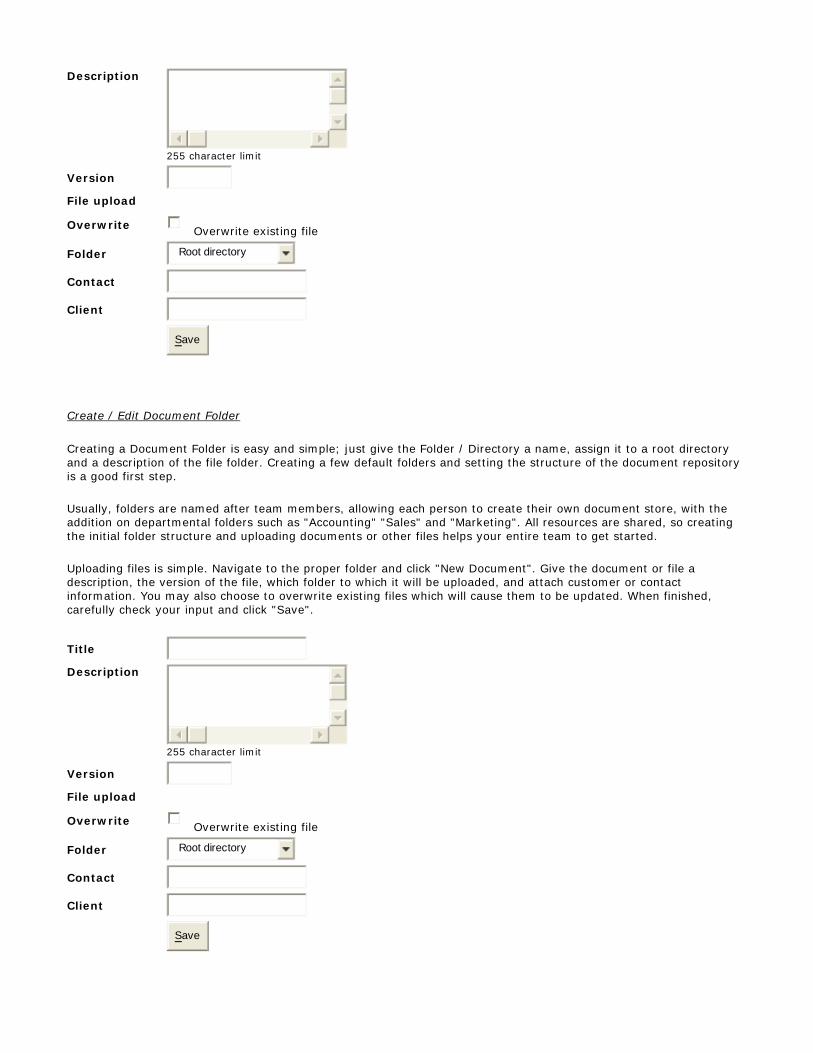
Create a new document from within the active folder; give the document a title, its version, and check if you want to overwrite existing files with the same name. You may also choose the destination folder from the pull-down box, and assign this document to a particular contact or client company.
Use the File upload box and click Browse to find the file on your local computer; once you find the file, and have checked all of the fields for accuracy, click the save button.
Your document should begin to upload; if you have sent a large file, please wait and make sure that you have the fastest and most reliable Internet provider and that large file uploads are allowed by your ISP.
Title
Description
255 character limit
Version
File upload
Overwrite Overwrite existing file
Folder Root directory
Contact
Client
Save
Create / Edit Document Folder
Creating a Document Folder is easy and simple; just give the Folder / Directory a name, assign it to a root directory and a description of the file folder. Creating a few default folders and setting the structure of the document repository is a good first step.
Usually, folders are named after team members, allowing each person to create their own document store, with the addition on departmental folders such as "Accounting" "Sales" and "Marketing". All resources are shared, so creating the initial folder structure and uploading documents or other files helps your entire team to get started.
Uploading files is simple. Navigate to the proper folder and click "New Document". Give the document or file a description, the version of the file, which folder to which it will be uploaded, and attach customer or contact information. You may also choose to overwrite existing files which will cause them to be updated. When finished, carefully check your input and click "Save".
Title
Description
255 character limit
Version
File upload
Overwrite Overwrite existing file
Folder Root directory
Contact
Client
Save

FORM
.
Forms are question and answer sheets that you can create to collect important information from your prospective leads and customers.
Once created, you can fill in the information or distribute the form as a link. You can create the information forms one question at a time, and each question can be of the following types:
• Checkbox • Date and/or Time • Multiple Choice • Multi-Choice Checkboxes • Option Boxes • Free Text • Yes / No
1. Create a new feedback form by giving your form a title, select how many pages it will have, and give a short description and instructions. 2. Select the type of question to create such as fill in he blank, yes/no, or multiple-choice. 3. Once completed, you can then send this qualification form to your prospects as a hyperlink or use it on calls.
Create / Edit Forms
Forms are question and answer sheets that you can create to collect important information from your prospective leads and customers.
Once created, you can fill in the information or distribute the form as a link. You can create the information forms one question at a time, and each question can be of the following types:
• Checkbox • Date and/or Time • Multiple Choice • Multi-Choice Checkboxes • Option Boxes • Free Text • Yes / No
1. Create a new feedback form by giving your form a title, select how many pages it will have, and give a short description and instructions. 2. Select the type of question to create such as fill in he blank, yes/no, or multiple-choice. 3. Once completed, you can then send this qualification form to your prospects as a hyperlink or use it on calls or within email campaigns.

Title New Customer Survey
Pages 1
Description: New Customer Survey
Welcome Message:
Thanks for joining out service!
Confirmation Message:
We have confirmed this link.
Save
Form: New Customer Survey | |
Title New Customer Survey Pages 1
Verification code EENFJBAIAB
Created at 24-Feb-04 06:51 AM Last Modified 24-Feb-04 06:51 AM
Owner Zalphod B
Public Form URL https://www.freecrm.com/form.cfm?id=231&vc=EENFJBAIAB
Description New Customer Survey
Welcome Message Thanks for joining out service!
Confirmation We have confirmed this link.

Element editor Element editor for feedback form: New Customer Survey
Element type Select the element type below
Title
Width 30
Height
Required Yes No
Is email? Yes No
Page 1
Data
Use the field above for the text to the right of checkboxes, default text for text input fields, or as text for non editable text blocks.
Options Text Value
Add
New Customer Survey 1 | (Page 1 of 1)
Thanks for joining out service! (Fields marked with * are required.)
Rate Edit | Delete
1
2
3
4
5
Finish

REPORT There are 7 reporting functions for this application. Reports are used to create specific views of your company's statistics and activity in a variety of areas. Custom reports can be created and saved, allowing you fine control and giving managers a top-down view of the activities of your sales staff. Create a new report
Support reports Support cases report Show how many support cases were created over a period of time
Company reports Company report All the companies
Contact reports Contacts report See a full report on all of your contacts
Email campaign reports Email campaign reports Show email campaign reports
Prospect reports Prospects and revenue report Prospects and Opportunities report
Task reports Task reports Show all tasks reports
Usage and user reports User and Usage Show user usage time of the system, and other usage data
1. Support reports are for problem cases that you have tracked in the system; create a report by giving the report a name, a description, and a timeframe.
Type Support cases report
Show how many support cases were created over a period of time
Name This is how your report will be saved as.
Description
Use dates?
Use a date range for the report
Do not limit by dates
From 23 February 2003
To 23 February 2004
Get Report
2. Company reports list all companies activities within the time specified.

Type Company report All the companies
Name This is how your report will be saved as.
Description
Use dates?
Use a date range for the report
Do not limit by dates
From 23 February 2003
To 23 February 2004
3. Contact reports: contacts activity within the duration given.
Type Contacts report See a full report on all of your contacts
Name This is how your report will be saved as.
Description
Use dates?
Use a date range for the report
Do not limit by dates
From 23 February 2003
To 23 February 2004
Get Report

4. Email campaign reports lets you see the activity for all outbound messaging in your team's queues. This report shows the total number of campaigns, subscribers, mail outs, and number unsubscribed.
Type Email campaign reports Show email campaign reports
Name This is how your report will be saved as.
Description
Use dates?
Use a date range for the report
Do not limit by dates
From 23 February 2003
To 23 February 2004
Get Report
5. Deal and prospect reports show reports on the total number of deals closed and real revenue compared with sales projections. This is aggregate data.
Type Prospects and revenue report Prospects and Opportunities report
Name This is how your report will be saved as.
Description
Use dates?
Use a date range for the report
Do not limit by dates
From 23 February 2003
To 23 February 2004
Get Report

6. Task Reports show the total number of outstanding, complete and open tasks for the team.
Type Task reports Show all tasks reports
Name This is how your report will be saved as.
Description
Use dates?
Use a date range for the report
Do not limit by dates
From 23 February 2003
To 23 February 2004
Get Report
7. Usage and user reports show the amount of time that
Type User and Usage Show user usage time of the system, and other usage data
Name This is how your report will be saved as.
Description
Use dates?
Use a date range for the report
Do not limit by dates
From 23 February 2003
To 23 February 2004
Get Report

SETUP The Setup menu allows users and administrators to control and customize the behavior of the CRM application.
You may import your contacts and companies with the first option. The second option, Update Organization, allows you to edit your company information.
Update Profile allows you to set a default currency, a time zone, and welcome text for your team. Administrators may select all of the important functions and details for the site.
Resources are links to sites or other data and are virtual bookmarks that are shared with your team. Creating quick links to support documentation, or competitor web sites is helpful to your sales and customer support staff.
Regions are assignments for your team members and allow you to model the system that fits your structure.
Setting unavailable times and dates are important for users' time management and system resource allocation. By marking out your available time, the system will let others know that you will not be an available resource for the team or customers.
Administrators can set the availability for particular regions, which is helpful in synchronizing corporate communications in a distributed, multi-time zone environment.
Update profile Edit the account profile and preferences for your company
Import Import your contacts and companies
Update Organization Edit your company's information
Resources Edit your company's resources
Regions Edit your region list
Set Unavailable Time These are dates where you are unavailable at all (for example, on vacation)
Set Availability by Region These are dates where you are available at particular region
Update Login Update your login information
Create/Edit users Setup more users to log in to the CRM, or edit existing ones
Setup Extended Fields Add additional fields to your companies, contacts, appointments etc.
Setup Field Sets Customize selection fields, such as Products, Deal Stage or Case Status.
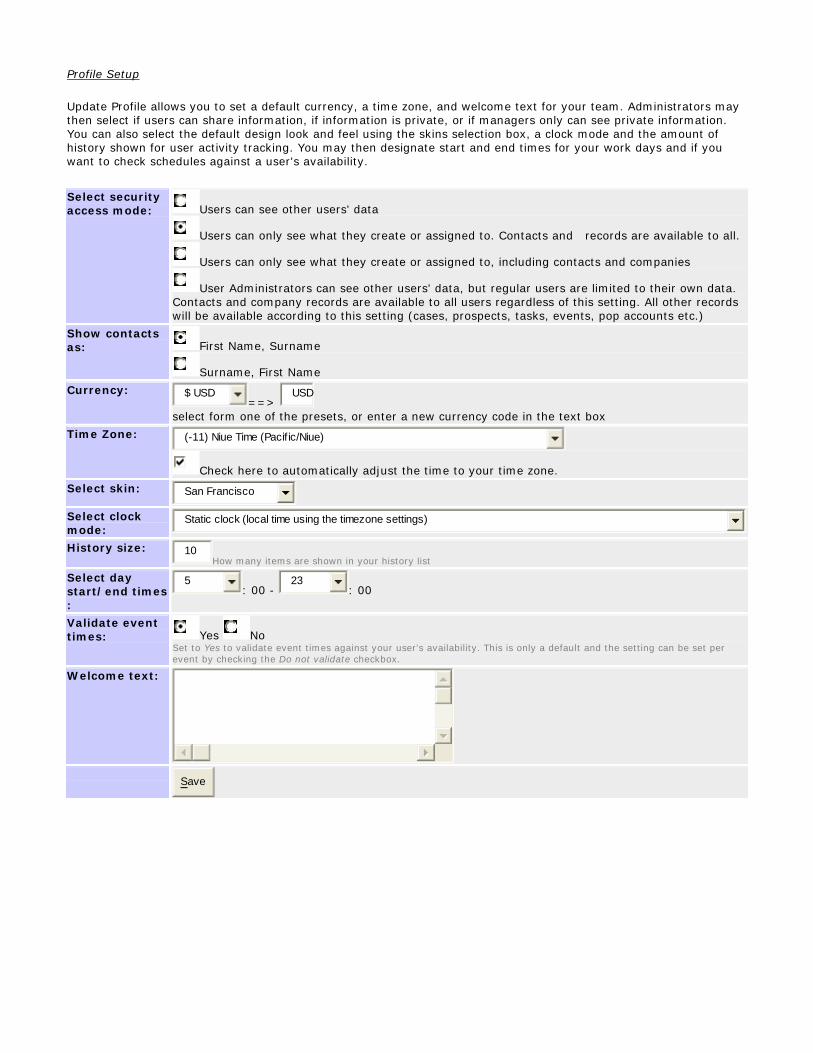
Profile Setup
Update Profile allows you to set a default currency, a time zone, and welcome text for your team. Administrators may then select if users can share information, if information is private, or if managers only can see private information. You can also select the default design look and feel using the skins selection box, a clock mode and the amount of history shown for user activity tracking. You may then designate start and end times for your work days and if you want to check schedules against a user's availability.
Select security access mode: Users can see other users' data
Users can only see what they create or assigned to. Contacts and records are available to all.
Users can only see what they create or assigned to, including contacts and companies
User Administrators can see other users' data, but regular users are limited to their own data. Contacts and company records are available to all users regardless of this setting. All other records will be available according to this setting (cases, prospects, tasks, events, pop accounts etc.)
Show contacts as: First Name, Surname
Surname, First Name
Currency: $ USD==>
USD
select form one of the presets, or enter a new currency code in the text box
Time Zone: (-11) Niue Time (Pacif ic/Niue)
Check here to automatically adjust the time to your time zone.
Select skin: San Francisco
Select clock mode:
Static clock (local time using the timezone settings)
History size: 10How many items are shown in your history list
Select day start/end times :
5: 00 -
23: 00
Validate event times: Yes No
Set to Yes to validate event times against your user's availability. This is only a default and the setting can be set per event by checking the Do not validate checkbox.
Welcome text:
Save

Import
Importing contacts from Outlook, your Palm, Act, Goldmine, SalesForce or other applications is a quick way to get started and migrate from your current CRM or SFA system.
Please reference the Import section above for detailed information for exporting and importing data to the CRM application.
Update Organization
On this screen, you can update all of the important information for your organization including contact information and separate shipping and billing addresses. You may also add information to the description screen as well if you like.
Import parameters: Please check your data before you attempt an import; check for duplicates and formatting. Files should be comma separated text files (.csv) and the first row should contain header names.
Your file size cannot exceed 512KBs per import, and must be a text file. .
It is recommended that you use text files that include the header names as the first row.
After the import finishes, check the validity of the imported data. You can roll back unsuccessful imports by accessing the import screen again.
After you roll back your import, check your import file for errors before you attempt to import the data again.
Import parameters: Please check your data before you attempt an import; check for duplicates and formatting. Files should be comma separated text files (.csv) and the first row should contain header names.

Your file size cannot exceed 512KBs per import, and must be a text file. .
It is recommended that you use text files that include the header names as the first row.
After the import finishes, check the validity of the imported data. You can roll back unsuccessful imports by accessing the import screen again.
After you roll back your import, check your import file for errors before you attempt to import the data again.
Import type Import Contacts
If you map an imported column to the Company Name field, a new company will be created and related to these records.
Import from Comma delimited f ile
Row delimiter Carriage Return
Record delimiter
Specify the record delimiter even if only a few columns in your import file are delimited (usually in double quotes).
First row First row contains header names
First row contains data (no headers) Import File
Continue

Resources
Resources are information links, which can be informational postings with instructions or any other free text, or resources can be hyperlinks. Create resources for marking quick links to partner sites, vendors, customer web sites, legal documents or any other kind of web resource.
Enter the type of link, either Hyperlink or Data types, a title or the URL. For a data resource, a large text box will be presented, allowing you to input your resource message for your team's instant access.
Type:
Link
Data
Title:
URL:
Enter your resource data here.
Save

Regions
In this section you can designate specific regions for your company; for example, your company may do business in certain portions of the United States and may divide the country by West Coast, East Coast, or Central; other examples would include North America, Central and South America, Europe, and Asia and Africa.
Set Unavailable Time
Once a region is defined, you may set the times that the office or representatives are unavailable for that particular region. For example, you may designate regional holidays such as President’s Day for each region in the United States or the Chinese New Year for parts of Asia.
If there are dates you are NOT available for appointments, please specify them here:
From 23 February 2004 22 00
To 23 February 2004 22 00
Notes
Save
Regions Region Options
East Coast delete
Mid / Central delete

Set Availability by Region
Once regions have been defined, you may designate times that the region’s offices or representatives are available for scheduling. Simply designate a data and time From and To and then select the Region to which these available dates correspond; you may also enter some notes about the schedule of availability.
From 23 February 2004 22 00
To 23 February 2004 22 00
Region You did not create any Regions. Click here to create some.
Notes
Save
Update Login
This allows the main administrator (account creator) to modify their login information.
First Name Zalphod
Surname B
Email zaphodz@zap
Username zaphod
Password
Confirm Password
Class User
Save

Create / Edit Users
Adding and editing users is simple with the edit / create users’ function. Simply enter the first name, last name, email address, username and password of the user that you wish to add. Additionally, select if the user is a regular user or an administrator of the system. Finally, you may activate and deactivate user accounts from this menu.
First Name
Surname
Username
Password
Confirm Password
Class User
Active Check this box if this account is active
Save
Setup Extended Fields
You may create custom fields for calendar items, companies and contacts. Simply select from the three options and then click “New Property”. Next, enter the name of the new custom field and then select if the data for this field is to be character / text, numeric, or a date / time field. Click the “Large Field” checkbox if the information is to be greater than 128 characters. Finally, select “Save”.
Extended Fields Select what kind of fields you would like to set:
APPOINTMENT Extended fields for appointments and events
CLIENT Extended fields for companies
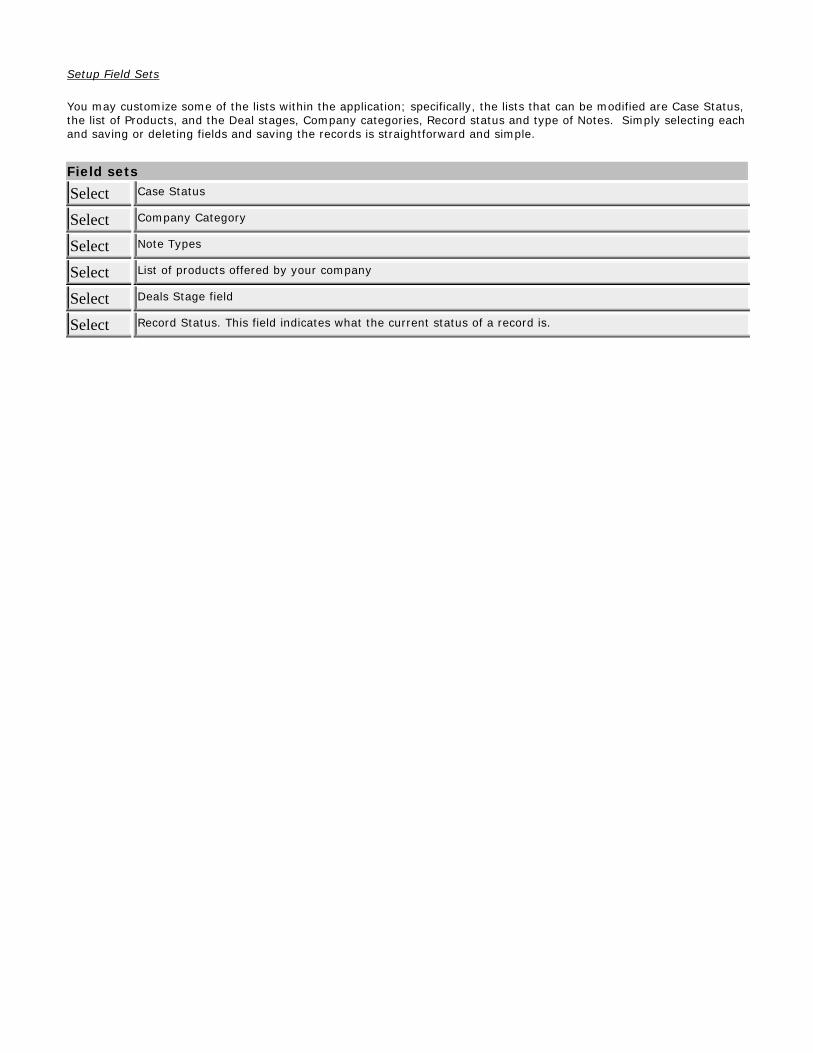
Setup Field Sets
You may customize some of the lists within the application; specifically, the lists that can be modified are Case Status, the list of Products, and the Deal stages, Company categories, Record status and type of Notes. Simply selecting each and saving or deleting fields and saving the records is straightforward and simple.
Field sets
Select Case Status
Select Company Category
Select Note Types
Select List of products offered by your company
Select Deals Stage field
Select Record Status. This field indicates what the current status of a record is.