Nokia N71-1 · Java™ and all Java-based marks are trademarks or registered trademarks of Sun ......
114
Nokia N71-1
-
Upload
nguyenkhue -
Category
Documents
-
view
228 -
download
3
Transcript of Nokia N71-1 · Java™ and all Java-based marks are trademarks or registered trademarks of Sun ......

Nokia N71-1

Copyright © 2006 Nokia. All rights reserved.
DECLARATION OF CONFORMITY We, NOKIA CORPORATION declare under our sole responsibility that the product RM-67 is in conformity with the provisions of the following Council Directive: 1999/5/EC. A copy of the Declaration of Conformity can be found at http://www.nokia.com/phones/declaration_of_conformity/
The crossed-out wheeled bin means that within the European Union the product must be taken to separate collection at the product end-of-life. This applies to your device but also to any enhancements marked with this symbol. Do not dispose of these products as unsorted municipal waste.
Copyright © 2006 Nokia. All rights reserved.Reproduction, transfer, distribution or storage of part or all of the contents in this document in any form without the prior written permission of Nokia is prohibited.Nokia, Nokia Connecting People, Pop-Port, and Visual Radio are trademarks or registered trademarks of Nokia Corporation. Other product and company names mentioned herein may be trademarks or tradenames of their respective owners.Nokia tune is a sound mark of Nokia Corporation.
This product includes software licensed from Symbian Software Ltd (c) 1998-200(6). Symbian and Symbian OS are trademarks of Symbian Ltd.
Java™ and all Java-based marks are trademarks or registered trademarks of Sun Microsystems, Inc. Stac ®, LZS ®, ©1996, Stac, Inc., ©1994-1996 Microsoft Corporation. Includes one or more U.S. Patents: No. 4701745, 5016009, 5126739, 5146221, and 5414425. Other patents pending.Hi/fn ®, LZS ®,©1988-98, Hi/fn. Includes one or more U.S. Patents: No. 4701745, 5016009, 5126739, 5146221, and 5414425. Other patents pending.
Part of the software in this product is © Copyright ANT Ltd. 1998. All rights reserved.US Patent No 5818437 and other pending patents. T9 text input software Copyright (C) 1997-2006. Tegic Communications, Inc. All rights reserved.This product is licensed under the MPEG-4 Visual Patent Portfolio License (i) for personal and noncommercial use in connection with information which has been encoded in compliance with the MPEG-4 Visual Standard by a consumer engaged in a personal and noncommercial activity and (ii) for use in connection with MPEG-4 video provided by a licensed video provider. No license is granted or shall be implied for any other use. Additional information including that relating to promotional, internal and commercial uses may be obtained from MPEG LA, LLC. See <http://www.mpegla.com>.Nokia operates a policy of ongoing development. Nokia reserves the right to make changes and improvements to any of the products described in this document without prior notice.Under no circumstances shall Nokia be responsible for any loss of data or income or any special, incidental, consequential or indirect damages howsoever caused.The contents of this document are provided ‘as is’. Except as required by applicable law, no warranties of any kind, either express or implied, including, but not limited to, the implied warranties of merchantability and fitness for a particular purpose, are made in relation to the accuracy, reliability or contents of this document. Nokia reserves the right to revise this document or withdraw it at any time without prior notice.The availability of particular products may vary by region. Please check with the Nokia dealer nearest to you.This device may contain commodities, technology or software subject to export laws and regulations from the US and other countries. Diversion contrary to law is prohibited.FCC / INDUSTRY CANADA NOTICEYour device may cause TV or radio interference (for example, when using a telephone in close proximity to receiving equipment). The FCC or Industry Canada can require you to stop using your telephone if such interference cannot be eliminated. If you require assistance, contact your local service facility. This device complies with part 15 of the FCC rules. Operation is subject to the condition that this device does not cause harmful interference.
ISSUE 1 EN, 9237522
Cont
ents
ht © 2006 Nokia. All rights reserved.
....................................26clips ............................................ 27..................................................... 27..................................................... 29..................................................... 29..................................................... 30.....................................................30
..................................32..................................................... 32..................................................... 34
....................................36..................................................... 37s ................................................. 38
s................................................... 40.....................................................42 card .........................................44
..................................................... 44
....................................49..................................................... 49vice) ........................................... 51
ContFor you
Your NSettings .Transfer cEssential Keypad loVolume aClock.......Memory cFile manaUseful shMultimedHelp ........Tutorial ..
CameraCamera dTake pictEdit imagTips on taVideo recRecord vi
Copyrig
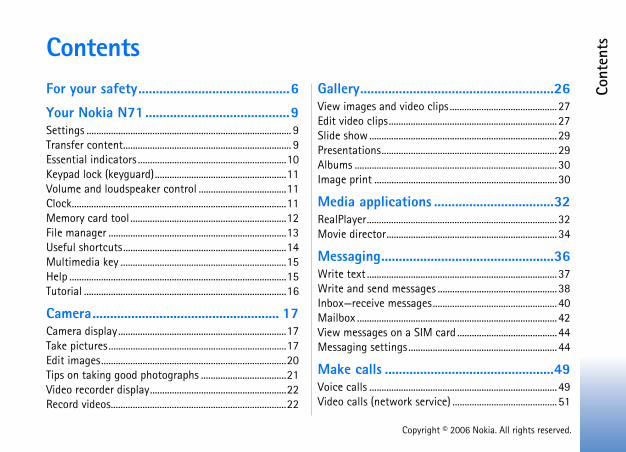
entsr safety...........................................6
okia N71.........................................9................................................................................... 9ontent..................................................................... 9indicators .............................................................10ck (keyguard)......................................................11nd loudspeaker control ....................................11.................................................................................11ard tool ................................................................12ger .........................................................................13ortcuts...................................................................14ia key ....................................................................15.................................................................................15.................................................................................16
..................................................... 17isplay.....................................................................17ures.........................................................................17es............................................................................20king good photographs ...................................21order display........................................................22deos........................................................................22
Gallery...................View images and video Edit video clips................Slide show ........................Presentations...................Albums ..............................Image print ......................
Media applicationsRealPlayer.........................Movie director.................
Messaging.............Write text .........................Write and send messageInbox—receive messageMailbox .............................View messages on a SIMMessaging settings........
Make calls ............Voice calls ........................Video calls (network ser

service) ........................................ 69twork service)............................. 71........................................................ 74........................................................ 75
......................................76........................................................ 76........................................................ 76........................................................ 76........................................................ 77
evice...........................78........................................................ 78ur device ...................................... 79........................................................ 80
......................................81...................................................... 81
........................................................ 84
........................................................ 85
........................................................ 85
........................................................ 85
........................................................ 86
........................................................ 86
......................................88........................................................ 88
Cont
ents
Copyright © 2006 Nokia. All rights reserved.
Video sharing (network service)...................................... 52Answer or reject a call....................................................... 55Log........................................................................................... 56
Contacts (phonebook) .............................59Save names and numbers................................................. 59Copy contacts ...................................................................... 60Add ringing tones for contacts ....................................... 61Create contact groups ....................................................... 61
Services.....................................................62Services access point ......................................................... 62Bookmarks view................................................................... 62Connection security ........................................................... 63Browse.................................................................................... 63Download and purchase items........................................ 64End a connection ................................................................ 64Services settings.................................................................. 65
Calendar....................................................66Create calendar entries ..................................................... 66Calendar views..................................................................... 66Manage your calendar entries ........................................ 67Calendar settings ................................................................ 67
My own.....................................................68Music player ......................................................................... 68
Visual Radio (networkInstant messaging (neGo to—add shortcuts..Games.............................
Office..................Calculator ......................Converter .......................Notes ..............................Recorder.........................
Personalize your dProfiles—set tones.......Change the look of yoActive standby mode..
Connectivity .......Bluetooth connectivityInfrared connection....Data cbl..........................PC connections ............Connection manager..Synchronization...........Device manager ...........
Tools....................Settings..........................

Cont
ents
ht © 2006 Nokia. All rights reserved.
n ............................. 104g...............................................104ation guidelines....................104
nce ......................... 106
nformation............. 107
Copyrig
Voice commands..................................................................97Application manager ..........................................................98Activation keys.................................................................. 100
Troubleshooting .................................... 101Q&A...................................................................................... 101
Battery informatioCharging and discharginNokia battery authentic
Care and maintena
Additional safety i

6ht © 2006 Nokia. All rights reserved.
WHEN REFUELLING Do not use a refuelling point. Do not use hemicals.
NEAR BLASTING Follow any o not use the device where progress.
Y Use only in the normal plained in the product n. Do not touch the antenna .
ERVICE Only qualified personnel repair this product.
NTS AND BATTERIES Use only ancements and batteries. Do not
patible products.
STANCE Your device is not nt. Keep it dry.
PIES Remember to make s or keep a written record of all
ormation stored in your device.
Copyrig
For your safetyRead these simple guidelines. Not following them may be dangerous or illegal. Read the complete user guide for further information.
SWITCH ON SAFELY Do not switch the device on when wireless phone use is prohibited or when it may cause interference or danger.
ROAD SAFETY COMES FIRST Obey all local laws. Always keep your hands free to operate the vehicle while driving. Your first consideration while driving should be road safety.
INTERFERENCE All wireless devices may be susceptible to interference, which could affect performance.
SWITCH OFF IN HOSPITALS Follow any restrictions. Switch the device off near medical equipment.
SWITCH OFF IN AIRCRAFT Follow any restrictions. Wireless devices can cause interference in aircraft.
SWITCH OFF the device at near fuel or c
SWITCH OFF restrictions. Dblasting is in
USE SENSIBLposition as exdocumentatiounnecessarily
QUALIFIED Smay install or
ENHANCEMEapproved enhconnect incom
WATER-RESIwater-resista
BACK-UP COback-up copieimportant inf

7
vice on when wireless device use ce or danger.
cesust have service from a wireless
of the features in this device he wireless network to function. may not be available on all ve to make specific arrangements er before you can utilize network ovider may need to give you for their use and explain what e networks may have limitations use network services. For instance, support all language-dependent
. Network features are designated k service).
ay have requested that certain not activated in your device. If so, your device menu. Your device may configured. This configuration menu names, menu order and ice provider for more information.
P 2.0 protocols (HTTP and SSL) that Some features of this device, such ail and content downloading using
Copyright © 2006 Nokia. All rights reserved.
CONNECTING TO OTHER DEVICES When connecting to any other device, read its user guide for detailed safety instructions. Do not connect incompatible products.
EMERGENCY CALLS Ensure the phone function of the device is switched on and in service. The keypad is active only in the fold open mode. Press as many times as needed to clear the display and return to the start screen. Enter the emergency number, then press . Give your location. Do not end the call until given permission to do so.
About your deviceThe wireless device described in this guide is approved for use on the EGSM 900,1800, and 1900 and UMTS 2100 networks. Contact your service provider for more information about networks.
When using the features in this device, obey all laws and respect privacy and legitimate rights of others.
When taking and using images or video clips, obey all laws and respect local customs as well as privacy and legitimate rights of others.
Warning: To use any features in this device, other than the alarm clock, the device must be switched on.
Do not switch the demay cause interferen
Network serviTo use the phone you mservice provider. Many depend on features in tThese network services networks or you may hawith your service providservices. Your service pradditional instructions charges will apply. Somthat affect how you cansome networks may notcharacters and servicesin this guide by (networ
Your service provider mfeatures be disabled or they will not appear on also have been speciallymay include changes inicons. Contact your serv
This device supports WArun on TCP/IP protocols.as MMS, browsing, e-m

8ht © 2006 Nokia. All rights reserved.
ed enhancements, please check ou disconnect the power cord of and pull the plug, not the cord.
Copyrig
the browser or over MMS, require network support for these technologies.
For availability and information on using SIM card services, contact your SIM card vendor. This may be the service provider, network operator, or other vendor.
Enhancements, batteries, and chargersAlways switch the device off and disconnect the charger before removing the battery.
Check the model number of any charger before use with this device. This device is intended for use when supplied with power from a DC-4, AC-3 and AC-4 charger, and from an AC-1, ACP-7, ACP-8, ACP-9, ACP-12, LCH-8, LCH-9, or LCH-12 charger when used with the charger adapter CA-44.
The battery intended for use with this device is BL-5C.
Warning: Use only batteries, chargers, and enhancements approved by Nokia for use with this particular model. The use of any other types may invalidate any approval or warranty, and may be dangerous.
For availability of approvwith your dealer. When yany enhancement, grasp

Your
Nok
ia N
71
9ht © 2006 Nokia. All rights reserved.
ard in the other device. When without a SIM card, the offline ctivated.
for the first time, press , and r. If you have used the want to start a new transfer,
w, select Continue.nt to use Bluetooth connectivity the data. Both devices must onnection type.
h connectivity to search for ue. The visibility of the other lect your other device from the nter a code on your Nokia N71.
gits), and select OK. Enter the er device, and select OK. The d. See ‘Pair devices’, p. 83.ls, the Transfer application is ce as a message. To install device, open the message, and s on the display.connect the two devices. See p. 84.
Copyrig
Your Nokia N71Model number: Nokia N71-1
Hereinafter referred to as Nokia N71.
SettingsYour Nokia N71 normally has MMS, GPRS, streaming, and mobile Internet settings automatically configured, based upon your service provider or network operator information. You may have settings from your service providers already installed in your device, or you may receive the settings from the service providers as a special text message.
Transfer content
You can transfer content, such as contacts, from a compatible Nokia device to your Nokia N71 using Bluetooth connectivity or infrared. The type of content that can be transferred depends on the phone model. If the other device supports synchronization, you can also synchronize data between the other device and your Nokia N71.
You can insert your SIM cNokia N71 is switched onprofile is automatically aTransfer content1 To use the application
select Tools > Transfeapplication before andselect Transfer data.In the information vie
2 Select whether you waor infrared to transfersupport the selected c
3 If you select Bluetootdevices, select Contindevice must be on. Selist. You are asked to eEnter a code (1–16 disame code on the othdevices are now paireFor some device modesent to the other deviTransfer on the otherfollow the instructionIf you select infrared, ‘Infrared connection’,

10
pe is set to Silent and Message ne, and E-mail alert tone are set
d is locked.
ive.
ne is being used (network service).
device are diverted to another phone lines (network service), the e is and for the second
cted to the device.
headset with Bluetooth st.
ted to the device.
onnected to the device.
ket data connection is available.
ket data connection is active.
ket data connection is on hold.
connection is available.
connection is active.
connection is on hold.
Your
Nok
ia N
71
Copyright © 2006 Nokia. All rights reserved.
4 From your Nokia N71, select the content you want to copy from the other device.
Content is copied from the memory and compatible memory card (if inserted) of the other device to the corresponding location in your Nokia N71 and compatible memory card (if inserted). Copying time depends on the amount of data to be transferred. You can cancel copying and continue later.
If the other device supports synchronization, you can keep the data up-to-date in both devices. To start a synchronization with a compatible Nokia device, select Phones, scroll to the device, and select Options > Synchronise. Follow the instructions on the display.
Essential indicators The device is being used in a GSM network.
The device is being used in a UMTS network (network service).
You have one or more unread messages in the Inbox folder in Messag..
You have received new e-mail in the remote mailbox.
There are messages waiting to be sent in the Outbox folder.
You have missed calls.
Shown if Ringing tyalert tone, IM alert toto Off.
The device keypa
A clock alarm is act
The second phone li
All calls to the number. If you have twoindicator for the first lin
.
A headset is conne
The connection to aconnectivity has been lo
A loopset is connec
A Text phone is c
A data call is active.
A GPRS or EDGE pac
A GPRS or EDGE pac
A GPRS or EDGE pac
A UMTS packet data
A UMTS packet data
A UMTS packet data

Your
Nok
ia N
71
11ht © 2006 Nokia. All rights reserved.
udspeaker controle ve
ing .
allows you to speak and listen out having to hold the device to
old the device near your ear is in use, because the volume .
ring a call, select Options >
er, select Options > Activate
e and date in fold closed mode, key.
k. To set a new alarm, select en an alarm is active, is
Copyrig
Bluetooth connectivity is on.
Data is being transmitted using Bluetooth connectivity.
A USB connection is active.
An infrared connection is active. If the indicator is blinking, the device is trying to connect to the other device or the connection has been lost.
Keypad lock (keyguard)Use the keypad lock to prevent the keys from being accidentally pressed.
To lock, in standby mode, press , then . When the keys are locked, is shown on the display.
To unlock in fold open mode, press , then .
To lock the keypad, in fold open mode press the power key, and select Lock keypad.
To lock the keypad, in fold closed mode press the power key twice to select Lock keypad, and press the cover key.
When the keypad lock is on, calls may be possible to the official emergency number programmed into your device.
To turn on the display light when the keypad lock is on, press the power key.
Volume and loTo increase or decrease thvolume level when you haan active call or are listento a sound, press or
The built-in loudspeaker from a short distance withyour ear.
Warning: Do not hwhen the loudspeakermay be extremely loud
To use the loudspeaker duActivate loudsp..
To turn off the loudspeakhandset.
Clock
Tip! To view the timpress and hold the cover
Press , and select ClocOptions > Set alarm. Whshown.

12
view, open Clock, and press . In u can view the time in different
select Options > Add city. You can ities to the list.
, scroll to a city, and select city. The city is displayed in the e time in your device is changed lected. Check that the time is ur time zone.
y card tool
pproved by Nokia for use with this e approved industry standards for ll other brands may function patible with this device.
ls > Memory. le memory card nd for backing e device
Your
Nok
ia N
71
Copyright © 2006 Nokia. All rights reserved.
To turn off the alarm, select Stop, or to stop the alarm for 5 minutes, select Snooze.
If the alarm time is reached while the device is switched off, the device switches itself on and starts sounding the alarm tone. If you select Stop, the device asks whether you want to activate the device for calls. Select No to switch off the device or Yes to make and receive calls. Do not select Yes when wireless phone use may cause interference or danger.
To cancel an alarm, select Clock > Options > Remove alarm.
Clock settingsTo change the clock settings, select Clock > Options > Settings.
To change the time or date, select Time or Date.
To change the clock shown in the standby mode, select Clock type > Analogue or Digital.
To allow the mobile phone network to update the time, date, and time zone information to your device (network service), select Network operator time > Auto-update.
To change the alarm tone, select Clock alarm tone.
World clockTo open the world clockthe world clock view, yocities.
To add cities to the list, add a maximum of 15 c
To set your current cityOptions > My current clock main view, and thaccording to the city secorrect and matches yo
Memor
Use only miniSD cards adevice. Nokia utilizes thmemory cards but not acorrectly or be fully com
Press , and select TooYou can use a compatibas extra storage space aup the information in thmemory.

Your
Nok
ia N
71
13ht © 2006 Nokia. All rights reserved.
ard, close the door, and select
remove the memory card in the hen the card is being accessed. middle of an operation may as well as the device, and data e corrupted.
ager
ice, such as contacts, messages, nes, calendar notes, documents, ions, use memory to store data. e depends on how much data is e memory.
memory card as extra storage rewritable, so you can delete old data on a memory card.
rs in the device memory or on a press , and select Tools > File view ( ) opens. Press to ew ( ) (if available).
folder, press and at the and select Options > Move to
Copyrig
To back up information from the device memory to a memory card, select Options > Backup phone mem.
To restore information from the memory card to the device memory, select Options > Restore from card.
Format a memory cardWhen a memory card is reformatted, all data on the card is permanently lost.
Some memory cards are supplied preformatted and others require formatting. Consult your retailer to find out if you must format the memory card before you can use it.
To format a memory card, select Options > Format mem. card. Select Yes to confirm.
Eject the memory card1 Before you eject the card, press
the power key, and select Remove mem. card. All applications are closed.
2 When Remove memory card and press 'OK' is displayed, open the door of the memory card slot.
3 Press and release the memory card to eject it from the slot.
4 Remove the memory cOK.
Important: Do notmiddle of an operation wRemoving the card in thedamage the memory cardstored on the card may b
File man
Many features of the devimages, videos, ringing toand downloaded applicatThe free memory availablalready saved in the devic
You can use a compatiblespace. Memory cards are information and save new
To browse files and foldememory card (if inserted),mgr.. The device memoryopen the memory card vi
To move or copy files to asame time to mark a file,folder or Copy to folder.

14
x, Drafts, and Sent folders in
ssages from the device memory
s, or sound files
tions, manager’, p. 98.) of applications you have installed iSD card; first back up the compatible PC using Nokia PC
you no longer need
ts get the most from your device. tions in this user guide for further
.
pplications that are open, press lect an application. If memory is close some applications. The device ata before closing an application.
Your
Nok
ia N
71
Copyright © 2006 Nokia. All rights reserved.
To find a file, select Options > Find and the memory from which to search, and enter a search text that matches the file name.
View memory consumptionTo view what types of data you have in the device and how much memory the different data types consume, select Options > Memory details. The amount of available free memory is shown in Free memory.
Memory low—free memoryThe device notifies you if the device or the memory card memory is low.
To free device memory, transfer data to a compatible memory card, if you have one. Mark files to be moved, and select Move to folder > Memory card and a folder.
You can also transfer media files to a compatible PC, for example, using the transfer option in Gallery. See ‘Gallery’, p. 26.
Tip! You can use Nokia Phone Browser available in Nokia PC Suite to view the different memories in your device and transfer data.
To remove data to free memory, use File mgr., or go to the respective application. For example, you can remove the following:
• Messages from InboMessag.
• Retrieved e-mail me• Saved Web pages• Saved images, video• Contact information• Calendar notes• Downloaded applica
See also ‘Application• Installation files (.sis
to a compatible mininstallation files to aSuite.
• Any other data that
Useful shortcuUse shortcuts to quicklyRefer to the relevant secdetails of the functions
Standby mode• To switch between a
and hold , and selow, the device may saves any unsaved d
Your
Nok
ia N
71
15ht © 2006 Nokia. All rights reserved.
a document, press and hold ,
yned to the multimedia key, press list of multimedia applications, sired application, press , , without selecting an application,
press , and press . To hat are shown when you press ddle, and Right and the
ixed, and you are not able to
sensitive help. When an t Options > Help to access help
instructions, to switch between that is open in the background,
Copyrig
Leaving applications running in the background increases the demand on battery power and reduces the battery life.
• To start the camera, press .• To call your voice mailbox (network service), press and
hold .• To open multimedia applications, press or press and
hold . See ‘Multimedia key’, p. 14.• To change the profile, press , and select a profile.• If you have two phone lines (network service), press
to switch between the two lines.• To open the last dialed numbers list, press .• To use voice commands, press and hold .• To start a connection to Services, press and hold .
See ‘Services’, p. 62.
For further shortcuts available in the standby mode, see ‘Active standby mode’, p. 80.
Edit text and lists• To mark an item in a list, scroll to it, and press and
at the same time.• To mark multiple items in a list, press and hold
while you press or . To end the selection, release or , then release .
• To select letters and words, press and hold . At the same time, press or to highlight text.
• To copy the text to clipboard, while still holding , select Copy.
• To insert the text into and select Paste.
Multimedia keTo open the shortcut assigand hold . To open a press . To open the de
or . To exit the list press .
To change the shortcuts, change the applications t
, select Top, Left, Miapplication.
Some shortcuts may be fchange them.
Help
Your device has context-application is open, selecfor the current view.
When you are reading thehelp and the application press and hold .

16
Your
Nok
ia N
71
Copyright © 2006 Nokia. All rights reserved.
To open help from the main menu, select Tools > Help. Select the desired application to view its help topics.
Tutorial
The tutorial gives you information about some of the features of your device. To access the tutorial in the menu, press , and select My own > Tutorial and the section you want to view.

Cam
era
17ht © 2006 Nokia. All rights reserved.
he following:) and memory card ( )
here images are saved.(2)
the , g
e or
or f- lf-
at the sequence mode is active. ictures’, p. 10.
mode, open the image mode by e mode.
Copyrig
CameraYour Nokia N71 has two cameras, a high resolution camera on the outside of the device, and a lower resolution camera above the inner main display, which is visible when the cover is opened. Both cameras can be used to take still pictures and video.
To activate the camera, open the cover, press , and select Camera. In the viewfinder, you can see the view to be captured.
The images and video clips are automatically saved in the Gallery. The cameras produce .jpg images. Video clips are recorded in the 3gpp file format with the .3gp file extension (normal and sharing video quality modes) or in the .mp4 file format (high video quality mode). See ‘Video settings’, p. 15.
You can send images in a multimedia message as an e-mail attachment, or by using Bluetooth connectivity.
Tip! You can insert an image into a contact card. See ‘Save names and numbers’, p. 59.
Your Nokia N71 supports an image capture resolution of up to 1600x1200 pixels using the primary camera. The image resolution in these materials may appear different.
Camera displayCamera indicators show t• The device memory (
indicators (1) show w• The images indicator
estimates how many images, depending onselected image qualitycan fit in the remaininmemory of your devicthe memory card.
• The self-timer indicat(3) shows that the seltimer is activated. See‘You in the picture—setimer’, p. 11.
• The sequence mode indicator (4) shows thSee ‘Take time-lapse p
Take picturesIf the camera is in video selecting Options > Imag

18
elect Options > Edit. See ‘Edit
select Options > Print. See ‘Image
attery saving mode if you do not r a while. To continue taking
ve, press or , or select
se r . The d on
nder,
he ou
oting mode have been set to match nment.
Cam
era
Copyright © 2006 Nokia. All rights reserved.
To select the secondary camera (for example, to include yourself in the picture), select Options > Use second. cam.. To use the main camera again, select Options > Use main camera.
To zoom in and out, press or . The zoom indicator, which is displayed on the side of the viewfinder, shows the zoom level. The quality (resolution) of a zoomed picture is lower than that of a nonzoomed picture.
To take a picture, press . Do not move the device before the image is saved. The image is saved automatically in the Images & videofolder of Gallery. See ‘Gallery’, p. 26.
Saving the captured image may take longer if you change the zoom, lighting, or color settings.
To select the shooting mode; flash, colour and lighting settings; or view the Last image before taking a picture, see ‘Camera setup’, p. 9.
After the image is taken, do any of the following: • If you do not want to keep the image, select Options >
Delete, or press .• To send the image Via multimedia, Via e-mail, or Via
Bluetooth, select Options > Send. For more information, see ‘Messaging’, p. 36 and ‘Bluetooth connectivity’, p. 81. This option is not available during an active call.
• To send an image to the other party during an active call, select Options > Send to caller.
• To edit the picture, simages’, p. 11.
• To print the picture, print’, p. 30.
The camera goes into bmake any key presses fopictures, press
Camera setupIf the viewfinder is actiOptions > Open setup.
Press or to choothe item to be viewed oadjusted, and press settings available depenwhich camera is in use.
To reactivate the viewfipress Cancel or .
The settings return to tdefault settings when yclose the Camera.
Shooting modeThe settings of each shoa certain style or enviro

Cam
era
19ht © 2006 Nokia. All rights reserved.
e subject of the picture to see . There is no flash effect on the
tting that matches the current llows the camera to reproduce
ng and press .
r effect setting and press .
ken, press .
picturesed sequence to set the camera a sequence automatically. You
two frames per second (fast) and es (slow). The number of pictures of memory available.
ically saved in Gallery.
Copyrig
The following shooting modes are available: Automatic, User defined, Portrait, Landscape, Night, and Sports.
Scroll to the appropriate shooting mode for taking a picture, and press .
When taking pictures, the default shooting mode is Automatic.
To make your own shooting mode suitable for a certain environment, select User defined. In the user defined mode you can adjust Based on mode, Flash, White balance, and Colour tone, and Reset user mode options. To copy the settings of another shooting mode, select Based on mode and the desired shooting mode.
If you select the User defined shooting mode, it is set as the default shooting mode.
FlashThe camera has an LED flashlight for low light conditions.
Keep a safe distance when using the flash. Do not use the flash on people or animals at close range. Do not cover the flash while taking a picture.
The following flash modes are available: Automatic, On, and Off.
Scroll to the desired flash setting and press .
If the flash is set to Off or Automatic during bright conditions, the flash still emits a low light when an image
is captured. This allows thwhen the picture is takenresultant picture.
White balanceSelect the appropriate selighting conditions. This acolors more accurately.
Scroll to the desired setti
Colour toneScroll to the desired colo
Last imageTo view the last image ta
Take time-lapse Select Options > Advancto take several pictures incan set the rate between one frame every 15 minutis limited by the amount
The pictures are automat

20
600x1200 resolution), E-n) or MMS (640x480 resolution). ality, the more memory the image
hether you want to save the image allery. If you select Yes, a list of .
On if you want to achieve prepared to accept a reduction in may be lower than you have quality setting. If you want to
d have less reduction in resolution,
elect On to see the captured image to continue taking pictures
Select Date or Text.
e tone you want to hear when you
where to store your images.
have just taken, select Options > res, select them from Gallery.
Cam
era
Copyright © 2006 Nokia. All rights reserved.
You can also use the sequence mode with the Self timer. See ‘You in the picture—self-timer’, p. 11.
After taking the pictures, they are shown in a grid on the main display. To view a picture, press to open it.
To return to the sequence mode viewfinder, select Back.
You in the picture—self-timerUse the self-timer to delay the taking of a picture so that you can include yourself in the picture. To set the self-timer delay, select Options > Self timer > 10 seconds, 20 seconds or 30 seconds. To activate the self-timer, select Activate. The self-timer indicator ( ) blinks and the device beeps when the timer is running. The camera takes the picture after the selected delay has elapsed. You can also use the Self timer in the sequence mode. See ‘Take time-lapse pictures’, p. 10.
Camera settingsTo change the main camera settings, select Options > Settings, and from the following:
Image quality—Print (1mail(800x600 resolutioThe better the image quuses.
Add to album—Select wto a certain album in Gavailable albums opens
Extended zoom—Selectmaximum zoom but areimage resolution, whichselected with the Imagelimit the zoom range anselect Off.
Show captured img.—Safter it is taken, or Off immediately.
Default image name—
Shutter tone—Select thtake a picture.
Memory in use—Select
Edit imagesTo edit the picture you Edit. To edit other pictu

Cam
era
21ht © 2006 Nokia. All rights reserved.
ckwise or counterclockwise,
ut, press and .
good photographs
ure quality. The camera has ngs. Use Print for large prints up x8 inches), E-mailfor e-mail and eters (6x4 inches), or MMS for ge. The better the image quality,
age consumes. The quality of a an that of a nonzoomed picture.
ality, select Options > Settings..
For portraits and other pictures your subject in front of a round that may distract t. Move the camera or the
itions cannot be met. Move the ct to take clearer portraits.
Copyrig
Select Options > Apply effect to crop and rotate the image; adjust the color, compression, and resolution; also, to add effects, text, clip art, or a frame to the picture.
To manually crop an image, select Options > Apply effect > Crop > Manual. A rectangle indicating the crop area is displayed. Scroll to define the top left starting point for the crop, and select Set. Scroll to the bottom right of the area to be cropped, and select Crop.
To reduce redness of the eyes in an image, select Options > Apply effect > Red eye reduction. Move the cross onto the eye, and press . A loop appears on the display. Scroll to resize the loop to fit the size of the eye. Press to reduce the redness.
To add clip art to an image, select Options > Apply effect > Clip-art. Select the item you want to add from the list, and press . To move, rotate, and change the size of the item, select Options > Move clip-art, Resize clip-art, or Rotate clip-art.
To add text to an image, select Options > Apply effect > Text. Enter the text, and select OK. To edit the text, select Options > Move text, Resize text, Rotate text, or Select colour.
Shortcuts in the image editor:• To view an image in full screen, press . To return to
the normal view, press again.
• To rotate an image clopress. and .
• To zoom in or zoom o
Tips on taking
Picture qualityUse the appropriate pictthree picture quality settito 25x20 centimeters (10prints up to 15x10 centimuse in a multimedia messathe more memory the imzoomed picture is lower thTo change the picture qu
BackgroundUse a simple background—with people, avoid havingcluttered, complex backgattention from the subjecsubject when these condcamera closer to the obje

22
udy day or on a sunny day in the
r displayrs
( ) )
here
ngth
e
cator
d.ator (4) indicates the format of the
mode, to select video mode, select .
camera (for example, to include lect Options > Use second. cam..
Cam
era
Copyright © 2006 Nokia. All rights reserved.
DepthWhen taking pictures of landscapes, add depth to your pictures by placing objects in the foreground. However, if the foreground object is too close to the camera, it may be blurred.
Lighting conditionsChanging the source, amount, and direction of light can change photographs dramatically. Here are some typical lighting conditions:• Light source behind the subject—Avoid placing your
subject in front of a strong light source. If the light source is behind the subject or visible in the display, the resulting picture may have weak contrast, may be too dark, and may contain unwanted lighting effects. You can use the flash to add more lighting to shadows. See ‘Flash’, p. 10.
• Sidelit subject—Strong side light gives a dramatic effect but may be too harsh, resulting in too much contrast.
• Light source in front of the subject—Harsh sunlight may cause the subjects to squint their eyes. The contrast may also be too high.
• Optimal lighting—Found in situations where there is plenty of diffused, soft light available; for example, on
a bright, partially closhadow of trees.
Video recordeVideo recorder indicatoshow the following:. • The device memory
and memory card (indicators (1) show wthe video is saved.
• The current video leindicator (2) shows elapsed time and timremaining.
• The microphone indi(3) shows that the microphone is mute
• The file format indicvideo clip.
Record videosIf the camera is in imageOptions > Video mode
To select the secondaryyourself in the video), se

Cam
era
23ht © 2006 Nokia. All rights reserved.
multimedia, Via e-mail, or Via ions > Send. For more saging’, p. 36 and ‘Bluetooth is option is not available during
the other party during an active Send to caller.ct Options > Edit. See also ‘Edit
tup, press or , or select
e the item to be viewed or he settings available depend on
der, press Cancel or .
default settings when you close
ting mode have been set to nvironment.
odes are available: Automatic,
Copyrig
To use the main camera again, select Options > Use main camera.
The zoom indicator, which appears on the side pane, shows the zoom level. Press or to zoom in or zoom out.1 Press to start recording. The record icon is
shown. The LED flash is lit, and a tone sounds, indicating to the subject that video is being recorded. There is no flash effect on the resultant video.
2 To pause recording at any time, select Pause. The pause icon blinks on the display. Video recording automatically stops if recording is set to pause and there are no key presses within a minute.
3 Select Continue to resume recording. 4 Select Stop to stop recording. The video clip is
automatically saved to the Images & videofolder of Gallery. See ‘Gallery’, p. 8.
To select the shooting mode; colour and lighting settings; or view the Last video clip before recording a video, see ‘Video recorder setup’, p. 14.
After a video clip is recorded, do the following:• To immediately play the video clip you just recorded,
select Options > Play.• If you do not want to keep the video, select Options >
Delete.• To return to the viewfinder to record a new video, press
.
• To send the video ViaBluetooth, select Optinformation, see ‘Mesconnectivity’, p. 81. Than active call.
• To send a video clip tocall, select Options >
• To edit the video, selevideo clips’, p. 27.
Video recorder seIf the viewfinder is activeOptions > Open setup.
Press or to choosadjusted, and press . Twhich camera is in use.
To reactivate the viewfin
The settings return to thethe Camera.
Shooting modeThe settings of each shoomatch a certain style or e
The following shooting mor Night.
24
quality of the video clip to High, you select High or Normal, the rding is restricted by the available ard, and up to one hour per clip. If eo on a compatible TV or PC, select ch has CIF resolution (352x288) u cannot send video clips saved in ultimedia message. If you want to ible mobile devices, select Normal, on (176x144) and file format .3gp. hrough MMS, or send it through aring (QCIF resolution, file format (network service)’, p. 52. The video (approximately 20 seconds in
be conveniently sent as a a compatible device. Some only support sending of ith a maximum size of 100 KB.
ovider for more information.
es to save the recorded video clip Gallery.
Select Off to record a video clip er. Your videos are not played after video recorder is ready for use
elect Date or Text as the default ord.
Cam
era
Copyright © 2006 Nokia. All rights reserved.
Scroll to the appropriate shooting mode for recording a video, and press .
White balanceSelect the appropriate setting that matches the current lighting conditions. This allows the camera to reproduce colors more accurately.
Scroll to the desired setting and press .
Color toneScroll to the desired color effect setting and press .
Last video clipTo view the last video taken, press .
Video settingsThere are two kinds of settings for the video recorder: video recorder setup and video settings. To adjust video recorder setup, see ‘Video recorder setup’, p. 14. The video recordersettings return to the default settings after you close the camera, but the video settings remain the same until you change them again. To change the video settings, select Options > Settings and from the following:
Audio recording—Select On if you want to record both image and sound.
Video quality—Set the Normal, or Sharing. If length of the video recospace on your memory cyou want to view the vidHigh video quality, whiand file format .mp4. Yothe .mp4 format in a mview the clip in compatwhich has QCIF resolutiTo send the video clip tvideo sharing, select Sh.3gp). See ‘Video sharingclip is limited to 300 KBduration) so that it canmultimedia message tonetworks, however, maymultimedia messages wContact your service pr
Add to album—Select Yto a particular album in
Show captured video—immediately after anothbeing recorded, and theagain.
Default video name—Sname for videos you rec

Cam
era
25ht © 2006 Nokia. All rights reserved.
CopyrigMemory in use—Choose the default memory store: device memory or memory card.
Galle
ry
26ht © 2006 Nokia. All rights reserved.
e CD-ROM supplied with your
ideos and Real audio clips open opens in the music player. See lips’, p. 9. See ‘Music player’, p.
compatible memory card or to e and Options > Move and copy Move to memory card, Copy to phone mem..
ry card are indicated with .
memory are indicated with .
e files, select Options > Shrink. that you have already copied to ple, a compatible PC) and ce, in the Images & video folder, > Free memory.
llery in one of the main folders Graphic downl., Video downl., ownl.. The browser opens, and k from which the site can
Copyrig
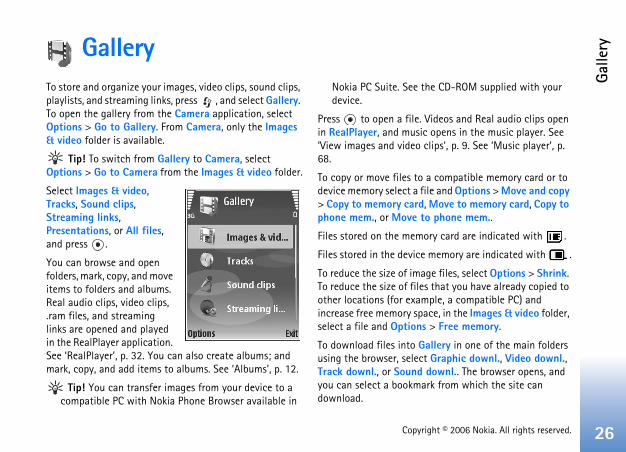
GalleryTo store and organize your images, video clips, sound clips, playlists, and streaming links, press , and select Gallery. To open the gallery from the Camera application, select Options > Go to Gallery. From Camera, only the Images & video folder is available.
Tip! To switch from Gallery to Camera, select Options > Go to Camera from the Images & video folder.
Select Images & video, Tracks, Sound clips, Streaming links, Presentations, or All files, and press .
You can browse and open folders, mark, copy, and move items to folders and albums. Real audio clips, video clips, .ram files, and streaming links are opened and played in the RealPlayer application. See ‘RealPlayer’, p. 32. You can also create albums; and mark, copy, and add items to albums. See ‘Albums’, p. 12.
Tip! You can transfer images from your device to a compatible PC with Nokia Phone Browser available in
Nokia PC Suite. See thdevice.
Press to open a file. Vin RealPlayer, and music‘View images and video c68.
To copy or move files to adevice memory select a fil> Copy to memory card, phone mem., or Move to
Files stored on the memo
Files stored in the device
To reduce the size of imagTo reduce the size of filesother locations (for examincrease free memory spaselect a file and Options
To download files into Gausing the browser, selectTrack downl., or Sound dyou can select a bookmardownload.

27
ge, select Options > Zoom in or ratio is at the top of the display. t stored permanently.
s in Gallery. See ‘Gallery’, p.8.
reate custom video clips, scroll to Options > Edit. You can create mbining and trimming video clips, nd clips, transitions, and effects. fects that you can add to the e video or between the video clips.
can see two timelines: video clip timeline. If you add images, text, clip, they are shown on the video n the timelines, press or . To elines, press or .
clips, mark and select one or more ptions > Edit.
ou can insert video clips to make a dit the clips by trimming and
add images and sound clips and nd also add text and images to the
ect from the following options:
Galle
ry
Copyright © 2006 Nokia. All rights reserved.
View images and video clipsPictures taken and video clips recorded with the camera are stored in the Images & video folder in Gallery. Images and video clips can also be sent to you in a multimedia message, as an e-mail attachment, or using Bluetooth connectivity. To be able to view a received image or video clip in Gallery or in RealPlayer, you must save it in the device memory or on a compatible memory card.
Open the Images & video folder in Gallery. The images and video clip files are in a loop and ordered by date. To browse individual files, press or . To browse files in groups, press or .
To edit a photo or a video clip, select Options > Edit. An image editor or a video editor opens.
To add an image or a video clip to an album in Gallery, select Options > Albums. > Add to album. See ‘Albums’, p. 12.
To create custom video clips, select a video clip or several clips in Gallery, and select Options > Edit. See ‘Edit video clips’, p. 9.
To print your images on a compatible printer connected to your device or to store them on a compatible memory card for printing, select Options > Print. See ‘Image print’, p. 12.
To zoom an opened imaZoom out. The zoomingThe zooming ratio is no
Edit video clipYou can edit video clips
To edit video clips and ca video clip, and select custom video clips by coand adding images, souTransitions are visual efbeginning and end of th
In the video editor you timeline and sound clipor transitions to a videoclip timeline. To move oswitch between the tim
To create custom video video clips, and select O
In the edit video view, ycustom video clip, and eadding effects. You canchange their duration, aclip.
To modify the video, sel

Galle
ry
28ht © 2006 Nokia. All rights reserved.
of
he
e : at e
n t
lected video clip. A thumbnail of the main view. A thumbnail lack frame of the video clip. The elected video clip is also shown.
ed image. A thumbnail of the in view.
video clip. You can insert a title,
lected sound clip. The name and nd clip is shown in the main
Copyrig
Edit video clip:
Cut—Trims the video clip in the cut video clip view.
Add colour effect—Inserts a color effect in the video clip.
Use slow motion—Slows the speed of the video clip.
Mute sound or Unmute sound—Mutes or unmutes the original video clip sound.
Move—Moves the video clip to the selected location on the timeline.
Remove—Removes the video clip from the video.
Duplicate—Makes a copy of the selected video clip.
Edit text (shown only if you have added text)—To move, remove, or duplicate text; change the color and style of the text; define how long it stays on the screen; and add effects to the text.
Edit image (shown only if you have added an image)—To move, remove, or duplicate an image; define how long it stays on the screen; and set a background or a color effect to the image.
Edit sound clip:
Cut—Trims the sound clip in the cut sound clip view.
Move—Moves the sound clip to the selected location on the timeline.
Remove—Removes the sound clip from the video.
Duplicate—Makes a copythe selected sound clip.
Set duration—Changes tlength of the sound clip.
Edit transition—There arthree types of transitionsthe start of a video, at thend of a video, and transitions between videoclips. A start transition cabe selected when the firstransition of the video is active.
Insert:
Video clip—Inserts the sethe video clip is shown inconsists of the first non-bname and length of the s
Image—Inserts the selectimage is shown in the ma
Text—Inserts text to the subtitle, or credits.
Sound clip—Inserts the selength of the selected souview.
29
tible memory card reader
eo clips in the full screen mode, show > Start.
(slower) to adjust the display us) or (next) to browse the
e show in the Images & video Slide show > Settings and from
ff
ile from the list
ecrease the volume or to
can view SVG (scaleable vector es maintain their appearance when different screen sizes and files, select Presentations folder, tions > Play.
Galle
ry
Copyright © 2006 Nokia. All rights reserved.
New sound clip—Records a new sound clip to the selected location.
Movie—To preview the movie in full screen or as a thumbnail, save or send the movie, or cut the movie to a suitable size for sending it in a multimedia message.
Tip! To take a snapshot of a video clip, select Options > Take snapshot in the thumbnail preview view or in the cut video view.
To save your video, select Options > Movie > Save. To define the Memory in use, select Options > Settings. The default is the device memory.
Tip! In the Settings view, you can define Default video name, Default sc. shot name, Resolution, and Memory in use.
Select Send > Via multimedia, Via e-mail, Via Bluetooth, or Via infrared if you want to send the video. Contact your service provider for details of the maximum multimedia message size that you can send. If your video is too large to be sent in a multimedia message, is displayed.
Tip! If you want to send a video clip that is over the maximum multimedia message size allowed by your service provider, you can send the clip using Bluetooth connectivity. See ‘Send data’, p. 82. You can also transfer your videos using Bluetooth connectivity to a compatible
PC, or by using a compa(enhancement).
Slide showTo view images and vidselect Options > Slide
Press (faster) or speed. Press (previothumbnails.
To add sound to the slidfolder, select Options >the following:
Music—Select On, or O
Track—Select a music f
Volume—Press to dincrease the volume
PresentationsWith presentations, yougraphic) files. SVG imagprinted or viewed with resolutions. To view SVGan image, and select Op

Galle
ry
30ht © 2006 Nokia. All rights reserved.
s that are in jpg format. The mera are automatically saved in
data cable to a PictBridge d select Pictbridge from the device before you print.
rst time, a list of available you select the image. Select a as the default printer.
ictBridge compatible printer e printer is automatically
t available, a list of available ed.
ter, select Options > Settings >
ens only when you start printing
isplayed using predefined out, scroll left and right through he selected printer. If the images
Copyrig
AlbumsWith albums you can conveniently manage your images and video clips. To view the albums list, in the Images & video folder, select Options > Albums > View albums. The albums are ordered alphabetically. To view the content of an album, press .
To create a new album, select Options > New album. Enter a name for the album, and select OK.
To add a picture or a video clip to an album in Gallery, scroll to a picture or video clip, and select Options > Albums > Add to album. A list of albums opens. Select the album to which you want to add the picture or video clip, and press .
To remove a file from an album, press . The file is not deleted from the Images & video folder in Gallery.
Image printTo print your images using a compatible data cable, Bluetooth connectivity, or your compatible memory card (if available), select the image you want to print, and the print option in Gallery, Camera, image editor, or image viewer.
You can only print imagepictures taken with the ca.jpg format.
Note: Connect thecompatible printer, anpopup display on your
Printer selectionWhen you print for the fiprinters is displayed afterprinter. The printer is set
If you have connected a Pusing the CA-53 cable, thdisplayed.
If the default printer is noprinting devices is display
To change the default prinDefault printer.
Print previewThe print preview view opan image in the gallery.
The selected images are dlayouts. To change the laythe available layouts for t

31
Galle
ry
Copyright © 2006 Nokia. All rights reserved.
do not fit on a single page, press or to display the additional pages.
Print settingsThe available options vary, depending on the capabilities of the printing device you selected.
To set a default printer, select Options > Default printer.
To select the paper size, select Paper size, the size of paper from the list, and OK. Select Cancel to return to the previous view.

Med
ia a
pplic
atio
ns
32ht © 2006 Nokia. All rights reserved.
file saved in Gallery.
ess to play the file.
clip in full screen mode, press e back to normal screen mode.
and hold . media file, press and hold .ess and hold until is the sound, press and hold
ver the airquire you to use an Internet r default access point. Other u to use a WAP access point.
configured when you first start
ider for more information.
r, you can only open an rtsp:// , RealPlayer recognizes an http
Copyrig
Media applicationsRealPlayer
Press , and select Imaging > RealPlayer. With RealPlayer, you can play video clips, sound clips, and playlists, or stream media files over the air. You can activate a streaming link when you browse Web pages, or store it in the device memory or a compatible memory card (if inserted).
RealPlayer supports files with extensions such as .3gp, .mp4 or .rm. However, RealPlayer does not necessarily support all file formats or all the variations of file formats. For example, RealPlayer attempts to open all .mp4 files, but some .mp4 files may include content that is not compliant with 3GPP standards and, therefore, is not supported by your device.
Play video or sound clips1 To play a media file stored in device memory, or on a
compatible memory card (if inserted), select Options > Open and from the following:Most recent clips—to play one of the last six files played in RealPlayer.
Saved clip—to play a See ‘Gallery’, p. 26.
2 Scroll to a file, and pr
Tip! To view a video. Press again to chang
Shortcuts during play:• To fast forward, press• To rewind through the• To mute the sound, pr
displayed. To turn on until you see .
Stream content oMany service providers reaccess point (IAP) for youservice providers allow yo
The access points may beyour device.
Contact your service prov
Note: In RealPlayeURL address. Howeverlink to a .ram file.

33
ter the IP address of the proxy
ter the port number of the proxy
rvers are intermediate servers ers and their users. Some service o provide additional security or
rowser pages that contain sound or
croll to the access point you want Internet, and press
me for RealPlayer to disconnect you pause a media clip playing Select User defined, and press . ct OK.
r the lowest port number of the minimum value is 1024.
er the highest port number of the maximum value is 65535.
ced settings to edit the fferent networks.
Med
ia a
pplic
atio
ns
Copyright © 2006 Nokia. All rights reserved.
To stream content over the air, select a streaming link saved in Gallery, on a Web page, or received in a text message or multimedia message. Before live content begins streaming, your device connects to the site and starts loading the content. The content is not saved in your device.
Receive RealPlayer settingsYou may receive RealPlayer settings in a special text message from the network operator or service provider. See ‘Data and settings’, p. 41. For more information, contact your network operator or service provider.
Change the RealPlayer settingsSelect Options > Settings and from the following:
Video—to adjust the contrast of the video, and to have RealPlayer automatically repeat video clips after they finish playing
Connection—to select whether to use a proxy server, change the default access point, and set the port range used when connecting. Contact your service provider for the correct settings.
Proxy sett.:
Use proxy—To use a proxy server, select Yes
Proxy serv. address—Enserver
Proxy port number—Enserver
Glossary: Proxy sebetween media servproviders use them tspeed up access to bvideo clips.
Netw. sett.:
Default access point—Sto use to connect to the
Online time—Set the tifrom the network whenthrough a network link. Enter the time, and sele
Lowest UDP port—Enteserver’s port range. The
Highest UDP port—Entserver’s port range. The
Select Options > Advanbandwidth values for di

Med
ia a
pplic
atio
ns
34ht © 2006 Nokia. All rights reserved.
muveer main view, select Custom
ant to include in your muvee in r Music. clips and images, to define the s are played in the muvee, select options. To select the file you
. Then scroll to the file below ce the marked file, and press . select Options > Select content’, p. 11.dd an opening and closing text
te muvee and from the
—to optimize the length of the ngde all the selected pictures and eet the muvee duration to be the usic clipne the length of the muvee.
uvee before saving it, in the ions > Play.
Copyrig
Movie director
To create muvees, press , and select Imaging > Movie. Muvees are short, edited video clips that can contain video, images, music, and text. Quick muvee is created automatically by Movie director after you select the style for the muvee. Movie director uses the default music and text associated with the chosen style. In a Custom muvee you can select your own video and music clips, images and style, and add an opening and closing message. You can send muvees with MMS.
Open Movie, and press or to move between the and views. To return to the main view from the
view, select Done.
The view contains a list of video clips that you can Play, Send, Rename, and Delete.
Create a quick muvee1 In the Movie director main view, select Quick muvee.2 Select a style for the muvee from the style list. The
created muvee is saved in the Movie director muvee list. The muvee is played automatically after saving.
Create a custom 1 In the Movie Directo
muvee.2 Select the clips you w
Video, Image, Style, oAfter you select videoorder in which the fileOptions > Advanced want to move, press which you want to plaTo cut the video clips,contents. See ‘Select In Message you can ato a muvee.
3 Select Options > Creafollowing:Multimedia messagemuvee for MMS sendiAuto-select—to incluvideo clips in the muvSame as music—to sesame as the chosen mUser defined—to defi
4 Select Options > Save
To preview the custom mPreview view, select Opt

35
Med
ia a
pplic
atio
ns
Copyright © 2006 Nokia. All rights reserved.
To create a new custom muvee by using the same style settings, select Options > Recreate.
Select contentTo edit the selected video clips, select Options > Advanced options > Options > Select contents. You can select which parts of the video clip you want to include or exclude in the muvee. In the slider, green is for included, red is for excluded, and grey is for neutral parts.
To include a part of the video clip in the muvee, scroll to the part, and select Options > Include. To exclude a part, select Options > Exclude. To exclude a shot, select Options > Exclude shot.
To let Movie director randomly include or exclude a part or parts of the video clip, scroll to the part, and select Options > Mark as neutral or Mark all as neutral.
SettingsSelect Settings to edit the following options:
Memory in use—Select where to store your muvees.
Resolution—Select the resolution of your muvees.
Default muvee name—Set a default name for the muvees.

Mes
sagi
ng
36ht © 2006 Nokia. All rights reserved.
ges that have not been sent are
essages that have been sent, using Bluetooth connectivity or To change the number of e ‘Other settings’, p. 20.
aiting to be sent are temporarily
are placed in the outbox, for evice is outside network schedule e-mail messages to be connect to your remote
rvice)—You can request the ivery report of the text messages s you have sent. Receiving a media message that has been may not be possible.
opened any of the default een the folders, press or .
requests (also known as USSD ation commands for network
Copyrig
MessagingPress , and select Messag.. In Messag., you can create, send, receive, view, edit, and organize text messages, multimedia messages, e-mail messages, and special text messages containing data. You can also receive messages and data using Bluetooth connectivity or infrared, receive Services messages, cell broadcast messages, and send service commands.
To create a new message, select New message.
Note: Only devices that have compatible features can receive and display multimedia messages. The appearance of a message may vary depending on the receiving device.
Messag. contains the following folders:
Inbox—Received messages, except e-mail and cell broadcast messages, are stored here. E-mail messages are stored in the Mailbox.
My folders—Organize your messages into folders.
Tip! To avoid rewriting messages that you send often, use texts in the templates folder.
Mailbox—Connect to your remote mailbox to retrieve your new e-mail messages or view your previously retrieved e-mail messages offline. See ‘E-mail’, p. 18.
Drafts—Draft messastored here.
Sent—The last 20 mexcluding messages sent infrared, are stored here. messages to be saved, se
Outbox—Messages wstored here.
Example: Messagesexample, when your dcoverage. You can alsosent the next time youmailbox.
Reports (network senetwork to send you a deland multimedia messagedelivery report of a multisent to an e-mail address
Tip! When you havefolders, to switch betw
To enter and send servicecommands), such as activ
37
ocated on the same key as the til the cursor appears (or press period), and enter the letter.ess . To move the cursor to the three times.
nputr with a single keypress. Predictive built-in dictionary to which you
is displayed when you write xt input.e text input, press , and select This activates predictive text input device.word,
. once
okia"
d, for o, and
changes after each keypress.ting the word correctly, press ss to add a space.
Mes
sagi
ng
Copyright © 2006 Nokia. All rights reserved.
services, to your service provider, select Options > Service command in the Messag. main view.
Cell broadcast (network service) allows you to receive messages on various topics, such as weather or traffic conditions, from your service provider. For available topics and relevant topic numbers, contact your service provider. In the Messaging main view, select Options > Cell broadcast. In the main view, you can see the status of a topic, a topic number, name, and whether it has been flagged ( ) for follow-up.
Cell broadcast messages cannot be received in UMTS networks. A packet data connection may prevent cell broadcast reception.
Write textABC, abc, and Abc indicate the selected character mode. 123 indicates the number mode.
Traditional text input is displayed when you are writing text using
traditional text input.• Press a number key ( — ) repeatedly until the
desired character appears. There are more characters available for a number key than are printed on the key.
• If the next letter is lpresent one, wait unto end the time-out
• To insert a space, prnext line, press
Predictive text iYou can enter any lettetext input is based on acan add new words. text using predictive te1 To activate predictiv
Predictive text on. for all editors in the
2 To write the desired press the keys —Press each key only for one letter. For example, to write "Nwhen the English dictionary is selectepress for N,
for k, for i, for a.
The word suggestion3 When you finish wri
to confirm it, or pre
Mes
sagi
ng
38ht © 2006 Nokia. All rights reserved.
ter and number mode, press and
fferent character modes, press
ss . To delete more than one .
on punctuation marks, press
haracters, press .
l special characters at the same you select each character.
messagesimedia message may vary, g device.
ultimedia message or write an e correct connection settings in and e-mail settings’, p. 12 and
limit the size of MMS messages. eeds this limit, the device may
can be sent by MMS.
and one of the following:d a text message
Copyrig
If the word is not correct, press repeatedly to view the matching words the dictionary has found one by one, or press , and select Predictive text > Matches.If the ? character is shown after the word, the word is not in the dictionary. To add a word to the dictionary, select Spell, enter the word using traditional text input, and select OK. The word is added to the dictionary. When the dictionary is full, a new word replaces the oldest added word.
4 Start writing the next word.
Write compound wordsWrite the first half of a compound word; to confirm it, press . Write the last part of the compound word. To complete the compound word, press to add a space.
Turn predictive text input offTo turn predictive text input off for all editors in the device, press , and select Predictive text > Off.
Tip! To turn predictive text input on or off, quickly press twice.
Tips on text inputTo insert a number in the letter mode, press and hold the desired number key.
To switch between the lethold .
To switch between the di.
To delete a character, precharacter, press and hold
To access the most comm.
To open a list of special c
Tip! To insert severatime, press when
Write and sendThe appearance of a multdepending on the receivin
Before you can create a me-mail, you must have thplace. See ‘Receive MMS ‘E-mail’, p. 18.
The wireless network mayIf the inserted picture excmake it smaller so that it
1 Select New message Text message—to sen

39
eo clips that are saved in the .mp4 dia message. To change the format deos are saved, see ‘Video settings’,
e or record sound or video for a , select Insert new > Image, clip. To insert a new slide to the
e.timedia message looks like, select
nt to an e-mail, select Options > nd clip, Video clip, or Note. E-mail icated by .er file types as attachments, open pplication, and select Send > Via le., select Options > Send, or press
e sending of text messages beyond single message. Longer messages o or more messages. Your service
cordingly. Characters that use and characters from some inese, take up more space limiting rs that can be sent in a single ion bar, you can see the message g backwards. For example, 10 (2)
Mes
sagi
ng
Copyright © 2006 Nokia. All rights reserved.
Multimedia message—to send a multimedia message (MMS)E-mail—to send an e-mailIf you have not set up your e-mail account, you are prompted to do so. To start creating the e-mail settings with the mailbox guide, select Start.
2 In the To field, press to select recipients or groups from contacts, or enter the recipient’s phone number or e-mail address. To add a semicolon (;) that separates the recipients, press . You can also copy and paste the number or address from the clipboard.
3 In the Subject field, enter the subject of a multimedia message or e-mail. To change the fields that are visible, select Options > Address fields.
4 In the message field, write the message. To insert a template, select Options > Insert or Insert object > Template.
5 To add a media object to a multimedia message, select Options > Insert object > Image, Sound clip, or Video clip. When sound is added, is shown.
You cannot send vidformat in a multimein which recorded vip. 24.
6 To take a new picturmultimedia messageSound clip, or Videomessage, select SlidTo see what the mulOptions > Preview.
7 To add an attachmeInsert > Image, Souattachments are ind
Tip! To send oththe appropriate ae-mail, if availab
8 To send the message.
Your device supports ththe character limit for aare sent as a series of twprovider may charge acaccents or other marks,language options like Chthe number of charactemessage. In the navigatlength indicator countin

Mes
sagi
ng
40ht © 2006 Nokia. All rights reserved.
ive, retrieve, reply to, and do the following: access point (IAP) correctly. See
ttings correctly. If you select g. main view and have not set up you are prompted to do so. To ail settings with the mailbox e also ‘E-mail’, p. 18.rate e-mail account. Follow the our remote mailbox and Internet
eceive messages
indicates an unread text ultimedia message, data
, and data received through
age, and 1 new message mode. To open the message, essage in Inbox, scroll to it, and
ssage, select Options > Reply
Copyrig
means that you can still add 10 characters for the text to be sent as two messages.
E-mail messages are automatically placed in Outbox before sending. If sending does not succeed, the e-mail is left in the Outbox with the Failed status.
Tip! You can combine images, video, sound, and text to a presentation and send it in a multimedia message. Start to create a multimedia message, and select Options > Create presentation. The option is shown only if MMS creation mode is set to Guided or Free. See ‘Multimedia messages’, p. 17.
Receive MMS and e-mail settingsYou may receive the settings in a message from your network operator or service provider. See ‘Data and settings’, p. 13.
Enter the MMS settings manually:1 Press , select Tools > Settings > Connection >
Access points, and define the settings for a multimedia messaging access point. See ‘Connection’, p. 90.
2 Press , and select Messaging > Options > Settings > Multimedia message> Access point in use and the access point you created as the preferred connection. See also ‘Multimedia messages’, p. 17.
Before you can send, receforward e-mail, you must• Configure an Internet
‘Connection’, p. 90.• Define your e-mail se
Mailbox in the Messayour e-mail account, start creating the e-mguide, select Start. SeYou must have a sepainstructions given by yservice provider (ISP).
Inbox—r
In the Inbox folder, message, an unread mreceived through infraredBluetooth connectivity.
When you receive a messare shown in the standbyselect Show. To open a mpress .
To reply to a received me

41
s many kinds of messages that
—You may receive settings from service provider, or company nt department in a configuration ttings, select Options > Save all.
the information to Contacts, select ss card. Certificates or sound files s card are not saved.
the ringing tone, select Options >
the logo shown in the standby work operator’s own identification,
he invitation, select Options >
the bookmark to the bookmarks ptions > Add to bookmarks. If the access point settings and data, select Options > Save all.
tells you how many new e-mails mailbox. An extended notification nformation.
Mes
sagi
ng
Copyright © 2006 Nokia. All rights reserved.
To print a text or a multimedia message on a compatible basic print profile (BPP) equipped printer with Bluetooth connectivity (such as HP Deskjet 450 Mobile Printer or HP Photosmart 8150), select Options > Print.
Multimedia messages Important: Exercise caution when opening
messages. Multimedia message objects may contain malicious software or otherwise be harmful to your device or PC.
You may receive a notification that a multimedia message is waiting in the multimedia message center. To start a packet data connection to retrieve the message to your device, select Options > Retrieve.
When you open a multimedia message ( ), you may see an image and a message. is shown if sound is included or if video is included. To play the sound or the video, select the indicator.
To see the media objects that have been included in the multimedia message, select Options > Objects.
If the message includes a multimedia presentation, is displayed. To play the presentation, select the indicator.
Data and settingYour device can receivecontain data ( ):
Configuration messageyour network operator, information managememessage. To save the se
Business card—To save Options > Save busineattached to the busines
Ringing tone—To save Save.
Operat. logo—To have mode instead of the netselect Options > Save.
Calen. entry—To save tSave to Calendar.
Web message—To savelist in Services, select Omessage contains both bookmarks, to save the
E-mail notif.—The noteyou have in your remotemay list more detailed i

Mes
sagi
ng
42ht © 2006 Nokia. All rights reserved.
ed e-mail messages offline, e-mail messages offline, your
o the remote mailbox.
essagesptions > Connect to start a mailbox.
e caution when opening es may contain malicious harmful to your device or PC.
en connection to a remote s > Retrieve e-mail and one of
ew e-mail messagesonly the e-mail messages that
ssages from the mailboxsages, select Cancel. e-mail messages, you can
online, or select Options > he connection and view the ne.rs:ffline or online mode) has not device.as been retrieved to your device.
Copyrig
Service messagesService messages ( ) are notifications (for example, news headlines) and may contain a text message or a link. For availability and subscription, contact your service provider.
Mailbox
If you select Mailbox and have not set up your e-mail account, you are prompted to do so. To start creating the e-mail settings with the mailbox guide, select Start. See also ‘E-mail’, p. 18.
When you create a new mailbox, the name you give to the mailbox replaces Mailbox in the Messaging main view. You can have up to six mailboxes.
Open the mailboxWhen you open the mailbox, the device asks if you want to connect to the mailbox (Connect to mailbox?).
To connect to your mailbox and retrieve new e-mail headings or messages, select Yes. When you view messages online, you are continuously connected to a remote mailbox using a data connection. See also ‘Connection’, p. 90.
To view previously retrievselect No. When you viewdevice is not connected t
Retrieve e-mail mIf you are offline, select Oconnection to the remote
Important: Exercismessages. E-mail messagsoftware or otherwise be
1 When you have an opmailbox, select Optionthe following:New—to retrieve all nSelected—to retrieve have been markedAll—to retrieve all meTo stop retrieving mes
2 After you retrieve thecontinue viewing themDisconnect to close te-mail messages offliE-mail status indicato
The new e-mail (obeen retrieved to your
The new e-mail h

43
essagesf an e-mail message from the ng it in the remote mailbox, select lete msg. from:, select Phone
-mail headings in the remote delete the message content, the your device. If you want to remove must first delete the e-mail
ote mailbox, then make a evice to the remote mailbox again
the device and the remote > Delete. In Delete msg. from:, r.
mail is deleted from your device. tion to the remote mailbox, it is om the remote mailbox. If you are l, messages marked to be deleted you have closed the connection to
mail from the device and server, has been marked to be deleted tion ( ), and select Options >
Mes
sagi
ng
Copyright © 2006 Nokia. All rights reserved.
The e-mail message has been read, and it has not been retrieved to your device.
The e-mail message has been read. The e-mail heading has been read and the
message content has been deleted from the device.3 To open an e-mail message, press . If the e-mail
message has not been retrieved and you are offline, you are asked if you want to retrieve this message from the mailbox.
To view e-mail attachments, open a message that has the attachment indicator , and select Options > Attachments. If the attachment has a dimmed indicator, it has not been retrieved to the device; select Options > Retrieve.
To print an e-mail message on a compatible basic print profile (BPP) equipped printer with Bluetooth connectivity (such as HP Deskjet 450 Mobile Printer or HP Photosmart 8150), select Options > Print.
Retrieve e-mail messages automaticallyTo retrieve messages automatically, select Options > E-mail settings > Automatic retrieval > Header retrieval > Always enabled or Only in home net., and define when and how often the messages are retrieved.
Retrieving e-mail messages automatically may increase your call costs due to the data traffic.
Delete e-mail mTo delete the contents odevice while still retainiOptions > Delete. In Deonly.
The device mirrors the emailbox. Although you e-mail heading stays in the heading as well, youmessage from your remconnection from your dto update the status.
To delete an e-mail frommailbox, select Optionsselect Phone and serve
If you are offline, the e-During the next connecautomatically deleted frusing the POP3 protocoare removed only after the remote mailbox.
To cancel deleting an e-scroll to an e-mail thatduring the next connecUndelete.

Mes
sagi
ng
44ht © 2006 Nokia. All rights reserved.
sag. > Options > Settings > he following:
list of all text message centers
use character conversion to when available, select Reduced
ct which message center is used
hether the network sends essages (network service).
how long the message center he first attempt fails (network annot be reached within the ge is deleted from the message
e this option only if you are sure is able to convert text messages Contact your network operator.
he connection used for sending ork or packet data, if supported
nection’, p. 90.
Copyrig
Disconnect from the mailboxWhen you are online, to end the data connection to the remote mailbox, select Options > Disconnect.
View messages on a SIM cardBefore you can view SIM messages, you must copy them to a folder in your device.1 In the Messag. main view, select Options > SIM
messages.2 Select Options > Mark/Unmark > Mark or Mark all to
mark messages.3 Select Options > Copy. A list of folders opens.4 To start copying, select a folder and OK. To view the
messages, open the folder.
Messaging settingsFill in all fields marked with Must be defined or with a red asterisk. Follow the instructions given by your service provider. You may also obtain settings from your service provider in a configuration message.
Some or all message centers or access points may be preset for your device by your service provider or network operator, and you may not be able to change, create, edit, or remove them.
Text messagesPress , and select MesText message and from t
Message centres—View athat have been defined.
Character encoding— Toanother encoding systemsupport.
Msg. centre in use—Seleto deliver text messages.
Receive report—Select wdelivery reports on your m
Message validity—Selectresends your message if tservice). If the recipient cvalidity period, the messacenter.
Message sent as—Changthat your message centerinto these other formats.
Preferred conn.—Select ttext messages: GSM netwby the network. See ‘Con

45
our home network, sending and essages may cost you more.
a retrieval > Always automatic, lly makes an active packet data he message both in and outside
lect whether you want to reject ymous sender.
e whether you want to receive vertisements.
whether you want the status of the wn in the log (network service). ort of a multimedia message that ail address may not be possible.
elect whether you want to deny ivery reports of received
ct how long the message center the first attempt fails (network cannot be reached within the sage is deleted from the message
Mes
sagi
ng
Copyright © 2006 Nokia. All rights reserved.
Reply via same ctr.—Select whether you want the reply message to be sent using the same text message center number (network service).
Multimedia messagesPress , and select Messag. > Options > Settings > Multimedia message and from the following:
Image size—Define the size of the image in a multimedia message: Original (shown only when the MMS creation mode is set to Guided or Free), Small, or Large.
MMS creation mode —If you select Guided, the device informs you if you try to send a message that may not be supported by the recipient. Select Restricted; the device prevents you from sending messages that may not be supported.
Access point in use—Select which access point is used as the preferred connection for the multimedia message center.
Multimedia retrieval—Select how you want to receive multimedia messages. To receive multimedia messages automatically in your home network, select Aut. in home network. Outside your home network, you receive a notification that there is multimedia message that you can retrieve in the multimedia message center.
When you are outside yreceiving multimedia m
If you select Multimediyour device automaticaconnection to retrieve tyour home network.
Allow anon. msgs.—Semessages from an anon
Receive adverts—Definmultimedia message ad
Receive report—Select sent message to be shoReceiving a delivery rephas been sent to an e-m
Deny report sending—Syour device sending delmultimedia messages.
Message validity—Seleresends your message ifservice). If the recipientvalidity period, the mescenter.

Mes
sagi
ng
46ht © 2006 Nokia. All rights reserved.
e e-mail protocol that your ovider recommends. The options is setting can be selected only ged if you have saved or exited s. If you use the POP3 protocol, pdated automatically when you st e-mail messages, you must
ew connection to your mailbox.
the security option used to the remote mailbox.
e connection.
OP3 only)—Use with the POP3 nding of passwords to the
le connecting to the mailbox.
e e-mail you send, select m the following:
r the e-mail address given to you eplies to your messages are sent
er the IP address or host name of s your e-mail. You may only be server of your network operator. ider for more information.
ct an Internet access point (IAP).
Copyrig
E-mailPress , and select Messag. > Options > Settings > E-mail and from the following:
Mailboxes—Select a mailbox to change Connection settings, User settings, Retrieval settings, and Automatic retrieval.
Mailbox in use— Select which mailbox you want to use for sending e-mail.
To create a new mailbox, select Options > New mailbox in the mailbox main view.
Connection settingsTo edit the settings for the e-mail you receive, select Incoming e-mail and from the following:
User name—Enter your user name, given to you by your service provider.
Password—Enter your password. If you leave this field blank, you are prompted for the password when you try to connect to your remote mailbox.
Incoming mail serv.—Enter the IP address or host name of the mail server that receives your e-mail.
Access point in use—Select an Internet access point (IAP). See ‘Connection’, p. 90.
Mailbox name—Enter a name for the mailbox.
Mailbox type—Defines thremote mailbox service prare POP3 and IMAP4. Thonce and cannot be chanfrom the mailbox settinge-mail messages are not uare online. To see the latedisconnect and make a n
Security (ports)—Select secure the connection to
Port—Define a port for th
APOP secure login (for Pprotocol to encrypt the seremote e-mail server whi
To edit the settings for thOutgoing e-mail and fro
My e-mail address—Enteby your service provider. Rto this address.
Outgoing mail serv.—Entthe mail server that sendable to use the outgoing Contact your service prov
Access point in use—SeleSee ‘Connection’, p. 90.

47
fine which parts of the e-mail are , Size limit, Messages (for IMAP4 hs..
ine how many new e-mail to the mailbox.
r IMAP4 only)—Define the folder bscribed.
r IMAP4 only)—Subscribe to other ailbox and retrieve content from
lelect whether you want to receive e-mail is received in your remote
automatic header retrieval cannot me.
t whether you want the device to omatically. You can define when, sages are retrieved.
ges automatically may increase e data traffic.
Mes
sagi
ng
Copyright © 2006 Nokia. All rights reserved.
The settings for User name, Password, Security (ports), and Port are similar to the ones in Incoming e-mail.
User settingsMy name—Enter your own name. Your name replaces your e-mail address in the recipient’s device when the recipient’s device supports this function.
Send message—Define how e-mail is sent from your device. Select Immediately for the device to connect to the mailbox when you select Send message. If you select During next conn., e-mail is sent when the connection to the remote mailbox is available.
Send copy to self—Select whether you want to save a copy of the e-mail to your remote mailbox and to the address defined in My e-mail address.
Include signature—Select whether you want to attach a signature to your e-mail messages.
New e-mail alerts—Select whether you want to receive the new e-mail indications, a tone and a note, when new mail is received to the mailbox.
Default encoding—Select another encoding according to language.
Retrieval settingsE-mail to retrieve—Deretrieved: Headers onlyonly), or Msgs. & attac
Retrieval amount—Defmessages are retrieved
IMAP4 folder path (fopath for folders to be su
Folder subscriptions (fofolders in the remote mthose folders.
Automatic retrievaE-mail notifications—Snotifications when newmailbox.
E-mail notifications andbe active at the same ti
Header retrieval—Selecretrieve new e-mail autand how often, the mes
Retrieving e-mail messayour call costs due to th

Mes
sagi
ng
48ht © 2006 Nokia. All rights reserved.
ect whether you want to save a s, multimedia messages, or he Sent folder.
ne how many sent messages are at a time. The default limit is 20 t is reached, the oldest message
patible memory card is inserted emory where you want to save
emory or Memory card.
Copyrig
Service messagesPress , and select Messaging > Options > Settings > Service message. Select whether you want to receive service messages. If you want to set the device to automatically activate the browser and start a network connection to retrieve content when you receive a service message, select Download messages > Automatically.
Cell broadcastCheck the available topics and related topic numbers with your service provider. Press , and select Messaging > Options > Settings > Cell broadcast and from the following:
Reception—Select whether you want to receive cell broadcast messages.
Language—Select the languages in which you want to receive messages: All, Selected, or Other.
Topic detection—Select whether the device automatically searches for new topic numbers, and saves the new numbers without a name to the topic list.
Other settingsPress , and select Messaging > Options > Settings > Other and from the following:
Save sent messages—Selcopy of the text messagee-mail that you send to t
No. of saved msgs.—Defisaved to the Sent folder messages. When the limiis deleted.
Memory in use—If a comin the device, select the myour messages: Phone m

Mak
e ca
lls
49ht © 2006 Nokia. All rights reserved.
cts from your SIM card to make a call this way. See ‘Copy
x (network service), press and ode. See also ‘Call divert’, p. 95.
hone number of your voice select Tools > Voic. mail > mber. Enter the number ervice provider), and select OK.
umber in the standby mode, umber you want, and press
ce callt participant.her participant, select Options > ll is automatically put on hold.answered, to join the first ference call, select Options >
o the call, select Options > New ference > Add to conference.
Copyrig
Make callsVoice calls
Tip! To increase or decrease the volume during a call, press or . If you have set the volume to Mute, you cannot adjust the volume with the or keys.
To adjust the volume, select Unmute, and press or .
1 In the standby mode, enter the phone number, including the area code. To remove a number, press . For international calls, press twice for the + character (replaces the international access code), and enter the country code, area code (omit the leading zero if necessary), and phone number.
2 Press to call the number.3 Press to end the call (or to cancel the call attempt).
Pressing always ends a call, even if another application is active. To end a call if the cover is open, and a compatible headset is not connected, close the cover.
To make a call from Contacts, press , and select Contacts. Scroll to the desired name, or enter the first letters of the name to the search field. Matching contacts are listed. To call, press . Select the call type Voice call.
You must copy the contaContacts before you can contacts’, p. 60.
To call your voice mailbohold in the standby m
Tip! To change the pmailbox, press , andOptions > Change nu(obtained from your s
To call a recently dialed npress . Scroll to the nto call the number.
Make a conferen1 Make a call to the firs2 To make a call to anot
New call. The first ca3 When the new call is
participant in the conConference.To add a new person tcall > Options > Con

50
hanced voice commands. nds are not dependent on the ser does not record voice tags in vice creates a voice tag for the
compares the spoken voice tag to in the device adapts to the main
e the voice commands better.
ct is the name or nickname that is rd. To listen to the synthesized ct card, and select Options > Play
voice tag tags may be difficult in a noisy g an emergency, so you should not e dialing in all circumstances.
ing, the loudspeaker is in use. Hold tance away when you say the voice
, press and hold the voice key. If patible headset with the headset he headset key to start voice
Mak
e ca
lls
Copyright © 2006 Nokia. All rights reserved.
Your device supports conference calls between a maximum of six participants, including yourself.To have a private conversation with one of the participants, select Options > Conference > Private. Select a participant, and select Private. The conference call is put on hold on your device. The other participants can still continue the conference call. Once you have finished the private conversation, select Options > Add to conference to return to the conference call.To drop a participant, select Options > Conference > Drop participant, scroll to the participant, and select Drop.
4 To end the active conference call, press .
Speed dial a phone numberTo activate speed dialing, press , and select Tools > Settings > Call > Speed dialling > On.
To assign a phone number to one of the speed dialing keys ( — ), press , and select Tools > Spd. dial. Scroll to the key to which you want to assign the phone number, and select Options > Assign. is reserved for the voice mailbox.
To call in the standby mode, press the speed dial key and .
Voice dialingYour device supports enEnhanced voice commaspeaker’s voice, so the uadvance. Instead, the deentries in contacts, andit. The voice recognitionuser’s voice to recogniz
The voice tag for a contasaved on the contact cavoice tag, open a contavoice tag.
Make a call with aNote: Using voice
environment or durinrely solely upon voic
When you use voice dialthe device at a short distag.1 To start voice dialing
you are using a comkey, press and hold tdialing.

Mak
e ca
lls
51ht © 2006 Nokia. All rights reserved.
evice or ISDN client. Video calls ere is another voice, video, or
video (the recipient is not ork is not transmitting it).
eo sending from your device. To , see ‘Call settings’, p. 89.pen hone y cts
>
fter
ake a ll is not successful (for example, rted by the network, or the mpatible), you are asked if you or send a text message instead.
en you see two video images and e loudspeaker. The call recipient
Copyrig
2 A short tone is played, and Speak now is displayed. Say clearly the name or nickname that is saved on the contact card.
3 The device plays a synthesized voice tag for the recognized contact in the selected device language, and displays the name and number. After a timeout of 1.5 seconds, the device dials the number.If the recognized contact was not correct, select Next to view a list of other matches or Quit to cancel voice dialing.
If several numbers are saved under the name, the device selects the default number, if it has been set. Otherwise, the device selects the first available number of the following: Mobile, Mobile (home), Mobile (business), Telephone, Tel. (home), and Tel. (business).
Video calls (network service)When you make a video call, you can see a real-time, two-way video between you and the recipient of the call. The live video image, or video image captured by the camera in your device is shown to the video call recipient.
To be able to make a video call, you must have a USIM card and be in the coverage of a UMTS network. For availability of and subscription to video call services, contact your network operator or service provider. A video call can only be made between two parties. The video call can be made
to a compatible mobile dcannot be made while thdata call active.
Icons: You are not receiving
sending video or the netw You have denied vid
send a still image instead1 To start a video call, o
the cover, enter the pnumber in the standbmode, or select Contaand a contact.
2 Select Options > CallVideo call.
3 Activate the camera athe call recipient has answered the call.
Starting a video call may twhile. Waiting for videoimage is shown. If the cavideo calls are not supporeceiving device is not cowant to try a normal call
The video call is active whhear the sound through th

52
(network service)nd live video or a video clip from
nother compatible mobile device ly invite a recipient to view the live want to share. Sharing begins recipient accepts the invitation, rrect mode. See ‘Share video’, p. 12.
quirements requires a UMTS connection, your ring depends on 3G network r service provider for questions
ity and fees associated with using Video sharing you must do the
ice is set up for person-to-person ttings’, p.12.active UMTS connection and are rk coverage. See ‘Settings’, p. 12. If session while you are within
rage and a handover to GSM ession is discontinued, but your
. sender and recipient are S network. If you invite someone
and that person has their device
Mak
e ca
lls
Copyright © 2006 Nokia. All rights reserved.
may deny video sending ( ), in which case you hear the sound and may see a still image or a grey background graphic.
Tip! To increase or decrease the volume during a call, scroll left or right.
To change between showing video or hearing only sound, select Enable or Disable > Sending video, Sending audio or Sending audio & video.
To send live video image of yourself, select Use second. cam. to switch on the secondary camera. To show the other party the view visible from the back camera, select Use main camera.
To zoom your own image, select Zoom in or Zoom out. The zoom indicator is shown on the top of the display.
To switch the places of the sent video images on the display, select Change image order.
Note: Even if you have denied video sending during a video call, the call is charged as a video call. Check the pricing with your network operator or service provider.
To end the video call, press .
Video sharingUse Video sharing to seyour mobile device to aduring a voice call. Simpvideo or a video clip youautomatically when theand you activate the co
Video sharing reBecause Video sharingability to use Video shaavailability. Contact youabout network availabilthis application. To use following:• Ensure that your dev
connections. See ‘Se• Ensure you have an
within UMTS netwoyou start the sharingUMTS network coveoccurs, the sharing svoice call continues
• Ensure that both theregistered to the UTMto a sharing session

Mak
e ca
lls
53ht © 2006 Nokia. All rights reserved.
gs
nection, do the following:rovider to establish an use the UMTS network.e UMTS access point connection d properly. For help, see
on, the recipient must install ure the required settings on their e recipient must both be
before you can start sharing.
s, you must be registered to the TS connection, and be within
ge.
ctive, select Options > Share
nvitation to the SIP address you tact card of the recipient. eral SIP addresses in the contact dress to which you want to send lect to send the invitation.
Copyrig
turned off, or that person is not within UMTS network coverage, they do not know that you are sending an invitation. However, you receive an error message that the recipient cannot accept the invitation.
SettingsPerson-to-person connection settings
A person-to-person connection is also known as a session initiation protocol (SIP) connection. The SIP profile settings must be configured in your device before you can use Video sharing. Setting up a SIP profile allows you to establish a live person-to-person connection to another compatible device. The SIP profile must also be established to receive a sharing session.
Ask your network operator or service provider for the SIP profile settings, and save them in your device. Your network operator or service provider may send you the settings over the air.
If you know a recipient’s SIP address, you can enter it on your contact card for that person. Select Contacts from the main menu, and open the contact card (or start a new card for that person). Select Options > Add detail > Web address. Enter the SIP address in the following format: sip:username@domainname (you can use an IP address instead of a domain name).
UMTS connection settin
To set up your UMTS con• Contact your service p
agreement for you to • Ensure that your devic
settings are configure‘Connection’, p. 90.
Share videoTo receive a sharing sessiVideo sharing and configmobile device. You and thregistered to the service
To receive share invitationservice, have an active UMthe UMTS network covera
Live video1 When a voice call is a
video > Live.2 The device sends the i
have added to the conIf the recipient has sevcard, select the SIP adthe invitation, and Se

54
the recipient is not available, enter OK to send the invitation.matically when the recipient n.
se the sharing session. Select to resume sharing.ssion, select Stop. To end the voice
tionou a share invitation, an invitation owing the sender’s name or SIP s not set to Silent, it rings when n.
share invitation and you are not overage, you will not know that on.
vitation, select from the following: sharing session. If the sender ideo, activate the camera.
e invitation. The sender receives a jected the invitation. You can also the sharing session and disconnect
on, select Stop. If you share a video sharing ended is displayed.
Mak
e ca
lls
Copyright © 2006 Nokia. All rights reserved.
If the SIP address of the recipient is not available, enter a SIP address. Select OK to send the invitation.
3 Sharing begins automatically when the recipient accepts the invitation.The loudspeaker is active. You can also use a compatible headset to continue your voice call while you share live video.
4 Select Pause to pause the sharing session. Select Continue to resume sharing.
5 To end the sharing session, select Stop. To end the voice call, press .
Video clip1 When a voice call is active, select Options > Share
video > Clip.A list of video clips opens.
2 Select a video clip you want to share. A preview view opens. To preview the clip, select Options > Play.
3 Select Options > Invite.You may need to convert the video clip into a suitable format to be able to share it. Clip must be converted for sharing. Continue? appears. Select OK.The device sends the invitation to the SIP address you have added to the contact card of the recipient. In case the recipient has several SIP addresses in the contact card, select the SIP address to which you want to send the invitation, and Select to send the invitation.
If the SIP address of a SIP address. Select
4 Sharing begins autoaccepts the invitatio
5 Select Pause to pauOptions > Continue
6 To end the sharing secall, press .
Accept an invitaWhen someone sends ymessage is displayed shaddress. If your device iyou receive an invitatio
If someone sends you awithin UMTS network cyou received an invitati
When you receive an in• Accept to begin the
wants to share live v• Reject to decline th
message that you repress to declinethe voice call.
To end the sharing sessiclip, select Exit. Video

Mak
e ca
lls
55ht © 2006 Nokia. All rights reserved.
a video call, is displayed.he video call. Allow video image is shown.image being captured by the is shown to the caller. If you ng, video sending is not ar a sound. A grey screen is video. To replace this grey screen ‘Call settings’, p. 89.press .
work service)ile you have another call in ated Call waiting in Tools > iting.
evice tones for different nts (for example, when you want t), see ‘Profiles—set tones’, p. 78.
ll, press . The first call is put
o calls, select Swap. To connect on hold with an active call and m the calls, select Options >
Copyrig
Answer or reject a callTo answer the call if the cover is open, press . If the cover is closed, open the cover, and the call will be answered automatically. See ‘Cover display settings’, p. 89.
To mute the ringing tone when a call comes in, select Silence. If the cover is closed, press the cover key to select Silence.
Tip! If a compatible headset is connected to the device, to answer and end a call, press the headset key.
If the cover is open, and you do not want to answer a call, press or close the cover to reject it, if a compatible headset is not connected. If the cover is closed, press the cover key once to silence the ringing, and again to reject the call. The caller hears a line busy tone. If you have activated the Call divert > If busy function to divert calls, rejecting an incoming call also diverts the call. See ‘Call divert’, p. 95.
When you reject an incoming call, you can also send a text message to the caller informing why you cannot answer the call. Select Options > Send text message. You can edit the text before sending it. To set up this option and write a standard text message, see ‘Call settings’, p. 89.
If you answer a voice call during a video call, the video call is dropped. Call waiting is not available during a video call.
Answer or reject When a video call arrives1 Press to answer t
to be sent to caller? If you select Yes, the camera in your deviceselect No, or do nothiactivated, and you heshown in place of the with a still image, see
2 To end the video call,
Call waiting (netYou can answer a call whprogress if you have activSettings > Call > Call wa
Tip! To change the denvironments and eveyour device to be silen
To answer the waiting caon hold.
To switch between the twan incoming call or a callto disconnect yourself fro

56
ctivate loudsp., you can close the the call.
a video call video call for the following ble, Activate handset (if a h Bluetooth connectivity is dsp., or Activate handsfree (fold a compatible headset with is attached), End active call, oom in/Zoom out, and Help.
umbers of missed, received, and d select My own > Log > Recent
rs missed and received calls only if ese functions, the device is twork coverage.
a note in the standby mode about how to access the list of missed
roll to a name or number, and press
Mak
e ca
lls
Copyright © 2006 Nokia. All rights reserved.
Transfer . To end the active call, press . To end both calls, select Options > End all calls.
Options during a voice callMany of the options that you can use during a voice call are network services. Select Options during a call for some of the following options: Mute or Unmute, Answer, Reject, Swap, Hold or Unhold, Activate handset, Activate loudsp., or Activate handsfree (if a compatible headset with Bluetooth connectivity is attached), End active call or End all calls, New call, Conference, and Transfer. Select from the following:
Replace—To end an active call and replace it by answering the waiting call.
Send MMS (in UMTS networks only)—To send an image or a video in a multimedia message to the other participant of the call. You can edit the message and change the recipient before sending. Press to send the file to a compatible device (network service).
Send DTMF—To send DTMF tone strings, for example, a password. Enter the DTMF string or search for it in Contacts. To enter a wait character (w) or a pause character (p), press repeatedly. Select OK to send the tone.
Tip! You can add DTMF tones to the Phone number or DTMF fields in a contact card.
Tip! If you select Acover and continue
Options during Select Options during aoptions: Enable or Disacompatible headset witattached), Activate louopen mode only, and if Bluetooth connectivity Change image order, Z
Log
Recent calls To monitor the phone ndialed calls, press , ancalls. The device registethe network supports thswitched on, and has ne
Tip! When you seemissed calls, select Scalls. To call back, sc
.

Mak
e ca
lls
57ht © 2006 Nokia. All rights reserved.
ions by the amount of data sent
unication events
ion events
video ata the y to
each u can t e of
cess
ne new contact cards based on the
tion of a voice call on the main e call, select Options > Settings > Yes.
Copyrig
To clear all recent call lists, select Options > Clear recent calls in the recent calls main view. To clear one of the call registers, open the register you want to erase, and select Options > Clear list. To clear an individual event, open a register, scroll to the event, and press .
Call duration To monitor the approximate duration of your incoming and outgoing calls, press , and select My own > Log > Call duration.
To set the display of the call duration while a call is active, select My own > Log > Options > Settings > Show call duration > Yes or No.
Note: The actual time invoiced for calls by your service provider may vary, depending on network features, rounding off for billing, and so forth.
To clear call duration timers, select Options > Clear timers. For this you need the lock code, see ‘Security’, p.93 and ‘Phone and SIM’, p. 93.
Packet dataTo check the amount of data sent and received during packet data connections, press , and select My own > Log > Packet data. For example, you may be charged for
your packet data connectand received.
Monitor all commIcons in Log:
Incoming Outgoing Missed communicat
To monitor all voice and calls, text messages, or dconnections registered bydevice, press , select Mown > Log, and press open the general log. Forcommunication event, yosee the sender or recipienname, phone number, namthe service provider, or acpoint. You can filter the general log to view just otype of event and create log information.
Tip! To see the duradisplay during an activ> Show call duration

58
ta connection lasts, scroll to an vent indicated by Pack., and select .
Mak
e ca
lls
Copyright © 2006 Nokia. All rights reserved.
Tip! To view a list of sent messages, press , and select Messaging > Sent.
Subevents, such as a text message sent in more than one part and packet data connections, are logged as one communication event. Connections to your mailbox, multimedia messaging center, or Web pages are shown as packet data connections.
To filter the log, select Options > Filter and a filter.
To erase the contents of the log, recent calls register, and messaging delivery reports permanently, select Options > Clear log. Select Yes to confirm. To remove a single event from the log, press .
To set the Log duration, select Options > Settings > Log duration. The log events remain in the device memory for a set number of days after which they are automatically erased to free memory. If you select No log, all the log contents, recent calls register, and messaging delivery reports are permanently deleted.
To view the details of a communication event, in the general log view scroll to an event, and press .
Tip! In the details view, to copy a phone number to the clipboard and paste it to a text message, select Options > Copy Number.
Packet data counter and connection timer: To view how much data, measured in kilobytes, is transferred and how
long a certain packet daincoming or outgoing eOptions > View details

Cont
acts
(ph
oneb
ook)
59ht © 2006 Nokia. All rights reserved.
contact cards, use Nokia ble in Nokia PC Suite.
ail image to a contact card, open ct Options > Edit > Options > bnail image is shown when the
a quick way to call frequently n assign speed dialing keys to See ‘Speed dial a phone number’,
information, select the card you ptions > Send > Via text
edia, Via Bluetooth, or Via ing’, p. 36 and ‘Send data’, p. 82.
up, select Options > Add to have created a group). See . 10.
ntacts, groups, and the available ct Options > Contacts info.
Copyrig
Contacts (phonebook)Press , and select Contacts. In Contacts you can add a personal ringing tone or a thumbnail image to a contact card. You can also create contact groups, that allow you to send text messages or e-mail to many recipients at the same time. You can add received contact information (business cards) to contacts. See ‘Data and settings’, p. 41. Contact information can only be sent to or received from compatible devices.
Save names and numbers1 Select Options > New contact.2 Fill in the fields that you want, and select Done.
To edit contact cards in Contacts, scroll to the contact card you want to edit, and select Options > Edit.
Tip! To print contact cards on a compatible basic print profile (BPP) equipped printer with Bluetooth connectivity (such as HP Deskjet 450 Mobile Printer or HP Photosmart 8150), select Options > Print.
To delete a contact card in Contacts, select a card, and press . To delete several contact cards at the same time, press and to mark the contacts, and press to delete.
Tip! To add and editContacts Editor availa
To attach a small thumbnthe contact card, and seleAdd thumbnail. The thumcontact calls.
Tip! Speed dialing isused numbers. You caeight phone numbers. p. 50.
Tip! To send contactwant to send. Select Omessage, Via multiminfrared. See ‘Messag
To add a contact to a grogroup: (shown only if you‘Create contact groups’, p
To view the amount of comemory in Contacts, sele

60
ronize your contacts to a Nokia PC Suite.
nd servicesmation on using SIM card services, endor. This may be the service tor, or other vendor.
ntacts > Options > SIM ry to see the names and numbers
In the SIM directory you can add, contacts, and you can make calls.
dialing numbers, select Options > ialling contacts. This setting is by your SIM card.
ur device to selected phone s > Activ. fixed dialling. To add ed dialing list, select Options > need the PIN2 code for these
lling, packet data connections are en sending text messages over a . In this case, the message center nt’s phone number must be ialing list.
Cont
acts
(ph
oneb
ook)
Copyright © 2006 Nokia. All rights reserved.
Default numbers and addressesYou can assign default numbers or addresses to a contact card. In this way if a contact has several numbers or addresses, you can easily call or send a message to the contact to a certain number or address. The default number is also used in voice dialing.1 In the address book, select a contact, and press .2 Select Options > Defaults.3 Select a default to which you want to add a number or
an address, and select Assign.4 Select a number or an address you want to set as a
default.
The default number or address is underlined in the contact card.
Copy contactsTo copy names and numbers from a SIM card to your device, press , and select Contacts > Options > SIM contacts > SIM directory. Select the names you want to copy and Options > Copy to Contacts.
To copy contacts to your SIM card, press , and select Contacts. Select the names you want to copy and Options > Copy to SIM direct.; or select Options > Copy > To SIM directory. Only the contact card fields supported by your SIM card are copied.
Tip! You can synchcompatible PC with
SIM directory aFor availability and inforcontact your SIM card vprovider, network opera
Press , and select Cocontacts > SIM directostored on the SIM card.edit, or copy numbers to
To view the list of fixedSIM contacts > Fixed donly shown if supported
To restrict calls from yonumbers, select Optionnew numbers to the fixNew SIM contact. Youfunctions.
When you use Fixed dianot possible, except whpacket data connectionnumber and the recipieincluded on the fixed d

Cont
acts
(ph
oneb
ook)
61ht © 2006 Nokia. All rights reserved.
d press to mark it. To add time, repeat this action on all
t to add.contacts to the group.
t Options > Rename, enter the .
from a groupn the group you want to modify.and select Options > Remove
the contact from the group.ch groups a contact belongs, nd select Options > Belongs to
Copyrig
When fixed dialing is activated, calls may be possible to the official emergency number programmed into your device.
Add ringing tones for contactsWhen a contact or group member calls you, the device plays the chosen ringing tone (if the caller’s phone number is sent with the call and your device recognizes it).1 Press to open a contact card or go to the groups list,
and select a contact group.2 Select Options > Ringing tone. A list of ringing tones
opens.3 Select the ringing tone you want to use for the
individual contact or the selected group.
To remove the ringing tone, select Default tone from the list of ringing tones.
Create contact groups1 In Contacts, press to open the groups list.2 Select Options > New group. 3 Write a name for the group or use the default name
Group %N, and select OK. 4 Open the group, and select Options > Add members.
5 Scroll to a contact, anmultiple members at athe contacts you wan
6 Select OK to add the
To rename a group, selecnew name, and select OK
Remove members1 In the groups list, ope2 Scroll to the contact,
from group.3 Select Yes to remove
Tip! To check to whiscroll to the contact, agroups.

Serv
ices
62ht © 2006 Nokia. All rights reserved.
s > Settings > Connection > fine the settings for an access uctions given to you by your Connection’, p. 90.ervices > Options > Bookmark mark. Write a name for the ress of the page defined for the
ess point as the default access > Settings > Access point.
ws when you open Services.
e bookmarks loaded for sites not ia does not warrant or endorse
to access them, you should take security or content as you would
page defined for the default
Copyrig
ServicesVarious service providers maintain pages specifically designed for mobile devices. These pages use the wireless markup language (WML), extensible hypertext markup language (XHTML), or hypertext markup language (HTML).
Check the availability of services, pricing, and fees with your network operator or service provider. Service providers will also give you instructions on how to use their services.
Press , and select Services.
Shortcut: To start a connection, press and hold in the standby mode.
Services access pointTo access pages, you need service settings for the page that you want to use. You may receive the settings in a special text message from the network operator or service provider that offers the Web page. See ‘Data and settings’, p. 41. For more information, contact your network operator or service provider.
Tip! Settings may be available on the Web site of a network operator or service provider.
Enter settings manually1 Press , select Tool
Access points, and depoint. Follow the instrservice provider. See ‘
2 Press , and select Smanager > Add bookbookmark and the addcurrent access point.
3 To set the created accpoint, select Options
Bookmarks vieThe bookmarks view open
Your device may have somaffiliated with Nokia. Nokthese sites. If you choosethe same precautions for with any Internet site.
indicates the startingaccess point.
63
links appear underlined in blue nks in purple. Images that act as around them.
selections, press .
to jump to the end of a page, and the beginning of a page.
ge while browsing, select Back. If lect Options > Navigation w a chronological list of the pages wsing session.
ntent from the server, select options > Reload.
ect Options > Save as bookmark.
bookmarks view while browsing, o return to the browser view, select age.
wsing, select Options > Advanced ou can save pages to the device e memory card (if inserted), and ne. To access the pages later, press ew to open the Saved pages view.
ress, select Options > Navigation ddress.
Serv
ices
Copyright © 2006 Nokia. All rights reserved.
Connection securityIf the security indicator is displayed during a connection, the data transmission between the device and the Internet gateway or server is encrypted.
The security icon does not indicate that the data transmission between the gateway and the content server (or place where the requested resource is stored) is secure. The service provider secures the data transmission between the gateway and the content server.
Select Options > Details > Security to view details about the connection, encryption status, and information about server and user authentication.
Security certificates may be required for some services, such as banking services. For more information, contact your service provider. See also ‘Certif. management’, p. 94.
Browse Important: Use only services that you trust and that
offer adequate security and protection against harmful software.
To download a page, select a bookmark, or enter the address in the field ( ).
On a browser page, newand previously visited lilinks have a blue border
To open links and make
Shortcut: Press press to jump to
To go to the previous paBack is not available, seoptions > History to vieyou visited during a bro
To retrieve the latest coOptions > Navigation
To save a bookmark, sel
Tip! To access the press and hold . TOptions > Back to p
To save a page while brooptions > Save page. Ymemory or a compatiblbrowse them when offli
in the bookmarks vi
To enter a new URL addoptions > Go to web a

Serv
ices
64ht © 2006 Nokia. All rights reserved.
stall and use applications and ces that offer adequate security rmful software.
, scroll to the link, and press . option to purchase the item.information provided.oad, select Accept. To cancel the cel.
ond view the browser page offline, d options > Disconnect. To end
the browser, selectOptions >
es you have accessed are stored he device.
tion that is used to store data ried to access or have accessed requiring passwords, empty the information or services you have e cache. To empty the cache, ed options > Clear cache.
Copyrig
You can download files that cannot be shown on the browser page, such as ringing tones, images, operator logos, themes, and video clips. To download an item, scroll to the link, and press .
When you start a download, a list of ongoing, paused, and completed downloads from the current browsing session is displayed. To view the list, select Options > Tools > Downloads. In the list, scroll to an item, and select Options to pause, resume, or cancel ongoing downloads, or open, save, or delete completed downloads.
Copyright protections may prevent some images, music (including ringing tones), and other content from being copied, modified, transferred or forwarded.
Important: Only install and use applications and other software from sources that offer adequate security and protection against harmful software.
Download and purchase itemsYou can download items such as ringing tones, images, operator logos, themes, and video clips. These items can be provided free, or you can purchase them. Downloaded items are handled by the respective applications in your device. For example, a downloaded photo can be saved in Gallery.
Important: Only inother software from sourand protection against ha
1 To download the item2 Select the appropriate3 Carefully read all the
To continue the downldownload, select Can
End a connectiTo end the connection anselect Options > Advancethe connection and closeExit.
Empty the cacheThe information or servicin the cache memory of t
A cache is a memory locatemporarily. If you have tconfidential information cache after each use. The accessed are stored in thselect Options > Advanc

65
e browser to play sounds s, select a volume level.
the page layout shown as hen in Small screen mode, select t want external cascading style d, select By speed.
ble the receiving and sending of
ble or disable the use of scripts.
e or show security notifications.
elect whether you want to confirm touch tones during a voice call. See oice call’, p. 56.
Serv
ices
Copyright © 2006 Nokia. All rights reserved.
Services settingsSelect Options > Settings and from the following:
Access point—Change the default access point. See ‘Connection’, p. 90. Some or all access points may be preset for your device by your service provider or network operator, and you may not be able to change, create, edit, or remove them.
Load imgs. & sounds—Select whether you want to load images while browsing. If you select No, to load images later during browsing, select Options > Show images.
Font size—Select the text size.
Default encoding—If text characters are not shown correctly, you can select another encoding according to language.
Auto. bookmarks—Enable or disable automatic bookmark collecting. If you want to continue collecting automatic bookmarks but hide the folder from the bookmarks view, select Hide folder.
Screen size—Select what is shown when you are browsing: Select. keys only or Full screen.
Homepage—Define the home page.
Search page—Define a Web page that is downloaded when you select Navigation options > Open search page in the bookmarks view, or when browsing.
Volume—If you want thembedded on Web page
Rendering—If you wantaccurately as possible wBy quality. If you do nosheets to be downloade
Cookies—Enable or disacookies.
Java/ECMA script—Ena
Security warnings—Hid
Conf. DTMF sending—Sbefore the device sends also ‘Options during a v

Cale
ndar
66ht © 2006 Nokia. All rights reserved.
of a task that needs doing by a
t an alarm, select Alarm > On, ime and Alarm date.or a meeting, select Options >
ct Done.
s for a note, select Silence to m tone. The reminder text stays calendar alarm, select Stop. To elect Snooze.
nize your calendar with a okia PC Suite. When creating a desired Synchronisation
Settings to change the starting view that is shown when you
that have calendar entries are gle in the right bottom corner. In
Copyrig
CalendarUse Calendar to remind you of meetings, anniversaries, and to keep track of your tasks and other notes.
Create calendar entries Shortcut: In the day, week, or month calendar view,
press any key ( — ). An appointment entry opens, and the characters you enter are added to the Subject field. In the to-do view, a to-do note entry opens.
1 Press , and select Calendar > Options > New entry and one of the following:Meeting—to remind you of an appointment that has a specific date and timeMemo—to write a general entry for a dayAnniversary—to remind you of birthdays or special dates (entries are repeated every year)
To-do—to remind youspecific date
2 Fill in the fields. To seand enter the Alarm tTo add a description fAdd description.
3 To save the entry, sele
When the calendar alarmturn off the calendar alaron the screen. To end theset the alarm to snooze, s
Tip! You can synchrocompatible PC using Ncalendar entry, set theoption.
Calendar views Tip! Select Options >
day of the week or theopen the calendar.
In the month view, datesmarked with a small trian

67
ings alarm tone, Default view, Week w title, select Options > Settings.
Cale
ndar
Copyright © 2006 Nokia. All rights reserved.
the week view, memos and anniversaries are placed before 8 a.m. To switch between the month view, week view, day view, and to-do view, press .
To go to a certain date, select Options > Go to date. To jump to today, press .
To send a calendar note to a compatible device, select Options > Send.
To print calendar entries on a compatible basic print profile (BPP) equipped printer with Bluetooth connectivity (such as HP Deskjet 450 Mobile Printer or HP Photosmart 8150), select Options > Print.
Manage your calendar entriesDeleting past entries in Calendar saves space in your device memory.
To delete more than one event at a time, go to the month view, and select Options > Delete entry > Before date or All entries.
To mark a task as completed, scroll to it in the to-do view, and select Options > Mark as done.
Calendar settTo modify the Calendarstarts on, and Week vie

My
own
68ht © 2006 Nokia. All rights reserved.
c player, the previously played ed. To view the music library, ibrary and the desired song list. s in the view, select Options >
o change between play and .
To fast forward or rewind, press tart playing the next or previous
laylist, select Options > Add to ew playlist, or select a saved
ss or .
play and normal play mode, play. To select whether playing aylist or restarts from its > Loop.
—Repeat; —Random; m; and —Loudspeaker muted.
Copyrig
My ownMusic player
Press , and select My own > Music player. With the music player, you can play music files and create and listen to playlists.
Warning: Listen to music at a moderate level. Continuous exposure to high volume may damage your hearing. Do not hold the device near your ear when the loudspeaker is in use, because the volume may be extremely loud.
Add musicWhen you open the music player for the first time, the player searches the device memory for music files to create a music library.
After you add or remove music files in the device, update your music library. Select Options > Music library > Options > Update Music library.
Tip! You can transfer music files from your device to your compatible memory card (if inserted) with Nokia Audio Manager available in Nokia PC Suite.
Play musicWhen you open the musitrack or playlist is displayselect Options > Music lTo start playing the songPlay.
When a song is playing, tpause, press and
To stop a song, press .and hold or . To ssong, press or .
To save the song list as a ptrack list, and create a nplaylist.
To adjust the volume, pre
To select between randomselect Options > Randomstops at the end of the plbeginning, select Options
Icons in Music player: — Repeat and rando
69
adio (network
Radio application as a traditional c tuning and saved stations. If you fer Visual Radio service, you can on the display related to the radio io service uses packet data an listen to the FM radio while
s.
service, the following conditions
switched on.e a valid SIM card inserted.n to and the network operator you is service.oint must be defined to access the io server. See ‘Access points’, p. 91.ve the correct Visual Radio service l Radio service enabled. See ‘Saved
ss to the Visual Radio service, the ions in your area may not support
Radio service may not be available es.
My
own
Copyright © 2006 Nokia. All rights reserved.
Tip! To leave the application open and music playing in the background, press to return to the standby mode. To return to the application, press , and select Music player.
To open your Web bookmarks for downloading music, select Options > Track downloads.
To return to the standby mode and leave the music playing in the background, select Options > Play in background.
Music libraryTo view the music library, select Options > Music library. All tracks lists all music. To view sorted songs, select Albums, Artists, Genres, or Composers. The album, artist, genre, and composer information is collected from the ID3 or M4A tags of the song files, if available.
To add songs, albums, artists, genres, or composers to a playlist, select the items and Options > Add to track list. You can create a new playlist or add to an existing one.
To view playlists, select Track lists. To create a new playlist, select Options > New track list. When viewing a playlist you have created yourself, to add more songs, select Options > Add tracks.
To delete a playlist, press . This only deletes the playlist, not the music files.
Visual Rservice)
You can use the Visual FM radio with automatitune to stations that ofview visual informationprogram. The Visual Rad(network service). You cusing other application
To use the Visual Radioare required:• The device must be • The device must hav• The station you liste
use must support th• An Internet access p
operator’s visual rad• The station must ha
ID defined and Visuastations’, p. 11.
If you do not have acceoperators and radio statVisual Radio. The Visualin all areas and countri

My
own
70ht © 2006 Nokia. All rights reserved.
iohe radio broadcast depends on station in that particular area.
adset to the device. The lead of the radio antenna, so let it hang ct My own > Radio.
select or . Searching und. To change the frequency
> Manual tuning.
ed or
n
y.
ss e er, e
based on location, select ory (network service).
station to your station list, ation. To open the list of your
Copyrig
The FM radio depends on an antenna other than the wireless device antenna. A compatible headset or enhancement needs to be attached to the device for the FM radio to function properly.
You can listen to the radio with the built-in loudspeaker or a compatible headset. When using the loudspeaker, keep the headset plugged in the device. The lead of the headset functions as the antenna of the radio, so let it hang freely.
Warning: Listen to music at a moderate level. Continuous exposure to high volume may damage your hearing. Do not hold the device near your ear when the loudspeaker is in use, because the volume may be extremely loud.
You can make a call or answer an incoming call while listening to the radio. The radio is turned off when there is an active call. When the call is finished, turn the radio back on manually.
The radio selects the used frequency band based on the country information received from the network.
Visual Radio can be used for listening when the device cover is closed. Channel information may be displayed on the cover display. To mute or unmute the radio, press the cover key.
Listen to the radNote that the quality of tthe coverage of the radio
Connect a compatible hethe headset functions as freely. Press , and sele
To start a station search, stops when a station is fomanually, select Options
If you have previously savradio stations, select
to go to the next orprevious saved station. Toselect the memory locatioof a station press the corresponding number ke
To adjust the volume, pre or . To listen to th
radio using the loudspeakselect Options > Activatloudspeaker.
To view available stationsOptions > Station direct
To save the current tunedselect Options > Save st

71
ion, select Options > Station > e visual content for a station with ect Options > Station > Start
ls, select Options > Station > Edit.
gs and from the following:
ct a tone to play when the
have the Visual Radio service start select a saved station that offers s.
the access point used for the data need an access point to use the ry FM radio.
messaging rk service)y own > IM.
allows you to converse with other ssages and join discussion forums
ic topics. Various service providers t you can log in to after you
My
own
Copyright © 2006 Nokia. All rights reserved.
saved stations, select Options > Stations. See ‘Saved stations’, p. 11.
To return to the standby mode and leave the FM radio playing in the background, select Options > Play in background.
View visual contentTo check availability and costs, and to subscribe to the service, contact your network operator or service provider.
To view available visual content for a tuned station, select or Options > Station > Start visual service. If the
visual service ID has not been saved for the station, enter it, or select Retrieve to search for it in the station directory (network service).
When the connection to the visual service is established, the display shows the current visual content designed by the content provider.
To adjust display settings for the visual content view, select Options > Display settings > Lighting or Power saver time-out.
Saved stationsYou can save up to 20 radio stations in Visual Radio. To open your station list, select Options > Stations.
To listen to a saved statListen. To view availablVisual Radio service, selvisual service.
To change station detai
SettingsSelect Options > Settin
Start-up tone—To seleapplication is started.
Auto-start service—Toautomatically when youvisual service, select Ye
Access point—To selectconnection. You do notapplication as an ordina
Instant(netwo
Press , and select M
Instant messaging (IM) people using instant me(IM groups) with specifmaintain IM servers tha

My
own
72ht © 2006 Nokia. All rights reserved.
ions > Logout.
ettingss > IM settings and from the
only if IM groups are supported nickname, select Yes.
hers to see if you are online,
allow messages from all, select
To allow invitations only from M contacts only. IM invitations ho want you to join their groups.
select the speed at which new
ect how your IM contacts are By online status.
elect how to update information ontacts are online or offline, ual.
ct whether IM contacts with an in the IM contacts list.
Copyrig
register to an IM service. Service providers may differ in their support of features.
Select Conversations to start or continue a conversation with an IM user; IM contacts to create, edit, or view the online status of your IM contacts; IM groups to start or continue a group conversation with multiple IM users; or Record. chats to view a previous IM session that you saved.
Check the availability of services, pricing, instructions, and fees with your network operator or service provider.
Receive IM settingsYou must save the settings to access the service that you want to use. You may receive the settings in a special text message from the network operator or service provider that offers the IM service. See ‘Data and settings’, p. 41. You can also enter the settings manually. See ‘Chat server settings’, p. 14.
Connect to an IM server1 To connect to the IM server in use, open IM, and select
Options > Login. To change the IM server in use and save new IM servers, see ‘Chat server settings’, p. 14.
2 Enter your user ID and password, and press to log in. You obtain the user ID and password for the IM server from your service provider.
3 To log out, select Opt
Modify your IM sSelect Options > Settingfollowing:
Use screen name (shownby the server)—To enter a
IM presence—To allow otselect Active for all.
Allow messages from—ToAll.
Allow invitations from—your IM contacts, select Iare sent by IM contacts w
Msg. scrolling speed—Tomessages are displayed.
Sort IM contacts—To selsorted: Alphabetically or
Availabil. reloading—To sabout whether your IM cselect Automatic or Man
Offline contacts—To seleoffline status are shown

73
ge to a participant, select msg..
ssage sent to you, select the Reply.
ho are online to join the IM group, invitation.
ssages from certain participants, ng options and the desired option.
that are exchanged during a ou are joined in a IM group, select . To stop recording, select ing. To view the recorded chats, in ecord. chats.
onversations shows a list of the individual ts that you have an ongoing oing conversations are en you exit IM.
scroll to a participant, and press
ation, write your message, and
My
own
Copyright © 2006 Nokia. All rights reserved.
Search for IM groups and usersTo search for groups, in the IM groups view, select Options > Search. You can search by Group name, Topic, and Members (user ID).
To search for users, in the IM contacts view, select Options > New IM contact > Search from server. You can search by User's name, User ID, Phone number, and E-mail address.
Join IM groupsThe IM groups view shows a list of the IM groups that you have saved or are currently joined to.
To join a saved IM group, press .
To join an IM group that is not on the list, but for which you know the group ID, select Options > Join new group.
To leave the IM group, select Options > Leave IM group.
ChatAfter you join an IM group, you can view the messages that are exchanged there, and send your own messages.
To send a message, write the message in the message editor field, and press .
To send a private messaOptions > Send private
To reply to a private memessage and Options >
To invite IM contacts wselect Options > Send
To prevent receiving meselect Options > Blocki
Record chatsTo record the messagesconversation or while yOptions > Record chatOptions > Stop recordthe main view, select R
View and start cThe Conversations viewconversation participanconversation with. Ongautomatically closed wh
To view a conversation,.
To continue the converspress .

My
own
74ht © 2006 Nokia. All rights reserved.
l defined IM servers.
he IM server to which you want
utomatically when you start IM,
ur list of IM servers, select server. Enter the following
for the chat server
access point you want to use for
ddress of the IM server
sword
dd shortcuts
own > Go to.
following: opens Calendar, opens Notes.
Copyrig
To return to the conversations list without closing the conversation, select Back. To close the conversation, select Options > End conversation.
To start a new conversation, select Options > New conversation.
To save a conversation participant to your IM contacts, select Options > Add to IM contacts.
To send automatic replies to incoming messages, select Options > Set auto reply on. You can still receive messages.
IM contactsIn the IM contacts view, you can retrieve chat contact lists from the server, or add a new chat contact to a contact list. When you log in to the server, the previously used chat contact list is retrieved from the server automatically.
Chat server settingsSelect Options > Settings > Server settings. You may receive the settings in a special text message from the network operator or service provider that offers the chat service. You obtain the user ID and password from your service provider when you register to the service. If you do not know your user ID or password, contact your service provider.
Servers—View a list of al
Default server—Change tto connect.
IM login type—To log in aselect On app. start-up.
To add a new server to yoServers > Options > Newsettings:
Server name—the name
Access point in use—the the server
Web address—the URL a
User ID—your user ID
Password—your login pas
Go to—a
Press , and select My
Default shortcuts are the opens Inbox, and

75
My
own
Copyright © 2006 Nokia. All rights reserved.
GamesPress , and select My own and a game. For instructions on how to play the game, select Options > Help.
Off
ice
76ht © 2006 Nokia. All rights reserved.
y and exchange rates Options > Currency rates.
rency conversions, you must add exchange rates. The rate of ys 1.
ange base currency, you must se all previously set exchange
and select Office > Notes. You ible devices, and save plain text
u receive to Notes.
atible basic print profile (BPP) etooth connectivity (such as HP r or HP Photosmart 8150), select
Copyrig
OfficeCalculator
To add, substract, multiply, divide, and calculate square roots and percentages, press , and select Office > Calculator.
Note: This calculator has limited accuracy and is designed for simple calculations.
Converter
To convert measures from one unit to another, press , and select Office > Converter.
Converter has limited accuracy, and rounding errors may occur.1 In the Type field, select the measure you want to use.2 In first Unit field, select the unit from which you want
to convert. In the next Unit field, select the unit to which you want to convert.
3 In the first Amount field, enter the value you want to convert. The other Amount field changes automatically to show the converted value.
Set base currencSelect Type > Currency >Before you can make curselect a base currency andthe base currency is alwa
Note: When you chenter new rates becaurates are cleared.
Notes
To write notes, press ,can send notes to compatfiles (.txt format) that yo
To print a note on a compequipped printer with BluDeskjet 450 Mobile PrinteOptions > Print.

77
Off
ice
Copyright © 2006 Nokia. All rights reserved.
Recorder
To record voice memos, press , and select Office > Recorder. To record a telephone conversation, open Recorder during a voice call. Both parties hear a tone every 5 seconds during recording.
The recorder cannot be used when a data call or GPRS connection is active.

Pers
onal
ize
your
dev
ice
78ht © 2006 Nokia. All rights reserved.
e note to an image or animation, ools > Settings > Phone > ote / logo.enu view, in the main menu, ge view > Grid or List.
menu, in the main menu, select e to folder, or New folder. You
plications into folders, and place use more often into the main
—set tones
ringing tones, message alert different events, environments, , and select Tools > Profiles.
ss in the standby mode. ant to activate, and select OK.
ode, press repeatedly until cted in the cover display, and
Copyrig
Personalize your deviceThe open applications and folders that have applications open are indicated by a small icon in the main menu.• To use the standby display for fast access to your most
frequently used applications, see ‘Active standby mode’, p. 10.
• To change the standby mode background image or what is shown in the screen saver, see ‘Change the look of your device’, p. 9.
• To customize the ringing tones, see ‘Profiles—set tones’, p. 8 and ‘Add ringing tones for contacts’, p. 61.
• To change the shortcuts assigned for the different presses of the scroll key and selection keys in the standby mode, see ‘Standby mode’, p. 88.
• To configure the cover display, see ‘Cover display settings’, p. 89.
• To change the clock shown in the standby mode, press , and select Clock > Options > Settings > Clock
type > Analogue or Digital.
• To change the welcompress , and select TGeneral > Welcome n
• To change the main mselect Options > Chan
• To rearrange the mainOptions > Move, Movcan move less used apapplications that you menu.
Profiles
To set and customize thetones, and other tones foror caller groups, press
To change the profile, preScroll to the profile you w
Tip! In fold closed mthe desired profile is selepress the cover key.
79
make calls, you must first activate by changing profiles. If the device er the lock code.
file, press , and select another ables wireless transmissions
cient signal strength). If a activated before entering the e deactivated. A Bluetooth cally reactivated after leaving the tings’, p. 81.
the look of your
he display, such as the wallpaper select Tools > Themes. The active
. In Themes you can group other themes or select images sonalize themes further. The card (if inserted) are indicated by memory card are not available if inserted in the device. If you want in the memory card without the
themes in the device memory first.
ection and download more themes, s.
Pers
onal
ize
your
dev
ice
Copyright © 2006 Nokia. All rights reserved.
To modify a profile, press , and select Tools > Profiles. Scroll to the profile, and select Options > Personalise. Scroll to the setting you want to change, and press to open the choices. Tones stored on the memory card are indicated with . You can scroll through the tone list and listen to each one before you make your selection. To stop the sound, press any key.
When you choose a tone, Tone downloads opens a list of bookmarks. You can select a bookmark and start connection to a Web page to download tones.
If you want the caller’s name to be said when your device rings, select Options > Personalise > Say caller's name > On. The caller’s name must be saved in Contacts.
To create a new profile, select Options > Create new.
Offline profileThe Offline profile lets you use the device without connecting to the wireless network. When you activate the Offline profile, the connection to the wireless network is turned off, as indicated by in the signal strength indicator area. All wireless phone signals to and from the device are prevented. If you try to send messages, they are placed in the outbox to be sent later.
Warning: In the offline profile you cannot make or receive any calls, except make calls to certain emergency numbers, or use other features that require
network coverage. Tothe phone function has been locked, ent
To leave the Offline proprofile. The device re-en(providing there is suffiBluetooth connection isOffline profile, it will bconnection is automatiOffline profile. See ‘Set
Changedevice
To change the look of tand icons, press , andtheme is indicated by together elements fromfrom the Gallery to perthemes on the memory
. The themes on thethe memory card is not to use the themes savedmemory card, save the
To open a browser connselect Theme download

Pers
onal
ize
your
dev
ice
80ht © 2006 Nokia. All rights reserved.
ortcuts available in the standby n the active standby mode is on.
plications shortcuts, press , Phone > Standby mode > d press .
ixed, and you are not able to
Copyrig
To activate a theme, scroll to it, and select Options > Apply. To preview a theme before activating it, select Options > Preview.
To edit themes, scroll to a theme, and select Options > Edit to change the Wallpaper and Power saver settings.
To restore the selected theme to its original settings, select Options > Restore orig. theme when you edit a theme.
Active standby modeUse your standby display for fast access to your most frequently used applications. By default, the active standby mode is on.
Press , select Tools > Settings > Phone > Standby mode > Active standby, and press to switch the active standby on or off.
The active standby display is shown with default applications across the top of the screen, and calendar, to-do, and player events listed below.
Scroll to an application or event, and press .
The standard scroll key shmode cannot be used whe
To change the default apselect Tools > Settings >Active standby apps., an
Some shortcuts may be fchange them.

Conn
ectiv
ity
81ht © 2006 Nokia. All rights reserved.
e Nokia approved enhancements h the manufacturers of other r compatibility with this device.
orresponds to a service or a how different devices connect. sfree profile is used between a your device. For devices to be support the same profiles.
on using Bluetooth technology with your local authorities or
technology, or allowing such kground while using other and on battery power and
d, you cannot use Bluetooth y’, p. 93 for more information on
nect. > Bluetooth. When you the first time, you are asked to
Copyrig
ConnectivityBluetooth connectivity
You can connect wirelessly to other compatible devices with wireless Bluetooth technology. Compatible devices may include mobile phones, computers, and enhancements such as headsets and car kits. You can use Bluetooth connectivity to send images, video clips, music and sound clips, and notes; connect wirelessly to your compatible PC (for example, to transfer files); and connect to a compatible printer to print images with Image print. See ‘Image print’, p. 30.
Since devices with Bluetooth technology communicate using radio waves, your device and the other device do not need to be in direct line-of-sight. The two devices only need to be within 10 meters (33 feet) of each other, but the connection may be subject to interference from obstructions such as walls or from other electronic devices.
This device is compliant with Bluetooth Specification 1.2 that supports the following profiles: basic printing, generic access, serial port, dial-up networking, headset, handsfree, generic object exchange, object push, file transfer, basic imaging, SIM access, and human interface device. To ensure interoperability between other devices supporting
Bluetooth technology, usfor this model. Check witdevices to determine thei
Glossary: A profile cfunction, and defines For example, the handhandsfree device and compatible, they must
There may be restrictionsin some locations. Check service provider.
Features using Bluetoothfeatures to run in the bacfeatures, increase the demreduce the battery life.
When the device is lockeconnectivity. See ‘Securitlocking the device.
SettingsPress , and select Conopen the application for

82
is on in your Nokia N71, Remote standby mode. The connection to turned off, as indicated by in ator area, and you cannot use SIM
s requiring cellular network
ce is in the remote SIM mode, you ble connected enhancement, such receive calls. Your wireless device except to the emergency numbers evice, while in this mode. To make ou must first leave the remote SIM been locked, enter the code to
mode, press , and select Exit
Bluetooth connectivity, select phone's visibility > Hidden.
nown device.
ections can be active at a time. For nected to a compatible headset,
Conn
ectiv
ity
Copyright © 2006 Nokia. All rights reserved.
define a name for your device. After you set Bluetooth connectivity on and change My phone's visibility to Shown to all, your device and this name can be seen by other users with devices using Bluetooth technology.
Select from the following:
Bluetooth—To connect wirelessly to another compatible device, set Bluetooth connectivity On, and establish a connection.
My phone's visibility—To allow your device to be found by other devices with Bluetooth technology, select Shown to all. To hide it from other devices, select Hidden.
My phone's name—Edit the name of your device.
Remote SIM mode—To enable another device, such as a compatible car kit enhancement, to use the SIM card in your device to connect to the network, select On.
Remote SIM modeTo use the remote SIM mode with a compatible car kit enhancement, set Bluetooth connectivity on, and enable the use of the remote SIM mode with your device. Before the mode can be activated, the two devices must be paired and the pairing initiated from the other device. When pairing, use a 16-digit passcode, and set the other device as authorized. See ‘Pair devices’, p. 10. Activate the remote SIM mode from the other device.
When remote SIM modeSIM is displayed in the the wireless network is the signal strength indiccard services or featurecoverage.
When the wireless devican only use a compatias a car kit, to make or will not make any calls,programmed into your dcalls from your device, ymode. If the device hasunlock it first.
To leave the remote SIMrem. SIM mode.
Security tipsWhen you are not usingBluetooth > Off or My
Do not pair with an unk
Send dataSeveral Bluetooth connexample, if you are con

Conn
ectiv
ity
83ht © 2006 Nokia. All rights reserved.
g. does not store messages sent vity.
for devices, some devices may address (device address). To find your device, enter the code by mode.
s view ( ), in the Bluetooth ess .
r own passcode (1—16 digits), r of the other device to use the o not have a user interface have he passcode is used only once.
ct Options > New paired less Bluetooth technology within he display. Select the device, and ame passcode must be entered ll. After pairing, the device is
es view.
ed by in the device search.
ized or unauthorized, scroll to a e following options:
ections between your device and ithout your knowledge. No
Copyrig
you can also transfer files to another compatible device at the same time.
Bluetooth connectivity indicators• When is shown in the standby mode, Bluetooth
connectivity is on.• When is blinking, your device is trying to connect
with another device.• When is shown continuously, data is being
transmitted. Tip! To send text, open Notes, write the text, and
select Options > Send > Via Bluetooth.
1 Open the application where the item you want to send is stored. For example, to send an image to another compatible device, open Gallery.
2 Select the item and Options > Send > Via Bluetooth. Devices with Bluetooth technology within range start to appear on the display.Device icons: —computer, —phone, —audio or video device, and —other device.To interrupt the search, select Stop.
3 Select the device with which you want to connect.4 If the other device requires pairing before data can be
transmitted, a tone sounds, and you are asked to enter a passcode. See ‘Pair devices’, p. 10.
5 When the connection has been established, Sending data is shown.
The Sent folder in Messausing Bluetooth connecti
Tip! When searchingshow only the unique the unique address of*#2820# in the stand
Pair devicesTo open the paired deviceapplication main view, pr
Before pairing, create youand agree with the ownesame code. Devices that da factory-set passcode. T
To pair with a device, seledevice. Devices with wirerange start to appear on tenter the passcode. The son the other device as wesaved to the paired devic
Paired devices are indicat
To set a device as authordevice, and select from th
Set as authorised—Connthis device can be made w

84
d connection
an transfer data such as business nd media files with a compatible
m at anyone's eye or allow it to evices. This device is a Class 1 laser
IR ports of the sending and pointing at each other, and that tions between the devices. The between the two devices is up to
iving device activates the IR port.rt of your device to receive data,
t Connect. > Infrared.ing device selects the desired IR data transfer.the desired file in an application or d select Options > Send > Via
arted within 1 minute after the t, the connection is cancelled and
Conn
ectiv
ity
Copyright © 2006 Nokia. All rights reserved.
separate acceptance or authorization is needed. Use this status for your own devices, such as your compatible headset or PC or devices that belong to someone you trust. indicates authorized devices in the paired devices view.
Set as unauthorised—Connection requests from this device must be accepted separately every time.
To cancel a pairing, scroll to the device, and select Options > Delete. If you want to cancel all pairings, select Options > Delete all.
Tip! If you are currently connected to a device and delete the pairing with that device, pairing is removed immediately, and the connection is switched off.
Receive dataWhen you receive data through Bluetooth connectivity, a tone sounds, and you are asked if you want to accept the message. If you accept, is shown, and the item is placed in the Inbox folder in Messag.. Messages received through Bluetooth connectivity are indicated by . See ‘Inbox—receive messages’, p. 40.
Switch off Bluetooth connectivityTo switch off Bluetooth connectivity, select Bluetooth > Off.
Infrare
With infrared (IR), you ccards, calendar notes, adevice.
Do not point the IR beainterfere with other IR dproduct.
Send and receive data:1 Make sure that the
receiving devices arethere are no obstrucpreferable distance 1 meter (3 feet).
2 The user of the receTo activate the IR popress , and selec
3 The user of the sendfunction to start theTo send data, locate the file manager, aninfrared.
If data transfer is not stactivation of the IR pormust be started again.

Conn
ectiv
ity
85ht © 2006 Nokia. All rights reserved.
modems a modem to send and receive e Internet with a compatible PC ctivity, infrared, or a USB data n instructions can be found in PC Suite.
ia PC Suite for the first time, to a compatible PC and to use Get Connected wizard available
on manager
nect. > Conn mgr. To view the s or end connections in GSM and t. data conn..
view, you can see the open data ) and packet data connections
ime invoiced for calls by your ary, depending on network for billing, and so forth.
Copyrig
All items received through IR are placed in the Inbox folder in Messaging. New IR messages are indicated by .
When blinks, your device is trying to connect to the other device or a connection has been lost.
When is shown continuously, the IR connection is active, and your device is ready to send and receive data using its IR port.
Data cbl.
To select the function for which the USB data cable connection is used, press , and select Connect. > Data cbl. > Ask on connection, PC Suite, Data transfer or Pictbridge.
PC connectionsYou can use your device with a variety of PC connectivity and data communications applications. For example, with Nokia PC Suite you can transfer images between your device and a compatible PC.
Always create the connection from the PC to synchronize with your device.
Your device as a You can use your device ae-mail, or to connect to thby using Bluetooth connecable. Detailed installatiothe user guide for Nokia
Tip! When using Nokconnect your device toNokia PC Suite, use thein Nokia PC Suite.
Connecti
Press , and select Constatus of data connectionUMTS network, select Ac
Data connectionsIn the active connectionsconnections: data calls (( and ).
Note: The actual tservice provider may vfeatures, rounding off
86
tion profile and Options > atus of the synchronization is y.ation before it finishes, select
n the synchronization is complete.howing the synchronization status es have been added, updated, (not synchronized) in your device ct Yes.
manager
nnect. > Dev. mgr.. You may nd different configuration settings ator, service provider, or company nt department. These configuration cess point settings for data ettings used by different ice.
nd receive configuration settings a profile, and select Options >
ng of configuration settings from Options > Enable config. or
Conn
ectiv
ity
Copyright © 2006 Nokia. All rights reserved.
To end a connection, select Options > Disconnect. To close all open connections, select Options > Disconnect all.
To view the details of a connection, select Options > Details. The details shown depend on the connection type.
Synchronization
Press , and select Connect. > Sync. Sync enables you to synchronize your notes, calendar, contacts, or e-mail with various compatible calendar and address book applications on a compatible computer or on the Internet. You can also create or edit synchronization settings.
The synchronization application uses SyncML technology for synchronization. For information on SyncML compatibility, contact the supplier of the application with which you want to synchronize your device data.
You may receive synchronization settings in a special text message. See ‘Data and settings’, p. 41.
Synchronize dataIn the Sync main view, you can see the different synchronization profiles.
1 Select a synchronizaSynchronise. The stshown on the displaTo cancel synchronizCancel.You are notified whe
2 To view the log file sand how many entrideleted, or discardedor on the server, sele
Device
Press , and select Coreceive server profiles afrom your network operinformation managemesettings may include acconnections and other sapplications in your dev
To connect to a server afor your device, scroll toStart configuration.
To allow or deny receiviservice providers, selectDisable config..

Conn
ectiv
ity
87ht © 2006 Nokia. All rights reserved.
CopyrigServer profile settingsContact your service provider for the correct settings.
Server name—Enter a name for the configuration server.
Server ID—Enter the unique ID to identify the configuration server.
Server password—Enter a password to identify your device to the server.
Access point—Select an access point to be used when connecting to the server.
Host address—Enter the URL address of the server.
Port—Enter the port number of the server.
User name and Password—Enter your user name and password.
Allow configuration—To receive configuration settings from the server, select Yes.
Auto-accept all reqs.—If you want your device to ask for confirmation before accepting a configuration from the server, select No.

Tool
s
88ht © 2006 Nokia. All rights reserved.
until you change these settings
ging the language affects the aracters available when writing xt dictionary used.
predictive text input On or Off ce. The predictive text dictionary guages.
he welcome note or logo is e you switch on the device. default image, Text to write a to select an image from Gallery.
u can reset some of the settings do this, you need the lock code. ne and SIM’, p. 14. After take a longer time to power on. unaffected.
e of the side key for voice
rtcuts to applications in the e standby mode’, p. 80.
Copyrig
ToolsSettings
To change settings, press , and select Tools > Settings. To open a settings group, press . Scroll to a setting you want to change, and press .
Some settings may be preset for the device by your network operator or service provider, and you may not be able to change them.
Phone sett.
GeneralPhone language—Changing the language of the display texts in your device also affects the format used for date and time and the separators used, for example, in calculations. Automatic selects the language according to the information on your SIM card. After you change the display text language, the device restarts.
Changing the settings for Phone language or Writing language affects every application in your device, and the
change remains effectiveagain.
Writing language—Chancharacters and special chtext and the predictive te
Predictive text—Set the for the editors in the deviis not available for all lan
Welcome note / logo—Tdisplayed briefly each timSelect Default to use thewelcome note, or Image
Orig. phone settings—Yoto their original values. ToSee ‘Security’, p. 13, ‘Phoresetting, the device mayDocuments and files are
Voice key—Define the uscommands or PTT.
Standby modeActive standby—Use shostandby mode. See ‘Activ

89
gsange the brightness of the cover er. Changing the brightness of the ffect the brightness of the main
crop a background image, and set n the cover display in the standby
e cover display power saver type, if an image or an animation screen time-out period before the power
—Select On to answer calls by
tings
can set your phone number to be den from (No) the person to whom alue may be set by your network ider when you make a subscription ork service).
ve activated call waiting (network tifies you of a new incoming call progress. Set the function on
Tool
s
Copyright © 2006 Nokia. All rights reserved.
Left selection key—Assign a shortcut to ( ) in the standby mode.
Right selection key—Assign a shortcut to ( ) in the standby mode.
Active standby apps.—Select the application shortcuts you want to appear in the active standby. This setting is only available if Active standby is on.
You can also assign keypad shortcuts for the different presses of the scroll key. The scroll key shortcuts are not available if the Active standby is on.
Operator logo—This setting is only available if you have received and saved an operator logo. Select Off if you do not want the logo to be shown.
DisplayBrightness—Adjust the basic brightness level of the display to lighter or darker. However, in extreme light conditions, the brightness of the display is automatically adjusted.
Power saver time-out—Select the time-out period after which the power saver is activated.
Light time-out—Select a time-out after which the backlight of the display is switched off.
Cover display settinBrightness—You can chdisplay to lighter or darkcover display does not adisplay.
Wallpaper—Select and how time is displayed omode.
Screen saver—Select thits time-out period, andsaver is shown after thesaver is activated.
Answer if fold openedopening the cover.
Call set
Send my caller ID—Youdisplayed to (Yes) or hidyou are calling, or the voperator or service prov(Set by network) (netw
Call waiting—If you haservice), the network nowhile you have a call in

Tool
s
90ht © 2006 Nokia. All rights reserved.
tive of the selected line. If you t subscribed to this network le to make calls. When line 2 is he standby mode.
en the phone lines, press and by mode.
line selection (network service), d by your SIM card. To change PIN2 code.
on
d access pointsket data connections, such as k. When you use your device in , multiple data connections can e, and access points can share a
tion, an access point is required. kinds of access points:send and receive multimedia
ervices application to view WML
Copyrig
(Activate) or off (Cancel), or check whether the function is activated (Check status).
Reject call with SMS—To send a text message to a caller informing why you could not answer the call, select Yes. See ‘Answer or reject a call’, p. 55.
Message text—Write a text to be sent in a text message when you reject a call.
Image in video call—You can deny video sending when you receive a video call. Select a still image to be displayed instead of video.
Automatic redial—To set your device to make a maximum of 10 attempts to connect the call after an unsuccessful call attempt. To stop automatic redialing, press .
Summary after call—Activate this setting if you want the device to briefly display the approximate duration of the last call.
Speed dialling—To dial numbers assigned to the speed dialing keys ( - ) press and hold the key. See also ‘Speed dial a phone number’, p. 50.
Anykey answer—To answer an incoming call, by pressing any key except , , , and , select On.
Line in use—This setting (network service) is shown only if the SIM card supports two subscriber numbers, that is, two phone lines. Select which phone line you want to use for making calls and sending text messages. Calls on both lines
can be answered irrespecselect Line 2 and have noservice, you will not be abselected, is shown in t
Tip! To switch betwehold in the stand
Line change—To preventselect Disable if supportethis setting, you need the
Connecti
Data connections anYour device supports pacGPRS in the GSM networGSM and UMTS networksbe active at the same timdata connection.
To establish a data connecYou can define different • MMS access point to
messages• Access point for the S
or XHTML pages

91
u have been instructed otherwise .
connection, the network service his feature, and if necessary, card.
from your service provider.
tain the access point name from r service provider.
me may be needed to make a data lly provided by the service provider.
u must enter the password every ver, or if you do not want to save vice, select Yes.
may be needed to make a data lly provided by the service provider.
the level of authentication:
on the access point you are setting ss or the address of the multimedia
ced settings to change the
Tool
s
Copyright © 2006 Nokia. All rights reserved.
• Internet access point (IAP) to send and receive e-mail and connect to the Internet
Check the type of access point you need with your service provider for the service you want to access. For availability and subscription to packet data connection services, contact your network operator or service provider.
Access pointsYou may receive access point settings in a message from a service provider. See ‘Data and settings’, p. 41. Some or all access points may be preset for your device by your service provider or network operator, and you may not be able to change, create, edit, or remove them. indicates a protected access point.
indicates a packet data access point.
To create a new access point, select Options > New access point. To edit the settings of an access point, select Options > Edit. Follow the instructions from your service provider.
Connection name—Enter a descriptive name for the connection.
Data bearer—Select the data connection type.
Depending on the data connection you select, only certain setting fields are available. Fill in all fields marked with Must be defined or with a red asterisk. Other fields can
be left empty, unless yoby your service provider
To be able to use a dataprovider must support tactivate it for your SIM
Packet data
Follow the instructions
Access point name—Obyour network operator o
User name—The user naconnection, and is usua
Prompt password—If yotime you log in to a seryour password in the de
Password—A password connection, and is usua
Authentication—DefineNormal or Secure.
Homepage—Dependingup, enter the Web addremessaging center.
Select Options > Advanfollowing settings:

Tool
s
92ht © 2006 Nokia. All rights reserved.
er the address for the proxy
er the proxy port number.
affect all access points using a
select When available and you ports packet data, the device ta network. Starting an active or example, to send and receive is no packet data coverage, the o establish a packet data When needed, the device uses a nly if you start an application or
point name is needed to use ata modem to your computer.
erver settings from your network er in a configuration message, or d on your (U)SIM card. You can r device, view, or delete them in
Copyrig
Network type—Select the Internet protocol type: IPv4 settings or IPv6 settings. The other settings depend on the selected network type.
Phone IP address (for IPv4 only)—Enter the IP address of your device.
DNS address—In Primary name serv.:, enter the IP address of the primary DNS server. In Second. name server:, enter the IP address of the secondary DNS server. Contact your Internet service provider to obtain these addresses.
Proxy serv. address—Define the address for the proxy server.
Proxy port number—Enter the proxy port number.
Homepage—Define a home page.
Select Options > Advanced settings and from the following:
IPv4 settings > Phone IP address (the IP address of your device), Subnet mask (the subnet IP address), Default gateway (the gateway), and DNS address—Enter the IP addresses of the primary and secondary DNS server. Contact your Internet service provider for these addresses.
IPv6 settings > DNS address—Select Automatic, Well-known, or User defined.
Ad-hoc channel (only for Ad-hoc)—To enter a channel number (1-11) manually, select User defined.
Proxy serv. address—Entserver.
Proxy port number—Ent
Packet dataThe packet data settings packet data connection.
Packet data conn.—If youare in a network that supregisters to the packet dapacket data connection (fe-mail) is quicker. If theredevice periodically tries tconnection. If you select packet data connection oaction that needs it.
Access point—The accessyour device as a packet d
Configs.You may receive trusted soperator or service providthe settings may be storesave these settings to youConfigs..

93
ter the lock code.
ed, calls still may be possible to the ber programmed into your device.
vice manually, press . A list of lect Lock phone.
You can set the device to ask for unknown SIM card is inserted into maintains a list of SIM cards that wner’s cards.
can specify a group of people to who can call you (network service).
o closed user groups, calls still may l emergency number programmed
You can set the device to display when you are using a SIM card ).
ck codes
se codes, contact your service
number (PIN) code—This code against unauthorized use. The PIN sually supplied with the SIM card.
Tool
s
Copyright © 2006 Nokia. All rights reserved.
Date and time
See ‘Clock settings’, p. 12, and language settings in ‘General’, p. 8.
Security
Phone and SIMPIN code request—When active, the code is requested each time the device is switched on. Deactivating the personal identification number (PIN) code request may not be allowed by some SIM cards. See ‘Glossary of PIN and lock codes’, p. 13.
PIN code, PIN2 code, and Lock code—You can change the lock code, PIN code, and PIN2 code. These codes can only include the numbers from 0 to 9. If you forget any of these codes, contact your service provider. See ‘Glossary of PIN and lock codes’, p. 13.
Avoid using access codes similar to the emergency numbers to prevent accidental dialing of the emergency number.
Autolock period—You can set an autolock period, a time-out after which the device automatically locks. To turn off the autolock period, select None.
To unlock the device, en
When the device is lockofficial emergency num
Tip! To lock the decommands opens. Se
Lock if SIM changed—the lock code when an your device. The device are recognized as the o
Closed user group—Youwhom you can call and
When calls are limited tbe possible to the officiainto your device.
Confirm SIM services—confirmation messages service (network service
Glossary of PIN and lo
If you forget any of theprovider.
Personal identification protects your SIM card code (4 to 8 digits) is u
Tool
s
94ht © 2006 Nokia. All rights reserved.
guarantee safety; they are used tware.
ment main view, you can see a es that are stored in your device. ersonal certificates, if available.
be used if you want to connect her site or remote server for ferring confidential information. if you want to reduce the risk of software and be sure of the hen downloading and installing
the use of certificates makes the onnections and software smaller, they must be used fit from increased security. The does not offer any protection by ager must contain correct, ificates for increased security to have a restricted lifetime. If rtificate not valid yet is shown uld be valid, check that the your device are correct.
Copyrig
After three consecutive incorrect PIN code entries, the code is blocked, and you need the PUK code to unblock it.
UPIN code—This code may be supplied with the USIM card. The USIM card is an enhanced version of the SIM card and is supported by UMTS mobile devices.
PIN2 code—This code (4 to 8 digits) is supplied with some SIM cards, and is required to access some functions in your device.
Lock code (also known as security code)—This code (5 digits) can be used to lock the device to avoid unauthorized use. The factory setting for the lock code is 12345. To avoid unauthorized use of your device, change the lock code. Keep the new code secret and in a safe place separate from your device. If you forget the code, contact your service provider.
Personal unblocking key (PUK) code and PUK2 code—These codes (8 digits) are required to change a blocked PIN code or PIN2 code, respectively. If the codes are not supplied with the SIM card, contact the operator whose SIM card is in your device.
UPUK code—This code (8 digits) is required to change a blocked UPIN code. If the code is not supplied with the USIM card, contact the operator whose USIM card is in your device.
Certif. managementDigital certificates do notto verify the origin of sof
In the certificate managelist of authority certificatPress to see a list of p
Digital certificates shouldto an online bank or anotactions that involve transThey should also be used viruses or other maliciousauthenticity of software wsoftware.
Important: Even if risks involved in remote cinstallation considerably correctly in order to beneexistence of a certificate itself; the certificate manauthentic, or trusted certbe available. Certificates Expired certificate or Ceeven if the certificate shocurrent date and time in
View certificate details

95
ertificate, and select Options > ng on the certificate, a list of the e the selected certificate is shown.
es—The certificate is able to ew Symbian operating system
tificate is able to certify servers.
—The certificate is able to certify TM application.
rust setting to change the value.
cted music files may include a elect whether you allow the h the music file if you send or vider of the music file can use the istribution of the files.
ert
divert your incoming calls to your r phone number. For details, vider.
Tool
s
Copyright © 2006 Nokia. All rights reserved.
You can only be sure of the correct identity of a server when the signature and the period of validity of a server certificate have been checked.
You are notified if the identity of the server is not authentic or if you do not have the correct security certificate in your device.
To check certificate details, scroll to a certificate, and select Options > Certificate details. When you open certificate details, the validity of the certificate is checked, and one of the following notes may be displayed:
Certificate not trusted—You have not set any application to use the certificate. See ‘Change the trust settings’, p. 15.
Expired certificate—The period of validity has ended for the selected certificate.
Certificate not valid yet—The period of validity has not yet begun for the selected certificate.
Certificate corrupted—The certificate cannot be used. Contact the certificate issuer.
Change the trust settings
Before changing any certificate settings, you must make sure that you really trust the owner of the certificate and that the certificate really belongs to the listed owner.
Scroll to an authority cTrust settings. Dependiapplications that can usFor example:
Symbian installation: Ycertify the origin of a napplication.
Internet > Yes—The cer
App. installation > Yesthe origin of a new Java
Select Options > Edit t
Track protect. objeSome copyright-protecttransaction identifier. Sidentifier to be sent witforward the file. The proidentifier to track the d
Call div
Call divert allows you tovoice mailbox or anothecontact your service pro
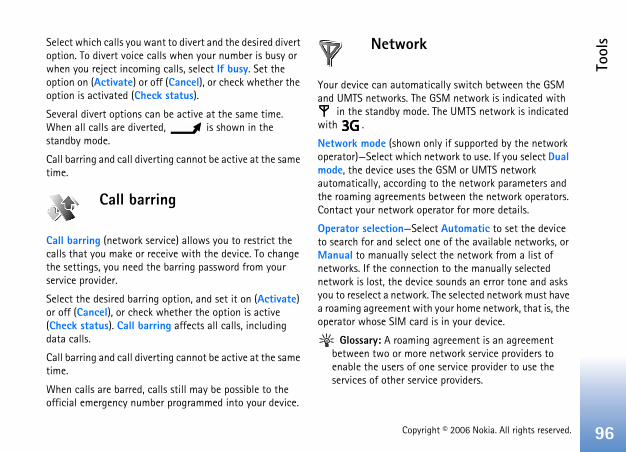
Tool
s
96ht © 2006 Nokia. All rights reserved.
ically switch between the GSM GSM network is indicated with . The UMTS network is indicated
nly if supported by the network etwork to use. If you select Dual e GSM or UMTS network to the network parameters and between the network operators. erator for more details.
ct Automatic to set the device ne of the available networks, or ct the network from a list of on to the manually selected e sounds an error tone and asks The selected network must have your home network, that is, the
is in your device.
agreement is an agreement network service providers to e service provider to use the ce providers.
Copyrig
Select which calls you want to divert and the desired divert option. To divert voice calls when your number is busy or when you reject incoming calls, select If busy. Set the option on (Activate) or off (Cancel), or check whether the option is activated (Check status).
Several divert options can be active at the same time. When all calls are diverted, is shown in the standby mode.
Call barring and call diverting cannot be active at the same time.
Call barring
Call barring (network service) allows you to restrict the calls that you make or receive with the device. To change the settings, you need the barring password from your service provider.
Select the desired barring option, and set it on (Activate) or off (Cancel), or check whether the option is active (Check status). Call barring affects all calls, including data calls.
Call barring and call diverting cannot be active at the same time.
When calls are barred, calls still may be possible to the official emergency number programmed into your device.
Network
Your device can automatand UMTS networks. The
in the standby modewith .
Network mode (shown ooperator)—Select which nmode, the device uses thautomatically, according the roaming agreements Contact your network op
Operator selection—Seleto search for and select oManual to manually selenetworks. If the connectinetwork is lost, the devicyou to reselect a network.a roaming agreement withoperator whose SIM card
Glossary: A roamingbetween two or more enable the users of onservices of other servi
97
ommands
ands to control your device. For t the enhanced voice commands e, see ‘Voice dialing’, p. 50.
ice commands for starting s, you must open the Voice cm. iles folder. Press , and select files; the device creates voice tags profiles. To use enhanced voice old in the standby mode, and he voice command is the name of le displayed in the list.
to define the side key to use voice eral’, p. 8.
s to the list, select Options > New cond voice command that can be
ation, select Options > Change e new voice command as text. , abbreviations, and acronyms.
ized voice tag, select Options >
nd settings, select Options > the synthesizer that plays nd commands in the selected
Tool
s
Copyright © 2006 Nokia. All rights reserved.
Cell info display—Select On to set the device to indicate when it is used in a cellular network based on microcellular network (MCN) technology and to activate cell info reception.
Enhanc. sett.
In the standby mode, indicates a compatible headset is connected, and that the headset is unavailable, or a Bluetooth connection to a headset is lost. indicates a compatible loopset is connected, that a Text phone is connected, and that a car kit is connected.
Select Headset, Loopset, Text phone, Bluetooth handsfree, or Car kit and from the following:
Default profile—Set the profile that you want activated each time you connect a certain enhancement to your device. See ‘Profiles—set tones’, p. 78.
Automatic answer—Set if you want the device to answer an incoming call automatically after 5 seconds. If the Ringing type is set to Beep once or Silent, automatic answer is disabled. Automatic answer is not available for Text phone.
If you are using a Text phone, you must activate it on your device. Press , and select Tools > Settings > Enhancement > Text phone > Use text phone > Yes.
Voice c
You can use voice commmore information abousupported by your devic
To activate enhanced voapplications and profileapplication and its ProfTools > Voice cm. > Profor the applications andcommands, press and hsay a voice command. Tthe application or profi
Tip! Alternatively, commands, see ‘Gen
To add more applicationapplication. To add a seused to start the appliccommand, and enter thAvoid very short names
To listen to the synthesPlayback.
To change voice commaSettings. To switch off recognized voice tags a

Tool
s
98ht © 2006 Nokia. All rights reserved.
ns and softwarecation, a Java application, is not fully installed, and talled on the memory card.
stall and use applications and ces that offer adequate security rmful software.
the following:n type, version number, and the rer of the application, select ils. certificate details of the tions > View certificate. See p. 14.t contains an update or repair to n, you can only restore the you have the original installation opy of the removed software e original application, remove stall the application again from n file or the back-up copy. for installing Java applications. ice may ask you to download it. oint defined for the application, t one. When you are ile, you may need to enter a user
Copyrig
device language, select Synthesiser > Off. To reset voice recognition learning (for example, when the main user of the device has changed), select Reset voice adapts..
Application manager
Press , and select Tools > App. mgr.. You can install two types of applications and software to your device:• J2ME™ applications based on Java technology with the
extension .jad or .jar ( ). • Other applications and software suitable for the
Symbian operating system ( ). The installation files have the .sis extension. Only install software specifically designed for your Nokia N71. Software providers will often refer to the official model number of this product: the Nokia N71-1.
Installation files may be transferred to your device from a compatible computer, downloaded during browsing, or sent to you in a multimedia message, as an e-mail attachment, or using Bluetooth connectivity or infrared. You can use Nokia Application Installer in Nokia PC Suite to install an application to your device. If you use Microsoft Windows Explorer to transfer a file, save the file to a compatible memory card (local disk).
Install applicatio indicates a .sis appli
that the application that the application is ins
Important: Only inother software from sourand protection against ha
Before installation, note • To view the applicatio
supplier or manufactuOptions > View deta
• To display the securityapplication, select Op‘Certif. management’,
• If you install a file thaan existing applicatiooriginal application if file or a full back-up cpackage. To restore ththe application, and inthe original installatio
• The .jar file is requiredIf it is missing, the devIf there is no access pyou are asked to selecdownloading the .jar f

99
ssage or Via e-mail (available only tings are in place).
device can only support one aving more than one application lity could affect performance and
device to stop running.
applications that are stored in the ain in the memory after the stalled to a compatible miniSD files may consume large amounts ng insufficient memory to store ges and other files. To help prevent stallation files to a compatible PC en remove the installations file
y using File mgr. (see ‘File
tions and softwarekage, and select Options > onfirm.
you can only reinstall it if you have ckage or a full backup of the
age. If you remove a software nger be able to open documents are.
Tool
s
Copyright © 2006 Nokia. All rights reserved.
name and password to access the server. You obtain these from the supplier or manufacturer of the application.
1 To locate an installation file, press , and select Tools > App. mgr.. Alternatively, search the device memory or a memory card (if inserted) in File mgr., or open a message in Messag. > Inbox that contains an installation file.
2 In App. mgr., select Options > Install. In other applications, scroll to the installation file, and press
to start the installation.During installation, the device shows information about the progress of the installation. If you are installing an application without a digital signature or certification, the device displays a warning. Continue installation only if you are sure of the origin and contents of the application.
To start an installed application, locate it in the menu, and press .
To start a network connection and to view extra information about the application, select Options > Go to web address, if available.
To see what software packages are installed or removed and when, select Options > View log.
To send your installation log to a help desk so that they can see what is installed or removed, select Options >
Send log > Via text meif the correct e-mail set
Important: Your antivirus application. Hwith antivirus functionaoperation or cause the
Installation files (.sis) ofdevice memory will remapplication has been incard. Stored installationof device memory, leavinew applications, messathis, first backup the inusing Nokia PC Suite, thfrom the device memormanager’, p. 13).
Remove applicaScroll to a software pacRemove. Select Yes to c
If you remove software,the original software paremoved software packpackage, you may no locreated with that softw

Tool
s
100ht © 2006 Nokia. All rights reserved.
at are connected to one or more e validity period has not started
hat are not valid; the time period exceeded or there is a protected ut no connected activation key.
t have no media files connected
r extend the usage period for a id activation key and Options > ation keys cannot be updated if
on is disabled. See ‘Service
ion, such as the validity status , scroll to an activation key, and
Copyrig
Note: If another software package depends on the software package that you removed, the other software package may stop working. Refer to the documentation of the installed software package for details.
SettingsSelect Options > Settings and from the following:
Online certif. check—Select to check the online certificates before installing an application.
Default web address—Set the default address used when checking online certificates.
Some Java applications may require a phone call, a message to be sent, or a network connection to a specific access point for downloading extra data or components. In the App. mgr. main view, scroll to an application, and select Options > Suite settings to change settings related to that specific application.
Activation keys
To view the digital rights activation keys stored in your device, press , and select Tools > Actv. keys and from the following:
Valid keys—View keys thmedia files and keys whosyet.
Invalid keys—View keys tfor using the media file ismedia file in the device b
Not in use—View keys thato them in the device.
To buy more usage time omedia file, select an invalGet activation key. ActivServices message receptimessages’, p. 42.
To view detailed informatand ability to send the filepress .

Trou
bles
hoot
ing
101ht © 2006 Nokia. All rights reserved.
ooth connection?
ected to your device, you can end e other device, or by deactivating Select Connect. > Bluetooth >
wing message is displayed: No ned. Define one in Services
er settings. Contact your service s.
udgy?
lastic films covering the display t the camera lens protection
red, or bright dots appear on the on my device?
this type of display. Some displays ots that remain on or off. This is
Copyrig
TroubleshootingQ&AAccess codes
Q: What is my password for the lock, PIN, or PUK codes?
A: The default lock code is 12345. If you forget or lose the lock code, contact your device dealer. If you forget or lose a PIN or PUK code, or if you have not received such a code, contact your service provider. For information about passwords, contact your access point provider, for example, a commercial Internet service provider (ISP), service provider, or network operator.
Application not responding
Q: How do I close an application that is not responding?
A: To open the application switching window, press and hold . Scroll to the application, and press to close the
application.
Bluetooth connectivity
Q: Why can’t I find my friend’s device?
A: Check that both devices have activated Bluetooth connectivity. Check that the distance between the two devices is not over 10 meters (33 feet) and that there are no walls or other obstructions between the devices. Check that the other device is not in hidden mode. Check that both devices are compatible.
Q: Why can’t I end a Bluet
A: If another device is connthe connection using thBluetooth connectivity.Off.
Browser services
Q: What do I do if the follovalid access point defisettings.?
A: Insert the correct browsprovider for instruction
Camera
Q: Why do images look sm
A: Remove the protective pand camera. Ensure thawindow is clean.
Display
Q: Why do missing, discoloscreen every time I turn
A: This is a characteristic ofmay contain pixels or dnormal, not a fault.

10
stallation file from the device (see ‘File manager’, p. 13).
ta before deleting it?
ne of the following methods:
make a backup copy of all data to a .-mail address; then save the images
tooth connectivity to a compatible
atible memory card.
ontact?
not have a phone number or an e missing information to the contact
n the device cannot receive a because memory is full?
y needed is indicated in the error memory to retrieve message. st. To view what kind of data you emory the different data groups anager > Options > Memory
Trou
bles
hoot
ing
2 Copyright © 2006 Nokia. All rights reserved.
Log
Q: Why does the log appear empty?
A: You may have activated a filter, and no communication events fitting that filter have been logged. To see all events, select My own > Log > Options > Filter > All communication.
Memory low
Q: What can I do if my device memory is low?
A: You can delete the following items regularly to avoid memory getting low:
• Messages from Inbox, Drafts, and Sent folders in Messag.• Retrieved e-mail messages from the device memory• Saved browser pages• Images and photos in Gallery
To delete contact information, calendar notes, call timers, call cost timers, game scores, or any other data, go to the respective application to remove the data. If you are deleting multiple items and one of the following notes are shown: Not enough mem-ory to perform operation. Delete some data first. or Memory low. Delete some data., try deleting items one by one (starting from the smallest item).
Installation files (.sis) of applications that are stored in the device memory remain in the memory after the application has been installed to a compatible miniSD card. Remove such installation files from the device memory. To do this, first backup the installation file to a compatible PC using Nokia PC
Suite, then remove the inmemory using File mgr.
Q: How can I save my da
A: Save your data using o
• Use Nokia PC Suite tocompatible computer
• Send images to your eto your computer.
• Send data using Bluedevice.
• Store data on a comp
Messaging
Q: Why can’t I select a c
A: The contact card doese-mail address. Add thcard in Contacts.
Multimedia messaging
Q: What should I do whemultimedia message
A: The amount of memormessage: Not enoughDelete some data firhave and how much mconsume, select File mdetails.

Trou
bles
hoot
ing
103ht © 2006 Nokia. All rights reserved.
Suite is installed and running on uide for Nokia PC Suite on the formation on how to use Nokia PC tion on Nokia PC Suite or visit the nokia.com.
fax modem with a compatible PC?
ice as a fax modem. However, with service), you can divert incoming ne number.
es and videos fail, when I send that has been successfully paired
ages and videos. Check the manual stem for the correct configuration
Copyrig
Q: The note Retrieving message is shown briefly. What is happening?
A: The device is trying to retrieve a multimedia message from the multimedia messaging center. Check that the settings for multimedia messaging are defined correctly and that there are no mistakes in phone numbers or addresses. Select Messaging > Options > Settings > Multim. msg..
Q: How can I end the data connection when the device starts a data connection again and again?
A: To stop the device from making a data connection, select Messaging and one of the following:On receiving msg. > Defer retrieval—To have the multimedia messaging center save the message to be retrieved later, for example, after you have checked the settings. After this change, the device still needs to send information notes to the network. To retrieve the message now, select Retr. immediately.On receiving msg. > Reject message—To reject all incoming multimedia messages. After this change, the device needs to send information notes to the network, and the multimedia messaging center deletes multimedia messages that are waiting to be sent to you.Multimedia recept. > Off—To ignore all incoming multimedia messages. After this change, the device does not make any network connections related to multimedia messaging.
PC connectivity
Q: Why do I have problems in connecting the device to my PC?
A: Make sure that Nokia PCyour PC. See the user gCD-ROM. For further inSuite, see the help funcsupport pages at www.
Q: Can I use my device as a
A: You cannot use your devcall diverting (network fax calls to another pho
Q: Why does sending imagthem to a compatible PCwith my device?
A: The PC may reject the imof the PC’s operating syof PIM settings.

Batt
ery
info
rmat
ion
104ht © 2006 Nokia. All rights reserved.
or cold places, such as in a closed nditions, will reduce the capacity . Always try to keep the battery 9°F and 77°F). A device with a hot rk temporarily, even when the ttery performance is particularly ll below freezing.
in a fire as they may explode. if damaged. Dispose of batteries ns. Please recycle when possible.
ld waste.
authentication
batteries for your safety. To check ginal Nokia battery, purchase it ealer, look for the Nokia Original
packaging and inspect the ollowing steps:
he four steps is not a total ity of the battery. If you have any battery is not an authentic original efrain from using it and take it to ia service point or dealer for
Copyrig
Battery informationCharging and dischargingYour device is powered by a rechargeable battery. The full performance of a new battery is achieved only after two or three complete charge and discharge cycles. The battery can be charged and discharged hundreds of times but it will eventually wear out. When the talk and standby times are noticeably shorter than normal, replace the battery. Use only Nokia approved batteries, and recharge your battery only with Nokia approved chargers designated for this device.
Unplug the charger from the electrical plug and the device when not in use. Do not leave fully charged battery connected to a charger, since overcharging may shorten its lifetime. If left unused, a fully charged battery will lose its charge over time.
If the battery is completely discharged, it may take a few minutes before the charging indicator appears on the display or before any calls can be made.
Use the battery only for its intended purpose. Never use any charger or battery that is damaged.
Do not short-circuit the battery. Accidental short-circuiting can occur when a metallic object such as a coin, clip, or pen causes direct connection of the positive (+) and negative (-) terminals of the battery. (These look like metal strips on the battery.) This might happen, for example, when you carry a spare battery in your pocket or purse. Short-circuiting the terminals may damage the battery or the connecting object.
Leaving the battery in hot car in summer or winter coand lifetime of the batterybetween 15°C and 25°C (5or cold battery may not wobattery is fully charged. Balimited in temperatures we
Do not dispose of batteriesBatteries may also explodeaccording to local regulatioDo not dispose as househo
Nokia battery guidelinesAlways use original Nokia that you are getting an orifrom an authorized Nokia dEnhancements logo on thehologram label using the f
Successful completion of tassurance of the authenticreason to believe that your Nokia battery, you should rthe nearest authorized Nok

10
digit code is instructions tterycheck.
, key in the le , and send to
al operator charges will apply.
age indicating whether the code can
not authentic?
at your Nokia battery with the n authentic Nokia battery, please do
it to the nearest authorized Nokia assistance. The use of a battery that anufacturer may be dangerous and mance and damage to your device may also invalidate any approval or device.
riginal Nokia batteries, visit
Batt
ery
info
rmat
ion
5 Copyright © 2006 Nokia. All rights reserved.
assistance. Your authorized Nokia service point or dealer will inspect the battery for authenticity. If authenticity cannot be verified, return the battery to the place of purchase.
Authenticate hologram1 When looking at the hologram on
the label, you should see the Nokia connecting hands symbol from one angle and the Nokia Original Enhancements logo when looking from another angle.
2 When you angle the hologram left, right, down, and up, you should see 1, 2, 3, and 4 dots on each side respectively.
3 Scratch the side of the label to reveal a 20-digit code, for example 12345678919876543210. Turn the battery so that the numbers are facing upwards. The 20-digit code reads starting from the number at the top row followed by the bottom row.
4 Confirm that the 20-valid by following theat www.nokia.com/ba
To create a text message20-digit code, for examp12345678919876543210+44 7786 200276.
National and internation
You should receive a messbe authenticated.
What if your battery is
If you cannot confirm thhologram on the label is anot use the battery. Takeservice point or dealer foris not approved by the mmay result in poor perforand its enhancements. Itwarranty applying to the
To find out more about owww.nokia.com/battery.

Care
and
mai
nten
ance
106ht © 2006 Nokia. All rights reserved.
age the device and may violate adio devices.
of data you want to keep (such as notes) before sending your device
s apply equally to your device, hancement. If any device is not the nearest authorized service
Copyrig
Care and maintenanceYour device is a product of superior design and craftsmanship and should be treated with care. The suggestions below will help you protect your warranty coverage.• Keep the device dry. Precipitation, humidity and all types
of liquids or moisture can contain minerals that will corrode electronic circuits. If your device does get wet, remove the battery and allow the device to dry completely before replacing it.
• Do not use or store the device in dusty, dirty areas. Its moving parts and electronic components can be damaged.
• Do not store the device in hot areas. High temperatures can shorten the life of electronic devices, damage batteries, and warp or melt certain plastics.
• Do not store the device in cold areas. When the device returns to its normal temperature, moisture can form inside the device and damage electronic circuit boards.
• Do not attempt to open the device other than as instructed in this guide.
• Do not drop, knock, or shake the device. Rough handling can break internal circuit boards and fine mechanics.
• Do not use harsh chemicals, cleaning solvents, or strong detergents to clean the device.
• Do not paint the device. Paint can clog the moving parts and prevent proper operation.
• Use a soft, clean, dry cloth to clean any lenses (such as camera, proximity sensor, and light sensor lenses).
• Use only the supplied or an approved replacement antenna. Unauthorized antennas, modifications, or
attachments could damregulations governing r
• Use chargers indoors.• Always create a backup
contacts and calendar to a service facility.
All of the above suggestionbattery, charger, or any enworking properly, take it tofacility for service.
10
ansmitting equipment, including rfere with the functionality of edical devices. Consult a physician or medical device to determine if they rom external RF energy or if you have your device in health care facilities ted in these areas instruct you to do re facilities may be using equipment external RF energy.
manufacturers recommend that a 5.3 centimeters (6 inches) be ireless phone and a pacemaker to ce with the pacemaker. These
nsistent with the independent ndations of Wireless Technology
acemakers should:e more than 15.3 centimeters
pacemaker;n a breast pocket; and ear opposite the pacemaker to
al for interference.
e, switch off your device and move
Addi
tiona
l saf
ety
info
rmat
ion
7 Copyright © 2006 Nokia. All rights reserved.
Additional safety informationYour device and its enhancements may contain small parts. Keep them out of the reach of small children.
Operating environment
Remember to follow any special regulations in force in any area and always switch off your device when its use is prohibited or when it may cause interference or danger. Use the device only in its normal operating positions. This device meets RF exposure guidelines when used either in the normal use position against the ear or when positioned at least 2.2 centimeters (7/8 inches) away from the body. When a carry case, belt clip or holder is used for body-worn operation, it should not contain metal and should position the device the above-stated distance from your body.
In order to transmit data files or messages, this device requires a good quality connection to the network. In some cases, transmission of data files or messages may be delayed until such a connection is available. Ensure the above separation distance instructions are followed until the transmission is completed.
Parts of the device are magnetic. Metallic materials may be attracted to the device. Do not place credit cards or other magnetic storage media near the device, because information stored on them may be erased.
Medical devices
Operation of any radio trwireless phones, may inteinadequately protected mthe manufacturer of the are adequately shielded fany questions. Switch offwhen any regulations posso. Hospitals or health cathat could be sensitive to
Pacemakers Pacemakerminimum separation of 1maintained between a wavoid potential interferenrecommendations are coresearch by and recommeResearch. Persons with p• always keep the devic
(6 inches) from their • not carry the device i• hold the device to the
minimize the potenti
If you suspect interferencthe device away.
Addi
tiona
l saf
ety
info
rmat
ion
108ht © 2006 Nokia. All rights reserved.
wireless telephone network, and
environments
n in any area with a potentially obey all signs and instructions. spheres include areas where you to turn off your vehicle engine. cause an explosion or fire resulting th. Switch off the device at
ear gas pumps at service stations. use of radio equipment in fuel ution areas, chemical plants or are in progress. Areas with a sphere are often but not always e below deck on boats, chemical s, vehicles using liquefied pane or butane), and areas where or particles such as grain, dust or
phones, including this device, , wireless networks, landline mmed functions. Because of this, ns cannot be guaranteed. You any wireless device for essential al emergencies.
Copyrig
Hearing aids Some digital wireless devices may interfere with some hearing aids. If interference occurs, consult your service provider.
Vehicles
RF signals may affect improperly installed or inadequately shielded electronic systems in motor vehicles such as electronic fuel injection systems, electronic antiskid (antilock) braking systems, electronic speed control systems, and air bag systems. For more information, check with the manufacturer or its representative of your vehicle or any equipment that has been added.
Only qualified personnel should service the device, or install the device in a vehicle. Faulty installation or service may be dangerous and may invalidate any warranty that may apply to the device. Check regularly that all wireless device equipment in your vehicle is mounted and operating properly. Do not store or carry flammable liquids, gases, or explosive materials in the same compartment as the device, its parts, or enhancements. For vehicles equipped with an air bag, remember that air bags inflate with great force. Do not place objects, including installed or portable wireless equipment in the area over the air bag or in the air bag deployment area. If in-vehicle wireless equipment is improperly installed and the air bag inflates, serious injury could result.
Using your device while flying may be prohibited. Switch off your device before boarding an aircraft. The use of wireless teledevices in an aircraft may be dangerous to the operation
of the aircraft, disrupt the may be illegal.
Potentially explosive
Switch off your device wheexplosive atmosphere and Potentially explosive atmowould normally be advisedSparks in such areas could in bodily injury or even dearefuelling points such as nObserve restrictions on thedepots, storage, and distribwhere blasting operations potentially explosive atmoclearly marked. They includtransfer or storage facilitiepetroleum gas (such as prothe air contains chemicals metal powders.
Emergency calls
Important: Wirelessoperate using radio signalsnetworks, and user-prograconnections in all conditioshould never rely solely oncommunications like medic

10
or mobile devices employ a unit of he Specific Absorption Rate or SAR. e ICNIRP guidelines is 2.0 watts/ over ten grams of tissue. Tests for
standard operating positions with t its highest certified power level in s. The actual SAR level of an elow the maximum value because
use only the power required to reach t changes depending on a number of you are to a network base station. der the ICNIRP guidelines for use of .41 W/kg.
and enhancements may result in values may vary depending on sting requirements and the network rmation may be provided under ww.nokia.com.
Addi
tiona
l saf
ety
info
rmat
ion
9 Copyright © 2006 Nokia. All rights reserved.
To make an emergency call: 1 If the device is not on, switch it on. Check for adequate
signal strength. Some networks may require that a valid SIM card is properly inserted in the device.
2 Press as many times as needed to clear the display and ready the device for calls.
3 Enter the official emergency number for your present location. Emergency numbers vary by location.
4 Press the key.
If certain features are in use, you may first need to turn those features off before you can make an emergency call. Consult this guide or your service provider for more information.
When making an emergency call, give all the necessary information as accurately as possible. Your wireless device may be the only means of communication at the scene of an accident. Do not end the call until given permission to do so.
Certification information (SAR)
THIS MOBILE DEVICE MEETS GUIDELINES FOR EXPOSURE TO RADIO WAVES
Your mobile device is a radio transmitter and receiver. It is designed not to exceed the limits for exposure to radio waves recommended by international guidelines. These guidelines were developed by the independent scientific organization ICNIRP and include safety margins designed to assure the protection of all persons, regardless of age and health.
The exposure guidelines fmeasurement known as tThe SAR limit stated in thkilogram (W/kg) averagedSAR are conducted usingthe device transmitting aall tested frequency bandoperating device can be bthe device is designed to the network. That amounfactors such as how closeThe highest SAR value unthe device at the ear is 0
Use of device accessoriesdifferent SAR values. SARnational reporting and teband. Additional SAR infoproduct information at w

Inde
x
110ht © 2006 Nokia. All rights reserved.
66
rding 95
7, 18, 23ighting 19, 24s 17er settings 24
7, 19, 24
Copyrig
IndexAaccess points 90
settings 91activate loudspeaker
with closed cover 56activation keys 100alarms
alarm clock 11applications
installing 98Java 98
Bbacking up 12Bluetooth 81
connecting two devices, pairing 83device address 83headset 97pairing 83security 82switching off 84
bookmarks 62brightness
display 89setting in camera 18, 23
Ccache, clearing 64calendar
create entries 66synchronizing PC Suite
call registerSee log
callsdialled numbers 56duration 57international 49received 56settings 89settings for call forwatransferring 55
cameraadjusting brightness 1adjusting colour and ladjusting flash settingadjusting video recordedit videos 27flash 19image setup settings 1saving video clips 23self-timer 20

11
t, DRM
777
43
ox 42
s 43
Inde
x
1 Copyright © 2006 Nokia. All rights reserved.
sending images 18sequence mode 19still image camera settings 20
certificates 94chat
See instant messagingclear screen
See standby modeclock 11
alarm 11settings 12
codes 93lock codePIN code 94PIN2 code 94security code 94
computer connections 85conference call 49connection settings 90contact cards 59
inserting pictures 59sending 59storing DTMF tones 56
copyingcontacts between the SIM card and device memory 60
copyright protectionsee activation keys
Ddata connections
details 85ending 86indicators 10
date 11device manager 86digital rights managemen
see activation keys
Eediting videos
adding effects 27adding sound clips 2adding transitions 2custom video clips 2
e-mail 39automatic retrievingopening 43remote mailbox 42retrieving from mailbsettings 46viewing attachment
Ffile formats
.jad 98
.jar 98
.sis 98

Inde
x
112ht © 2006 Nokia. All rights reserved.
3
57mption 14
39
Copyrig
RealPlayer 32file manager 13fixed dialing 60FM radio 69
Ggallery
ordering files in albums 30presentations 29
Hhandsfree
see loudspeakerheadset settings 97help application 15
Iindicators 10instant messaging 71
blocking 73connecting to a server 72recording messages 73sending instant messages 73
InternetSee Services
Internet access points (IAP)See access points
JJava
See applications
Llock code 94log
erasing contents 58filtering 58
log duration 58loopset settings 97loudspeaker 11
Mmailbox 42
automatic retrieving 4media files
fast forward 32file formats 32mute sound 32rewind 32
memoryclearing memory 14, viewing memory consu
memory card 12menu, rearranging 78messaging
e-mail 39multimedia messages text messages 38
movies, muveescustom muvees 34quick muvees 34
11
ess cards 59
ity 81
one 78
Inde
x
3 Copyright © 2006 Nokia. All rights reserved.
multimedia messages 39music player 68mute sound 32
Ppacket data connections
settings 92PC connections 85PC Suite
calendar data 66synchronization 85transferring images to a PC 26transferring music files to your memory card 68viewing device memory data 11, 14
personalization 79phonebook
See contact cardsPIN code 94profiles 78
Rradio 69remote mailbox 42remote SIM mode 82ringing tones
personal ringing tone 61receiving in a text message 41
Ssecurity code
See lock codesending
contact cards, businimages 18video clips 29
service commands 37Services
browser 62settings
access codes 93access points 91Bluetooth connectivcalendar 67call forwarding 95call restriction 96certificates 94cover display 89data connections 90date and time 93display 89IM 72, 74language 88lock code 94original settings 88personalizing the phPIN code 94screen saver 89UPIN code 94

Inde
x
114ht © 2006 Nokia. All rights reserved.
umber 17, 49ice mailbox 95
ss points
Copyrig
UPUK code 94shortcuts 14SIM card
copying names and numbers to phone 60messages 44names and numbers 60
sis file 98snooze 11software
transferring a file to your device 98sound clips 26sounds
muting a ringing tone 55recording sounds 77
speed dialing 50standby mode 78SVG files 29synchronization 86
Ttext messages 38themes 79time 11transferring content from another device 9UUPIN code 94UPUK code 94USSD commands 37
Vvideo call 51
answering 55rejecting 55
video clips 26video player
See RealPlayerVisual Radio 69
viewing content 71visual service ID 71
voice commands 97voice dialing 50voice mailbox 49
changing the phone nforwarding calls to vo
voice messages 49voice tags 97
making calls 50volume control 11
during a call 49loudspeaker 11
WWeb
access points, see acceSee Services