Expense Management - Invoice Management Module User Guide ...
64
NEC NEC Corporation Expense Management Invoice Management Module User Guide November 2010 NDA-31012, Issue 2
Transcript of Expense Management - Invoice Management Module User Guide ...

NEC NEC Corporation
Expense Management
Invoice Management Module
User Guide
November 2010NDA-31012, Issue 2
Liability Disclaimer
NEC Corporation reserves the right to change the specifications, functions, or features, at any time, without notice.
NEC Corporation has prepared this document for the exclusive use of its employees and customers. The information contained herein is the property of NEC Corporation and shall not be reproduced without prior
written approval fromNEC Corporation
© 2010 NEC Corporation
Windows®, and Microsoft® are registered trademarks of Microsoft Corporation.
All other brand or product names are or may be trademarks or registered trademarks of, and are used to identify products or services
of, their respective owners.

i
Expense Management - Invoice Management Module User Guide - Issue 2
Contents
Introduction 1-1
Invoice Management Overview. . . . . . . . . . . . . . . . . . . . . . . . . . . . . . . . . . . . . 1-1
Expense Management Overview . . . . . . . . . . . . . . . . . . . . . . . . . . . . . . . . . . . 1-2
Getting Started 2-1
Entering the Invoice Management. . . . . . . . . . . . . . . . . . . . . . . . . . . . . . . . . . . 2-1
Invoice Management Window . . . . . . . . . . . . . . . . . . . . . . . . . . . . . . . . . . . . . . 2-1Application Heading . . . . . . . . . . . . . . . . . . . . . . . . . . . . . . . . . . . . . . . . . . . . . 2-2Sub Module Dependent Area . . . . . . . . . . . . . . . . . . . . . . . . . . . . . . . . . . . . . . 2-2
Sorting Records. . . . . . . . . . . . . . . . . . . . . . . . . . . . . . . . . . . . . . . . . . . . . . . . . 2-3
Filtering Records . . . . . . . . . . . . . . . . . . . . . . . . . . . . . . . . . . . . . . . . . . . . . . . . 2-3
Invoice Management Work Flow 3-1
Contracts Sub Module. . . . . . . . . . . . . . . . . . . . . . . . . . . . . . . . . . . . . . . . . . . . 3-1
Invoices Sub Module . . . . . . . . . . . . . . . . . . . . . . . . . . . . . . . . . . . . . . . . . . . . . 3-2
Contracts Sub Module 4-1
Introduction . . . . . . . . . . . . . . . . . . . . . . . . . . . . . . . . . . . . . . . . . . . . . . . . . . . . 4-1
Service Providers . . . . . . . . . . . . . . . . . . . . . . . . . . . . . . . . . . . . . . . . . . . . . . . 4-3
Contracts . . . . . . . . . . . . . . . . . . . . . . . . . . . . . . . . . . . . . . . . . . . . . . . . . . . . . . 4-5
ii Contents
Expense Management - Invoice Management Module User Guide - Issue 2
Working with Contracts . . . . . . . . . . . . . . . . . . . . . . . . . . . . . . . . . . . . . . . . . . . 4-5Contract Fields . . . . . . . . . . . . . . . . . . . . . . . . . . . . . . . . . . . . . . . . . . . . . . . . . 4-6
Accounts . . . . . . . . . . . . . . . . . . . . . . . . . . . . . . . . . . . . . . . . . . . . . . . . . . . . . . 4-7Working with Accounts . . . . . . . . . . . . . . . . . . . . . . . . . . . . . . . . . . . . . . . . . . . 4-7Billing Account Fields . . . . . . . . . . . . . . . . . . . . . . . . . . . . . . . . . . . . . . . . . . . . 4-9
Devices . . . . . . . . . . . . . . . . . . . . . . . . . . . . . . . . . . . . . . . . . . . . . . . . . . . . . . 4-10Working with Devices . . . . . . . . . . . . . . . . . . . . . . . . . . . . . . . . . . . . . . . . . . . 4-10Creating New Devices . . . . . . . . . . . . . . . . . . . . . . . . . . . . . . . . . . . . . . . . . . 4-12Editing or Deleting Devices. . . . . . . . . . . . . . . . . . . . . . . . . . . . . . . . . . . . . . . 4-14Device Fields . . . . . . . . . . . . . . . . . . . . . . . . . . . . . . . . . . . . . . . . . . . . . . . . . 4-16
Charge Types . . . . . . . . . . . . . . . . . . . . . . . . . . . . . . . . . . . . . . . . . . . . . . . . . 4-17
Invoices Sub Module 5-1
Invoices . . . . . . . . . . . . . . . . . . . . . . . . . . . . . . . . . . . . . . . . . . . . . . . . . . . . . . . 5-1Introduction . . . . . . . . . . . . . . . . . . . . . . . . . . . . . . . . . . . . . . . . . . . . . . . . . . . . 5-1Creating Invoices . . . . . . . . . . . . . . . . . . . . . . . . . . . . . . . . . . . . . . . . . . . . . . . 5-1Editing or Deleting Invoices . . . . . . . . . . . . . . . . . . . . . . . . . . . . . . . . . . . . . . . 5-4Invoice Fields . . . . . . . . . . . . . . . . . . . . . . . . . . . . . . . . . . . . . . . . . . . . . . . . . . 5-5
Approving or Disputing Invoices . . . . . . . . . . . . . . . . . . . . . . . . . . . . . . . . . . . . 5-7Approving and Disputing - Introduction. . . . . . . . . . . . . . . . . . . . . . . . . . . . . . . 5-7Approving or Disputing Devices . . . . . . . . . . . . . . . . . . . . . . . . . . . . . . . . . . . . 5-7Creating an Invoice Dispute . . . . . . . . . . . . . . . . . . . . . . . . . . . . . . . . . . . . . . 5-10Approving or Disputing Invoice Charges. . . . . . . . . . . . . . . . . . . . . . . . . . . . . 5-12Invoice Dispute Fields. . . . . . . . . . . . . . . . . . . . . . . . . . . . . . . . . . . . . . . . . . . 5-13Payments . . . . . . . . . . . . . . . . . . . . . . . . . . . . . . . . . . . . . . . . . . . . . . . . . . . . 5-14
Reports 6-1
Introduction . . . . . . . . . . . . . . . . . . . . . . . . . . . . . . . . . . . . . . . . . . . . . . . . . . . . 6-1
Reports Toolbar . . . . . . . . . . . . . . . . . . . . . . . . . . . . . . . . . . . . . . . . . . . . . . . . . 6-3
Report Parameters . . . . . . . . . . . . . . . . . . . . . . . . . . . . . . . . . . . . . . . . . . . . . . 6-4

Contents iii
Expense Management - Invoice Management Module User Guide - Issue 2
Alerts 7-1
Introduction . . . . . . . . . . . . . . . . . . . . . . . . . . . . . . . . . . . . . . . . . . . . . . . . . . . . 7-1
Working with Alerts . . . . . . . . . . . . . . . . . . . . . . . . . . . . . . . . . . . . . . . . . . . . . . 7-2
Alert Fields . . . . . . . . . . . . . . . . . . . . . . . . . . . . . . . . . . . . . . . . . . . . . . . . . . . . 7-4
Scheduling Fields . . . . . . . . . . . . . . . . . . . . . . . . . . . . . . . . . . . . . . . . . . . . . . . 7-5

iv Contents
Expense Management - Invoice Management Module User Guide - Issue 2

v
Expense Management - Invoice Management Module User Guide - Issue 2
Figures
Figure Title Page
2-1 Application Heading. . . . . . . . . . . . . . . . . . . . . . . . . . . . . . . . . . . . . . . . . 2-2
4-1 New Provider . . . . . . . . . . . . . . . . . . . . . . . . . . . . . . . . . . . . . . . . . . . . . . 4-3
4-2 New Contract . . . . . . . . . . . . . . . . . . . . . . . . . . . . . . . . . . . . . . . . . . . . . . 4-5
4-3 New Billing Account . . . . . . . . . . . . . . . . . . . . . . . . . . . . . . . . . . . . . . . . . 4-8
4-4 New Device . . . . . . . . . . . . . . . . . . . . . . . . . . . . . . . . . . . . . . . . . . . . . . 4-10
5-1 New Invoice . . . . . . . . . . . . . . . . . . . . . . . . . . . . . . . . . . . . . . . . . . . . . . . 5-2
5-2 Invoice Manual Load . . . . . . . . . . . . . . . . . . . . . . . . . . . . . . . . . . . . . . . . 5-3
5-3 New Invoice Dispute . . . . . . . . . . . . . . . . . . . . . . . . . . . . . . . . . . . . . . . 5-10
5-4 Invoice Summary . . . . . . . . . . . . . . . . . . . . . . . . . . . . . . . . . . . . . . . . . . 5-13
5-5 Outstanding Payments . . . . . . . . . . . . . . . . . . . . . . . . . . . . . . . . . . . . . 5-15
6-1 Report Parameters for the Invoice Summary by Period Report . . . . . . . 6-2
7-1 New Alert - Select Task . . . . . . . . . . . . . . . . . . . . . . . . . . . . . . . . . . . . . . 7-2
7-2 New Alert - Select Scheduling Type . . . . . . . . . . . . . . . . . . . . . . . . . . . . 7-2
7-3 New Alert - Select Scheduling . . . . . . . . . . . . . . . . . . . . . . . . . . . . . . . . . 7-3

vi Figures
Expense Management - Invoice Management Module User Guide - Issue 2

vii
Expense Management - Invoice Management Module User Guide - Issue 2
Tables
Table Title Page
4-1 Contract Field Descriptions . . . . . . . . . . . . . . . . . . . . . . . . . . . . . . . . . . . 4-6
4-2 Billing Account Field Descriptions . . . . . . . . . . . . . . . . . . . . . . . . . . . . . . 4-9
4-3 Device Field Descriptions . . . . . . . . . . . . . . . . . . . . . . . . . . . . . . . . . . . 4-16
5-1 Invoice Field Descriptions . . . . . . . . . . . . . . . . . . . . . . . . . . . . . . . . . . . . 5-5
5-2 Invoice Dispute Field Descriptions. . . . . . . . . . . . . . . . . . . . . . . . . . . . . 5-13
6-1 Reports Toolbar . . . . . . . . . . . . . . . . . . . . . . . . . . . . . . . . . . . . . . . . . . . . 6-3
6-2 Report Parameters . . . . . . . . . . . . . . . . . . . . . . . . . . . . . . . . . . . . . . . . . 6-4
7-1 Alert Field Descriptions . . . . . . . . . . . . . . . . . . . . . . . . . . . . . . . . . . . . . . 7-4
7-2 Scheduling Field Descriptions . . . . . . . . . . . . . . . . . . . . . . . . . . . . . . . . . 7-5

viii Tables
Expense Management - Invoice Management Module User Guide - Issue 2
1-1
Expense Management - Invoice Management Module User Guide - Issue 2
1Introduction
Chapter Topics • Invoice Management Overview• Expense Management Overview
Invoice Management Overview
The Invoice Management module of Expense Management enables you to:
• Follow up on invoices your organization receives from various Service Providers or Carriers;
• Assign invoice charges to Accounts, Devices and Charge Types;• Approve or dispute invoices according to accounts, devices, charge
types, or devices and charge types;• Create timely payments for approved charges;• Set alerts to remind you that an invoice is due, a contract is about to
expire or that an invoice has not been received yet.
Once the relatively fixed entities of the Invoice Management - Service Providers, Contracts, Accounts, Devices and Charge Types - are defined, you can easily enter the periodic invoice charges.
On the other hand, you can start using the module by defining your organization's contracts only. The module automatically creates a default account, device and charge type, which enables you to simply enter and approve or dispute entire invoices. If and when the need for a more detailed follow up on invoices arises, you can then add more details.

1-2 Introduction
Expense Management - Invoice Management Module User Guide - Issue 2
Expense Management Overview
Expense Management provides an integrated, scalable IT management solution for businesses of almost every size and market segment. Organizations can become more productive using its tools to effectively manage IT operations and services while controlling IT-related expenses. Features include:
• Integration with Back Office Accounting Systems - Expense Management seamlessly integrates with back office accounting systems to provide detailed reports of voice and data use. The information provided can be used in compliance reports, to properly attribute time to specific customers, and for other budgeting purposes. Invoice management integrates with accounts payable to provide payment commands and receive paid transaction numbers.
• Improving Customer Service - Provides the tools to manage IT services such as usage, routing and scheduling, Expense Management enables enterprises to improve customer service. Customer registration and organization tools are offered, and registered customers can be assigned relevant services and resources. Customers are served with speed and accuracy, and customers’ satisfaction with those services improves.
• Monitoring Performance and Controls Expense - Invoice management provides an ultimately accurate inventory list, facilitates term simulations and best-package allocation, identifies policy abuse and erroneous charges, and enables accurate bill-back of organizational units and convergent invoice issuance to employees. The policy-planning module implements and monitors real time performance and system usage based on policies and criteria defined by the organization.
• Working for Organizations of Any Size - Powerful, scalable and totally secure, Expense Management can handle jobs of nearly any size; it works as well for a global corporation’s multiple high-traffic, heavy-volume sites as it does for a small organization with minimal traffic. It also provides multi-vendor PBX support and additional inputs including online mobile call detail records.
• Supporting Business Growth - The system’s modular architecture supports the ongoing expansion of system functionality. Additional modules may be added based on customer request. The application is designed around a multi-tier processes, queues and services architecture, which offers the benefit of distributing loads across multiple servers and provides growth opportunities and flexibility.
2-1
Expense Management - Invoice Management Module User Guide - Issue 2
2Getting Started
Chapter Topics • Entering the Invoice Management• Invoice Management Window• Sorting Records• Filtering Records
Entering the Invoice Management
In order to use the Invoice Management Module of Expense Management, you must have permissions to access it. Ask your System Administrator to provide you with appropriate permissions.
To enter the Invoice Management module:
Step In the Expense Management Module selection bar, select IM.
Invoice Management Window
The Invoice Management module window changes according to the needs of the different sub modules (functions and entities). However, most of the Invoice Management windows retain the basic structure as well as a similar look and feel. See Figure 2-1.
2-2 Getting Started
Expense Management - Invoice Management Module User Guide - Issue 2
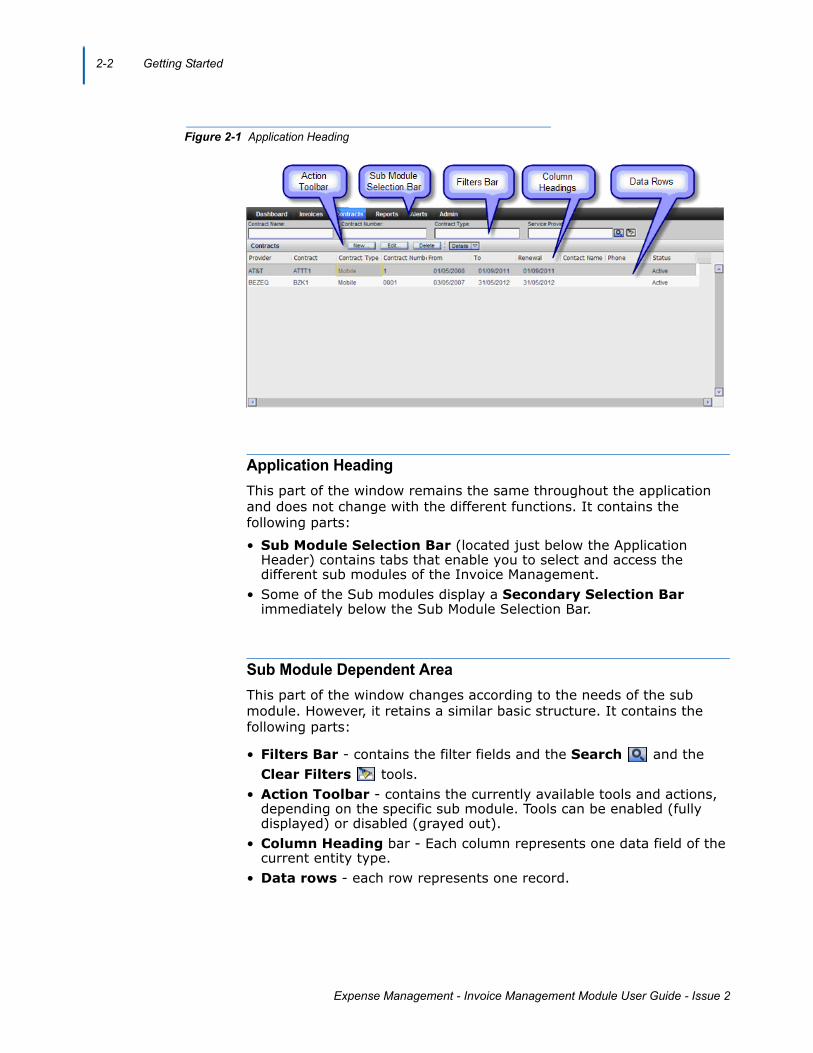
Figure 2-1 Application Heading
Application Heading
This part of the window remains the same throughout the application and does not change with the different functions. It contains the following parts:
• Sub Module Selection Bar (located just below the Application Header) contains tabs that enable you to select and access the different sub modules of the Invoice Management.
• Some of the Sub modules display a Secondary Selection Bar immediately below the Sub Module Selection Bar.
Sub Module Dependent Area
This part of the window changes according to the needs of the sub module. However, it retains a similar basic structure. It contains the following parts:
• Filters Bar - contains the filter fields and the Search and the Clear Filters tools.
• Action Toolbar - contains the currently available tools and actions, depending on the specific sub module. Tools can be enabled (fully displayed) or disabled (grayed out).
• Column Heading bar - Each column represents one data field of the current entity type.
• Data rows - each row represents one record.

Getting Started 2-3
Expense Management - Invoice Management Module User Guide - Issue 2
Sorting Records
You can sort the displayed records by any of the columns, but only by one column. A small triangle in the column heading indicates it.
To sort the records:
• Click in the column heading to sort by that column.• First time you click in the column heading, it is sorted by ascending
order. A small triangle in the column heading indicates the sort order.• To reverse the sort order, click in the column heading again.
Filtering Records
Filtering enables you to select and display only records that match the filter fields values. Matching is determined as follows:
• If more than one filter field is used, only records matching all non empty filter fields are selected.
• Alphanumeric filter fields are matched only to the length of the filter value, e.g. data values "Abracadabra", "Abba", and "Abraham" - all match filter value "Ab".
• Alphanumeric filter field matching is not case sensitive, e.g. data values "Abracadabra", "Abba", and "Abraham" - all match filter value "ab".
• From Date filter field selects records with dates not less than the filter date.
• To Date filter field selects records with dates not greater than the filter value.
• Numeric filter field selects records with value greater than the filter value.
To filter records:
Step 1 Enter the required values in the appropriate filter fields.
Step 2 Click .
To cancel filtering:
1.Click .

2-4 Getting Started
Expense Management - Invoice Management Module User Guide - Issue 2
3-1
Expense Management - Invoice Management Module User Guide - Issue 2
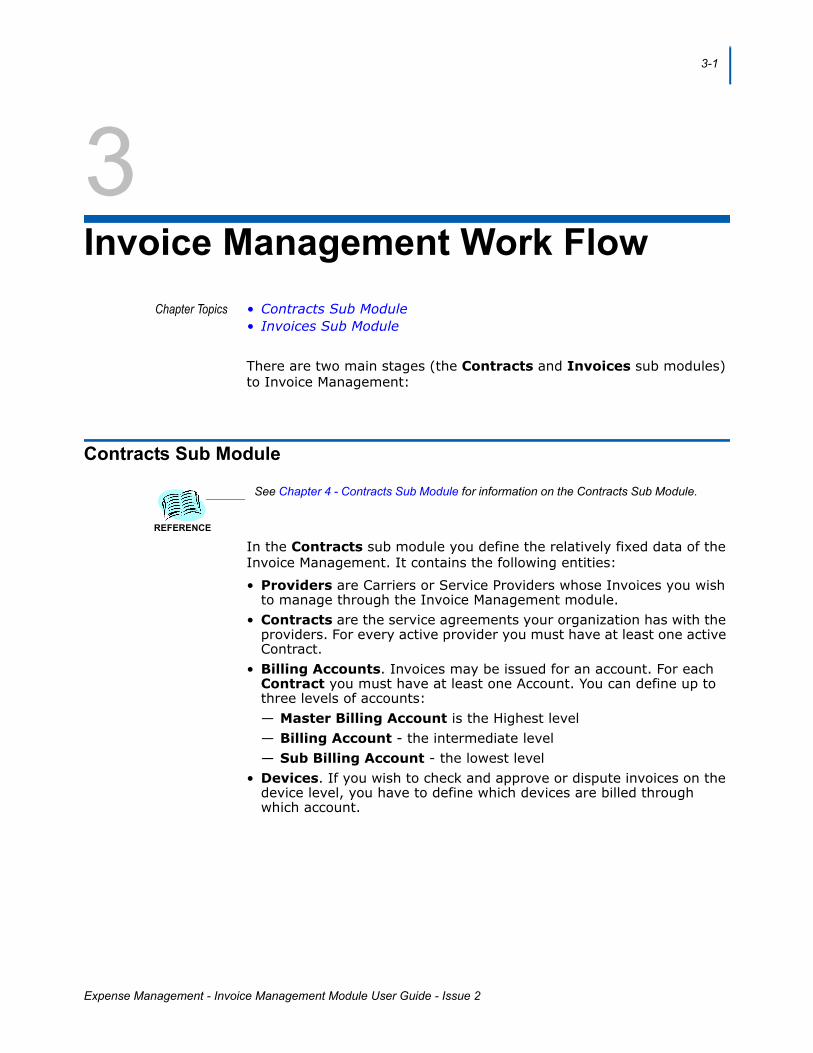
3Invoice Management Work Flow
Chapter Topics • Contracts Sub Module• Invoices Sub Module
There are two main stages (the Contracts and Invoices sub modules) to Invoice Management:
Contracts Sub Module
See Chapter 4 - Contracts Sub Module for information on the Contracts Sub Module.
In the Contracts sub module you define the relatively fixed data of the Invoice Management. It contains the following entities:
• Providers are Carriers or Service Providers whose Invoices you wish to manage through the Invoice Management module.
• Contracts are the service agreements your organization has with the providers. For every active provider you must have at least one active Contract.
• Billing Accounts. Invoices may be issued for an account. For each Contract you must have at least one Account. You can define up to three levels of accounts:— Master Billing Account is the Highest level— Billing Account - the intermediate level— Sub Billing Account - the lowest level
• Devices. If you wish to check and approve or dispute invoices on the device level, you have to define which devices are billed through which account.
REFERENCE

3-2 Invoice Management Work Flow
Expense Management - Invoice Management Module User Guide - Issue 2
Invoices Sub Module
See Chapter 5 - Invoices Sub Module for information on the Invoice Sub Module.
In the Invoice sub module you enter the periodic Invoices' data and Approve or Dispute Invoices, Devices, and Events.
Each billing period you enter the invoice data into the Invoice Management. You can enter the Invoice Summary, or, if you wish to approve or dispute invoices on the Device level, you have to enter the Invoice details too.
REFERENCE

4-1
Expense Management - Invoice Management Module User Guide - Issue 2
4Contracts Sub Module
Chapter Topics • Introduction• Service Providers• Contracts• Accounts• Devices• Charge Types
Introduction
In the Contracts sub module, you define the relatively fixed data of the Invoice Management module: Service Providers (or telephony Operators), the Contracts (service agreements) your organization has with these providers, and for each contract - its Billing Accounts, the Devices billed through each Account, and their Charge Types.
In the Invoices sub module you use these definitions: Invoice amounts are assigned to these entities and then approved or disputed.
The Contracts sub module entities are:
• Providers define the Service Providers (or Carriers) whose Invoices you wish to manage through the Invoice Management module.
• Contracts define the service agreements your organization have with these providers. For every active provide you must have at least one active Contract.
• Invoices are assigned to Billing Accounts, so each Contract must have at least one Account.
You can define up to three levels of accounts:
• Master Billing Account is the Highest level. Each contract must have one, and only one, Master Billing Account. A Master Billing Account is created by default once a contract has been defined. You can edit it, but you cannot delete it or create another Master Billing Account.
• Billing Account is the intermediate level. You can define as many Billing Accounts as needed.

4-2 Contracts Sub Module
Expense Management - Invoice Management Module User Guide - Issue 2
• Sub Billing Account is the lowest level. You can define as many Billing Accounts as needed.Higher level accounts (that is, Accounts under which you defined lower level Accounts) does not cease to be valid accounts. They can still have Devices assigned to them and Invoices charged to them.Some windows display Accounts by concatenating their IDs into a "Path" ID: <Master Billing Account ID>/<Billing Account ID>/<Sub Billing Account ID>.
• Devices. If you wish to approve or dispute invoices per device, you have to define which devices are billed through which account.
• Charge Types enables you, on the one hand, to approve or dispute groups of devices at once, and on the other hand, to farther refine the Device charge assignments.
However, you do not have to define all these details right from the beginning. You can start by defining only Providers and their Contracts. When you create a new Contract, it is automatically created with one default "Main" Master Billing Account and one default "General" Device with a default Charge Type of "Account Charge".
This enables you to enter Invoices and Charges on a "per Contract" level. When and if the need for more details arises, you can first create more detailed Accounts, then assign Devices to the Accounts, and finally define one or more Charge Types for the Devices.
Contracts Sub Module 4-3
Expense Management - Invoice Management Module User Guide - Issue 2
Service Providers
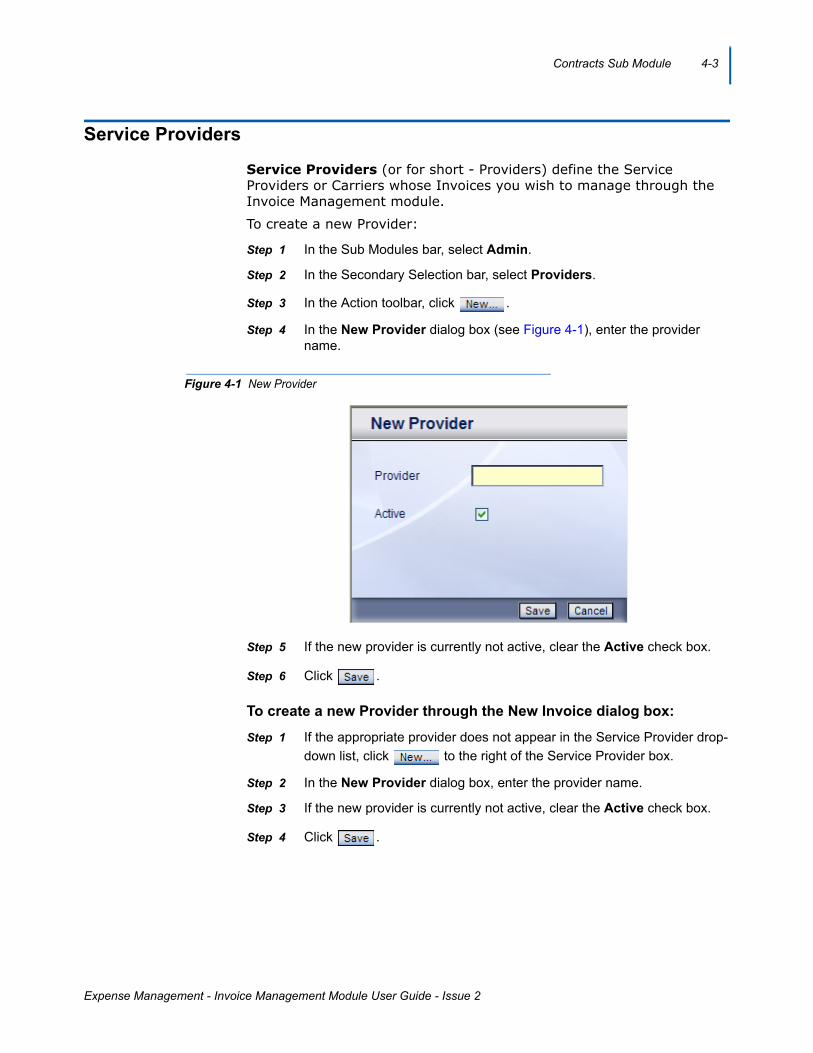
Service Providers (or for short - Providers) define the Service Providers or Carriers whose Invoices you wish to manage through the Invoice Management module.
To create a new Provider:
Step 1 In the Sub Modules bar, select Admin.
Step 2 In the Secondary Selection bar, select Providers.
Step 3 In the Action toolbar, click .
Step 4 In the New Provider dialog box (see Figure 4-1), enter the provider name.
Figure 4-1 New Provider
Step 5 If the new provider is currently not active, clear the Active check box.
Step 6 Click .
To create a new Provider through the New Invoice dialog box:
Step 1 If the appropriate provider does not appear in the Service Provider drop-
down list, click to the right of the Service Provider box.
Step 2 In the New Provider dialog box, enter the provider name.
Step 3 If the new provider is currently not active, clear the Active check box.
Step 4 Click .

4-4 Contracts Sub Module
Expense Management - Invoice Management Module User Guide - Issue 2
To edit a Provider:
Step 1 In the Sub Modules bar, select Admin.
Step 2 In the Secondary Selection bar, select Providers.
Step 3 If the Provider you wish to edit is not displayed in the window, scroll, filter, or sort the Providers records until the desired Provider appears in the window.
Step 4 Click in the desired Provider row to select it.
Step 5 In the Action toolbar, click .
Step 6 Check or clear the Active check box. This is the only Provider field you can edit.
Step 7 Click .
To delete an existing Provider:
Step 1 In the Sub Modules bar, select Admin.
Step 2 In the Secondary Selection bar, select Providers.
Step 3 If the Provider you wish to delete is not displayed in the window, scroll, filter, or sort the Provider records until the desired Provider appears in the window.
Step 4 Click in the desired Provider row to select it.
Step 5 In the Action toolbar, click .
Step 6 In the confirmation dialog box, select OK.

Contracts Sub Module 4-5
Expense Management - Invoice Management Module User Guide - Issue 2
Contracts
Working with Contracts
A Contract represents a service agreement of your organization with a Service Provides.
To create a new Contract:
Step 1 In the Sub Modules bar, select Contracts.
Step 2 In the Action toolbar, click .
Step 3 In the New Contract dialog box (see Figure 4-2), fill in the Contract fields. See Contract Fields.
Figure 4-2 New Contract
Step 4 Click .
To edit a Contract:
Step 1 In the Sub Modules bar, select Contracts.
Step 2 Click in the desired Contract row to select it. If the Contract you wish to edit does not appear in the window, scroll, filter, or sort the Contract records until the desired Contract appears in the window.
Step 3 In the Action toolbar, click .
Step 4 In the Edit Contract dialog box, edit the fields you wish to change. See Contract Fields.
Step 5 Click .
4-6 Contracts Sub Module
Expense Management - Invoice Management Module User Guide - Issue 2
To delete an existing Contract:
Step 1 In the Sub Modules bar, select Contracts.
Step 2 If the Contract you wish to delete does not appear in the window, scroll, filter, or sort the Contract records until the desired Contract appears in the window.
Step 3 Click in the desired Contract row to select it.
Step 4 In the Action toolbar, click .
Step 5 In the confirmation dialog box, select OK.
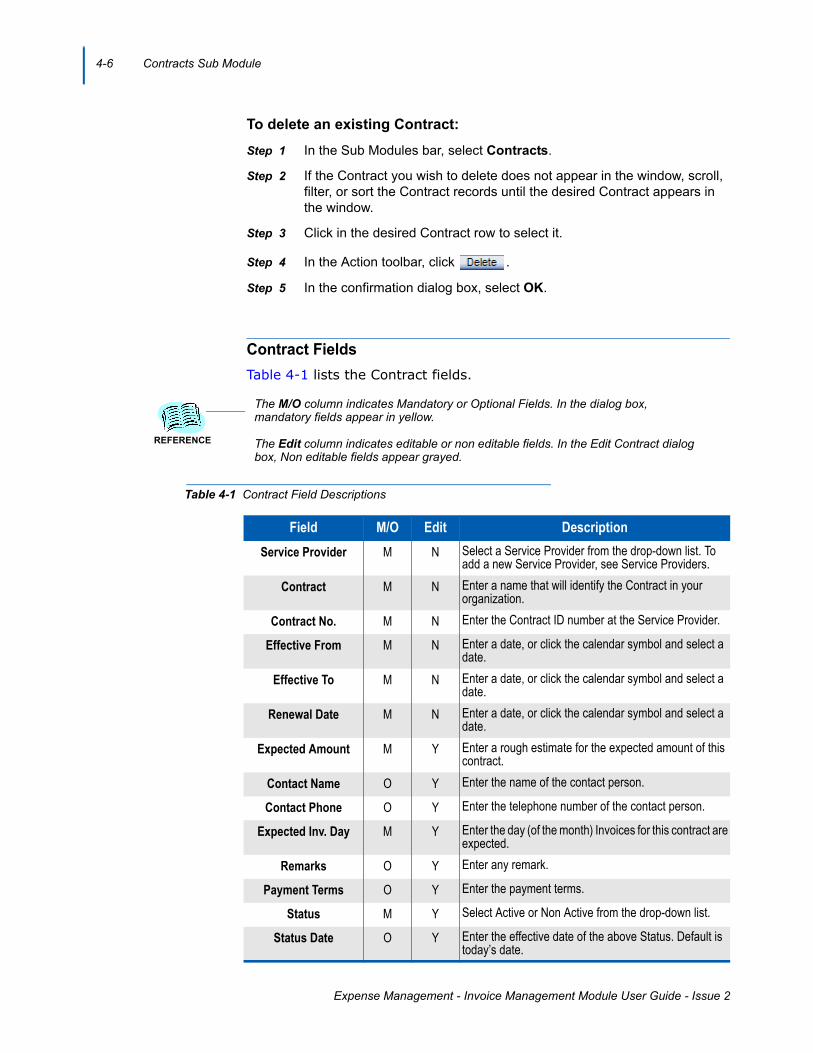
Contract Fields
Table 4-1 lists the Contract fields.
Table 4-1 Contract Field Descriptions
Field M/O Edit Description
Service Provider M N Select a Service Provider from the drop-down list. To add a new Service Provider, see Service Providers.
Contract M N Enter a name that will identify the Contract in your organization.
Contract No. M N Enter the Contract ID number at the Service Provider.
Effective From M N Enter a date, or click the calendar symbol and select a date.
Effective To M N Enter a date, or click the calendar symbol and select a date.
Renewal Date M N Enter a date, or click the calendar symbol and select a date.
Expected Amount M Y Enter a rough estimate for the expected amount of this contract.
Contact Name O Y Enter the name of the contact person.
Contact Phone O Y Enter the telephone number of the contact person.
Expected Inv. Day M Y Enter the day (of the month) Invoices for this contract are expected.
Remarks O Y Enter any remark.
Payment Terms O Y Enter the payment terms.
Status M Y Select Active or Non Active from the drop-down list.
Status Date O Y Enter the effective date of the above Status. Default is today’s date.
REFERENCE
The M/O column indicates Mandatory or Optional Fields. In the dialog box, mandatory fields appear in yellow.
The Edit column indicates editable or non editable fields. In the Edit Contract dialog box, Non editable fields appear grayed.
Contracts Sub Module 4-7
Expense Management - Invoice Management Module User Guide - Issue 2
Accounts
Working with Accounts
Invoices may be issued by Billing Accounts. For each Contract you must have at least one Account. You can define as many Accounts as you wish in a hierarchy of up to three levels:
• The Master Billing Account is the top of the hierarchy. Each Contract must have one, and only one, Master Billing Account.
• Billing Account is the intermediate level• Sub Billing Account is the lowest level
When you create a new Contract, it is automatically created with a default Master Billing Account called "Main". If all you need for that contract is one Account, you can use it. You can edit the Master Billing Account data, including its Account ID "main". However, you cannot create another Master Billing Account, and you cannot delete a Master Billing Account.
If you need more than one account, you can create many Billing Accounts under the Master Billing Account. Under each Billing Account you can create many Sub Billing Accounts.
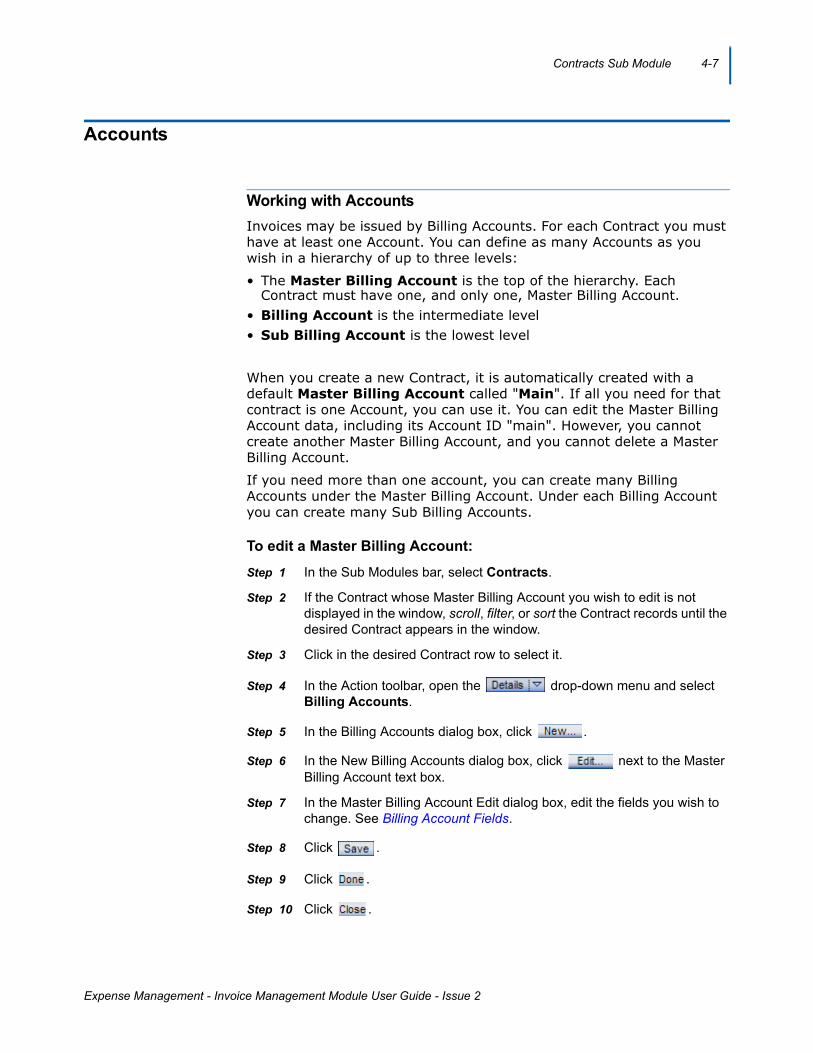
To edit a Master Billing Account:
Step 1 In the Sub Modules bar, select Contracts.
Step 2 If the Contract whose Master Billing Account you wish to edit is not displayed in the window, scroll, filter, or sort the Contract records until the desired Contract appears in the window.
Step 3 Click in the desired Contract row to select it.
Step 4 In the Action toolbar, open the drop-down menu and select Billing Accounts.
Step 5 In the Billing Accounts dialog box, click .
Step 6 In the New Billing Accounts dialog box, click next to the Master Billing Account text box.
Step 7 In the Master Billing Account Edit dialog box, edit the fields you wish to change. See Billing Account Fields.
Step 8 Click .
Step 9 Click .
Step 10 Click .

4-8 Contracts Sub Module
Expense Management - Invoice Management Module User Guide - Issue 2
Figure 4-3 New Billing Account
To create a new Billing Account:
Step 1 In the Sub Modules bar, select Contracts.
Step 2 If the Contract for which you wish to create a new Account is not displayed in the window, scroll, filter, or sort the Contract records until the desired Contract appears in the window.
Step 3 Click in the desired Contract row to select it.
Step 4 In the Action toolbar, open the drop-down menu and select Billing Accounts.
Step 5 In the Billing Accounts window, click .
Step 6 In the New Billing Account window, click next to the Billing Account text box.
Step 7 In the New Account dialog box, fill in the Billing Account fields. See Billing Account Fields.
Step 8 Click .
Step 9 Click .
Step 10 Click .
To create a new Sub Billing Account:
Step 1 In the Sub Modules bar, select Contracts.
Step 2 If the Contract for which you wish to create a new Account is not displayed in the window, scroll, filter, or sort the Contract records until the desired Contract appears in the window.
Step 3 Click in the desired Contract row to select it.
Step 4 In the Action toolbar, open the drop-down menu and select Billing Accounts.
Step 5 In the Billing Accounts window, click .
Contracts Sub Module 4-9
Expense Management - Invoice Management Module User Guide - Issue 2
Step 6 In the New Billing Account dialog box, open the Billing Account drop-down list and select the desired Billing Account.
Step 7 Click next to the Sub Account text box.
Step 8 In the New Account dialog box, fill in the Billing Account fields. See Billing Account Fields.
Step 9 Click .
Step 10 Click .
Step 11 Click .
To delete an existing Billing Account:
Step 1 In the Sub Modules bar, select Contracts.
Step 2 If the Contract for which you wish to delete an Account is not displayed in the window, scroll, filter, or sort the Contract records until the desired Contract appears in the window.
Step 3 Click in the desired Contract row to select it.
Step 4 In the Action toolbar, open the drop-down menu and select Billing Accounts.
Step 5 In the Billing Accounts window, select the Account you wish to delete click .
Step 6 In the confirmation dialog box, select OK.
Step 7 Click .
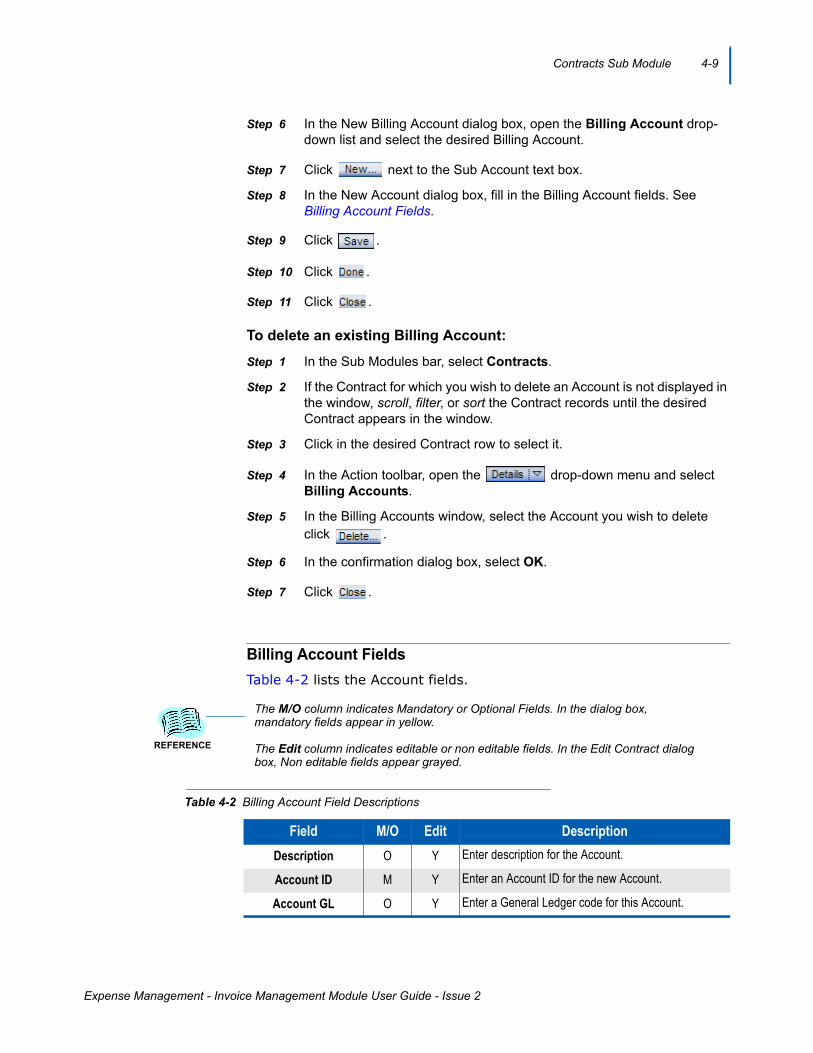
Billing Account Fields
Table 4-2 lists the Account fields.
Table 4-2 Billing Account Field Descriptions
Field M/O Edit Description
Description O Y Enter description for the Account.
Account ID M Y Enter an Account ID for the new Account.
Account GL O Y Enter a General Ledger code for this Account.
REFERENCE
The M/O column indicates Mandatory or Optional Fields. In the dialog box, mandatory fields appear in yellow.
The Edit column indicates editable or non editable fields. In the Edit Contract dialog box, Non editable fields appear grayed.
4-10 Contracts Sub Module
Expense Management - Invoice Management Module User Guide - Issue 2
Devices
Working with Devices
Devices. If you wish to approve or dispute invoices on the device level, you have to define which devices are billed through which account.
You can create a new Device:
• From the Contracts list. • From the Billing Accounts list• While you enter a new invoice
To create a new Device from the Contracts list:
Step 1 In the Sub Modules bar, select Contracts.
Step 2 If the desired Contract is not displayed in the window, scroll, filter, or sort the Contract records until the desired Contract appears in the window.
Step 3 Click in the desired Contract row to select it.
Step 4 In the Action toolbar, open the drop-down menu and select Devices.
Step 5 In the Contract Devices action toolbar, click .
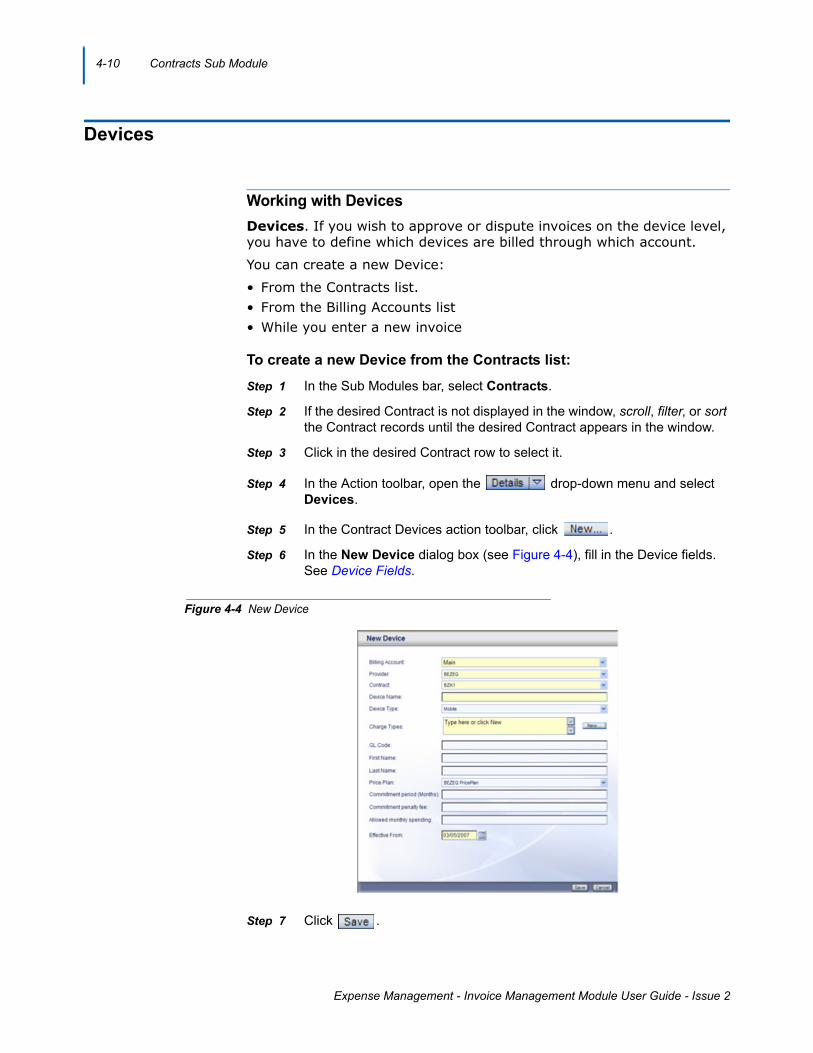
Step 6 In the New Device dialog box (see Figure 4-4), fill in the Device fields. See Device Fields.
Figure 4-4 New Device
Step 7 Click .
Contracts Sub Module 4-11
Expense Management - Invoice Management Module User Guide - Issue 2
To create a new Device from the Billing Accounts list:
Step 1 In the Sub Modules bar, select Contracts.
Step 2 2.If the desired Contract is not displayed in the window, scroll, filter, or sort the Contract records until the desired Contract appears in the window.
Step 3 Click in the desired Contract row to select it.
Step 4 In the Action toolbar, open the drop-down menu and select Billing Accounts.
Step 5 Click in the desired Account row to select it.
Step 6 In the Billing Accounts action toolbar, click .
Step 7 In the New Device dialog box, fill in the Device fields. See Device Fields.
Step 8 Click .
To create a new Device while entering an Invoice:
Step 1 In the Sub Modules bar, select Invoices.
Step 2 In the Action toolbar, open the drop-down menu and select New.
Step 3 In the New Invoice dialog box, in the Invoice Format field select the Paper Details option and fill in the rest of the Invoice fields.
Step 4 Click .
Step 5 In the Continue to edit Invoice Data? dialog box, click OK.
Step 6 In the action toolbar of the Invoice Manual Load dialog box, click
.
Step 7 In the New Device dialog box, fill in the Device fields. See Device Fields.
Step 8 Click .
4-12 Contracts Sub Module
Expense Management - Invoice Management Module User Guide - Issue 2
Creating New Devices
You can create a new Device:
• From the Contracts list. • From the Billing Accounts list• While you enter the details of a new invoice• While you approve or dispute Invoice charges
To create a new Device from the Contracts list:
Step 1 In the Sub Modules bar, select Contracts.
Step 2 If the desired Contract is not displayed in the window, scroll, filter, or sort the Contract records until the desired Contract appears in the window.
Step 3 Click in the desired Contract row to select it.
Step 4 In the Action toolbar, open the drop-down menu and select Devices.
Step 5 In the Contract Devices action toolbar, click .
Step 6 In the New Device dialog box, fill in the Device fields.
Step 7 Click .
To create a new Device from the Billing Accounts list:
Step 1 In the Sub Modules bar, select Contracts.
Step 2 If the desired Contract is not displayed in the window, scroll, filter, or sort the Contract records until the desired Contract appears in the window.
Step 3 Click in the desired Contract row to select it.
Step 4 In the Action toolbar, open the drop-down menu and select Billing Accounts.
Step 5 Click in the desired Account row to select it.
Step 6 In the Billing Accounts action toolbar, click .
Step 7 In the New Device dialog box, fill in the Device fields.
Step 8 Click .

Contracts Sub Module 4-13
Expense Management - Invoice Management Module User Guide - Issue 2
To create a new Device while entering an Invoice:
Step 1 In the Sub Modules bar, select Invoices.
Step 2 In the Action toolbar, open the drop-down menu and select New.
Step 3 In the New Invoice dialog box, in the Invoice Format field select the Paper Details option and fill in the rest of the Invoice fields.
Step 4 Click .
Step 5 In the "Continue to edit..." dialog box, click OK.
Step 6 In the action toolbar of the Invoice Manual Load window, click
.
Step 7 In the New Device dialog box, fill in the Device fields.
Step 8 Click .
To create a new Device while approving/disputing Invoice charges:
Step 1 In the Sub Modules bar, select Invoices.
Step 2 If the desired Invoice is not displayed in the window, scroll, filter, or sort the Invoice records until the desired Invoice appears in the window.
Step 3 Click in the desired Invoice row to select it.
Step 4 In the Invoices Action toolbar, open the drop-down menu and select Devices....
Step 5 In the Device Management Action toolbar, click .
Step 6 In the New Device dialog box, fill in the Device fields.
Step 7 Click .
4-14 Contracts Sub Module
Expense Management - Invoice Management Module User Guide - Issue 2
Editing or Deleting Devices
To delete or edit a Device you must first navigate to that Device. You can navigate to a specific Device or list of Devices:
• Through a Contract Device list, or• Through a Billing Account Device list.
To navigate to a Contract Device list:
Step 1 In the Sub Modules bar, select Contracts.
Step 2 If the desired Contract is not displayed in the window, scroll, filter, or sort the Contract records until the desired Contract appears in the window.
Step 3 Click in the desired Contract row to select it.
Step 4 In the Action toolbar, open the drop-down menu and select Devices.The Contract device list appears.
To navigate to a Billing Account Device list:
Step 1 In the Sub Modules bar, select Contracts.
Step 2 If the desired Contract is not displayed in the window, scroll, filter, or sort the Contract records until the desired Contract appears in the window.
Step 3 Click in the desired Contract row to select it.
Step 4 In the Action toolbar, open the drop-down menu and select Billing Accounts.
Step 5 Click in the desired Billing Account row to select it.
Step 6 In the Billing Accounts action toolbar, click . The Billing Account device list appears.
To Edit a Device:
Step 1 Navigate to the Device list through one of the navigation options above.
Step 2 If the desired Device is not displayed in the window, scroll, filter, or sort the Device records until the desired Device appears in the window.
Step 3 Click in the desired Device row to select it. In the Contract Devices action toolbar, click .
Step 4 In the Edit Device dialog box, edit the Device fields.
Step 5 Click .

Contracts Sub Module 4-15
Expense Management - Invoice Management Module User Guide - Issue 2
To Delete a Device:
Step 1 Navigate to the Device list through one of the navigation options above.
Step 2 If the desired Device is not displayed in the window, scroll, filter, or sort the Device records until the desired Device appears in the window.
Step 3 Click in the desired Device row to select it.
Step 4 In the Device list action toolbar, click .
Step 5 Click .
To Delete all the Devices of a certain Account:
Step 1 Navigate to the Device list through the Billing Account navigation option above.
Step 2 In the Device list action toolbar, click .
Step 3 Click .

4-16 Contracts Sub Module
Expense Management - Invoice Management Module User Guide - Issue 2
Device Fields
Table 4-3 lists the Device fields.
Table 4-3 Device Field Descriptions
Field M/O Edit Description
Billing Account
O Y From the drop-down list, select the appropriate Billing Account.
Provider M Y From the drop-down list, select the appropriate Provider.
Contract O Y From the drop-down list, select the appropriate Contract.
Device Name M N Enter a unique ID for the Device within the Account.
Device Type O Y From the drop-down list, select the appropriate Device Type.
Charge Type M Y The default Charge Type for this Device. Enter an existing Charge Type or click to define a new Charge Type.
GL Code O Y Enter a General Ledger Code for the new Device.
First Name O Y Enter the first name of the person using this Device.
Last Name O Y Enter the last name of the person using this Device.
Price Plan O Y The relevant Price Plan for this Device.
Commitment period
O Y Enter the commitment period in months.
Commitment penalty fee
O Y Enter the penalty fee.
Allowed monthly spending
O Y Maximum monthly spending for this Device.
Effective From M Y Enter or select the Effective date.
REFERENCE
The M/O column indicates Mandatory or Optional Fields. In the dialog box, mandatory fields appear in yellow.
The Edit column indicates editable or non editable fields. In the Edit dialog box, Non editable fields appear grayed.
Contracts Sub Module 4-17
Expense Management - Invoice Management Module User Guide - Issue 2
Charge Types
Charge Types enables you, on the one hand to approve or dispute groups of devices at once, and on the other hand, to farther refine the Device charge assignments.
You can create new Charge types:
• From the Contracts sub module, while you create or edit devices• From the Invoices sub module, while you enter Invoice charges
To create a new Charge type:
Step 1 Do one of the following:
—From the New Device or Edit Device dialog box, click next to the Charge Types field.
—From the actions toolbar of the Invoice Manual Load window, click .
Step 2 In the New Charge dialog box, fill in the Charge Name and Description fields.
Step 3 Click .

4-18 Contracts Sub Module
Expense Management - Invoice Management Module User Guide - Issue 2
5-1
Expense Management - Invoice Management Module User Guide - Issue 2
5Invoices Sub Module
Chapter Topics • Invoices• Approving or Disputing Invoices
Invoices
Introduction
In the Invoice sub module, you enter the periodic Invoices' data and Approve or Dispute the invoice charges.
You can approve or dispute Invoices by Charge Types, by Devices, or by both Devices and Charge Types. In order to be able to manage an invoice by devices, Charge Types, or both, you have to define the devices assigned to that account, and their Charge Types, and to enter the invoice details per device.
If you prefer to approve or dispute an entire Invoice, you simply approve or dispute all charges assigned to it. Even an empty Invoice gets a default Charge, which represents its total amount.
Creating Invoices
To create a new totals only invoice:
Step 1 In the Sub Modules bar, select Invoices.
Step 2 In the Action toolbar, open the drop-down menu and select New.
Step 3 In the New Invoice dialog box, fill in the Invoice Fields. For the Invoice Format options, be sure to select Paper Totals.
Step 4 Click .
5-2 Invoices Sub Module
Expense Management - Invoice Management Module User Guide - Issue 2
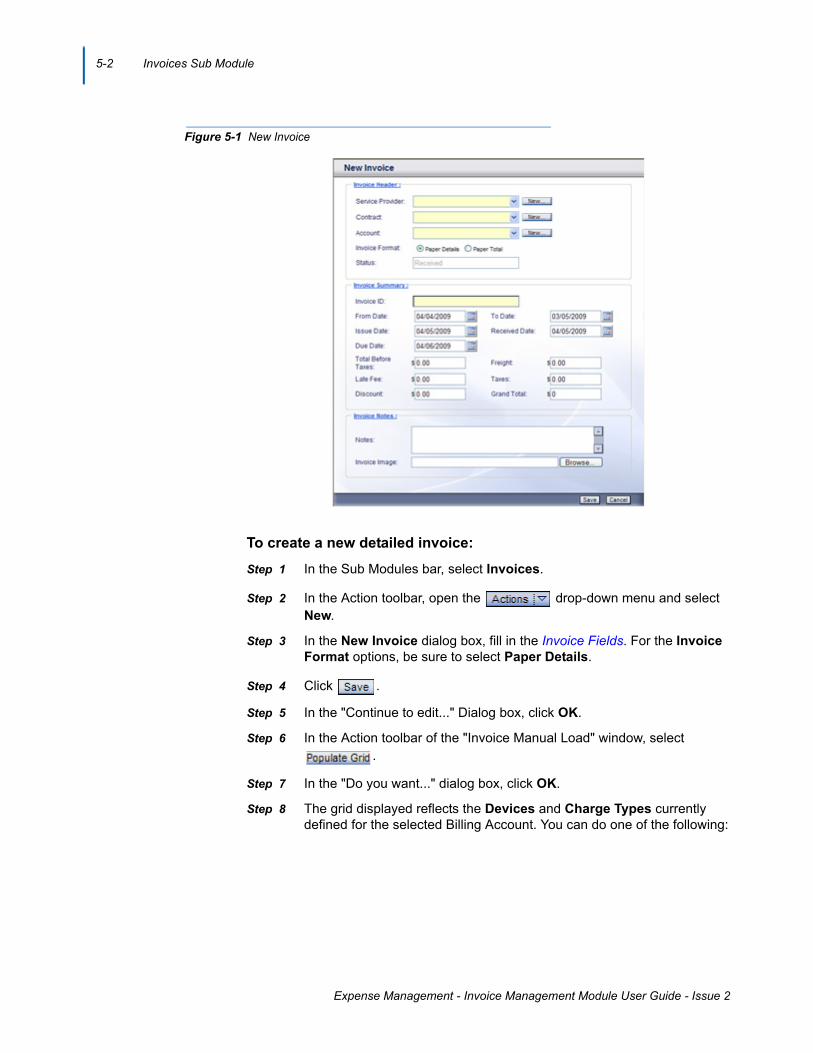
Figure 5-1 New Invoice
To create a new detailed invoice:
Step 1 In the Sub Modules bar, select Invoices.
Step 2 In the Action toolbar, open the drop-down menu and select New.
Step 3 In the New Invoice dialog box, fill in the Invoice Fields. For the Invoice Format options, be sure to select Paper Details.
Step 4 Click .
Step 5 In the "Continue to edit..." Dialog box, click OK.
Step 6 In the Action toolbar of the "Invoice Manual Load" window, select .
Step 7 In the "Do you want..." dialog box, click OK.
Step 8 The grid displayed reflects the Devices and Charge Types currently defined for the selected Billing Account. You can do one of the following:

Invoices Sub Module 5-3
Expense Management - Invoice Management Module User Guide - Issue 2
Figure 5-2 Invoice Manual Load
—Insert charge amounts in the Charge Price column of the existing rows.
—To add a charge for which there is no ready row in the grid, select from the Action toolbar.
—To delete rows you do not need, click in a row to select it, use Ctrl +
click to select more than one row, and then select from the Action toolbar.
—To create a new Charge Type, select from the Action toolbar. In the New Charge dialog bow, fill in a the Charge Name and Description fields and click .
—To create a new Device, select from the Action toolbar. In
the New Device dialog box, fill in the Device Fields and click .
Step 9 Do one of the following:
—To save the current Invoice data as a draft, click . This will enable you to edit the Invoice Details again later.
—To finalize the Invoice data and load it, click . Check the data before loading it, as you will not be able to edit the Invoice details again after loading it.

5-4 Invoices Sub Module
Expense Management - Invoice Management Module User Guide - Issue 2
Editing or Deleting Invoices
To edit a totals only Invoice:
Step 1 In the Sub Modules bar, select Invoices.
Step 2 If the Invoice you wish to edit does not appear in the window, scroll, filter, or sort the Invoice records until the desired Invoice appears in the window.
Step 3 Click in the desired Invoice row to select it.
Step 4 In the Action toolbar, open the drop-down menu and select Edit.
Step 5 In the Edit Invoice dialog box, edit the Invoice Fields you wish to change.
Step 6 Click .
To edit Invoice Details:
Only Invoices with status Editing can be edited.
Step 1 In the Sub Modules bar, select Invoices.
Step 2 If the Invoice you wish to edit does not appear in the window, scroll, filter, or sort the Invoice records until the desired Invoice appears in the window.
Step 3 Click in the desired Invoice row to select it. The Invoice status must be Editing.
Step 4 In the Action toolbar, open the drop-down menu and select Edit Paper Invoice Draft....
Step 5 The Invoice Details data appear as it was when you last saved it. You can do one of the following:
—Insert charge amounts in the Charge Price column of the existing rows.
—To add a charge for which there is no ready row in the grid, select from the Action toolbar.
—To delete rows you do not need, click in a row to select it, use Ctrl +
click to select more than one row, and then select from the Action toolbar.
—To create a new Charge Type, select from the Action toolbar. In the New Charge dialog bow, fill in a the Charge Name and Description fields and click .
—To create a new Device, select from the Action toolbar. In
the New Device dialog box, fill in the Device Fields and click .
NOTE

Invoices Sub Module 5-5
Expense Management - Invoice Management Module User Guide - Issue 2
Step 6 Do one of the following:
—To save the current Invoice data as a draft, click . This will enable you to edit the Invoice Details again later.
—To finalize the Invoice data and load it, click . Check the data before loading it, as you will not be able to edit the Invoice details again after loading it.
To delete an Invoice:
Step 1 In the Sub Modules bar, select Invoices.
Step 2 If the Invoice you wish to edit does not appear in the window, scroll, filter, or sort the Invoice records until the desired Invoice appears in the window.
Step 3 Click in the desired Invoice row to select it.
Step 4 In the Action toolbar, open the drop-down menu and select Delete.
Step 5 Click .
Invoice Fields
Table 5-1 lists the Device fields.
Table 5-1 Invoice Field Descriptions
REFERENCE
The M/O/I column indicates Mandatory, Optional or Information only Fields. In the dialog box, mandatory fields appear in yellow.
The Edit column indicates editable or non editable fields. In the Edit dialog box, Non editable fields appear grayed.
Field M/O/I Edit Description
Service Provider M N From the drop-down list, select the appropriate Provider. You can also click and create a new Provider.
Contract M N From the drop-down list, select the appropriate Contract. You can also click and create a new Contract.
Account M N From the drop-down list, select the appropriate Account. You can also click and create a new Account.
Invoice Format O Y For Detailed Invoice, select Paper Details.For Totals only Invoice, select Paper Total.
Status I N Invoice status field changes with your actions to reflect its current status. The possible values are: Received, Editing and Completed.
Invoice ID M N A name identifying the invoice.
From Date M Y MyFirst day of the invoice period. Enter a date or click the calendar symbol and select a date.

5-6 Invoices Sub Module
Expense Management - Invoice Management Module User Guide - Issue 2
To Date O Y Last day of the invoice period. Enter a date or click the calendar symbol and select a date.
Issue Date O Y The date the invoice was issued. Enter a date or click the calendar symbol and select a date.
Received Date O Y The date the invoice was received in your organization. Enter a date or click the calendar symbol and select a date.
Due Date O Y The date payment of the invoice is due. Enter a date or click the calendar symbol and select a date.
Total Before Taxes O Y Basic total of the Invoice, without late fee, discount, freight and taxes.
Freight O Y Freight charge included in the Invoice.
Late Fee O Y Late Fee included in the Invoice.
Taxes O Y Taxes added to the Invoice.
Discount O Y Discount included in the Invoice.
Grand Total I N This field is automatically calculated from the previous fields.
Invoice Notes O Y Enter any text concerning this invoice.
Invoice Image O Y Click and browse to a file containing an image of the Invoice.
Field M/O/I Edit Description

Invoices Sub Module 5-7
Expense Management - Invoice Management Module User Guide - Issue 2
Approving or Disputing Invoices
Approving and Disputing - Introduction
Approving and/or disputing charges of an Invoice is the main purpose of the Invoice Management module. You can Approve or dispute both Devices and Charges.
• When you approve or dispute a Device you affect the Status field of the Device record.
• When you approve or dispute an Invoice you affect the Status field of the Invoice Details record.
An amount charged to a Device is considered Approved if both the Device and the Charge is approved.
Both Devices and Charges have three possible statuses:
• Tentative - Indicated by a yellow circle. • Disputed - Indicated by a red circle • Approved- Indicated by a green circle
Every Device or Charge starts its life in the Tentative status. Ones you approve or dispute it, you cannot return it to the Tentative status. However, as long as the charge is not paid, you can change the status from Approved to Disputed and vice versa.
When you have one Charge Type per Device, it seems as if the result of disputing the Device or the Charge is identical. Think of it this way:
• If the Device should not be charged through this Invoice at all - dispute the Device.
• If the Device should be charged through this Invoice, but the amount does not seem right - Dispute the Charge.
Approving or Disputing Devices
Approving or disputing Devices is done in one of the Device list windows. You can access a Device list window through one of three possible routs. The rout you use determines which devices will be displayed.
• Through the Invoices sub module - you get Devices relevant to the selected Invoice.
• Through the Contracts window in the Contracts sub module - you get Devices relevant to the selected Contract.
• Through the Billing Accounts window in the Contracts sub module - you get Devices relevant to the selected Account.
Once you are in one of the Device list window, the procedure of approving or disputing Devices is the same.
5-8 Invoices Sub Module
Expense Management - Invoice Management Module User Guide - Issue 2
To access Devices from the Invoices sub module:
Step 1 In the Sub Modules bar, select Invoices.
Step 2 If the appropriate Invoice is not displayed in the window, scroll, filter, or sort the Invoice records until the desired Invoice appears in the window.
Step 3 Click in the desired Invoice row to select it.
Step 4 In the Action toolbar, open the drop-down menu and select
Devices.
Step 5 The Device Management window appears displaying only the Devices relevant to the selected Invoice. Continue to approve or dispute as described in To approve or dispute Devices:.
To access Devices from the Contracts window:
Step 1 In the Sub Modules bar, select Contracts.
Step 2 If the appropriate Contract is not displayed in the window, scroll, filter, or sort the Contract records until the desired Contract appears in the window.
Step 3 Click in the desired Contract row to select it.
Step 4 In the Action toolbar, open the drop-down menu and select
Devices.
Step 5 The Contract Devices window appears displaying only the Devices relevant to the selected Contract. Continue to approve or dispute as described in To approve or dispute Devices:.
To access Devices from the Billing Accounts window:
Step 1 In the Sub Modules bar, select Contracts.
Step 2 If the appropriate Contract is not displayed in the window, scroll, filter, or sort the Contract records until the desired Contract appears in the window.
Step 3 Click in the desired Contract row to select it.
Step 4 In the Action toolbar, open the drop-down menu and select
Billing Accounts.
Step 5 If the appropriate Billing Account is not displayed in the window, scroll, filter, or sort the Billing Account records until the desired Billing Account appears in the window.
Step 6 Click in the desired Billing Account row to select it.
Step 7 In the Action toolbar, click .
Step 8 The Contract Devices window appears displaying only the Devices relevant to the selected Contract and Account. Continue to approve or dispute in To approve or dispute Devices:.

Invoices Sub Module 5-9
Expense Management - Invoice Management Module User Guide - Issue 2
To approve or dispute Devices:
Step 1 If the appropriate Device is not displayed in the window, scroll, filter, or sort the Device records until the desired Device appears in the window.
Step 2 If you wish to approve or dispute a specific Device, click in the Device row to select it. Use Ctrl + click to select additional Devices.
Step 3 Open the or the drop-down menu and select the
required option:
—Dispute/Approve All... will affect all the Devices in the currently filtered list. That is, all the Devices matching the current filter criteria.
—Dispute/Approve Selected... will affect only the selected (and highlighted) Devices.
—Dispute All except Approved... and Approve All except Disputed... will affect only Tentative Devices in the currently filtered list.
Step 4 Click .
5-10 Invoices Sub Module
Expense Management - Invoice Management Module User Guide - Issue 2
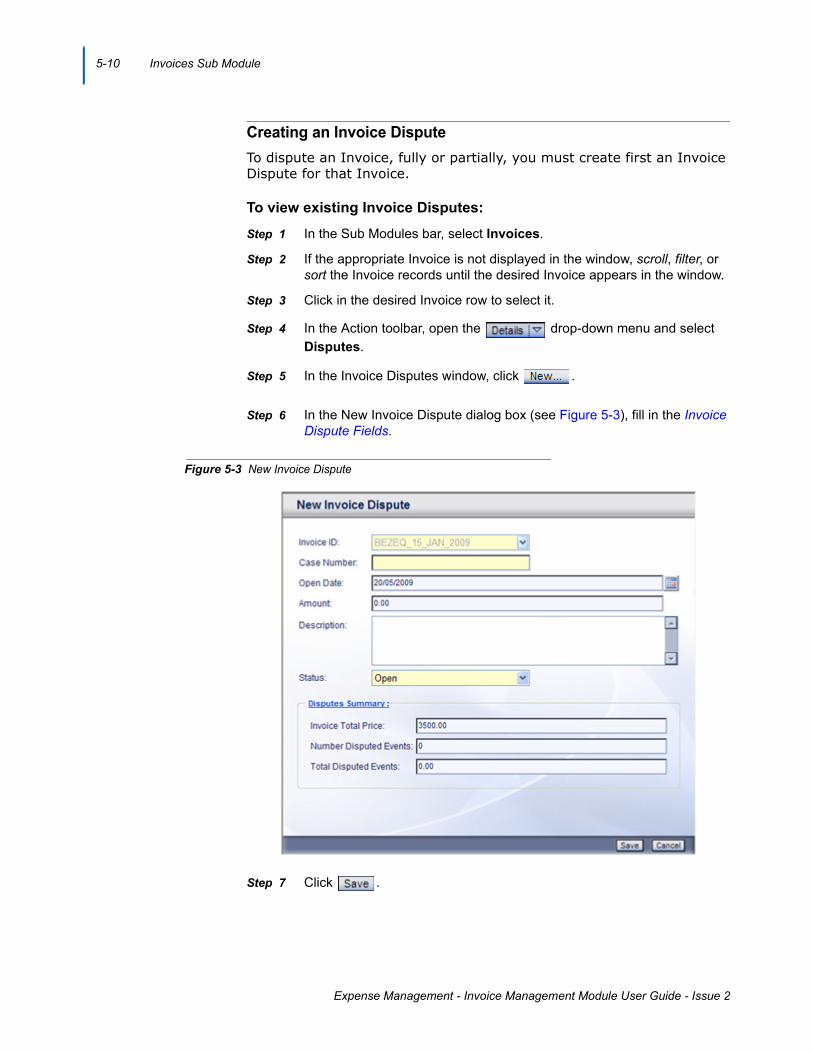
Creating an Invoice Dispute
To dispute an Invoice, fully or partially, you must create first an Invoice Dispute for that Invoice.
To view existing Invoice Disputes:
Step 1 In the Sub Modules bar, select Invoices.
Step 2 If the appropriate Invoice is not displayed in the window, scroll, filter, or sort the Invoice records until the desired Invoice appears in the window.
Step 3 Click in the desired Invoice row to select it.
Step 4 In the Action toolbar, open the drop-down menu and select
Disputes.
Step 5 In the Invoice Disputes window, click .
Step 6 In the New Invoice Dispute dialog box (see Figure 5-3), fill in the Invoice Dispute Fields.
Figure 5-3 New Invoice Dispute
Step 7 Click .
Invoices Sub Module 5-11
Expense Management - Invoice Management Module User Guide - Issue 2
To create a new Invoice Dispute:
Step 1 In the Sub Modules bar, select Invoices.
Step 2 If the appropriate Invoice is not displayed in the window, scroll, filter, or sort the Invoice records until the desired Invoice appears in the window.
Step 3 Click in the desired Invoice row to select it.
Step 4 In the Action toolbar, open the drop-down menu and select
Disputes.
Step 5 In the Invoice Disputes window, click .
Step 6 In the New Invoice Dispute dialog box, fill in the Invoice Dispute Fields.
Step 7 Click .
To edit an Invoice Dispute:
Step 1 In the Sub Modules bar, select Invoices.
Step 2 If the appropriate Invoice is not displayed in the window, scroll, filter, or sort the Invoice records until the desired Invoice appears in the window.
Step 3 Click in the desired Invoice row to select it.
Step 4 In the Action toolbar, open the drop-down menu and select
Disputes.
Step 5 Click in the desired Invoice Disputes row to select it.
Step 6 In the Invoice Disputes window, click .
Step 7 In the Edit Invoice Dispute dialog box, edit the fields you wish to change, see Invoice Dispute Fields.
Step 8 Click .
5-12 Invoices Sub Module
Expense Management - Invoice Management Module User Guide - Issue 2
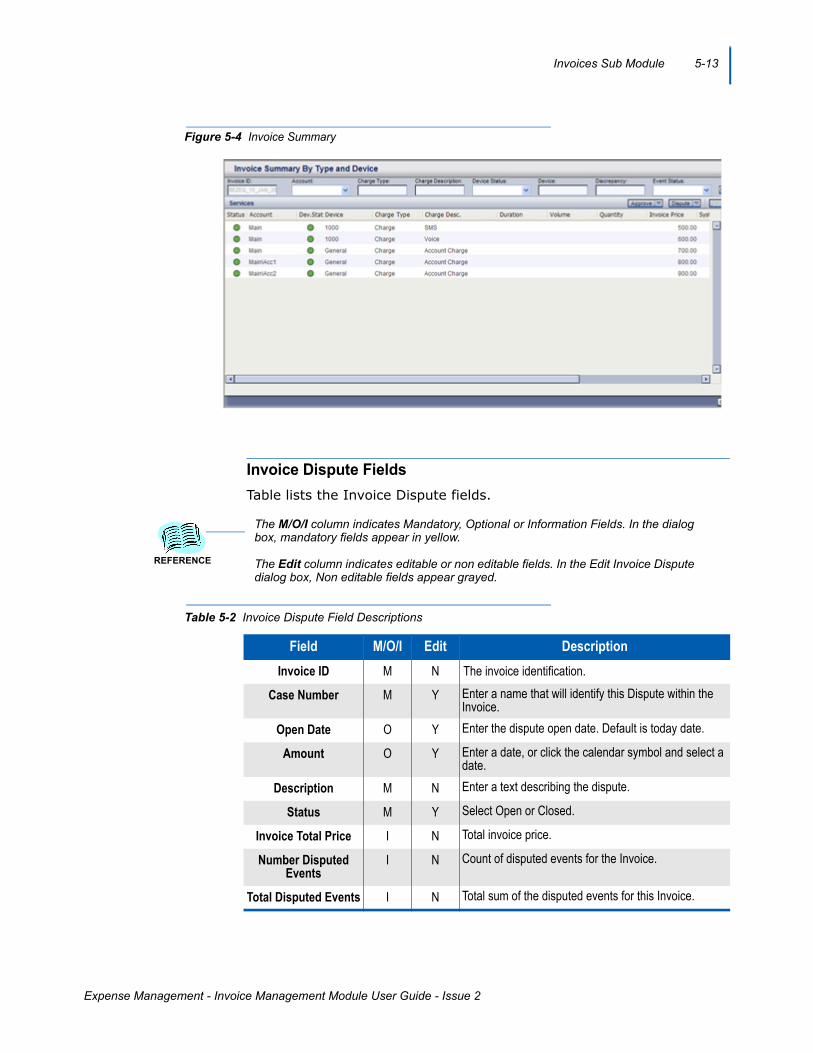
Approving or Disputing Invoice Charges
To dispute an Invoice, fully or partially, you must create first an Invoice Dispute for that Invoice. See Creating an Invoice Dispute.
Approving or disputing Invoice Details is done through the Invoices sub module. You can Approve or dispute Invoice Details by Events, Accounts, Charge Types, and a combination of Charge Types and Devices:
• Accounts enables you to approve or dispute whole accounts• Charge Types enables you to approve according to Charge Types• Charge Types and Devices gives you one line for each combination• Events gives you the most detailed view of the Invoice
To approve or dispute Invoices:
Step 1 In the Sub Modules bar, select Invoices.
Step 2 If the appropriate Invoice is not displayed in the window, scroll, filter, or sort the Invoice records until the desired Invoice appears in the window.
Step 3 Click in the desired Invoice row to select it.
Step 4 In the Action toolbar, open the drop-down menu and select
one of the following:
—Accounts...
—Summary by Type...
—Summary By Type and Devices...
—Events...One of the Invoice Details windows opens displaying the invoice Details summarized according to the selected option.
You can move from the current window to one of the more detailed Invoice Details
windows for the same Invoice. Open the drop-down menu and select the desired option.
Step 5 To approve or dispute a specific row, click in the row to select it. Use Ctrl + click to select additional rows.
Step 6 Open the or the drop-down menu and select the
required option:
—Dispute/Approve All... will affect all the Devices in the currently filtered list. That is, all the Devices matching the current filter criteria.
—Dispute/Approve Selected... will affect only the selected (and highlighted) Devices.
—Dispute All except Approved... and Approve All except Disputed... will affect only Tentative Devices in the currently filtered list.
If no Invoice Dispute exists for the selected Invoice, a New Invoice Dispute dialog box will open the first time you dispute any of the Invoice details. Fill up the New
Invoice Dispute Fields and click .
NOTE
NOTE
Invoices Sub Module 5-13
Expense Management - Invoice Management Module User Guide - Issue 2
Figure 5-4 Invoice Summary
Invoice Dispute Fields
Table lists the Invoice Dispute fields.
Table 5-2 Invoice Dispute Field Descriptions
Field M/O/I Edit Description
Invoice ID M N The invoice identification.
Case Number M Y Enter a name that will identify this Dispute within the Invoice.
Open Date O Y Enter the dispute open date. Default is today date.
Amount O Y Enter a date, or click the calendar symbol and select a date.
Description M N Enter a text describing the dispute.
Status M Y Select Open or Closed.
Invoice Total Price I N Total invoice price.
Number Disputed Events
I N Count of disputed events for the Invoice.
Total Disputed Events I N Total sum of the disputed events for this Invoice.
REFERENCE
The M/O/I column indicates Mandatory, Optional or Information Fields. In the dialog box, mandatory fields appear in yellow.
The Edit column indicates editable or non editable fields. In the Edit Invoice Dispute dialog box, Non editable fields appear grayed.
5-14 Invoices Sub Module
Expense Management - Invoice Management Module User Guide - Issue 2
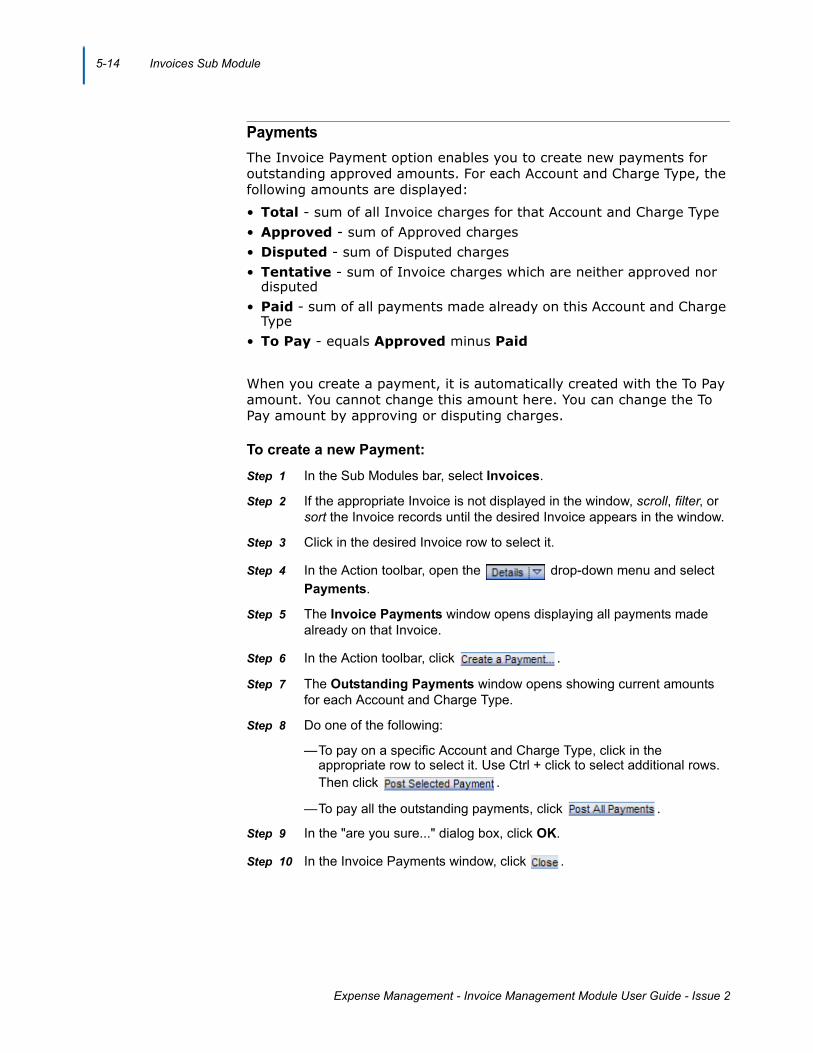
Payments
The Invoice Payment option enables you to create new payments for outstanding approved amounts. For each Account and Charge Type, the following amounts are displayed:
• Total - sum of all Invoice charges for that Account and Charge Type• Approved - sum of Approved charges• Disputed - sum of Disputed charges• Tentative - sum of Invoice charges which are neither approved nor
disputed• Paid - sum of all payments made already on this Account and Charge
Type• To Pay - equals Approved minus Paid
When you create a payment, it is automatically created with the To Pay amount. You cannot change this amount here. You can change the To Pay amount by approving or disputing charges.
To create a new Payment:
Step 1 In the Sub Modules bar, select Invoices.
Step 2 If the appropriate Invoice is not displayed in the window, scroll, filter, or sort the Invoice records until the desired Invoice appears in the window.
Step 3 Click in the desired Invoice row to select it.
Step 4 In the Action toolbar, open the drop-down menu and select
Payments.
Step 5 The Invoice Payments window opens displaying all payments made already on that Invoice.
Step 6 In the Action toolbar, click .
Step 7 The Outstanding Payments window opens showing current amounts for each Account and Charge Type.
Step 8 Do one of the following:
—To pay on a specific Account and Charge Type, click in the appropriate row to select it. Use Ctrl + click to select additional rows. Then click .
—To pay all the outstanding payments, click .
Step 9 In the "are you sure..." dialog box, click OK.
Step 10 In the Invoice Payments window, click .
Invoices Sub Module 5-15
Expense Management - Invoice Management Module User Guide - Issue 2
Figure 5-5 Outstanding Payments

5-16 Invoices Sub Module
Expense Management - Invoice Management Module User Guide - Issue 2

6-1
Expense Management - Invoice Management Module User Guide - Issue 2
6Reports
Chapter Topics • Introduction• Reports Toolbar• Report Parameters
Introduction
The Reports sub module enables you to view the data in a easy to read format. You can view the reports on screen, create PDF files (print ready files) of the reports or export certain or all data fields from the report into a Microsoft Excel file.
You can select from the following report types:
• Disputes list report - lists all open, closed, or both Invoice Disputes for all or specific Invoices of all or specific Providers.
• Invoice Summaries reports - list Invoice summaries by Provider or by Period. You can request these reports for all or specific Providers, for all or specific Contracts, for all or specific Invoices, for a specific period of time, and for all or specific Invoice Statuses.
• Invoice Summary reports - list Invoices Summary by Charge Type and period or by Charge Type and Provider. You can request these reports for all or specific Providers, for all or specific Contracts, for all or specific Invoices, and for a specific period of time.
• Invoiced Due in the Next X Days - lists all invoices for all or specific Providers which will become due in the coming X days.
To create a report:
Step 1 In the Sub Modules bar, select Reports.
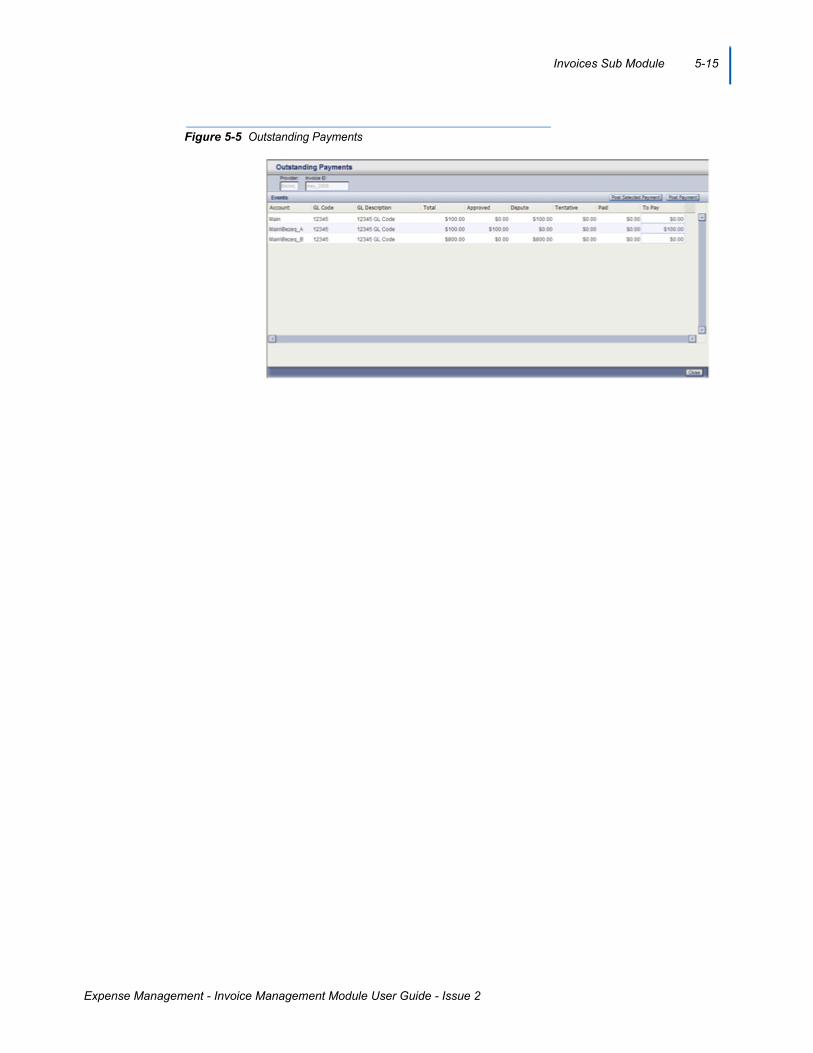
Step 2 In the Reports window, open the Report drop-down menu and select the desired Report type. Figure 6-1 displays.
6-2 Reports
Expense Management - Invoice Management Module User Guide - Issue 2
Figure 6-1 Report Parameters for the Invoice Summary by Period Report
Step 3 Supply the required report parameters. An empty parameter stands for All.
Step 4 Click . The system generates the report and displays it on screen. You can use the toolbar in the View Report window to navigate in the report, to export it to an excel file or to create a PDF (print ready file) from it.
Step 5 To exit the report, close the Report Viewer window.

Reports 6-3
Expense Management - Invoice Management Module User Guide - Issue 2
Reports Toolbar
Use the tools listed in Table 6-1 to navigate in the report, to export data or to create a PDF file of it.
Table 6-1 Reports Toolbar
Tool Name Function
Toggle table of contents Enables (or disables) quick navigation to specific report content.
Run report Run of the report again (possibly with different parameters.)
Export data Export certain data fields into an Excel file.
Print report as PDF Creates a PDF file of the report.
First page Go to the beginning of the report.
Last page Go to the last page of the report.
Previous page Go to the previous page.
Next page Go to the next page.
Go to page Go to the specified page.

6-4 Reports
Expense Management - Invoice Management Module User Guide - Issue 2
Report Parameters
Table lists the Report Parameters.
Table 6-2 Report Parameters
Parameter Description
Report Open the drop down list and select the required report.
Provider Open the drop down list and select the required Provider. Leave empty to include all Providers.
Contract Open the drop down list and select the required Contract. Leave empty to include all Contracts.
Invoice Number Open the drop down list and select the required Invoice. Leave empty to include all Invoices.
Invoice ID Open the drop down list and select the required Invoice. Leave empty to include all Invoices.
From Date Enter date or click the calendar symbol and select a date.
To Date Enter date or click the calendar symbol and select a date.
Status (Disputes) Open the drop down list and select the required Status or select Both to include all statuses.
Status (Invoices) Open the drop down list and select the required Invoice or leave empty to include all Invoices.
7-1
Expense Management - Invoice Management Module User Guide - Issue 2
7Alerts
Chapter Topics • Introduction• Working with Alerts• Alert Fields• Scheduling Fields
Introduction
An alert is an instruction to the system to check for a certain pre defined condition, and if the condition holds - to send an alerting e-mail to inform the assigned recipient of that condition. The purpose of an alert is to give you a timely reminder of an action you need to take. You can define alerts for the following conditions:
• Contract is about to expire.• Invoice amount is greater than its expected amount.• An expected Invoice has not been received yet.• An Invoice Payment is due.
You can instruct the system to check each alert once or on a daily, weekly, or monthly basis.
7-2 Alerts
Expense Management - Invoice Management Module User Guide - Issue 2
Working with Alerts
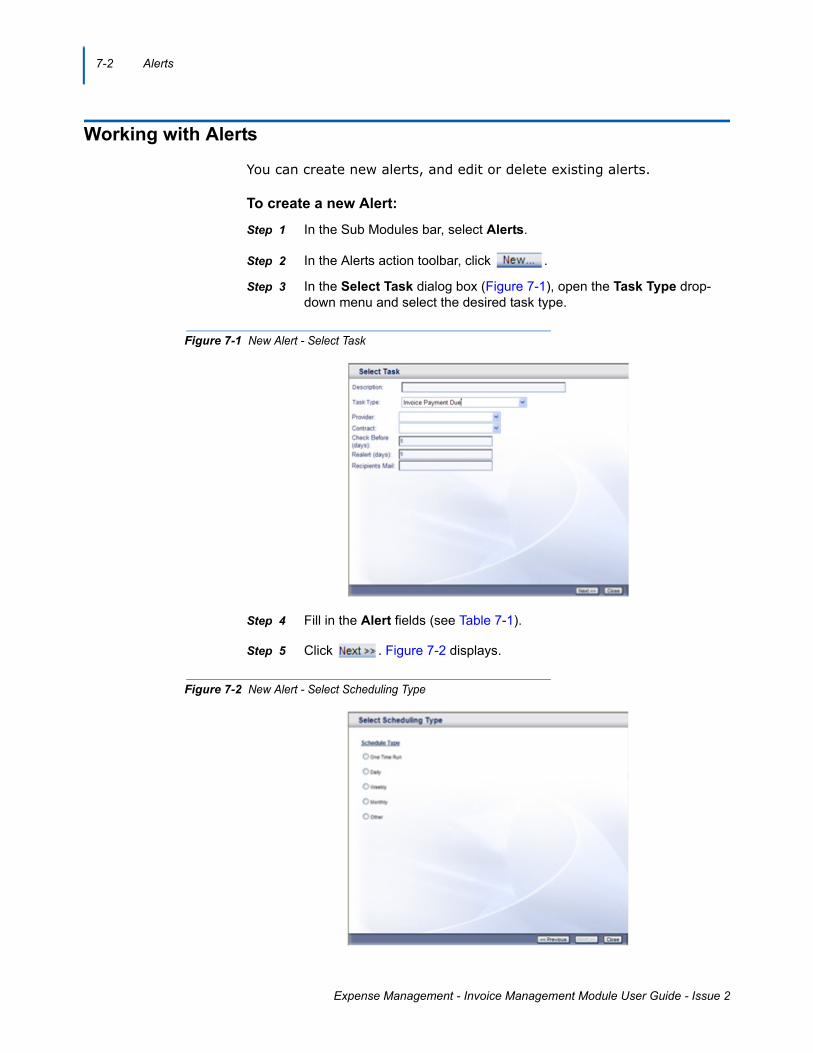
You can create new alerts, and edit or delete existing alerts.
To create a new Alert:
Step 1 In the Sub Modules bar, select Alerts.
Step 2 In the Alerts action toolbar, click .
Step 3 In the Select Task dialog box (Figure 7-1), open the Task Type drop-down menu and select the desired task type.
Figure 7-1 New Alert - Select Task
Step 4 Fill in the Alert fields (see Table 7-1).
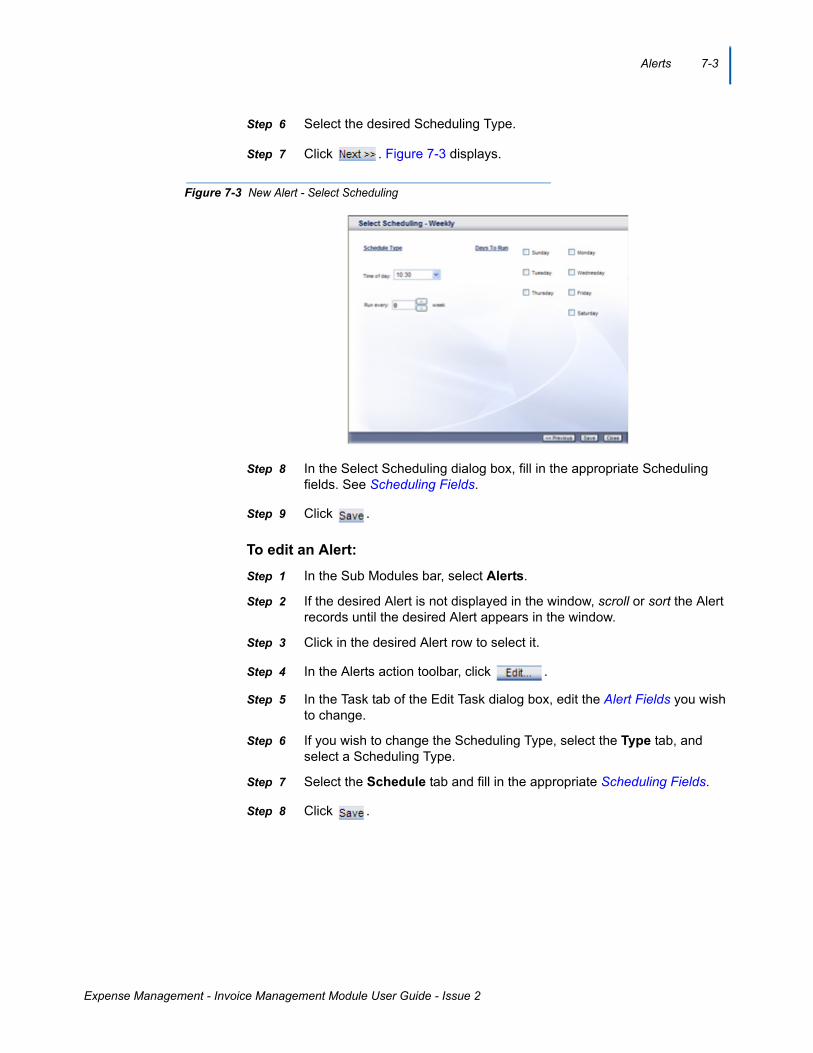
Step 5 Click . Figure 7-2 displays.
Figure 7-2 New Alert - Select Scheduling Type
Alerts 7-3
Expense Management - Invoice Management Module User Guide - Issue 2
Step 6 Select the desired Scheduling Type.
Step 7 Click . Figure 7-3 displays.
Figure 7-3 New Alert - Select Scheduling
Step 8 In the Select Scheduling dialog box, fill in the appropriate Scheduling fields. See Scheduling Fields.
Step 9 Click .
To edit an Alert:
Step 1 In the Sub Modules bar, select Alerts.
Step 2 If the desired Alert is not displayed in the window, scroll or sort the Alert records until the desired Alert appears in the window.
Step 3 Click in the desired Alert row to select it.
Step 4 In the Alerts action toolbar, click .
Step 5 In the Task tab of the Edit Task dialog box, edit the Alert Fields you wish to change.
Step 6 If you wish to change the Scheduling Type, select the Type tab, and select a Scheduling Type.
Step 7 Select the Schedule tab and fill in the appropriate Scheduling Fields.
Step 8 Click .

7-4 Alerts
Expense Management - Invoice Management Module User Guide - Issue 2
To delete an Alert:
Step 1 In the Sub Modules bar, select Alerts.
Step 2 If the desired Alert is not displayed in the window, scroll, or sort the Alert records until the desired Alert appears in the window.
Step 3 Click in the desired Alert row to select it.
Step 4 In the Alerts action toolbar, click .
Step 5 In the "You are about to delete..." dialog box, click OK.
Alert Fields
Table 7-1 lists the Alert fields.
Table 7-1 Alert Field Descriptions
Field M/O Description
Description O Enter a text describing the Alert.
Task Type M Open the drop down menu and select a task type.
Provider M Open the drop down Providers list and select a Provider.
Contract M Open the drop down Contracts list and select a Contract.
Check Before (days) M Enter how many days before the relevant expiration/due date you wish to start receiving the alert.
Realert (days) M Enter the required frequency of re-alerts.
Deviation M Enter the minimum discrepancy (percent).
Recipient Mail M Enter the recipient e-mail address.
REFERENCE
The M/O column indicates Mandatory or Optional Fields. In the dialog box, mandatory fields appear in yellow.
All fields are editable.

Alerts 7-5
Expense Management - Invoice Management Module User Guide - Issue 2
Scheduling Fields
Table 7-2 lists the Alert Scheduling fields.
Table 7-2 Scheduling Field Descriptions
Schedule Type Scheduling Fields Options Description
One Time Run
Run the check once on the defined date and time.
Start Date Date to activate the one-time run.
Start Time Time in the day to activate the one-time run.
Daily
Activate the run on a daily basis.
State Date Date to start activating the daily runs.
StartTime Time in the day to activate the daily runs.
Run Every
Day Activate the run every day.
Weekdays Activate the run on Weekdays only.
Every N days Activate the run every N days.
Weekly
Activate the run on a weekly basis.
Time of Day Time in the day to activate the weekly runs.
Run Every Activate the run every N weeks.
Days to run Select on which days of the week to activate the run. You can select more that one day.
Monthly
Activate the run on a monthly basis.
Start Time Time in the day to activate the monthly runs.
Day (in the month) Select a day in the month to activate the run.
Nth occurrence of a weekday Select the Nth Week
Select on which occurrence of the weekday in the month to activate the run.
Select the weekday Select the weekday on which to activate the run.
Months to run Select on which months to activate the run. You can select more than one month.

7-6 Alerts
Expense Management - Invoice Management Module User Guide - Issue 2
For additional information or support on this NEC Corporation product, contact your NEC Corporation representative.

Expense Management - Invoice Management Module User Guide
NEC NEC Corporation
NDA-31012, Issue 2