Eee final year project over head projector
24
Overhead projector An overhead projector is a very basic but reliable tool used to display images onto a screen or wall. It consists of a large box containing a cooling fan and an extremely bright light, with a long arm extended above it. At the end of the arm is a mirror that catches and redirects the light towards the screen. This type of projector can be used to enlarge images onto the screen or wall for audiences to view. Transparencies can be placed onto the base to be viewed by both the audience and the speaker. The device was once a common feature in both classrooms and business meetings, although it has seen a decline in use as more sophisticated computer based projectors are favored. Overhead projectors were used during World War II as a tool to train groups of servicemen. In the 1950s and '60s, it crossed over into the classroom as an educational tool, and then into the business world as a training tool. It reached its sales peak in the 1990s, when almost every classroom and business place in America had one installed. The projector is best used when the screen is approximately 6 to 12 feet (about 2 to 4 meters) from the projector. There are overheads that can increase the distance between projector and screen, but these are usually custom built and the cost is greatly increased. The biggest difference that can be seen between projectors is the type of optics used. There are three main types of optics that can be used in the overhead projector. A direct optics projector puts the optics and light source in a straight line, allowing the image to be reflected from a mirror onto the screen. It's a very common form, and relatively inexpensive, but it can get quite hot. Folded optics or chamber optics have a mirror placed in between the lamp and the lens, and a light source that is surrounded by an elliptical faceted reflector. This has a number of benefits, including making the resolution quite clear, and making more light available to project the image. This model is usually cooler than direct optic versions. Another type is the reflected light optic, which has a specially designed lens that is backed by a mirror. The light source directs light to the lens and is reflected by the mirror. The reflected light is directed back through the lens and onto the main projective lens. The light is then focused to a second mirror and onto the screen.
-
Upload
ravi-sankar -
Category
Education
-
view
107 -
download
0
Transcript of Eee final year project over head projector

Overhead projector
An overhead projector is a very basic but reliable tool used to display
images onto a screen or wall. It consists of a large box containing a cooling fan and an extremely bright light, with a long arm extended above it. At the end of
the arm is a mirror that catches and redirects the light towards the screen.
This type of projector can be used to enlarge images onto the screen or wall for audiences to view. Transparencies can be placed onto the base to be
viewed by both the audience and the speaker. The device was once a common feature in both classrooms and business meetings, although it has seen a decline
in use as more sophisticated computer based projectors are favored.
Overhead projectors were used during World War II as a tool to train groups of servicemen. In the 1950s and '60s, it crossed over into the classroom
as an educational tool, and then into the business world as a training tool. It reached its sales peak in the 1990s, when almost every classroom and business
place in America had one installed.
The projector is best used when the screen is approximately 6 to 12 feet (about 2 to 4 meters) from the projector. There are overheads that can increase
the distance between projector and screen, but these are usually custom built and the cost is greatly increased. The biggest difference that can be seen
between projectors is the type of optics used.
There are three main types of optics that can be used in the overhead projector. A direct optics projector puts the optics and light source in a straight
line, allowing the image to be reflected from a mirror onto the screen. It's a very common form, and relatively inexpensive, but it can get quite hot.
Folded optics or chamber optics have a mirror placed in between the lamp
and the lens, and a light source that is surrounded by an elliptical faceted reflector. This has a number of benefits, including making the resolution quite
clear, and making more light available to project the image. This model is usually cooler than direct optic versions.
Another type is the reflected light optic, which has a specially designed
lens that is backed by a mirror. The light source directs light to the lens and is reflected by the mirror. The reflected light is directed back through the lens and
onto the main projective lens. The light is then focused to a second mirror and onto the screen.

The reflected light optic is used more in portable overhead projectors, and the cooling system, light source, and main projection optics are all placed in one
unit. The entire projector can be folded down into a case for portability. Although still used in many classrooms around the world, these devices are on
the decline. Some critics still favor them for their reliability, however, and claim that they are far easier to use than the more sophisticated digital versions.
Overhead projector in operation during a classroom lesson
An overhead projector is a variant of slide projector that is used to display images to an audience.
Optical system
An overhead projector works on the same principle as a 35mm slide projector, in which a focusing lens projects light from an illuminated slide onto a projection screen where a real image is formed. However some differences are
necessitated by the much larger size of the transparencies used (generally the size of a printed page), and the requirement that the transparency be placed face
up (and readable to the presenter). For the latter purpose, the projector includes a mirror just before or after the focusing lens to fold the optical system toward
the horizontal. That mirror also accomplishes a reversal of the image in order that the image projected onto the screen corresponds to that of the slide as seen
by the presenter looking down at it, rather than a mirror image thereof. Therefore the transparency is placed face up (toward the mirror and focusing
lens), in contrast with a 35mm slide projector or film projector (which lack such a mirror) where the slide's image is non-reversed on the side opposite the
focusing lens.
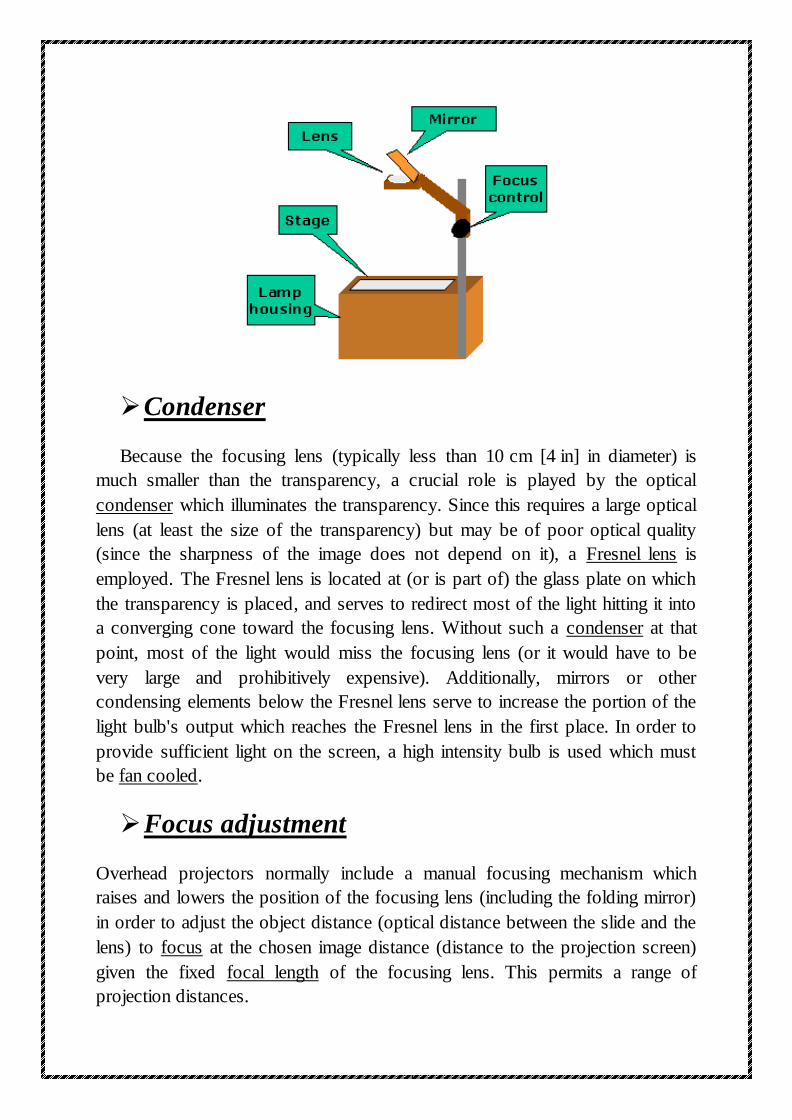
Condenser
Because the focusing lens (typically less than 10 cm [4 in] in diameter) is
much smaller than the transparency, a crucial role is played by the optical
condenser which illuminates the transparency. Since this requires a large optical
lens (at least the size of the transparency) but may be of poor optical quality
(since the sharpness of the image does not depend on it), a Fresnel lens is
employed. The Fresnel lens is located at (or is part of) the glass plate on which
the transparency is placed, and serves to redirect most of the light hitting it into
a converging cone toward the focusing lens. Without such a condenser at that
point, most of the light would miss the focusing lens (or it would have to be
very large and prohibitively expensive). Additionally, mirrors or other
condensing elements below the Fresnel lens serve to increase the portion of the
light bulb's output which reaches the Fresnel lens in the first place. In order to
provide sufficient light on the screen, a high intensity bulb is used which must
be fan cooled.
Focus adjustment
Overhead projectors normally include a manual focusing mechanism which
raises and lowers the position of the focusing lens (including the folding mirror)
in order to adjust the object distance (optical distance between the slide and the
lens) to focus at the chosen image distance (distance to the projection screen)
given the fixed focal length of the focusing lens. This permits a range of
projection distances.

Increasing (or decreasing) the projection distance increases (or decreases)
the focusing system's magnification in order to fit the projection screen in use
(or sometimes just to accommodate the room setup). Increasing the projection
distance also means that the same amount of light is spread over a larger screen,
resulting in a dimmer image. With a change in the projection distance, the
focusing must be readjusted for a sharp image. However, the condensing optics
(Fresnel lens) is optimized for one particular vertical position of the lens,
corresponding to one projection distance. Therefore when it is focused for a
greatly different projection distance, part of the light cone projected by the
Fresnel lens towards the focusing lens misses that lens. This has the greatest
effect towards the outer edges of the projected image, so that one typically sees
either blue or brown fringing at the edge of the screen when the focus is towards
an extreme. Using the projector near its recommended projection distance
allows a focusing position where this is avoided and the intensity across the
screen is approximately uniform.

Source of illumination
The lamp technology of an overhead projector is typically very simple
compared to a modern LCD or DLP video projector. Most overheads use an
extremely high-power halogen lamp that may consume up to 750 watts. A high-
flow blower is required to keep the bulb from melting due to the heat generated,
and this blower is often on a timer that keeps it running for a period after the
light is extinguished.
Further, the intense heat accelerates failure of the high intensity lamp,
often burning out in less than 100 hours, requiring replacement. In contrast, a
modern LCD or DLP projector uses an arc lamp which has a higher luminous
efficacy and lasts for thousands of hours. A drawback of that technology is the
warm up time required for arc lamps.
Older overhead projectors used a tubular quartz bulb which was mounted
above a bowl-shaped polished reflector. However because the lamp was
suspended above and outside the reflector, a large amount of light was cast to
the sides inside the projector body that was wasted, thus requiring a higher
power lamp for sufficient screen illumination. More modern overhead
projectors use an integrated lamp and conical reflector assembly, allowing the
lamp to be located deep within the reflector and sending a greater portion of its
light towards the Fresnel lens; these permits using a lower power lamp for the
same screen illumination.

A useful innovation for overhead projectors with integrated lamps/reflectors
is the quick-swap dual-lamp control, allowing two lamps to be installed in the
projector in movable sockets. If one lamp fails during a presentation the
presenter can merely move a lever to slide the spare into position and continue
with the presentation, without needing to open the projection unit or waiting for
the failed bulb to cool before replacing it.
History
Also called a "viewgraph," the overhead projector was created by Jules
Duboscq, a French inventor, in the 1870s.[1] It was first used for police work,
and used a cellophane roll over a 9-inch stage allowing facial characteristics to
be rolled across the stage. The U.S. Army in 1945 was the first to use it in
quantity for training as World War II wound down. It began to be widely used
in schools and businesses in the late 1950s and early 1960s.
A major manufacturer of overhead projectors in this early period was the
company 3M, where engineer Roger Appledorn had developed a transparency
projection system.[2] As the demand for projectors grew, Buhl Industries was
founded in 1953, and became the leading US contributor for several optical
refinements for the overhead projector and its projection lens. In 1957, the
United States' first Federal Aid to Education program stimulated overhead sales
which remained high up to the late 1990s and into the 21st Century.

Using the Overhead Projector
While the current trend in the training industry is heading toward the use
of the LCD Projector technology, the overhead projector is still the most
popular presentation device used today. Most facilities have an overhead
projector in every training room or conference room. Although it is the most
widely used, it is also the biggest abused. Some presenters continue to misuse
the overhead projector even though they have used them for years.
I have provided below some basic guidelines and tips when using
an overhead projector. Although some of these tips seem like common
sense, many presentations fail because these basic tips are not
consistently applied.
Here are some tips and rules to be aware of:
1. Practice giving your presentation using your visual aids to check out how
well they project. This is a good time to also check for spelling errors. Have a
friend sit and watch your presentation and make notes on any problems or
needed improvements with your visual aids. Practice using your overhead
transparencies so you will be comfortable with handling them correctly.

2. Stand off to one side of the overhead projector while you face the
audience - Too many people stand between the overhead projector and the
screen causing a shadow of the presenters body. Standing to one side will allow
the audience to see you as the presenter and will prevent you from blocking
their view of your visual aid.
3. Do not face the "projected" image on the screen - Face your audience and
not the screen. Many presenters face the screen and end up talking to the screen.
4. Cover the transparency when you are done using it-with an opaque piece
of cardboard (I usually mount a solid sheet of paper on one of my transparency
frames). You may also turn off the projector completely, but beware, this can
cause the projector bulb to burn out sooner.
5. Bring a spare bulb! - Nothing is more unsettling than to have your
overhead projector bulb burn out during your presentation. Bring spare bulbs
and a glove to change the bulb. The old bulb will be HOT! Make sure you know
how to change the bulb. CAUTION: Remember HOT glass looks the same as
cold glass!
6. Place the overhead to your RIGHT if you are right handed and to your
LEFT of you are left handed-This will make it easier for you to face your
audience and write if you need to. In either case, you want to stand in the center
of the speaking area and face the audience when you speak.
7. Place your overhead projector on a table low enough so it does not block
you or the screen. Have a small table next to the overhead so you can stack your
overheads before and after you use them.
8. Place your screen on a diagonal instead of directly behind you-this will
assure that you do not block the view for your audience. Also, have the top of
the screen tilted forward towards the overhead projector (if possible) to prevent
the "keystone" effect (This is where the top of the image is larger than the
bottom).
9. Tape the power chord to the floor - to protect you or someone else from
tripping. As the presenter, tripping over the chord and falling, although
humorous, is one large gesture you would prefer to avoid.

10. Store your overhead transparencies in a sturdy box or container so they
will stay clean and protected for the next time you need them. Label the box and
include a "clean" copy of your handouts in the box. This will make it easier for
you the next time you give your award winning presentation again.
Use in education
The overhead projector facilitates an easy low-cost interactive environment
for educators. Teaching materials can be pre-printed on plastic sheets, upon
which the educator can directly write using a non-permanent, washable color
marking pen. This saves time, since the transparency can be pre-printed and
used repetitively, rather than having materials written manually before each
class.
The overhead is typically placed at a comfortable writing height for the
educator and allows the educator to face the class, facilitating better
communication between the students and teacher. The enlarging features of the
projector allow the educator to write in a comfortable small script in a natural
writing position rather than writing in an overly large script on a blackboard and
having to constantly hold his arm out in midair to write on the blackboard.
When the transparency sheet is full of written or drawn material, it can
simply be replaced with a new, fresh sheet with more pre-printed material, again
saving class time vs a blackboard that would need to be erased and teaching
materials rewritten by the educator. Following the class period, the
transparencies are easily restored to their original unused state by washing off
with soap and water.

LCD overhead displays
In the early 1980s–1990s, overhead projectors were used as part of a
classroom computer display/projection system. A liquid-crystal panel mounted
in a plastic frame was placed on top of the overhead projector and connected to
the video output of the computer, often splitting off the normal monitor output.
A cooling fan in the frame of the LCD panel would blow cooling air across the
LCD to prevent overheating that would fog the image.
The first of these LCD panels were monochrome-only, and could display
NTSC video output such as from an Apple II computer or VCR. In the late
1980s color models became available, capable of "thousands" of colors (16-bit
color), for the color Macintosh and VGA PCs. The displays were never
particularly fast to refresh or update, resulting in the smearing of fast-moving
images, but it was acceptable when nothing else was available.
The Do-It-Yourself community has started using this idea to make low-cost
home theater projectors. By removing the casing and backlight assembly of a
common LCD monitor, one can use the exposed LCD screen in conjunction
with the overhead projector to project the contents of the LCD screen to the wall
at a much lower cost than with standard LCD projectors. Due to the mirroring
of the image in the head of the overhead projector, the image on the wall is "re-
flipped" to where it would be if one was looking at the LCD screen normally.

Decline in use
Overhead projectors were once a common fixture in most classrooms and
business conference rooms, but today are slowly being replaced by document
cameras, dedicated computer projection systems and interactive whiteboards.
Such systems allow the presenter to project video directly from a computer file,
typically produced using software such as Microsoft PowerPoint and Libre
Office. Such presentations can also include animations, interactive components,
or even video clips, with ease of paging between slides. The relatively
expensive printing or photocopying of color transparencies is eliminated.
The primary reason for this gradual replacement is the deeply ingrained use of
computing technology in modern society and the inability of overheads to easily
support the features that modern users demand. While an overhead can display
static images fairly well, it performs poorly at displaying moving images. The
LCD video display panels that were once used as an add-on to an overhead
projector have become obsolete, with that combination of display technology
and projection optics now optimally integrated into a modern video projector.
The standards of users have also increased, so that a dim, fuzzy overhead
projection that is too bright in the center and too dim around the edges is no
longer acceptable. The optical focus, linearity, brightness and clarity of an
overhead generally cannot match that of a video projector, Video projectors use
extremely small picture generation mechanisms, allowing for precision optics
that far exceed the plastic fresnel lens' optical performance. They also include
additional optics that eliminate the hotspot in the center of the screen directly
above the light source, so that the brightness is uniform everywhere on the
projection screen.
Critics feel that there are some downsides as these technologies are more prone
to failure and have a much steeper learning curve for the user than a standard
overhead projector. Also, the overhead projector allows a more direct
interaction through live writing on the transparency.
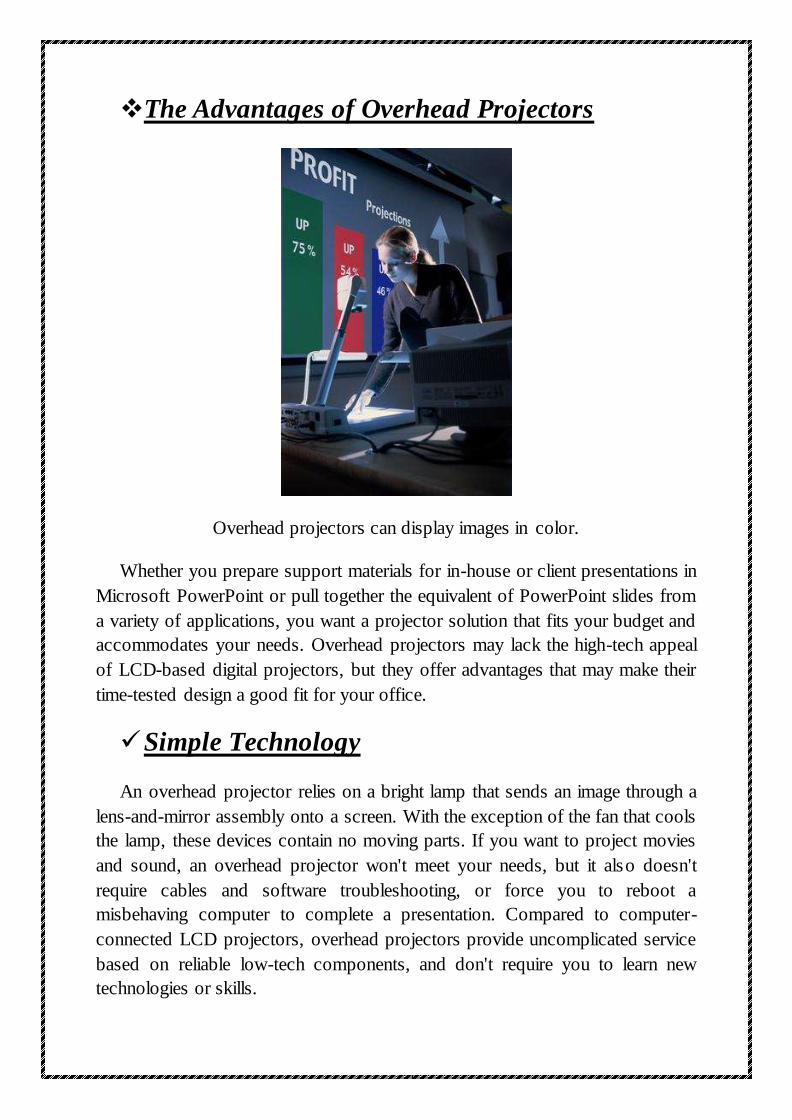
The Advantages of Overhead Projectors
Overhead projectors can display images in color.
Whether you prepare support materials for in-house or client presentations in
Microsoft PowerPoint or pull together the equivalent of PowerPoint slides from
a variety of applications, you want a projector solution that fits your budget and
accommodates your needs. Overhead projectors may lack the high-tech appeal
of LCD-based digital projectors, but they offer advantages that may make their
time-tested design a good fit for your office.
Simple Technology
An overhead projector relies on a bright lamp that sends an image through a
lens-and-mirror assembly onto a screen. With the exception of the fan that cools
the lamp, these devices contain no moving parts. If you want to project movies
and sound, an overhead projector won't meet your needs, but it also doesn't
require cables and software troubleshooting, or force you to reboot a
misbehaving computer to complete a presentation. Compared to computer-
connected LCD projectors, overhead projectors provide uncomplicated service
based on reliable low-tech components, and don't require you to learn new
technologies or skills.

Equipment Costs
Overhead projectors carry a price tag that can run from 10 percent to 50
percent of the cost of their LCD-based cousins. Both device types use
specialized lamps, but the price differential continues when you evaluate their
parts head to head. In some cases, you can buy a new overhead projector for the
cost of an LCD projector lamp. If you present materials that don't require
computer projection of A/V content, an overhead projector will save you
money, both when you buy it and over its functional life.
Transparencies
Transparency film may cost more than regular office paper, but it's available
at virtually any office-supply store, local or on the Web. If you prefer to
purchase environmentally friendly materials, look for transparencies with
recycled content. Regardless of whether you use a laser or inkjet printer, or
direct your output to a networked color copier, you'll find a film product
formulated for your device. You can prepare your transparencies well in
advance of your presentation and reuse them each time you give the same talk.
If parts of your message change, replace the outdated transparencies with new
ones.

Annotations
Because overhead projectors display anything you print onto sheets of clear
plastic material, their transparencies make it easy to annotate your presentation
pages with comments you elicit from your audience or points of emphasis
related to your data. With an inexpensive wax or grease pencil, you can write or
draw on your transparencies during your talk and wipe the notes away with a
tissue or paper towel. Overhead projectors can't display anything through
opaque materials, so you can cover parts of a transparency with a piece of
cardboard and reveal your talking points one at a time, focusing audience
attention.
Class Room Advantages
1. Demonstrate math manipulative
2. Show visuals for science experiments
3. Modeling of the physical process of writing – hand movements
4. Art: Virtual Museum Tours Audio visual resources from internet Whole
class participate in practice test Going over tests Isolate new vocabulary
5. Show and Tell Current Events Highlighted good vs bad grammar in
writing
6. Showing selected DVDs or Videos Graphing, charts, tables Creative
writing – add a line Step-by-step math problem solving

7. Displaying student work Comparison activities using split-screen
Storyboarding
8. Displaying class agenda/schedule Read-aloud Modeling note-taking
9. Mapping and group editing Live web-cams Coins and manipulatives
10. Finished project to look, model while going through directions
11. No more big semicircle watching the teacher
12. Video streaming (United Streaming and online videos)
13. Sequence of pictures, time lapse, to demonstrate progression. Adding
visuals to note outlines. Paperless handouts. Showing hands-on tasks.
14. Compare and Contrast. Step by step instructions. Choral reading. Cloze
activities. Labeling activities Display maps, charts, graphs, images from
textbooks.
15. Visualization of content-Reading comprehension-Making connections.
16. Descriptive writing activities using image as writing prompt.
17. Geography connections using Google Earth, Google Maps Picture books
with read aloud Display a timer for assignments
18. PowerPoint Jeopardy Freeze screen to get websites up without pop-up
interference
19. Skype video chatting with classes around the world Online
20. Textbook Teach songs using pp Graphic organizer- Inspiration-
Inspiration Britannica & Net Trekker (model how to search) Surround
your students with images from the unit you are studying.
21. Show people, architecture, art, food, social scenes, etc. for a social
studies.
Other Advantages
1. Face to face contact with audience
2. Eye contact possible

3. Can pick up verbal and nonverbal cues to understanding
4. Projector located in front of room and near speaker for easy access
5. Can be used to focus audience's attention
6. On to focus attention on visual material
7. Off to focus attention on speaker
8. Effective in a fully-lighted room; audience can follow handouts or take
notes
9. Ability to modify transparencies during presentations
10. Highlighting important points with transparency pen
11. Writing on blank acetate film like a chalk board
12. Sequence of material can be modified during presentation
13. Accommodates audience questions or interest
14. Can abbreviate or extend sections of presentation
15. Unframed transparencies easy to store and transport; easily fit in file
folder
16. Overlays can be used to simplify complex information into layers
17. Short lead time (minutes) for preparation of transparencies
18. Low cost of transparency material.
Disadvantages of Using an Overhead Projector:

An overhead projector enables you to present individual, static transparencies
that contain business information and statistics. If you're accustomed to sharing
movies, sound files and illustrated documents from your notebook computer
through a digital projector, stepping back to older technology may prove
challenging. In a pinch, an overhead projector can help you get your message
across, but the technology shows its age and its limiting disadvantages.
Transparencies
Whether you print, copy or handwrite on individual sheets of transparency film
to convey your message, you'll quickly discover that the cost of these plastic
sheets adds up to more than pocket change. Although you can reuse them to
make the same presentation to a different audience, transparencies eventually
begin to show their age. Printed material can flake off, and the plastic itself can
scratch and dull over time.
Heat and Noise
An overhead projector uses a bright lamp to push its message from the
illuminated transparency onto a mirror and then onto a projection screen. Like
any incandescent bulb, the lamp generates byproduct heat while the device
operates -- a significant enough amount of heat to require a noisy fan to
dissipate it. You'll need to source lamps from an office-supply store or website,
as they're not a garden-variety off-the-shelf item you can pick up where you buy
regular light bulbs.
Other Disadvantages 1. Continuous tone color transparencies are costly
2. Overhead projector is bulky and heavy to transport
3. Framed transparencies are bulky and difficult to store
4. Pages from books cannot be used effectively without modification since
text will usually be too small for audience to read.
5. Overhead projection is perceived as being "less professional" than slides
in a formal setting.

Bulky, Heavy Equipment
Picking up an overhead projector qualifies as weightlifting. With most of its
bulk in the bottom of the projector, along with the lamp and fan, topped by a
long neck with a mirror assembly on the end of it, it's difficult to carry for more
than a short distance. Where they're moved from room to room, you'll often see
them on wheeled carts that double as projection platforms.
Projection Surface
Finding enough room for an overhead projector can be a challenge, especially in
small rooms or facilities with hard-to-move furniture. In classroom-style setups
in which these projectors see frequent use, one desk may become a permanent
projection stand. If the equipment rolls in on a wheeled cart, you may be forced

to move furniture to make room for it. Plan ahead by checking out the space in
which you'll be presenting.
Subject-Matter Limitations
Unlike today's digital generation of projection hardware, overhead projectors
only display what you place or write on their platforms, and only if you put your
message on transparency film. That forces you to prepare your message in
advance, or write it out longhand with a grease pencil. If you want to present
audio or video with your slides, you'll need a separate player to add multimedia
to your message.

Using Overhead Projectors in The Classrooms
OVERHEAD PROJECTOR
Beneficial Strengths
This projector definitely has a number of advantages that would outdo most
other visual teaching aids. For instance, a lecturer can use it in just the same
way that he or she would use a chalkboard, but the biggest advantage would be
that with the projector, lecturers all over the world now get to face the whole
class and maintain eye contact all times with their students instead of having to
turn around and write. As a teacher, you would know that this eye contact plays
a very big role in both facilitative as well as expository teaching, and serves
both as a means of receiving feedback from the class on how good or bad the
session is and as an outward non-verbal communication medium for the teacher.
Another very important benefit that the projector has over the chalkboard is
that it is multipurpose and can be used to present prior prepared material, which
enables lecturers to build notes, tables, diagrams, and so on; and these can be
used anytime, repeatedly. If designed well and planned well, these overhead
transparencies will provide all the aides and cues that are needed during a
lecture, so that you don’t have to resort to the conventional note taking. These
overhead transparencies are fairly compact when you compare them with some
of the other types of visual aids like charts and can easily be stored in boxes,
folders, files, or large envelopes.

As compared to most other projected visual aids, the projector also has
another big advantage, as it does not require a room to be darkened, so it allows
students to take notes easily. It can also be used in any kind of room, except
ones with extreme bright lights or in the direct sunlight. The projector is quiet,
‘user-friendly’ and clean and requires no technical knowledge or skill on the
part of the person operating it, apart, of course, from the ability to change the
lamps occasionally.
Possible Weaknesses
The drawbacks of this projector include the basic fact that it requires a
constant power supply and also requires a white flat surface on which its image
can be projected. Another disadvantage is that if the surface is not suitable
inclined at the correct angle, the image will suffer from a phenomenon called
‘keystoning’.
Unlike marker boards and chalkboards, these projectors require a small
amount of maintenance. They are more likely to crack or break, so you must be
very careful and always keep a spare bulb close at hand. Another disadvantage
is that some teachers find the glare that is emitted from the projector quite
bothersome, even though this can be overcome by attaching a shade to the
device.
Besides these hardware ‘glitches’, the basic problems that are associated
with the projectors arise from the fact that most users do not really provide
enough thought or consideration to the production of their display material. The
writing is generally too untidy or too small and can’t be read easily, and apart
from this it could also extend beyond the area of transparency. Lecturers and
teachers always forget that this illuminated projection area in the projector is not
the same exact size as the acetate sheets that produce the transparencies.
However, most projectors are still of the older ‘square’ variety.
Lastly, lecturers and teachers tend to overuse these overhead projectors only
because they are so convenient. They employ it in situations where, on other
occasions, other visual aids would have been more effective.
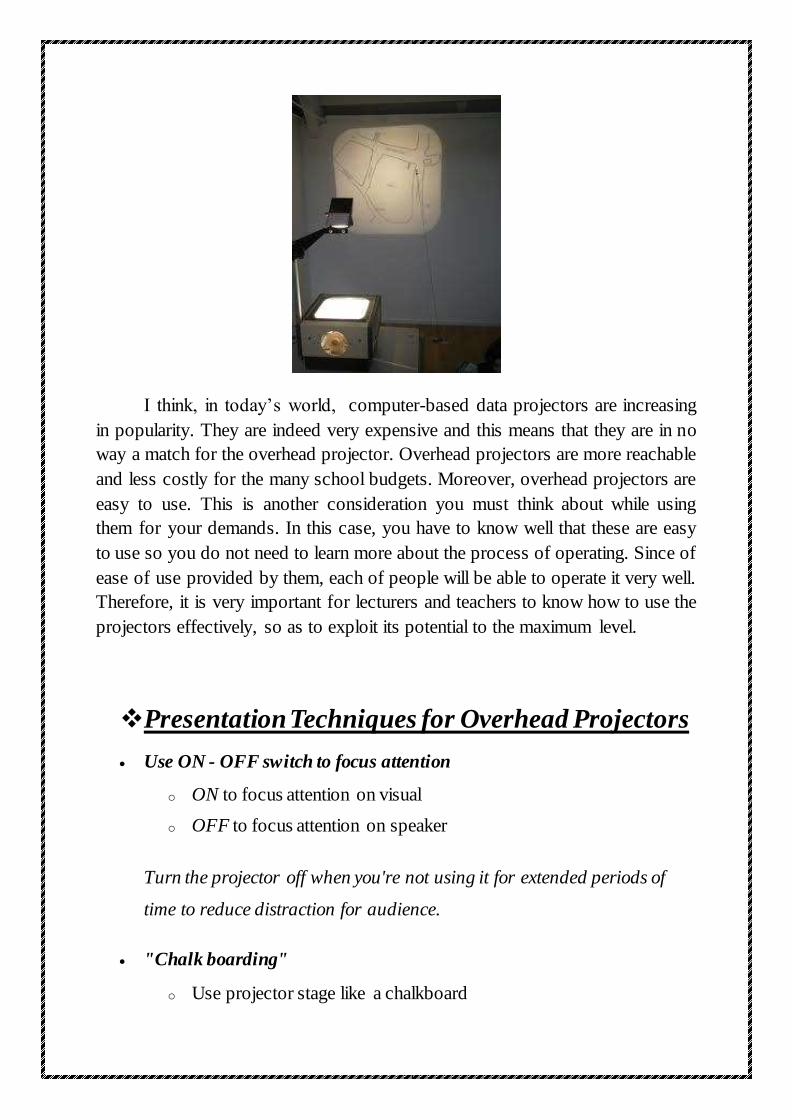
I think, in today’s world, computer-based data projectors are increasing
in popularity. They are indeed very expensive and this means that they are in no
way a match for the overhead projector. Overhead projectors are more reachable
and less costly for the many school budgets. Moreover, overhead projectors are
easy to use. This is another consideration you must think about while using
them for your demands. In this case, you have to know well that these are easy
to use so you do not need to learn more about the process of operating. Since of
ease of use provided by them, each of people will be able to operate it very well.
Therefore, it is very important for lecturers and teachers to know how to use the
projectors effectively, so as to exploit its potential to the maximum level.
Presentation Techniques for Overhead Projectors
Use ON - OFF switch to focus attention
o ON to focus attention on visual
o OFF to focus attention on speaker
Turn the projector off when you're not using it for extended periods of
time to reduce distraction for audience.
"Chalk boarding"
o Use projector stage like a chalkboard
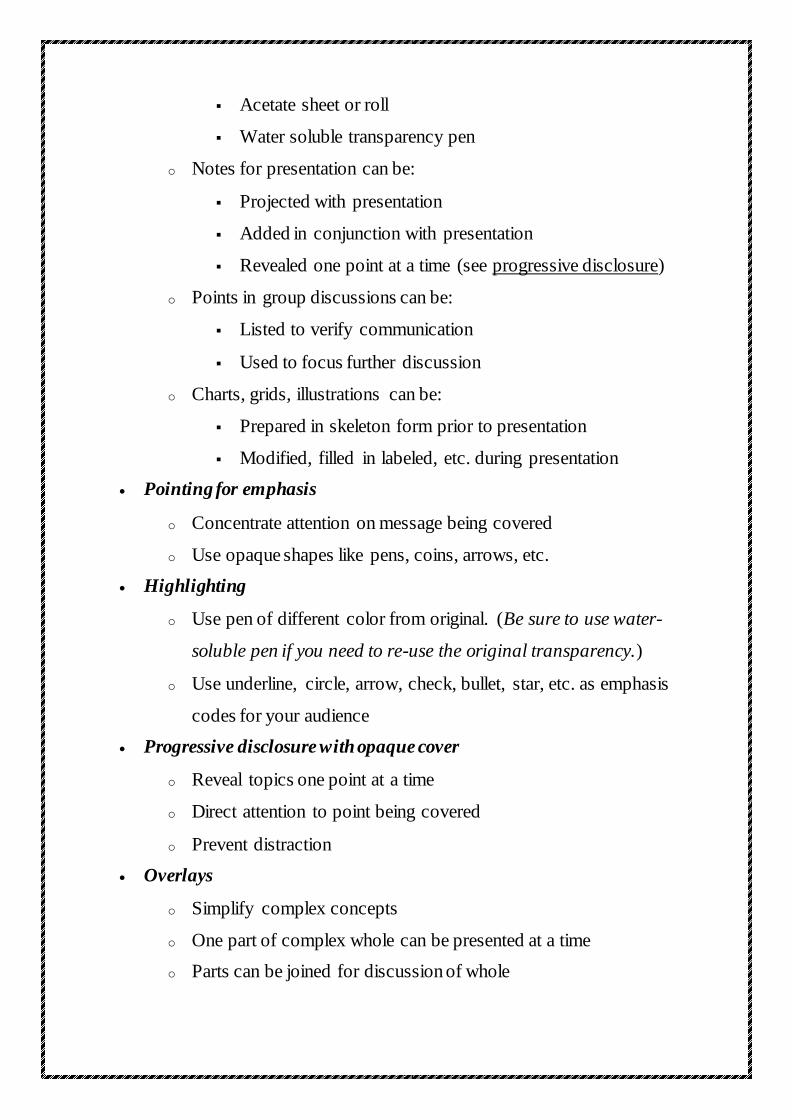
Acetate sheet or roll
Water soluble transparency pen
o Notes for presentation can be:
Projected with presentation
Added in conjunction with presentation
Revealed one point at a time (see progressive disclosure)
o Points in group discussions can be:
Listed to verify communication
Used to focus further discussion
o Charts, grids, illustrations can be:
Prepared in skeleton form prior to presentation
Modified, filled in labeled, etc. during presentation
Pointing for emphasis
o Concentrate attention on message being covered
o Use opaque shapes like pens, coins, arrows, etc.
Highlighting
o Use pen of different color from original. (Be sure to use water-
soluble pen if you need to re-use the original transparency.)
o Use underline, circle, arrow, check, bullet, star, etc. as emphasis
codes for your audience
Progressive disclosure with opaque cover
o Reveal topics one point at a time
o Direct attention to point being covered
o Prevent distraction
Overlays
o Simplify complex concepts
o One part of complex whole can be presented at a time
o Parts can be joined for discussion of whole

Projector to Scree Distances:-
![A Romantic Jazz Suite [C118] - Free-scores.com : World Free … · eee eee e eee )o 2e %e&o %vq i r x m ± ± m ± ± ± ± ± m ± ± m ± ± ± ± ± " eee eee e eee)o 2e %e&o %vq](https://static.fdocuments.us/doc/165x107/60a6220791891f1ffb1e5d23/a-romantic-jazz-suite-c118-free-world-free-eee-eee-e-eee-o-2e-eo-vq.jpg)