Competency based learning material assembling and disassembling
102
COM PETENCY-BASED LEARNING MATERIAL Sector: ELECTRONICS Qualification: Consumer Electronics Servicing NC II UNIT OF COMPETENCY ASSEMBLE/DISASSEMBLE CONSUMER ELECTRONICS PRODUCTS AND SYSTEMS
Transcript of Competency based learning material assembling and disassembling
Sector:
ELECTRONICSQualification:
Consumer Electronics Servicing NC II
UNIT OF COMPETENCY
ASSEMBLE/DISASSEMBLE CONSUMER ELECTRONICS PRODUCTS AND SYSTEMS
MODULE TITLE ASSEMBLING/DISASSEMBLING CONSUMER ELECTRONICS PRODUCTS AND SYSTEMS
TECHNICAL EDUCATION AND SKILLS DEVELOPMENT AUTHORITY
Access for Youth training and Employment Center
COMPETENCY-BASED LEARNING MATERIAL

National Certificate Level IIQualification Level
Code BASIC COMPETENCIES
5 00 311 1 05 Participate in workplace communication5 00 311 1 06 Work in team environment5 00 311 1 07 Practice career professionalism
5 00 311 1 08Practice occupational health and safety procedures
Code COMMON COMPETENCIES
ELC724201 Use Hand ToolsELC311201 Perform Mensuration and CalculationELC311202 Prepare and Interpret Technical DrawingELC315202 Apply Quality StandardsELC311203 Perform Computer Operations
ELC724202Terminate and Connect Electrical Wiring and Electronic Circuits
Code CORE COMPETENCIES
ELC724322Assemble/ Disassemble Consumer Electronic Products and Systems
ELC724323Maintain and Repair Audio/ Video Products and Systems
ELC724324Maintain and Repair Electronically-Controlled Domestic Appliances
ELC724325 Maintain and Repair Cellular Phones

HOW TO USE THIS MODULEWelcome to the Module “Assembling and Disassembling Consumer Electronic Products and
Systems”. This module contains training materials and activities for you to complete.
The unit of competency “Assemble and Disassemble Consumer Electronic Products and Systems” contains the knowledge, skills and attitudes required for Consumer Electronic Servicing required to obtain the National Certificate (NC) level II.
You are required to go through a series of learning activities in order to complete each of the learning outcomes of the module. In each learning outcome, there are Information Sheets, Job Sheets, Task sheets and Operation Sheets. Do these activities on your own and answer the Self-Check at the end of each learning activity.
If you have questions, don’t hesitate to ask your teacher for assistance.
Recognition of Prior Learning (RPL)
You have already some basic knowledge and skills covered in this module because you have been working for some time; or already completed training in this area.
If you can demonstrate competence to your teacher in a particular skill, talk to your teacher so you don’t have to undergo the same training again. If you have a qualification or Certificate of Competency from previous trainings show it to him/her. If the skills you acquired are consistent with and relevant to this module, they become part of the evidence. You can present these for RPL. If you are not sure about your competence skills, discuss this with your teacher.
After completing this module, ask your teacher to assess your competence. Result of your assessment will be recorded in your competency profile. All the learning activities are designed for you to complete at your own pace.
In this module, you will find the activities for you to complete and relevant information sheets for each learning outcome. Each learning outcome may have more than one learning activity.
This module is prepared to help you achieve the required competency, in receiving and relaying information. This will be the source of information that will enable you to acquire the knowledge and skills in Assembling and Disassembling Consumer Electronic Products and Systems and independently at your own pace with minimum supervision from your teacher.
Code No. Module: Date Developed: Date Revised: Page # :

ELC724322 ASSEMBLING/DISASSEMBLING CONSUMER ELECTRONICS PRODUCTS AND SYSTEMS January 01, 2013
Prepared by: Bless T. Tajale i
Qualification : Consumer Electronics Servicing NC II
Unit of competency : Assemble/Disassemble Consumer Electronics products and Systems
Module Title : Assembling/Disassembling Consumer Electronics products and SystemsIntroduction:
This module contains information and suggested learning activities on Assembling and Disassembling Consumer Electronic Products and systems.
This module consists of seven (7) learning outcomes. Each learning outcome contains learning activities supported by instructional sheets. Before you perform the instructions, read the information sheets and answer the self-check and activities provided to ascertain to yourself and your teacher that you have acquired the knowledge necessary to perform the skill portion of the particular learning outcome.
Upon completing this module, report to your teacher for assessment to check your achievement of knowledge and skills requirements of this module. If you pass the assessment, you will be given a certificate of completion.
SUMMARY OF LEARNING OUTCOMES:
Upon completion of the module the students should be able to:
LO1. Enumerate, explain and apply OHS policies and procedures in Assembling and
Disassembling consumer electronics products and systems.
LO2. Identify and explain the uses/functions of tools, equipment and testing instruments.
LO3. Identify electronic symbols and interpret schematic diagrams and parts list.
LO4. Apply soldering and desoldering techniques.
LO5. Apply wiring and cabling techniques.
LO6. Apply assembling and disassembling techniques.
LO7. Perform systematic inspection and apply specific testing procedures.
Code No. Module: Date Developed: Date Revised: Page # :
ELC724322 ASSEMBLING/DISASSEMBLING CONSUMER ELECTRONICS PRODUCTS AND SYSTEMS January 01, 2013
Prepared by: Bless T. Tajale ii
ASSESMENT CRITERIA
All standard of performance for Assembling and Disassembling Consumer Electronics Products and systems is in accordance with Company Standard Operating Procedures and Manufacturer’s Specification Manuals using specified tools and equipments.
1. Enumerate, explain and apply OHS policies and procedures in assembling and disassembling consumer products and systems.
1.1 Electrical safety precautions are identified, enumerated and explained correctly.
1.2 OHS in assembling / disassembling consumer products and systems are defined and explained.
1.3 OHS in assembling and disassembling consumer products and systems area demonstrated in accordance to the set procedures/ instruction.
2. Identify and explain the uses /functions of different types of tools, equipment and testing materials.
2.1 Materials needed for assembly and disassembly are identified, prepared and checked according to the work instructions.
2.2 Tools and equipment types and functions needed for assembly and disassembly are identified and demonstrated according to set standards.
2.3 Testing devices and instrument operations needed for assembly and disassembly are explained and demonstrated according to instruction manual.
2.4 Personal Protective Equipment is used in accordance with the Occupational Health and Safety guidelines and policies.
3. Identify Electronics Symbols and Interpret Schematics Diagrams and Parts List
3.1 Electronics Symbols are identified and selected according to the schematics diagram.
3.2 Electronics parts value are read and matched correctly as required.
3.3 Schematic diagram sections and functions are identified and explained.
4. Apply proper Soldering and Desoldering Techniques
4.1 Workplace is prepared in accordance with OHS policies and procedures.4.2 Required materials, tools and equipment are prepared and checked in
accordance with establish procedure.4.3 Soldering and desoldering processes are performed in accordance with OHS
policies are procedures.4.4 Responsible person is consulted for effective and proper work coordination.
Code No.ELC724322
Module:ASSEMBLING/DISASSEMBLING CONSUMER ELECTRONICS PRODUCTS AND SYSTEMS
Date Developed: Date Revised: Page # :
January 01, 2013Prepared by: Bless T. Tajale iii
5. Apply Wiring and Cabling Techniques
5.1 Workplace is prepared in accordance with OHS policies and procedures 5.2 Required materials tools and equipment are prepared checked in accordance
with established procedures.5.3 Parts and materials needed to complete the work are prepared and obtained
according to requirements.5.4 Wiring and cabling processes are performed in accordance with OHS policies
and procedures.5.5 Responsible person is consulted for effective and proper coordination.
6. Apply Assembling and Disassembling Techniques
6.1 Assembly workplace is prepared in accordance with OHS policies and procedures.
6.2 Responsible person is consulted for effective and proper work coordination.6.3 Required materials, tools and equipment are prepared and checked in
accordance with established procedures.6.4 Parts and materials needed to complete the work are prepared and obtained
according to requirements.6.5 Assembling and disassembling processes are performed in accordance with
OHS policies and procedures.
7. Perform Systematic Inspection and Apply Specific Testing Procedures.
7.1 Process is checked according with quality standards. 7.2 Assembled products are checked in accordance with quality standards.7.3 Finished products are subjected to final visual inspection and testing in
accordance with quality standards, procedures and requirements.7.4 Wok completion is documented and responsible person is informed in
accordance with established procedures.7.5 Housekeeping procedures are observed in accordance with 5’s discipline and
established procedures.

Code No.ELC724322
Module:ASSEMBLING/DISASSEMBLING CONSUMER ELECTRONICS PRODUCTS AND SYSTEMS
Date Developed: Date Revised: Page # :
January 01, 2013Prepared by: Bless T. Tajale iv
Qualification : Consumer Electronics Servicing NC II
Module title : Assembling/Disassembling Consumer Electronics Products and Systems
Learning Outcome : Enumerate, Explain and Apply OHS Policies and Procedures in Assembling and Disassembling ConsumerElectronic Products and Systems
Assessment Criteria:
1. Electrical safety precautions are identified, enumerated and explained correctly.
2. OHS in assembling / disassembling consumer products and systems are defined and explained.
3. OHS in assembling and disassembling consumer products and systems area demonstrated in accordance to the set procedures/ instruction.
RESOURCES:
ELECTRONICS Principles and Applications: by Charles A. Schuler
LEARNING EXPERIENCELearning Outcome 1: Enumerate, Explain and Apply OHS Policies and Procedures in Assembling and Disassembling Consumer Electronic Products and Systems.
Learning Activities Special Instruction
Read the attached Information Sheet # 1.1
“OHS Policies and Safety Procedures”
These covers the following topics:
hazardous and risk assessment implementation of safety regulation safety systems incorporating safety training monitoring and testing procedures
After reading Information Sheet#1.
“OHS Policies and Safety procedures”
Try to answer self-check 1.1
You will be assessed with your trainer.
Perform job sheet 1.1
Your trainer will give you rate to your performance checklist.

Code No.ELC724322
Module:ASSEMBLING/DISASSEMBLING CONSUMER ELECTRONICS PRODUCTS AND SYSTEMS
Date Developed: Date Revised: Page # :
January 01, 2013Prepared by: Bless T. Tajale 1
INFORMATION SHEET # 1.1
OHS POLICIES AND SAFETY PROCEDURES
1.1-1 “Hazardous and risk assessment mechanisms”
Specific hazards- ELEDTRICITY !!! ELECTRIC SHOCK
Electric shock is the reflection of a living being, the passage of electrical current. Just be a shock if the central nervous system to react and detect the passage of current. This passage of current may not have any consequences later, but can also cause burns or cardiac fibrillation in severe cases death.
Electric shock is an electrical shock is received when electrical current passes through the body. You will get an electrical shock if a part of your body completes an electrical circuit by:
Touching a live wire and an electrical groundTouching a live wire and another wire at a different voltage.
The direct consequences vary depending on several factors:
-Higher or lower potential difference (voltage- volt)-Greater of lesser frequency (Hertz)-Higher or lower current (Ampere)-Electrical resistance of the body to direct current that flows by it-Resistance between the body and the earth element Earth.-Susceptibility of a body to a greater or lesser capacity for movement of -Electrical power
CURRENT FLOW THROUGH THE BODY:
The tension uses the path of least resistance for potential higher contrast. If this voltage into a living body to circulate the point where the body will have a higher potential difference physically closer and with less electrical resistance, i.e., whether a human body has a hand in making a left and right hand in the sector other pole current will circulate between two hands (these type of shocks are very common in technical interventions, the technician has a hand in picking neutral element with another shock). If on the other hand only one hand to be subject to tension, electricity tends to travel throughout the body to leave the area of contact with earth (ground).
MINIMUM AND THAT THE BODY FEELS THE PASSAGE OF CURRENT:
These values may vary according to electrical isolation of each physical body. If there is a use of footwear with element on high electrical resistance (rubber, wood) the body itself undergoes changes in its electrical resistance as a function of variables such as food, you’re doing or not digestion the level of sweating is higher or lower. These factors mean that the consequences of a shock are different from case to case. There is however standard values that can be used as the basis of the consequences of a shock.
Values below 50V (AC) AND 120V (DC) are considered safe but may be detected by living bodies. These voltage values are referred to as EST (Extra Low Voltage). Tensions with values 50-1000v (AC) or 120-1500V (DC) are in range designated for low voltage (LV) can High Voltage (HV) the consequences of a shock can even higher.
Code No.ELC724322
Module:ASSEMBLING/DISASSEMBLING CONSUMER ELECTRONICS PRODUCTS AND SYSTEMS
Date Developed: Date Revised: Page # :
January 01, 2013Prepared by: Bless T. Tajale 2
Whereas an electric shock with entrance and exit to the earth elementDuration of physical contact between the body.Current intensity that circulates through the body.
50 HZ AC AC 60 HZ RESULT
0.5 to 1 mA 0.5 to 3 mA Begins to feel the energy circulating1-8 mA 3-10 mA Sit back pain, muscle contraction
10-25 mA 10-40 mA Twitch, the pain tends to want to physically release the body does not react
15-40 mA 30-75 mA Top of paralysis of the respiratory system by asphyxiation
40-50 mA 100-200 mA Cardiac Fibrillation100 mA 200-500 mA Heart Failures
1000 mA 1500 mA Arcs in the tissues causing internal and external burns
2 A 2 A Neurological damage
This chart should be used as indicative values with average values listed above can cause enormous damage in people with health problems.
Depending on the muscle mass and whether a man or woman the beginning of muscle contraction is different. The female body is more sensitive to electric shock.
Unlike what is widely diffused, is not the voltage that is dangerous but the power that circulates in the body, all the TV Technicians have already receive a discharge of MAT (more than 20KV), some have some scars on the hands, but the total power is reduced, the lower risk. An appliance is the most dangerous of the magnetron microwave, but there is a high power beyond a high voltage while the voltage is below the transformer lines of a TV.
USE OF RUBBER BOOTS MINIMIZES THE RISK OF THE SHOCK?
Yes, the use of rubber footwear to prevent a shock through the body and go to the land, intensity of the shock is so minor. However, if another part of the body is in contact with a negative potential (hand on the wall, the other hand the negative or ground unit) and the intensity of the shock effects are identical. This protection of isolating boots does not isolate high voltage (outputs high-voltage TVS, magnetron microwave) so it does not serve as effective protection for all voltages and situations.
ELECTRICAL CHARGES
Some devices store energy (capacitor, batteries,) some capacitors for its ability shocks can produce quite painful. Also on TVs is common to hear, the TV is off but the fly back is acrregado, this is an error, the high voltage actually stored between the plates that make the picture tube armature condenser (capacitor) storing very high voltage.
ELECTRIC SHOCK IN DEVICES
Until a few years ago, it was common chassis of the devices are “live”, this means that the chassis was connected to the pole of the current input sector, the isolation was done in the case of televisions, through two condensers placed in decision antenna, the antenna was in shock given mainly by the poor insulation in one of these capacitors. In the current sources (switching, switched) may be failures in this sector, leaving the sources voltage to pass the unit chassis.
Code No.ELC724322
Module:ASSEMBLING/DISASSEMBLING CONSUMER ELECTRONICS PRODUCTS AND SYSTEMS
Date Developed: Date Revised: Page # :
January 01, 2013Prepared by: Bless T. Tajale 3
CONSEQUENCES THAT MAY HAVE FREQUENT SHOCK?
Electric shocks act on the nervous system and muscle, may therefore lead to irreversible damage, however there is some scientific debate and conflicting views, some sectors maintain that a body to receive frequent shocks causes the brain to become accustomed to react not producing the damaged caused by less frequent shocks, there are some theories that claim that the common shocks are be beneficial to the cardiac system.
REDUCING ELECTRICAL HAZARDS
Electrical service cords should be in good condition.Remove from service any equipment with frayed cords or exposed wires, never use temporary wiring.All electrical equipment must be grounded, used 3-pronged plugs.Water can turn into an electrical conductor “don’t stand in water or with water on your hands when using electrical equipment. Follow the safe work procedures on electrical isolation and tagging.Never bypass safety device on piece of electrical equipment.No electrical work shall be performed except by a qualified person.Never use temporary wiring.Keep electrical cables in a safe and good condition away from water and traffic.Hazards increase with the frequency of use and the harshness of the environment.
Note: always remember that there is no such a minor electric shock; they are all serious events and each has the potential to extinguish life in seconds.
ELECTRIC FIRE RESPONSE
In case of a fire involving electrical equipment, the first action must be the isolation of the power supply so that the circuit is no longer live.Where it is not possible to switch off the current, the first must be attacked in a way which will not cause additional danger.The use of non-conducting extinguishing medium, such as carbon dioxide or powder is necessary.After extinguishing such a fire careful watch should be kept for renewed outbreaks until the fault has been rectified.Re-ignition is a particular problem when carbon dioxide extinguishers are used, although less equipment may be damaged than is the case when powder is used.
“CONTROL MEASURES”Here are some common protective systems:
FusesEarthingIsolation
Reduced low voltage systemsResidual current devices
Double insulation
Code No.ELC724322
Module:ASSEMBLING/DISASSEMBLING CONSUMER ELECTRONICS PRODUCTS AND SYSTEMS
Date Developed: Date Revised: Page # :
January 01, 2013Prepared by: Bless T. Tajale 4
FIRE
Fire is most destructive and hazardous that can happen anywhere. That is why when fire is discovered, immediate and correct action is necessary to put it out quickly to prevent its spreading.
One therefore must be fire-conscious, know the causes and elements of fire, and the different fire extinguishers used, as well as the position of the nearest fire point.
1. The three elements of fire are:
- combustible materials such as wood, paper, cardboard, gasoline, rubbish, etc.;
- oxygen in air which supports combustion;
- heat which is high enough to raise temperature of fuel to its ignition point.
2. When all three are brought together, fire results. Remove any one of them, and the fire danger disappears.
3. It is important to classify fires to recognize the hazards present and to select the proper extinguisher to be used.
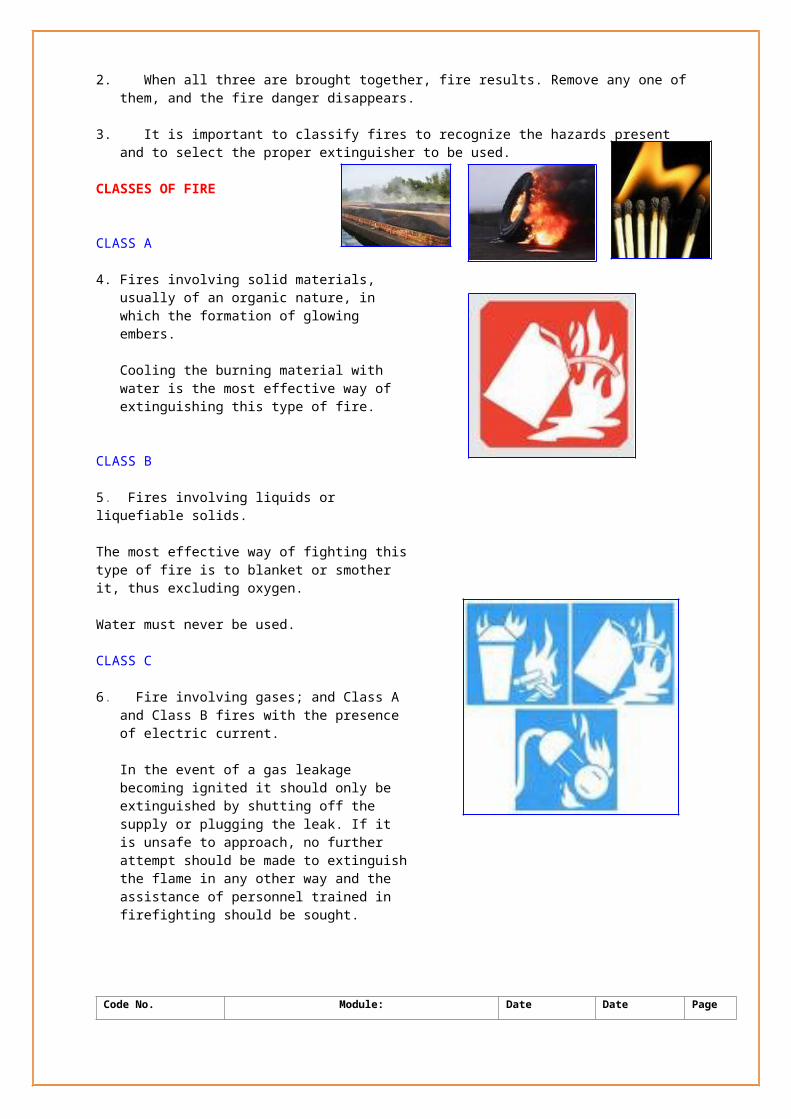
CLASSES OF FIRE
CLASS A
4. Fires involving solid materials, usually of an organic nature, in which the formation of glowing embers.
Cooling the burning material with water is the most effective way of extinguishing this type of fire.
CLASS B
5. Fires involving liquids or liquefiable solids.
The most effective way of fighting this type of fire is to blanket or smother it, thus excluding oxygen.
Water must never be used.
CLASS C
6. Fire involving gases; and Class A and Class B fires with the presence of electric current.
In the event of a gas leakage becoming ignited it should only be extinguished by shutting off the supply or plugging the leak. If it is unsafe to approach, no further attempt should be made to extinguish the flame in any other way and the assistance of personnel trained in firefighting should be sought.

Code No.ELC724322
Module:ASSEMBLING/DISASSEMBLING CONSUMER ELECTRONICS PRODUCTS AND SYSTEMS
Date Developed: Date Revised: Page # :
January 01, 2013Prepared by: Bless T. Tajale 5
CLASS D
7. Fires involving metals.
Powders capable of controlling and/or extinguishing this type of fire have now been developed. The standard range of fire extinguishing agents is inadequate or dangerous when dealing with metal fires.
NOTE: ‘C’ and ‘D’ type fires should not be tackled by untrained personnel. Several types of extinguishers described in the following pages can cause dangerous conditions when used on class ‘C and ‘D’ fires.
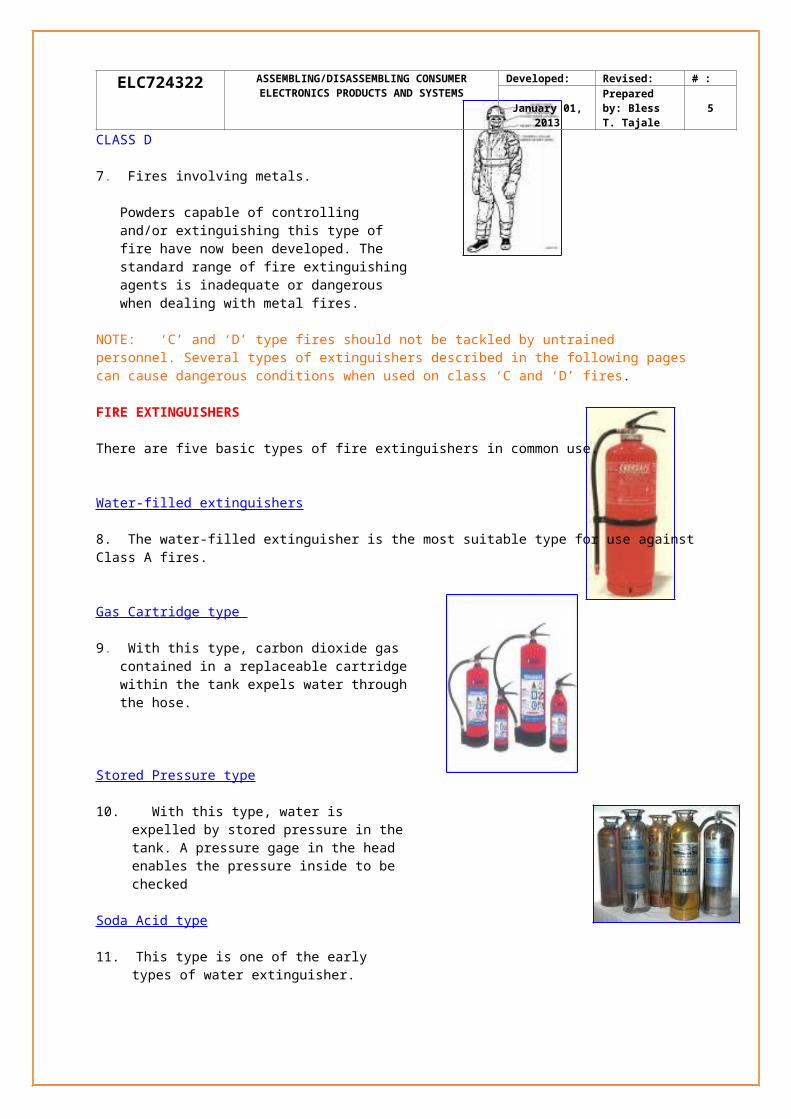
FIRE EXTINGUISHERS
There are five basic types of fire extinguishers in common use.
Water-filled extinguishers
8. The water-filled extinguisher is the most suitable type for use against Class A fires.
Gas Cartridge type
9. With this type, carbon dioxide gas contained in a replaceable cartridge within the tank expels water through the hose.
Stored Pressure type
10. With this type, water is expelled by stored pressure in the tank. A pressure gage in the head enables the pressure inside to be checked
Soda Acid type
11. This type is one of the early types of water extinguisher.
Water is expelled by the action of acid freed into a bicarbonate solution by turning the tank upside down.
Carbon Dioxide type
12. CO2 fire extinguishers are filled with carbon dioxide.
- They are suitable for Class B fires where contamination by deposits is to be avoided.
- They have limited application for Class A type fire.
- They are operated by means of a trigger or lever.
NOTE: Never use a CO2 extinguisher without a discharge horn.
Code No.ELC724322
Module:ASSEMBLING/DISASSEMBLING CONSUMER ELECTRONICS PRODUCTS AND SYSTEMS
Date Developed: Date Revised: Page # :
January 01, 2013Prepared by: Bless T. Tajale 6
Halon Extinguishers
13. These extinguishers are filled either with chlorobromethane (CBM), Bromochlorodifluoromethane (BCF) or Bromotriflouromthane (BTM) in either, gas cartridge or stored pressure type. Since these chemicals are electrically non-conductive, these are suitable and safe to use on electrical fires (class C) and burning liquids (class B).
NOTE: Always ventilate thoroughly after extinguishing a fire indoors.
Dry Powder extinguishers
14. Extinguishers filled with dry powder may be of the gas cartridge or stored pressure type.
- They are similar in appearance to their water-filled counterparts and have the same method of operation. The main distinguishing feature is the fan shaped nozzle.
- These extinguishers are suitable for use on Class B fires where contamination of the equipment is acceptable.
- A multi-purpose dry powder can be effective on Class A fires provided it has a Class A rating.
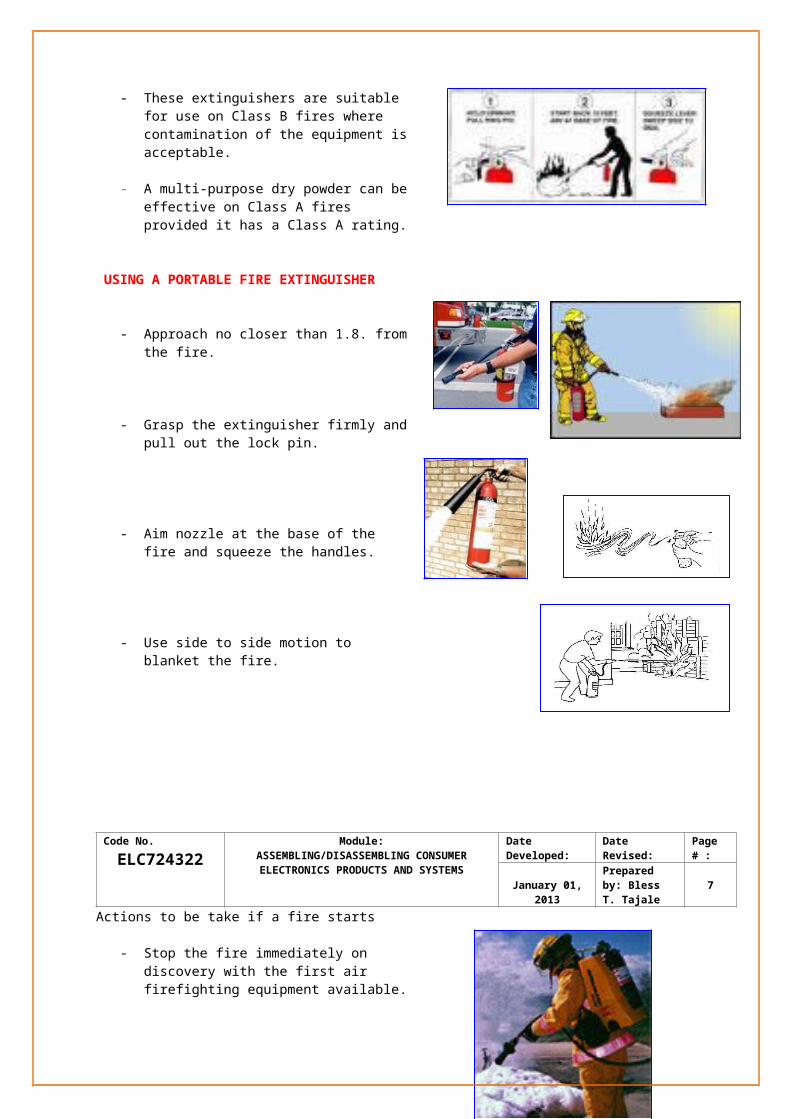
USING A PORTABLE FIRE EXTINGUISHER
- Approach no closer than 1.8. from the fire.
- Grasp the extinguisher firmly and pull out the lock pin.
- Aim nozzle at the base of the fire and squeeze the handles.
- Use side to side motion to blanket the fire.
Code No.ELC724322
Module:ASSEMBLING/DISASSEMBLING CONSUMER ELECTRONICS PRODUCTS AND SYSTEMS
Date Developed: Date Revised: Page # :
January 01, 2013Prepared by: Bless T. Tajale 7
Actions to be take if a fire starts
- Stop the fire immediately on discovery with the first air firefighting equipment available.
- Warn everyone in the area.- Contact your supervisor so that a warning is
issued and fire equipment is rushed to the area.
- Stop fighting the fire and leave the area if
- The fire is beyond control
- Escape route is threatened by fire
- Smoke obscures or threatens to obscure the escape route.
Code No.ELC724322
Module:ASSEMBLING/DISASSEMBLING CONSUMER ELECTRONICS PRODUCTS AND SYSTEMS
Date Developed: Date Revised: Page # :
January 01, 2013Prepared by: Bless T. Tajale 8
1.1-2 “Implementation of safety regulations”
ELECTRIC devices and circuits can be dangerous. Safe practices are necessary to prevent electric shock, fires, explosions, mechanical damage, and injuries resulting from the improper use of tools.
Perhaps the greatest hazard is electric shock. A current through the human body in excess of 10 milliamperes can paralyze the victim and make it impossible to let go of “live” conductor.
Human skin usually has a resistance of several hundred thousand ohms. In low voltage systems, a high resistance restricts current flow to very low values. Thus, there is little danger of an electric shock.
High voltage, on the other hand, can force enough current through the skin to produce a shock. The danger of harmful shock increases. Those who work on very high-voltage circuit must use special equipment and procedures for protection.
When human skin is moist or cut, its resistance can drop several hundred ohms. Much less voltage is then required to produce a shock. Potentials as low as 40 volts can produce a fatal shock if the skin is broken! Although most technicians and electrical workers refer to 40 volts as a low voltage, it does not necessarily mean safe voltage. You should therefore, be very cautious even when working with so called low voltages.
Safety is an attitude.Safety is knowledge.
Safe workers are not fooled by terms such as low voltage they do not assume a circuit is off even the switch is in off position. They know that the switch could be defective. As your knowledge of electricity and electronics grows, you will learn specific safety rules and practices.
SPECIFIC RULES AND PRACTICES:
1. Investigate before you act
2. Follow procedures
3. When in doubt, do not act, Ask your instructor.
Code No.ELC724322
Module:ASSEMBLING/DISASSEMBLING CONSUMER ELECTRONICS PRODUCTS AND SYSTEMS
Date Developed: Date Revised: Page # :
January 01, 2013Prepared by: Bless T. Tajale 9
1.1-3 “Safety training’’ GOOD HOUSEKEEPING
1. Have a place for every tool and piece of equipment that is not permanently located. A storage place with enough racks and cupboards must be provided for them.
2. Store short pieces of stock in suitable containers or holders. Do not leave them lying around.
3. Have an adequate supply of cotton waste, rags and brushes for cleaning purposes.
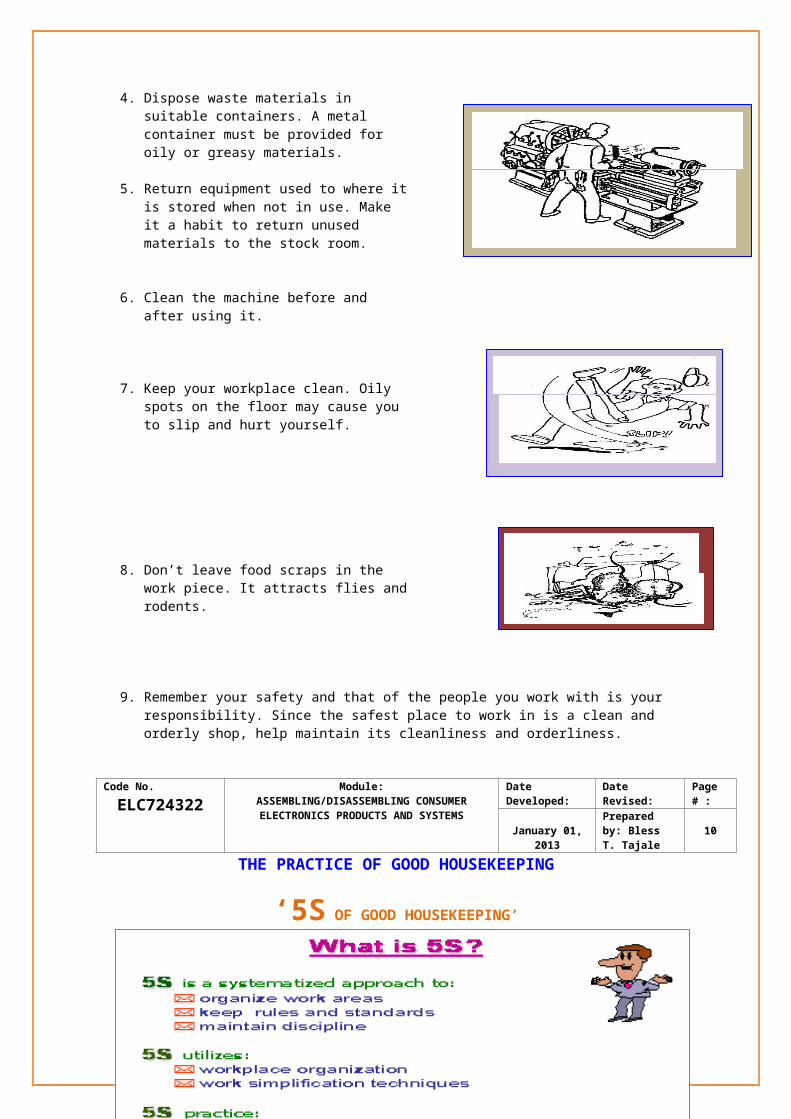
4. Dispose waste materials in suitable containers. A metal container must be provided for oily or greasy materials.
5. Return equipment used to where it is stored when not in use. Make it a habit to return unused materials to the stock room.
6. Clean the machine before and after using it.
7. Keep your workplace clean. Oily spots on the floor may cause you to slip and hurt yourself.
8. Don’t leave food scraps in the work piece. It attracts flies and rodents.

9. Remember your safety and that of the people you work with is your responsibility. Since the safest place to work in is a clean and orderly shop, help maintain its cleanliness and orderliness.
Code No.ELC724322
Module:ASSEMBLING/DISASSEMBLING CONSUMER ELECTRONICS PRODUCTS AND SYSTEMS
Date Developed: Date Revised: Page # :
January 01, 2013Prepared by: Bless T. Tajale 10
THE PRACTICE OF GOOD HOUSEKEEPING
‘5S OF GOOD HOUSEKEEPING’
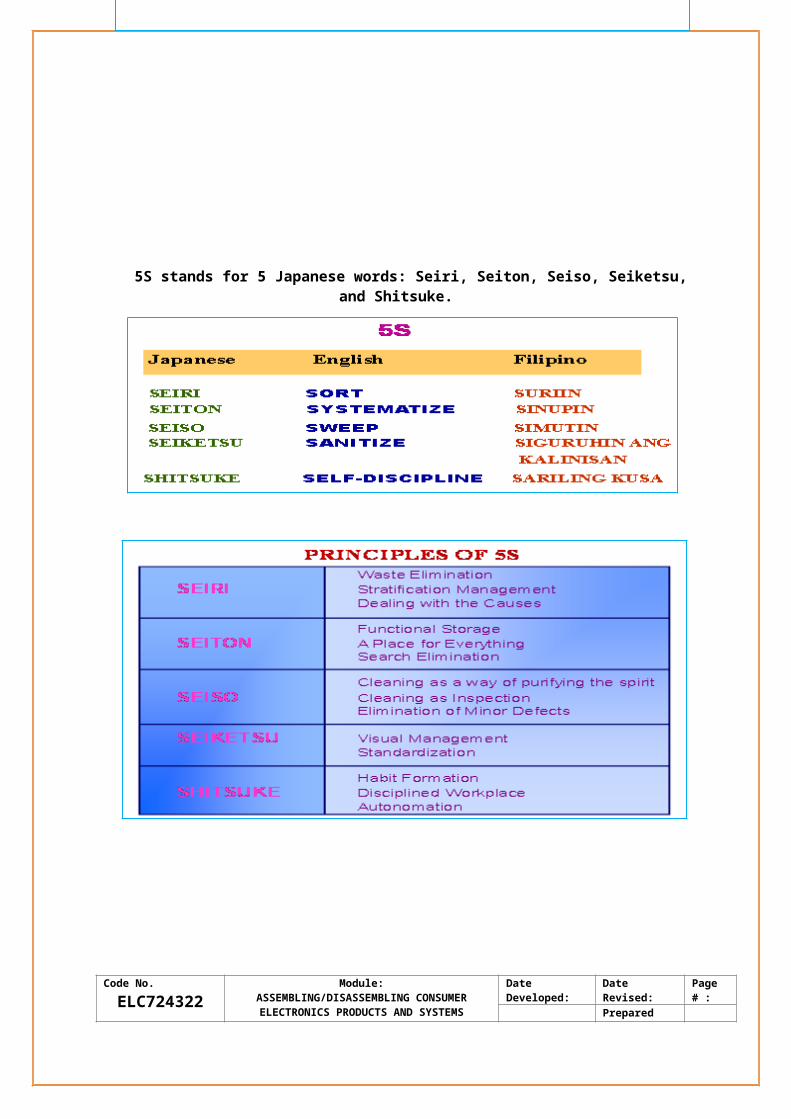
5S stands for 5 Japanese words: Seiri, Seiton, Seiso, Seiketsu, and Shitsuke.
Code No.ELC724322
Module:ASSEMBLING/DISASSEMBLING CONSUMER ELECTRONICS PRODUCTS AND SYSTEMS
Date Developed: Date Revised: Page # :
January 01, 2013Prepared by: Bless T. Tajale 11
1. SEIRI Seiri means SORT. It is actually the taking out of the unnecessary items and then
disposing them accordingly.
Steps in practicing Seiri in the workplace:
1. IMMEDIATELY THROW AWAY all the things belonging to you which are not of any use anymore.
2. DISPOSE unnecessary things belonging to other or to the company in their proper place.
2. SEITONSeiton means SYSTEMATIZE. It is generally the organization or the
arrangement of necessary items of good order for use.
Steps in practicing Seiton:
1. ASSIGN A PLACE FOR EVRYTHING. In assigning a place for equipment, tools and materials, the most often used item should be nearest ergonomically situated- meaning there should be as little effort required in accessing, using and returning the equipment, tools and parts.
2. MAKE SURE EVERYTHING IS RETURNED IN ITS PLACE. To sustain a well organized and well arranged work place, things must be put back in their designated places. This should ensure that when one needs to use the things again, he/she should be able to find it where it is supposed to be.
3. SEISO Seiso means SWEEP or clean the work place. It includes the regular cleaning
and protection of used machines and tools. Seiso also means cleaning even if the things are NOT DIRTY, because a regular cleaning schedule will prevent things from having the chance to get dirty.
It is recommended to allot 5-10 minute everyday to clean the work place cleaner than when it is found.
4. SEIKETSUSeiketsu means SANITIZE, to maintain a high standard of good housekeeping
and workplace organization.
STES:1. Prepare a House Keeping Standard and Checklist. Should be very
detailed and stringent. Remember that thoroughness is a requirement of excellence.
5. SHITSUKEShitsuke means SELF_DISCIPLINE, doing things spontaneously without being
told or ordered.Doing the job alone will not be futile, unless you are not doing it effectively.
And as soon as people notice the difference you are making, they will tend to do it themselves.

And the more people practice good housekeeping, the stronger the motivation for everyone to do likewise.
Code No.ELC724322
Module:ASSEMBLING/DISASSEMBLING CONSUMER ELECTRONICS PRODUCTS AND SYSTEMS
Date Developed: Date Revised: Page # :
January 01, 2013Prepared by: Bless T. Tajale 12
1.1-4 Safety systems incorporating
SAFETY PRECAUTIONS AND FIRST AID PROCEDURES
The word electronics derives from the electron, which is tiny, invisible quantity of electricity present in all materials. Electronics is the sciences that studies the behavior of electrons in devices and play a major role for the advancement of technology.
Industrial electronics can be defined as the control of industrial machinery and processes through the use of electronic circuits and systems.
General Safety Precautions
1. Remove power form the circuit or equipment prior to working on it.2. Remove and replace fuses only after the power to the circuit has been deenergized.3. Make sure all equipment is properly grounded.4. Use extreme caution when removing or installing batteries containing acid.5. Use cleaning fluids only in well-ventilated spaces.6. Dispose of cleaning rags and other flammable materials in tightly closed metal containers.7. In case of an electrical fire deenergized the circuit and report it immediately to the appropriate authority.
Safety knows how to use and take care of tools, as well as the safety procedures to follow when using them. An awareness of the hazards is also necessary for safety. Safe handling of tools, materials, and equipment can be learned, but awareness of safety hazards and procedures depend so much on attitude.
GENERAL SHOP SAFETY
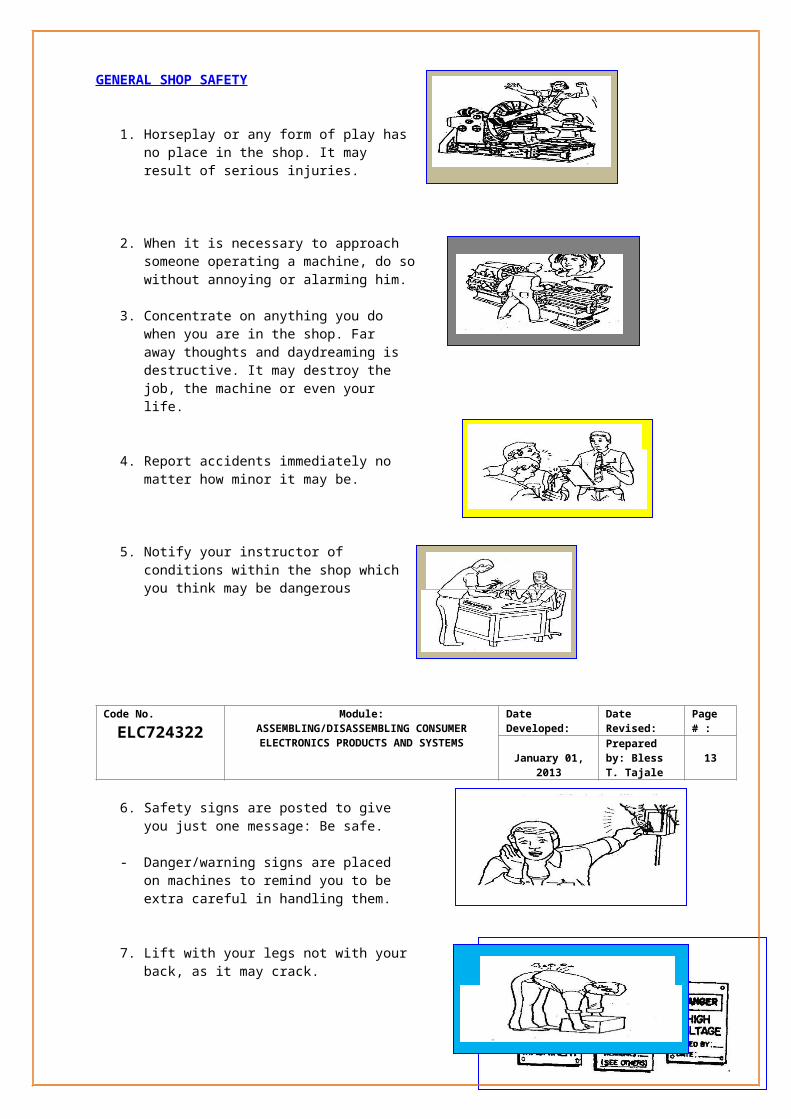
1. Horseplay or any form of play has no place in the shop. It may result of serious injuries.
2. When it is necessary to approach someone operating a machine, do so without annoying or alarming him.
3. Concentrate on anything you do when you are in the shop. Far away thoughts and daydreaming is destructive. It may destroy the job, the machine or even your life.
4. Report accidents immediately no matter how minor it may be.
5. Notify your instructor of conditions within the shop which you think may be dangerous

Code No.ELC724322
Module:ASSEMBLING/DISASSEMBLING CONSUMER ELECTRONICS PRODUCTS AND SYSTEMS
Date Developed: Date Revised: Page # :
January 01, 2013Prepared by: Bless T. Tajale 13
6. Safety signs are posted to give you just one message: Be safe.
- Danger/warning signs are placed on machines to remind you to be extra careful in handling them.
7. Lift with your legs not with your back, as it may crack.
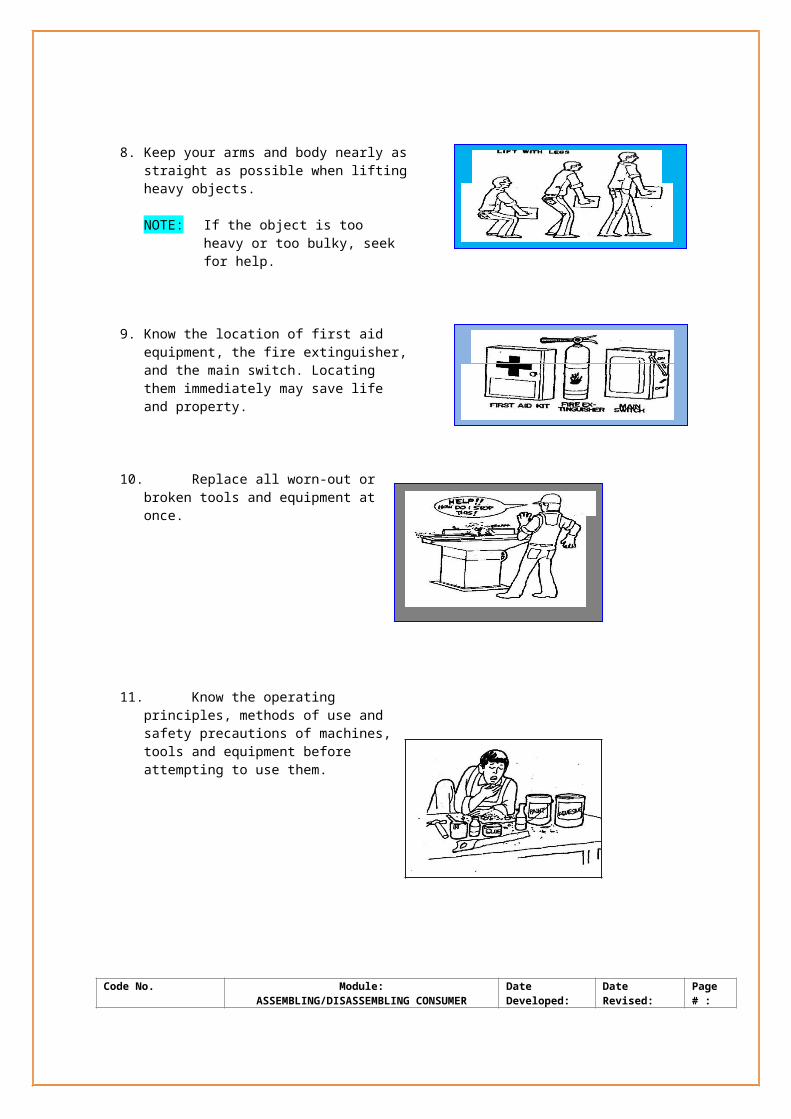
8. Keep your arms and body nearly as straight as possible when lifting heavy objects.
NOTE: If the object is too heavy or too bulky, seek for help.
9. Know the location of first aid equipment, the fire extinguisher, and the main switch. Locating them immediately may save life and property.
10. Replace all worn-out or broken tools and equipment at once.
11. Know the operating principles, methods of use and safety precautions of machines, tools and equipment before attempting to use them.

Code No.ELC724322
Module:ASSEMBLING/DISASSEMBLING CONSUMER ELECTRONICS PRODUCTS AND SYSTEMS
Date Developed: Date Revised: Page # :
January 01, 2013Prepared by: Bless T. Tajale 14
PERSONAL SAFETY PRECAUTIONS
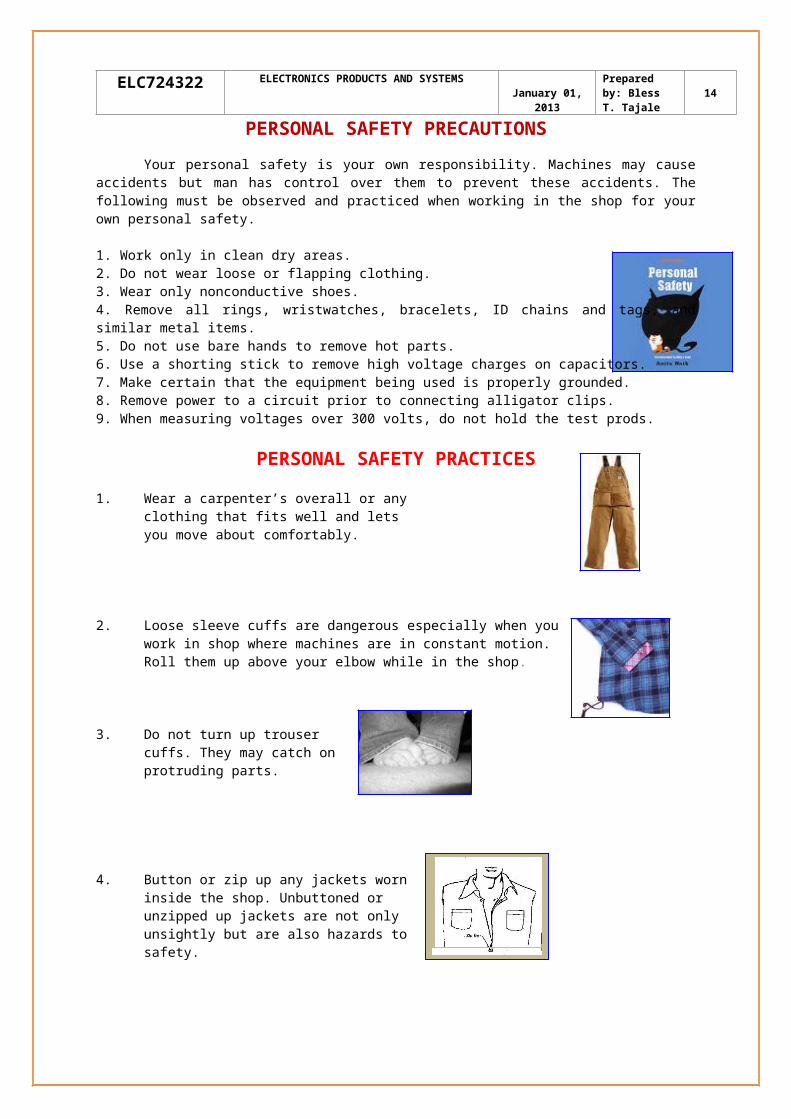
Your personal safety is your own responsibility. Machines may cause accidents but man has control over them to prevent these accidents. The following must be observed and practiced when working in the shop for your own personal safety.
1. Work only in clean dry areas.2. Do not wear loose or flapping clothing.3. Wear only nonconductive shoes.4. Remove all rings, wristwatches, bracelets, ID chains and tags, and similar metal items.5. Do not use bare hands to remove hot parts.6. Use a shorting stick to remove high voltage charges on capacitors. 7. Make certain that the equipment being used is properly grounded.8. Remove power to a circuit prior to connecting alligator clips.9. When measuring voltages over 300 volts, do not hold the test prods.
PERSONAL SAFETY PRACTICES
1. Wear a carpenter’s overall or any clothing that fits well and lets you move about comfortably.
2. Loose sleeve cuffs are dangerous especially when you work in shop where machines are in constant motion. Roll them up above your elbow while in the shop.
3. Do not turn up trouser cuffs. They may catch on protruding parts.
4. Button or zip up any jackets worn inside the shop. Unbuttoned or unzipped up jackets are not only unsightly but are also hazards to safety.
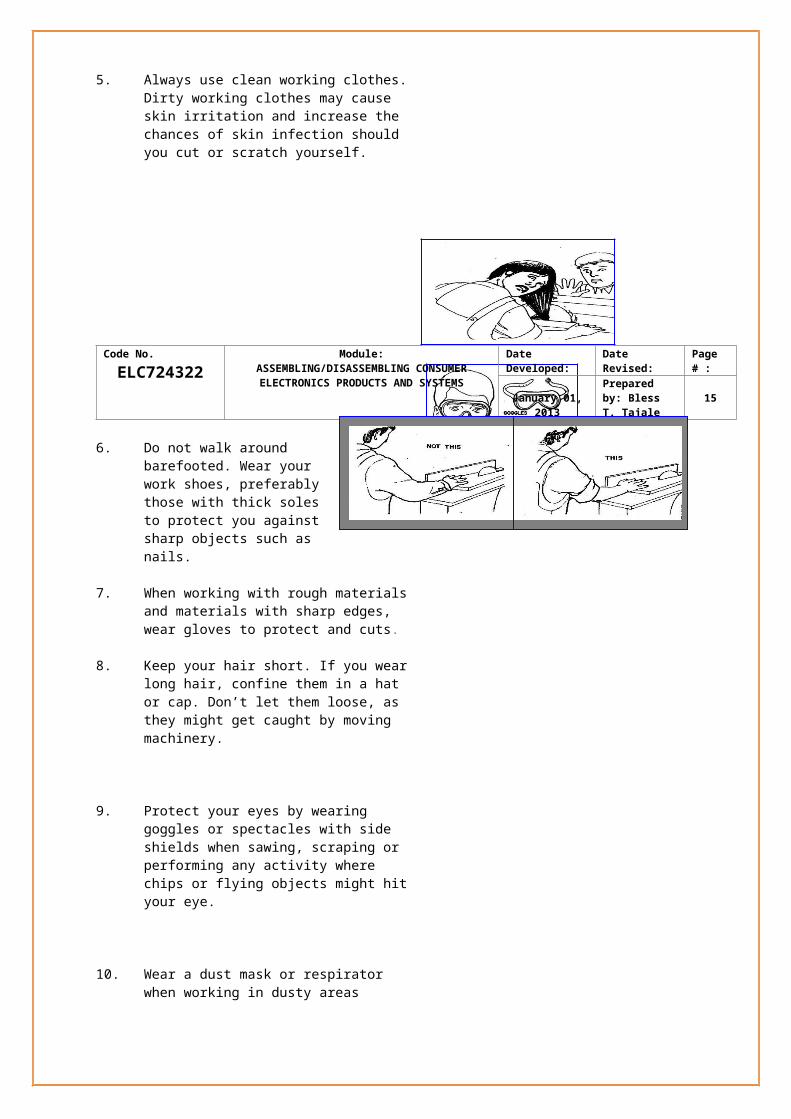
5. Always use clean working clothes. Dirty working clothes may cause skin irritation and increase the chances of skin infection should you cut or scratch yourself.
Code No.ELC724322
Module:ASSEMBLING/DISASSEMBLING CONSUMER ELECTRONICS PRODUCTS AND SYSTEMS
Date Developed: Date Revised: Page # :
January 01, 2013Prepared by: Bless T. Tajale 15
6. Do not walk around barefooted. Wear your work shoes, preferably those with thick soles to protect you against sharp objects such as nails.
7. When working with rough materials and materials with sharp edges, wear gloves to protect and cuts.
8. Keep your hair short. If you wear long hair, confine them in a hat or cap. Don’t let them loose, as they might get caught by moving machinery.
9. Protect your eyes by wearing goggles or spectacles with side shields when sawing, scraping or performing any activity where chips or flying objects might hit your eye.
10. Wear a dust mask or respirator when working in dusty areas and/or with chemicals such as finishes and adhesives.
11. When working with conditions of prolonged or high noise levels, wear an ear protector.
12. See to it that your hands are dry before you use any power tool.
13. Do not leave left-overs and other food scraps in your locker. It attracts insects and rodents which is a hazard to your health and to the people you work with.
14. Don’t spit anywhere in the shop. Fellow trainees might slip into it. It also spreads germs that cause illness. Spit on spit boxes or if these are not available, make a paper
cone and spit into it. Then throw it in a waste box.
Code No.ELC724322
Module:ASSEMBLING/DISASSEMBLING CONSUMER ELECTRONICS PRODUCTS AND SYSTEMS
Date Developed: Date Revised: Page # :
January 01, 2013Prepared by: Bless T. Tajale 16
15. Make the workshop a nice and safe place to work in, the tools, equipment and machines in it are your friends, so maintain them and observe safety about them.
HIGH VOLTAGE SAFETY PRECAUTIONS
1. Consider the result of each act.2. Keep away from live circuits.3. Do not work alone.4. Do not tamper with interlocks.5. Do not ground yourself.6. Never energize equipment in the presence of water leakage.
FIRST AID PROCEDURES:1. Don’t Panic!!!
Determine if there is any immediate danger to the injured person. Never move an unconscious person without cause. Lay the person FLAT. Keep the person warm to prevent shock. Never try to force liquids on an unconscious person. If the person is breathing normally, keep him/her still comfortable until medical aid arrives.
2. Severe electrical shock or other types of accidents may interrupt breathing. A procedure such as artificial respiration (mouth to mouth resuscitation) or CPR (Cardiopulmonary Resuscitation) can be used to stimulate the breathing process. Check for a swallowed tongue before applying artificial respiration. This procedure should be administered by trained person if possible, and continued until medical help arrives.
3. Report all injuries to the instructor immediately. Even minor cuts can become infected, and the best first aid supplies, nurses, doctors cannot help an unreported injury.
FIRST AID FOR ELECTRIC SHOCK VICTIM ADULT CPR
Whenever your body touched a live wire or conductors, you receive and electric shock. The amount of current which is enough to cause an electric shock or even kill a person is as little as 1/10 ampere. An electric shock causes stopping of the heart, respiration or breathing. There are two methods of reviving electric shock victim which can be learned in this learning element.
1. Remove the live wires from the victim by using materials such as dry wood, plastic as shown or pull the victim from the live wires by using dry clothes or rope.

NOTE:Call for the nearest doctor as soon as the accident occurs.
Code No.ELC724322
Module:ASSEMBLING/DISASSEMBLING CONSUMER ELECTRONICS PRODUCTS AND SYSTEMS
Date Developed: Date Revised: Page # :
January 01, 2013Prepared by: Bless T. Tajale 17
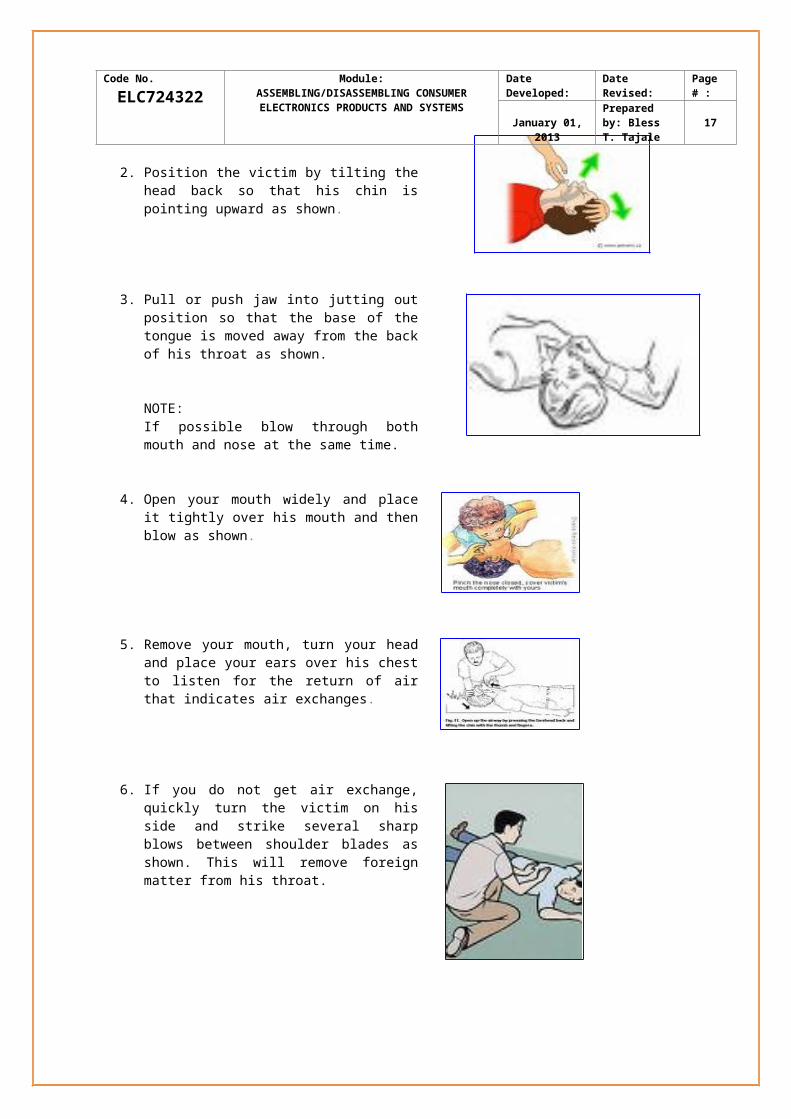
2. Position the victim by tilting the head back so that his chin is pointing upward as shown.
3. Pull or push jaw into jutting out position so that the base of the tongue is moved away from the back of his throat as shown.
NOTE:If possible blow through both mouth and nose at the same time.
4. Open your mouth widely and place it tightly over his mouth and then blow as shown.
5. Remove your mouth, turn your head and place your ears over his chest to listen for the return of air that indicates air exchanges.
6. If you do not get air exchange, quickly turn the victim on his side and strike several sharp blows between shoulder blades as shown. This will remove foreign matter from his throat.
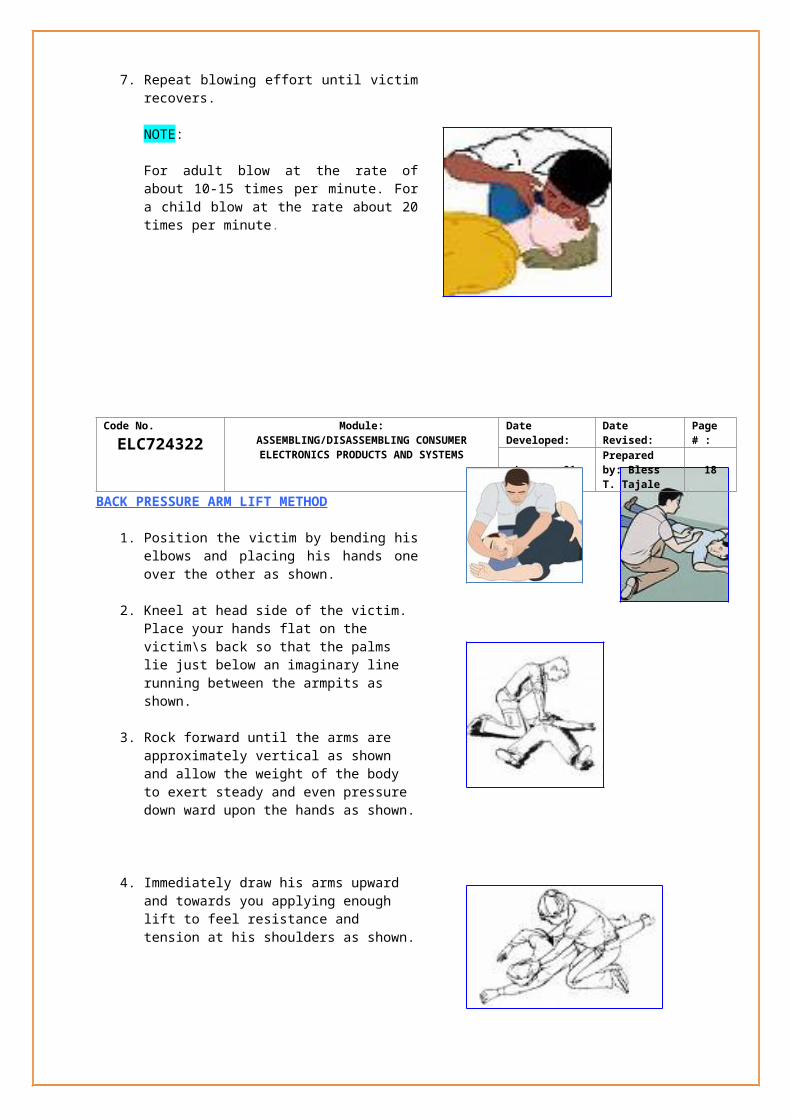
7. Repeat blowing effort until victim recovers.
NOTE:
For adult blow at the rate of about 10-15 times per minute. For a child blow at the rate about 20 times per minute.

Code No.ELC724322
Module:ASSEMBLING/DISASSEMBLING CONSUMER ELECTRONICS PRODUCTS AND SYSTEMS
Date Developed: Date Revised: Page # :
January 01, 2013Prepared by: Bless T. Tajale 18
BACK PRESSURE ARM LIFT METHOD
1. Position the victim by bending his elbows and placing his hands one over the other as shown.
2. Kneel at head side of the victim. Place your hands flat on the victim\s back so that the palms lie just below an imaginary line running between the armpits as shown.
3. Rock forward until the arms are approximately vertical as shown and allow the weight of the body to exert steady and even pressure down ward upon the hands as shown.
4. Immediately draw his arms upward and towards you applying enough lift to feel resistance and tension at his shoulders as shown.
ADMINISTERING FIRST AID ON COMMON WOUNDS
1. Arrest the hemorrhage by administering cold compress over the wounded part of the patient.
2. Prevent infection by removing bacteria already in the wound.This is achieved thru:
- mechanical cleansing which is done by washing the wound with soap and water and picking out foreign matter, such as dirt, grass and bits of cloth; and
-
- Chemical cleansing which is done by applying antiseptics.
3. When using an antiseptic, keep in mind that you are using a substance which may be fatal or deadly when used excessively or improperly handled. Shown below is a table which presents each type of antiseptic.
Code No.ELC724322
Module:ASSEMBLING/DISASSEMBLING CONSUMER ELECTRONICS PRODUCTS AND SYSTEMS
Date Developed: Date Revised: Page # :
January 01, 2013Prepared by: Bless T. Tajale 19
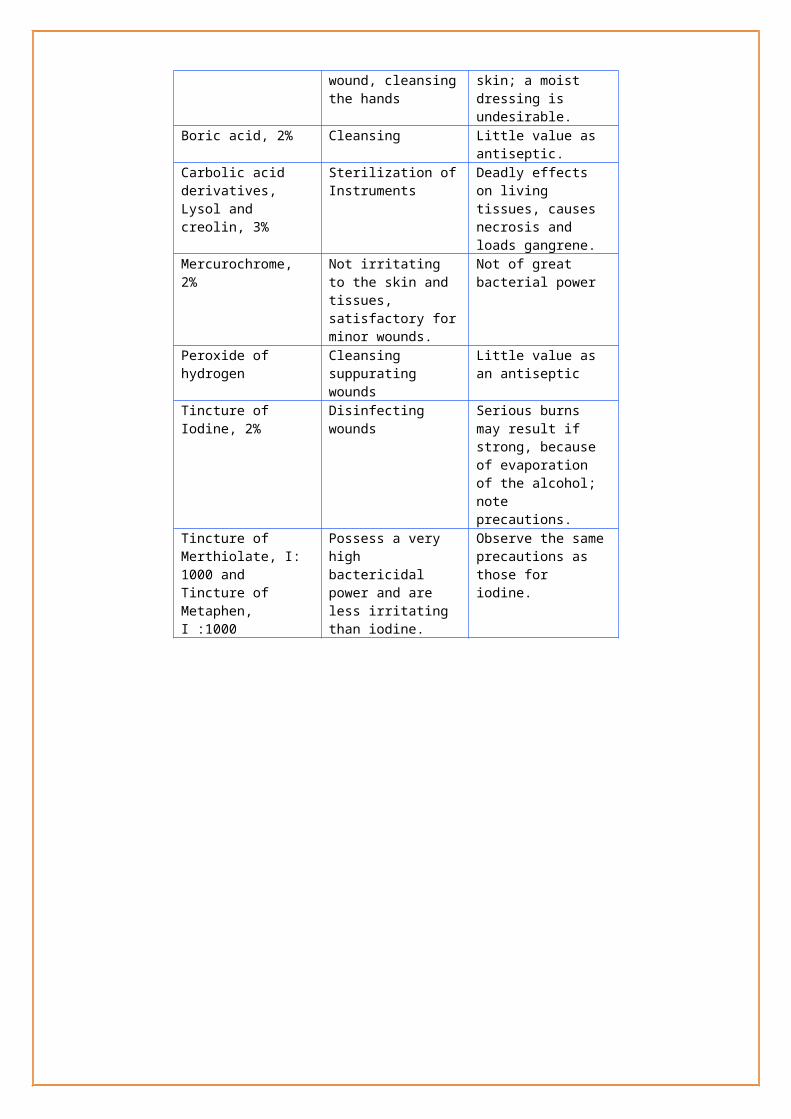
CHEMICAL CLEANSING AGENTS (ANTISEPTICS)
ANITSEPTIC ADVANTAGES DISADVANTAGESAlcohol (grain), 70% Excellent antiseptic for
quick sterilization of instruments, and cleansing the hands.
95% strength is harmful to living tissues.
Denatured alcohol, 70%
Cleansing the skin around a wound, cleansing the hands
Somewhat irritating the skin; a moist dressing is undesirable.
Boric acid, 2% Cleansing Little value as antiseptic.
Carbolic acid derivatives, Lysol and creolin, 3%
Sterilization of Instruments
Deadly effects on living tissues, causes necrosis and loads gangrene.
Mercurochrome, 2% Not irritating to the skin and tissues, satisfactory for minor wounds.
Not of great bacterial power
Peroxide of hydrogen Cleansing suppurating wounds
Little value as an antiseptic
Tincture of Iodine, 2% Disinfecting wounds Serious burns may result if strong, because of evaporation of the alcohol; note precautions.
Tincture of Merthiolate, I: 1000 and Tincture of Metaphen, I :1000
Possess a very high bactericidal power and are less irritating than iodine.
Observe the same precautions as those for iodine.
Code No.ELC724322
Module:ASSEMBLING/DISASSEMBLING CONSUMER ELECTRONICS PRODUCTS AND SYSTEMS
Date Developed: Date Revised: Page # :
January 01, 2013Prepared by: Bless T. Tajale 20
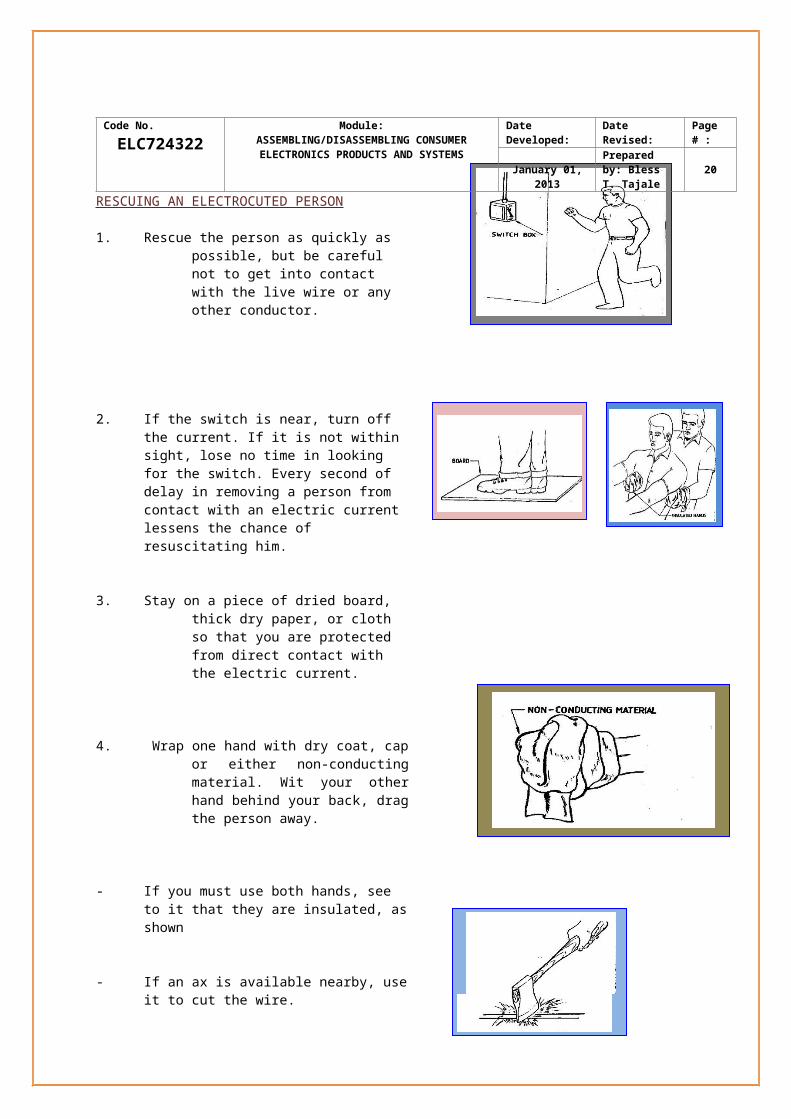
RESCUING AN ELECTROCUTED PERSON
1. Rescue the person as quickly as possible, but be careful not to get into contact with the live wire or any other conductor.
2. If the switch is near, turn off the current. If it is not within sight, lose no time in looking for the switch. Every second of delay in removing a person from contact with an electric current lessens the chance of resuscitating him.
3. Stay on a piece of dried board, thick dry paper, or cloth so that you are protected from direct contact with the electric current.
4. Wrap one hand with dry coat, cap or either non-conducting material. Wit your other hand behind your back, drag the person away.
- If you must use both hands, see to it that they are insulated, as shown
- If an ax is available nearby, use it to cut the wire.
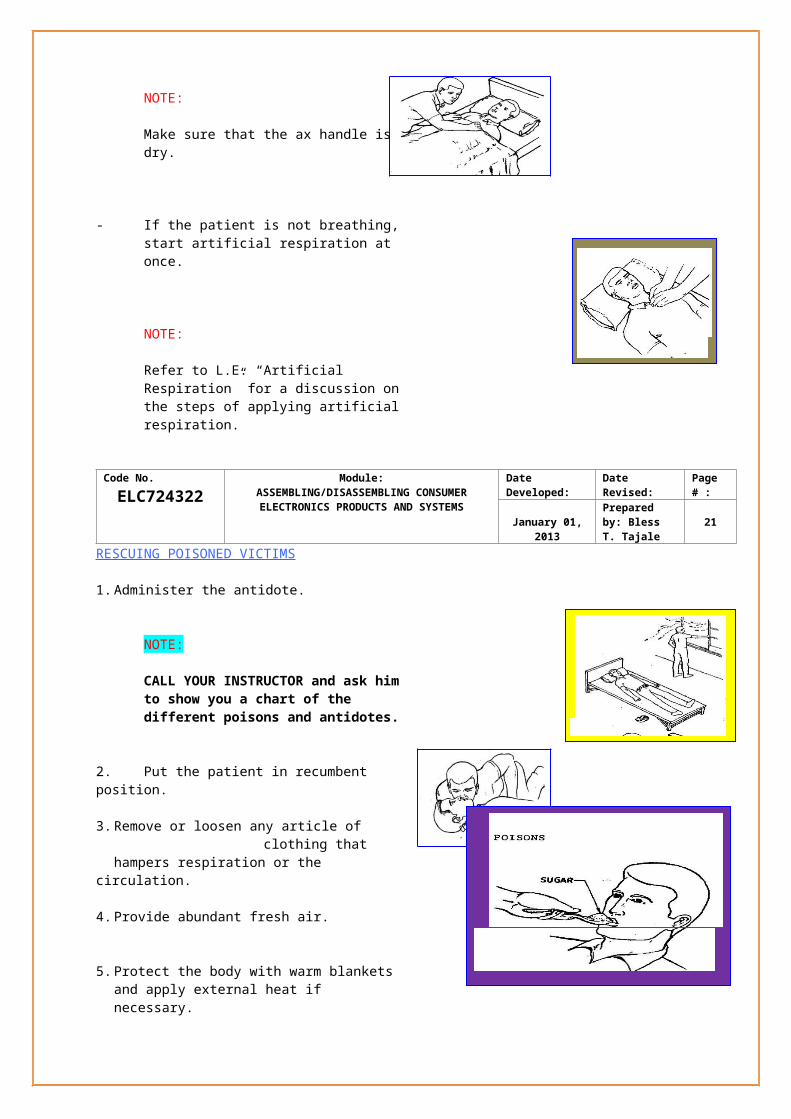
NOTE:
Make sure that the ax handle is dry.
- If the patient is not breathing, start artificial respiration at once.
NOTE:
Refer to L.E. “Artificial Respiration” for a discussion on the steps of applying artificial respiration.
Code No.ELC724322
Module:ASSEMBLING/DISASSEMBLING CONSUMER ELECTRONICS PRODUCTS AND SYSTEMS
Date Developed: Date Revised: Page # :
January 01, 2013Prepared by: Bless T. Tajale 21
RESCUING POISONED VICTIMS
1. Administer the antidote.
NOTE:
CALL YOUR INSTRUCTOR and ask him to show you a chart of the different poisons and antidotes.
2. Put the patient in recumbent position.
3. Remove or loosen any article of clothing that hampers respiration or the circulation.
4. Provide abundant fresh air.
5. Protect the body with warm blankets and apply external heat if necessary.
6. Allay severe pain with a mild opiate.
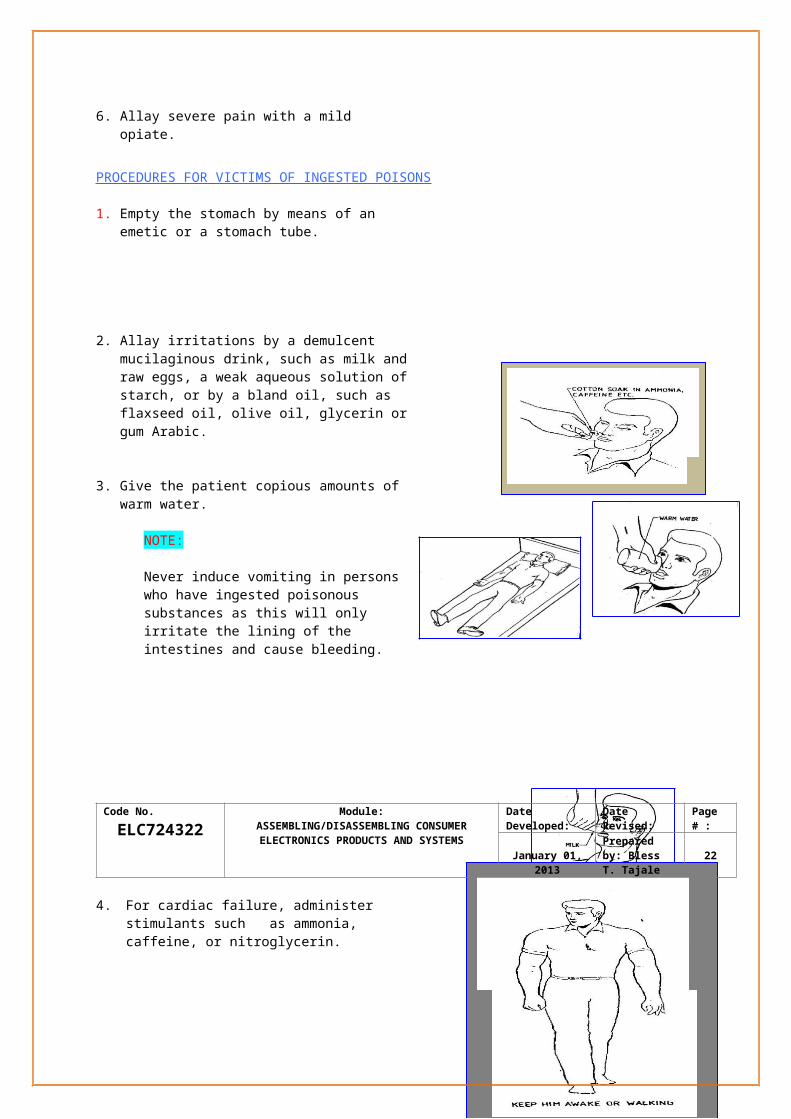
PROCEDURES FOR VICTIMS OF INGESTED POISONS
1. Empty the stomach by means of an emetic or a stomach tube.
2. Allay irritations by a demulcent mucilaginous drink, such as milk and raw eggs, a weak aqueous solution of starch, or by a bland oil, such as flaxseed oil, olive oil, glycerin or gum Arabic.
3. Give the patient copious amounts of warm water.
NOTE:
Never induce vomiting in persons who have ingested poisonous substances as this will only irritate the lining of the intestines and cause bleeding.
Code No.ELC724322
Module:ASSEMBLING/DISASSEMBLING CONSUMER ELECTRONICS PRODUCTS AND SYSTEMS
Date Developed: Date Revised: Page # :
January 01, 2013Prepared by: Bless T. Tajale 22
4. For cardiac failure, administer stimulants such as ammonia, caffeine, or nitroglycerin.
5. For narcosis, keep the patient awake by means of cold effusions or letting him walk continuously.

Code No.ELC724322
Module:ASSEMBLING/DISASSEMBLING CONSUMER ELECTRONICS PRODUCTS AND SYSTEMS
Date Developed: Date Revised: Page # :
January 01, 2013Prepared by: Bless Tajale 23
1.1-5 “Monitoring/testing procedures”
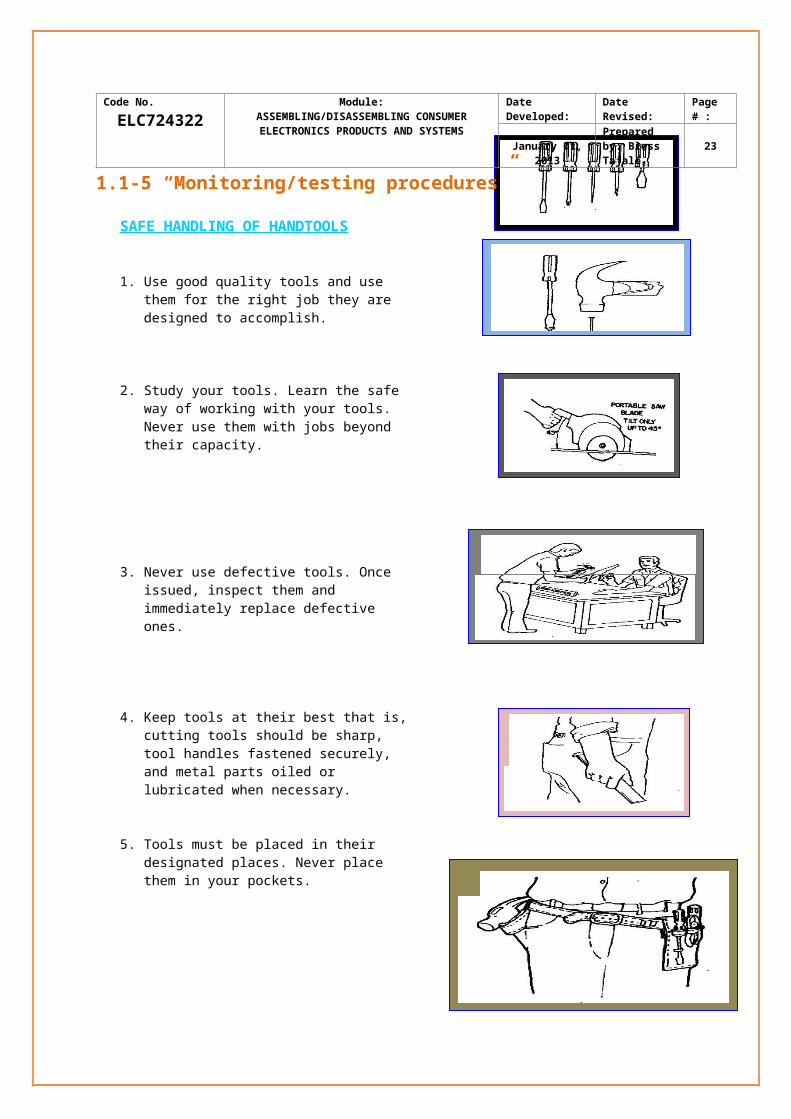
SAFE HANDLING OF HANDTOOLS
1. Use good quality tools and use them for the right job they are designed to accomplish.
2. Study your tools. Learn the safe way of working with your tools. Never use them with jobs beyond their capacity.
3. Never use defective tools. Once issued, inspect them and immediately replace defective ones.
4. Keep tools at their best that is, cutting tools should be sharp, tool handles fastened securely, and metal parts oiled or lubricated when necessary.
5. Tools must be placed in their designated places. Never place them in your pockets.
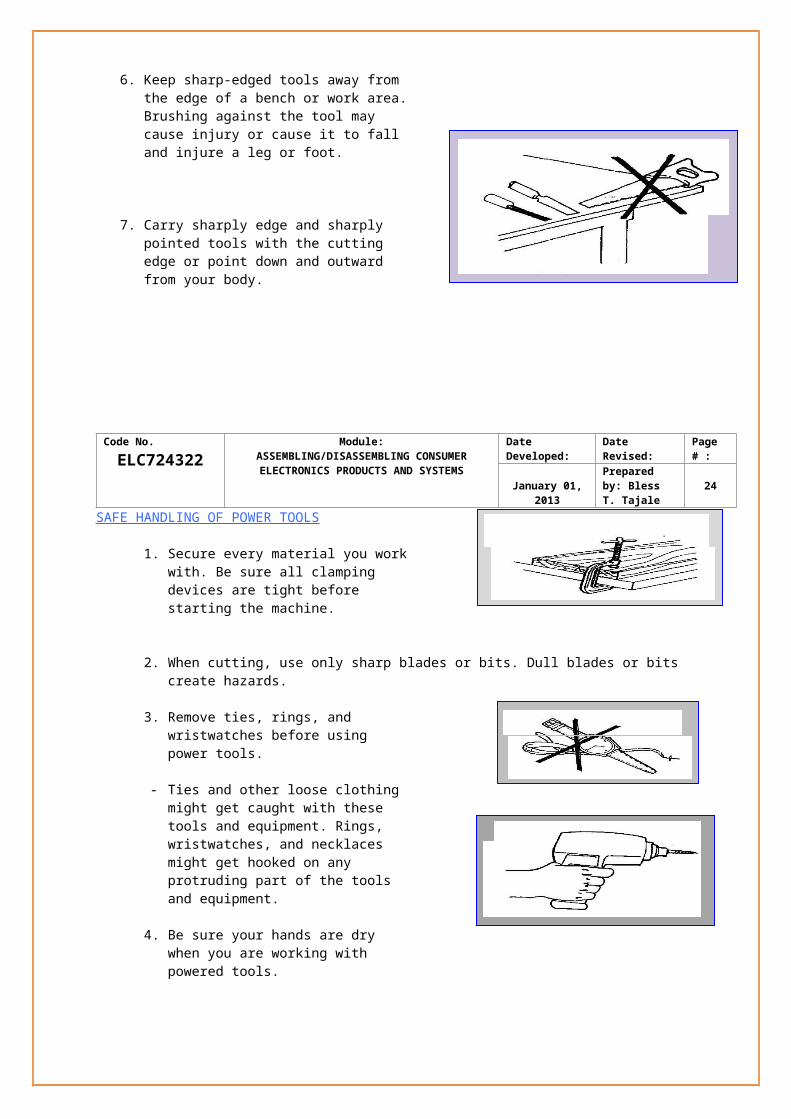
6. Keep sharp-edged tools away from the edge of a bench or work area. Brushing against the tool may cause injury or cause it to fall and injure a leg or foot.
7. Carry sharply edge and sharply pointed tools with the cutting edge or point down and outward from your body.

Code No.ELC724322
Module:ASSEMBLING/DISASSEMBLING CONSUMER ELECTRONICS PRODUCTS AND SYSTEMS
Date Developed: Date Revised: Page # :
January 01, 2013Prepared by: Bless T. Tajale 24
SAFE HANDLING OF POWER TOOLS
1. Secure every material you work with. Be sure all clamping devices are tight before starting the machine.
2. When cutting, use only sharp blades or bits. Dull blades or bits create hazards.
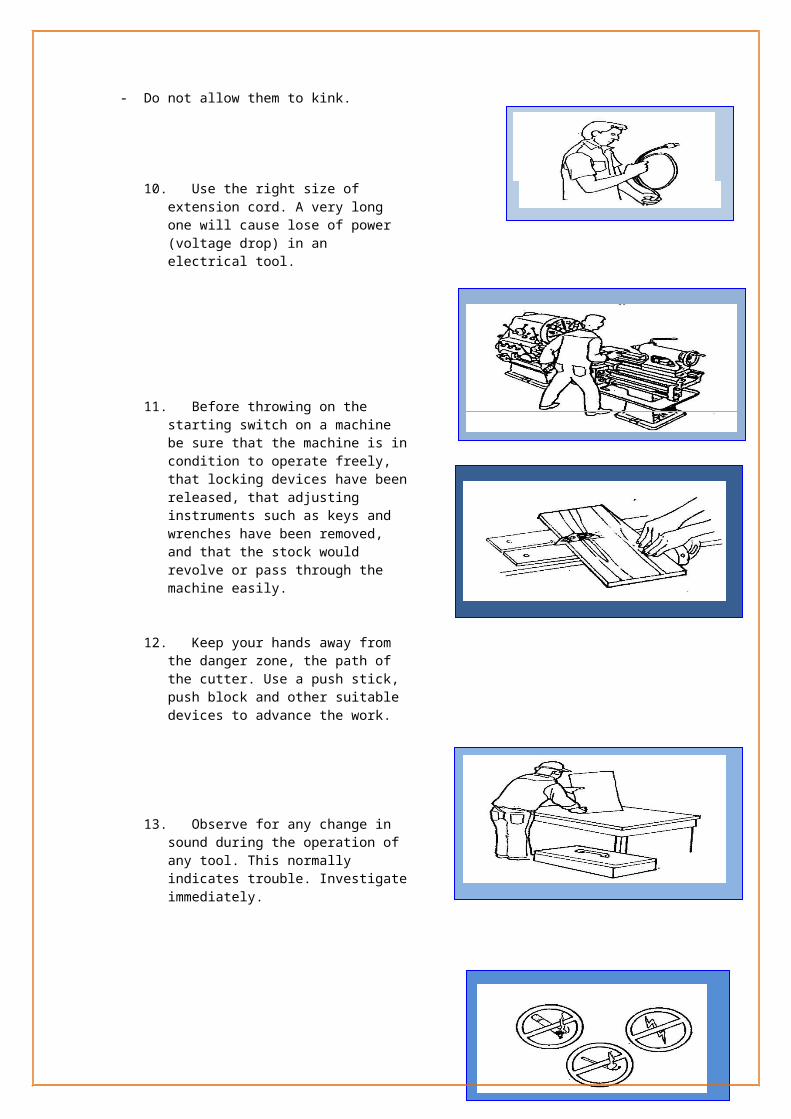
3. Remove ties, rings, and wristwatches before using power tools.
- Ties and other loose clothing might get caught with these tools and equipment. Rings, wristwatches, and necklaces might get hooked on any protruding part of the tools and equipment.
4. Be sure your hands are dry when you are working with powered tools.
5. Turn off the power and disconnect the cord before making any adjustments on or inspection of the machine.
6. Check for voltage requirements before plugging any tool or piece of equipment. Plugging a tool to the wrong power voltage supply may cause damage to it.
7. Ground all power tools.
- It is dangerous to use an adapter plug to allow a 3 prong pug to be plugged in a 2-hole outlet, unless a separate ground wire is connected to an approved type of ground to ensure that any short circuit will trip the breaker or blow the fuse.
REMEMBER: Ungrounded tools can shock you.
8. Inspect electrical cords before plugging on any tool or equipment that requires electricity. Cover insulation breaks/chip
off with an electrical tape. The exposed wires can cause electric shock.
Code No.ELC724322
Module:ASSEMBLING/DISASSEMBLING CONSUMER ELECTRONICS PRODUCTS AND SYSTEMS
Date Developed: Date Revised: Page # :
January 01, 2013Prepared by: Bless T. Tajale 25
9. Arrange cords in a manner that they won’t be run over or damaged.
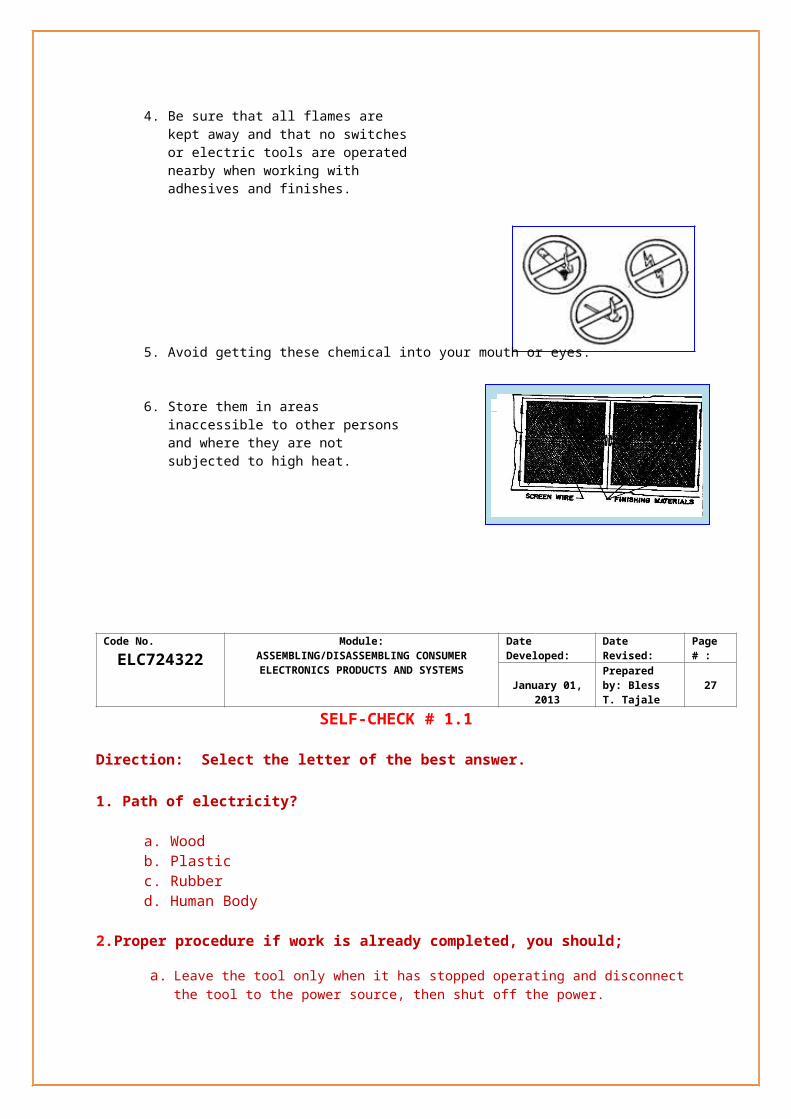
- Do not allow them to kink.
10. Use the right size of extension cord. A very long one will cause lose of power (voltage drop) in an electrical tool.
11. Before throwing on the starting switch on a machine be sure that the machine is in condition to operate freely, that locking devices have been released, that adjusting instruments such as keys and wrenches have been removed, and that the stock would revolve or pass through the machine easily.
12. Keep your hands away from the danger zone, the path of the cutter. Use a push stick, push block and other suitable devices to advance the work.
13. Observe for any change in sound during the operation of any tool. This normally indicates trouble. Investigate immediately.
14. Ensure safety in working with your tools by seeing to it that guards are placed properly and are in working order.
Code No.ELC724322
Module:ASSEMBLING/DISASSEMBLING CONSUMER ELECTRONICS PRODUCTS AND SYSTEMS
Date Developed: Date Revised: Page # :
January 01, 2013Prepared by: Bless T. Tajale 26
15. When work is completed, shut off the power. Leave the tool only when it has stopped operating and has been disconnected from the power source.
SAFE HANDLING OR MATERIALS
1. Chemicals in the form of finishes is damaging to one’s health. In applying finishes, wear a respirator or any mask that will minimize their inhalation.
2. Do finishing of furniture and cabinets in a well ventilated place.
3. Check the label of containers of finishes, adhesives and the like for specific cautions. Follow manufacturer’s instructions.
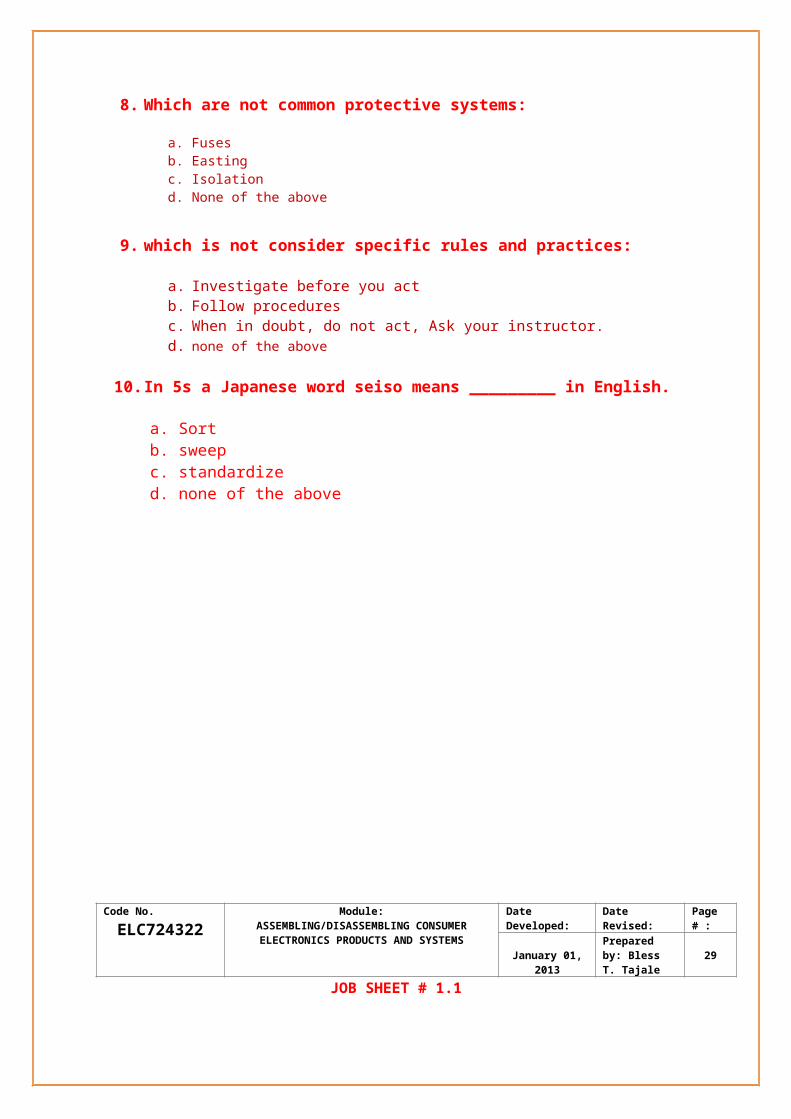
4. Be sure that all flames are kept away and that no switches or electric tools are operated nearby when working with adhesives and finishes.
5. Avoid getting these chemical into your mouth or eyes.
6. Store them in areas inaccessible to other persons and where they are not subjected to high heat.

Code No.ELC724322
Module:ASSEMBLING/DISASSEMBLING CONSUMER ELECTRONICS PRODUCTS AND SYSTEMS
Date Developed: Date Revised: Page # :
January 01, 2013Prepared by: Bless T. Tajale 27
SELF-CHECK # 1.1
Direction: Select the letter of the best answer.
1. Path of electricity?
a. Woodb. Plasticc. Rubberd. Human Body
2. Proper procedure if work is already completed, you should;
a. Leave the tool only when it has stopped operating and disconnect the tool to the power source, then shut off the power.
b. Disconnect the tool to the power source before leaving the tool when it has stopped. Then shut off the main power.
c. Shut off the main power. Leave the tool only when it has stopped operating and has been disconnected from the power source.
d. None of the above
3. Do not work if the floor is?
a. Slippery b. Wetc. Untidyd. All of the above
4. Open Wire should be?
a. Coveredb. Splicec. Solderd. All of the above
5. Check for ____________requirements before plugging any tool or piece of equipment.
a. Currentb. Resistancec. Voltaged. power
6. Which is NOT considering to HIGH VOLTAGE SAFETY PRECAUTIONS?
a. Consider the result of each act.b. Check the live circuits.c. Do not work alone.d. Do not ground yourself.
Code No.ELC724322
Module:ASSEMBLING/DISASSEMBLING CONSUMER ELECTRONICS PRODUCTS AND SYSTEMS
Date Developed: Date Revised: Page # :
January 01, 2013Prepared by: Bless T. Tajale 28
7. What is CPR?
a. Cardiopulmonary Resuscitationb. Carbonpolmonary resuscitationc. Cordiupulmonary resuscitationd. None of the above
8. Which are not common protective systems:
a. Fusesb. Eastingc. Isolationd. None of the above
9. which is not consider specific rules and practices:
a. Investigate before you actb. Follow procedures c. When in doubt, do not act, Ask your instructor. d. none of the above
10.In 5s a Japanese word seiso means _________ in English.
a. Sort b. sweepc. standardized. none of the above
Code No.ELC724322
Module:ASSEMBLING/DISASSEMBLING CONSUMER ELECTRONICS PRODUCTS AND SYSTEMS
Date Developed: Date Revised: Page # :
January 01, 2013Prepared by: Bless T. Tajale 29
JOB SHEET # 1.1
THE PRACTICE OF GOOD HOUSEKEEPINGObjectives:
Upon completion of this job, you will have to perform and demonstrate 5S
Tools and Materials:1. Brooms2. Trash can3. Mask 4. Checklist and Working area
Protective Materials:
1. PPE
Procedures:
Sorting:Steps in practicing seiri in the workplace
1. IMMEDIATELY THROW AWAY all the things belonging to yourself which are not of any use anymore.
2. DISPOSE unnecessary things belonging to other or to the company in their proper place.
SEISOSteps in practicing Seiso:
1. Clean the work place. It includes the regular cleaning and protection of used machines and tools.
2. Seiso also means cleaning even if the things are NOT DIRTY, because a regular cleaning schedule will prevent things from having the chance to get dirty.
SEITONSteps in practicing Seiton
1. ASSIGN A PLACE FOR EVERYTHING. In assigning a place for equipment, tools and materials, the most often used item should be nearest ergonomically situazted – meaning there should be as little effort required in accessing, using and returning the equipment, tools and parts.
2. MAKE SURE EVERYTHING IS RETURNED IN ITS PLACE. To sustain a well-organized and well arranged work place, things MUST be put back in their designated places. This should ensure that when one needs to use the things again, he/she should be able to find it where it is supposed to be.
SEIKETSU
STEPS:1. Prepare a House Keeping Standard and checklist. Checklist should be very detailed
and stringent. Remember that thoroughness is a requirement of excellence2. Prepare or implement a periodic clean-up schedule.
a. daily, b. weekly, c. monthly
Problems Encountered:_____________________________________________________________________________________________________________________________________________________________________________________________________________________________________________.Instructor’s Comments:_____________________________________________________________________________________________________________________________________________________________________________________________________________________________________________.
Code No.ELC724322
Module:ASSEMBLING/DISASSEMBLING CONSUMER ELECTRONICS PRODUCTS AND SYSTEMS
Date Developed: Date Revised: Page # :
January 01, 2013Prepared by: Bless T. Tajale 30
Performance Criteria ChecklistJob Sheet 1.2-1
Criteria YES NO1. Does the operational procedures, principles and techniques of
maintenance of tools is undertaken according to standard?2. Does unnecessary things are properly placed?3. Is the tasks to be undertaken are properly identified4. Does things not in use are thrown away?5. Does everything returned in its place?6. Did the House Keeping Standard and checklist prepared?
Trainee’s Signature Trainer’s Signature
Code No.ELC724322
Module:ASSEMBLING/DISASSEMBLING CONSUMER ELECTRONICS PRODUCTS AND SYSTEMS
Date Developed: Date Revised: Page # :
January 01, 2013Prepared by: Bless T. Tajale 31
Qualification : Consumer Electronics Servicing NC II
Module title : Assembling/Disassembling Consumer Electronics Products and Systems
Learning Outcome : Identify and explain the uses /functions of different types of tools,
equipment and testing materials.
Assessment Criteria:
1. Materials needed for assembly and disassembly are identified, prepared and checked according to the work instructions.
2. Tools and equipment types and functions needed for assembly and disassembly are identified and demonstrated according to set standards.
3. Testing devices and instrument operations needed for assembly and disassembly are explained and demonstrated according to instruction manual.
4. Personal Protective Equipment is used in accordance with the Occupational Health and Safety guidelines and policies.
RESOURCES:
ELECTRONICS Principles and Applications: by Charles A. Schuler
LEARNING EXPERIENCE
Learning Outcome 2: Identify and explain the uses /functions of different types of tools,
Equipment and testing materials.
Learning Activities Special Instruction
Read the attached Information Sheet # 2.1
TYPES OF TOOLS, TESTING INSTRUMENT/EQUIPMENT AND MATERIALS AND THERE FUNCTIONS AND OPERATIONS
BASIC TYPES OF HAND TOOLS
MAINTENANCE AND CARE OF TOOLS AND EQUIPMENT
PERSONAL PROTECTIVE EQUIPMENT AND CLOTHING
After reading Information Sheet # 2.1:
Answer self-check 2.1, you will be assess and check by your trainer.
Perform Task sheet 2.1, you will be rated by your trainer in your performance checklist.

Code No.ELC724322
Module:ASSEMBLING/DISASSEMBLING CONSUMER ELECTRONICS PRODUCTS AND SYSTEMS
Date Developed: Date Revised: Page # :
January 01, 2013Prepared by: Bless T. Tajale 32
INFORMATION SHEET # 2.1
TYPES OF TOOLS, TESTING INSTRUMENT/EQUIPMENT AND MATERIALS AND
THERE FUNCTIONS AND OPERATIONS
2.1-1 “BASIC TYPES OF HAND TOOLS”
“SPLICING TOOLS”
LONG-NOSED PLIER/WITH SIDE CUTTERNeedle-nose pliers (also known as Long-nose pliers and pinch-nose pliers) are both cutting
and gripping pliers used by electricians and other tradesmen to bend, reposition and cut wire. Their namesake long gripping nose provides excellent control and reach for fine work in small or crowded electrical enclosures, while cutting edges nearer the pliers’ joint provide “one-tool” convenience. Given their long shape, they are useful for reaching into cavities where cables (or other materials) have become stuck or unreachable to fingers or other means.
DIAGONAL CUTTER PLIERDiagonal pliers also known as Side-cutting pliers, are used for gripping, wire splicing, wire
cutting, insulation stripping, and for crushing insulation (they are generally not used to grab or turn anything). Diagonal pliers are useful for cutting copper, brass, iron, aluminum and steel wire. These pliers are made of tempered steel and inductive heating and quenching is often selectively hardening the jaws.
PLIERS ASSORTED
The primary purpose of the tool known as Pliers is to grip objects firmly. The objects can then be turned, bent, or otherwise manipulated. The types of pliers includes Engineer’s pliers for gripping metal, flat nosed pliers for grasping smaller objects, electricians pliers for gripping electrical wires, and round nosed pliers for bending wires into loops.
BENT NOSE PLIER
A Bent-nose plier is used for all kinds of jewelry making methods from bending wire and metal to grasping a jewelry finding. For whatever reason, they just sometimes feel better to use since the end is bent to about a 45 degree angle.
“`DRIVING TOOLS” STANDARD/SLOTTED SCREWDRIVER
Slotted Screwdriver is used to drive or fasten negative slotted screws. Slotted screwdriver (also known as flat head screwdriver, standard screwdriver, flared
screwdriver, and straight screwdriver) are the oldest of the drive types and was in use by the early 1800s and is one of the most common drives you are likely to see. The flat blade of the head should match a grove in the slotted screw.
PHILLIPS SCREWDRIVERPhillips Screwdriver is used to drive or fasten positive slotted screws. It is a screwdriver that
could take greater torque and could provide tighter fastenings.
Code No.ELC724322
Module:ASSEMBLING/DISASSEMBLING CONSUMER ELECTRONICS PRODUCTS AND SYSTEMS
Date Developed: Date Revised: Page # :
January 01, 2013Prepared by: Bless T. Tajale 33
ALLEN WRENCH
Allen Wrench is used to drive or fasten hexagonal screws. The head has a hexagonal hole turned by an Allen key. An Allen key is a hexagonal shaped wrench bent in letter-L. The Allen key may have been invented by American, Gilbert F. Heublein.
TORX SCREWDRIVER SETTorx Screwdriver Set is used to drive or fasten six pointed star screws. In modern electrical
appliances, they use screws with heads of non-standard shape to prevent users of the device from easily disassembling them.
JEWELER’S SCREWDRIVER SETJeweler's Screwdriver Set is a set of small screw drivers composed of slotted and Philips
screwdrivers.
“CUTTING TOOLS”
UTILITY KNIFEUtility Knife – is a common tool used in cutting various trades and crafts for a variety of
purposes.
STRIPPERStripper is a pair of opposing blades much like scissors or wire cutters. The addition of a center
notch makes it easier to cut the insulation without cutting the wire. This type of wire stripper is used by rotating it around the insulation while applying pressure in order to make a cut around the insulation. Since the insulation is not bonded to the wire, it then pulls easily off the end.
TUBE CUTTER
Tube cutter – It is use to cut a tube element, especially in designing antennas (like for example, Antenna Yagi, Hi-top antenna etc.)
HACKSAW
Hacksaw is a saw for cutting metal. Some of them have pistol grips which keep the hacksaw firm and easy to grip. The small hand-held hacksaw consists of a metal arch with a handle that fits around a narrow, rigid blade. The blade has many small saw teeth along one side. It can either be attached such that the teeth face away from the handle, resulting in sawing action by pushing, or be attached such that the teeth face toward the handle, resulting in sawing action by pulling. On the push stroke, the arch will bend a little, releasing the tension on the blade. The blade is normally quite brittle, so care needs to be taken to prevent brittle fracture of the blade.
Code No.ELC724322
Module:ASSEMBLING/DISASSEMBLING CONSUMER ELECTRONICS PRODUCTS AND SYSTEMS
Date Developed: Date Revised: Page # :
January 01, 2013Prepared by: Bless T. Tajale 34
“SOLDERING TOOLS”
SOLDERING IRON
Soldering Iron is a device for applying heat to melt solder in attaching two metals parts. A soldering iron is composed of a heated metal tip and an insulated handle. Heating is often achieved electrically, by passing a current, supplied through an electrical cord, through a heating element. For electrical work, wires are usually soldered to printed circuit boards, other wires, or small terminals. A low- power iron (15-40 Watts) is suitable for this work.
Use soldering iron rated 20-40 watts. Soldering tip can be replaced with same wattage rating of the soldering iron.
DESOLDERING PUMP(SOLDER SUCKER)
Desoldering Pump/Sucker is the removal of solder and components from a circuit for troubleshooting, repair purposes and to salvage components. Electronic components are often mounted on a circuit board and it is usually desirable to avoid damaging the circuit board, surrounding components, and the component being removed.
SOLDERING TOOL STAND
Soldering Tool Stand is a place of the soldering iron to keep them away from flammable materials. The stand often also comes with a sponge and flux pot for cleaning the tip.
SOLDERING GUN
Soldering Gun is a pistol-shaped soldering tool having a trigger switch to turn it on. Operates from 117 volts ac and has an integral step-down transformer with a single-turn secondary which quickly heats the copper soldering loop. Pistol-grip guns have trigger action control of low or high tip temperatures for general use, with output ranges commonly rated at 100/140, 145/210, or 240/325 watts; temperature controlled guns designed for solid-state electronics work with enter changeable power heads for varying fixed-tip temperatures.
“BORING TOOLS” MINI DRILL
Mini-Drill is used to bore or drill hole in the printed circuit board (PCB).
PORTABLE ELECTRIC DRILL
Portable Electric Drill is used for boring hole/s in the plastic chassis with the used of drill bits.

Code No.ELC724322
Module:ASSEMBLING/DISASSEMBLING CONSUMER ELECTRONICS PRODUCTS AND SYSTEMS
Date Developed: Date Revised: Page # :
January 01, 2013Prepared by: Bless T. Tajale 35
METAL FILES
A file is a metalworking and woodworking tool used to cut fine amounts of material from a work piece. It most commonly refers to the hand tool style, which takes the form of a steel bar with a case hardened surface and a series of sharp, parallel teeth. Most files have a narrow, pointed tang at one end to which a handle can be fitted. A similar tool is the rasp. This is an older form, with simpler teeth. As they have larger clearance between teeth, these are usually used on softer, non-metallic materials.
“AUXILIARY TOOLS” MAGNIFYING GLASS
A convex lens which is used to produce a magnified image of an object. The lens is usually mounted in a frame with a handle (see image). Roger Bacon is the original inventor of the magnifying glass. A magnifying glass works by creating a magnified virtual image of an object behind the lens. The distance between the lens and the object must be shorter than the focal length of the lens for this to occur. Otherwise, the image appears smaller and inverted, and can be used to project images onto surfaces. The framed lens may be mounted on a stand, keeping the lens at the right distance from the table, and therefore at the right distance from the object on the table. The latter applies if the object is small and also if the height is adjustable. Some magnifying glasses are foldable with built-in light.
SCREW TESTERScrew Tester is a tool used to indicate live wires.
CLEANING BRUSH (paint Brush) Paint Brush – Made of bristles set in handle,
Use for cleaning dirty parts of a circuit or an object.
TWEEZERS
Tweezers is a device use to pick tiny components or parts when performing troubleshoot / repair (especially in cell phone) and in assemble and disassemble consumer electronics product.
Ball-peen Hammer
Ball-peen Hammer is a type of hammer used in metalworking. The ball-peen hammer remains useful for many tasks such as tapping punches and chisels. The original function of the hammer was to "peen" riveted or welded material so that it will exhibit the same elastic behavior as the surrounding material. Specifically, striking the metal imparts a stress at the point of impact which results in strain-hardening of that area. Strain hardening raises the elastic limit of a material into the plastic range without affecting its ultimate strength. A strain-hardened material will not deform under the same low stresses as a non-hardened material.
Code No.ELC724322
Module:ASSEMBLING/DISASSEMBLING CONSUMER ELECTRONICS PRODUCTS AND SYSTEMS
Date Developed: Date Revised: Page # :
January 01, 2013Prepared by: Bless T. Tajale 36
Most metals can be "worked" by such methods until they lose all of their ductile characteristics and become strong but brittle.
Bench Vise
A bench vise is a type of vise grip which is designed to attach to a workbench. Vise grips are tools which are designed to be cranked shut to hold on to something. Essentially, a vise grip is like an extra pair of hands, but unlike hands, a vise grip can exert considerable pressure, and it will never tire out or get bored. Most vise grips consist of a pair of large jaws which can be moved closer together or further apart with the use of a crank, with safety measures or locks which hold the vise grip shut unless the user
takes a specific action to open it. Vise grips generally clamp onto a workbench with an adjustable clamp which can be used to
move the grip around or change the angle. Some are padded to reduce the risk of scarring the workbench, while the jaws themselves are usually made from textured metal which provides traction and firms hold.
“Turning Tools”
a. Monkey Wrench – used for turning/fastening big nuts.
b. Adjustable Wrench – used for holding/turning nuts. Opening is adjustable.
Adjustable Wrench
c. Vice Grip Wrench – used for holding work with a locking device to avoid slipping and causing damage to nuts.
Vise Grip Wrench
d. Pipe Wrench – used for holding and turning pipe. Also used for turning nuts, when fastening pieces of work.
Pipe Wrench

Code No.ELC724322
Module:ASSEMBLING/DISASSEMBLING CONSUMER ELECTRONICS PRODUCTS AND SYSTEMS
Date Developed: Date Revised: Page # :
January 01, 2013Prepared by: Bless T. Tajale 37
e. Open-End-Wrench – used for tightening/loosening nuts. It has fixed and opening.
Set of Open-End-Wrench
f. Box Wrench – used for holding, tightening, loosening nuts or bolts. It completely surrounds the bolt or nut to prevent possible slippage.
Box Wrench
g. Socket Wrench – probably the most useful tool among the wrenches. Used for turning, tightening, loosening nuts and bolts.
Socket Wrenchh. Allen Wrench – used for fastening/removing Allen set screws.
Allen Wrench
Code No.ELC724322
Module:ASSEMBLING/DISASSEMBLING CONSUMER ELECTRONICS PRODUCTS AND SYSTEMS
Date Developed: Date Revised: Page # :
January 01, 2013Prepared by: Bless T. Tajale 38
“TESTING AND MEASURING INSTRUMENTS”
VOLT-OHM-MILLIAMMETER (ANALOG)
A Volt-Ohm-Milliammeter, often called a Multitester.Multitester is an instrument use to measure AC VOLTAGE, DC VOLTAGE, RESISTANCE and
small amount of CURRENT. A multitester is used as a voltage tester and a continuity tester for many diagnostic jobs.
CLAMP-ON AMMETERClamp-on ammeter is an AC ammeter with a built-in current transformer whose core can be
clamped around the conductor in which current measured.
DIGITAL FREQUENCY COUNTERDigital Frequency counter – An instrument in which frequency is measured by counting the
number of cycles (pulses) occurring during a precisely established time interval.
OSCILLOSCOPE
Oscilloscope is an instrument in which the horizontal and vertical deflection of the electron beam of a cathode-ray tube are, respectively, proportional to a pair of applied voltages. In the most usual application of the instrument the vertical deflection is a signal voltage and the horizontal deflection is a linear time base. An electronic “window” that displays variations of voltage at any point in a circuit by displaying in graphic form on its screen the actual waveform of voltage plotted against time. In addition, an oscilloscope serves as an accurate ac/dc voltmeter and time-period counter.

Code No.ELC724322
Module:ASSEMBLING/DISASSEMBLING CONSUMER ELECTRONICS PRODUCTS AND SYSTEMS
Date Developed: Date Revised: Page # :
January 01, 2013Prepared by: Bless T. Tajale 39
2.1-2 “Maintenance Procedure of hand tools”Always allow enough time to pack up properly when you’ve finished a job. Cleaning your tools
and putting them back where they belong. Maintaining a safe and efficient work environment can save everyone a lot of time and inconvenience.
Cleaning
Always clean your tools immediately after use.Tools can be washed using hosepipe and/or scrubbed with a wire brush.Make sure that there is no risk of spreading of pathogens while you are washing your tools.Spray light oil on prone to trust.
Storage
Store tools in a dry, sheltered environment.Place tools in racks for easy location and safety.Place similar tools together so that people can see easily what is available.
Maintenance
Keep metal blades sharp and well-oiled.Check any nuts, bolts, rivets, screws, blades, and springs regularly for wear or damage, and replace if necessary. Sand wooden parts back regularly and oil with a 50/50 linseed oil and turps mix.Label damaged tools, place them out of the way and tell your supervisor or maintenance person.
Hand power tools safety information
Hand and power tools are a common part of our everyday lives and are present in nearly every industry. These tools help us to easily perform tasks that otherwise would be difficult or impossible. However, these simple tools can be dangerous, and have the potential for causing severe injuries when used or maintained improperly. Special attention toward hand and power tool safety is necessary in order to reduce or eliminate these dangers.
Taking care of hand tools
Hand tools are of great importance in everyday life. What they are, how to use them, what they can be used for are significant to the worker. There are different varieties of tools and each tool has a special use. Hand tools cost money and hence every worker should know how to take care of tools he uses.
Care of hand tools depends on many factors like as follows:
Cleaning and Conditioning A tool should always be kept clean and free of dust so that it remains in a good condition and a tool in good condition gives the maximum efficiency.
Clean your tools after useYou can wash your hand tools using brush.There should not be any risk of spreading pathogens while washing your tools.As rust is caused by dampness or moisture, the formation of rust can be prevented by applying light oil on those rust prone areas.When rust forms on tools, remove it by using a fine abrasive cloth or scrubber.The moving parts of the tools must kept working freely and hence it is necessary to lubricate the regularly.
Code No.ELC724322
Module:ASSEMBLING/DISASSEMBLING CONSUMER ELECTRONICS PRODUCTS AND SYSTEMS
Date Developed: Date Revised: Page # :
January 01, 2013Prepared by: Bless T. Tajale 44
Storage
Tools should keep in a tool box or a tool cabinet or work bench.Each tool should be kept in its own individual place so that it is easily accessible and can be replaced readily after they have been used.The compartments in a tool box or a cabinet should be designed and placed in such a way that there is no danger of one tool coming in contact with the other.The bench top or the working area should always be kept clear and unobstructed.Tools should not lie idle on the floor or in the working area as they are a hazard to anyone working there or passing by.Sharp tools like chisels and knives should be placed in their respective holders so that there is no danger of cutting oneself when picking in out or replacing it.Store hand tools in a dry, sheltered environment.Place similar tools together so that people can see easily what is available.
Maintenance
It is important to note that a user hurts or cuts himself only when the tool is dull. A hand tool in a good working condition will do its work efficiently without any effort on the part of the worker. It is seen that when blades are dull. The worker has to exert great pressure to cut, which it turns may off balance the worker leading to his slip or fall. That is why the blades of the cutting tools should always be kept sharp. Metal blades should be well-oiled.Any kind of screws, blades, nuts, bolts, rivets, and springs must always be checked regularly for wear or damage, and should be replaced if necessary.Wooden parts hand tools are beyond your capacity to clean and maintain, then take advice from the concerned maintenance person.
Use
Last but not the least; tools should be used to do only that specific job for which they are designed. For example, you cannot use a chisel as a screw driver or a screw driver as a chisel. Such misuse is dangerous how the tools and to the person using them. You should learn how the tool be used and for what purpose.
Review the following points:
Use the right tool for the intended job Always wear safety glasses/goggles to prevent serious eye damage It is unsafe to add more leverage to any tool by use of an extension Use the shop vise when the job requires

Code No.ELC724322
Module:ASSEMBLING/DISASSEMBLING CONSUMER ELECTRONICS PRODUCTS AND SYSTEMS
Date Developed: Date Revised: Page # :
January 01, 2013Prepared by; Bless T. Tajale 45
Handling hand tools
Keep tools clean. Check their condition before you use them. If heads of striking tools become mushroomed or burred, have them dressed. If handles if handles are splintered, broken or loose, have them replaced before you use the tool.
Each tool should have its own storage place. Tools must be returned to their proper places, and not be to lie around where they could fall on, or trip you or someone else.
Carrying tools in your pockets is dangerous, especially if the tools are sharp or pointed. Use a kit or tool or belt.
Do not use excessive pressure or force on any hand tool.
The care of hand tools
Hand tools are used every day in a construction site. They are use so much and so often that the proper care is many times forgotten. As we list some important points on proper care of hand tools please refresh your memory concerning these points.
1. Take good care of tools. Use tools carefully and you will have less needs for first aid kit.2. Keep tools clean. Protect them against damage from corrosion. Dip tools occasionally in cleaning
fluids or solvents and wipe them clean. Lubricate adjustable and moving parts to prevent wear and misalignment.
3. Keep cutting edges sharp. Tools are much safer than dull ones. 4. When sharpening tools, redressing or repairing tools, sharpen, grind, hone, file, fit, and set them
properly, using other tools suited to each purpose.5. For sharpening tools, either an oil stone or a grind stone is preferable.6. Tools which are struck by hammers, such as chisels or punches, should have the head ground
periodically to prevent mushrooming. 7. When tools are not in use keep them in suitable boxes, racks, or trays. Put them down carefully
an in orderly manner on workbenches, with cutting edges turned away from you.8. Place tools so they cannot fall and where no one can strike against or trip over them. Tools
should be placed on elevated benches, tables, or platforms so they cannot roll or be kicked or knocked off.
9. When carrying tools protect the cutting edges and carry the tools in such a way that you will not endanger yourself or others.
10. Carry pointed or sharp-edges tools in pouches or holster.11. Refit or replace loose or split handles. Do not rely on friction tape to secure split handles. 12. Keep handles wedged tightly in heads of all tools. Keep them smooth and free of rough or jagged
surfaces.
Avoiding hand tools injuries
Hand tools have been with us probably as long as the use of fire has. And like fire, hand tools cause their share of injuries to users. Causes of hand tools injuries can often to some type of improper use of a hand tool – be it manual or some type of power tool (electrical, hydraulic, gasoline, powder, etc.).
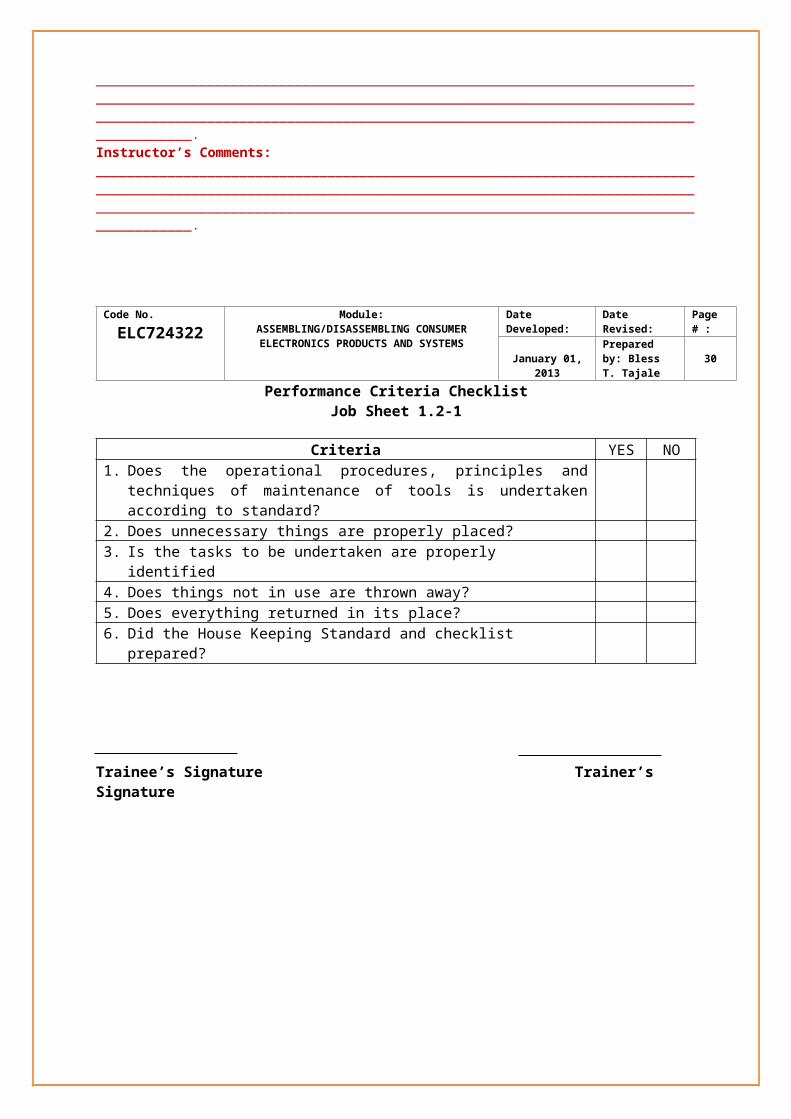
Code No.ELC724322
Module:ASSEMBLING/DISASSEMBLING CONSUMER ELECTRONICS PRODUCTS AND SYSTEMS
Date Developed: Date Revised: Page # :
January 01, 2013Prepared by: Bless T. Tajale 46
Some ways to avoid hand tool injuries:
Use the right tool for the job. Some examples of misuse of tools are using a wrench as a hammer, pliers as a wrench, and a claw hammer as a ball pen hammer.
Keep tools in good condition, broken or worn tools (wrenches with crack or worn jaws, electric tools with broken plugs, etc.) should be repaired or discarded.
Use tools in the way they were intended to be used (e.g., instruct users to cut away from the body when using knives, ground ~ electric tools, etc.).
Keep tools in safe place. Many accidents have been caused by tools falling from overhead, and by sharp tools carried in pockets or left in toolboxes with the cutting edges exposed.
Handling power tools safely
Power tools present far greater accidents hazards than hand tools. Portable power tools- because they must be handled- are even more dangerous stationary power machinery. The most frequent accidents are cuts, punctures, electric shock, burns and eye damage from flying particles.
Nearly all power tool accidents are due to improper handling and poor maintenance. Clean tools regularly.
Guards are for your protection. Power tool hazards are vastly increased when workmen reject using the guards or wedge the guard open on electric saws and other equipment.
Disconnect the power source before adjusting, oiling or changing accessories never fail to replace the guards afterward.
When stringing temporary extension cords and hoses make certain that are protected and do not present a tripping hazard. Make a daily check of the insulation on the wires of the power tools that you are using and couplings on pneumatic hoses. Repair or report them if they are frayed or broken.
Every electric power tool must be grounded. This averts the possibility of the body of the operator becoming a part of the energized circuit. Grounding is done automatically on unaltered three-pronged plugs when the plug is inserted.
Tools should be inspected frequently for the following malfunctions:
1. Defective or broken insulation on cord.2. Improper or poorly made connections to terminal.3. Broken or otherwise defective plug.4. Loose or broken switch.5. Brushes sparking.
Guidelines for hand tools safety:
Some guidelines to avoid hand tools injuries,
Right tool for the right job: for example, do not use a knife as a saw or a wrench as a hammer or screwdriver as a chisel etc.
Correct size: all tools used for specific purpose should be of the appropriate size. You should have the correct sized tool. Forcing a small hand tool to do the job of a large one may result in tool damage or injury.
Code No.ELC724322
Module:ASSEMBLING/DISASSEMBLING CONSUMER ELECTRONICS PRODUCTS AND SYSTEMS
Date Developed: Date Revised: Page # :
January 01, 2013Prepared by: Bless T. Tajale 47
Proper training: users should be trained to properly use the tool. The tools should be used the way they were intended. For example: you drive a wood chisel outward and away from your body.
Good condition: tools should be kept in good condition. Broken or worn tools should be repaired immediately and should be discarded if no repair is possible.
Proper storage: store tools in safe places. Many accidents occur when tools fall from overhead. Injuries also occur when sharp tools are left in toolboxes with the cutting edges exposed or when carried in pockets. Store all sharp0-edge hand tools with the sharp edges down.
Watch your fingers: you should take special care when hammering so that you strike not your fingers but the object.
Keep tools and work area clean: it is very essential to keep your work area clean. Dirty, oily and greasy tools after use should be clean properly. Spills and scraps from the floor should be removed immediately after the job is done.
Avoid using damage hand tools: Tools that have broken handles should be considered unsafe. Grip tools firmly: always hold hand tools securely and tightly so that they do not slip and hit
someone. Do not wear gloves: do not wear gloves when holding hand tools because they are bulky and
make gripping difficult. Protective clothing: Wear personal protective equipment like eye, face mask, coverall
appropriate shoes, etc. Be alert and work defensively. Inspect tools before using. Tools with “mushroomed head” during use should be sharpened regularly. Keep hand tool cutting edges sharp so that the tool moves smoothly without skipping or binding.
Dull tools are considered to be more hazardous than sharp tools. Keep wooden handles of hand tools free of splinters and cracks.
All hazards involved in the use of power tools can be prevented by following some basic safety rules:
Keep all tools in good condition with regular maintenance Use the right tools for the job; Examine each tool for damage before use; Utilize the proper protective equipment. Participating in safety training.
Hand tools are non- powered. They include anything from axes to wrenches. The greatest hazards posed by hand tools result from misuse and improper maintenance.

Code No.ELC724322
Module:ASSEMBLING/DISASSEMBLING CONSUMER ELECTRONICS PRODUCTS AND SYSTEMS
Date Developed: Date Revised: Page # :
January 01, 2013Prepared byBless T. Tajale 48
2.1-3 “Use of protective equipment and clothing”
PERSONAL PROTECTIVE EQUIPMENT
Health hazards in the workplace are the major concern for both employers and employees. It is important, though, to remember that hazardous materials only present a health hazard when they come into contact with your body. Hazardous materials can enter your body in three ways:
Ingestion Skin absorption Inhalation
Because much substance which is health hazards can become airborne, knowing how to protect you is very important.
Personal Protective Equipment commonly referred to as “PPE”, is equipment worn to minimize exposure to a variety of hazards. Examples of PPE include such items as gloves, foot and eye protection, protective hearing devices (earplugs, muffs) hard hats, respirators and full body suits.
It is the employer’s responsibility to provide protective clothing and equipment. Work clothes and specially designed protective clothing are designed for your protection. Wear the correct clothing and equipment to protect yourself from possible serious injury. Do not interfere with or misuse any item provided by your employer for health and safety.
Wear plain, tough clothes that are closefitting and keep them buttoned up. Loose sleeves, unbuttoned or torn shirts or sweaters, ties or loose belts can easily be
caught in revolving machinery. Your work clothes should be cleaned regularly. Wear cuff less trousers Trouser cuffs may cause you to trip or they may catch sparks or harmful substances. Wear suitable footwear and keep it in good repair Wear safety shoes or boots with insulated sole for electrical work. Good uppers protect against burning from hot turning, drops of molten metal, etc.
safety shoes and boots have reinforced toecaps to protect against heavy falling objects.
Keep long hair under a tight fitting cap or net, as required by regulations. It is your employer’s duty to ensure that machineries have guards to protect
employees who work closely to machine. Even, so, if your hair is long, it could be easily caught in machinery, such as a frilling machine. Many people have been scalped in this type of accident.
Do not wear rings or wrist watches on the job Because such item can be caught on moving machinery. It is extremely dangerous to
wear them in certain types of work. You could lose fingers. Do not wear earrings, neck chains, pendants and bracelets. All items or personal jewelry worn at work have the potential to cause an accident or
aggravate an injury sustained in an accident. Wear personal protective equipment suited to the work to be done.
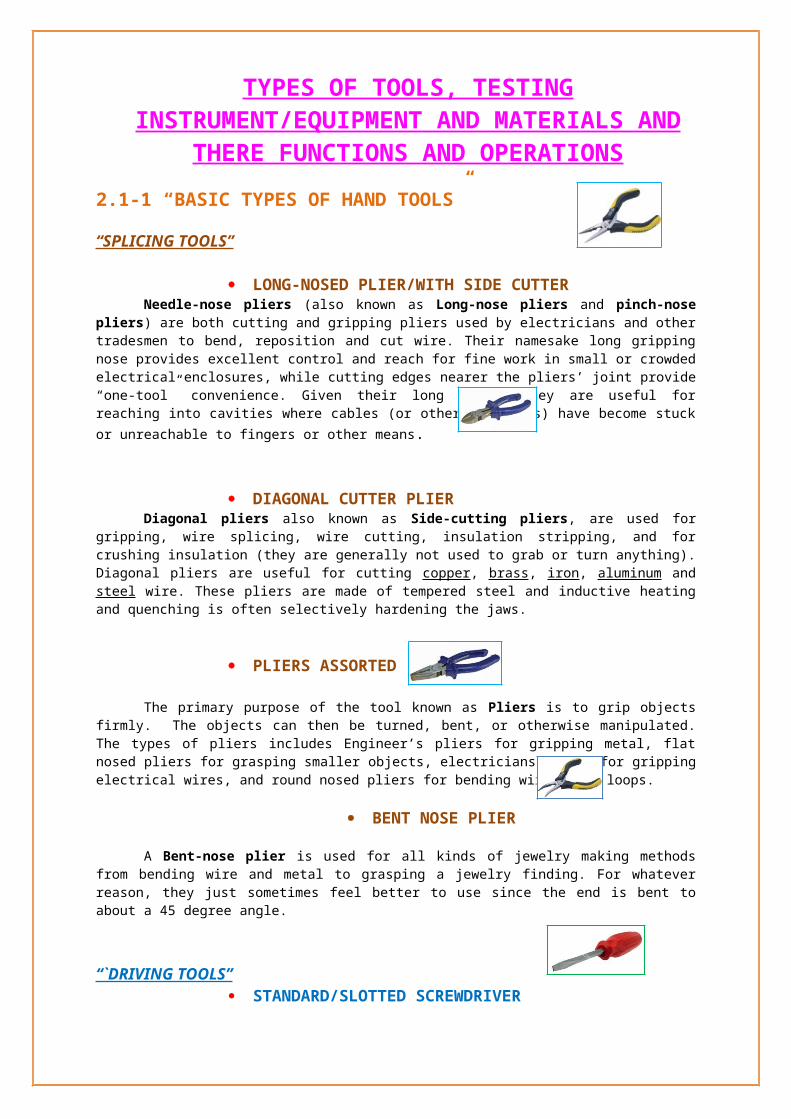
Code No.ELC724322
Module:ASSEMBLING/DISASSEMBLING CONSUMER ELECTRONICS PRODUCTS AND SYSTEMS
Date Developed: Date Revised: Page # :
January 01, 2013Prepared by: Bless T. Tajale 49
PERSONAL PROTECTIVE EQUIPMENTSChoose quality product made to a high standard (e.g. EC mark)Choose equipment which suits the wearers consider size, fit, and weight.Make sure it fits properlyWhere more than one item of PPE is in use make sure they are compatible.Instruct and train peoples in its use, why t is needed, when to use it and what its limitations are.
REMEMBER YOUR SAFETY!!!IT IS YOUR RESPONSIBILTY TO USE, MAINTAIN AND STORE YOUR PERSONAL
PROTECTIVE EQUIPMENT CORRECTLY.
PPE IS DESIGNED FOR SPECIFIC HAZARDS THAT ARE PRESENT IN SPECIFIC CIRCUMSTANCES, CHANGE THE CIRCUMTANCES AND YOU CHANGE THE
HAZARD.
THE PPE IS ONLY AS GOOD AS THE PERSON WEARING IT!!!
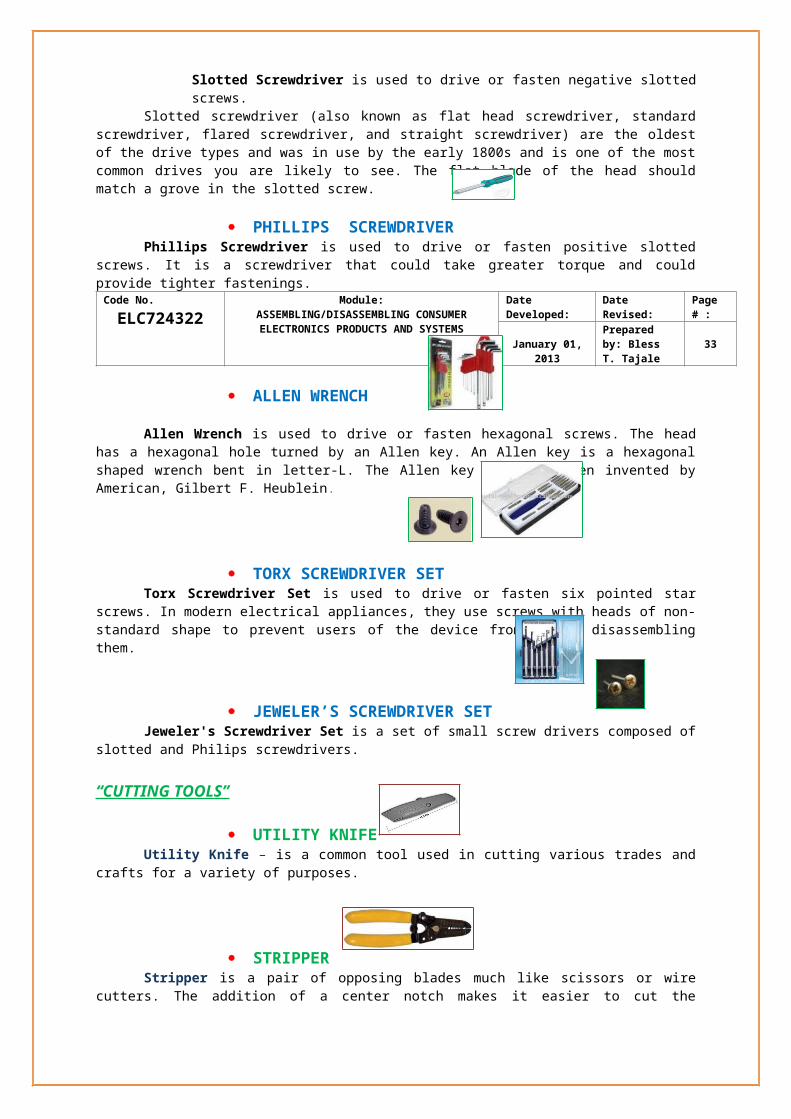
Code No.ELC724322
Module:ASSEMBLING/DISASSEMBLING CONSUMER ELECTRONICS PRODUCTS AND SYSTEMS
Date Developed: Date Revised: Page # :
January 01, 2013Prepared by: Bless T. Tajale 50
“Head protection” Must be worn at all times within designated areas on construction and industrial sites. The use of helmets or hard hats on construction sites is a requirement of law and strictly
enforced. Helmets that have been subject to impacts or any types of damage must be replaced
immediately.
“Foot protection” Safety boots fitted with steel caps must be worn at all times on entering
construction sites. Safety boots, both rubber and leather, are fitted with steel toe caps. Chemical resistant footwear also available.
“Safety glasses” Unbreakable lenses of plastic or tempered glass with side shields. For light-to moderate work. Can be prescription lenses contact safety department for appointment.
“Hearing protection” Hearing protection should be worn in all designated areas (noise in excess of 85 decibels
(dba)). If two people 1 meter apart must shout to be heard, the background noise is too loud
( about 85 decibels)
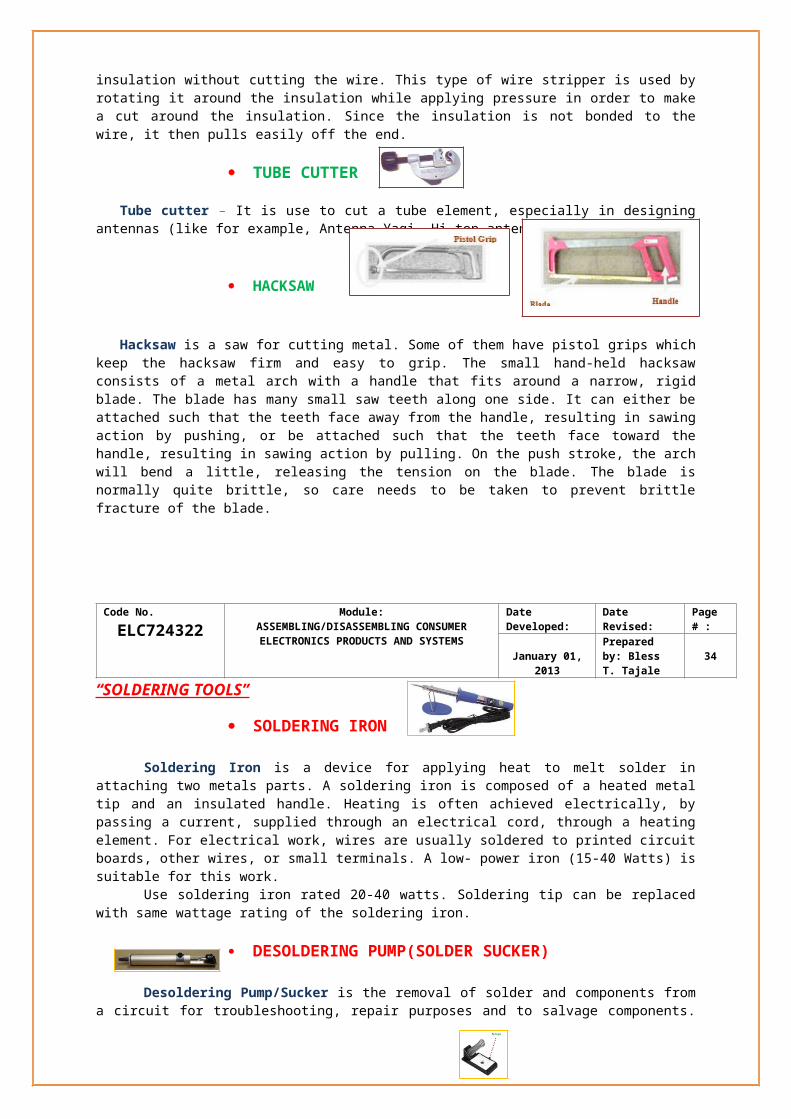
Code No.ELC724322
Module:ASSEMBLING/DISASSEMBLING CONSUMER ELECTRONICS PRODUCTS AND SYSTEMS
Date Developed: Date Revised: Page # :
January 01, 2013Prepared by: Bless T. Tajale 51
“Hand protection” Gloves should be worn wherever possible to prevent injury and chemical contact. Various types of gloves are available. Ensure the type used is suitable for the task, particularly if working with chemical
products. Gloves are in no longer in use should be disposed of properly into rubbish bins.
“Respiratory protection” Respiratory are an effective method of protection against designated hazards
when properly selected and worn. Includes disposable respirators, half mask, full face mask respirator, and
breathing apparatus. Make sure you use the right type of respirator filter. If respirator is used improperly or not kept clean, the respirator can become a
hazard to you. Read and follow the instructions provided by the manufacturer on use,
maintenance, cleaning and care, and warning regarding the limitations of a respirator.
Do not wear your respirator into atmospheres containing contaminants for which your respirator is not designed to prevent against. For example, a respirator is designed to filter dust particles will not protect against gasses and vapors.
Keep track of your respirator so that you do not mistakenly use someone else’s respirator.
CARE AND MAINTENANCE OF PPE
INSPECT FOR DAMAGE DAILY CLEAN AS NEEDED
REPLACED IF BROKEN, CRACKED OR IF MATERIAL CAN’T BE
REMOVED.
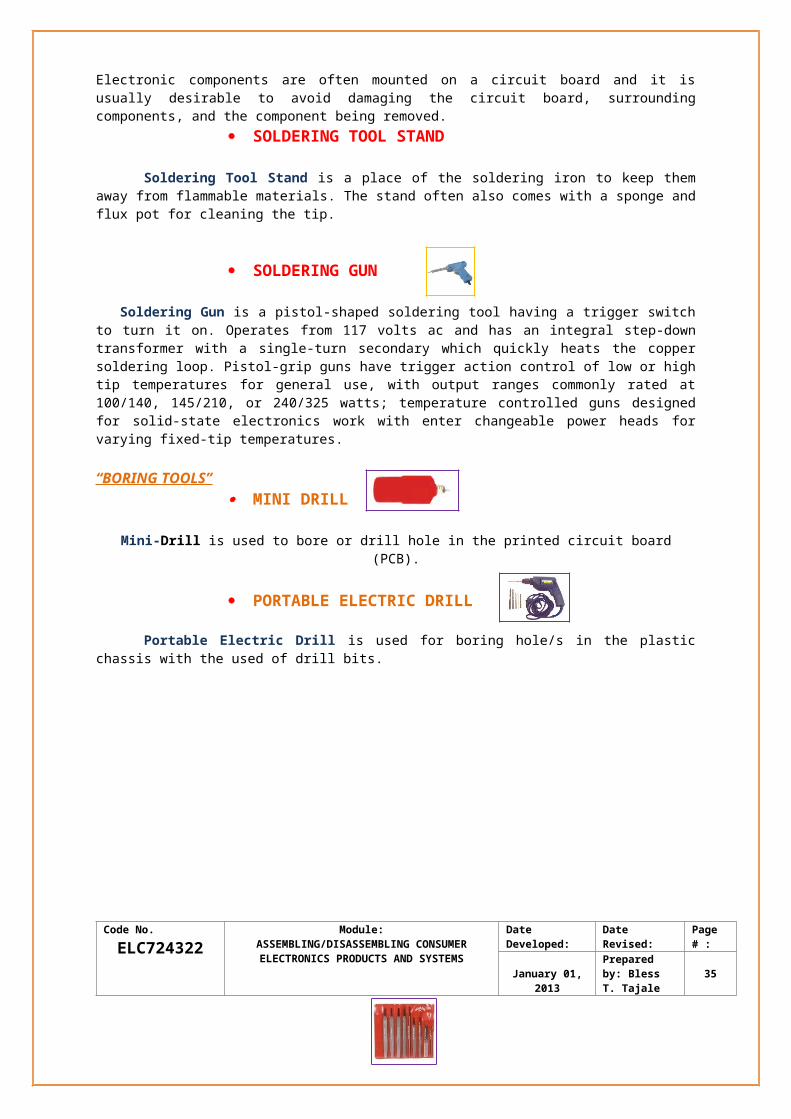
Code No.ELC724322
Module:ASSEMBLING/DISASSEMBLING CONSUMER ELECTRONICS PRODUCTS AND SYSTEMS
Date Developed: Date Revised: Page # :
January 01, 2013Prepared by: Bless T. Tajale 52
TASK SHEET # 2.1
CLASSIFICATION AND IDENTIFICATION OF TOOLS AND INSTRUMENTS
Objectives:Upon completion of this task, you will have to demonstrate in identifying and classifying hand
tools and instruments in accordance to their specifications and functions.
Direction: Follow the steps/procedures given below.
Steps/Procedures;
1. Together with your instructor, you will be given a tools needed in repairing audio/video products and systems.
2. Demonstrate on how to identify and determine the tools description the uses and functions. 3. Here are some common hand tools sample pictures as required in audio/video repair.

Code No.ELC724322
Module:ASSEMBLING/DISASSEMBLING CONSUMER ELECTRONICS PRODUCTS AND SYSTEMS
Date Developed: Date Revised: Page # :
January 01, 2013Prepared by: Bless T. Tajale 53
Performance Criteria ChecklistTask Sheet 2.1-1
Criteria YES NO1. Does all hand tools are identified according to its specifications?2. Does appropriate tools are determined according to their uses and functions?3. Is the tasks to be undertaken are properly identified?4. Does all testing instruments are properly checked and operated according to their procedural operations.5. Appropriate hand tools and testing instruments are selected to the task requirements?
Trainee’s Signature Trainer’s Signature

Code No.ELC724322
Module:ASSEMBLING/DISASSEMBLING CONSUMER ELECTRONICS PRODUCTS AND SYSTEMS
Date Developed: Date Revised: Page # :
January 01, 2013Prepared by: Bless T. Tajale 54
B. Direction: On a separate piece of paper, classify the different kinds of hand tools according to their specification in Consumer Electronic Servicing.
1. Desoldering Sucker/pump2. Wire Stripper3. Side Cutter pliers4. Long Nose Pliers5. Mini Drill6. Magnifying Glass7. Soldering Stand 8. Pliers9. Soldering Iron10. Portable Electric Drill 11. Bent nose pliers12. Slotted screwdriver13. Phillip screwdriver14. Hacksaw15. Screw tester
D. What are the guidelines of hand tools safety?
E. What are the factors to be followed in caring and maintaining of hand tools?
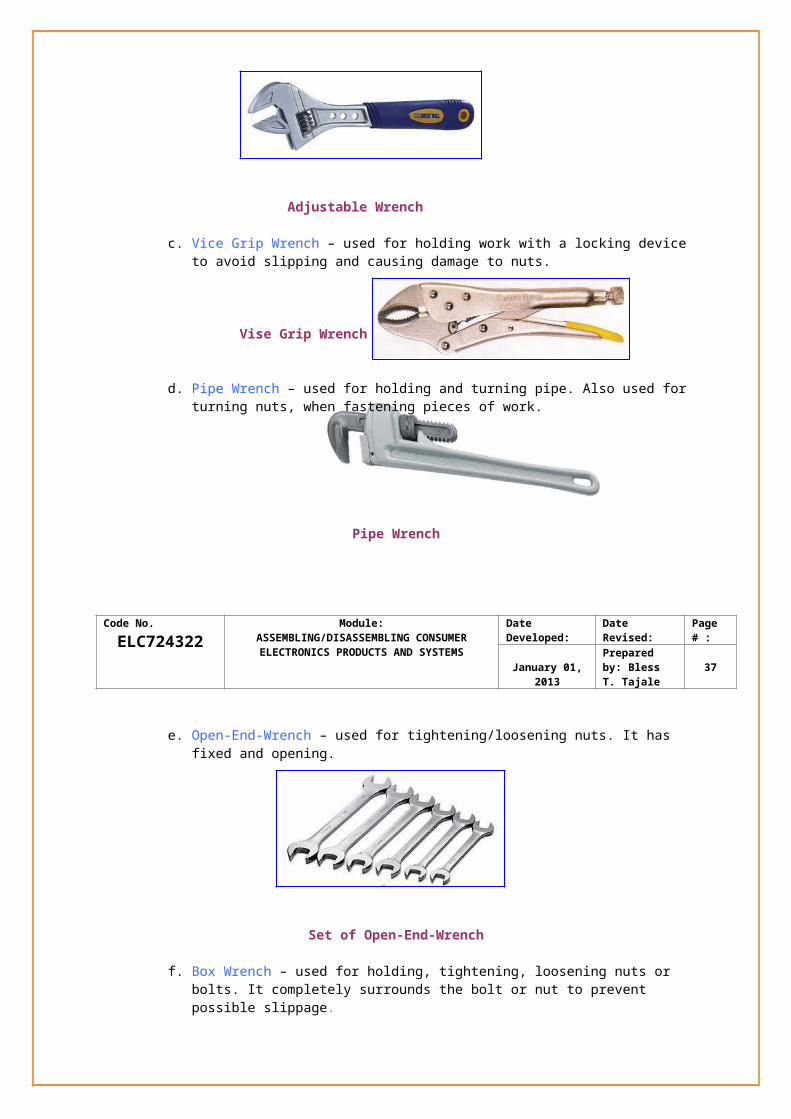
Code No.ELC724322
Module:ASSEMBLING/DISASSEMBLING CONSUMER ELECTRONICS PRODUCTS AND SYSTEMS
Date Developed: Date Revised: Page # :
January 01, 2013Prepared by: Bless T. Tajale 55
3.1-2 “Electronic Schematic Diagrams”
POWER SUPPLY SCHEMATIC DIAGRAMA power supply is the heart of all electronics equipment. It converts AC input power line to DC
output voltage. It is the one, which supplies the desired voltage or current in a circuit. Without it all of the electronic equipments will not function properly or dead set.
Schematic Diagram of Half-Wave Rectifier
Schematic Diagram of Full-Wave Center Tapped RectifierCircuit
Schematic Diagram of Full-Wave Bridge Rectifier

Code No.ELC724322
Module:ASSEMBLING/DISASSEMBLING CONSUMER ELECTRONICS PRODUCTS AND SYSTEMS
Date Developed: Date Revised: Page # :
January 01, 2013Prepared by: Bless T. Tajale 56
PCB LAYOUT
COMPONENT TYPE/WATTAGE/VALUE QUANTITYTRANSFORMER – T1 MULTI TAPPED – 3V,4.5V,6V,9V,12V 1 PC.RESISTOR – R1 ½ Watt – 1 K 1 PC.ROTARY SWITCH 6-SLOTS 1 PC.CAPCITOR – C1,C2,C3,C4 0.001UF 4 PCS.DIODE – D1,D2,D3,D4 IN4001 4 PCS.CAPACITOR – C5 1OOOUF or 2200UF/16V or 25V 1 PC.LED – D5 3-5V 1 PC.FUSE 1 A 1 PC.

Code No.ELC724322
Module:ASSEMBLING/DISASSEMBLING CONSUMER ELECTRONICS PRODUCTS AND SYSTEMS
Date Developed: Date Revised: Page # :
January 01, 2013Prepared by: Bless T. Tajale 57
Internal Parts of AC-DC Power Supply
The internal parts of the AC-DC Power Supply are shown in the Fig. 14.
Internal Parts of an AC-DC Power Supply
Parts of AC-DC Power Supply
Components Description
Alligator Clip A special type of connector used to connect the power supply to the electronic gadget.
CapacitorA capacitor stores electric charge. A capacitor is used with a resistor in a timing circuit. It can also be used as a filter, to block DC signals but pass AC signals.
Case and Cover It serves as a housing of an AC-DC power supply.
Diode A device which only allows current to flow in one direction.
Fuse A protective device used to prevent the circuit from short circuit or damage.
LEDLight Emitting Diode
A transducer which converts electrical energy to light.
Line cord A type of cord used to connect the unit to the voltage source.
On-Off switch Used to on and off the circuit.
Printed Circuit Board
PCB – a conductive pattern formed on one or both sides of an insulating base by etching, plating or stamping.
Resistor
A resistor restricts the flow of current, for example to limit the current passing through an LED. A resistor is used with a capacitor in a timing circuit. Some publications still use the old resistor symbol:
Rotary Switch A switch that is operated by a rotating shaft.
Transformer A component that consist of two or more coils which are coupled together by magnetic induction.
Code No. Module: Date Developed: Date Revised: Page # :
ELC724322 ASSEMBLING/DISASSEMBLING CONSUMER ELECTRONICS PRODUCTS AND SYSTEMS January 01, 2013
Prepared by: Bless T. Tajale 58
BOOSTER AMPLIFIER SCHEMATIC DIAGRAM
As the name implies a booster amplifier increase the gain or power originating from a much lower power amplifier.
Input
This type of amplifier cannot amplify low output signals from tuner, microphone, etc. it has be driven by a strong output signal say, from a lower power amplifier. The schematic diagram of a transformer-coupled booster amplifier is shown below:
COMPONENT TYPE/WATTAGE/VALUE QUANTITY
TRANSISTOR – Q1,Q2 GERMANIUM MJ2955 2 PCS.RESISTOR – R1 5W-12 ohms 1 PC.RESISTOR – R2 5W- 470 ohms 1 PC.CAPCITOR – C1 ELETROLYTIC-2200UF/25V 1 PC.TRANSFORMER – T1 INPUT PT-22 (cannon) 1 PC.TRANSFORMER – T2 OUTPUT- 50W or 100W (cannon) 1 PC.
So far output transistors have been used. Here is an amplifier that uses NPN output transistors.
COMPONENT TYPE/WATTAGE/VALUE QUANTITYTRANSISTOR – Q1,Q2 GERMANIUM 2N3055 2 PCS.RESISTOR – R1 5W-15 ohms 1 PC.RESISTOR – R2 5W- 470 ohms 1 PC.CAPCITOR – C1 ELETROLYTIC-2200UF/25V 1 PC.TRANSFORMER – T1 INPUT PT-22 (cannon) 1 PC.TRANSFORMER – T2 OUTPUT- 50W or 100W (cannon) 1 PC.
Code No. Module: Date Developed: Date Revised: Page # :
Low power Amplifier
Booster Amplifier

ELC724322 ASSEMBLING/DISASSEMBLING CONSUMER ELECTRONICS PRODUCTS AND SYSTEMS January 01, 2013
Prepared by: Bless T. Tajale 58
Qualification : Consumer Electronics Servicing NC II
Module title : Assembling/Disassembling Consumer Electronics Products and Systems
Learning Outcome : Apply proper soldering and desoldering techniques
Assessment Criteria:
1. Workplace is prepared in accordance with OHS policies and procedures.
2. Required materials, tools and equipment are prepared and checked in accordance with establish procedure.
3. Soldering and desoldering processes are performed in accordance with OHS policies are procedures.
4. Responsible person is consulted for effective and proper work coordination.
Resources:ELECTRONICS Principles and Applications: by Charles A. Schuler
http://www.aaroncake.net/electronics/solder.htmLEARNING EXPERIENCE
Learning Outcome 4: Apply proper soldering and desoldering techniques.
Learning Activities Special Instruction
Read the attached Information Sheet #
4.1
“PROPER SOLDERING AND DESOLDERING TECHNIQUE”
This includes:
Basic principle of soldering
Importance of soldering
Tinning techniques
After reading Information Sheet on Proper soldering and desoldering technique.
Perform Job sheet # 4.1.
You will be given a performance
sheet to your trainer.
Code No.ELC724322
Module:ASSEMBLING/DISASSEMBLING CONSUMER ELECTRONICS PRODUCTS AND SYSTEMS
Date Developed: Date Revised: Page # :
January 01, 2013Prepared by: Bless T. Tajale 59
INFORMATION SHEET # 4.1
PROPER SOLDERING AND DESOLDERING TECHNIQUEDEFINITION OF SOLDERING
Is a connecting method in which to be soldered are first heated where solder can melt and then joined each other with supplied solder between them, an alloy layer is formed between the solder and the metal surface.
THREE BASIC PRINCIPLES OF SOLDERING
CLEANING – components must be kept clean. HEATING – connecting parts must be heated to a proper temperature evenly.SOLDERING – a proper amount of solder must be supplied to a properly heated spot.
IMPORTANCE OF SOLDERING
The most important factor involve in soldering is reliability. This is considered as assurance for the satisfaction of our customers.
PURPOSE OF SOLDERING
ELECTRICAL JOINING – to join two or more metals together and to achieve electrical connection between them.
MECHANICAL JOINING – to join two or more metals and to fix a relative position between them.
KINDS OF SOLDERING
MANUAL SOLDERING – method of soldering which perform by man. AUTOMATIC SOLDERING – is an automated system that performs the application of solder paste,
pre-heating, soldering, cooling , drying, hardening of PWD using reflow machine (Ex. SMT, Pulse Heat, Robot soldering).
WHY USE LEAD FREE SOLDER? We use lead free solder because this is one of the social requirements in preservation of the
environment since lead application can cause harmful effect to all living creatures.
To help improve our deteriorating condition.
One of the customer’s worldwide requirements for technology application.

Code No.ELC724322
Module:ASSEMBLING/DISASSEMBLING CONSUMER ELECTRONICS PRODUCTS AND SYSTEMS
Date Developed: Date Revised: Page # :
January 01, 2013Prepared by: Bless T. Tajale 60
PREPARING TO SOLDERTinning the Soldering Tip
Before use, a new soldering tip, or one that is very dirty, must be tinned. "Tinning" is the process of coating a soldering tip with a thin coat of solder. This aids in heat transfer between the tip and the component you are soldering, and also gives the solder a base from which to flow from.
Step 1: Warm Up the IronWarm up the soldering iron or gun thoroughly. Make sure that it has fully come to temperature because you are about to melt a lot of solder on it. This is especially important if the iron is new because it may have been packed with some kind of coating to prevent corrosion.
Step 2: Prepare A Little SpaceWhile the soldering iron is warming up, prepare a little space to work. Moisten a little sponge and place it in the base of your soldering iron stand or in a dish close by. Lay down a piece of cardboard in case you drip solder (you probably will) and make sure you have room to work comfortably.
Step 3: Thoroughly Coat the Tip in SolderThoroughly coat the soldering tip in solder. It is very important to cover the entire tip. You will use a considerable amount of solder during this process and it will drip, so be ready. If you leave any part of the tip uncovered it will tend to collect flux residue and will not conduct heat very well, so run the solder up and down the tip and completely around it to totally cover it in molten solder.
Step 4: Clean the Soldering TipAfter you are certain that the tip is totally coated in solder, wipe the tip off on the wet sponge to remove the entire flux residue. Do this immediately so there is no time for the flux to dry out and solidify.

Code No.ELC724322
Module:ASSEMBLING/DISASSEMBLING CONSUMER ELECTRONICS PRODUCTS AND SYSTEMS
Date Developed: Date Revised: Page # :
January 01, 2013Prepared by: Bless T. Tajale 61
Qualification : Consumer Electronics Servicing NC II
Module title : Assembling/Disassembling Consumer Electronics Products and Systems
Learning Outcome : Apply Wiring and Cabling Techniques
Assessment Criteria:
1. Workplace is prepared in accordance with OHS policies and procedures 2. Required materials tools and equipment are prepared checked in accordance with established
procedures.3. Parts and materials needed to complete the work are prepared and obtained according to
requirements.4. Wiring and cabling processes are performed in accordance with OHS policies and procedures.5. Responsible person is consulted for effective and proper coordination
Resources:ELECTRONICS Principles and Applications: by Charles A. Schulerhttp://www.aaroncake.net/electronics/solder.htm
http://www.windsun.com/Hardware/Wire_Table.htm
LEARNING EXPERIENCE
Learning Outcome 5: Apply Wiring and Cabling Techniques.
Learning Activities Special Instruction
Read the attached Information Sheet # 5.1
“WIRING AND CABLING TECHNIQUE”
Read Information Sheet Wiring and cabling technique.
Answer self-check # 5.1
Compare your answer to the answer key and you will be given a performance sheet to your trainer.
Code No.ELC724322
Module:ASSEMBLING/DISASSEMBLING CONSUMER ELECTRONICS PRODUCTS AND SYSTEMS
Date Developed: Date Revised: Page # :
January 01, 2013Prepared by: Bless T. Tajale 62
INFORMATION SHEET # 5.1
WIRING AND CABLING TECHNIQUESBefore you can build or design, you will need to recognize how to use proper wiring techniques
in order to start connecting simple circuits.
– Choose appropriate electrical components.– Select proper electrical wire color configurations.– Select proper wire connectors for various applications.
Choosing gauges:
• The most important wiring practice is to observe proper wiring sizes. • Failure to choose the correct size can result in marginal performance of your circuit or even
overheating of your wires or connectors.• Always use one size larger if possible.
Code No.ELC724322
Module:ASSEMBLING/DISASSEMBLING CONSUMER ELECTRONICS PRODUCTS AND SYSTEMS
Date Developed: Date Revised: Page # :
January 01, 2013Prepared by: Bless T. Tajale 63
Wire Color Selection:
• Properly choosing the colors for your wires can help you decipher your wiring configurations.
• For low DC voltages use the following color codes:Black – NegativeRed – PositiveGreen - Ground
Conductors:
• Conductors are defined as materials that allow the flow of electric current.• Metals are usually good conductors while nonmetals are not.• The most common conductor used in electrical wiring is copper.
Insulators:
• An insulator is materials that has few, if any, free electrons and resists the flow of electrons.• No material has been found to be a perfect insulator, but common insulators include air, glass,
rubber, plastic, paper, and porcelain.• An advantage of using insulators in circuits is that they provide the ability to place wires close
together without the risk of a short circuit.
Wire Terminals:
• Terminals are used to safely and easily connect wires to a device or load.• They are usually crimped onto the ends of wires, or soldered directly onto the terminal.
Advantages:
Single pole wire connectors• Allows a clean connection between the wires.• They can be “crimped” on instead of having to be soldered together.• You can safely separate the wires without having to cut or splice.

Code No.ELC724322
Module:ASSEMBLING/DISASSEMBLING CONSUMER ELECTRONICS PRODUCTS AND SYSTEMS
Date Developed: Date Revised: Page # :
January 01, 2013Prepared by: Bless T. Tajale 64
Tools and Materials use in wiring and cabling in electronic projects:
SOLDERING IRON SOLDER
CRIMPING TOOL WIRE NUTS
DIAGONAL CUTTER PLIER ELECTRONIC WIRES AND CABLES
ALLIGATOR CLIPS ELECTRICAL TAPE
RCA PHONES,PLUGS AND JACKS ADAPTORS AND CONNECTORS

Code No.ELC724322
Module:ASSEMBLING/DISASSEMBLING CONSUMER ELECTRONICS PRODUCTS AND SYSTEMS
Date Developed: Date Revised: Page # :
January 01, 2013Prepared by: Bless T. Tajale 65
SELF-CHECK # 5.1-1Direction:
ANSWER THE FOLLOWING QUESTIONS;
1. Why should we use a wire color code?
2. Why do we need to use insulators?
3. Why do we need to use conductors?

Code No.ELC724322
Module:ASSEMBLING/DISASSEMBLING CONSUMER ELECTRONICS PRODUCTS AND SYSTEMS
Date Developed: Date Revised: Page # :
January 01, 2013Prepared by: Bless T. Tajale 67
Qualification : Consumer Electronics Servicing NC II
Module title : Assembling/Disassembling Consumer Electronics Products and Systems
Learning Outcome : Apply Assembling and Disassembling Techniques
Assessment Criteria:
1. Assembly workplace is prepared in accordance with OHS policies and procedures.2. Responsible person is consulted for effective and proper work coordination.3. Required materials, tools and equipment are prepared and checked in accordance with
established procedures.4. Parts and materials needed to complete the work are prepared and obtained according to
requirements.5. Assembling and disassembling processes are performed in accordance with OHS policies and
procedures.
Resources:ELECTRONICS Principles and Applications: by Charles A. Schulerhttp://www.aaroncake.net/electronics/solder.htm
http://www.windsun.com/Hardware/Wire_Table.htm
LEARNING EXPERIENCE
Learning Outcome 6: Apply Assembling and Disassembling Techniques.
Learning Activities Special Instruction
Read the attached Information Sheet # 6.1
“ASSEMBLING AND DISASSEMBLING
TECHNIQUES”
Read Information Sheet Assembling and disassembling techniques;
Perform job sheet # 6.1-1
Perform job sheet # 6.1-2
Answer self-check # 6.1
You will be given a performance sheet to your trainer and Compare your answer to the answer key.

Code No.ELC724322
Module:ASSEMBLING/DISASSEMBLING CONSUMER ELECTRONICS PRODUCTS AND SYSTEMS
Date Developed: Date Revised: Page # :
January 01, 2013Prepared by: Bless T. Tajale 68
INFORMATION SHEET # 6.1
ASSEMBLING AND DISASSEMBLING TECHNIQUESSteps for a Safe and Successful System Unit Assembly and Disassembly
You might think that disassembly and assembly of the system unit is easy. Yes it is provided that you have done it correct and safely. The first thing that every technician should keep in mind is SAFETY. You must think that electrocution and nasty cuts are the most common injuries a technician might have and we need to avoid it by following simple safety procedures.
1. Wear anti-ESD Wrist Strap and if there is none, drain off the ESD by touching the unpainted part of the unit.
2. Wear proper clothing. If ever the unit you’re working on catches fire, cotton most likely better resist burning than nylon clothes.
3. Turn off the system unit and unplug the power cord.
4. Keep screws together. Short circuit will likely be a big possibility if screws or other similar small metallic objects are misplaced. It is best to keep a small canister to contain the screws or just put the screws back where they were taken.
5. Clean your tools and equipment before and after use. Take care of your tools because they will also take good care of you. Tools and equipment in good condition lessens accident.- Clean your system unit before fixing it.
6. Fix the unit if it is broken. Yes, don't assume that the unit is broken lest you're sure it really is. You might add up or make the problem yourself rather than to fix it.
8. Have documentation or note on each unit being fixed. Documentation will be your personal troubleshooting database. This will be a handy future troubleshooting reference. Your documentation will also serve as your guide as you go on with your troubleshooting.
9. Do make use of the comfort of time in troubleshooting. Do not be in a hurry when fixing the unit. If you can't finish the fix on that day, let the day pass and fix it by the morning. Mistakes occur because of distraction and of the lack of concentration.
Tips in Assembling and Disassembling a Unit
1. Always cut off the power source before disassembling.2. Open the case of the unit slowly. 3. Familiarize yourself with the parts of the unit.4. Always remove the screws first and locks before disconnecting the parts of the unit.5. Always be careful in putting or removing all the parts inside the unit.

Code No.ELC724322
Module:ASSEMBLING/DISASSEMBLING CONSUMER ELECTRONICS PRODUCTS AND SYSTEMS
Date Developed: Date Revised: Page # :
January 01, 2011Prepared by: Bless T. Tajale 69
JOB SHEET # 6.1-1-----------------------------------------------------------------------------------------------------------------
JOB TITLE : ASSEMBLING OF A FULL WAVE BRIDGE RECTIFIER CIRCUIT *(POWER SUPPLY)*
PUPOSE : TO HAVE A PROPER WIRING AND CABLING IN AC-DC POWERSUPPLY.
CONDITIONS OR SITUTATIONS FORTHE OPERATION : WIRING AND CABLING MUST BE SOLDERED OR CONNECTED PROPERLY.
WIRING COLOR CODE MUST BE APPLIED.
EQUIPMENT : MULTITESTER
TOOLS : PLIERS, SODERING IRON 30-40W, DESOLDERING PUMP, UTILITY KNIFE, SOLDERING STAND, WIRE STRIPPER.
MATERIALS : SOLDERING LEAD 60/40, SOLDERING PASTE, MASKING TAPE,COMPONENTS AS REQUIRED IN AC-DC POWER SUPPLY, WIRES #16 OR #22 AW.
PROCEDURE : 1. CONNECT THE WIRES AS PER THE DRAWING GIVEN BELOW. 2. WIRES MUST BE PROPER IN SIZE, COLOR AND EXACT LENGTH IN CONNECTING BETWEEN TWO OBJECTS.
3. AFTER ASSEMBLING, WIRING AND CABLING THE POWER SUPPLY, TEST OR MEASURE THE OUTPUT VOLTAGE GIVEN THE TABLE BELOW.
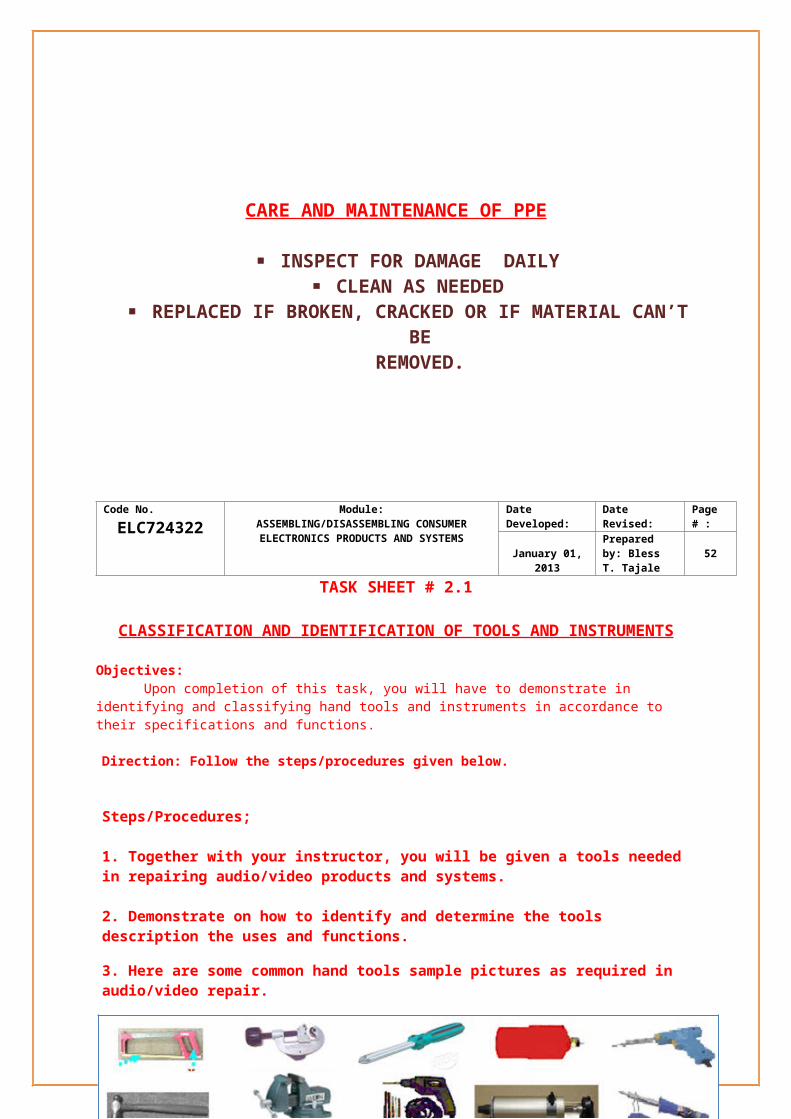
Code No.ELC724322
Module:ASSEMBLING/DISASSEMBLING CONSUMER ELECTRONICS PRODUCTS AND SYSTEMS
Date Developed: Date Revised: Page # :
January 01, 2013Prepared by: Bless T. Tajale 70
DC OUTPUT VOLTAGE MEASURED VOLTAGE RANGE
3 V DC
4.5 V DC
6 V DC
9 V DC
12 V DC
PRECAUTIONS: WEAR PPE (PERSONAL PROTECTIVE EQUIPMENT).
PROBLEMS ENCOUNTERED: _________________________________________________________________________________________________________________________________________________________________________________________________________.
INSTRUCTOR’S COMMENTS: _________________________________________________________________________________________________________________________________________________________________________________________________________.
Code No. Module: Date Developed: Date Revised: Page # :
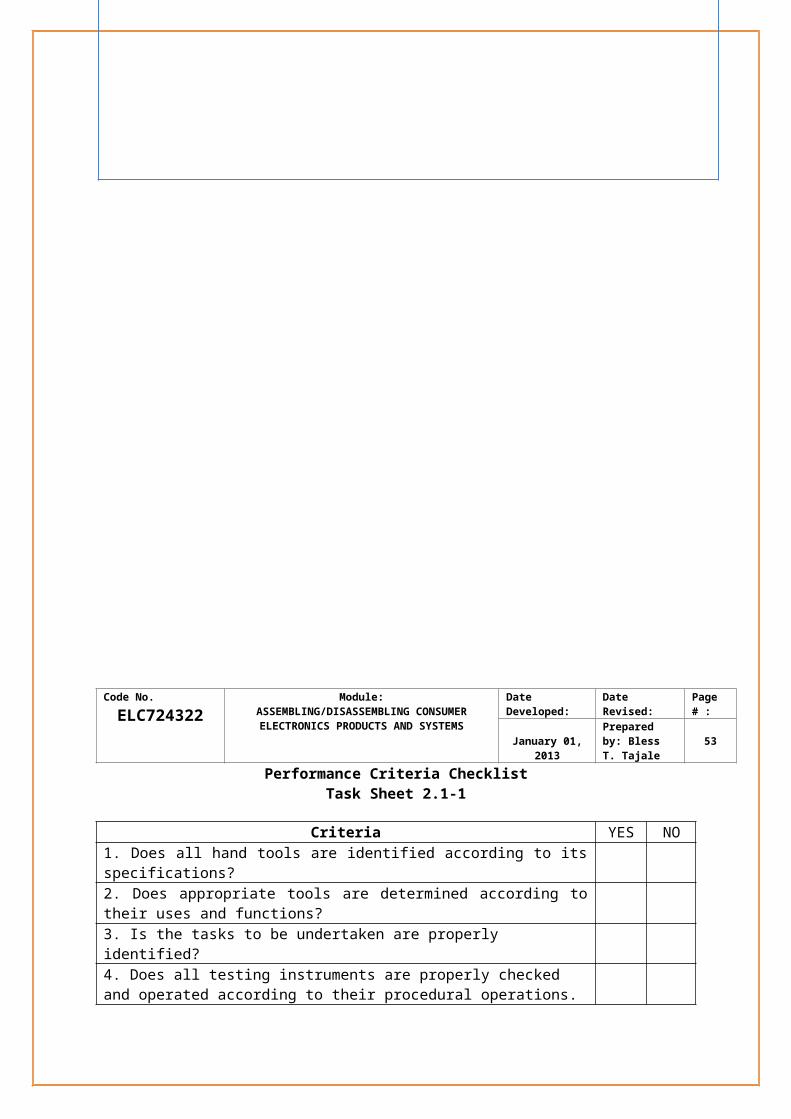
ELC724322 ASSEMBLING/DISASSEMBLING CONSUMER ELECTRONICS PRODUCTS AND SYSTEMS January 01, 2013
Prepared by: Bless T. Tajale 71
PERFORMANCE CHECK LIST OFJOB SHEET # 6.1-1
Criteria YES NO1. Wiring and circuits are checked using specified testing procedures?
2. Process is checked according to established standards and requirements?3. Is the tasks to be undertaken are properly identified?4. Unplanned events or conditions are responded to in accordance with established procedures?5. Appropriate hand tools and testing instruments are selected to the task requirements?
Trainee’s signature Trainer’s signature
Code No. Module: Date Developed: Date Revised: Page # :

ELC724322 ASSEMBLING/DISASSEMBLING CONSUMER ELECTRONICS PRODUCTS AND SYSTEMS January 01, 2013
Prepared by: Bless T. Tajale 72
JOB SHEET # 6.1-2
APPLY ASSEMBLING AND DISASSEMBLING TECHNIQUE______________________________________________________________________________________________________________
JOB TITLE: DISASSEMBLING OF AC-DC POWER SUPPLY
OBJECTIVES: UPON COMPLETION OF THIS JOB SHEET YOU WILL HAVE TO DEMONSTRATE
THE ABILITY TO ASSMEBLE AND DISASSEMBLE THE CIRCUIT.
TOOLS: PLIERS, SCREW DRIVERS, SOLDERING IRON, DESOLDERING PUMP
EQUIPMENT: PPE, MULTITESTER
MATERIALS: SOLDERING LEAD 60/40, FLUX
PROCEDURE:
1. POWER OFF AND UNPLUG THE POWER SUPPLY.2. UNSCREW AND REMOVE THE CASING.3. UNLOCK AND REMOVE THE MAIN PCB AND OTHER COMPONENTS OF THE CASE.
(APPLY SOLDERING AND DESOLDERING)4. COMPONENTS AND SCREWS MUST BE PUT IN A PROPER PLACE.
PROBLEMS ENCOUNTERED: _________________________________________________________________________________________________________________________________________________________________________________________________________.
INSTRUCTOR’S COMMENTS: _________________________________________________________________________________________________________________________________________________________________________________________________________.
Code No.ELC724322
Module:ASSEMBLING/DISASSEMBLING CONSUMER ELECTRONICS PRODUCTS AND SYSTEMS
Date Developed: Date Revised: Page # :
Prepared by:
January 01, 2013 Bless T. Tajale 73PERFORMANCE CHECK LIST
FOR JOB SHEET # 6.1-2
Criteria YES NO1. Assembling and disassembling processes are performed in accordance with OH&S policies and procedures?2. Process is checked according to established standards and requirements?3. Is the tasks to be undertaken are properly identified?4. Unplanned events or conditions are responded to in accordance with established procedures?5. Appropriate hand tools and testing instruments are selected to the task requirements?6. Assembled products are checked in accordance with quality standards?
Trainee’s signature Trainer’s signature
Code No.ELC724322
Module:ASSEMBLING/DISASSEMBLING CONSUMER ELECTRONICS PRODUCTS AND SYSTEMS
Date Developed: Date Revised: Page # :
January 01, 2013Prepared by: Bless T. Tajale 74
SELF-CHECK # 6.1
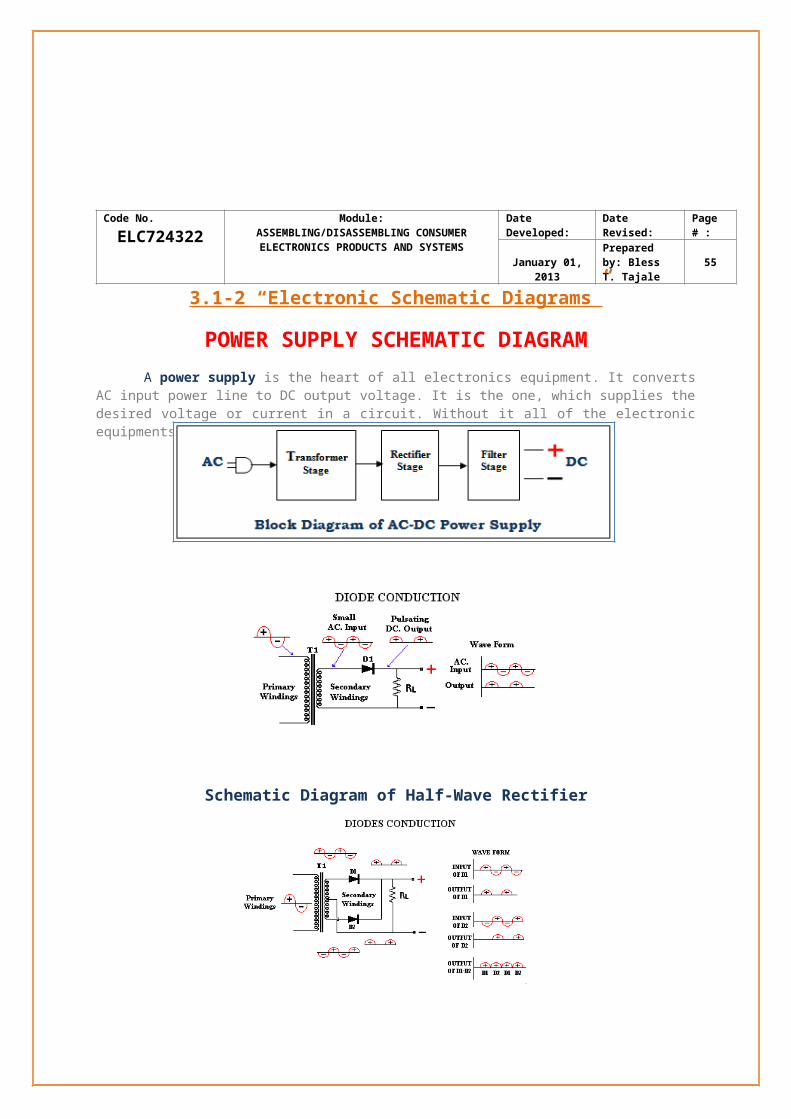
APPLY ASSEMBLING AND DISASSEMBLING TECHNIQUE
DIRECTION: ANSWER THE FOLLOWING QUESTIONS.
1. WHAT ARE SOME KEY FACTORS THAT AFFECT THE QUALITY OF THE JOINT?
2. WHAT SHOULD YOU CONSIDER FIRST BEFORE APPLYING A SOLDER?
3. WHAT IS THE MELTING POINT OF MOST SOLDER?
4. HOW MUCH SOLDER SHOULD BE APPLIED FOR SOLDER WORK?
5. WHAT SHOULD BE THE CAUSE AND REMEDY IF SOLDER WON’T STICK OR ADHERE TO BOARD OR PART?
Code No.ELC724322
Module:ASSEMBLING/DISASSEMBLING CONSUMER ELECTRONICS PRODUCTS AND SYSTEMS
Date Developed: Date Revised: Page # :
January 01, 2013Prepared by: Bless T. Tajale 75