
Clamping Calculations
7
10 PLANNING The most important and cost effective part of the fixture design process is planning. All facets of the project should be considered, and questions answered before fixture designing begins. • How many operations are required? • What machine will be used? • What is the expected cycle time? • How many parts will be run? How often? • How fast must the workpiece be changed? The answers to questions like these will help determine the relative cost/benefit of the clamping system chosen for the fixture. The following information will help prove that a hydraulic power clamping system can be a cost effective fixturing alternative. HYDRAULIC FORCE A basic principle of hydraulics states that pressure applied to a confined fluid is transmitted equally in all directions. This principle allows the transmission of pres- sure through tubes and hoses to remotely located actuators where that pressure is converted to usable force. The simplicity of hydraulic power clamp- ing can be summed up in one small equation: FOR CE = Pre ssure X Area In the cylinder above, the fluid pressur- ized at 2000 psi is acting on the 3 sq. in. piston. As the formula says, 2000 psi times 3 sq. in. yields a force of 6000 pounds. This same concept applies to all hydraulic actuators. PLUMBING OPTIONS The method used to route the pressure to the actuators on the fixture should be determined early in the planning stages. The plumbing is an essential part of the fixture and should never be left as an afterthought. There are two basic plumbing methods; conventional and manifold mount. Conventional Mounting Conventionally mounted components have threaded ports which accept fittings for tub- ing and hoses. Many different types of fit- tings are available, giving you several options for customizing your design. Since most of these components are commonly available, conventional mounting will typi- cally be the lower cost option. The threaded ports are usually one of two designs, NPT tapered pipe threads or SAE O-Ring boss. NPT tapered pipe threads depend on the interference of the mating thread forms. This thread form has been in use for general plumbing applications for many years. Consequently there is a wide selection of fit- tings available for even the most unique applications. However, the thread form is the same whether the application is a household water supply or a high pressure hydraulic workholding system. It is important to speci- fy only fittings that are rated for the maximum pressure to be seen in your application. The plastic, copper and iron pipe fittings are not acceptable alternatives. Straight thread, O-Ring boss ports per SAE J514 are common in both industrial and mobile hydraulic systems. Because this system of ports and fittings depends on a simple, replaceable o-ring for sealing instead of the interference of perfectly formed threads, the chance for leakage is greatly reduced. Systems can be disassembled and reassembled numerous times with no additional make-up required. Fittings will always be in the exact same place and elbows will always point in the right direc- tion. There is never the need to over or under-tighten elbows to properly align them in your system. Pipe sealants and teflon tapes that can contaminate your system are not required. The torque needed to properly tighten these fittings is less, too. All of Hytec’s newest products have the SAE ports and a line o f fittings and adapters is available in our catalog. In addition, we have made many of our other products (originally designed with NPT threads) available with SAE ports. Where available, this is noted on the product description page. Manifold Mounting Manifold mounted components eliminate the need for external fittings, tubing, and hoses because the fluid passages are machined directly into the fixture. Securing the workholding component to the fixture automatically makes the hydraulic connec- tion. Manifold mounting: • Provides no-tool hydraulic connections • Saves valuable fixture space • Eliminates tubes, hoses, or fittings that disrupt coolant flow and collect chips • Simplifies post-machining fixture cleaning • Reduces assembly and maintenance time • Improves performance • Means fewer hydraulic connections resulting in fewer potential leak points • Results in a cleaner, more professional looking fixture PLUMBING SIZING When designing and assembling your hydraulic system, keep in mind that your choices of size and length of plumbing lines can significantly change the performance of your fixture. The back-pressure created by fittings, tubing and hoses can slow the oper- ation of your system, especially single-acting systems. Larger diameter plumbing runs with a minimum number of bends and fit- tings will reduce this back pressure. When sizing hydraulic lines, make sure you look at the inside diameter. 1⁄4" hose is not the same as 1⁄4" tubing. Hose is specified by its inside diameter. Hydraulic tubing is usually specified by the outside diameter. 1⁄4"O.D., .035" wall tubing has an inside diameter of .180", a flow carrying capacity of only 50% of that of the hose. Design Information
Transcript of Clamping Calculations
8/4/2019 Clamping Calculations
http://slidepdf.com/reader/full/clamping-calculations 1/710
PLANNINGThe most important and cost effective part
of the fixture design process is planning. Allfacets of the project should be considered,and questions answered before fixturedesigning begins.
• How many operations are required?• What machine will be used?• What is the expected cycle time?• How many parts will be run? How often?• How fast must the workpiece be changed?
The answers to questions like these willhelp determine the relative cost/benefit ofthe clamping system chosen for the fixture.
The following information will help provethat a hydraulic power clamping system canbe a cost effective fixturing alternative.
HYDRAULIC FORCEA basic principle of hydraulics states
that pressure applied to a confined fluid istransmitted equally in all directions. Thisprinciple allows the transmission of pres-sure through tubes and hoses to remotelylocated actuators where that pressure isconverted to usable force.
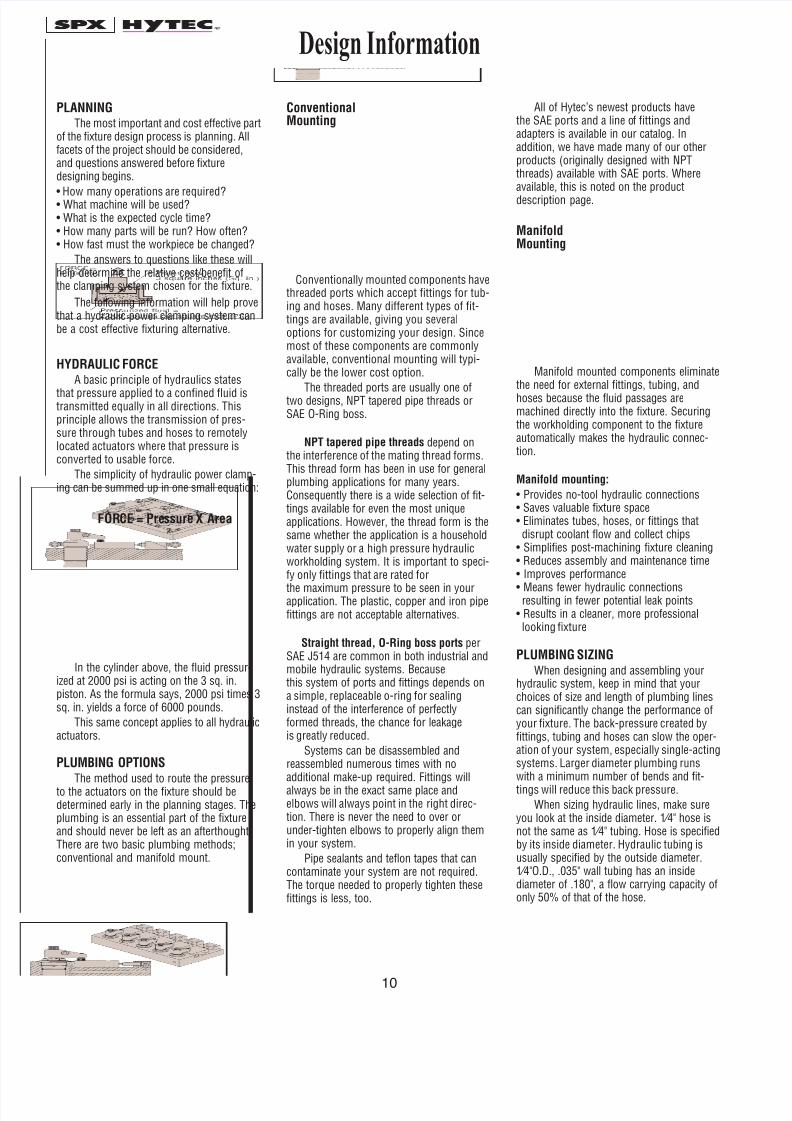
The simplicity of hydraulic power clamp-ing can be summed up in one small equation:
FORCE = Pressure X Area
In the cylinder above, the fluid pressur-ized at 2000 psi is acting on the 3 sq. in.piston. As the formula says, 2000 psi times 3sq. in. yields a force of 6000 pounds.
This same concept applies to all hydraulicactuators.
PLUMBING OPTIONSThe method used to route the pressure
to the actuators on the fixture should bedetermined early in the planning stages. Theplumbing is an essential part of the fixtureand should never be left as an afterthought.There are two basic plumbing methods;conventional and manifold mount.
ConventionalMounting
Conventionally mounted components havethreaded ports which accept fittings for tub-ing and hoses. Many different types of fit-tings are available, giving you severaloptions for customizing your design. Sincemost of these components are commonlyavailable, conventional mounting will typi-cally be the lower cost option.
The threaded ports are usually one oftwo designs, NPT tapered pipe threads orSAE O-Ring boss.
NPT tapered pipe threads depend onthe interference of the mating thread forms.This thread form has been in use for generalplumbing applications for many years.Consequently there is a wide selection of fit-tings available for even the most uniqueapplications. However, the thread form is thesame whether the application is a householdwater supply or a high pressure hydraulicworkholding system. It is important to speci-fy only fittings that are rated for
the maximum pressure to be seen in yourapplication. The plastic, copper and iron pipefittings are not acceptable alternatives.
Straight thread, O-Ring boss ports perSAE J514 are common in both industrial andmobile hydraulic systems. Becausethis system of ports and fittings depends ona simple, replaceable o-ring for sealinginstead of the interference of perfectlyformed threads, the chance for leakageis greatly reduced.
Systems can be disassembled andreassembled numerous times with noadditional make-up required. Fittings will
always be in the exact same place andelbows will always point in the right direc-tion. There is never the need to over orunder-tighten elbows to properly align themin your system.
Pipe sealants and teflon tapes that cancontaminate your system are not required.The torque needed to properly tighten thesefittings is less, too.
All of Hytec’s newest products havethe SAE ports and a line of fittings andadapters is available in our catalog. Inaddition, we have made many of our otherproducts (originally designed with NPTthreads) available with SAE ports. Whereavailable, this is noted on the product
description page.
ManifoldMounting
Manifold mounted components eliminatethe need for external fittings, tubing, andhoses because the fluid passages aremachined directly into the fixture. Securingthe workholding component to the fixtureautomatically makes the hydraulic connec-tion.
Manifold mounting:
• Provides no-tool hydraulic connections• Saves valuable fixture space• Eliminates tubes, hoses, or fittings thatdisrupt coolant flow and collect chips
• Simplifies post-machining fixture cleaning• Reduces assembly and maintenance time• Improves performance
• Means fewer hydraulic connectionsresulting in fewer potential leak points• Results in a cleaner, more professionallooking fixture
PLUMBING SIZINGWhen designing and assembling your
hydraulic system, keep in mind that yourchoices of size and length of plumbing linescan significantly change the performance ofyour fixture. The back-pressure created byfittings, tubing and hoses can slow the oper-ation of your system, especially single-actingsystems. Larger diameter plumbing runswith a minimum number of bends and fit-
tings will reduce this back pressure.When sizing hydraulic lines, make sure
you look at the inside diameter. 1⁄4" hose isnot the same as 1⁄4" tubing. Hose is specifiedby its inside diameter. Hydraulic tubing isusually specified by the outside diameter.1⁄4"O.D., .035" wall tubing has an insidediameter of .180", a flow carrying capacity ofonly 50% of that of the hose.
Design Information

8/4/2019 Clamping Calculations
http://slidepdf.com/reader/full/clamping-calculations 2/7
11
Single acting clamps can develop only alimited amount of pressure to force hydraulicfluid out of the clamp and allow it to retract.When the return fluid from multiple clampsmust share the same hydraulic line, backpressure can easily become excessive andslow the clamp’s retraction.
When connecting multiple clamps, youcan use either a “daisy chain” or “home run”configuration. In a daisy chain, you use a teeat each clamp and run tubing from the firstclamp to the second and then to the thirdand then the fourth, etc. When using a homerun configuration, you begin at a manifoldand run hydraulic lines all the way from themanifold to each clamp.
The daisy chain method uses less tubingso it might appear that this would minimizeback pressure. However in the daisy chain,the fluid from all of the clamps must pass
through a single hydraulic line. In the homerun, while there may be longer runs, eachline only has to accommodate flow fromone clamp.
The viscosity of the hydraulic fluid usedwill also affect back pressure. Viscosity isaffected by temperature. Contact the factoryto discuss applications running below roomtemperature. We recommend using onlyHytec fluids. Other fluids may have differentviscosities or other characteristics that canadversely affect system operation.
SINGLE- vs. DOUBLE-ACTING
Another decision to be made early in theplanning stage is whether to use single- ordouble-acting components.
Single-acting components are typicallyactuated using hydraulic pressure. Whenreleased, the pressure is removed andthe actuator is returned by a spring whichforces the hydraulic fluid back into the pumpreservoir. This type of system is usually themost cost effective because each actuatorneeds only one pressure source connectionfor operation. Single-acting actuatorsshould be vented to clean atmospherewhenever appropriate. Remember, double
the plumbing for double-acting systems.This does, however, use more valuable fix-ture space and adds to the cost.
Nevertheless, there are good reasons touse double-acting systems. The largerand/or more complex the circuit design, thegreater the potential for return restrictionswhich will slow the return of the single-actingactuators. Double-acting actuators are ideal
for applications which require both pushingand pulling or returning clamps with heavy,custom designed attachments. They workwell for powering linkages which requirefast actuation in both directions. Double-acting clamps are often used in automatedsystems where coordinating the action ofthe clamp with that of the rest of the systemrequires fast, positive, predictable cycletimes. By installing pressure switches inboth the pressure and return lines, the status
of the clamp can constantly be monitored.
AUTOMATION
Hydraulic power clamping provides vary-ing degrees of automation. During the plan-ning stage, the method of actuating the fix-ture must be considered. The simplest sys-tems use manually operated valves wherethe operator turns a handle to clamp andunclamp the fixture. In totally automatedsystems, the machine tool itself can beprogrammed to control the clamping andunclamping functions through the use ofelectric solenoid valves.
POSITIONING vs. CLAMPING
Hydraulic actuators are typically used ona fixture to perform one of two functions:positioning or clamping. Positioning actuators’primary purpose is to push the workpieceagainst the solid positioning stops built intothe fixture. Clamping actuators hold the work-piece in position during machining.
With a properly designed fixture, all theoperator needs to do is to place the work-piece into the fixture. The positioningactuators (typically cylinders) will move
and correctly orient the workpiece againstthe stops, and hold it there while theclamps are sequenced, thus securingthe part to resist machining forces. Whileclamps are always needed to hold thepart, positioning actuators are sometimesoptional depending on the workpiece,fixture design, and the level of operatorinvolvement.
3-2-1 LOCATING PRINCIPLE
One of the most basic concepts ofwork-holding is referred to as the 3-2-1locating principle. To repeatedly locate (orreference) a workpiece, it must be orientedand positioned in three planes: X, Y, and Z.
Thinking of a typical fixture where theworkpiece is loaded and gravity holds it inplace during clamping, start with the Z axis.Knowing that three points define a plane, itfollows that any rigid object in the fixture
is technically being supported at only threepoints regardless of shape. With the partsupported in this manner, the workpiece isprevented from moving in the Z direction,but is still free to rotate or slide in the Xand Y directions. To prevent rotation andposition the workpiece in the Y direction,two stops are used. With the part contactingthree stops in the Z axis, and two stops inthe Y axis, the only direction the part canmove is in the X direction. A single stopis all that is needed to prevent this motion.Always use three locators as the primary(Z) locators, two secondary (Y) locators,
and one tertiary (X) locator; thus the name3-2-1 principle. In rigid parts, these are theonly solid stops required to locate the part.Any more are a duplication and can affectrepeatability from one part to the next.
Design Information

8/4/2019 Clamping Calculations
http://slidepdf.com/reader/full/clamping-calculations 3/7
12
Design Information
RESISTING FORCES – STOPS vs. CLAMPS
When designing the solid stops for afixture, it is usually best to locate them sothat they directly resist the machining forces.
If the cutting tool forces are resisted bysolid stops, the workholding clamps needonly hold the part in position and can typi-cally be much smaller, saving money andvaluable fixture space.
TORQUE vs. TENSION
A user’s first introduction to hydraulicpower workholding is often the replacementof the nut on a typical strap clamp with acenter hole cylinder.
If the torque of the nut is known, theresulting tension on the bolt or stud canbe easily approximated.
For example, a 1 ⁄ 2-13 UNC nut istorqued to 300 inch pounds. The resultingapproximate tension would be:
The most accurate way to determinethat the hydraulic power clamping systemis exactly duplicating the mechanical sys-tem is to place the center hole cylinderover the stud or bolt and replace the nutloosely over the cylinder. Use the hydraulicsystem to partially extend the cylinder untilit contacts the nut. Use a torque wrench totorque the nut to its original value whilemonitoring the system pressure gauge.When the nut is properly torqued, thegauge will indicate the exact systempressure setting for this application.
OPERATING PRESSURES
Most Hytec workholding components arerated at 5000 psi. When designing, it is agood rule of thumb to choose componentsfor your fixture that will give you the forcesyou need at a pressure of about 3000 psi.
This gives you plenty of latitude to adjust thesystem pressure both up and down when finetuning the fixture on the machine tool.Operating at lower pressures, while some-times necessary, does not make the mostefficient use of these components. Higherpressures allow the use of smaller compo-nents, saving cost and fixture space.
DESIGN STROKE LENGTH
Clamps and cylinders should never bedesigned into a fixture at their rated fullstroke. Always use something less than fullstroke to make sure that all tolerances andvariations in the workpiece, workholding
device and fixture can be accepted, insuringthat the workpiece is properly clamped.
VOLUME CALCULATIONS
The total volume required to actuate acircuit should be checked to make surethat the power source chosen has enoughusable fluid capacity. The fluid volumerequired to fully actuate each clamp andcylinder is listed in the charts on eachproduct page. By totaling this value foreach component, you know the maximumfluid volume that could possibly be usedin this fixture. Even the smallest Hytecpumps have enough fluid volume for most
applications.Since the fixture is designed to use less
than the full stroke of the actuators, theactual fluid volume will be less. If it becomesnecessary to get an exact figure, it can beeasily calculated using the following formula:
Effective Area (Sq. In.) X Stroke (In.)
= Fluid Capacity (Cu. In.)
The effective area of the actuators (fromproduct chart) multiplied by the stroke used(not total stroke) will result in the fluid vol-ume. For example, if a cylinder has an effec-tive area of 2 square inches, and an actualstroke of 3 inches, its fluid volume will be 2 x3 or 6 cubic inches. (For easy reference, 231cubic inches = 1 gallon.)
SYSTEM CARE AND MAINTENANCE
The single most important factor in deter-mining the life of a properly designed systemis the effort taken to keep the fluid clean.
System Flushing
During assembly, make sure all fluid-carrying components are flushed with cleansolvent and blown dry. Hydraulic tubing is
particularly notorious for the amount ofcontaminant's found inside. If not removed,this debris will quickly damage seals andscore precision-fit metal parts. The conta-mination will also clog passages in pumpsand control valves.
After fixture assembly, the entire sys-tem should be flushed to remove any cont-amination created during assembly. Useonly hydraulic fluid for this procedure.Solvents may become trapped in the sys-tem, contaminating the fluid.
Once the fluid in the system is clean,be sure to keep it that way by changing thefluid on a regular basis and making surethat extreme care is taken whenever thesystem is disconnected or disassembled sothat new contaminant's are not introduced.
System Bleeding
Air trapped in the hydraulic system isthe most common cause of erratic opera-tion and slow return times. The most com-mon way to bleed a system is to pressurizethe circuit and carefully loosen a fitting justenough to let fluid escape. The trapped airwill usually be flushed out with the fluid.With conventionally mounted components,the fittings required for connection provideideal bleeding locations. Since manifoldmounting eliminates external fittings andlines, the fixture designer/builder no longergets bleeding points by default and mustnow consciously plan for system bleeding.
As workholding hydraulic systemsbecome more sophisticated, compact and
automated, proper bleeding becomesincreasingly important. Air trapped in thesystem is most often revealed by the slowretraction of single acting (spring return)components. To understand why, picturethe following example:• Single acting actuators - return springsdevelop 15 psi
• Flow required to clamp - 1 cubic inch• System pressure - 3000 psi
Return time for this application is dic-tated by the time it takes to force 1 cubicinch of fluid through all of the return linerestrictions at 15 psi.
Take the same example with 1 cubic inch
of air (at atmospheric pressure) trappedanywhere in the system:
When pressurized, this “bubble” com-presses and becomes 200 times smaller or.005 cubic inch. This means that .995 cubicinch of oil must be pumped into the systemjust to compress the bubble. Now when theclamps are released, 1.995 cubic inches offluid must leave the system - nearly doublethat of the same system without air.
300
.5 X .12 = 5000 lbs.Tension
Torque (In. Lbs.)
Nominal thd. size (In.) X .12= Tension (Lbs.)
From this:
To this:

8/4/2019 Clamping Calculations
http://slidepdf.com/reader/full/clamping-calculations 4/713
Design Information
CALCULATING MACHINING FORCES
To help you choose the right cylinders,clamps, and work supports, it is importantto know how much clamping or supportingforce is necessary.
There are numerous ways to calculate
the approximate forces that the cutting toolplaces on the workpiece. Please note thatthe results of these calculations are esti-mates and must never replace experience,common sense, and caution. In addition,these results indicate only the magnitudeof the force, not the direction. Dependingon the specific application, the direction ofthe force may vary significantly from thebeginning to the end of the cut.
MILLING, TURNING, AND BORING
A rough estimate of cutting tool force—if the horsepower required to make the cutis known—is the result of the following
equation:
HP X 24,750
Cutting Speed (SFPM)
For example, an operation is expected totake 5 horsepower with a cutting speed of150 surface feet per minute.
5 X 24,750
150
Where horsepower is not yet known, avalue called unit power comes into play.Unit power is the horsepower required to
remove one cubic inch of material in oneminute. (Refer to Table A.)
MILLING
Example: a 4-flute end mill is used to
machine aluminum. The cut is1
⁄ 2" deep andthe feed per tooth is .002". From the tablethe unit power value is 0.4. So the cuttingforce transferred to the workpiece is:
.5 X .002 X 4 X .4 X 125,950 = 202 lbs.Cutting Force
Note that this calculation assumes a fullwidth cut. Applications using less than thefull cut may reduce the calculated force bythe percentage of the full cut being taken.
TURNING AND BORING
A similar calculation applies to turningand boring. Note that the cutting force isusually perpendicular to the cutting toolbut since the tool or workpiece is rotating,the direction of the force relative to thework piece is constantly changing.
Example: Boring a hole in alloy steel heattreated to 37 Rc (unit power 1.7), with adepth of cut of .060", a feed rate of .003"inches per revolution gives a result of:
.060 X .003 X 1.7 X 396,000 = 121 lbs. Cutting Force
DRILLING
The forces involved in drilling can beseparated into two distinctly differentcategories: thrust and torque. With thenumber of drill styles available, the thrust
varies tremendously. Torque is somewhatless variable and can be estimated as shown:
Feed (IPR) X (Drill Dia.)2 X Unit Power X 49,500 =
Drilling Torque (In. Lbs.)
For example, drilling a 3 ⁄ 4" diameter holein magnesium (unit power .2) with a feedrate of .010" per revolution gives a result of:
.010 X .752 X .2 X 49,500 = 56 in. lbs.
FRICTION COEFFICIENT
Now that an estimate of the amount ofcutter force being transferred to the work-piece is available, we must determine howmuch clamping force is necessary to resistthe cutter force. This depends on theamount of friction between the workpieceand the fixture, commonly referred to asthe friction coefficient.
Typically, if an object is lying on a surface,the amount of force required to slide itsideways will be considerably less than theweight of the object. It follows then thatwhen clamping a workpiece to resistmachining forces, the clamping force willneed to be much higher than the machiningforce. The following chart shows approxi-mate friction coefficients:
The estimated clamping force is dividedby the appropriate friction coefficient andthen multiplied by a suitable safety factorto get an estimated total clamping force
required.
Cutting Force (Lbs.) =
= 825 lbs. Cutting Force
Depth of Cut (In.)Feed per Tooth (In.)
Number of TeethUnit Power
___X___X___X___ X 125,950 = _____ lbs.Cutting Force
Depth of Cut (In.)Feed per Revolution (In.)
Unit Power
____X____X____X 396,000 = _____ lbs.Cutting Force
CAST IRONSGray, Ductile& Malleable
STAINLESSSTEELS
TITANIUM
NICKELALLOYS
ALUMINUMALLOYS
MAGNESIUMALLOYS
COPPERALLOYS
STEELSPlainCarbonAlloy Steels
85-200 1.4 1.3 1.435-40Rc 1.7 1.7 1.940-50Rc 1.9 2.1 2.250-55Rc 2.5 2.6 2.655-58Rc 4.2 3.2 3.2
110-190 0.9 1.2 0.8190-320 1.7 2.0 1.4
135-275 1.6 1.4 1.730-45Rc 1.7 1.5 1.9
250-375 1.5 1.4 1.4
80-360 2.5 2.2 2.4
30-150 0.3 0.2 0.4500kg
40-90 0.2 0.2 0.2500kg
10-80Rb 0.8 0.6 0.880-100Rb 1.2 1.0 1.2
Unit Power hp/in3 /min
HSSDrills
MillingTurning Drilling
HSS &CarbideTools
HSS &CarbideTools
Hardness
Bhn
Material
TABLE A
Static Friction Coefficientsfor Steel on Various Materials
Machining Force (Lbs.)
Friction CoefficientX Safety Factor = Total
Clamping
Force (Lbs.)
Example: A steel workpiece on steel restbuttons is being machined using coolant. Theestimated machining force is 300 lbs. Fromthe table the friction coefficient for steel onsteel (lubricated) is .16. After choosing anappropriate safety factor (usually about 2),the estimated total clamping force would be
300
.16
This total clamping force may now bedivided by the number of clamps holding theworkpiece, which equals the clamping forceneeded for each clamp.
X 2 = 3750 lbs. Total Clamping Force
Force
CuttingTool
Friction Coefficient
Material Clean Lubricated
Brass 0.35 0.19
Bronze – 0.16Bronze, Aluminum 0.45 –
Bronze, Phosphor 0.35 –
Bronze, Sintered – 0.13
Carbon, Hard 0.14 0.11-0.14
Copper-Lead Alloy 0.22 –
Graphite 0.10 0.10
Iron, Cast 0.40 0.21
Steel 0.80 0.16
Tungsten Carbide 0.4-0.6 0.1-0.2

8/4/2019 Clamping Calculations
http://slidepdf.com/reader/full/clamping-calculations 5/714
CYLINDER SYMBOLS
Cylinder, Single-Acting
Cylinder, Double-Acting
Cylinder, Single or Double-Acting
Pull Cylinder, Single-Acting, Spring Return
Pull Cylinder, Single-Acting
CLAMP SYMBOLS
Swing/Pull Clamp, Single-Acting
w/Flow Restrictor Valve
Swing/Pull Clamp, Double-Acting
Swing/Pull Clamp, Single-Acting
Swing Clamp, Single or Double-Acting
Retract Clamp, Single or Double-Acting
WORK SUPPORT SYMBOLS
Work Support, Fluid Advance
WORK SUPPORT SYMBOLS
Work Support, Spring Advance
Work Support, Air Advance
POWER SOURCE SYMBOLS
Electric/Hydraulic Pump
Air/Hydraulic Pump, Reciprocating
Air/Hydraulic Pump, Reciprocating 2-stage
Air/Hydraulic Pump, Reciprocating
w/Air/Hydraulic Booster
Intensifier
CONTROL VALVE SYMBOLS
Directional Control Valve, Manual 4-Way,
2-Position w/Inlet Check Valve
Directional Control Valve, Manual 4-Way,
2-Position w/Inlet and Outlet Check Valves
Directional Control Valve, Manual 4-Way,
3-Position Detented
Directional Control Valve, Electric 4-Way,
2-Position w/Inlet and Outlet Check Valves
w/Manual Override
Directional Control Valve, Manual 4-Way,
2-Position
Design Information
M
A B
P T

8/4/2019 Clamping Calculations
http://slidepdf.com/reader/full/clamping-calculations 6/7
CONTROL VALVE SYMBOLS
Pressure Sequence Valve, Adjustable w/Reverse
Free-Flow Check Valve
Pressure Reducing Valve, Adjustable w/Reverse
Free-Flow Check Valve w/Over-Pressure Relief Valve
Check Valve, Pilot Operated w/Filters
Flow Restrictor, Adjustable w/Reverse
Free-Flow Check Valve
Flow Restrictor, Adjustable
PALLET COUPLING SYMBOLS
Manual Pallet Valve w/Gauge and Male Coupler
Base Unit, Automatic Pallet Coupling System
Pallet Unit
Manual Pallet Valve With Filters, Gauge andCoupler
ACCESSORY SYMBOLS
Hydraulic Coupler, Half-Male or Female
Hydraulic Coupler Set, Coupled
ACCESSORY SYMBOLS
Check Valve
Flow Restrictor, Fitted w/Reverse Free-FlowCheck Valve w/Filtered Orifice
Hydraulic Coupler Set, Uncoupled
Accumulator, Gas Charged
Filter
Pressure Gauge
Rotating Union, Dual Circuit
Rotating Union, Single Circuit
Pressure Switch, Adjustable
Check Valve Sub-Plate
Air Bleed Valve
Ball Valve
15
Design Information
TP
BA

8/4/2019 Clamping Calculations
http://slidepdf.com/reader/full/clamping-calculations 7/7
FREE Workholding ConsultantAvailable to YOU!
Hytec offers you FREE workholding consultation service.Our experienced staff of manufacturing
engineers and fixture designers will help you with your Hytec workholding application.
Hytec CAD GraphicsLibrary Release 6.0
Designing fixtureshas never been easier.This newly updatedCAD Graphics Libraryis suitable for use onany compatible CADsystem without creating or recreating graph-
ic geometry. It is actually a computerizedcatalog of our standard clamping cylinders,clamps, work supports, valves, and palletcoupling devices.
Our designers have made sure you get a“clean” translation. They contain no text ele-ments and all graphics are displayed in theirsimplest form on a single layer or level.There is even a “SCALE ME” file so you cancheck the scale in both English and metricafter translation (where applicable). Forsimplicity, all file names are identical to partnumbers in the Hytec catalog.
To receive your CAD Graphics Library
CALL HYTEC’s Customer Service :Tel.: 1-888-GO-HYTEC (1-888-464-9832)
or 507-455-7100 Fax: 1-800-288-7031 or 507-455-7122
or you can E-mail your request to:[email protected].
Graphics Library Features:• Available in 2-D or 3-D wireframe.
• Release 6.0 contains all the latest Hytecfixture mounted components introducedwith Hytec’s new H-98 Catalog.
• Release 6.0 files are compressed so youare working with a limited number of
diskettes.• Release 6.0 gives you the option to
access individual files without the needto download all files into your system.
• Now available in Autocad for directusage on that system without the needfor translation.
HYTEC Application Videos Available:IVT289 - Quick Die Change
IVT293 - Hytec Applications
IVT390 - Auto Pallet Coupling Systems
IVT497 - Manual Pallet Valves
ORDER FROM CUSTOMER SERVICE
16
Design Information
NOTE: "100002-" Library Nos. denotes 2-D Version."100003-" Library Nos. denotes 3-D Wireframe Version.
CAD Graphics
Library No.
100002-ATO3HD
2-D
3 1 Ú 2
100002-DXF3HD 3 1 Ú 2
100002-IGS3HD 3 1 Ú 2
100002-MIC3HD 3 1 Ú 2
100003-ATO3HD
3-D
3 1 Ú 2
100003-DXF3HD 3 1 Ú 2
100003-IGS3HD 3 1 Ú 2
100003-MIC3HD 3 1 Ú 2
1.4 M High
1.4 M High
1.4 M High
1.4 M High
1.4 M High
1.4 M High
1.4 M High
1.4 M High
Size (Inches) Density (Bytes)
DiskFormat
AutoCAD
DXF
IGES
MicroStation PC
AutoCAD
DXF
IGES
MicroStation PC
CAD GRAPHICS ORDERING INFORMATION
Power-Techª SurfaceTreatment
Power-Tech Features• 56 Rc minimum surface hardness
• Passes ASTM B117-85 100 hour saltspray corrosion resistance tests
Benefits• High corrosion resistance
• High wear resistance• Anti-galling
• Retains lubricants
• Prevents bronze and other materials fromsticking to surface
• Increases fatigue strength
• Increases impact strength
• Increases surface yield and tensile strength
• Improved abrasion and scratch resistance
• No appreciable dimension change
A proprietary HYTEC process for treating steel surfaces