
Childcare Sage Timeclock Manual · Childcare Sage TimeClock Manual by B & I Computer Consultants,...
25
Childcare Sage Timeclock Manual (Childcare and Preschool Management System) Version 17.3 Childcare Sage TimeClock Manual by B & I Computer Consultants, Inc. (www.childcaresage.com ) 2017 1
Transcript of Childcare Sage Timeclock Manual · Childcare Sage TimeClock Manual by B & I Computer Consultants,...

Childcare Sage Timeclock Manual (Childcare and Preschool Management System)
Version 17.3
Childcare Sage TimeClock Manual by B & I Computer Consultants, Inc. (www.childcaresage.com) 2017
1

Childcare Sage TimeClock Manual by B & I Computer Consultants, Inc. (www.childcaresage.com) 2017
2
Introduction: The Childcare Sage system includes a separate TimeClock program that lets children, parents, pickup persons, and staff sign in and out by using id numbers or by using their fingerprints (fingerprint functionality is optional.) The Timeclock program is usually setup on a separate computer. The main childcare sage and timeclock programs communicate over your network, or through the Timeclock Link program on a USB flash drive. (The timeclock can be installed on the same computer as the main childcare sage, but we usually recommend a separate computer.) For security purposes, child, parent, and pickup person photos can be displayed when a child is signed in and/or out, and the system can record who dropped off and who picked up the child. The timeclock program also incorporates a notes area where up to 18 general notes can be displayed, and a two way private notes system in which the center can leave notes for specific children and staff, and the parents, pickup persons, and staff can leave notes for the center. The timeclock program also includes numerous timesheet functions including the ability to add, edit, or delete timesheets, and view and print lists of contacts and their timelogs. There are built in batch functions that can sign selected groups of children/staff in and out (bus run functionality), midnight cycle all children/staff currently signed in (sign children/staff out at 11:59pm and sign them back in at 12:00am), and leave messages for groups of children/staff. Meal counting is integrated into the timeclock, and the Childcare Sage can fill in child meal counts based on the hours that the child was at the center for each day and the times when meals are served at the center. (You can even setup different meal times for different classes.) Users can sign in and out by using a keyboard, a mouse, or a touch screen. Instead of a keyboard and mouse, you can also setup a USB keypad (which is the number pad of the keyboard and sells for about $15) for the timeclock computer. This makes it simpler to sign in/out, it takes up less space in front of the monitor, and users are limited to only entering ID numbers. The only drawback to the USB keypad is that users cannot leave messages for the center. To speedup and simplify signing in and out, we also offer our BioPlugin Fingerprint package. The Bioplugin package has several advantages over using an id number including:
1) children can sign themselves in and out with their finger, 2) no one has to remember id numbers, 3) fingerprint scanning takes about 1 second, 4) staff cannot sign each other in and out saving the center money from the buddy signing in and out problem, and 5) security is improved because you can not copy a fingerprint.
If space for the timeclock computer is an issue, you can use a touchscreen monitor, or a Windows tablet with our timeclock. Please call us with any questions about setting up the timeclock. The filename for the timeclock program is timesheets.mdb, and for the timeclock data is timesheets_be.mdb .
Table of Contents
Introduction 1 Setting Up the Timeclock 3 Installation onto a Separate Networked Computer 4 Installation onto a Separate Non-Networked Computer 5 Using the Timeclock Loader 6 Using the Timeclock Program 8 Keypad Screen 8 Edit Timesheets Screen 10 Batch Functions Screen 11 Setup Screen 13 Find Contacts Screen 15 Notes/Messages/Messages to Staff Screens 15 Windows 8 Tablet Mode 16 Appendix A: TimeClock Networking Guide 17 Appendix B: Using the TimeClock Link 24

Setting up the Timeclock The Timeclock program is installed separately from the main Childcare Sage because most centers set up a separate timeclock computer. (Some small home-based centers use 1 computer for the main program and the timeclock.) The timeclock works by having the user enter a unique id number to clock children and staff in and out. All of the id numbers must be numeric and have from 1-5 digits. Before using the timeclock program, you should first enter all of the children, staff, parent, and pickup persons that will use the timeclock into the Childcare Sage, and assign all of them an ID number (figure 1.) To keep things simple, we suggest the following for selecting id numbers: a) child master id numbers- use the last 4 digits of the child’s home phone or parent’s cell phone plus a digit for each sibling
(if there are 2 siblings and the last 4 of the sibling’s home phone is 1234, make the master id numbers 12341 for the sibling 1, and 12342 for sibling 2.)
b) staff master id numbers- use the last 4 digits of the staff’s cell phone number c) parent and pickup person id numbers- use the last 4 digits of that person’s cell phone number For staff with children that attend the center, you should setup 2 id numbers, one for the child and one for the staff member. The reason for this is so that the staff member can sign in/out for breaks, appointments, etc, without having to also sign their child in/out. Figure 1
Once you have entered the children and staff and assigned them ID numbers, you can run the Timeclock Loader from the Main Menu of the childcare sage or the TimeClock Link program to load children and staff into the timeclock program. In this manual, the computer that has the Childcare Sage installed on it is called the main computer, and the computer that has the Timeclock program installed on it is called the timeclock computer. If you will be using 1 computer for both the Childcare Sage and the Timeclock program, please skip to the section titled Using the Timeclock Loader Program. If the main and timeclock computers will be networked together, please follow the instructions in the Installation onto a separate networked computer section. If the computers will not be networked, please follow the instructions in the Installation onto a separate non-networked computer section. If possible, we always recommend that you use a networked timeclock computer. By networking the computers together, you can open and edit the timeclock program from the main computer, and you are saving yourself multiple steps each time that you want to load the contacts or transfer the timesheet records back into the main Childcare Sage. At some centers the main and timeclock computers are located far apart, are in different buildings, or for whatever reason cannot be networked together. These centers use our TimeClock Link program on a USB flash drive to load contacts into the timeclock and transfer timesheets into the main childcare sage. Timesheets are usually transferred weekly.
Childcare Sage TimeClock Manual by B & I Computer Consultants, Inc. (www.childcaresage.com) 2017
3
Installation onto a Separate Networked Computer ChildCare Sage Support includes helping you setup the ChildCare Sage Timeclock on your existing network as long as you have a high-speed internet connection at each computer that you want to use the ChildCare Sage Timeclock. Please keep in mind that we can not help you set up a network at your center, and that all of the computers that you want to run the ChildCare Sage Timeclock on must be able to see each other. To check if the computers can see each other for: Windows XP: click the Start button in Windows (bottom left), then My Network Places (left side), then View Workgroup Computers (left side) Windows Vista/7: click the Start button in Windows (bottom left), then Computer (right side), then Network (left side) Windows 8/8.1/10: click the brown folder at the bottom left of the desktop, then Network (left side) If prompted, turn on Network Discovery. ***WARNING**** Wireless networks greatly increase the chance of database corruption and subsequent data loss. We always recommend a wired network. Wired networks are faster, much more reliable, and cheaper than wireless networks. If you have to use a wireless network, try to limit the time that it transfers data (do not leave the timeclock program open on the main computer for long periods of time, etc.) Network speed is not a factor. The steps below are an overview of the process, and assume knowledge of windows networking. For step by step instructions with screenshots, go to Appendix A at the end of this manual. Initial Steps: 1) Make sure that Microsoft Access 2002/XP or newer is installed on the timeclock computer. 2) Run Install ChildCare Sage Timeclock on the timeclock computer (downloaded or run from the Install ChildCare Sage Program choice on the ChildCare Sage CD-Rom menu.) 3) Run Setup Networked Timeclock Computer on the main childcare sage computer (downloaded or run from the Install ChildCare Sage Program choice on the ChildCare Sage CD-Rom menu.) 4) Make sure that both computers are networked (connected wired/wirelessly to a router) To install the timeclock program onto a network, please follow these step by step directions: 1) put both computers onto the same workgroup name On the Timeclock Computer 2) share the c:\ccsagetimeclock\ folder (ccsagetimeclock folder on the c drive of the computer) with the network 3) if the timeclock computer has Windows 7/8/10, change the sharing permissions to:
a. let all network users (everyone) change files for the folder in step 2, and if necessary turn off password access protection
On the main ChildCare Sage Computer 4) map a drive (select drive z) that points to the ccsagetimeclock folder on the timeclock computer 5) set the timeclock dir in the ChildCare Sage to point to the mapped drive
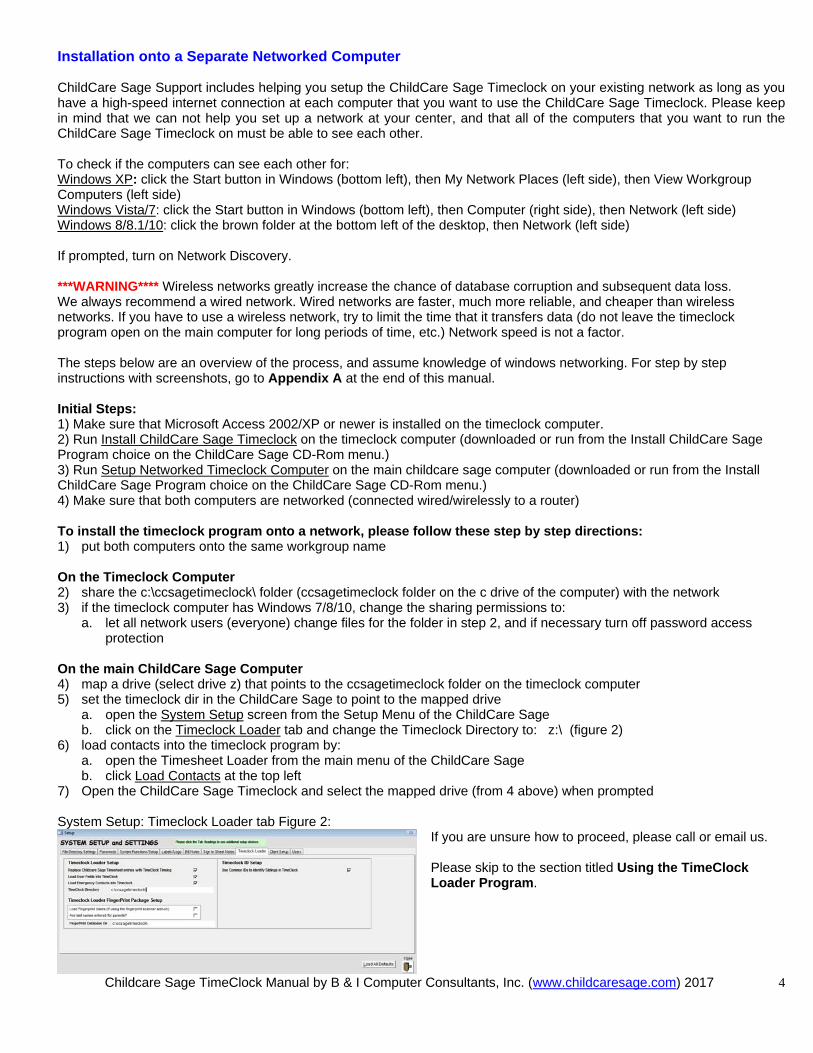
a. open the System Setup screen from the Setup Menu of the ChildCare Sage b. click on the Timeclock Loader tab and change the Timeclock Directory to: z:\ (figure 2)
6) load contacts into the timeclock program by: a. open the Timesheet Loader from the main menu of the ChildCare Sage b. click Load Contacts at the top left
7) Open the ChildCare Sage Timeclock and select the mapped drive (from 4 above) when prompted
Childcare Sage TimeClock Manual by B & I Computer Consultants, Inc. (www.childcaresage.com) 2017
4
System Setup: Timeclock Loader tab Figure 2: If you are unsure how to proceed, please call or email us.
Please skip to the section titled Using the TimeClock Loader Program.

Installation onto a separate Non-Networked Computer If the main and timeclock computers are not networked together, you should use our TimeClock Link program that comes with the Childcare Sage (figure 3). After you have copied the TimeClock Link program to a USB flash drive, please go to Appendix B at the end of this manual for step by step instructions in using the TimeClock Link. Initial Steps: 1) Make sure that Microsoft Access 2002/XP or newer is installed on the timeclock computer. 2) Run Install Childcare Sage Timeclock on the timeclock computer (downloaded or run from the Childcare Sage CD-Rom.) You are now ready to copy the TimeClock Link file to your USB flash drive (figure 4): On the TimeClock computer.
a. plug in a USB drive (note the drive letter at the top of the pop-up menu; F:/G:/etc, then close the menu) b. open the hard drive on the computer
i) for windows 7, click the Start button in Windows, then click Computer from the right side of the start menufor ii) windows 8/10, right click the tan or beige folder next to the windows start button, then click This PC from the right side of the start menu
c. double-click on C: or Local Disk C: d. if you don’t see any icons for files and folders click on Show Files on the left side of the screen e. double click on the ccsagetimeclock folder f. right click on the timeclocklink file g. click Send To, then click your USB flash drive
The TimeClock Loader in the main menu of ChildCare Sage is not used with the TimeClock Link, so please skip to the section titled Using the Timeclock Program. System Setup: Timeclock Loader tab Figure 3:
USB Flash Drive Figure 4:
Childcare Sage TimeClock Manual by B & I Computer Consultants, Inc. (www.childcaresage.com) 2017
5
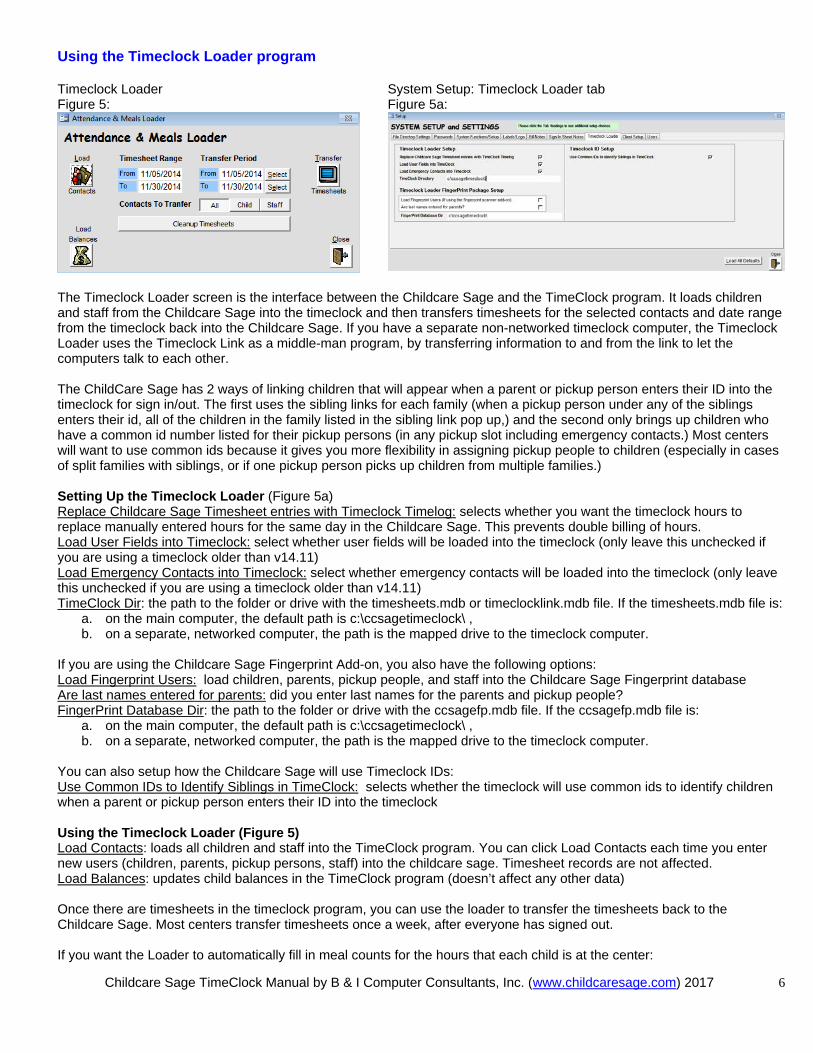
Using the Timeclock Loader program Timeclock Loader Figure 5:
System Setup: Timeclock Loader tab Figure 5a:
The Timeclock Loader screen is the interface between the Childcare Sage and the TimeClock program. It loads children and staff from the Childcare Sage into the timeclock and then transfers timesheets for the selected contacts and date range from the timeclock back into the Childcare Sage. If you have a separate non-networked timeclock computer, the Timeclock Loader uses the Timeclock Link as a middle-man program, by transferring information to and from the link to let the computers talk to each other. The ChildCare Sage has 2 ways of linking children that will appear when a parent or pickup person enters their ID into the timeclock for sign in/out. The first uses the sibling links for each family (when a pickup person under any of the siblings enters their id, all of the children in the family listed in the sibling link pop up,) and the second only brings up children who have a common id number listed for their pickup persons (in any pickup slot including emergency contacts.) Most centers will want to use common ids because it gives you more flexibility in assigning pickup people to children (especially in cases of split families with siblings, or if one pickup person picks up children from multiple families.) Setting Up the Timeclock Loader (Figure 5a) Replace Childcare Sage Timesheet entries with Timeclock Timelog: selects whether you want the timeclock hours to replace manually entered hours for the same day in the Childcare Sage. This prevents double billing of hours. Load User Fields into Timeclock: select whether user fields will be loaded into the timeclock (only leave this unchecked if you are using a timeclock older than v14.11) Load Emergency Contacts into Timeclock: select whether emergency contacts will be loaded into the timeclock (only leave this unchecked if you are using a timeclock older than v14.11) TimeClock Dir: the path to the folder or drive with the timesheets.mdb or timeclocklink.mdb file. If the timesheets.mdb file is:
a. on the main computer, the default path is c:\ccsagetimeclock\ , b. on a separate, networked computer, the path is the mapped drive to the timeclock computer.
If you are using the Childcare Sage Fingerprint Add-on, you also have the following options: Load Fingerprint Users: load children, parents, pickup people, and staff into the Childcare Sage Fingerprint database Are last names entered for parents: did you enter last names for the parents and pickup people? FingerPrint Database Dir: the path to the folder or drive with the ccsagefp.mdb file. If the ccsagefp.mdb file is:
a. on the main computer, the default path is c:\ccsagetimeclock\ , b. on a separate, networked computer, the path is the mapped drive to the timeclock computer.
You can also setup how the Childcare Sage will use Timeclock IDs: Use Common IDs to Identify Siblings in TimeClock: selects whether the timeclock will use common ids to identify children when a parent or pickup person enters their ID into the timeclock Using the Timeclock Loader (Figure 5) Load Contacts: loads all children and staff into the TimeClock program. You can click Load Contacts each time you enter new users (children, parents, pickup persons, staff) into the childcare sage. Timesheet records are not affected. Load Balances: updates child balances in the TimeClock program (doesn’t affect any other data) Once there are timesheets in the timeclock program, you can use the loader to transfer the timesheets back to the Childcare Sage. Most centers transfer timesheets once a week, after everyone has signed out. If you want the Loader to automatically fill in meal counts for the hours that each child is at the center:
Childcare Sage TimeClock Manual by B & I Computer Consultants, Inc. (www.childcaresage.com) 2017
6

Childcare Sage TimeClock Manual by B & I Computer Consultants, Inc. (www.childcaresage.com) 2017
7
1) make sure that meal times are filled in on the Categories/Foods tab of the Choices Screen (opened from Screen Choices in the Setup Menu)
2) make sure that the Track Meals checkbox is checked in the Center tab on the Contact Information screen for all of the children you want to track meals for
Timesheet Range: shows the timesheet date range in the timesheet program for the selected Contacts To Transfer. Transfer Period: selects which dates will be transferred into the Childcare Sage. Transfer Timesheets: transfer the timesheets for the Contacts To Transfer for the transfer period selected. Keep in mind that the transfer process will not work until all timesheet entries for the contacts and date range that you want to transfer have a start and end time.

Using the Timeclock program Timeclock screen: Figure 6
This is the keypad screen in the timeclock program. This screen is used to sign children and staff in and out. Children can be signed in and out by their parents and up to 8 additional pickup persons per child (including 4 pickup persons and 4 emergency contacts,) each with their own unique 3-5 digit ID number. The system stores the ID numbers entered which are then used to track who dropped off and who picked up the child. The id codes can also be entered to view photos, leave messages, check account balances, and view timelogs.
Codes can be entered by clicking the number buttons with a mouse then clicking Enter, using a touchscreen monitor, or by entering the number on the keyboard or keypad and pressing enter. Keep in mind that users should be consistent in entering the id numbers and commands. If you use the keypad to enter the id number, you should also use the keypad to clear the id, show child photos, or leave a message. If you use the mouse to enter the id, you should also use the mouse to click the desired command. In the ChildCare Sage, you setup the child, staff, and parent/pickup person id numbers. To keep things simple, we suggest the following: a) child master id numbers- use the last 4 digits of the child’s home phone plus a digit for each sibling
(if there are 2 siblings and the last 4 of the sibling’s home phone is 1234, make the master id numbers 12341 for the sibling 1, and 12342 for sibling 2.)
b) staff master id numbers- use the last 4 digits of the staff’s cell phone number c) parent and pickup person id numbers- use the last 4 digits of that person’s cell phone number For staff with children that attend the center, you should setup 2 id numbers, one for the child and one for the staff member. The reason for this is so that the staff member can sign in/out for breaks, appointments, etc, without having to also sign their child in/out. All of the timeclock functions are opened by clicking the ChildCare Sage logo at the bottom left and entering a password. You can change these passwords on the TimeClock Setup screen. Timeclock Passwords:
Default Passwords (Passwords can be changed on the Setup Screen)
Screen Opened Screen Functions
open edit child/staff timesheets edit timesheets, open setup/batch functions
child edit child timesheets only edit timesheets
batch open batch functions batch sign in/out, midnight cycle
notes edit daily notes
messages edit contact messages leave messages to specific children/staff
staff view messages to staff
ssignout batch signout children/staff
signout batch signout children only
List fire drill list
There is also a master Password. If you can't remember your edit timesheet password, please email us.
Childcare Sage TimeClock Manual by B & I Computer Consultants, Inc. (www.childcaresage.com) 2017
8

Sibling Sign In/Out screen: Figure 7
If the id entered is either for a child that has siblings that attend the center, or is a common id for multiple children, the Family Sign In/Out screen (figure 7) will appear. You can select and unselect any of the siblings by pressing or clicking on their slot number. Once you have finished making the selections, press or click Enter. If you are NOT using Common ID’s in the timeclock, and you check the No Siblings with Master ID checkbox on the setup screen, the Sibling Sign In/Out screen will only appear for siblings if a parent or pickup person ID number is entered. It will not appear if a child’s master id number is entered.
After a child is signed in/out, one of the confirmation messages in figure 8 will appear. You can select whether photos are shown at sign-in and/or sign-out on the Setup screen. Figure 8a: Child Signed In (Show Photos unchecked) Figure 8b: Child Signed Out (Show Photos unchecked)
Figure 8c: Child Signed In Figure 8d: Child Signed Out
You can also view child and pickup person photos (figure 8c,d) for any child by entering that child’s id and then clicking Show Child Photos. A pickup person or staff member can leave a message for the center staff by entering the child or staff id and then clicking Leave Message (figure 9.)
Figure 9
If a message is left for the staff, an “M” will appear at the bottom right of the keypad screen.
Childcare Sage TimeClock Manual by B & I Computer Consultants, Inc. (www.childcaresage.com) 2017
9

Edit Timesheets Screen: Figure 10
To view the timesheet entries for a child or staff member, click a contact on the left side of the screen. You can edit any of the timesheet entries by typing directly into the Date, Start, End, or drop off/pick up boxes in the middle of the screen. To add new entries, click Add or enter a new date. When editing timesheet entries, you can see the schedule for the current child/staff member on the right side of the screen. The total of the timesheet hours for the current contact is shown in the Hours box above the Cleanup TS button. Add: add a new timesheet entry for the current child/staff Delete: delete the current timesheet entry Show All/Sign-In Without Sign-Out/Scheduled Without Sign-In: you can choose whether you want to see: 1) Show All- a list of all of the children/staff 2) Sign-In Without Sign-Out- just those who signed-in but never signed-out. The list will default to display all children/staff who signed in but didn’t sign out regardless of date. You can enter a specific date to check for sign-in without sign-out by clicking one of the calendar days in the top right of the screen. To go back to a non-specific date, clear the date in the yellow date box at the top of the calendar. 3) Scheduled Without Sign-In- those scheduled to attend who never signed in. The list will default to display all children/staff who are scheduled to attend at the current date and time, but didn’t sign in. You can enter a specific date and time to check for scheduled attendance without a sign-in by clicking one of the calendar days in the top right of the screen and entering a time in the box below the calendar. To check for the current date and time, clear the date in the yellow date box at the top of the calendar and the time box below the calendar. The contacts that appear can be further filtered with the selectors at the bottom of the contact list (bottom left of the screen). You can view contacts for a specific class by selecting the class from the drop down class list, or you can view only children or staff by clicking the desired button (figures 10a, 10b.) Figure 10a Figure 10b
Print List: Prints out the list selected. Keep in mind that a timesheet entry must have a start and end time before the entry can be transferred to the ChildCare Sage.
Childcare Sage TimeClock Manual by B & I Computer Consultants, Inc. (www.childcaresage.com) 2017
10

Cleanup TS: removes blank timesheet entries from the timesheet records. You should always click this button before you transfer the timesheets to the Childcare Sage. You can enter a daily comment for each day that will appear on the child’s or staff bill. To enter a daily comment, click on the date in a timesheet entry row (row that has the date, start time and end time.) The daily comment box will then appear for that date at the bottom of the timesheet entry box. If you would like to enter a daily comment for a particular day without entering the times for that day, do the following: 1) Enter the date for the comment in the date column 2) Click in the start time entry box, then click in the date box from 1) 3) Enter the comment in the daily comment box at the bottom of the timesheet section 4) Before you transfer the timesheets, click Cleanup Timesheet Search: opens the Find Contact screen List/Batch: opens the Contact List/Batch Functions screen Batch Edit: opens the Batch Timesheet Editor screen Setup: opens the Setup screen Batch TimeSheet Editor Figure 11:
This screen lets you edit all of the timesheets in the timeclock at one time. Timesheets are organized by person, by date (in reverse chronological order.) To change timesheet rows, simply type into the columns. To add new timesheets, click Add. Figure 11a: Figure 11b:
Simly fill in the timesheet and click Save. Time selectors (figure 11b) lets you pick a time of a timeline versus typing it in.
Delete: deletes the current timesheet row Class: only shows children in the selected class
Childcare Sage TimeClock Manual by B & I Computer Consultants, Inc. (www.childcaresage.com) 2017
11

Batch Child TimeSheet Editor Figure 12:
This is the same as the Edit Timesheets screen, except that it only lets you edit child timesheets and doesn’t give access to the setup or batch functions screens. Batch SignOut Editor Figure 13:
The Batch Signout Editor lets you view incomplete timesheets (sign in without sign out,) and sign children/staff out in batch. All Sign-In Without Sign-Out: shows all incomplete timesheets in the system Past Sign-In Without Sign-Out: only shows incomplete timesheets for prior days If you looking for incomplete timesheets when the center is closed, click All Sign-In…., when the center is open, click Past Sign-In…. (If you are editing incomplete timesheets, you don’t want to see today’s timesheets while the center is open.) Child Batch SignOut Editor Figure 14:
This is the same as the Batch SignOut Editor screen, except that it only lets you edit child timesheets.
Childcare Sage TimeClock Manual by B & I Computer Consultants, Inc. (www.childcaresage.com) 2017
12

Setup Screen Figure 15
The setup screen lets you customize the timeclock program. The Door Strike functions on the right side of the screen let the timeclock control an electric door. Please see the Childcare Sage Doorstrike manual for directions. The FingerPrint functions at the bottom of the screen set up the fingerprint package that works with the timeclock. Please see the Childcare Sage BioPlugin Fingerprint manual for directions.
Business Name: Name of center that appear at the top left of the keypad screen Picture Directory: If you are using a separate timeclock computer and want to show child and pickup person photos; create a folder on the timeclock computer to store the child and pickup person photos and copy all child and pickup person photos from the main computer to the photo directory on the timeclock computer. Enter the path to that folder here. CCSage Directory: points to the Childcare Sage for account balance inquiries from the timeclock. If you want timeclock users to lookup account balances, you should put a copy of the childcare sage onto the timeclock computer, point the timeclock to that copy, and refresh that copy frequently. Passwords: You can setup different passwords to open the edit timesheets, edit notes, and edit messages screens from the keypad screen. TimeClock Options: Hide ID Number: Selects whether to show the id number as it is entered, or show * instead of the numbers Show Balance: Selects whether to show the Balance button to let parents check their account balance Add Balance to Confirmation: Selects whether to add the account balance to the sign in/out confirmation screen Allow Sign-In w/o Sign-Out: Selects whether users should be able to sign in if they forgot to sign out on a previous day Show Photos on Sign-In: Selects if photos of the child, parents, and pickup persons are displayed on child sign-in Show Photos on Sign-Out: Selects if photos of the child, parents, and pickup persons are displayed on child sign-out Reset Keypad Screen: Selects if the cursor should always go back to the id entry box after something is done on the main timeclock screen (check this if the cursor doesn’t always go back to the id entry box) No Siblings with Master ID: selects whether siblings appear if a child’s master ID number is entered (siblings will appear if a parent or pickup person’s id is entered) Skip Confirmation Check: selects whether a user must click enter on the Sign In / Sign Out Recorded confirmation screen
Confirmation Time: selects how long the confirmation message is displayed if the confirmation check is skipped Error Display Time: selects how long the error message is displayed Beep on Sign In/Out: Batch Sign Out Times: sets the default sign out times for the Child Sign Out screen Use Common ID for Siblings: selects whether the timeclock will use common ids to identify siblings/children when a parent or pickup person enters their ID into the timeclock List Time Buffer: Controls the buffer for the Scheduled without sign-in button on the edit timesheets screen. For example, if you want to see who was scheduled to come in at 9:00am but never signed-in, you can set the buffer to 5 minutes so that the system looks for sign-in’s between 8:55am and 9:05am. Show Custom Logo: Select whether the B & I logo at the bottom left is replaced with the center’s logo pointed to in Custom Logo Path. Utility Functions: Childcare Sage Website User ID: your user id to access your account on the childcare sage website Backup Data to ChildCare Sage server: selects whether you want your data to backup to our ChildCare Sage server Backup Data to Your server: selects whether you want your data to backup to your server
FTP: enter your FTP account information Backup Frequency: selects how often you want to backup to your server
Childcare Sage TimeClock Manual by B & I Computer Consultants, Inc. (www.childcaresage.com) 2017
13

Contact List / Batch Functions Screen Figure 16
The batch functions screen can be opened by entering the batch password on the keypad screen or from the Edit Timesheet screen. If the batch functions screen is opened by password from the keypad screen, clicking Close on the Find Contacts or Batch Functions screens will open the keypad screen. However, if the batch functions screen is opened from the edit timesheet screen, clicking Close on the Find Contacts or Batch Functions screen will open the Edit Timesheet screen. This function was added to the timeclock so that any staff member can batch sign in/out groups of children without having access to the main timesheet edit screen.
The Contact List/Batch Functions screen opens by either clicking the List button on the edit timesheets screen, or if the criteria entered in the Find Contacts screen finds contacts. The Timeclock program has a list function that allows you to individually select contacts to use in batch functions. Batch Sign In/Out Functions: This function lets you sign in/out groups of children and/or staff in batch. All of the contacts selected on the left side of this screen (selected by checking the checkbox to the left of the desired contact, or clicking Select All at the bottom of the contact list,) can be signed in/out at the date and time specified. Because these contacts are signed in/out in batch, no drop off or pick up id’s are recorded. Now: Fill the date and time boxes with the current date and time Sign In: Sign In all of the selected contacts at the date and time shown. Sign Out: Sign Out all of the selected contacts at the date and time shown. Sign Out All Signed In: Sign Out all contacts who are currently signed in for the date shown. The recorded sign out time is shown in the time box. (Only contacts signed in for the date in the date box will be signed out.) Midnight Sign Out/In Functions: This function lets you sign groups of contacts out at 11:59pm and back in at 12:00am the next day. (Midnight cycle) This must be done for centers who have overnight hours because the childcare sage cannot calculate hours that cross different calendar days. You can also select which contacts will be midnight cycled. a) All Contacts Currently Signed In: midnight cycle all contacts who are currently signed in for the date entered b) All Signed In Contacts Scheduled Through Midnight: midnight cycle all contacts who are currently signed in for the date entered and who are scheduled to be at the center through midnight for the date selected c) Only Selected Contacts: midnight cycle all selected contacts (selected by checking the checkbox to the left of the desired contact, or clicking Select All at the bottom of the contact list) Date: The date of the midnight cycle. (If you want to midnight cycle contacts on Tuesday at midnight, the date should be Tuesday’s date.) T: Fills the date box with the current date (or the previous date if the T box is clicked before 6am) Run: Midnight cycles the chosen contacts for the date entered Batch Message Functions Leave Message: Copies the entered message into all of the selected contacts (selected by checking the checkbox to the left of the desired contact, or clicking Select All at the bottom of the contact list) General Batch Functions Clear All Messages: Clears the sign-in messages for all contacts.
Childcare Sage TimeClock Manual by B & I Computer Consultants, Inc. (www.childcaresage.com) 2017
14

Timesheet Logs Print: You can print out timesheet logs that list all of the sign in/out actions for selected children/staff. The logs can be printed with each child/staff member on a separate page, or combined. Search: opens the Find Contacts Screen Close: goes back to the Edit Timesheets screen or the keypad screen (depends on where this screen was opened from) Find Contacts Screen: Figure 17
You can search for contacts to use in batch functions via a combination of any of the white boxes on the find contacts screen. For example, you can look for children/staff in class 220 who are scheduled to be at the center on Wednesdays at 2:00pm. The system will search the database for contacts matching the description. If children/staff matching the criteria entered are found, the Contact List/Batch Functions screen will come up. Data can only be entered on the find contact screen in the white boxes. Please refer to the search guide in the Childcare Sage for search rules.
Search: creates a filter based on your criteria and applies that filter to the database. If contacts matching the criteria are found, the Contact List/Batch Functions screen will come up. List: opens up the Contact List/Batch Functions screen without applying any filters. Reset: clears all entries on the screen. Close: goes back to the Edit Timesheets screen or the keypad screen (depends on where this screen was opened from) Edit Notes Screen: Figure 18
To add or change a note, simply type into the 18 rows.
Edit Messages Screen: Figure 19
To add or change a message, simply type into the message column. To delete a message, backspace or clear the message until it is gone.
Messages to Staff Screen: Figure 20
Messages to staff are date and time stamped. The child or staff member who’s id was used is recorded, as well as the parent or pickup person who left the message if the id entered was not a master id.
Childcare Sage TimeClock Manual by B & I Computer Consultants, Inc. (www.childcaresage.com) 2017
15

Windows 8 Tablet Mode Many users prefer to use a tablet with our TimeClock program. A tablet is small, portable, and relatively inexpensive. Please keep in mind that you need a Windows 8 tablet for our software. An Ipad, or Android tablet will not work. If you want to use a tablet with our timeclock, we recommend the Dell Venue 8 Pro 8” tablet. It is fairly durable, and the small size makes it perfect if space is limited. The ChildCare Sage TimeClock has a tablet mode that resizes the screen for use with an 8” tablet. To toggle between the modes, simply click the center name at the top left of the keypad screen. Normal mode: figure 21 Tablet Mode: figure 22
Childcare Sage TimeClock Manual by B & I Computer Consultants, Inc. (www.childcaresage.com) 2017
16

Childcare Sage TimeClock Manual by B & I Computer Consultants, Inc. (www.childcaresage.com) 2017
17
Appendix A: TimeClock Networking Guide Most childcare centers use a separate windows computer (desktop, laptop, or tablet,) for the timeclock to let parents and staff sign in and out. The timeclock computer is usually located by the entrance or in a central location. If the main and the timeclock computers are both at the center, they can share information over the existing network at the center that lets each computer go online. This network can be wired or wireless. If possible, we always suggest wired networks, which involve running an Ethernet cable between each computer and the router. In general, wired networks are much faster, more stable, and more reliable. There are numerous ways to setup a wired network if the router is not close to the computers you will use for the childcare sage, including connecting a wired switch to the router, then wiring each computer to the switch, or connecting a wireless bridge to the router, then wiring each computer to the bridge. Many of the support calls we get concern the main computer not being able to see the timeclock computer in a wireless network. Our support policy includes connecting the computers at your center together into a wired or wireless network. After the network is setup, we can only trouble shoot WIRED networks. Please keep in mind that our software uses the existing network at your center; It is not the network. This guide shows how to setup and troubleshoot the network between the computers. This guide applies equally to both wired and wireless networks. To keep things simple, this guide assumes a center has 1 main computer in the office, and 1 timeclock computer by the entrance or in a central location in the center. If your setup is more complex (more computers,) the process is similar but simply involves more steps for any computers outside of the 2 this guide assumes. To setup a separate timeclock computer, do the following: 1) make sure that Microsoft Access 2002/XP or newer is installed on the timeclock computer. 2) install the Childcare Sage Timeclock onto the timeclock computer and make sure it opens 3) install the Setup Network Timeclock Computer onto the main computer 4) follow the steps in A) to determine the version of windows on the timeclock computer 5) follow the steps in B) or C) (depending on the version of windows on the timeclock computer) to add a new user to the timeclock computer (we suggest you use “timeclock” for the username and password) 6) follow the steps in D) to share the “ccsagetimeclock” folder on the timeclock computer with the network 7) follow the steps in E) to map a drive from the main computer to the timeclock computer After you have completed the steps above, do the following: 1) point the timeclock on the main computer to the timeclock computer by: open the Timeclock on the main computer click Ok when it says it cannot find the timesheets_be.mdb file on the left side of the box that opens, click This PC or Computer, then click the z: drive and then click the
timesheets_be.mdb file click Open 2) point the childcare sage to the timeclock computer by: open the Childcare Sage on the main computer on the main menu, click Setup Menu (bottom right), then System Setup (top left) click on the TimeClock Loader tab in the TimeClock Dir row, enter “z:\” (nothing else) If you have any questions, or need help, please contact us.

A) Which version of Windows is on my computer and what is my Computer’s Name To determine the version of windows on a computer, please follow the steps below: 1) Right click on the Windows start button,
or 2) Click File Explorer or Open Windows Explorer
or 3) Right click Computer or This PC on the left side of the menu,
or 4) Click Properties
or The information you need is pointed out below.
Write down the version of windows and the Computer name.
Childcare Sage TimeClock Manual by B & I Computer Consultants, Inc. (www.childcaresage.com) 2017
18

B) Adding a New User to Windows 7 1) click the windows start button,
2) then click Control Panel.
3) click User Accounts
4) click Manage another account
5) click Create a new account
6) enter the name of the new account, select Administrator, then click Create Account
7) click the new Account
8) click Create a Password
9) enter the password twice, then enter a hint (we suggest: program ), and click Create Password
Childcare Sage TimeClock Manual by B & I Computer Consultants, Inc. (www.childcaresage.com) 2017
19

C) Adding a New User To Windows 8/10 1) right click the windows start button,
2) then click Control Panel.
3) click User Accounts
4) click Manage another account
5) click Add a new user in PC settings
6) click Add Someone else to this PC
7) click I don’t have this person’s sign-in information
8) click Add a user withour a Microsoft account
9) fill in the information for the account a) enter the name, b) enter the password twice, c) enter a hint (we suggest: program ), d) click Next
Childcare Sage TimeClock Manual by B & I Computer Consultants, Inc. (www.childcaresage.com) 2017
20

D) Sharing a Folder with the Network 1) Right click on the Windows start button,
or 2) Click File Explorer or Open Windows Explorer
or 3) Click Computer or This PC on the left side of the menu,
or 4) Click Local Disk (C:) 5) Right click on the ccsagetimeclock folder, then click Share With, then Specific People
6) From the top select Everyone in the dropbox, then click Add
7) When you see everyone in the name column, change the Permission Level to: Read/Write and click Share
Childcare Sage TimeClock Manual by B & I Computer Consultants, Inc. (www.childcaresage.com) 2017
21

E) Mapping a Drive on the Network 1) Right click on the Windows start button,
or 2) Click File Explorer or Open Windows Explorer
or 3) Click Network,
4) Double click the Computer you want to connect to (if you don’t see the computer listed, go to the next page)
5) Enter the Username and Password that you setup on the computer, check Remember my Credentials and then click OK. If you enter the username and password and the same box reappears, add the name of the computer before the user name: M93P-PC\timeclock
6) Right Click on CCSageTimeClock, then click Map Network Drive
then 7) Click Finish
Childcare Sage TimeClock Manual by B & I Computer Consultants, Inc. (www.childcaresage.com) 2017
22
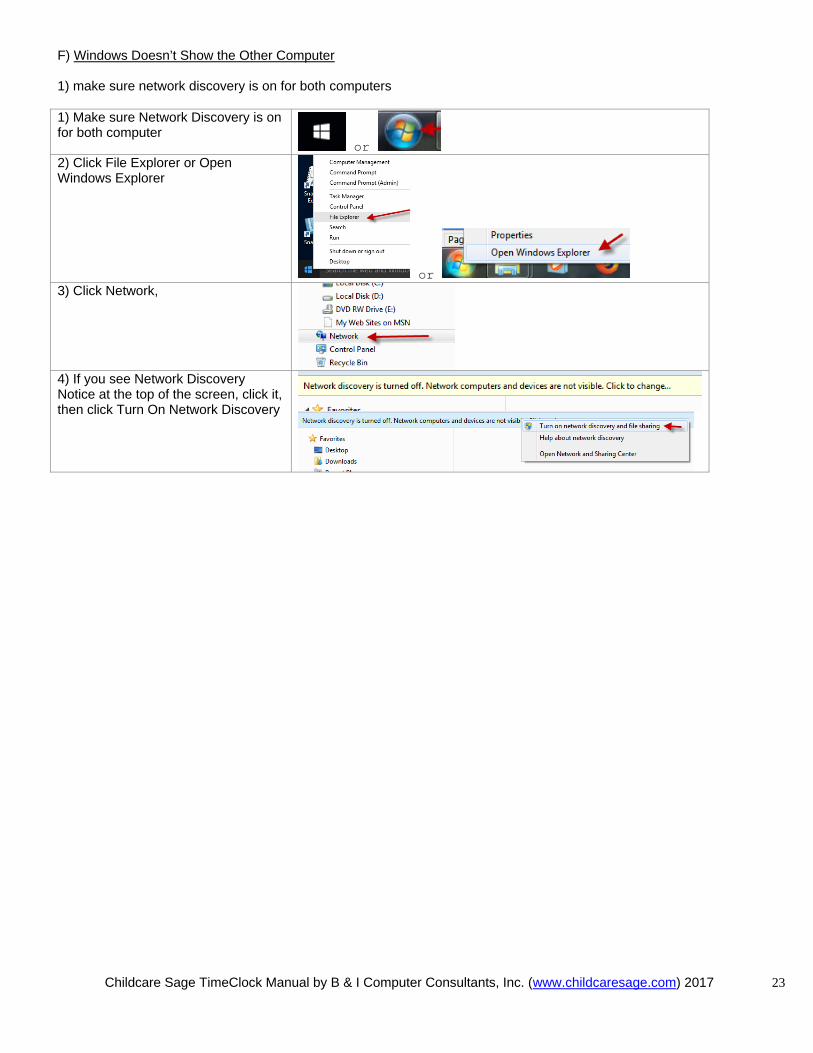
F) Windows Doesn’t Show the Other Computer 1) make sure network discovery is on for both computers 1) Make sure Network Discovery is on for both computer
or 2) Click File Explorer or Open Windows Explorer
or 3) Click Network,
4) If you see Network Discovery Notice at the top of the screen, click it, then click Turn On Network Discovery
Childcare Sage TimeClock Manual by B & I Computer Consultants, Inc. (www.childcaresage.com) 2017
23

Appendix B: Using the TimeClock Link The Timeclock program is usually setup on a separate computer, located centrally or by the entrance. If the main and timeclock computers cannot be networked together (if they are in different buildings or too far apart,) you can transfer information between them by using the TimeClock Link program on a USB flash drive. Setting Up the TimeClockLink The TimeClockLink is automatically installed with the TimeClock. The TimeClock Link program is 1 file (timeclocklink.mdb) that is saved into the c:\ccsagetimeclock\ folder on your computer’s hard drive. The best way to use the link is to copy the timeclocklink.mdb file onto a USB flash drive and then plug the flash drive into the main and timeclock computers to use it. You use the TimeClockLink to load new children and staff into the timeclock, and to transfer timesheets from the timeclock back into the ChildCare Sage. (Timesheets are usually transferred weekly.) Setup Screen Figure 1:
This screen is opened by clicking Setup in the TimeClockLink.
ChildCare Sage Dir: points to the Childcare Sage (ccsage_be.mdb) on the main computer. The default path is: c:\ccsage\ TimeClock Dir: points to TimeClock (timesheets_be.mdb) on the timeclock computer. The default path is: c:\ccsagetimeclock\ Replace Timesheet entries with Timeclock Entries: selects whether you want overwrite existing timesheet hours in the childcare sage with timeclock hours. This prevents double billing of hours. If you are using the Childcare Sage Fingerprint Add-on, you also have the following options: Load Fingerprint Users: load children, parents, pickup people, and staff into the Childcare Sage Fingerprint database Are last names entered for parents: did you enter last names for the parents and pickup people? FingerPrint Dir: points to the Fingerprint file (ccsagefp.mdb) on the timeclock computer. The default path is: c:\ccsagetimeclock\ Using the TimeclockLink program Timeclock Link
Figure 2: To Load Contacts or Update Balances in the TimeClockLink:
a) plug the usb flash drive into the main ChildCareSage Computer b) double click the timeclocklink file to open the TimeClock Link c) click Import Contacts
To Load Contacts into the TimeClock:
a) plug the usb flash drive into the timeclock computer b) double click the timeclocklink file to open the TimeClock Link c) click Export Contacts
To Update Balances in the TimeClock:
a) plug the usb flash drive into the timeclock computer b) double click the timeclocklink file to open the TimeClock Link c) click Update Balances
Timeclock Link
Childcare Sage TimeClock Manual by B & I Computer Consultants, Inc. (www.childcaresage.com) 2017
24

Figure 3: To Import Timesheets into the TimeclockLink:
a) plug the usb flash drive into the timeclock computer b) double click the timeclocklink file to open the TimeClock Link c) change the transfer period if you want to only import certain
dates from the timeclock d) click Import Timesheets
Timeclock Link
Figure 4: To Review and Edit Timesheets in the TimeclockLink:
a) plug the usb flash drive into the main ChildCareSage Computer b) double click the timeclocklink file to open the TimeClock Link c) click Batch Signout to see the incomplete timesheets (figure 6) d) to see all of the timesheets, click Review Timesheets (figure 7)
Timeclock Link
Figure 5: To Transfer Timesheets from TimeclockLink into the Childcare Sage:
a) plug the usb flash drive into the main ChildCareSage Computer b) click Export Timesheets
If you receive a message that says there are timesheets without a start/stop time, click the Batch Signout button and fill in the incomplete timesheets.
Batch SignOut Editor Figure 6:
All timesheets must be complete (have a start and end time) before you can export timesheets into the ChildCare Sage. This screen lets you quickly fill in incomplete timesheets. A: Select an arrive time L: Select a leave time A->L: move the arrive time into the leave time column ->L: fill the leave time with the default leave time at the bottom left Del: delete the timesheet row
Batch Editor Figure 7:
This screen lets you edit all of the timesheets in the timeclock at one time. Timesheets are organized by person, by date (in reverse chronological order.) To change timesheet rows, simply type into the columns.
Childcare Sage TimeClock Manual by B & I Computer Consultants, Inc. (www.childcaresage.com) 2017
25