Assigner’s Presentation Tool for Officials. · •The first time you log onto you must change...
47
8/17/2008 Version 2.5 Assigner’s Presentation Tool for Officials.
Transcript of Assigner’s Presentation Tool for Officials. · •The first time you log onto you must change...

8/17/2008
Version 2.5
Assigner’s Presentation Tool for Officials.

8/17/2008
Version 2.5
No Notes

8/17/2008
Version 2.5
In this section you will:
• Log onto thearbiter.net
• Review the terms of agreement
• Set-up your password
• Join one or more organizations

8/17/2008
Version 2.5
• Your e-mail address is the one you use for your sport.
• Every official MUST have their own e-mail address.
Addresses cannot be shared.
• Your initial password is your last name.
• If in the future you forget your password, click on “Forgot
your password” and it will be mailed to you.
• Your computer will remember your password if you select
“Remember my sign in information on this computer”.
Watch out, don’t do this on a public or shared computer!
8/17/2008
Version 2.5
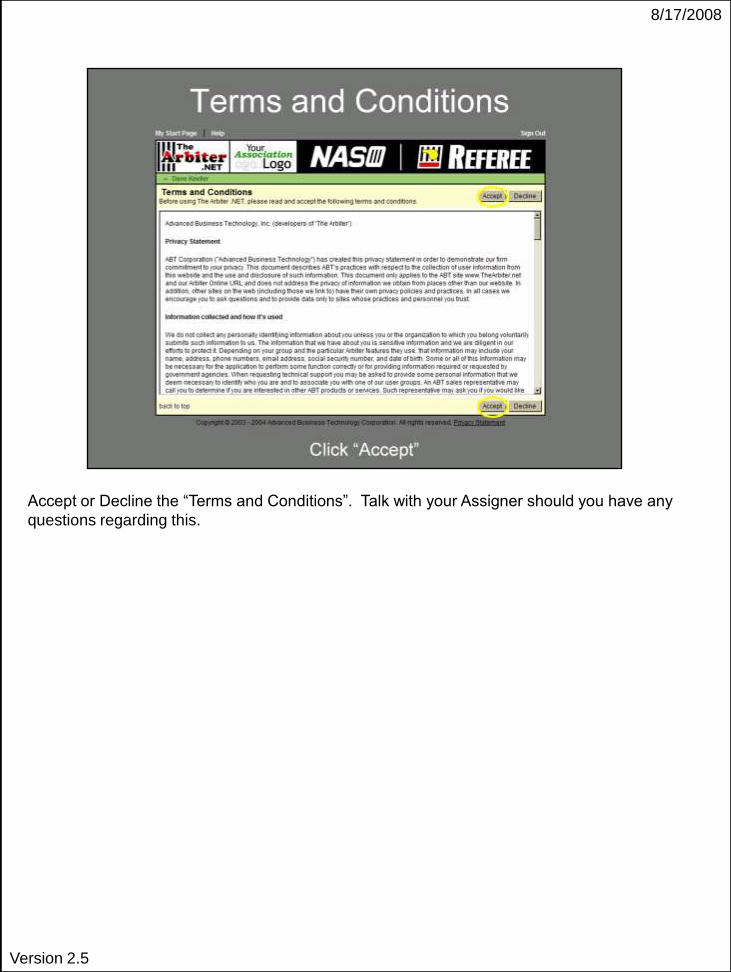
Accept or Decline the “Terms and Conditions”. Talk with your Assigner should you have any
questions regarding this.

8/17/2008
Version 2.5
• The first time you log onto www.thearbiter.net you must change your
password from the default password.
• When changing your password, please consider using numbers and
characters – i.e. C4n4d4.

8/17/2008
Version 2.5
No Notes

8/17/2008
Version 2.5
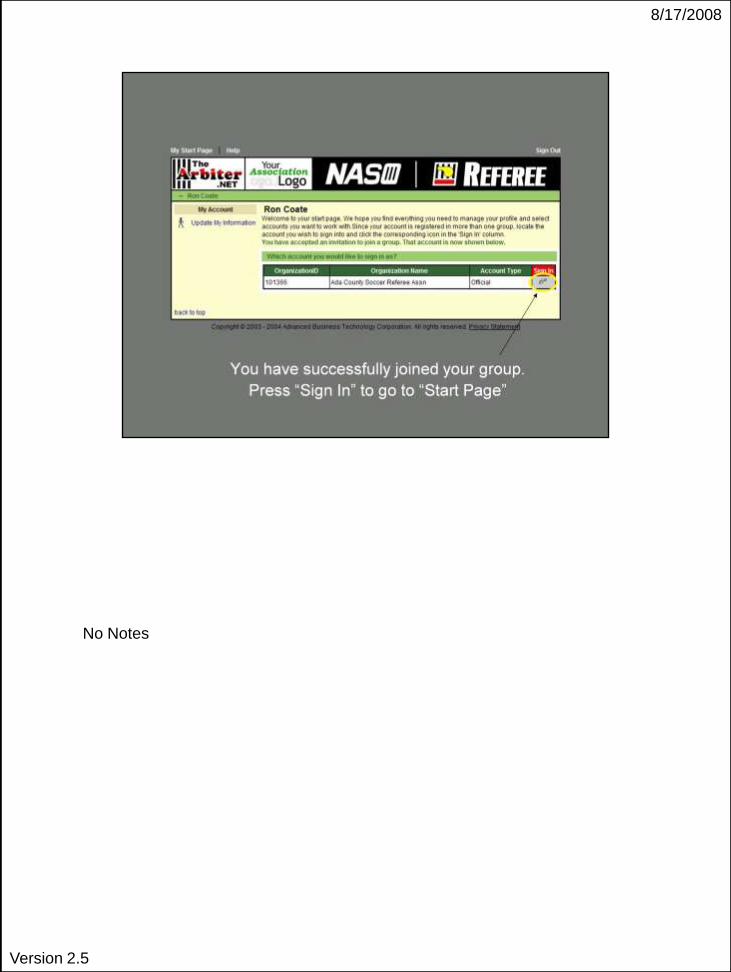
Once you log on, you will be invited to join one or more organizations.
If you want to join an organization that is not listed here, contact the assigner for
that organization.
Click “Accept” to join your organization.
8/17/2008
Version 2.5
No Notes

8/17/2008
Version 2.5
You are in!
“Start Page” is the home base for all operations inside of TheArbiter.net. You
can always return to this page by clicking on “Start Page” in the upper left corner
of any page in TheArbiter.net.
Watch this page for important announcements!
Click on “Help” to access more information. Try looking here for information
before contacting the assignor.
Click “Switch Accounts” to switch from, for example, ACSRA and GMSL

8/17/2008
Version 2.5
In this section you will:
• Edit your personal information
• Add and edit phone numbers
• Edit your referee information

8/17/2008
Version 2.5
No Notes

8/17/2008
Version 2.5
From “My Start Page” select “Update My Information”
• Make sure that your information is correct. Be sure to include your Social
Security Number and your date of birth.
• Don’t worry about the Jersey number. While the system requires that you have
one, the actual value is unimportant.
• Next, edit your phone information.

8/17/2008
Version 2.5
From “Update My Information”, select “Edit Phones”
To add a phone click on the “+” (plus) symbol.

8/17/2008
Version 2.5
No Notes

8/17/2008
Version 2.5
• Click on the “Pencil” symbol to edit a phone.
• Click on the “Trash Can” to delete a phone.
• Use the “up” and “down” arrows on the right to get them in your preferred
order. The first phone in the list is the one displayed
by default on the officials roster list and on your game schedules.
• The assigner is the only one who can see the note.
.

8/17/2008
Version 2.5
No Notes

8/17/2008
Version 2.5
The officials will update their information accordingly. **Assigners can specify
what information is pertinent for their officials to fill out in their organization.
8/17/2008
Version 2.5
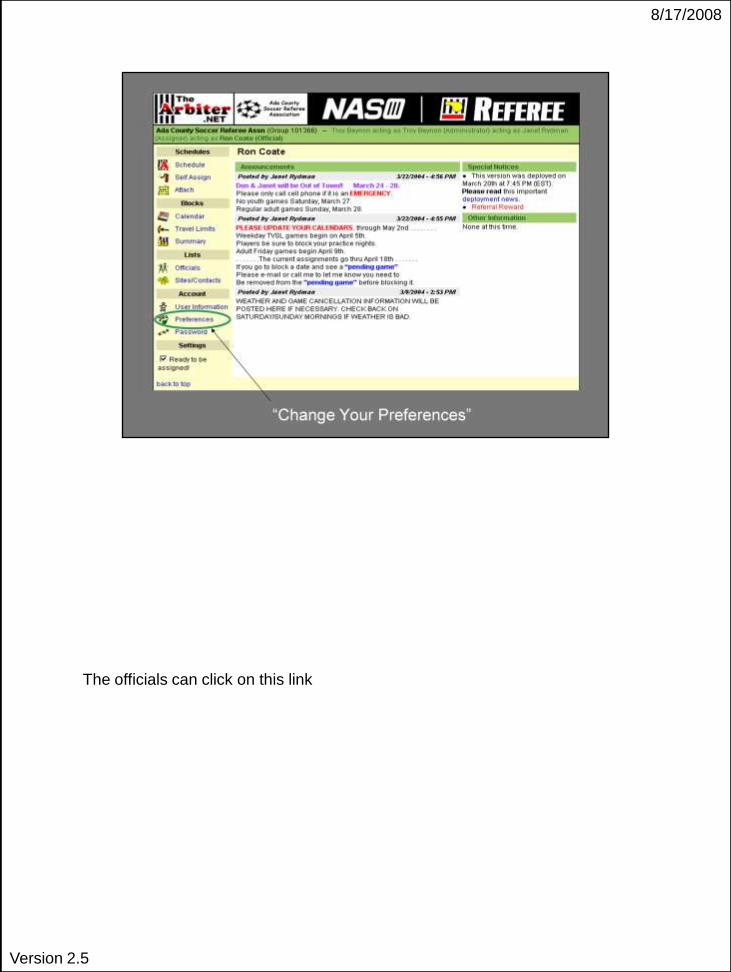
The officials can click on this link

8/17/2008
Version 2.5
No Notes

8/17/2008
Version 2.5
In this section you will:
• Block an entire day
• Block part of a day
• Review a list of blocked dates
• Set travel limits

8/17/2008
Version 2.5
From “My Start Page”, select “Calendar”
8/17/2008
Version 2.5
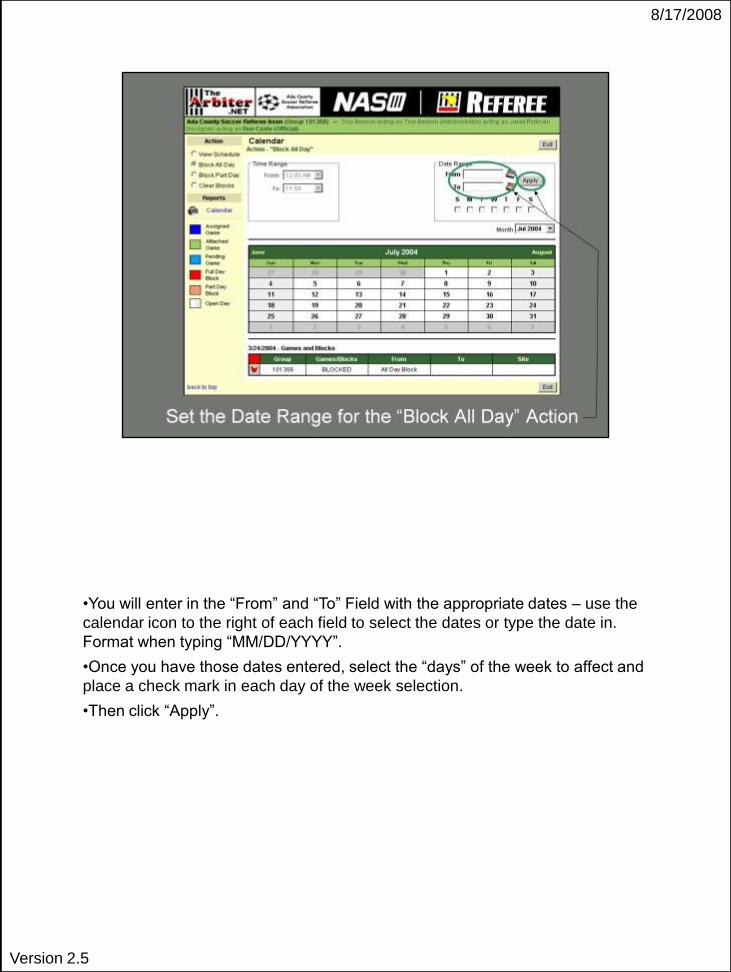
•You will enter in the “From” and “To” Field with the appropriate dates – use the
calendar icon to the right of each field to select the dates or type the date in.
Format when typing “MM/DD/YYYY”.
•Once you have those dates entered, select the “days” of the week to affect and
place a check mark in each day of the week selection.
•Then click “Apply”.

8/17/2008
Version 2.5
“Blocking Part of a day”
•To Block Part of the day would be the same, except you would include
the “Time Range” – “From” & “To”.
•Remember – Do not forget to include the Date Range in your selection.
•**You can also select a single day from the calendar to block (All or Part Day
Block).

8/17/2008
Version 2.5
No Notes

8/17/2008
Version 2.5
•Click on the “Summary” Link to Print out your Blocks Summary Report.

8/17/2008
Version 2.5
From “My Start Page”, select “Print Blocks Summary”
• For now you must be running Internet Explorer in order to print your blocked
dates (or any other list).
• Select the format that you would like and press “Print”. The document will
appear in a separate window that can sent to your printer.
• Select “Done” to return to “My Start Page”.

8/17/2008
Version 2.5
No Notes

8/17/2008
Version 2.5
No Notes

8/17/2008
Version 2.5
From “My Start Page”, select “Edit Travel Limits”
8/17/2008
Version 2.5
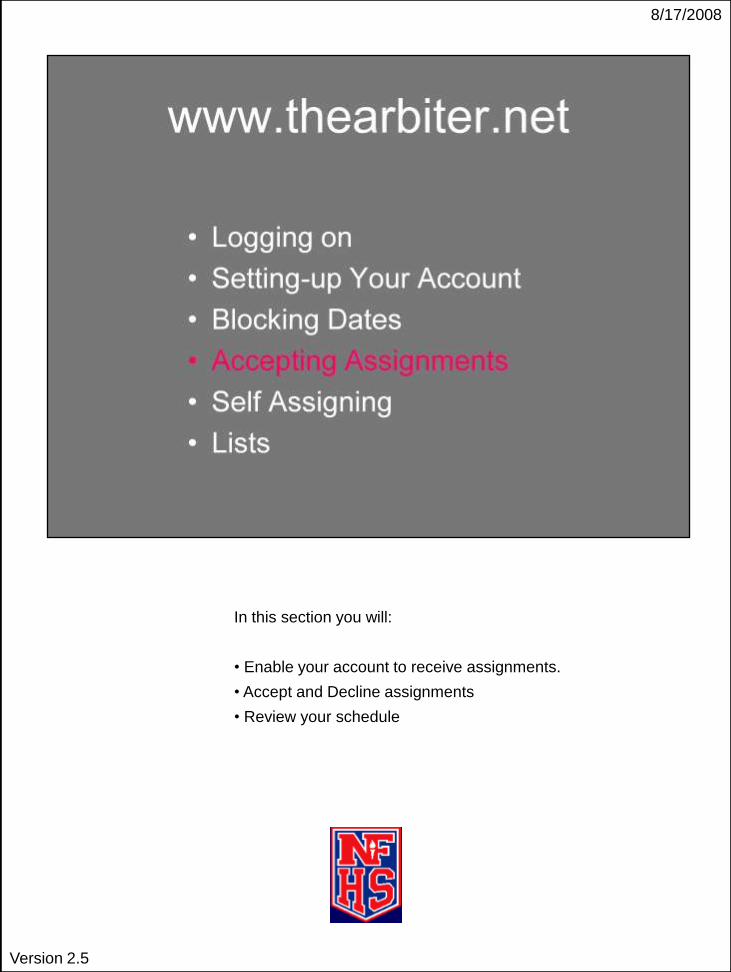
In this section you will:
• Enable your account to receive assignments.
• Accept and Decline assignments
• Review your schedule

8/17/2008
Version 2.5
No Notes
8/17/2008
Version 2.5
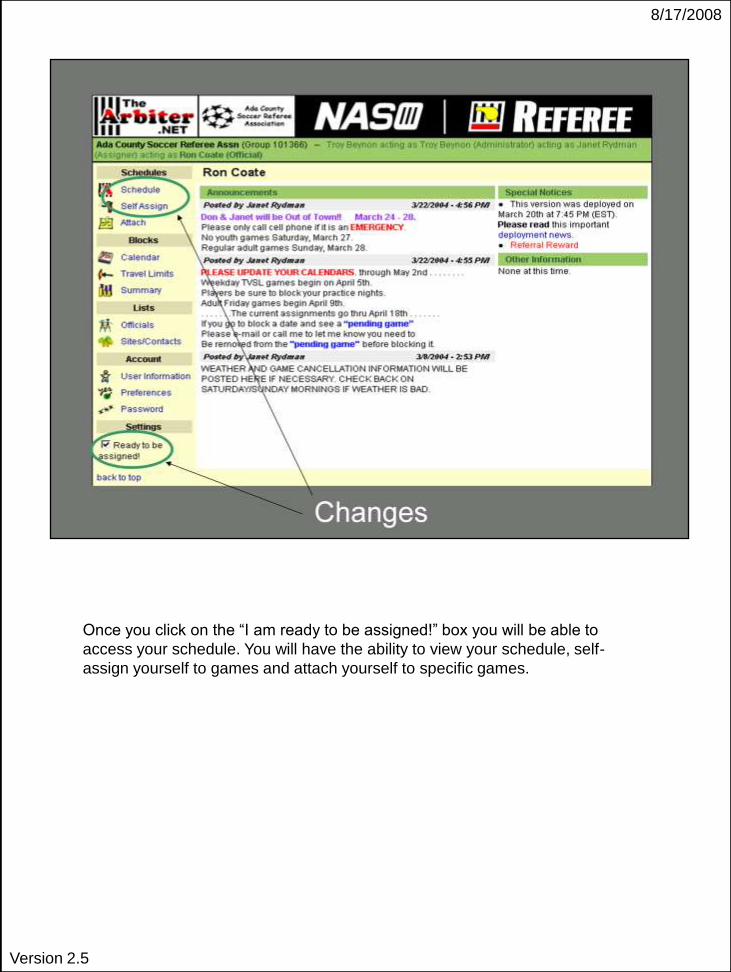
Once you click on the “I am ready to be assigned!” box you will be able to
access your schedule. You will have the ability to view your schedule, self-
assign yourself to games and attach yourself to specific games.

8/17/2008
Version 2.5
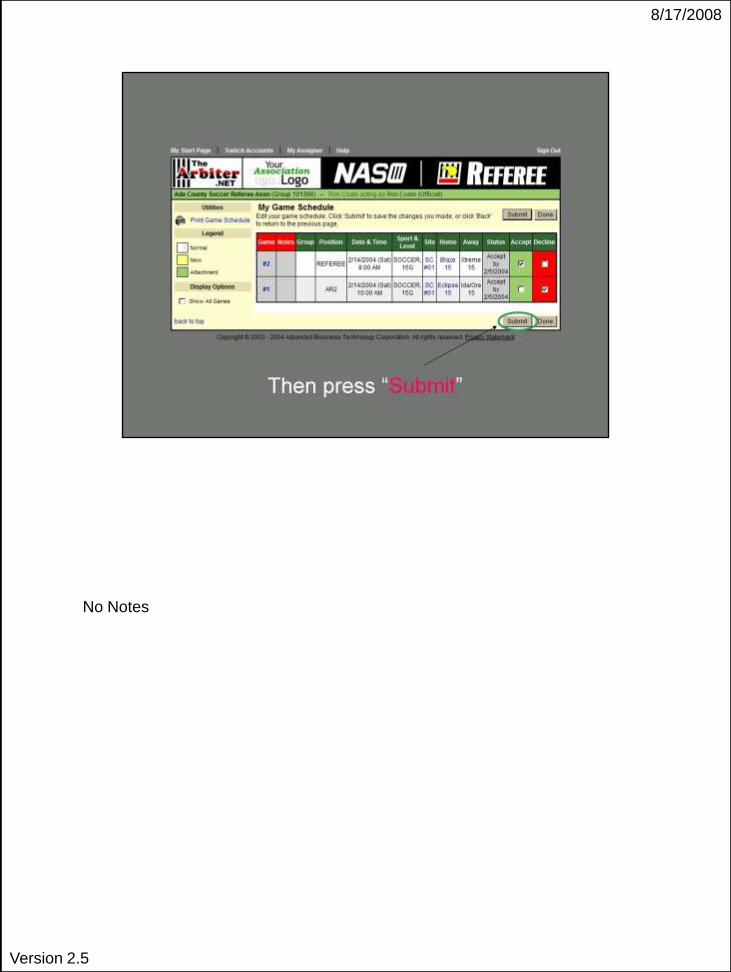
Be sure to press “Submit” when you are done. If you press “Done” instead, you
will return to the previous screen with no changes to your schedule!
Once you press submit you can no longer edit the status of any game that you
accept or decline. After you press submit, you must contact the assignor to
change the status of any game that you have accepted or declined.

8/17/2008
Version 2.5
No Notes
8/17/2008
Version 2.5
No Notes

8/17/2008
Version 2.5
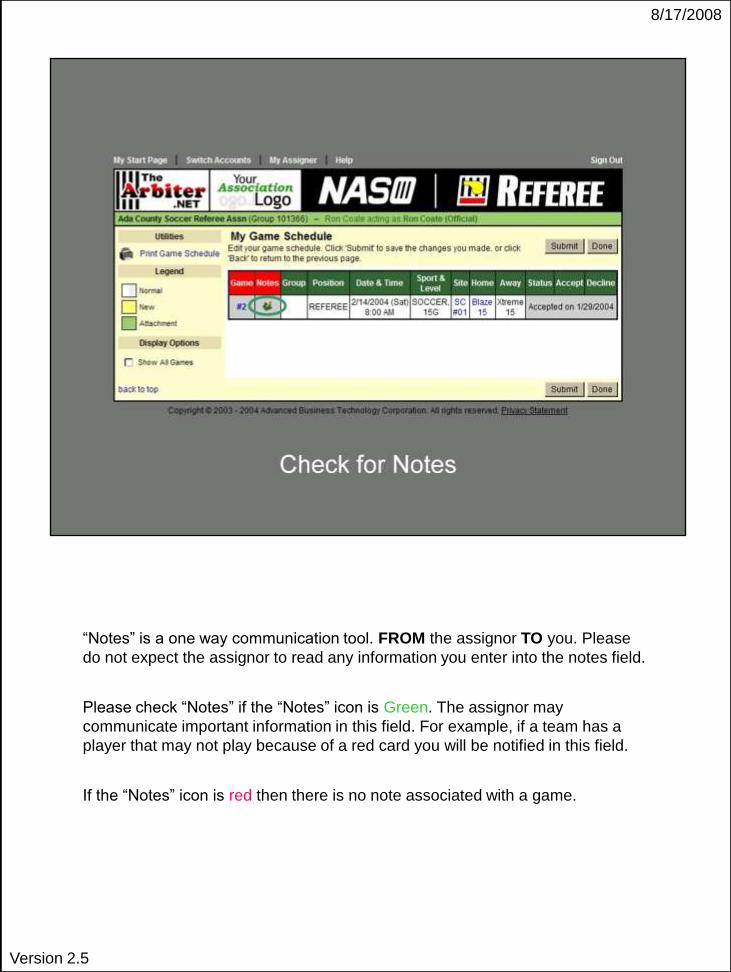
“Notes” is a one way communication tool. FROM the assignor TO you. Please
do not expect the assignor to read any information you enter into the notes field.
Please check “Notes” if the “Notes” icon is Green. The assignor may
communicate important information in this field. For example, if a team has a
player that may not play because of a red card you will be notified in this field.
If the “Notes” icon is red then there is no note associated with a game.
8/17/2008
Version 2.5
“Notes” is a one way communication tool. FROM the assignor TO you. Please
do not expect the assignor to read any information you enter into the notes field.
Please check “Notes” if the “Notes” icon is Green. The assignor may
communicate important information in this field. For example, if a team has a
player that may not play because of a red card you will be notified in this field.
If the “Notes” icon is red then there is no note associated with a game.

8/17/2008
Version 2.5
No Notes

8/17/2008
Version 2.5
No Notes

8/17/2008
Version 2.5
From “View My Schedule”, select “Print Game Schedule”
• Select the date range that covers the period you want to print.
• Select the format and press “Print”. As before, your schedule will appear in a
separate window that can be sent to your printer.
• Your printed schedule will show the names of other officials who have
accepted their assignments.

8/17/2008
Version 2.5
No Notes
8/17/2008
Version 2.5
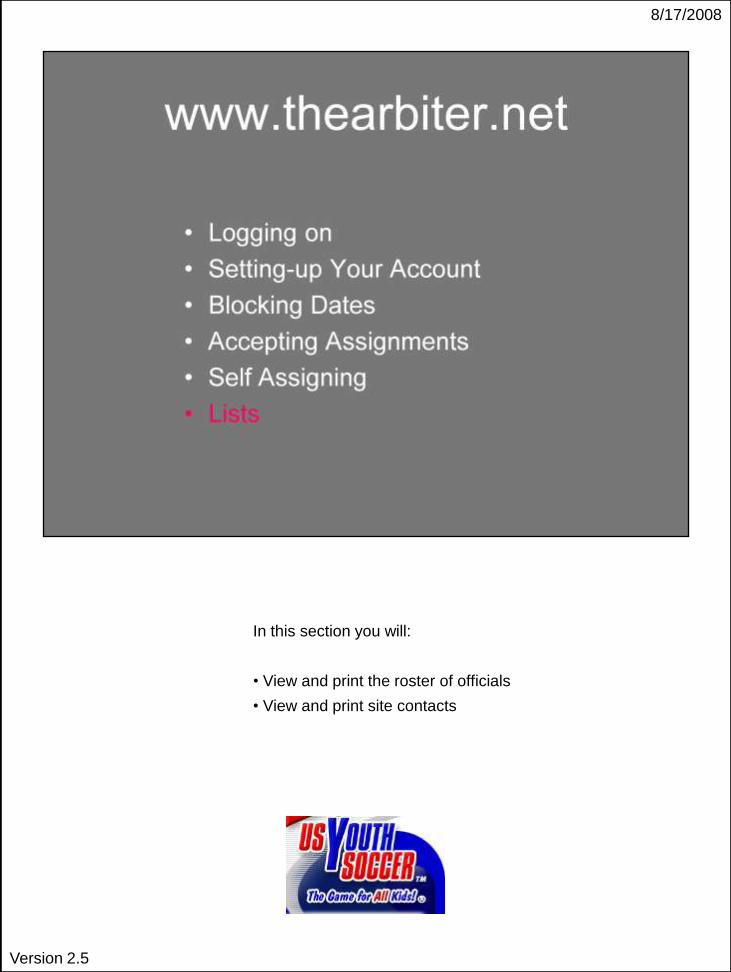
In this section you will:
• View and print the roster of officials
• View and print site contacts
8/17/2008
Version 2.5
No Notes

8/17/2008
Version 2.5
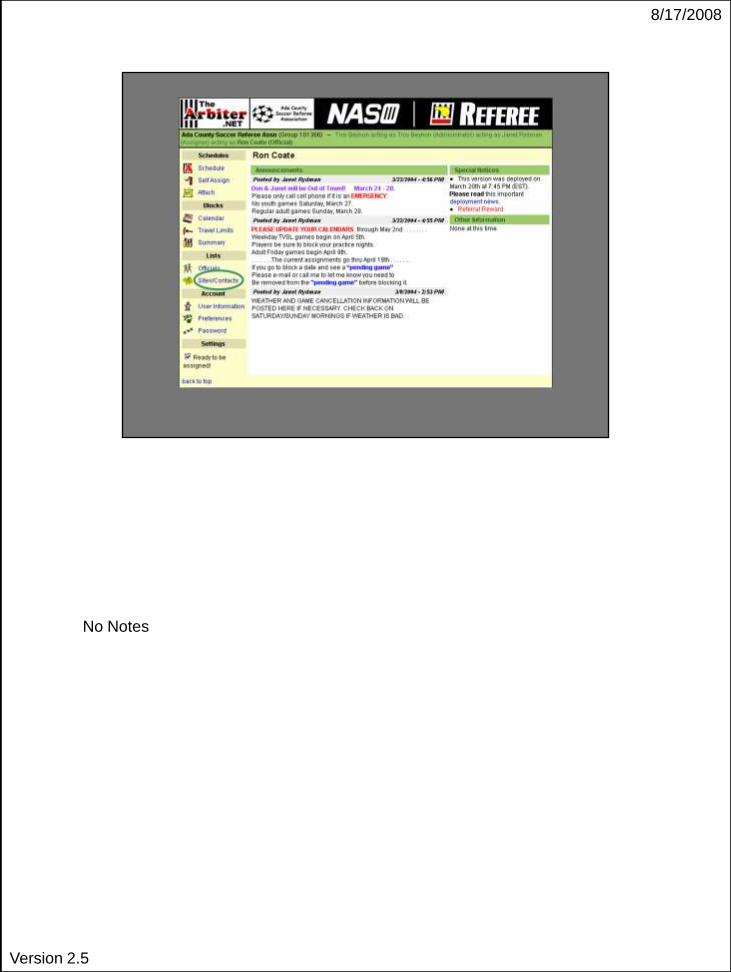
From “My Start Page” select “Sites/Contacts”
• Clicking on “Address” generates a map to the field (via MapQuest).
• Clicking on “Name” generates written direction to the field.

8/17/2008
Version 2.5
No Notes
8/17/2008
Version 2.5
www.TheArbiter.net - League Administration Software