2011 Ford Fiesta L41 - JustAnswer...2011 Ford Fiesta L41.6L Vehicle » Engine, Cooling and Exhaust...
19
2011 Ford Fiesta L41.6L Vehicle » Engine, Cooling and Exhaust » Cooling System » Water Pump » Service and Repair Coolant Pump
Transcript of 2011 Ford Fiesta L41 - JustAnswer...2011 Ford Fiesta L41.6L Vehicle » Engine, Cooling and Exhaust...

2011 Ford Fiesta L41.6LVehicle » Engine, Cooling and Exhaust » Cooling System » Water Pump » Service and Repair
Coolant Pump

Removal
All vehicles
1. Drain the cooling system. For additional information, refer to Cooling System Draining, Filling and BleedingSee: Service and Repair\Cooling System Draining, Filling and Bleeding.
2. Loosen the 4 coolant pump pulley bolts.
3. Remove the accessory drive belt. For additional information, refer to Accessory Drive See: Engine\DriveBelt\Service and Repair\Accessory Drive Belt.
Vehicles with A/C
4. Remove the 2 bolts, the studbolt, position the A/C compressor aside and support it with a length of mechanic'swire.
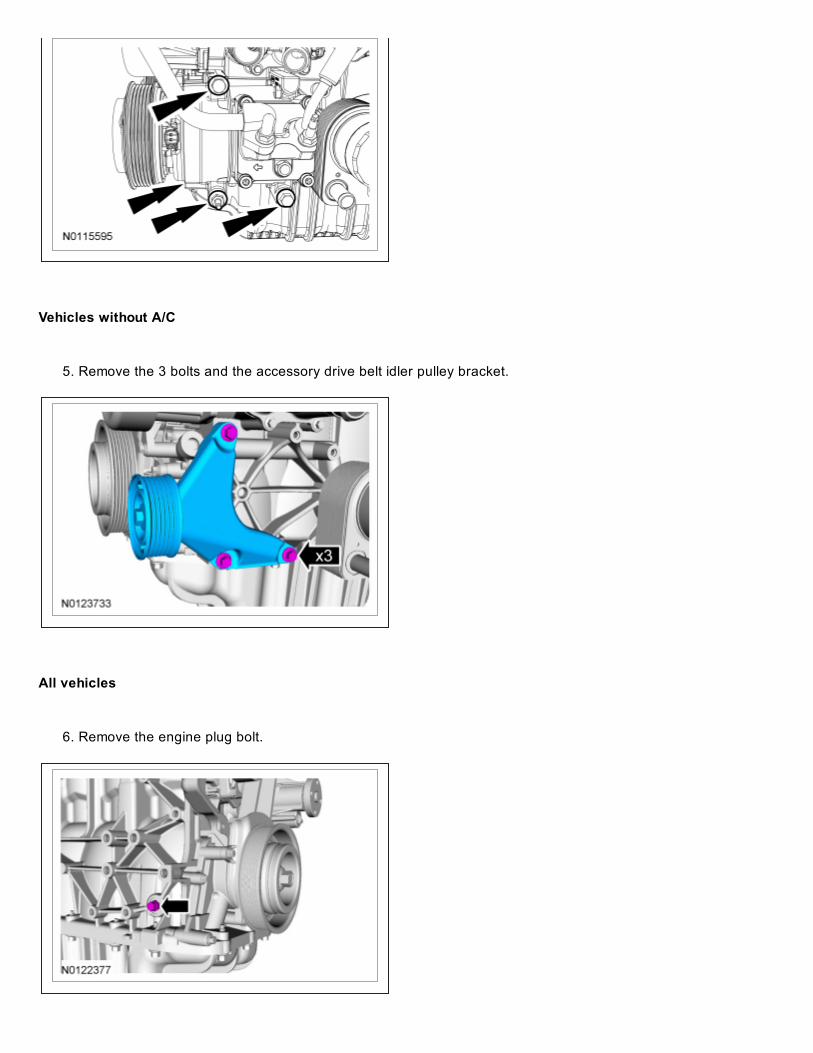
Vehicles without A/C
5. Remove the 3 bolts and the accessory drive belt idler pulley bracket.
All vehicles
6. Remove the engine plug bolt.
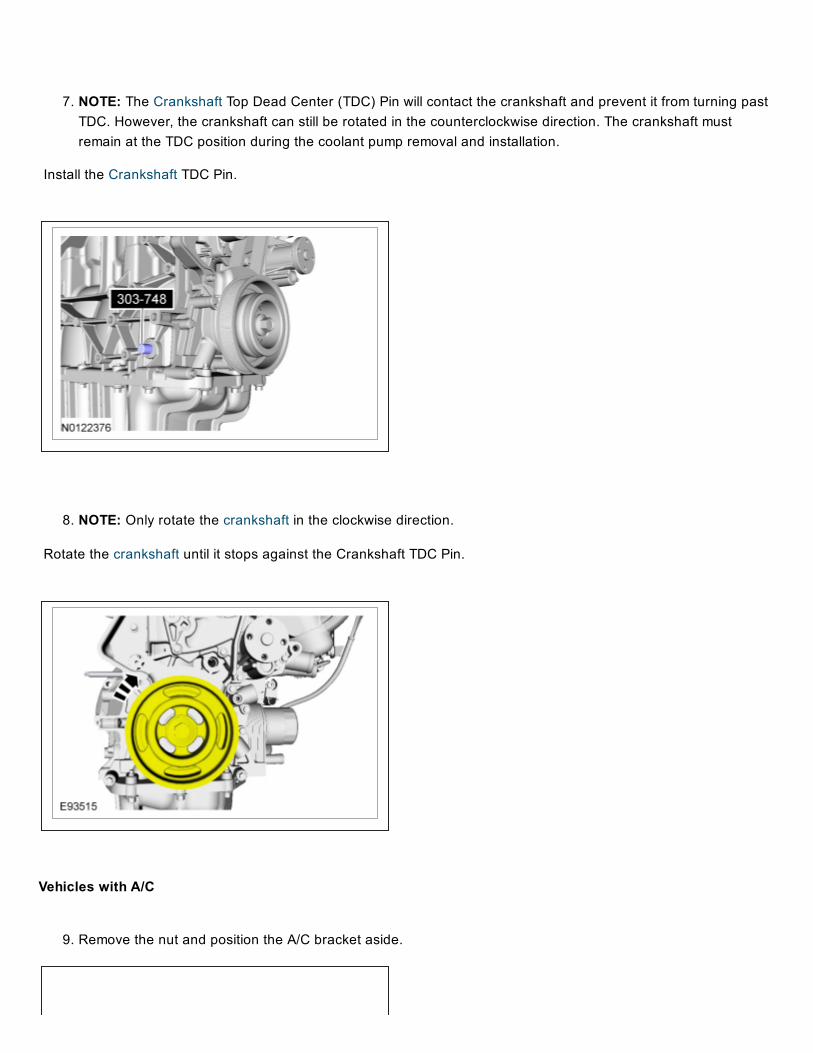
7. NOTE: The Crankshaft Top Dead Center (TDC) Pin will contact the crankshaft and prevent it from turning pastTDC. However, the crankshaft can still be rotated in the counterclockwise direction. The crankshaft mustremain at the TDC position during the coolant pump removal and installation.
Install the Crankshaft TDC Pin.
8. NOTE: Only rotate the crankshaft in the clockwise direction.
Rotate the crankshaft until it stops against the Crankshaft TDC Pin.
Vehicles with A/C
9. Remove the nut and position the A/C bracket aside.

All vehicles
10. Release the 2 tabs and position the degas bottle aside.
11. NOTICE: Use a wooden block to protect the oil pan when supporting the engine
Using a floor jack and a block of wood, support the engine.
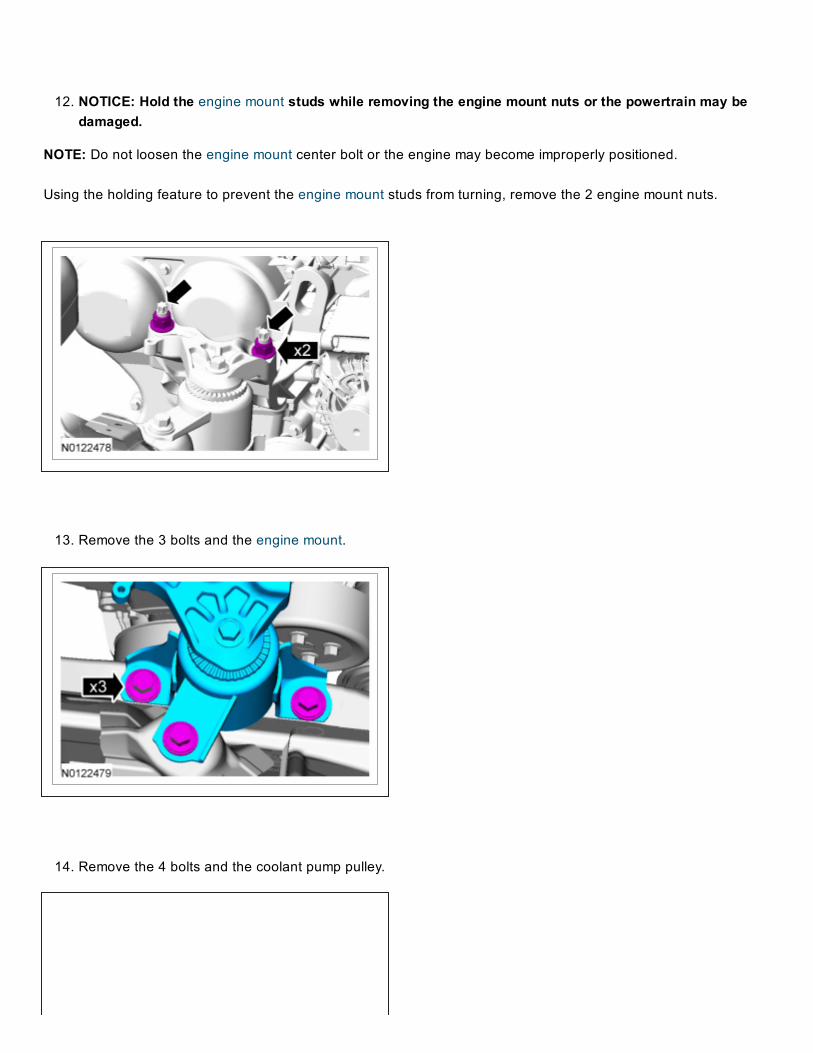
12. NOTICE: Hold the engine mount studs while removing the engine mount nuts or the powertrain may bedamaged.
NOTE: Do not loosen the engine mount center bolt or the engine may become improperly positioned.
Using the holding feature to prevent the engine mount studs from turning, remove the 2 engine mount nuts.
13. Remove the 3 bolts and the engine mount.
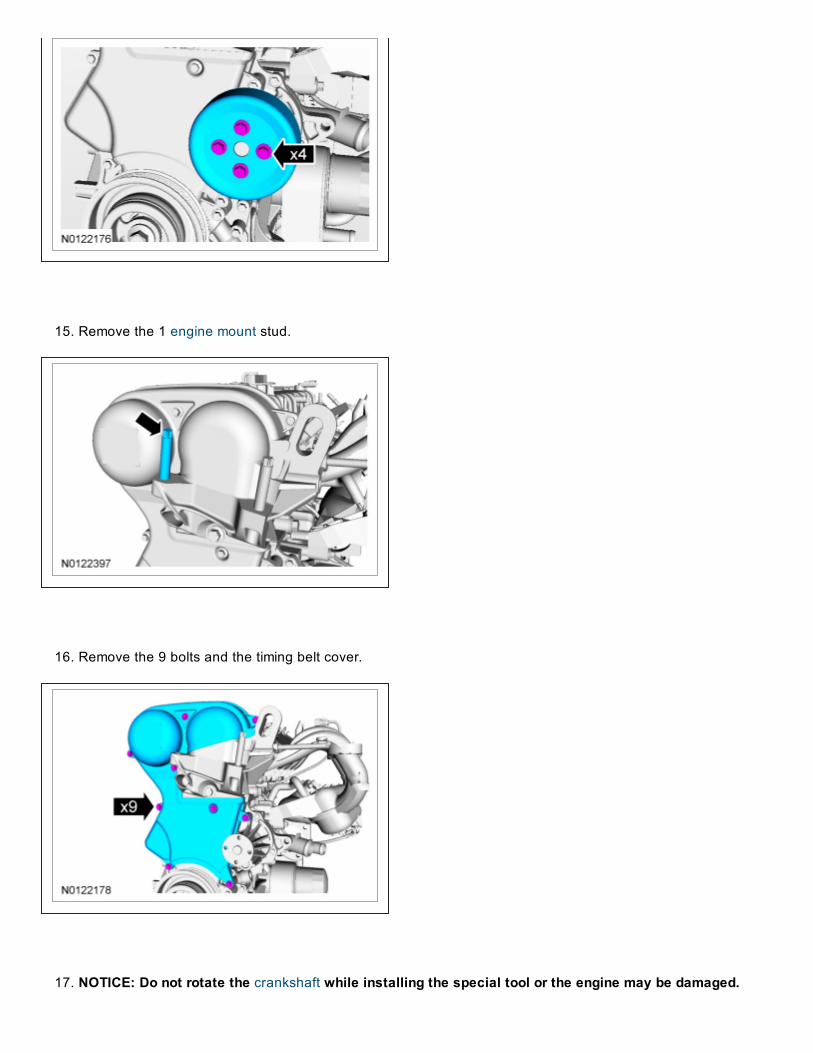
14. Remove the 4 bolts and the coolant pump pulley.
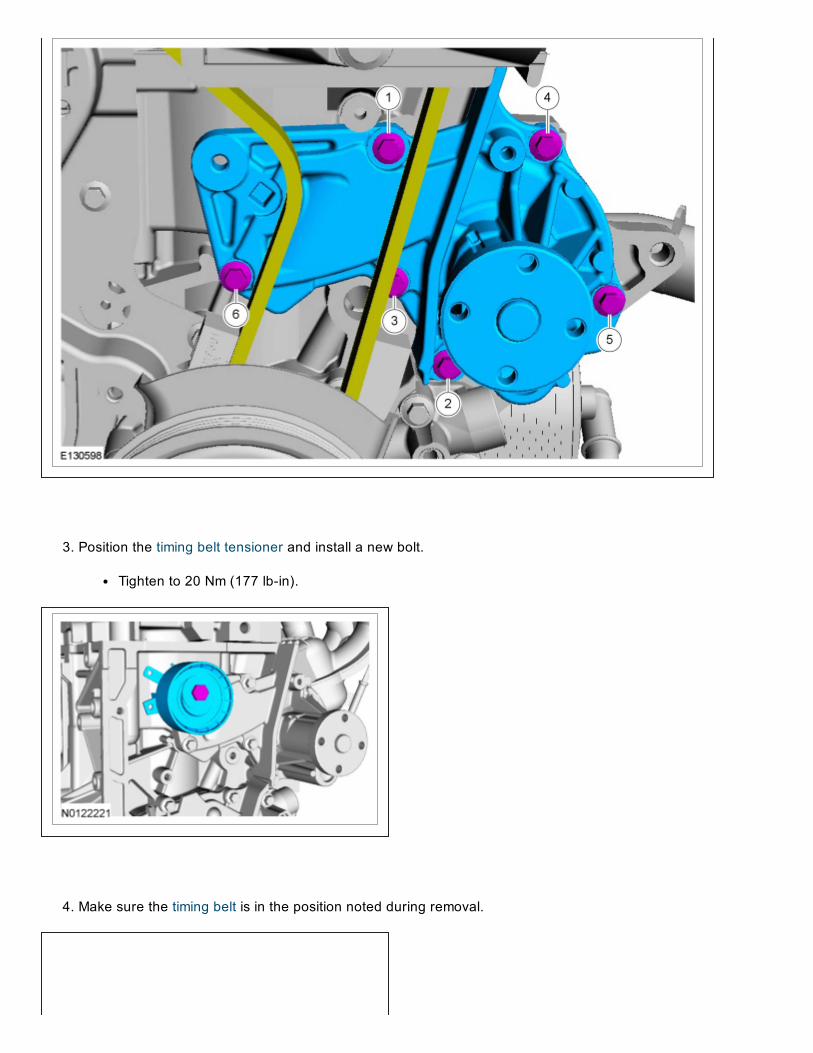
15. Remove the 1 engine mount stud.
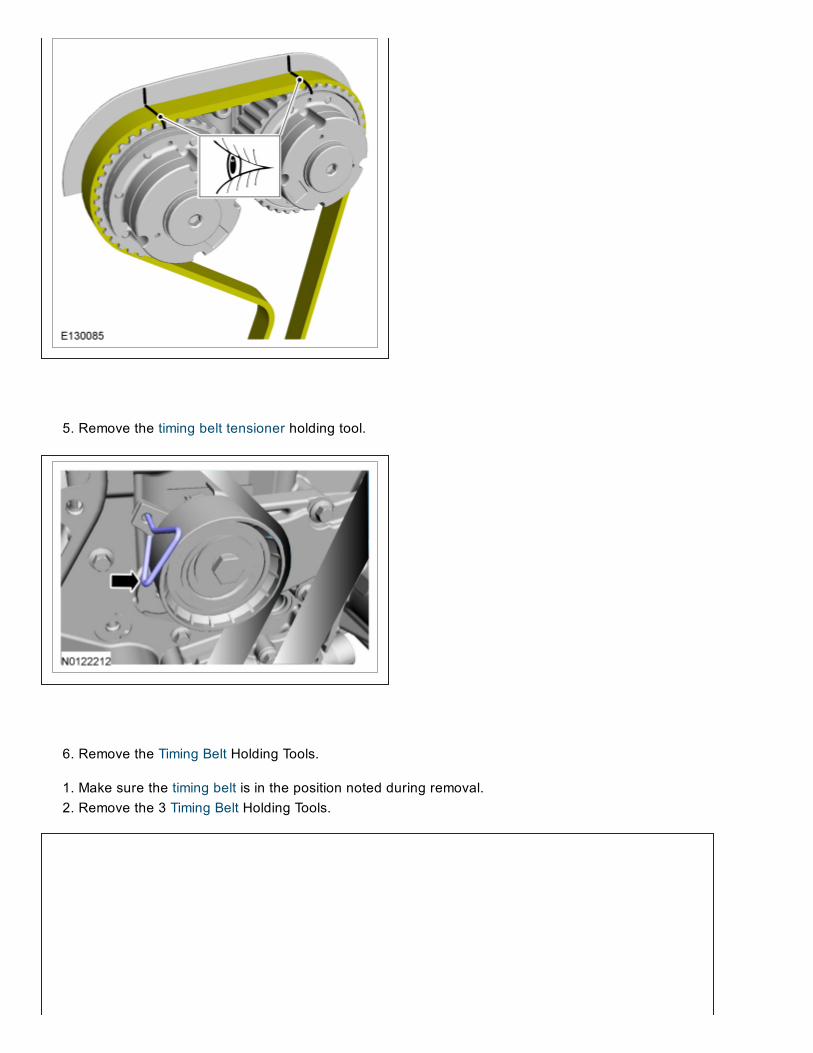
16. Remove the 9 bolts and the timing belt cover.
17. NOTICE: Do not rotate the crankshaft while installing the special tool or the engine may be damaged.

Hold the timing belt in position.
1. Install the Timing Belt Holding Tools in 3 places as shown.2. Mark the position of the timing belt for assembly reference.
18. Release the timing belt tension.
1. Rotate the timing belt tensioner clockwise.2. Align the 2 holes on the tensioner and install a small screwdriver or holding pin.

19. Remove the bolt and the timing belt tensioner.
Discard the bolt.
20. Remove the 6 bolts, the coolant pump and the gasket.
Discard the gasket.

Installation
All vehicles
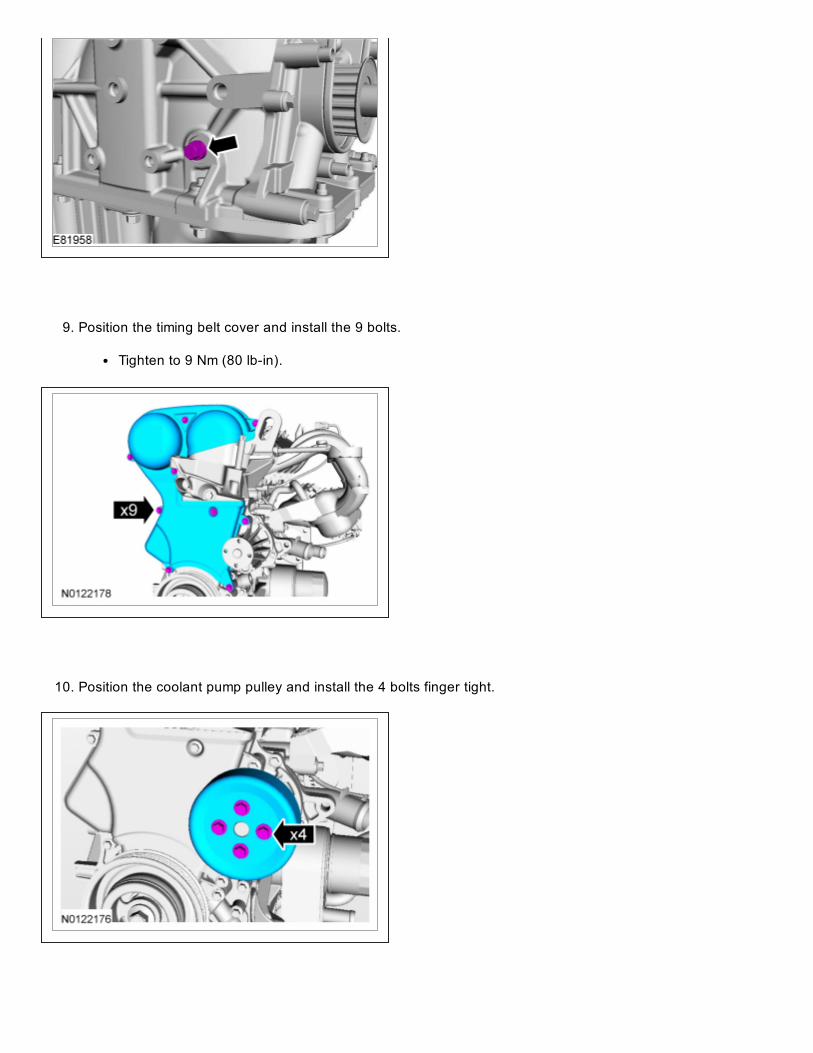
1. Clean the sealing surfaces with metal surface prep. Follow the directions on the packaging.2. Install a new gasket, the coolant pump and the 6 bolts.
Tighten the bolts in the sequence shown to 10 Nm (89 lbin).
3. Position the timing belt tensioner and install a new bolt.
Tighten to 20 Nm (177 lbin).
4. Make sure the timing belt is in the position noted during removal.
5. Remove the timing belt tensioner holding tool.
6. Remove the Timing Belt Holding Tools.
1. Make sure the timing belt is in the position noted during removal.2. Remove the 3 Timing Belt Holding Tools.

7. Remove the Crankshaft TDC Pin.
8. Install the engine plug bolt.
Tighten to 20 Nm (177 lbin).
9. Position the timing belt cover and install the 9 bolts.
Tighten to 9 Nm (80 lbin).
10. Position the coolant pump pulley and install the 4 bolts finger tight.
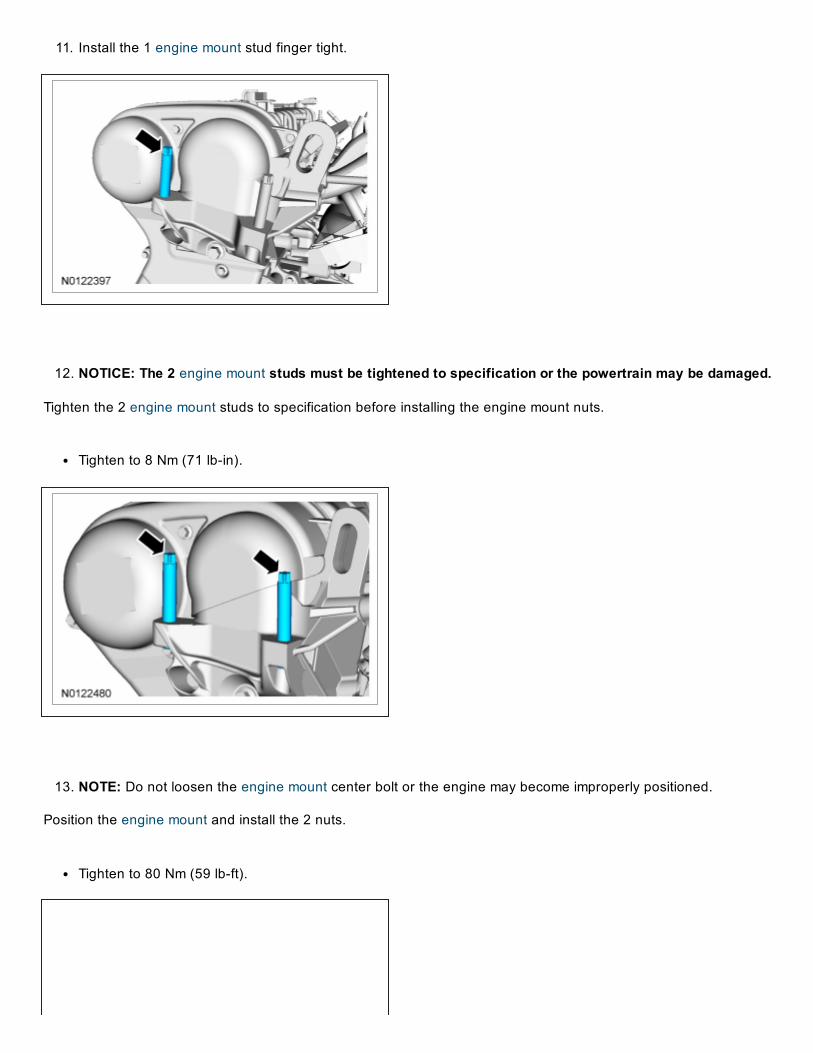
11. Install the 1 engine mount stud finger tight.
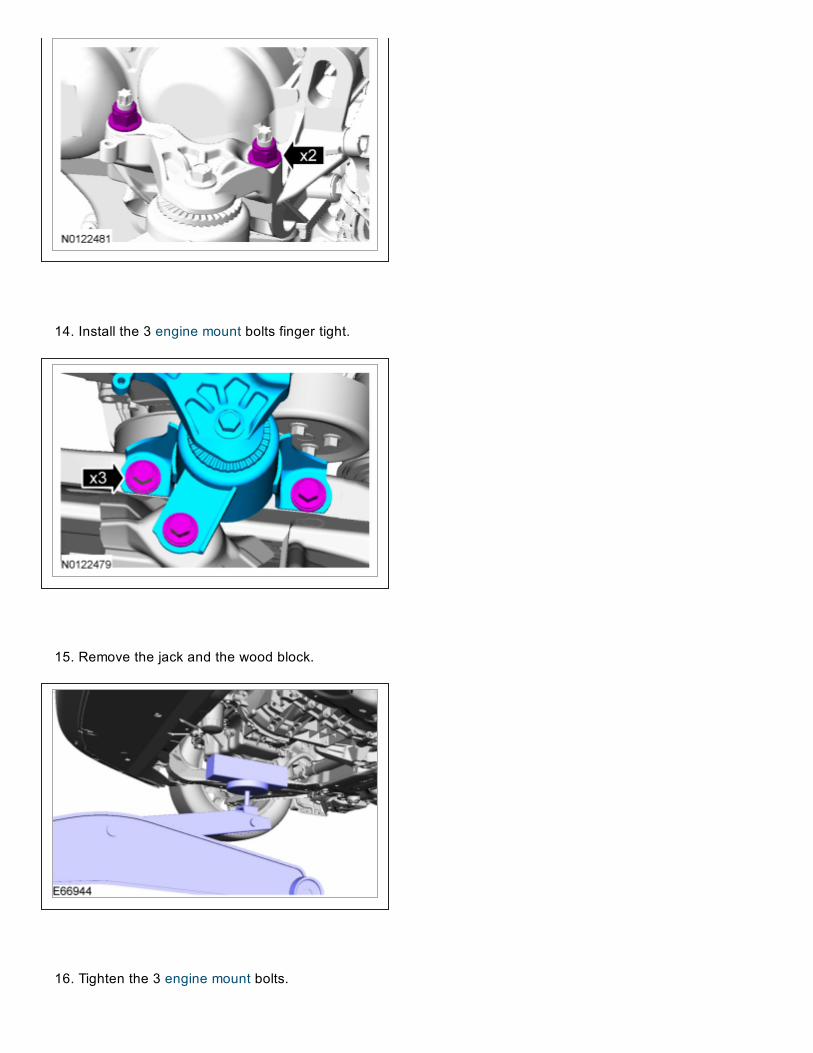
12. NOTICE: The 2 engine mount studs must be tightened to specification or the powertrain may be damaged.
Tighten the 2 engine mount studs to specification before installing the engine mount nuts.
Tighten to 8 Nm (71 lbin).
13. NOTE: Do not loosen the engine mount center bolt or the engine may become improperly positioned.
Position the engine mount and install the 2 nuts.
Tighten to 80 Nm (59 lbft).
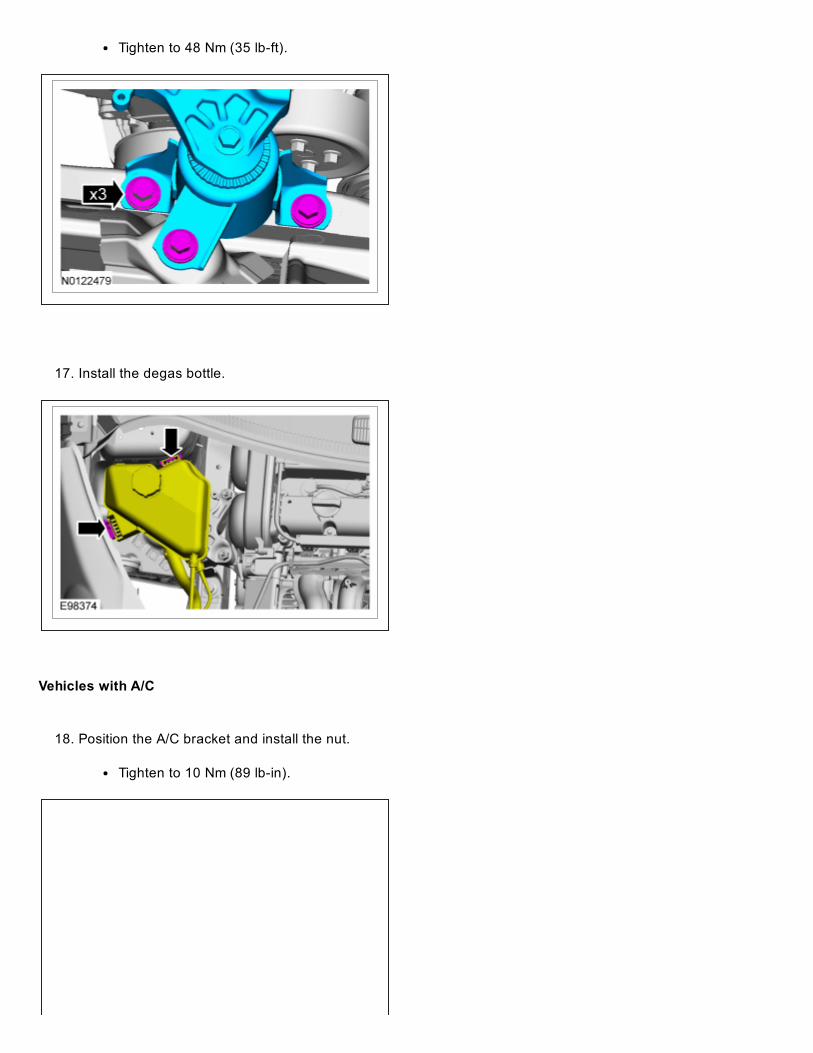
14. Install the 3 engine mount bolts finger tight.
15. Remove the jack and the wood block.
16. Tighten the 3 engine mount bolts.
Tighten to 48 Nm (35 lbft).
17. Install the degas bottle.
Vehicles with A/C
18. Position the A/C bracket and install the nut.
Tighten to 10 Nm (89 lbin).

19. Position the A/C compressor and install the 2 bolts and the studbolt.
Tighten to 24 Nm (18 lbft).
Vehicles without A/C
20. Position the accessory drive belt idler pulley bracket and install the 3 bolts.
Tighten to 24 Nm (18 lbft).
All vehicles
21. Install the accessory drive belt. For additional information, refer to Accessory Drive See: Engine\DriveBelt\Service and Repair\Accessory Drive Belt.
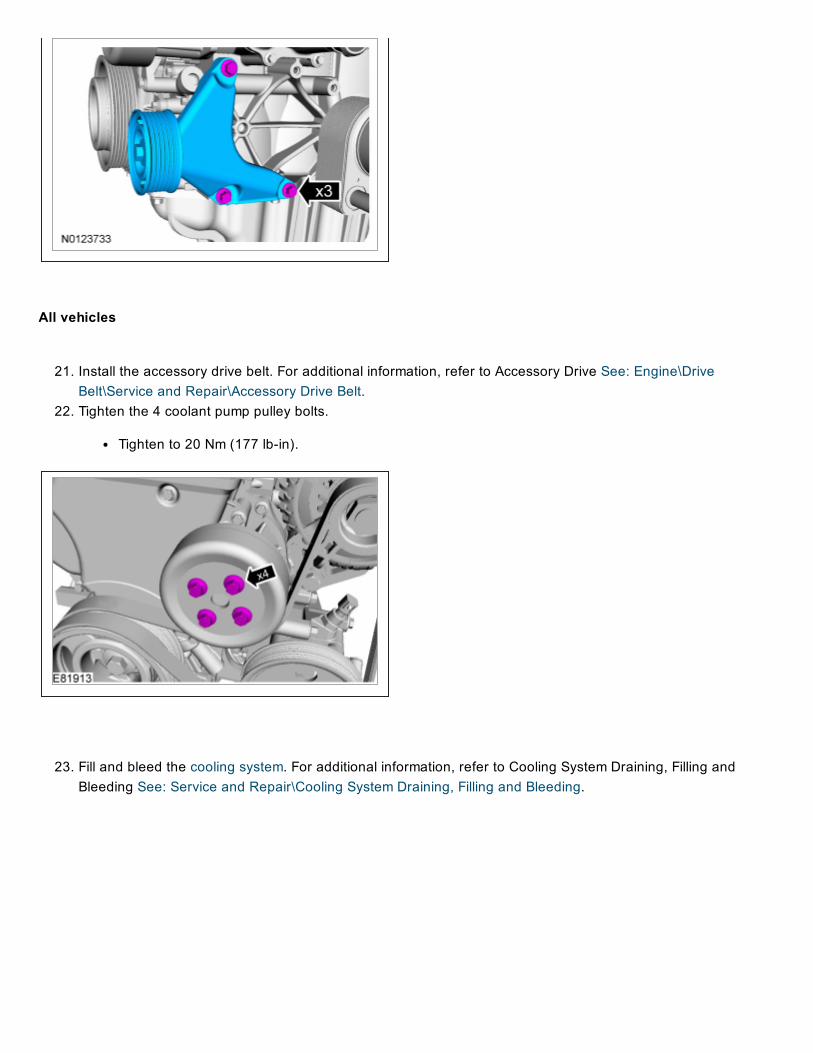
22. Tighten the 4 coolant pump pulley bolts.
Tighten to 20 Nm (177 lbin).
23. Fill and bleed the cooling system. For additional information, refer to Cooling System Draining, Filling andBleeding See: Service and Repair\Cooling System Draining, Filling and Bleeding.