


Languages
Pages
Legal


Model: CO117-DK
Original Digital Glass Kettle
User Manual
Questions or Concerns?Mon —Fri, 9:00 am—5:00 pm PST/PDT
[email protected] | (888) 402-1684

2
(We hope you love your new glass kettle as much as we do.)
Our helpful, in-house chefs are ready to assist you with any questions you might have!
On behalf of all of us at Cosori,
CONTACT OUR CHEFS
Email: [email protected]: (888) 402-1684M–F, 9:00 am—5:00 pm PST/PDT
exploreexplore our recipe gallerywww.cosori.com/recipes
joinjoin the Cosori Cooks Community on Facebook facebook.com/groups/cosoricooks
enjoyenjoy weekly, featured recipesmade exclusively by our in-house chefs
3
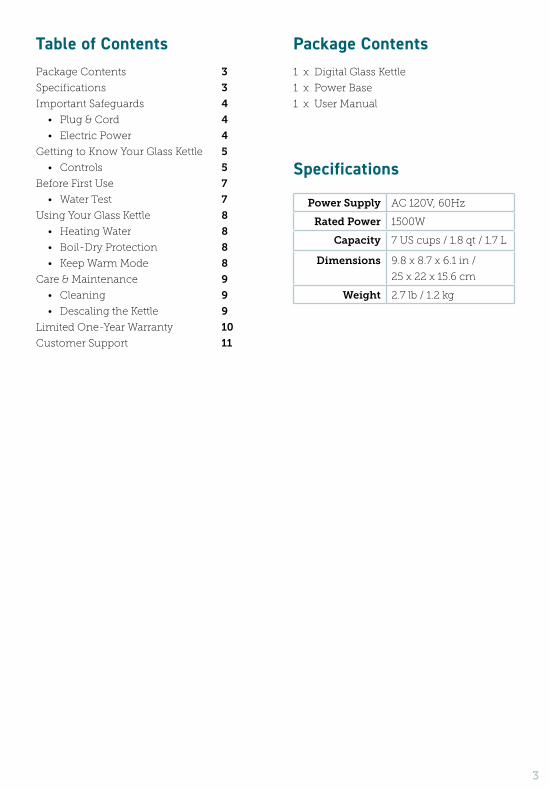
Table of Contents Package Contents1 x Digital Glass Kettle
1 x Power Base
1 x User Manual
Power Supply AC 120V, 60Hz
Rated Power 1500W
Capacity 7 US cups / 1.8 qt / 1.7 L
Dimensions 9.8 x 8.7 x 6.1 in /
25 x 22 x 15.6 cm
Weight 2.7 lb / 1.2 kg
Package Contents
Specifications
Important Safeguards
• Plug & Cord
• Electric Power
Getting to Know Your Glass Kettle
• Controls
Before First Use
• Water Test
Using Your Glass Kettle
• Heating Water
• Boil-Dry Protection
• Keep Warm Mode
Care & Maintenance
• Cleaning
• Descaling the Kettle
Limited One-Year Warranty
Customer Support
Specifications
3
3
4
4
4
5
5
7
7
8
8
8
8
9
9
9
10
11

4
IMPORTANT SAFEGUARDS
Always follow basic safety precautions when using your kettle. Read all instructions.
• Do not immerse the kettle, base, cord, or plug
in water or other liquids.
• Closely supervise children near the kettle.
Do not allow children to use or play with this
kettle.
• Unplug the kettle when it is not being used
and before cleaning. This will avoid electric
shock and prevent moisture from causing
a short circuit in the power base while it is
plugged in.
• Allow to cool before putting on or taking off
parts, and before cleaning.
• Do not use the kettle if it is malfunctioning,
broken or chipped, or if the power cord or plug
is damaged in any way. Do not try to repair
the kettle. Contact Customer Support (see
page 11).
• Using accessory attachments not
recommended by the manufacturer may
result in fire, electric shock, or injury.
• Do not use outdoors.
• Place the kettle on a dry, flat surface. Do not place the kettle on or near heat sources such
as stovetops, ovens, radiators, etc.
• Always make sure the lid is closed while the
kettle is operating. Do not cover the spout
opening while the kettle is operating.
SAVE THESE INSTRUCTIONS
Plug & Cord
Electric Power
• Do not let the cord (or any extension cord)
hang over the edge of a table or counter. Do not allow the cord to touch hot surfaces.
• This kettle has a 3-prong grounding plug.
Always plug in to a grounded electrical outlet.
Do not modify the plug in any way.
• This kettle uses a short power-supply cord to
reduce the risk of entangling or tripping. Use
extension cords with care.
• Any extension cord must also be a grounding-
type 3-wire cord.
• The marked electrical rating of an extension
cord should be at least as high as the rating of
the kettle (see page 3).
• If the electrical circuit is overloaded with
other appliances, this kettle may not operate
properly. The kettle should be operated
on a separate electrical circuit from other
appliances.
• To disconnect, use the START/CANCEL
button to turn the kettle off, then remove the
plug from the wall outlet.
• Only use the kettle as directed in this manual.
• Household use only.
• Do not touch hot surfaces. Use handle.
Do not touch the base or glass parts of
the kettle during or immediately after
operation.
• Do not fill the kettle above the “MAX“
line. This may cause water to boil over
and may cause scalding.
• Always handle with care when there
is hot water inside the kettle to avoid
scalding.
CAUTION!

5
GETTING TO KNOW YOUR GLASS KETTLE
A
C
H
G
D
F
E
B
A. Filter
B. Spout
C. Lid
D. Kettle
E. Heating Plate
F. Power Base
G. Lid Release Button
H. Handle
Note:
• The filter is made with food-grade stainless steel.
6
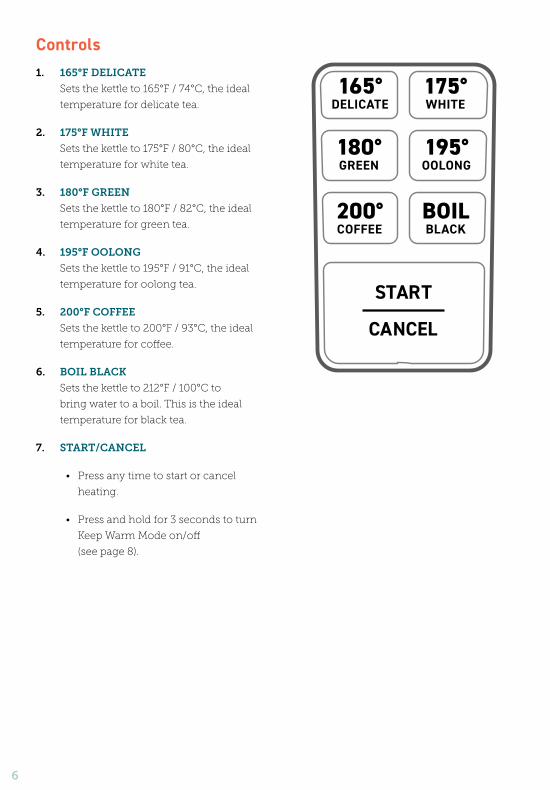
Controls1. 165°F DELICATE
Sets the kettle to 165°F / 74°C, the ideal
temperature for delicate tea.
2. 175°F WHITE
Sets the kettle to 175°F / 80°C, the ideal
temperature for white tea.
3. 180°F GREEN
Sets the kettle to 180°F / 82°C, the ideal
temperature for green tea.
4. 195°F OOLONG
Sets the kettle to 195°F / 91°C, the ideal
temperature for oolong tea.
5. 200°F COFFEE
Sets the kettle to 200°F / 93°C, the ideal
temperature for coffee.
6. BOIL BLACK
Sets the kettle to 212°F / 100°C to
bring water to a boil. This is the ideal
temperature for black tea.
7. START/CANCEL
• Press any time to start or cancel
heating.
• Press and hold for 3 seconds to turn
Keep Warm Mode on/off
(see page 8).
CANCEL
START

7
BEFORE FIRST USE
Water TestPerform the Water Test before using your
kettle to make sure it’s working properly. Do
not drink the water that is boiled during this
test.
1. Remove all packaging from your kettle
and its accessories.
2. Completely unravel the power cable
and place the power base on a flat,
level, stable surface.
3. Fill the kettle with water to the “MAX”
line, then put the lid on the kettle.
[Figure 1.1-1.2]
4. Press BOIL BLACK. Then, press
START/CANCEL to begin heating.
5. Turn off the kettle once it has finished
boiling the water. Allow it to cool, then
pour out the water. Rinse thoroughly
2–3 times with cold water.
Figure 1.1
Figure 1.2
8
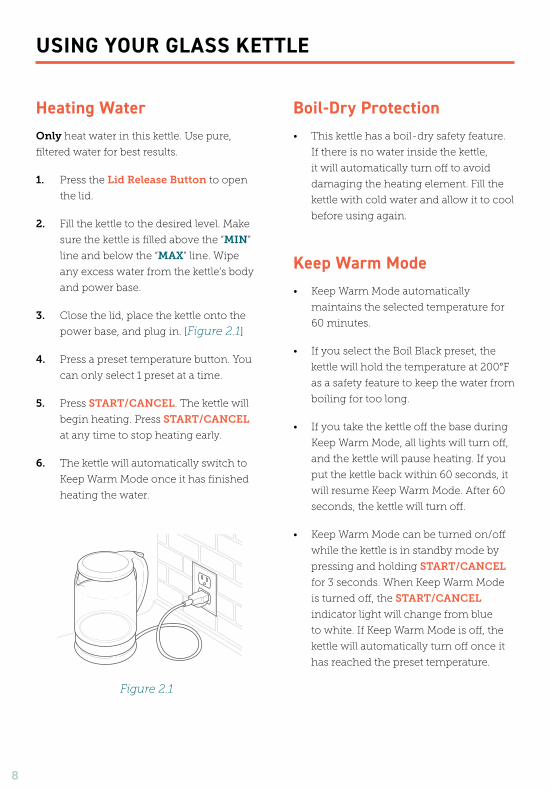
USING YOUR GLASS KETTLE
Heating Water Boil-Dry Protection
Keep Warm Mode
Only heat water in this kettle. Use pure,
filtered water for best results.
1. Press the Lid Release Button to open
the lid.
2. Fill the kettle to the desired level. Make
sure the kettle is filled above the “MIN”
line and below the “MAX” line. Wipe
any excess water from the kettle’s body
and power base.
3. Close the lid, place the kettle onto the
power base, and plug in. [Figure 2.1]
4. Press a preset temperature button. You
can only select 1 preset at a time.
5. Press START/CANCEL. The kettle will
begin heating. Press START/CANCEL
at any time to stop heating early.
6. The kettle will automatically switch to
Keep Warm Mode once it has finished
heating the water.
• This kettle has a boil-dry safety feature.
If there is no water inside the kettle,
it will automatically turn off to avoid
damaging the heating element. Fill the
kettle with cold water and allow it to cool
before using again.
• Keep Warm Mode automatically
maintains the selected temperature for
60 minutes.
• If you select the Boil Black preset, the
kettle will hold the temperature at 200°F
as a safety feature to keep the water from
boiling for too long.
• If you take the kettle off the base during
Keep Warm Mode, all lights will turn off,
and the kettle will pause heating. If you
put the kettle back within 60 seconds, it
will resume Keep Warm Mode. After 60
seconds, the kettle will turn off.
• Keep Warm Mode can be turned on/off
while the kettle is in standby mode by
pressing and holding START/CANCEL
for 3 seconds. When Keep Warm Mode
is turned off, the START/CANCEL
indicator light will change from blue
to white. If Keep Warm Mode is off, the
kettle will automatically turn off once it
has reached the preset temperature.
Figure 2.1
9
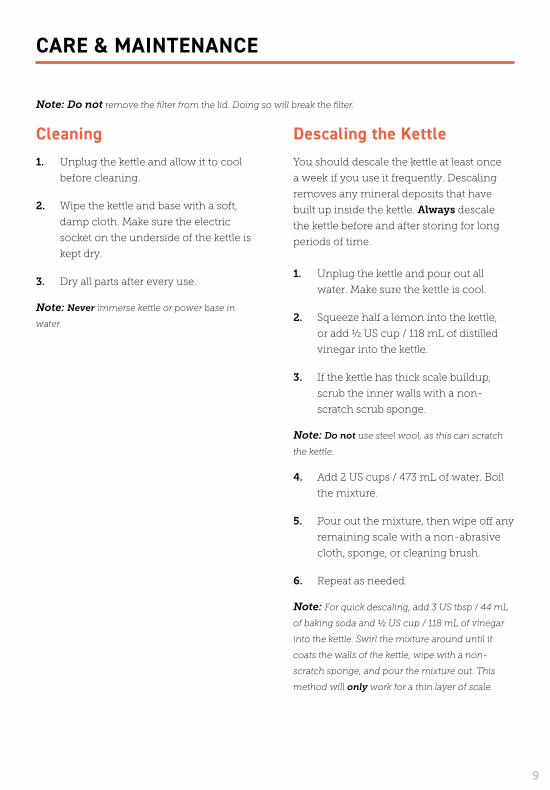
CARE & MAINTENANCE
Cleaning Descaling the Kettle1. Unplug the kettle and allow it to cool
before cleaning.
2. Wipe the kettle and base with a soft,
damp cloth. Make sure the electric
socket on the underside of the kettle is
kept dry.
3. Dry all parts after every use.
You should descale the kettle at least once
a week if you use it frequently. Descaling
removes any mineral deposits that have
built up inside the kettle. Always descale
the kettle before and after storing for long
periods of time.
1. Unplug the kettle and pour out all
water. Make sure the kettle is cool.
2. Squeeze half a lemon into the kettle,
or add ½ US cup / 118 mL of distilled
vinegar into the kettle.
3. If the kettle has thick scale buildup,
scrub the inner walls with a non-
scratch scrub sponge.
4. Add 2 US cups / 473 mL of water. Boil
the mixture.
5. Pour out the mixture, then wipe off any
remaining scale with a non-abrasive
cloth, sponge, or cleaning brush.
6. Repeat as needed.
Note: Never immerse kettle or power base in
water.
Note: For quick descaling, add 3 US tbsp / 44 mL
of baking soda and ½ US cup / 118 mL of vinegar
into the kettle. Swirl the mixture around until it
coats the walls of the kettle, wipe with a non-
scratch sponge, and pour the mixture out. This
method will only work for a thin layer of scale.
Note: Do not use steel wool, as this can scratch
the kettle.
Note: Do not remove the filter from the lid. Doing so will break the filter.
10
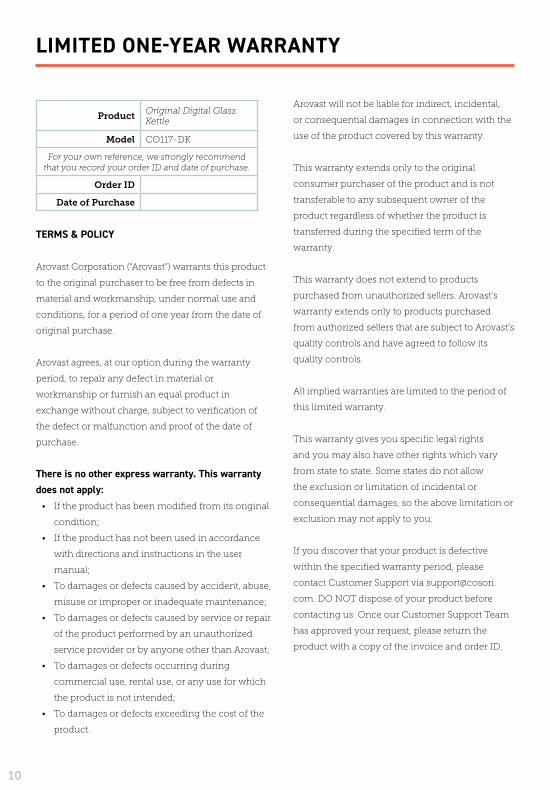
LIMITED ONE-YEAR WARRANTY
TERMS & POLICY
Arovast Corporation (“Arovast”) warrants this product
to the original purchaser to be free from defects in
material and workmanship, under normal use and
conditions, for a period of one year from the date of
original purchase.
Arovast agrees, at our option during the warranty
period, to repair any defect in material or
workmanship or furnish an equal product in
exchange without charge, subject to verification of
the defect or malfunction and proof of the date of
purchase.
There is no other express warranty. This warranty does not apply:
• If the product has been modified from its original
condition;
• If the product has not been used in accordance
with directions and instructions in the user
manual;
• To damages or defects caused by accident, abuse,
misuse or improper or inadequate maintenance;
• To damages or defects caused by service or repair
of the product performed by an unauthorized
service provider or by anyone other than Arovast;
• To damages or defects occurring during
commercial use, rental use, or any use for which
the product is not intended;
• To damages or defects exceeding the cost of the
product.
Arovast will not be liable for indirect, incidental,
or consequential damages in connection with the
use of the product covered by this warranty.
This warranty extends only to the original
consumer purchaser of the product and is not
transferable to any subsequent owner of the
product regardless of whether the product is
transferred during the specified term of the
warranty.
This warranty does not extend to products
purchased from unauthorized sellers. Arovast’s
warranty extends only to products purchased
from authorized sellers that are subject to Arovast’s
quality controls and have agreed to follow its
quality controls.
All implied warranties are limited to the period of
this limited warranty.
This warranty gives you specific legal rights
and you may also have other rights which vary
from state to state. Some states do not allow
the exclusion or limitation of incidental or
consequential damages, so the above limitation or
exclusion may not apply to you.
If you discover that your product is defective
within the specified warranty period, please
contact Customer Support via support@cosori.
com. DO NOT dispose of your product before
contacting us. Once our Customer Support Team
has approved your request, please return the
product with a copy of the invoice and order ID.
Product Original Digital Glass Kettle
Model CO117-DK
For your own reference, we strongly recommend that you record your order ID and date of purchase.
Order ID
Date of Purchase
11
WARRANTY INFORMATION (CONT.)
CUSTOMER SUPPORT
If you have any questions or concerns about your new product, please contact our helpful
Customer Support Team.
*Please have your invoice and order ID ready before
contacting Customer Support.
Arovast Corporation
1202 N. Miller St., Suite A
Anaheim, CA 92806
Email: [email protected]
Toll-Free: (888) 402-1684
Support Hours
Mon–Fri
9:00 am–5:00 pm PST/PDT
Extend Your Warranty by 1 YearRegister your product within 14 days of purchase
at www.cosori.com/warranty to extend your
1-year warranty by an additional year.
This warranty is made by:
Arovast Corporation
1202 N. Miller St. Suite A
Anaheim, CA 93806

12
NOTES

13
NOTES

14
NOTES
15
We hope this has been helpful to you. We can’t wait to see your beautiful
results, and we think you’ll want to share glam shots! Others already in
the community are awaiting your uploads—just pick your platform of
choice below. Snap, tag, and hashtag away, Cosori chef!
SHOW US WHAT YOU’RE MAKING
MORE COSORI PRODUCTS
If you’re happy with this kettle, the line doesn’t stop here. Check out
www.cosori.com for a line of all our beautiful and thoughtfully designed
cookware. They might be right at home in your kitchen, too!
@cosoricooks
Cosori Appliances
#iCookCosori
Considering what to cook? Many recipe ideas are
available, both from us and the Cosori community.

16
JD060420AL_ M1_0520CO117-DK
Questions or Concerns?Mon–Fri, 9:00 am–5:00 pm PST/PDT
[email protected] | (888) 402-1684
Top Related