
Youth Technical Guide - Integrity Soccer
41
Youth Technical Guide
Transcript of Youth Technical Guide - Integrity Soccer

Youth Technical Guide

Please see this weeks session overleaf; themed this week around building attacks. You may (if you haven’t already) want to consider: 1. The game (in the middle of the slide) as the reference point. The other three practices, potentially, help
players work towards developing the skills and understanding to build attacks. Consider which of the practices you would like to deliver/or that your players would like to play in. It isn’t always best to go from 1 to 2 to 3 and then to the game (although sometimes it is).
2. Building attacks is about trying to find a balance between playing forward and seeking to penetrate/exploit space and keeping possession until the right time to attack.
3. Should you wish to use all the practices in one session; they should seamlessly move from one to the other. Depending upon the numbers in your team/age of the players.
4. Involve your goalkeepers. They can play in all parts of the session.
5. Challenges that may help your players practise and focus upon building attacks: a. Try to recognise when and when not to play forward b. Try to spot when to risk it and when to keep it c. Try to play quickly when it’s on (but don’t rush) d. Try to move to support as the ball moves (speed of movement/anticipation) e. Try to switch play when its on f. Try to wear down the opposition by keeping the ball from them g. Try to use your GK’s to help keep the ball (when it’s on) h. Try to spot when to move forward to support and when to stay put i. Try to spread out as a team
Building Attacks

Possession to Build Attacks
1 – Keeping & Risking
1. Three groups – 2 of 5, 1 of 4 (or whatever numbers you have)
2. GK’s included in a team as players (need to be able to use their feet)
3. Keep ball practice. Blues try to keep it from yellows. 5 passes equals a goal – can use red players to help keep possession but if it is played to the outside your passing score counter returns to 0 (and you start again).
4. Help players recognise when to play a scoring pass and when to make sure you keep possession
5. Swap outside players
2 - Keeping Possession
1. 1 ball – 8 vs. 4 + GK’s (rotate 4 defenders regularly)
2. Yellows – try to keep the ball and utilise the GK’s in doing so (back pass law applies). One point for every 5 passes made.
3. Reds – try to win it and keep it for 3 passes – if they do, then they get to swap with 4 yellows and become attackers
3 – Building Attacks
1. 8 vs. 4 + 2 GK’s
2. Yellows – Keep possession and use GK’s to help and try to get to 5 passes. When you get to the 5th pass – attack the goal which is farthest away from where the 5th pass is completed (half-way line acts as guide for players to see which goal is farthest away). Remind it isn’t essential that they attack on the 5th pass- it may take more passes to set up the opportunity to attack (6 or 7 or 8 or more)
3. Reds – try to win ball back and counter attack into either goal
Game
1. Yellows vs. Reds – 7 vs. 7 – in a 1-3-2-1 formation. Recognise when to play forward and when not to.
2. Players are not locked into their areas.
3. Number of passes played before scoring equals number of goals (e.g. 6 passes – goal = 6 goals)
3

Please see this weeks session overleaf; themed this week around Breaking into the Box. You may (if you haven’t already) want to consider: 1. The game (in the middle of the slide) as the reference point. The other two practices, potentially, help players work towards
developing the skills and understanding to break forward to support front players in the game. Consider which of the practices you would like to deliver/or that your players would like to play in. It isn’t always best to go from 1 to 2 and then to the game (although sometimes it is).
2. That the timing and type of run will aid how effective it is. Think about blind-side runs, runs that support behind the ball (maybe if forward receiving cannot turn), runs that go in advance of the ball, runs that go from in to out or out to in, runs that go against the flow of play and ones that ensure the runner stays onside.
3. The value of third man runs
4. That runs don’t always have to be 20-30 yarders. Maybe a few yards drift can be just as effective.
5. The following challenges utilised with your players to aid them focusing upon the things that may help them: a. Try to recognise when to and when not to move forward b. Try to make runs that lose your marker c. Try to time your run to arrive as the ball does d. Try to spot when to support behind the ball and when to support in advance of the ball e. Try to recognise when to run with the ball f. Try to run where your opponent cannot see you g. Try to know what’s around you before you receive the ball h. Try to make movements out of your area of the pitch into others areas i. Try to recognise when other peoples areas may need to be covered j. Try to look for passes into the forwards feet
Breaking into the Box

Breaking into the Box
1
In The Game
1. 8 vs. 8 including GK’s
2. 2-3-2– look to get players into attacking boxes to support strikers
Repetition Circuit
1. 2 pitches side by side.
2. Pitch 1 – red passes on and two reds play 2 vs. 1 in midfield to try to get to forward area and join in to score.
3. Pitch 2 – yellow runs ball onto pitch and tries to pass or run ball into forward area to score.
4. Swap attacking team for defending team and swap pitches (so all players practice each situation)
2
Playing Up + Joining Up
1. Reds work toward bottom goal, yellows towards top goal. Each team has a ball and midfielder passes ball from midfield into attacking area. Both work simultaneously.
2. One of the advanced midfielders joins into attacking area to help score.
3. Recognise which player is best to join up in different situations

Please see this weeks session overleaf; themed this week around Collecting, Carrying & Combining Through Midfield. You may (if you haven’t already) want to consider: 1. The game (in the middle of the slide) as the reference point. The other two practices, potentially, help players work towards
developing the skills and understanding to collect the ball, carry it and combine with others. Consider which of the practices you would like to deliver/or that your players would like to play in. It isn’t always best to go from 1 to 2 and then to the game (although sometimes it is).
2. That playing through midfield is about more than just passing. Try to help your players with how they receive the ball, retain it (recognising when & when not to play forward), release it and run with the ball when appropriate.
3. That sometimes it may be appropriate to ‘miss out midfield’ by playing all the from deep to forward areas. Perhaps consider that this is also a way to play and help your players to do it accurately and with quality
4. That support play away from the ball aids all of the elements within this session. When can players support behind the ball, in front of the ball; how might this change the way we play passes to feet and passes to space and try to get players to think ahead and be on the move to support as the ball travels.
5. The following challenges utilised with your players to aid them focusing upon the things that may help them: a. Try to recognise when and when not to play forward b. Try to give the ball to someone and look to get it back (give + go’s) c. Try to not give the ball back to the person who gave it to you (3rd man runs) d. Try to miss out as many opposition as possible with your passes e. Try to recognise when to support behind the player and when to support in front of them f. Try to recognise when and when not to join the attack g. Try not to leave your team outnumbered at the back h. Try to play passes between opponents if it’s on i. Try to play one touch if it’s on j. Try to spot the times to run with the ball k. Try to recognise when to play to feet and when to play to space
Collecting, Carrying & Combining Through Midfield

Collecting, Carrying + Combining Through Midfield
1
In The Game
1. 7 vs. 7 including GK’s
2. 3-1-2 – look to combine or carry from deep to midfield and from midfield to front
Establishing Foundations
1. 2 x teams of 7 (6 players + 1 GK). Two balls per team. Practice passing and running with the ball within your team of 7. GK’s can use feet or hands to collect and release.
2. Look for opportunities to a. run with the ball from third to third, b. play give + go’s with team-mates and c. passes that go between two players of the other colour (split passes)
2
Linking + Changing Overloads
1. 7 vs. 7 organised into a 1-3-1-2. Yellow GK has 6 balls and yellows get 6 attempts to score – serving one in, yellows try to break through each area, allowing players to combine and carry to build an attack and shot on goal.
2. Yellows see how many they can score, if red’s regain, counter attack to get to opposition GK’s hands.
3. Swap roles – reds attack and try to beat yellows score.

Defending - Variety
Challenges Relating to the Theme Other Challenges that may suit Individuals
1. Try to work out when to mark the space and when to mark the player
1. Try to play 1-touch when it’s on
2. Try and recognise when to press and when not to 2b. Try to recognise when to follow an opponent short and when to hold your position
2. Try to recognise when to run with it and when to release it
3. Try to position yourself to be able to intercept 3a. Try to work out when to intercept and when to prevent turning
3. Try to win the ball back within 4 passes of the opposition gaining it
4. Try to position yourself to see the ball and your opponent 4b. Try to mark ball side
4. Try to recognise when to play forward and when not to
5. Try to prevent your opposition playing forward 5a. If they do; try to turn and pinch it from the front
5. Look for opportunities to switch play
6. Try to recognise when to run back to help and when not to 6a. When running back, try to recognise when to go to the ball and when to run to space
6. GK – when to push defence up 6b. GK – when to play short and when to play long
7. Try to recognise when to block shots 7b. When blocking shots; try to recognise when to go to ground and when not to
7. When to use skills and tricks to beat an opponent
Notes for Coaches
1. Try to use the challenges to help the players to decide the best thing to do for the situation
2. Try to select challenges that fit the area of work
3. Try to recognise which player(s) needs a new/different challenge (recognise when to stop the whole group and when you can speak to an individual
4. Allow players to choose their own challenges (even if it doesn’t link directly to the theme (so it’s their own syllabus)

Defending – Variety Individual Defending – Repetition Circuit
• Pitch 1 - Server plays into attacker who attempts to beat red and score in goal – server becomes attacker and attacker retrieves their
ball and joins end of other pitch.
• Pitch 2 – Blue attacker runs ball onto pitch – defender deals with attacker running at them –
attacker retrieves ball and joins end of other pitch
• On pitch 1 - If attacker scores without using support players (yellows), 3 goals. If attacker
uses support to score, 1 goal is scored.
Defending in Two’s
1. Pitch 1 – Blue server plays in to blues who attack to score past GK
2. If Red’s regain, score by playing into the blue server who then dribbles onto pitch to make a
3 vs. 2
3. Pitch 2 – Blue dribbles ball onto pitch to make 2 vs. 2. As blue enters the pitch, red at back of
servers box recovers onto pitch. Red’s score by regaining and dribbling into servers box.
Back Four
1. Four vs. three + GK in defensive third of the pitch & 3 vs. 2 in midfield
2. Red’s trying to defend goal . If they regain, break into middle area and score into goal
3. Try to keep at least one of your team in midfield area
4. Encourage general flow of game to allow realistic situations to occur
Pitch 1
Pitch 2
Pitch 1
Pitch 2

Please see this weeks session overleaf; themed this week around defending when out of balance. You may (if you haven’t already) want to consider: 1. The game (in the middle of the slide) as the reference point. The other three practices, potentially, help players work towards
developing the skills and understanding to defend when out of balance. Consider which of the practices you would like to deliver/or that your players would like to play in. It isn’t always best to go from 1 to 2 to 3 and then to the game (although sometimes it is).
2. Defending out of balance is, generally, about trying to restrict and limit the options that your opponents have to score goals. Sometimes this will be achieved by regaining the ball early, others by delaying and buying time for recovering defenders to help and sometimes by accepting that shots will come in but the acuter the angle, farther from goal and greater the pressure on the ball may reduce the likelihood of a goal.
3. Should you wish to use all the practices in one session; they should seamlessly move from one to the other. Depending upon the numbers in your team/age of the players.
4. Starting with the game (the teams have different formations) and setting the scene by asking the players to ‘try to get players forward to support the attack’. This may mean that on the ball turning over the team losing possession is out of balance and will give opportunity for the players to practice realistically.
5. That a team rarely defends out of balance/outnumbered forever. Think about including either a recovering defender in practices where the attackers have more players going forward than the defenders have defending or placing a condition on the attacking team to try to score in 4 passes (which should bring realism to the attack).
6. Challenges that may help your players practise and focus upon defending when out of balance: a. Try to slow the attackers down (can ask the question – what things slow the attack down?) b. Try to spot when to stop the attack early c. Try to buy time for help to come (Q - how do we do this?) d. Try to recognise the best place to force the attackers to (Q – does this change from attack to attack?) e. Try to stop shots on goal f. Try to recognise when to (and when not to) go to the ball
Defending When Out of Balance

T
T
Defending When Out of Balance
1 – Repetition Practice (Concurrent)
1. Shorten length of midfield third (so that end thirds or bigger) – 2 x practices run at the same time (1 at each end) of 3 v. 2
2. Player in central strip has a ball and either passes on to pitch and joins in or runs ball in and plays 3 v 2 trying to score in the goal.
3. If defenders win the ball, they play to their target player (T) in central strip and attackers recover back and try again. If attackers score, they move back to central strip, collect another ball and go again.
4. Four attacks per team and then swap attackers and defenders.
5. Can allow (T) player to recover back into practice as a recovering defenders after ball has entered the pitch.
2 – Changing Overloads from Midfield
1. 2 practices running at the same time. Reds attack one end with 2 v 1 in midfield and 2 v 2 in area nearer to goal
2. Yellows attack other area with 2 v 1 in midfield and 1 v 1 in area nearer to goal
3. Midfield players work ball into attacking area and try to score. Defenders try to win ball back and run onto halfway line to score. If defenders score, leave ball on half-way line and attackers collect and try again
3 – Game – Defending Players Locked In
1. 7 vs 7 – 2-3-1 vs. 2-2-2 (+ GK’s)
2. Attacking players can move freely from area to area. When out of possession you’re restricted to your areas (on turnover of possession recover back to your original area as quickly as possible)
3. This should generate outnumbered situations along with recovery runs when the ball turns over.
4. Utilise challenges on first sheet to focus players work (either specific to the players needs or the position they’re playing)
Game
1. Yellows vs. Reds – 7 vs. 7 – yellows - in a 1-2-3-1; reds in a 1-2-2-2 formation.
2. Try to get players forward to join the attack
3

Please see this weeks session overleaf; themed this week around Deft Distribution. You may (if you haven’t already) want to consider: 1. The game (in the middle of the slide) as the reference point. The other three practices, potentially, help players work towards
developing the skills and understanding to distribute the ball cleverly. Consider which of the practices you would like to deliver/or that your players would like to play in. It isn’t always best to go from 1 to 2 to 3 and then to the game (although sometimes it is).
2. That distribution is a key element of the game. Your players can practice pushing, swerving, driving, clipping, lofting and sliding the ball.
3. Linking to passing priorities. For example, practice 2 encourages players to recognise different passing outlets. 1 point is scored by playing from full back to full back (across the pitch), largely in front of the opposition. 2 points for playing from deep on side to advanced on the same side of the pitch (down the pitch) – possibly penetrating the opposition. 3 points is scored for the diagonal change of play from deep on one side to advanced on the other – possibly penetrating and stretching the opposition in one go.
4. Encouraging your players to risk & reward. The greater the risk on passing, the greater reward. Ask them to recognise when and when not to take greater risk based upon the situation.
5. The following challenges utilised with your players to aid them focusing upon the things that may help them: a. Try to advance the ball in as few passes as possible b. Try to recognise when and when not to risk possession c. Try to spot when to play to space and when to play to feet d. Try to recognise when to speed the game up and when to slow it down e. Try to pass in way that your opponent can’t read what you’re doing f. Try to recognise when to change the height of the ball (e.g. chipping, clipping & scooping) g. Try to know what’s around you before you receive the ball h. Try to face forward before you receive the ball i. Try to recognise when to play 1 touch and when to take more j. Try to play past as many opponents as possible but keep possession k. Try to respond quickly to the change of possession
Deft Distribution

Deft Distribution
Unopposed Practice
1. 4 teams of 4 – one team occupy corner boxes
2. 3 teams with one ball per team receive from corner boxes and work ball to another corner box – continuously repeat
3. Try to transfer in as few passes as possible
4. Recognise when to play diagonally, sideways and forward
5. Rotate corner box players
6. Practice driving, clipping, pushing and swerving passes
2
Outnumbered Practice
1. 7 vs. 5 + 4 box players
2. 1 point if playing across pitch, 2 points if playing forward and 3 points if playing diagonally
3. Upon scoring, receive back and scoring process continues from where ball is fed in from
4. If red’s regain, play in the same way
5. Recognise when to play direct and when to combine
Game Related Practice
1. 6 vs. 6 + 4 target players – yellows attack to score by playing to greys on right on diagram and reds score by playing to greys on left of diagram
2. Upon scoring target player plays ball to opposition to attack themselves
3. Try to free yourself up and receive to play penetrative pass
4. Can use other teams grey targets to keep possession (retain or risk)
In The Game
1. 8 vs. 8 including GK’s
2. 3-2-2 – recognise when to be direct, develop play and when to switch play
2 point
s
1 point 3
points

Please see this weeks session overleaf; themed this week around Creating Goal-scoring Opportunities. You may (if you haven’t already) want to consider: 1. The game (in the middle of the slide) as the reference point. The other three practices, potentially, help players work towards
developing the skills and understanding to develop Goal-scoring Opportunities in the game. Consider which of the practices you would like to deliver/or that your players would like to play in. It isn’t always best to go from 1 to 2 to 3 and then to the game (although sometimes it is).
2. That goal-scoring chances are created in a range of ways – from the forwards combining in front of the defenders, from penetrating space behind, by running at opponents, shooting from distance if defenders stand off, by wide players coming in off the line or going outside and crossing and any other possibilities that you can think of. Try to allow your practices and players to reflect this.
3. Should you wish to use all the practices in one session; they should seamlessly move from one to the other. Depending upon the numbers in your team/age of the players; consider running concurrent practices (2 groups working at the same time) in the first part and perhaps using a 2 v 2 at one end (to reflect 2 traditional strikers working together) and a 3 v 3 at the other (to reflect wide forwards).
4. The following challenges utilised with your players to aid them focusing upon the things that may help them: a. Try to lose your marker to receive the ball b. Try to recognise when and when not to go short c. Try to combine with your team-mate to set up a shot d. Try to play one-touch when it’s on e. Try to look for the time to play passes that go between defenders f. Try to shoot to the vulnerable part of the goal g. Try to recognise when to run with the ball and when to release (pass or shot) h. Try to move your marker out of position i. Try to spot when to come inside and when to go outside j. Try to recognise when to support behind the ball and when to go in advance
Forwards Linking to Create Goal-scoring Opportunities

Forwards Linking to Create Goal-Scoring Opportunities
1 – Feeding + Finishing
1. Concurrent practices. 5 x yellows vs. 3 blues + GK on one half. 4 x blues vs. 2 yellows + 1 GK on other half.
2. Midfield players (in central area) can play straight in or combine to play in. Attackers can play back to midfielders if necessary
3. Attackers try to score – defenders score a point by regaining and playing into opposition midfielders or 2 points if they can run the ball (under control) into the midfield area
2 – Splitting + Shifting
1. As per 1 but midfield players swap areas so that they have to play past the other colour to get ball to their attackers.
2. Forwards can, if appropriate, come short into midfield area to support (blue defenders can follow but blue midfielders can’t block/tackle)
3. One midfielder can move into attacking area to support (one must stay). If defenders regain – play through to opposition midfielder that stayed back
3 – Rotating + Running On
1. 1 ball – blues vs. yellows
2. Play 8 vs. 8 but players locked into areas (initially)
3. Rotation through areas then allowed (e.g. forward comes short into midfield and midfielder runs onto support forward)
Game
1. Free flowing 8 vs. 8
2. Utilise challenges from throughout session (as per session description)
3

Please see this weeks session overleaf; themed this week around Marking & Intercepting. You may (if you haven’t already) want to consider: 1. The game (in the middle of the slide) as the reference point. The other three practices, potentially, help players work towards
developing the skills and understanding to mark and intercept in the game. Consider which of the practices you would like to deliver/or that your players would like to play in. It isn’t always best to go from 1 to 2 to 3 and then to the game (although sometimes it is).
2. That the key to successful marking and intercepting is in the players starting position. Some defending practices have the defender passing over 20 yards to an attacker and then closing them down. This prevents them being able to start in a position that relates to where the ball is, where the goal is and where the opponent is. Once a player can consider those three things they can assume a starting position to try to pressure their opponent as or before they receive the ball and protect the goal too.
3. Marking positions. Ball side (the side of the player that the ball is – left shoulder or right shoulder) and goal side can help players to be in a position to read a pass and intercept.
4. Counter attacking as a constituent element of marking and intercepting. Steal the ball (or spoil the ball to a team-mate) and then run or pass with it to try to score yourselves
5. The following challenges utilised with your players to aid them focusing upon the things that may help them: a. Try to mark ball side b. Try to mark goal side c. Try to be close enough to your opponent to press them on receiving d. Try to recognise when to mark the player and when to cover the space e. Try to position yourself so you can intercept f. Try to recognise when to and when not to intercept g. Try to play quickly when regaining possession h. Try to use the offside law to help you (when appropriate)
Marking & Intercepting

Marking & Intercepting
1 – Where + How to Mark
1. Concurrent practices (both running at the same time) – both unopposed
2. Players on the outside of the practice pass ball to each other – attackers can move freely to seek to lose the attentions of the defenders
3. Mark ball side and goal side of your opponent and be close enough to your opponent so that if ball were played to them you would be able to apply pressure
4. Progression – Outside players can pass into forwards who control and play back to any outside player. Defenders apply pressure and try to touch opponent just before or as they receive the ball
5. 2nd defender – try to mark your player and protect space behind your pressing defender at the same time
2 – Marking to Intercept
1. As per 1 but outside players can play into 2 vs. 2 whenever they choose. Attackers try to score in the goal and defenders score 1 point if they pass to an outside player or 2 points if they can run ball under control into the middle zone
2. Defenders – try to position yourself to intercept and recognise when to intercept and when not to and prevent attackers from turning
3. If intercepting recognise whether to run or pass to score (counter-attacking)
3 – Midfielders Joining + Recovering
1. 1 ball – blues vs. yellows
2. Play 8 vs. 8 but all players locked into areas – except midfielders
3. Play into midfield area and one of midfielders plays into attackers (or runs ball in) and joins in (to create 3 vs. 3)
4. Upon regain or goal – ball played into midfield area and other team attack the goal in the same way (midfielder who had joined in recovers back into midfield)
Game
1. Free flowing 8 vs. 8
2. Utilise challenges from throughout session (as per session description)
3
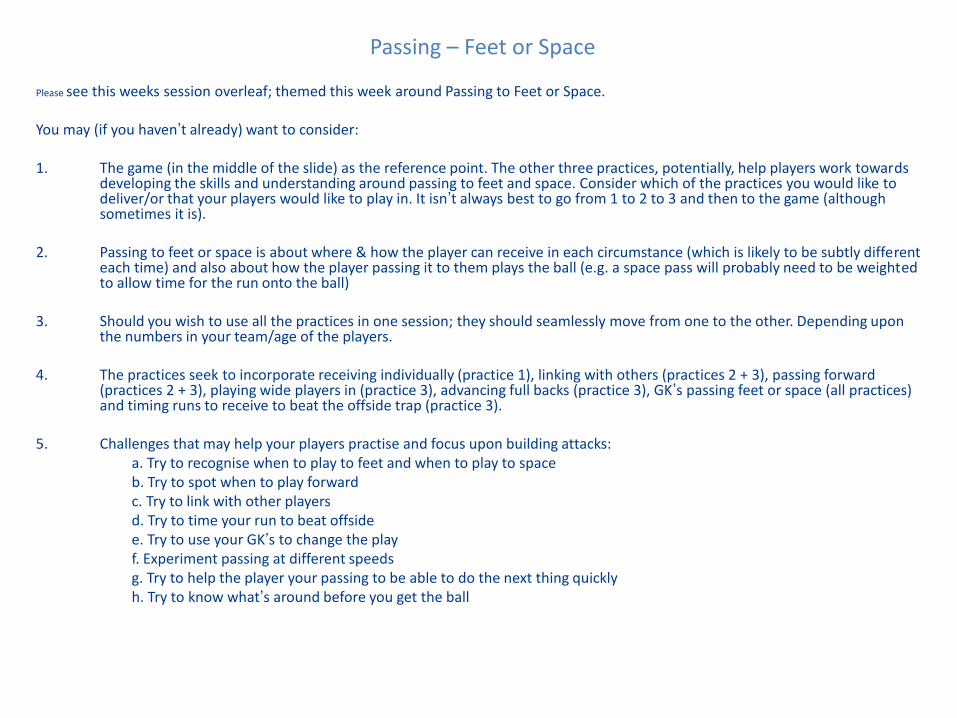
Please see this weeks session overleaf; themed this week around Passing to Feet or Space. You may (if you haven’t already) want to consider: 1. The game (in the middle of the slide) as the reference point. The other three practices, potentially, help players work towards
developing the skills and understanding around passing to feet and space. Consider which of the practices you would like to deliver/or that your players would like to play in. It isn’t always best to go from 1 to 2 to 3 and then to the game (although sometimes it is).
2. Passing to feet or space is about where & how the player can receive in each circumstance (which is likely to be subtly different each time) and also about how the player passing it to them plays the ball (e.g. a space pass will probably need to be weighted to allow time for the run onto the ball)
3. Should you wish to use all the practices in one session; they should seamlessly move from one to the other. Depending upon the numbers in your team/age of the players.
4. The practices seek to incorporate receiving individually (practice 1), linking with others (practices 2 + 3), passing forward (practices 2 + 3), playing wide players in (practice 3), advancing full backs (practice 3), GK’s passing feet or space (all practices) and timing runs to receive to beat the offside trap (practice 3).
5. Challenges that may help your players practise and focus upon building attacks: a. Try to recognise when to play to feet and when to play to space b. Try to spot when to play forward c. Try to link with other players d. Try to time your run to beat offside e. Try to use your GK’s to change the play f. Experiment passing at different speeds g. Try to help the player your passing to be able to do the next thing quickly h. Try to know what’s around before you get the ball
Passing – Feet or Space

GK GK
1
Passing - Feet or Space
1 – Receiving
1. 2 areas – players play concurrently
2. Red pitch – 2 balls – players on the outside play into the 2 central players (1 ball played to 1, 1 to the other) – unopposed; try to either receive to feet & touch the ball from the box you received it in to another before playing to the outside or outside player plays into a box that you’re not in to receive into space. Repeat for 90 seconds and then rotate outside players in
3. Yellow pitch – 1 vs. 1 in the middle – other 4 support player in possession. Score 1 point if you receive from the outside and play to a different outside player from whom you received. Score 3 points if you can receive from the outside and touch ball into another box before passing to a different outside player. First to 10 points wins – rotate.
2 – Playing Forward
1. Unopposed – 5 yellows & 5 reds; plus two GK’s
2. Yellows on outside; reds in the middle. One yellow in central area (like a Central Midfielder)
3. Reds, all concurrently, receive a ball from the outside and seek to play to a yellow (or GK) in the other half of the pitch (can use central yellow to combine with)
4. Repeat 6 passes – swap reds for yellows
3 – Linking with Wide Players (FB’s & WM’s)
1. 3 vs. 3 + GK’s and two side players (1 in own half; 1 in opposition half)
2. Players on the pitch can move freely from half to half – try to score past the GK
3. Can use wide players to help set up attacks. Either the deep lying one or the advanced one – offside applies though. Wide players try to return ball into play in ideally one (or two) touches.
4. If outside player chooses they can receive ball and enter pitch – one of their team-mates should then take their place on the outside
5. Recognise when to play to feet (e.g. forwards feet) and when to play to space (e.g. wide player advancing)
Game
1. Yellows vs. Reds – 6 vs. 6 – in a 1-2-2-1 formation. Recognise when to play forward and when not to.
2. Players are not locked into their areas. Can move freely.
3
2
GK GK
GK GK

Penetrating
Please see this weeks session overleaf; it’s on penetrating.
You may want to consider (if you haven’t already):
1. Games as a means of building players understanding. There are four games overleaf which look at varying ways of penetrating play. From deep, through midfield, around the box and down the sides.
2. That changing the pace of play and changing the point of attack are both key instruments for players/teams to unlock the opposition. Players having the capacity to slow the game down and then speed it up (Van der Vaart style) as well as having the awareness to change the point of attack briskly and with brevity may be important modern game characteristics.
3. In wide areas; looking at four types of cross – a. Beckham – Back from the Box (just entering the final third), b. Backfoot – Ashley Young style – coming inside and in-swinging, c. By-line – getting to by-line for whipped, dinked or cut back cross, d. Box-side – from the side of the box and also, encouraging players to run ball inside if it’s appropriate
4. Challenges to focus players attention in the game:
a. Try to recognise when and when not to play forward
b. Try to play past as many opponents as possible
c. Try to use wide areas to set up attacks
d. Try to spot when to support behind and when to support in advance of the ball
e. Try to spot when to switch play (inc. GK’s)
f. Try to recognise when to run and when to pass
g. Try to play as much 1-touch football as possible (speeding play up)
h. Try to leave the ball playable (helps quick play)

Penetrating Attacks
Combining in Midfield
•2 teams of 5 – 4 vs. 4 in midfield area and one deep lying in own defensive third (if more players can create 2 vs. 1 in end thirds). Can have GK’s
(encourage 1 touch finish or hitting net on full if no GK’s)
• Deep lying player play into midfield area where four try to combine and break out into opposition defensive third to create 1 vs. 1 and score in the
goal - Encourage give & go’s, round the corners and 3rd man runs
• Deep lying player can step into midfield (e.g. Rio Ferdinand) – team-mate may replace them (to encourage rotation)
Forwards Receiving In & Around Penalty Box Practice
•2 teams of 6 (inc GK’s) – 3 + GK in own half and 2 in opposition half. Pitch recommended to be width of box and each half 25 yards long (total 50 yards long). With larger group can
play 4 vs. 2 or 4 vs. 3 in each half
• Seek to work ball into front two – players can support from own half (but remind on defensive/security responsibilities). Allow free flowing game so as to incorporate counter
attacks
• Look at forwards receiving back to goal; dropping off to receive; combinations with partner/supporting players from deep & finishing
• Can remind on defending too – starting positions; marking positions etc.
Playing in Wide Areas
•2 teams of 8 – start as illustrated but freedom to move to ensure realism – encourage positive play in wide areas –
crossing (inc from deep),; overlaps; driving inside
Playing Through the Thirds Game (70yards x 50 yards)
* 8 vs. 8 – Reds 3-2-2 & Blues 3-3-1 + GK’s
•Encourage playing through the thirds; creating overloads; playing when overloaded; different tempos (when/how to slow
play down/speed it up)
Ball
Player run
Player run with ball
44
yards
56 yards
20 yards
20
yards

Please see this weeks session overleaf; themed this week around possession.
You may (if you haven’t already) want to consider:
1. The game (in the middle of the slide) as the reference point. The other three practices, potentially, help players work towards developing the skills and understanding to develop possession in the game. Consider which of the practices you would like to deliver/or that your players would like to play in. It isn’t always best to go from 1 to 2 to 3 and then to the game (although sometimes it is).
2. Possession is about passing; but isn’t only about passing. It’s about having the ball. Hopefully the practices detailed get players to look at quick passing, through passing, safe passing, running with the ball, dribbling, shielding and protecting possession.
3. Should you wish to use all the practices in one session; they should seamlessly move from one to the other. Depending upon the numbers in your team/age of the players; consider using a 25 x 25 area for practices 1,2 and 3 and using this area as the central part of your game with a 15 yard long scoring zone at either end with goals. This can be set up before the session starts and moved into at the point that you utilise the game.
4. Involve your goalkeepers. They can play in all parts of the session. Urge them to mix up using their feet and their hands and develop possession playing on the floor and distributing from hands. Consider that modern GK’s are like outfield players with gloves on.
Possession

Possession
1 - Developing Possession Skills
1. Three groups – ball per group
2. Red’s on perimeter; can move along their side of the box, receive and play to any other available red (below waist height)
3. Yellows + blues – move ball amongst your group – look for the times to pass or run with the ball
4. Try to find spaces between other colours to play through
2 - Keeping + Risking Possession
1. 1 ball – blues vs. yellows (rotate teams)
2. Score a point for every pass played to your team. Can use outside players to help keep possession but no point scored if passing to outside (when to risk, when to keep)
3. Add – split pass (between two opponents) worth 3 points – give + go = 5 points
3 - Protecting Possession
1. 1 ball – blues vs. yellows (rotate teams)
2. Score by working ball into one of the 3 boxes (only 1 attacker and 1 defender allowed in box at a time) and keeping it under control in box for 5 seconds (shielding)
3. Defender tries to knock ball away from attacker and out of box to prevent goal being scored (providing pressure)
4. Can use outside players (reds) to help keep possession
Game
1. Yellows vs. Reds (playing in central area (can be square from previous practices – blues provide two side supporters and two GK’s
2. Work ball into end area before finishing (offside applies) – work out when to run ball/pass ball into scoring zone and when to look after it
3

Please see this weeks session overleaf; themed this week around receiving, retaining, releasing and regaining the ball. You may (if you haven’t already) want to consider: 1. The game (in the middle of the slide) as the reference point. The other three practices, potentially, help players work
towards developing the skills and understanding to receive, retain, release and regain. Consider which of the practices you would like to deliver/or that your players would like to play in. It isn’t always best to go from 1 to 2 to 3 and then to the game (although sometimes it is).
2. Receiving is different in different parts of the pitch – your forward may receive with back to goal quite often, whilst your deeper players may often receive facing forward – try to use the practices to reflect this.
3. Should you wish to use all the practices in one session; they should seamlessly move from one to the other. Depending upon the numbers in your team/age of the players.
4. Regaining the ball isn’t always about high pressure. The top left practice when the yellows defend 2 vs. 3 may reflect a 4-4-2 playing against a 4-3-3 where a team is outnumbered centrally (permanently or until forward screens the anchoring midfielder, or a wide midfielder comes in to even the numbers or a centre half steps forward to occupy a midfielder playing ‘in the hole’) – use the blues as outlets to protect or help transfer but be happy asking your players to receive in tight areas and under pressure – that’s how they’ll get better at it
5. Utilise the challenge sheet on page 3. The left hand column gives challenges that relate to the theme. The right hand side some other things you may want your players to practice or your players may wish to practice. Use the Youth Soccer Syllabus at www.integritysoccer.co.uk/communicating - click on youth soccer syllabus to focus your work and tick off what you’ve worked on with your players.
Receiving – Retaining – Releasing – Regaining – for ‘The Game

Receiving – Retaining – Releasing – Regaining for ‘The Game’
Receiving in Midfield Practice
1. 2 vs. 3 + 4 or 6 blues – Try to receive from one side of the circle and play to other side. If scoring – keep ball and attack the other way
2. Yellows – can use blues to transfer – as they are outnumbered 2 vs. 3 (reflective of 2 central midfielders vs. 3 central midfielders
3. Red’s – try to work ball around the yellows in the central area
4. Out of possession – Yellows – try to work out when to press and when not to – try to keep possession in front of you
5. Out of possession - Reds – try to position so that you can intercept
Front Player Receiving Practice
1. 4 vs. 4
2. Half way line – 2 v 1 in each half (3 v 1 inc. GK)
3. Work ball into attacking half and try to get one deep lying player to join in to score goals
4. On re-gaining- try to counter quickly
Running or Linking Practice
1. 3 areas – end areas 10 long x 20 wide – central area 20 long and 20 wide. Yellows score by moving ball from end to end ensuring they work through central area
2. Reds – 3 x regains and then swap with 4 yellows (motive to defend well)
3. Either run bal out of end zone, pass someone else out or play into ‘c’ who can link with a player coming out (as per diagram) – when playing into other end – join in that end
In The Game
1. 6 vs.5 including GK’s
2. Incorporates all elements from each of the practices – when to run/link to move forward; playing off a front player and receiving and playing through midfield.
C

Please see this weeks session overleaf; themed this week around Receiving to Shoot. You may (if you haven’t already) want to consider: 1. The game (in the middle of the slide) as the reference point. The other three practices, potentially, help players work towards
developing the skills and understanding around receiving to shoot. Consider which of the practices you would like to deliver/or that your players would like to play in. It isn’t always best to go from 1 to 2 to 3 and then to the game (although sometimes it is).
2. That your players can receive the ball from a range of different angles, with passes played at different speeds with varying levels of pressure (sometimes a defender is tight, sometimes the defender is closing and sometimes there is no pressure) and at different distances from goal. This variety in practice should reflect the ever changing nature of the game of football.
3. Should you wish to use all the practices in one session; they should seamlessly move from one to the other. There may need to be a little shifting of goals to the side from practice 1 to 2 and the same moving into 3.
4. The practices seek to incorporate game understanding in the context of a handball game (practice 1), receiving 1 v 1 against an opponent (practice 2), receiving 2 v 2 and working with a partner (practice 2), receiving and linking with an advancing midfield player (practice 3) and, in all practices, the opportunity to score from a range of different positions.
5. Challenges that may help your players practise and focus upon receiving to shoot: a. Try to know what’s around you before you get the ball b. Try to face forward before you receive the ball c. Recognise when to link with a mate and when to take the ball yourself d. Try to spot when to play backwards and when to play forward e. Try to recognise the time to shoot f. Try to shoot to the most vulnerable part of the goal g. Try to spot when to support in front of the ball and when to support behind the ball h. Practise passing safe side and pressure side (and the right time to do which) i. Try to time your runs to avoid being off-side
Receiving to Shoot

GK GK
Receiving to Shoot
1 – Setting the Scene – Handball Game
1. 6 vs. 6 (or whatever numbers turn up)
2. Handball game. Work ball up the pitch throwing and catching or running with the ball. If tagged whilst running with the ball then ball goes to opposition
3. Score by throwing the ball past the opposition GK.
4. Score 3 goals if scoring with a header or a volley.
2 – Receiving to Set up Shots (Repetition Circuit)
1. 2 pitches working concurrently. One is 2 v 2 and the other is 1 v 1.
2. Pitch 1 – server feeds ball onto attackers who seek to work ball to goal for shot. If red’s regain they score a point by playing back to server. Rotate servers with players + rotate defenders too.
3. Pitch 2 – server feeds ball onto attacker. Defender can come forward from line at the point that pass is played. Try to score in goal- If red wins – play to server. Rotate attacker + defender. Swap pitches
3 – Dual Half-Court Games
1. 2 pitches play concurrently. Pitch separated into three areas – central area is 10 yards long.
2. 2 vs 2 on one pitch – 3 vs 3 on the other.
3. Server plays to team mare (or runs ball onto pitch) and joins in. Attackers try to score.
4. If defenders win ball back – try to work ball into central area. If they do they turn and attack the goal they defended and the players that attacked become the defenders.
5. If attackers score – they return to central area, collect another ball and attack the goal again.
Game
1. Yellows vs. Reds – 6 vs. 6 – in a 1-2-2-1 formation.
2. Players are not locked into their areas. Can move freely.
3
GK
GK
GK GK
60 yds

Please see this weeks session overleaf; themed this week around Scanning. You may (if you haven’t already) want to consider: 1. The game (in the middle of the slide) as the reference point. The other three practices, potentially, help players work towards
developing the skills and understanding to have an awareness and ability to play all around themselves in the game. Consider which of the practices you would like to deliver/or that your players would like to play in. It isn’t always best to go from 1 to 2 to 3 and then to the game (although sometimes it is).
2. That the players ability to see and know what is around them before they get the ball will help them to be effective when they get it.
3. That all players should possibly have an opportunity to play in the heart of the side. Only then can they start to deal with the 360 degree environment that is the middle of the field.
4. That playing backwards and keeping possession is as valuable as trying to penetrate and that slowing the game down is as valuable as playing fast.
5. The following challenges can be utilised with your players to aid them focusing upon the things that may help them: a. Try to position yourself to face forward before your receive the ball b. Try to recognise when to play passes safe side and when to play them pressure side c. Try to leave the pass playable for the next player d. Try to recognise when and when not to play forward e. Try to spot when to turn towards space f. Try to know what’s around you before you receive the ball g. Try to play one touch when it’s on h. Try to make movements out of your area of the pitch into others areas i. Try to look for passes into the forwards feet
Scanning Through The 360 °

Scanning Through The 360°
Dealing with the Ball
1. Pass back and forth with your mate.
2. Try to use different parts of the foot and control/pass on different angles
3. Try to recognise moments to swap places with your mate (run with ball)
4. Try to help your mate as he swaps by clearing space
5. Let the ball run across your body and move to pass with a different yellow – visit 5 different yellows and then go back to swap with your mate
2
1
1
2
3
1
1
2
2
2
3
3
3 Dealing with the Space
1. In 3’s – Receive from your number 1 and pass to your number 3 (on the other side of the circle) – repeat 5 times and then swap places with one of the outside players
2. Try to spot the times to turn 1 touch, no touch or multiple touch
3. If number 3 receives and turns away from the circle with the ball – number 1 + 2 swap places
Dealing with the Pressure
1. 4 vs. 4 + 4 target players – try to receive the ball from a target player on one side of the pitch and get it to the other to score
2. Upon scoring target player plays back to scoring team to try to score in opposite direction – opposition team try to regain and do the same
3. Try to recognise when to turn, combine, set back or score
In The Game
1. 6 vs. 6 including GK’s
2. 2-2-1 – try to play through and support your midfield players to set up scoring chances

Please see this weeks session overleaf; themed this week around Receiving to Shoot. You may (if you haven’t already) want to consider: 1. The game (in the middle of the slide) as the reference point. The other three practices, potentially, help players work towards
developing the skills and understanding around receiving to shoot. Consider which of the practices you would like to deliver/or that your players would like to play in. It isn’t always best to go from 1 to 2 to 3 and then to the game (although sometimes it is).
2. That your players can receive the ball from a range of different angles, with passes played at different speeds with varying levels of pressure (sometimes a defender is tight, sometimes the defender is closing and sometimes there is no pressure) and at different distances from goal. This variety in practice should reflect the ever changing nature of the game of football.
3. Should you wish to use all the practices in one session; they should seamlessly move from one to the other. There may need to be a little shifting of goals to the side from practice 1 to 2 and the same moving into 3.
4. The practices seek to incorporate game understanding in the context of a handball game (practice 1), receiving 1 v 1 against an opponent (practice 2), receiving 2 v 2 and working with a partner (practice 2), receiving and linking with an advancing midfield player (practice 3) and, in all practices, the opportunity to score from a range of different positions.
5. Challenges that may help your players practise and focus upon receiving to shoot: a. Try to know what’s around you before you get the ball b. Try to face forward before you receive the ball c. Recognise when to link with a mate and when to take the ball yourself d. Try to spot when to play backwards and when to play forward e. Try to recognise the time to shoot f. Try to shoot to the most vulnerable part of the goal g. Try to spot when to support in front of the ball and when to support behind the ball h. Practise passing safe side and pressure side (and the right time to do which) i. Try to time your runs to avoid being off-side
In & Around the Box

GK GK
In & Around the Box
1 – Setting the Scene – Handball Game
1. 6 vs. 6 (or whatever numbers turn up)
2. Handball game. Work ball up the pitch throwing and catching or running with the ball. If tagged whilst running with the ball then ball goes to opposition
3. Score by throwing the ball past the opposition GK.
4. Score 3 goals if scoring with a header or a volley.
2 – Receiving to Set up Shots (Repetition Circuit)
1. 2 pitches working concurrently. One is 2 v 2 and the other is 1 v 1.
2. Pitch 1 – server feeds ball onto attackers who seek to work ball to goal for shot. If red’s regain they score a point by playing back to server. Rotate servers with players + rotate defenders too.
3. Pitch 2 – server feeds ball onto attacker. Defender can come forward from line at the point that pass is played. Try to score in goal- If red wins – play to server. Rotate attacker + defender. Swap pitches
3 – Dual Half-Court Games
1. 2 pitches play concurrently. Pitch separated into three areas – central area is 10 yards long.
2. 2 vs 2 on one pitch – 3 vs 3 on the other.
3. Server plays to team mare (or runs ball onto pitch) and joins in. Attackers try to score.
4. If defenders win ball back – try to work ball into central area. If they do they turn and attack the goal they defended and the players that attacked become the defenders.
5. If attackers score – they return to central area, collect another ball and attack the goal again.
Game
1. Yellows vs. Reds – 6 vs. 6 – in a 1-2-2-1 formation.
2. Players are not locked into their areas. Can move freely.
3
GK
GK
GK GK
60 yds

Please see this weeks session overleaf; themed this week around Creating Goal-scoring Opportunities. You may (if you haven’t already) want to consider: 1. The game (in the middle of the slide) as the reference point. The other three practices, potentially, help players work towards
developing the skills and understanding to develop Goal-scoring Opportunities in the game. Consider which of the practices you would like to deliver/or that your players would like to play in. It isn’t always best to go from 1 to 2 to 3 and then to the game (although sometimes it is).
2. That goal-scoring chances are created in a range of ways – from the forwards combining in front of the defenders, from penetrating space behind, by running at opponents, shooting from distance if defenders stand off, by wide players coming in off the line or going outside and crossing and any other possibilities that you can think of. Try to allow your practices and players to reflect this.
3. Should you wish to use all the practices in one session; they should seamlessly move from one to the other. Depending upon the numbers in your team/age of the players; consider running concurrent practices (2 groups working at the same time) in the first part and perhaps using a 2 v 2 at one end (to reflect 2 traditional strikers working together) and a 3 v 3 at the other (to reflect wide forwards).
4. The following challenges utilised with your players to aid them focusing upon the things that may help them: a. Try to lose your marker to receive the ball b. Try to recognise when and when not to go short c. Try to combine with your team-mate to set up a shot d. Try to play one-touch when it’s on e. Try to look for the time to play passes that go between defenders f. Try to shoot to the vulnerable part of the goal g. Try to recognise when to run with the ball and when to release (pass or shot) h. Try to move your marker out of position i. Try to spot when to come inside and when to go outside j. Try to recognise when to support behind the ball and when to go in advance
Forwards Linking to Create Goal-scoring Opportunities

Forwards Linking to Create Goal-Scoring Opportunities
1 – Feeding + Finishing
1. Concurrent practices. 5 x yellows vs. 3 blues + GK on one half. 4 x blues vs. 2 yellows + 1 GK on other half.
2. Midfield players (in central area) can play straight in or combine to play in. Attackers can play back to midfielders if necessary
3. Attackers try to score – defenders score a point by regaining and playing into opposition midfielders or 2 points if they can run the ball (under control) into the midfield area
2 – Splitting + Shifting
1. As per 1 but midfield players swap areas so that they have to play past the other colour to get ball to their attackers.
2. Forwards can, if appropriate, come short into midfield area to support (blue defenders can follow but blue midfielders can’t block/tackle)
3. One midfielder can move into attacking area to support (one must stay). If defenders regain – play through to opposition midfielder that stayed back
3 – Rotating + Running On
1. 1 ball – blues vs. yellows
2. Play 8 vs. 8 but players locked into areas (initially)
3. Rotation through areas then allowed (e.g. forward comes short into midfield and midfielder runs onto support forward)
Game
1. Free flowing 8 vs. 8
2. Utilise challenges from throughout session (as per session description)
3

Wide Play
Please see this weeks session overleaf; it’s on using wide areas to set up attacks.
You may want to consider (if you haven’t already):
1. The game (in the middle of the slide) as the reference point. The other three practices, potentially, help players work towards developing the skills and understanding to develop attacks in wide areas in the game. Consider which of the practices you would like to deliver/or that your players would like to play in. It isn’t always best to go from 1 to 2 to 3 and then to the game (although sometimes it is).
2. That changing the pace of play and changing the point of attack are both key instruments for players/teams to unlock the opposition. Players having the capacity to slow the game down and then speed it up (Van der Vaart style) as well as having the awareness to change the point of attack briskly and with brevity may be important modern game characteristics.
3. In wide areas; looking at four types of cross – a. Beckham – Back from the Box (just entering the final third), b. Backfoot – Ashley Young style – coming inside and in-swinging, c. By-line – getting to by-line for whipped, dinked or cut back cross, d. Box-side – from the side of the box and also, encouraging players to run ball inside if it’s appropriate
4. Challenges to focus players attention in the game:
a. Try to recognise when and when not to play forward
b. Try to overload the opposition in wide areas
c. Try to use wide areas to set up attacks
d. Try to spot when to support behind and when to support in advance of the ball (both for wide players and the front players to exploit space for finishing)
e. Try to spot when to switch play (inc. GK’s)
f. Try to cross early
g. Try to play as much 1-touch football as possible (speeding the play up)
h. Try to leave the ball playable (helps quick play)

Wide Play
1 – Weaving Wide
1. Wave practice, which flows end to end. Gk starts practice by playing out to any of the attacking 3 or 4 players. Group of three of four players combine to work the ball wide for a cross. Other players in group seek to turn cross into the goal.
2. Yellows join end which they finish at and blues work up pitch.
3. Once players comfortable, practice can run with one group of yellows working towards bottom goal and one group of blues working towards top goal simultaneously.
4. Introduce idea of four different types of cross – Beckham, Boxside, Backfoot & Byline
2 – Working Wide
1. As per 1 but as GK serves to yellows, four blues join game to make a 4 vs. 4. Both teams look for opportunities to score and if a goal comes from linking with a wide player – it counts as 3.
2. Upon a shot on goal, practice finishes and other two teams play from a GK’s serve and the two playing work their way back to start position.
3 – Overloading & Overlapping
1. 1 ball – blues vs. yellows
2. Play 9 vs. 8 but players locked into areas – except for full backs who look to join the attack to overload the opposition full back.
3. FB seeks to recover back on turn over. However, a CH can shift out to block wide players path if they’re still recovering.
Game
1. 9 vs. 8 (or adapt to suit numbers attending) – players can move freely – pitch is wider than it is long
2. Try to score goals from crosses – (reference Beckham, Boxside, Backfoot & Byline Crosses)
3

Converting on the Counter
Please see this weeks session overleaf; it’s on scoring on the counter attack. You may want to consider (if you haven’t already): 1. The game (in the middle of the slide) as the reference point. The other three practices, potentially, help players work
towards developing the skills and understanding to counter attack effectively in the game. Consider which of the practices you would like to deliver/or that your players would like to play in. It isn’t always best to go from 1 to 2 to 3 and then to the game (although sometimes it is).
2. That speed and incision are key elements of a successful counter attacking policy. Playing past and eliminating opponents, accelerating across open areas of the pitch along with swift and slick support play can be encouraged and coached. Within the game(s) a setting the scene suggestion for the players is to ‘ try to get players forward to support the attack’. This may a. help with the support play elements of counter attacking and b. help when the ball turns over – as the opposition may be out of balance.
3. Being mindful of having the attack outnumber for too long. The likely reality is that recovering defenders (in the game of football) will negate the counter attacking opportunity within 3-5 passes. So in the practice where the attackers outnumber the defenders, encourage the attackers to score within 4 passes of the attack starting.
4. Challenges to focus players attention in the game: a. Try to play forward b. If you can’t play forward, try to play to someone who can c. Try to play past as many opponents as possible d. Try to join the attack as quickly as you can e. Try to spot when to pass and when to run with the ball f. Try to score within 4 passes of regaining the ball g. Try to play as much 1-touch football as possible h. Try to leave the ball playable for the next player

Converting on the Counter
1 – Breaking & Recovering 1. Blue goes first – runs ball towards goal
and shoots to score
2. At the point that the blue shoots the ball – yellow from other group starts run towards other goal – blue sprints back to try to prevent shot (recovery)
3. 2nd blue then runs ball out as yellow shoots and the yellow recovers themselves. One ‘go’ for each player is a shot and a recovery run.
4. After recovery run, players should collect the ball that the player they were recovering to stop shot and join their team
5. Whilst this appears to have a queuing element, once the practice is running there is a continuous flow of attacking and recovering.
2 – Breaking
1. 2 vs. 2 + Gk in each half. One player of each team on halfway line.
2. Yellow GK plays into midfield area where yellow player drifts off line to collect ball and drive into attacking half – try to score within 3 passes
3. If blue defenders win the ball they play to their blue midfield player who attacks in the same way.
4. If yellows shoot/score; GK plays out to blue midfield to start attack in the opposition direction.
3 – Joining In Attack
1. 1 ball – blues vs. yellows
2. Play 6 vs. 6.
3. Players can move from third to third when their team is in possession only. Upon turn over they seek to recover back.
4. This will create imbalances and counter attacking opportunities.
Game
1. Free flowing 6 vs. 6 – try to get midfield players forward to join the attack
2. Utilise challenges from throughout session (as per session description)
3

In & Out of ‘The Tight’
You may wish to consider that; (if you haven’t already): 1 – Practising playing in tight areas is helpful for developing receiving, retaining and releasing skills with high degrees of pressure and limited time. 2 – Protecting the ball from opponents is important and supports players to practice managing body, ball and opponent at the same time. 3 – Players having the capacity to play high tempo football in tight areas and then working it out of tight areas encourages them to change the speed of play. 4 – Practice 2 and 3 are hard. Getting to five passes in an area that is 25 x 25 requires perseverance, patience and poise. Players spending time struggling and working out problems are good. Be mindful of success in this work being long term. Try to help your players to be comfortable with this and encourage a ‘can do’ mentality. 5 – It isn’t always appropriate to go from practice 1 to 2 to 3 and then the game (although sometimes it is) – recognise where your players are at and what work is most relevant for them. 6 – Wording the interventions as follows: a. Try to play a pass that helps your team-mate stay on the ball b. Recognise when to play quickly and when to slow the game down c. Spot when to play one touch football d. Show me the ways you can combine to retain possession e. How can the pass you play help your mate to play quickly?

In & Out of ‘The Tight’
Practice 1 1 – 2 x teams unopposed
2 – 2 x balls per team 3 – Look for opportunities to
combine with your team 4 – GK’s – use hands and feet
Practice 2 1 – 2 x teams opposed
2 – Try to get 5 passes – play to GK = goal – retain ball & repeat 3 – GK – Support and return to
team who play to you
Practice 3 1 – 2 x teams opposed
2 – Try to get to 5 passes – play to GK
3 – Upon playing to a GK – spread into full area and attack
goal farthest away 4 – Opposition try to regain
and counter 5 – Goal scored – return to
central box and repeat
Game 1 – 8 vs. 8 – 2-4-1
2 – Try to work ball through midfield

Finding Space
You may wish to consider that; (if you haven’t already): 1 – This session as a means of encouraging forwards to find and use space to set up attacks 2 – We will be using practices 1 & 2 in the 25 minutes we deliver for; practice 3 and the game may be of use to further develop the content 3 – It isn’t only the forwards who we will be encouraging to work on finding space 4 – Feeding back to us on the way we try to build individual ability to find space and then combined methods to find space 5 – We hope to word some of the interventions as follows: Direct Instruction to start session – Find space to receive the ball Guided Discovery – Show me the different ways you can turn with the ball Question – How can the pass you receive help you to turn? Guided Discovery – Link with the end players in a variety of ways Question – How can the timing of your run help you? Question – What things can help be aware of what’s around? Command – Play your passes with accuracy and care Trial & Error – Combine with your mate to enter the end area

Finding Space
Practice 1 1 – 2 x groups running concurrently
2 – Receive; turn and play to opposite corner
3 – Passer goes to middle; middle to corner and corner player takes ball to
start of other group
Practice 2 1 – 4 vs. 3 in each end (or whatever
numbers) 2 – 1 or 2 can drop into central zone to receive and turn to play into other end
zone 3 – If unable to turn; play back, clear space and next player can come in
Practice 3 1 – 2 x teams opposed 2 – Directional game
3 – 1 or 2 players can drop into central zone to try to set up an
attack and score a goal
Game 1 – 8 vs. 8 – 2-3-2
2 – Try to find space to set up attacks