VC Simulator 3.70 Release Notes 704883 002
17
HP Virtual Connect Simulator Version 3.70 Release Notes Abstract These release notes provide information for the release of the Virtual Connect Simulator based on Virtual Connect 3.70. This document is for Channel Partners and HP internal employees. The VC Simulator should never be left at a customer site. You can let a customer use it, but only on your laptop under your supervision. Never leave a copy behind. The VC Simulator contains the actual VC Manager software, which is considered the intellectual property of HP. Part Number: 704883-002 October 2012 Edition: 2
-
Upload
gigisuperduru -
Category
Documents
-
view
507 -
download
54
Transcript of VC Simulator 3.70 Release Notes 704883 002

HP Virtual Connect Simulator Version 3.70
Release Notes
Abstract
These release notes provide information for the release of the Virtual Connect Simulator based on Virtual Connect 3.70. This document is for Channel Partners and HP internal employees. The VC Simulator should never be left at a customer site. You can let a customer use it, but only on your laptop
under your supervision. Never leave a copy behind. The VC Simulator contains the actual VC Manager software, which is considered the intellectual property of HP.
Part Number: 704883-002
October 2012
Edition: 2

© Copyright 2012 Hewlett-Packard Development Company, L.P.
The information contained herein is subject to change without notice. The only warranties for HP products and services are set forth in the express
warranty statements accompanying such products and services. Nothing herein should be construed as constituting an additional warranty. HP shall not be liable for technical or editorial errors or omissions contained herein.
Confidential computer software. Valid license from HP required for possession, use or copying. Consistent with FAR 12.211 and 12.212,
Commercial Computer Software, Computer Software Documentation, and Technical Data for Commercial Items are licensed to the U.S. Government under vendor’s standard commercial license.
Microsoft® and Windows® are U.S. registered trademarks of Microsoft Corporation.
Contents 3
Contents
Update recommendation ............................................................................................................... 4
Supercede information .................................................................................................................. 4
Product ........................................................................................................................................ 4
Devices supported......................................................................................................................... 5
Operating Systems ...................................................................................................................... 10
Languages ................................................................................................................................. 10
Enhancements ............................................................................................................................ 10
Fixes ......................................................................................................................................... 11
Deprecated or obsolete features ................................................................................................... 11
Issues and workarounds .............................................................................................................. 11
Prerequisites ............................................................................................................................... 11
Installation instructions ................................................................................................................. 12
Operations................................................................................................................................. 13 Using the Virtual Machine ........................................................................................................................... 13 Importing enclosures ................................................................................................................................... 15 Shutting down the VC Simulator ................................................................................................................... 16
Related information ..................................................................................................................... 17 Documentation feedback ............................................................................................................................. 17
Update recommendation 4
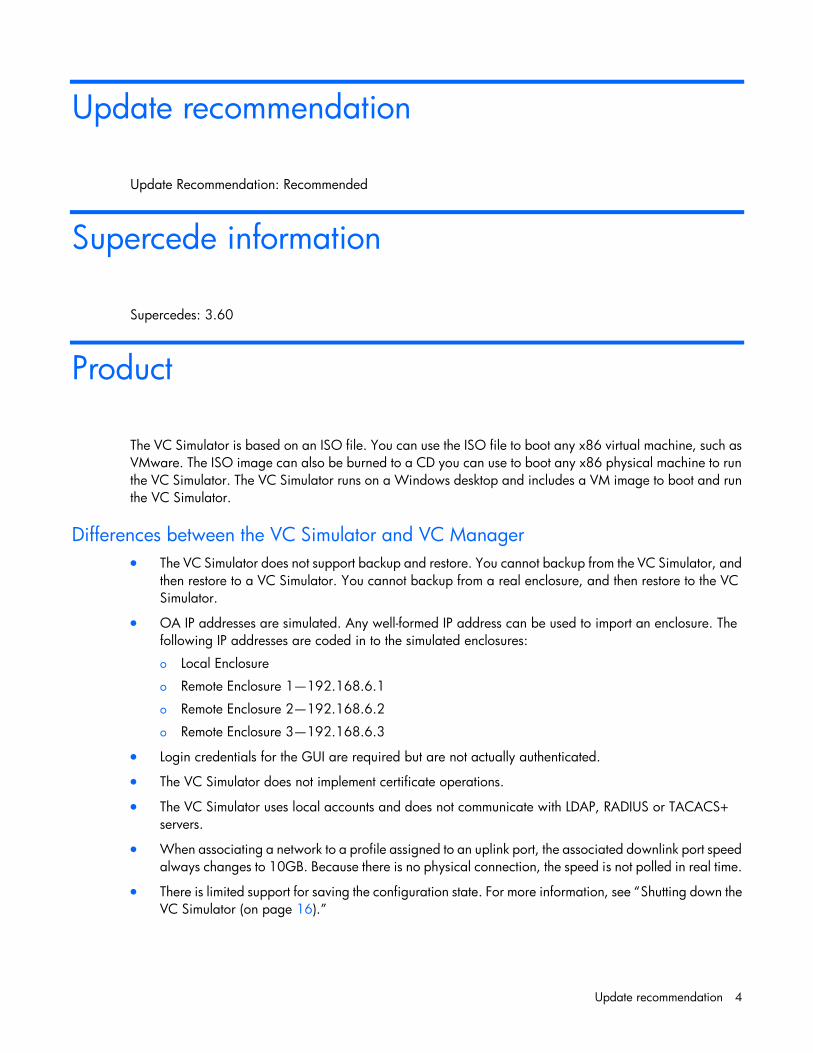
Update recommendation
Update Recommendation: Recommended
Supercede information
Supercedes: 3.60
Product
The VC Simulator is based on an ISO file. You can use the ISO file to boot any x86 virtual machine, such as
VMware. The ISO image can also be burned to a CD you can use to boot any x86 physical machine to run
the VC Simulator. The VC Simulator runs on a Windows desktop and includes a VM image to boot and run
the VC Simulator.
Differences between the VC Simulator and VC Manager
The VC Simulator does not support backup and restore. You cannot backup from the VC Simulator, and
then restore to a VC Simulator. You cannot backup from a real enclosure, and then restore to the VC
Simulator.
OA IP addresses are simulated. Any well-formed IP address can be used to import an enclosure. The
following IP addresses are coded in to the simulated enclosures:
o Local Enclosure
o Remote Enclosure 1—192.168.6.1
o Remote Enclosure 2—192.168.6.2
o Remote Enclosure 3—192.168.6.3
Login credentials for the GUI are required but are not actually authenticated.
The VC Simulator does not implement certificate operations.
The VC Simulator uses local accounts and does not communicate with LDAP, RADIUS or TACACS+
servers.
When associating a network to a profile assigned to an uplink port, the associated downlink port speed
always changes to 10GB. Because there is no physical connection, the speed is not polled in real time.
There is limited support for saving the configuration state. For more information, see “Shutting down the
VC Simulator (on page 16).”
Devices supported 5
The VCM CLI requires a login. The username is Administrator and the password is
Administrator.
The VC Simulator supports a remote connection to the interactive VCM CLI. You can achieve an SSH
login using the vcmcli user. However, rather than getting a shell prompt, the prompt is dropped in to
the VCM CLI and requires a username of Administrator and a password of Administrator.
The VC Simulator does not support VCM CLI scripting. For example, the following is not supported:
->plink [email protected] -m myscript.txt
For more information, see the HP Virtual Connect Manager Command Line Interface for c-Class
BladeSystem User Guide on the HP website).
Although the VC Simulator allows you to configure LDAP, RADIUS, and TACACS+ authentication and
authorization parameters, it does not attempt to authenticate with the corresponding servers.
Although the VC Simulator allows you to enable SNMP and configure traps, it does not respond to
SNMP queries or send SNMP traps.
Although the VC Simulator allows you to enable remote logging, it does not log events to the remote
syslog server.
The VC Simulator does not interoperate with any other simulators, such as the P4000 Simulator, EVA
Simulator, Comware Simulator, and so on.
A VC simulated domain cannot be imported into VCEM.
Although you can enable the display of the historical throughput data, it is statically preconfigured.
The VC Simulator does not support importing or exporting of the SSL certificates or SSH keys
The VC Simulator cannot be customized and comes preconfigured with certain server and adapter
models.
There are differences between the simulator and real hardware in the power model. In real hardware,
if a server has a mezz or LOM card that is an incompatible type with the I/O module port mapping, the
enclosure is imported but the server does not power on. The simulator does allow the server to power on
in this situation. When there are incompatible types, both the simulator and real hardware do not make
those connections available for use in profiles.
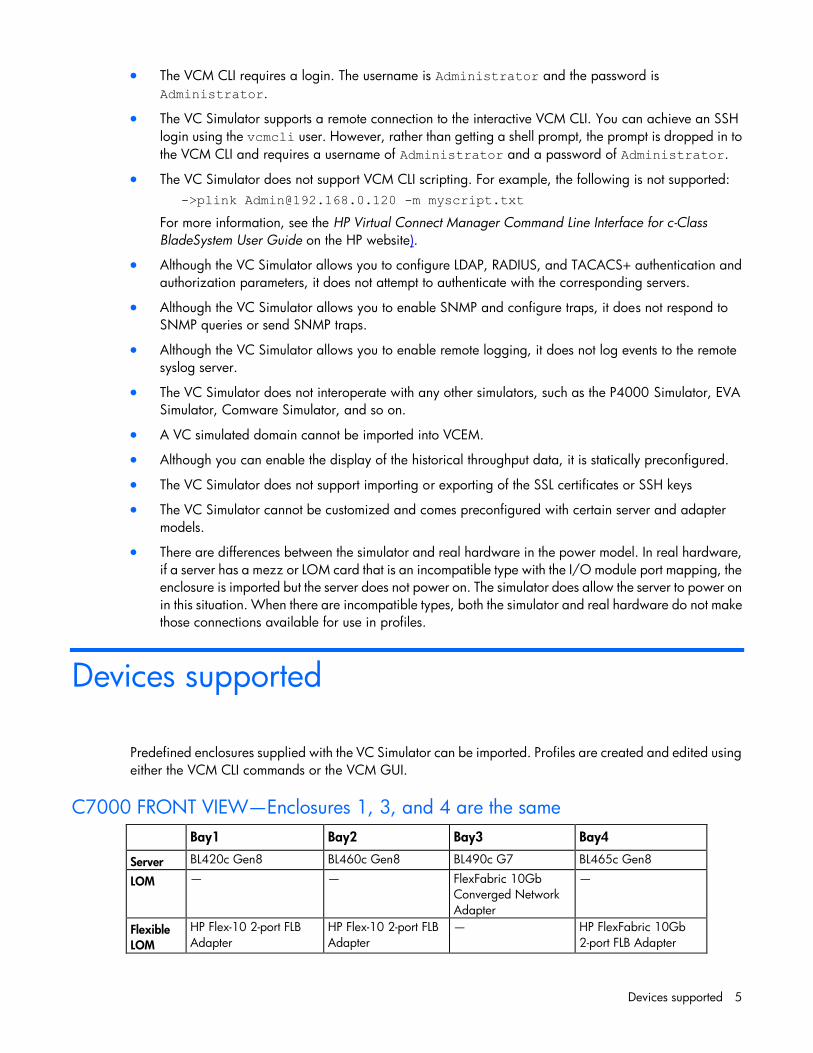
Devices supported
Predefined enclosures supplied with the VC Simulator can be imported. Profiles are created and edited using
either the VCM CLI commands or the VCM GUI.
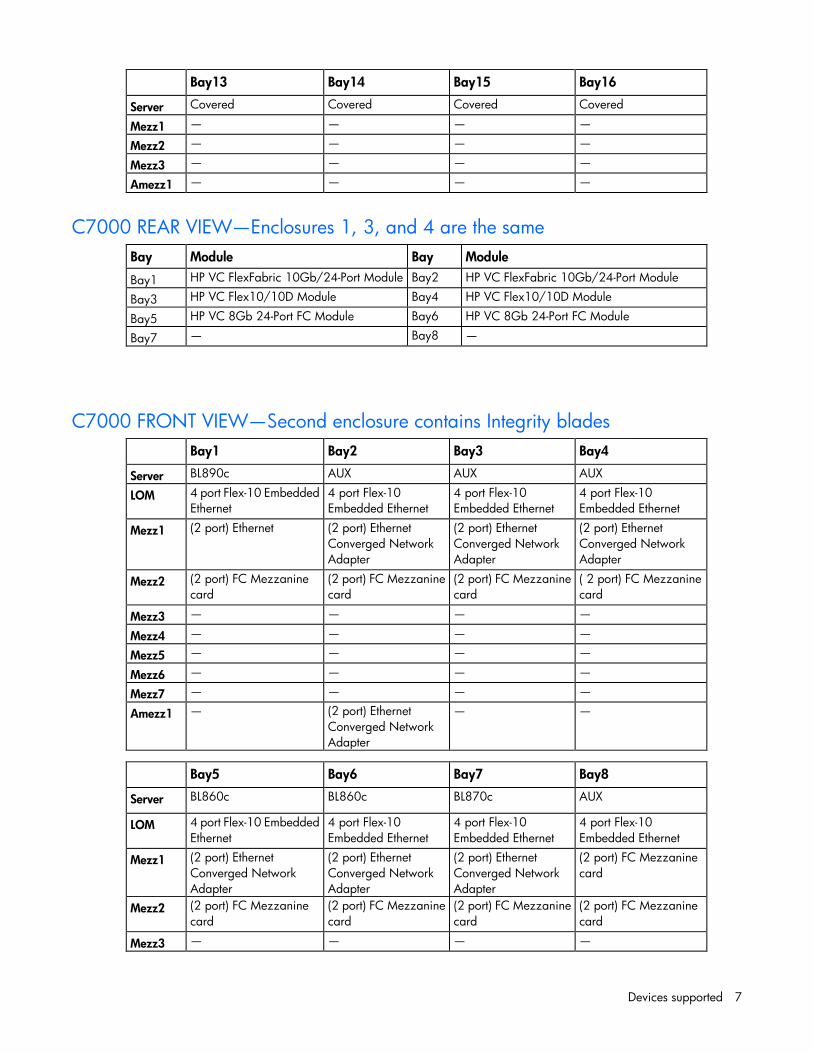
C7000 FRONT VIEW—Enclosures 1, 3, and 4 are the same
Bay1 Bay2 Bay3 Bay4
Server BL420c Gen8 BL460c Gen8 BL490c G7 BL465c Gen8
LOM — — FlexFabric 10Gb
Converged Network
Adapter
—
Flexible
LOM
HP Flex-10 2-port FLB
Adapter
HP Flex-10 2-port FLB
Adapter
— HP FlexFabric 10Gb
2-port FLB Adapter

Devices supported 6
Bay1 Bay2 Bay3 Bay4
Mezz1 (2 port) Ethernet
Converged Network
Adapter
(2 port) Ethernet
Converged Network
Adapter
(2 port) Ethernet
Converged Network
Adapter
(2 port) Flex-10 Ethernet
Mezz2 FC Mezzanine card FC Mezzanine card FC Mezzanine card FC Mezzanine card
Mezz3 — — — —
Mezz4 — — — —
Mezz5 — — — —
Mezz6 — — — —
Mezz7 — — — —
Amezz1 (2 port) Flex-10 Ethernet (2 port) Flex-10
Ethernet
— (2 port) Ethernet
Converged Network
Adapter
Bay5 Bay6 Bay7 Bay8
Server BL685c G7 BL620c G7 Covered BL680c G7
LOM FlexFabric 10Gb
Converged Network
Adapter
FlexFabric 10Gb
Converged Network
Adapter
— Flex10 Embedded
Ethernet
Flexible
LOM
— — — —
Mezz1 (2 port) Ethernet
Converged Network
Adapter
(2 port) Ethernet
Converged Network
Adapter
— (2 port) Flex-10
Embedded Ethernet
Mezz2 (2 port) FC Mezzanine
card
(2 port) FC Mezzanine
card
— (2 port) FC Mezzanine
card
Mezz3 — — — —
Mezz4 — — — —
Mezz5 — — — (2 port) Ethernet
Converged Network
Adapter
Mezz6 — — — —
Mezz7 — — — —
Amezz1 — — — —
Bay9 Bay10 Bay11 Bay12
Server BL420c Gen8 BL460c Gen8 BL490c G7 BL465c Gen8
LOM — — FlexFabric 10Gb
Converged Network
Adapter
—
Flexible
LOM
HP Flex-10 2-port FLB
Adapter
HP Flex-10 2-port FLB
Adapter
— HP FlexFabric 10Gb
2-port FLB Adapter
Mezz1 — — — —
Mezz2 (2 port) FC Mezzanine
card
(2 port) FC Mezzanine
card
(2 port) FC Mezzanine
card
(2 port) FC Mezzanine
card
Mezz3 — — — —
Amezz1 (2 port) Flex-10
Embedded Ethernet
(2 port) Flex-10
Embedded Ethernet (2 port) Ethernet
Converged Network
Adapter
Devices supported 7
Bay13 Bay14 Bay15 Bay16
Server Covered Covered Covered Covered
Mezz1 — — — —
Mezz2 — — — —
Mezz3 — — — —
Amezz1 — — — —
C7000 REAR VIEW—Enclosures 1, 3, and 4 are the same
Bay Module Bay Module
Bay1 HP VC FlexFabric 10Gb/24-Port Module Bay2 HP VC FlexFabric 10Gb/24-Port Module
Bay3 HP VC Flex10/10D Module Bay4 HP VC Flex10/10D Module
Bay5 HP VC 8Gb 24-Port FC Module Bay6 HP VC 8Gb 24-Port FC Module
Bay7 — Bay8 —
C7000 FRONT VIEW—Second enclosure contains Integrity blades
Bay1 Bay2 Bay3 Bay4
Server BL890c AUX AUX AUX
LOM 4 port Flex-10 Embedded
Ethernet
4 port Flex-10
Embedded Ethernet
4 port Flex-10
Embedded Ethernet
4 port Flex-10
Embedded Ethernet
Mezz1 (2 port) Ethernet (2 port) Ethernet
Converged Network
Adapter
(2 port) Ethernet
Converged Network
Adapter
(2 port) Ethernet
Converged Network
Adapter
Mezz2 (2 port) FC Mezzanine
card
(2 port) FC Mezzanine
card
(2 port) FC Mezzanine
card
( 2 port) FC Mezzanine
card
Mezz3 — — — —
Mezz4 — — — —
Mezz5 — — — —
Mezz6 — — — —
Mezz7 — — — —
Amezz1 — (2 port) Ethernet
Converged Network
Adapter
— —
Bay5 Bay6 Bay7 Bay8
Server BL860c BL860c BL870c AUX
LOM 4 port Flex-10 Embedded
Ethernet
4 port Flex-10
Embedded Ethernet
4 port Flex-10
Embedded Ethernet
4 port Flex-10
Embedded Ethernet
Mezz1 (2 port) Ethernet
Converged Network
Adapter
(2 port) Ethernet
Converged Network
Adapter
(2 port) Ethernet
Converged Network
Adapter
(2 port) FC Mezzanine
card
Mezz2 (2 port) FC Mezzanine
card
(2 port) FC Mezzanine
card
(2 port) FC Mezzanine
card
(2 port) FC Mezzanine
card
Mezz3 — — — —

Devices supported 8
Bay5 Bay6 Bay7 Bay8
Mezz4 — — — —
Mezz5 — — — —
Mezz6 — — — —
Mezz7 — — — —
Amezz1 — — — —
Bay9 Bay10 Bay11 Bay12
Server Covered Covered Covered Covered
Mezz1 — — — —
Mezz2 — — — —
Mezz3 — — — —
Mezz4 — — — —
Mezz5 — — — —
Mezz6 — — — —
Mezz7 — — — —
Amezz1 — — — —
Bay13 Bay14 Bay15 Bay16
Server Covered Covered Covered Covered
LOM* — — — —
Mezz1 — — — —
Mezz2 — — — —
Mezz3 — — — —
Mezz4 — — — —
Mezz5 — — — —
Mezz6 — — — —
Mezz7 — — — —
Amezz1 — — — —
C7000 REAR VIEW—Second enclosure
Bay Module Bay Module
Bay1 HP VC FlexFabric 10Gb/24-Port Module Bay2 HP VC FlexFabric 10Gb/24-Port Module
Bay3 HP VC FlexFabric 10Gb/24-Port Module Bay4 HP VC FlexFabric 10Gb/24-Port Module
Bay5 HP VC FlexFabric 10Gb/24-Port Module Bay6 HP VC FlexFabric 10Gb/24-Port Module
Bay7 — Bay8 —
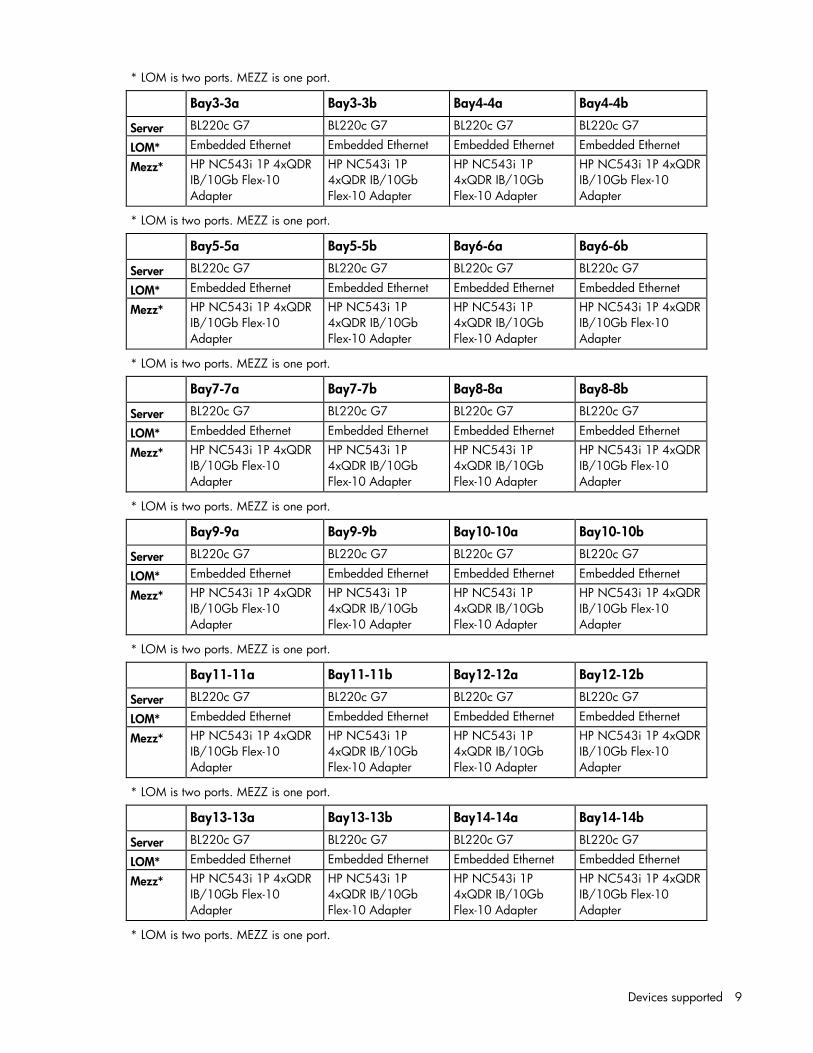
C7000 Double Dense FRONT VIEW—All four enclosures are the same
Bay1-1a Bay1-1b Bay2-2a Bay2-2b
Server BL220c G7 BL220c G7 BL220c G7 BL220c G7
LOM* Embedded Ethernet Embedded Ethernet Embedded Ethernet Embedded Ethernet
Mezz* HP NC543i 1P 4xQDR
IB/10Gb Flex-10
Adapter
HP NC543i 1P
4xQDR IB/10Gb
Flex-10 Adapter
HP NC543i 1P
4xQDR IB/10Gb
Flex-10 Adapter
HP NC543i 1P 4xQDR
IB/10Gb Flex-10
Adapter
Devices supported 9
* LOM is two ports. MEZZ is one port.
Bay3-3a Bay3-3b Bay4-4a Bay4-4b
Server BL220c G7 BL220c G7 BL220c G7 BL220c G7
LOM* Embedded Ethernet Embedded Ethernet Embedded Ethernet Embedded Ethernet
Mezz* HP NC543i 1P 4xQDR
IB/10Gb Flex-10
Adapter
HP NC543i 1P
4xQDR IB/10Gb
Flex-10 Adapter
HP NC543i 1P
4xQDR IB/10Gb
Flex-10 Adapter
HP NC543i 1P 4xQDR
IB/10Gb Flex-10
Adapter
* LOM is two ports. MEZZ is one port.
Bay5-5a Bay5-5b Bay6-6a Bay6-6b
Server BL220c G7 BL220c G7 BL220c G7 BL220c G7
LOM* Embedded Ethernet Embedded Ethernet Embedded Ethernet Embedded Ethernet
Mezz* HP NC543i 1P 4xQDR
IB/10Gb Flex-10
Adapter
HP NC543i 1P
4xQDR IB/10Gb
Flex-10 Adapter
HP NC543i 1P
4xQDR IB/10Gb
Flex-10 Adapter
HP NC543i 1P 4xQDR
IB/10Gb Flex-10
Adapter
* LOM is two ports. MEZZ is one port.
Bay7-7a Bay7-7b Bay8-8a Bay8-8b
Server BL220c G7 BL220c G7 BL220c G7 BL220c G7
LOM* Embedded Ethernet Embedded Ethernet Embedded Ethernet Embedded Ethernet
Mezz* HP NC543i 1P 4xQDR
IB/10Gb Flex-10
Adapter
HP NC543i 1P
4xQDR IB/10Gb
Flex-10 Adapter
HP NC543i 1P
4xQDR IB/10Gb
Flex-10 Adapter
HP NC543i 1P 4xQDR
IB/10Gb Flex-10
Adapter
* LOM is two ports. MEZZ is one port.
Bay9-9a Bay9-9b Bay10-10a Bay10-10b
Server BL220c G7 BL220c G7 BL220c G7 BL220c G7
LOM* Embedded Ethernet Embedded Ethernet Embedded Ethernet Embedded Ethernet
Mezz* HP NC543i 1P 4xQDR
IB/10Gb Flex-10
Adapter
HP NC543i 1P
4xQDR IB/10Gb
Flex-10 Adapter
HP NC543i 1P
4xQDR IB/10Gb
Flex-10 Adapter
HP NC543i 1P 4xQDR
IB/10Gb Flex-10
Adapter
* LOM is two ports. MEZZ is one port.
Bay11-11a Bay11-11b Bay12-12a Bay12-12b
Server BL220c G7 BL220c G7 BL220c G7 BL220c G7
LOM* Embedded Ethernet Embedded Ethernet Embedded Ethernet Embedded Ethernet
Mezz* HP NC543i 1P 4xQDR
IB/10Gb Flex-10
Adapter
HP NC543i 1P
4xQDR IB/10Gb
Flex-10 Adapter
HP NC543i 1P
4xQDR IB/10Gb
Flex-10 Adapter
HP NC543i 1P 4xQDR
IB/10Gb Flex-10
Adapter
* LOM is two ports. MEZZ is one port.
Bay13-13a Bay13-13b Bay14-14a Bay14-14b
Server BL220c G7 BL220c G7 BL220c G7 BL220c G7
LOM* Embedded Ethernet Embedded Ethernet Embedded Ethernet Embedded Ethernet
Mezz* HP NC543i 1P 4xQDR
IB/10Gb Flex-10
Adapter
HP NC543i 1P
4xQDR IB/10Gb
Flex-10 Adapter
HP NC543i 1P
4xQDR IB/10Gb
Flex-10 Adapter
HP NC543i 1P 4xQDR
IB/10Gb Flex-10
Adapter
* LOM is two ports. MEZZ is one port.

Operating Systems 10
Bay15-15a Bay15-15b Bay16-16a Bay16-16b
Server BL220c G7 BL220c G7 BL220c G7 BL220c G7
LOM* Embedded Ethernet Embedded Ethernet Embedded Ethernet Embedded Ethernet
Mezz* HP NC543i 1P 4xQDR
IB/10Gb Flex-10
Adapter
HP NC543i 1P
4xQDR IB/10Gb
Flex-10 Adapter
HP NC543i 1P
4xQDR IB/10Gb
Flex-10 Adapter
HP NC543i 1P 4xQDR
IB/10Gb Flex-10
Adapter
* LOM is two ports. MEZZ is one port.
C7000 Double Dense REAR VIEW—All four enclosures are the same
Bay Module Bay Module
Bay1 HP VC Flex-10 Enet Module Bay2 HP VC Flex-10 Enet Module
Bay3 HP VC Flex-10 Enet Module Bay4 HP VC Flex-10 Enet Module
Bay5 HP VC Flex-10 Enet Module Bay6 HP VC Flex-10 Enet Module
Bay7 HP VC Flex-10 Enet Module Bay8 HP VC Flex-10 Enet Module
NOTE: The simulated configuration loads a working HA configuration of stacking links for the
Ethernet modules in the simulated enclosure.
Operating Systems
Microsoft Windows 7
Microsoft Windows Vista
Languages
Languages supported for this release: English
Enhancements
Version 3.70 of the VC simulator contains support for the HP ProLiant BL420c Gen8 and HP ProLiant BL465c
Gen8 server blades.
Fixes 11
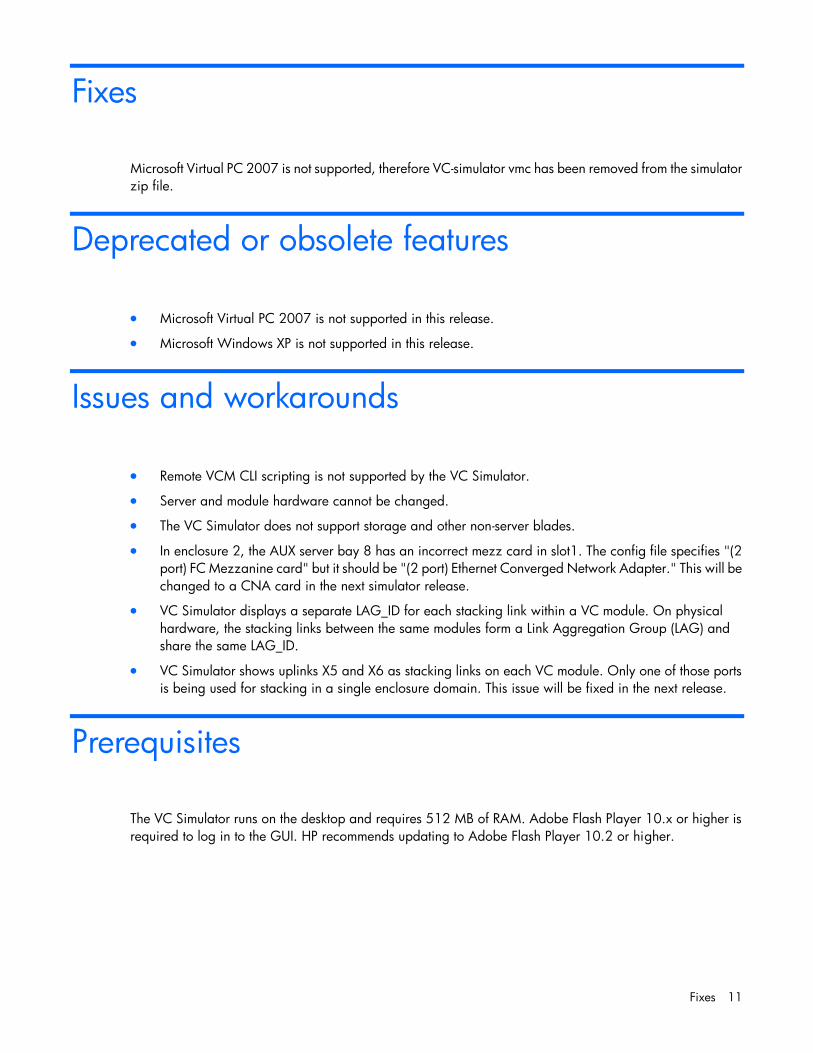
Fixes
Microsoft Virtual PC 2007 is not supported, therefore VC-simulator vmc has been removed from the simulator
zip file.
Deprecated or obsolete features
Microsoft Virtual PC 2007 is not supported in this release.
Microsoft Windows XP is not supported in this release.
Issues and workarounds
Remote VCM CLI scripting is not supported by the VC Simulator.
Server and module hardware cannot be changed.
The VC Simulator does not support storage and other non-server blades.
In enclosure 2, the AUX server bay 8 has an incorrect mezz card in slot1. The config file specifies "(2
port) FC Mezzanine card" but it should be "(2 port) Ethernet Converged Network Adapter." This will be
changed to a CNA card in the next simulator release.
VC Simulator displays a separate LAG_ID for each stacking link within a VC module. On physical
hardware, the stacking links between the same modules form a Link Aggregation Group (LAG) and
share the same LAG_ID.
VC Simulator shows uplinks X5 and X6 as stacking links on each VC module. Only one of those ports
is being used for stacking in a single enclosure domain. This issue will be fixed in the next release.
Prerequisites
The VC Simulator runs on the desktop and requires 512 MB of RAM. Adobe Flash Player 10.x or higher is
required to log in to the GUI. HP recommends updating to Adobe Flash Player 10.2 or higher.
Installation instructions 12
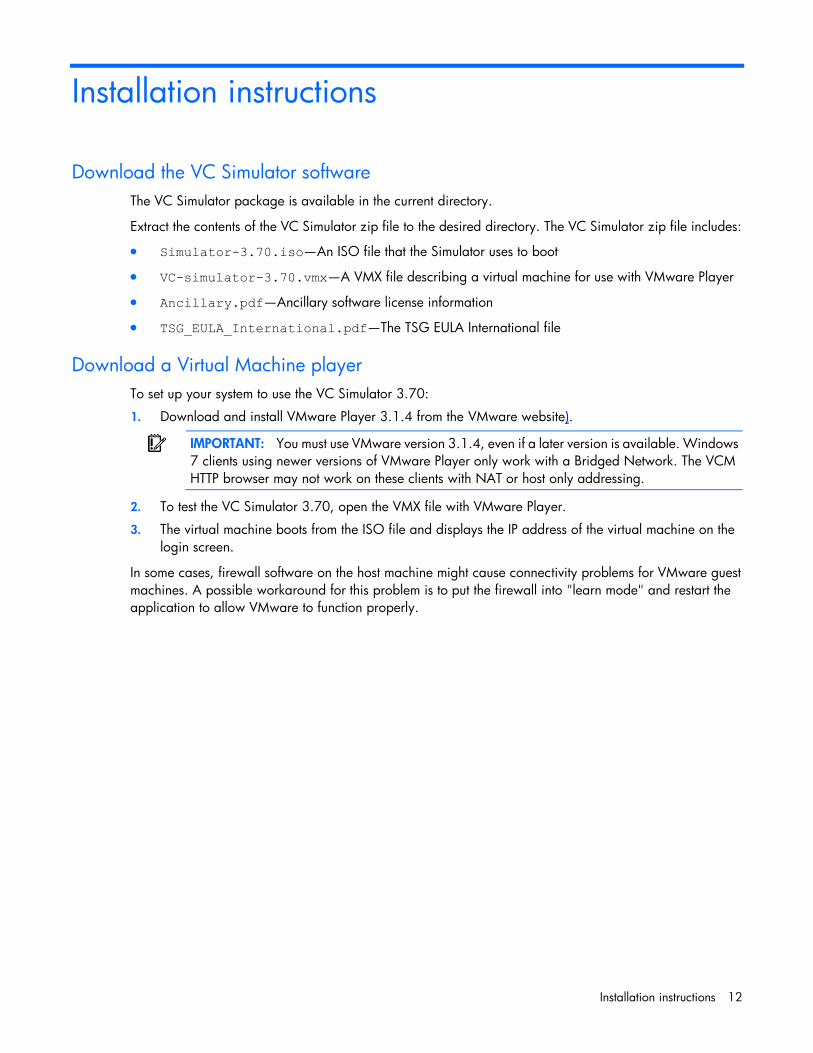
Installation instructions
Download the VC Simulator software
The VC Simulator package is available in the current directory.
Extract the contents of the VC Simulator zip file to the desired directory. The VC Simulator zip file includes:
Simulator-3.70.iso—An ISO file that the Simulator uses to boot
VC-simulator-3.70.vmx—A VMX file describing a virtual machine for use with VMware Player
Ancillary.pdf—Ancillary software license information
TSG_EULA_International.pdf—The TSG EULA International file
Download a Virtual Machine player
To set up your system to use the VC Simulator 3.70:
1. Download and install VMware Player 3.1.4 from the VMware website).
IMPORTANT: You must use VMware version 3.1.4, even if a later version is available. Windows
7 clients using newer versions of VMware Player only work with a Bridged Network. The VCM
HTTP browser may not work on these clients with NAT or host only addressing.
2. To test the VC Simulator 3.70, open the VMX file with VMware Player.
3. The virtual machine boots from the ISO file and displays the IP address of the virtual machine on the
login screen.
In some cases, firewall software on the host machine might cause connectivity problems for VMware guest
machines. A possible workaround for this problem is to put the firewall into "learn mode" and restart the
application to allow VMware to function properly.

Operations 13
Operations
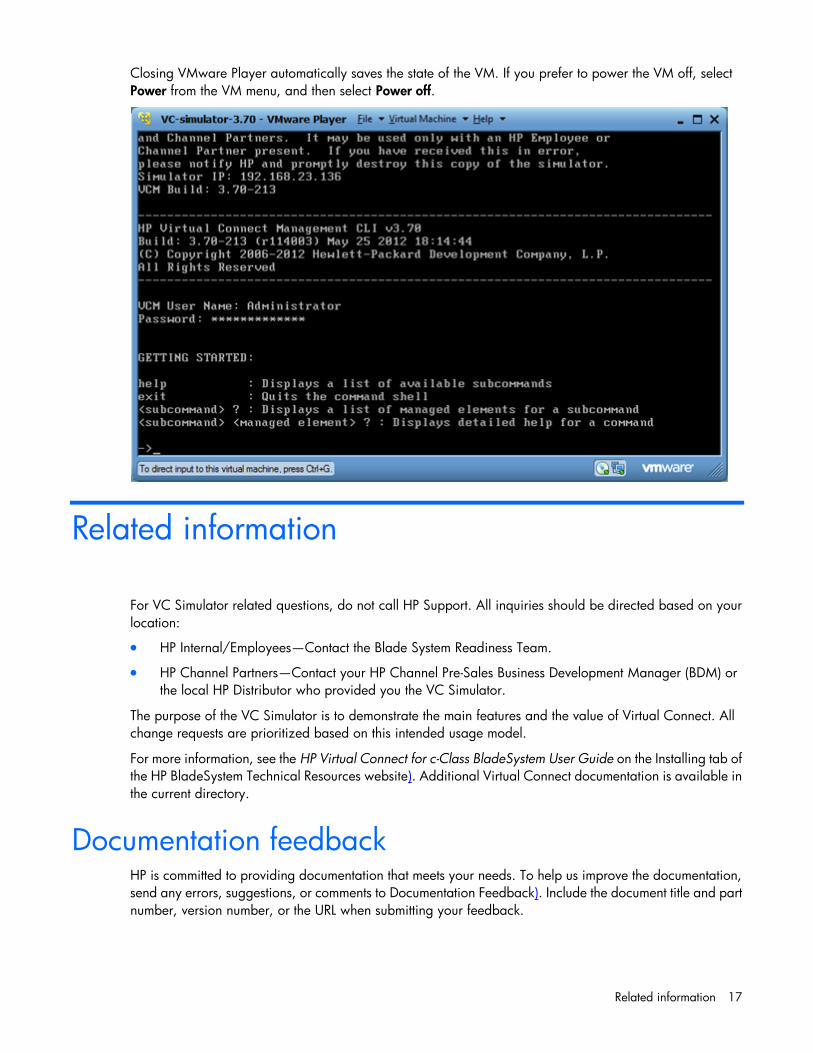
Using the Virtual Machine The IP address of the VM displays on the login banner as shown in the following figure. Record this IP
address. Use the IP address to launch:
A remote SSH connection to the VCM CLI.
The VCM GUI from a web browser.
Running the VCM CLI
The VCM CLI is running on the VM console. At the VCM User Name prompt, enter Administrator for the
user name and Administrator for the password.

Operations 14
Establishing a remote SSH connection to the VCM CLI
Establish a remote SSH connection as the vcmcli user (no password) using the recorded IP address. This
SSH connection places you directly in the VCM CLI. At the VCM User Name prompt, enter Administrator
for the user name and Administrator for the password.
Launching the VCM GUI
Launch the VCM GUI by browsing to the recorded IP address with Microsoft Internet Explorer. When the
login screen appears, enter Administrator for the user name and Administrator for the password.

Operations 15
Resetting the VM
To reset the VM using VMware Player:
1. Select Power from the VM pull-down menu.
2. Select Reset.
Importing enclosures The capability to simulate multi-enclosure stacking is built in to the VC Simulator. A combination of double
dense and single dense blades is not supported.
To import enclosures using the GUI:
1. Use the Domain Setup Wizard to import local enclosures.
2. (optional) To simulate double dense server enclosures, select the Enable double dense server support
(Restricts single dense server support) checkbox on the Import/Recovery screen.
3. Click Configuration.
4. Click the Enclosures tab.
5. Click Add.
6. Enter an IP address for the remote OA, and then enter Administrator for the user name and
Administrator for the password.
7. Import additional enclosures using the Domain Settings (Enclosures) screen after finishing the Domain
Setup Wizard.
To import enclosures using the CLI:
1. Import a single dense base enclosure using the following command:
import enclosure username=Administrator password=Administrator
Import a double dense base enclosure using the following command:
import enclosure username=Administrator password=Administrator
doubledense=true
2. Import a second enclosure by its IP address, in this example 192.168.6.1, using the following
command:
import enclosure 192.168.6.1 username=Administrator
password=Administrator

Operations 16
3. Import additional enclosures using the same syntax used in step 2.
Shutting down the VC Simulator A graceful shut down of the VM is not required. You can simply power it off. If the VM is powered off or
rebooted, all changes made are lost. To save any configuration changes made within the VC Simulator, be
sure to save the state of the VM by suspending it, rather than powering it off.
Related information 17
Closing VMware Player automatically saves the state of the VM. If you prefer to power the VM off, select
Power from the VM menu, and then select Power off.
Related information
For VC Simulator related questions, do not call HP Support. All inquiries should be directed based on your
location:
HP Internal/Employees—Contact the Blade System Readiness Team.
HP Channel Partners—Contact your HP Channel Pre-Sales Business Development Manager (BDM) or
the local HP Distributor who provided you the VC Simulator.
The purpose of the VC Simulator is to demonstrate the main features and the value of Virtual Connect. All
change requests are prioritized based on this intended usage model.
For more information, see the HP Virtual Connect for c-Class BladeSystem User Guide on the Installing tab of
the HP BladeSystem Technical Resources website). Additional Virtual Connect documentation is available in
the current directory.
Documentation feedback HP is committed to providing documentation that meets your needs. To help us improve the documentation,
send any errors, suggestions, or comments to Documentation Feedback). Include the document title and part
number, version number, or the URL when submitting your feedback.


![Barahipath, jif{ @@ c° ^$ @)&$ c;f/ g] 19 k[ ^±^≠!@ dNo ...apeksha thapa gpa: 3.70 kajal rai gpa: 3.70 rohan dahal gpa: 3.70 deewakar dahal gpa: 3.70 ishwor poudel gpa: 3.65 sonam](https://static.fdocuments.us/doc/165x107/5e9ce50a88852d7f7d5df312/barahipath-jif-c-cf-g-19-k-a-dno-apeksha-thapa.jpg)


![[vc 1037 - listing.archiviolocation.com · [vc 1037] ARCHIVIOLOCATION.COM [vc 1037] ARCHIVIOLOCATION.COM [vc 1037] ARCHIVIOLOCATION.COM [vc 1037] ARCHIVIOLOCATION.COM. archivio location](https://static.fdocuments.us/doc/165x107/5fcd99d1df347e1ae154645c/vc-1037-vc-1037-archiviolocationcom-vc-1037-archiviolocationcom-vc-1037.jpg)