USER MANUAL - virtavia.com E-2C Hawkeye Manual.pdf · coarse pitch (ctrl-F1 through ctrl-F4). There...
30
Virtavia E-2C Hawkeye Manual Version 1.0 0 E-2C Hawkeye USER MANUAL
Transcript of USER MANUAL - virtavia.com E-2C Hawkeye Manual.pdf · coarse pitch (ctrl-F1 through ctrl-F4). There...

Virtavia E-2C Hawkeye Manual Version 1.0
0
E-2C Hawkeye
USER MANUAL
Virtavia E-2C Hawkeye Manual Version 1.0
1
Introduction
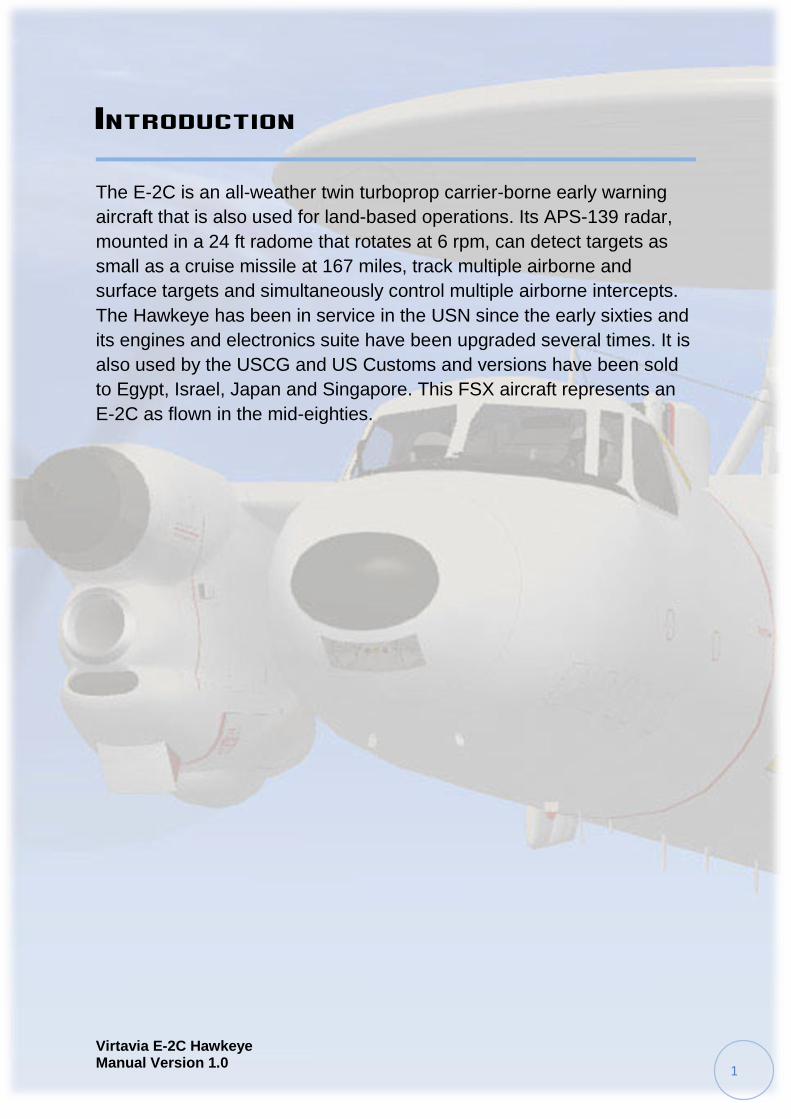
The E-2C is an all-weather twin turboprop carrier-borne early warning
aircraft that is also used for land-based operations. Its APS-139 radar,
mounted in a 24 ft radome that rotates at 6 rpm, can detect targets as
small as a cruise missile at 167 miles, track multiple airborne and
surface targets and simultaneously control multiple airborne intercepts.
The Hawkeye has been in service in the USN since the early sixties and
its engines and electronics suite have been upgraded several times. It is
also used by the USCG and US Customs and versions have been sold
to Egypt, Israel, Japan and Singapore. This FSX aircraft represents an
E-2C as flown in the mid-eighties.

Virtavia E-2C Hawkeye Manual Version 1.0
2
Support
Should you experience difficulties or require extra information about the
Virtavia E-2C Hawkeye, please e-mail our technical support on
Copyright Information
Please help us provide you with more top quality flight simulator models
like this one by NOT using pirate copies. Help us grow by buying a
legitimate copy.
These files may not be copied (other than for backup purposes),
transmitted or passed to third parties or altered in any way without the
prior permission of the publisher.
The source code for this product is closed. No modifications or reverse
engineering may be carried out without prior consent from Virtavia.
All rights reserved – copyright Virtavia 2016
Virtavia E-2C Hawkeye Manual Version 1.0
3
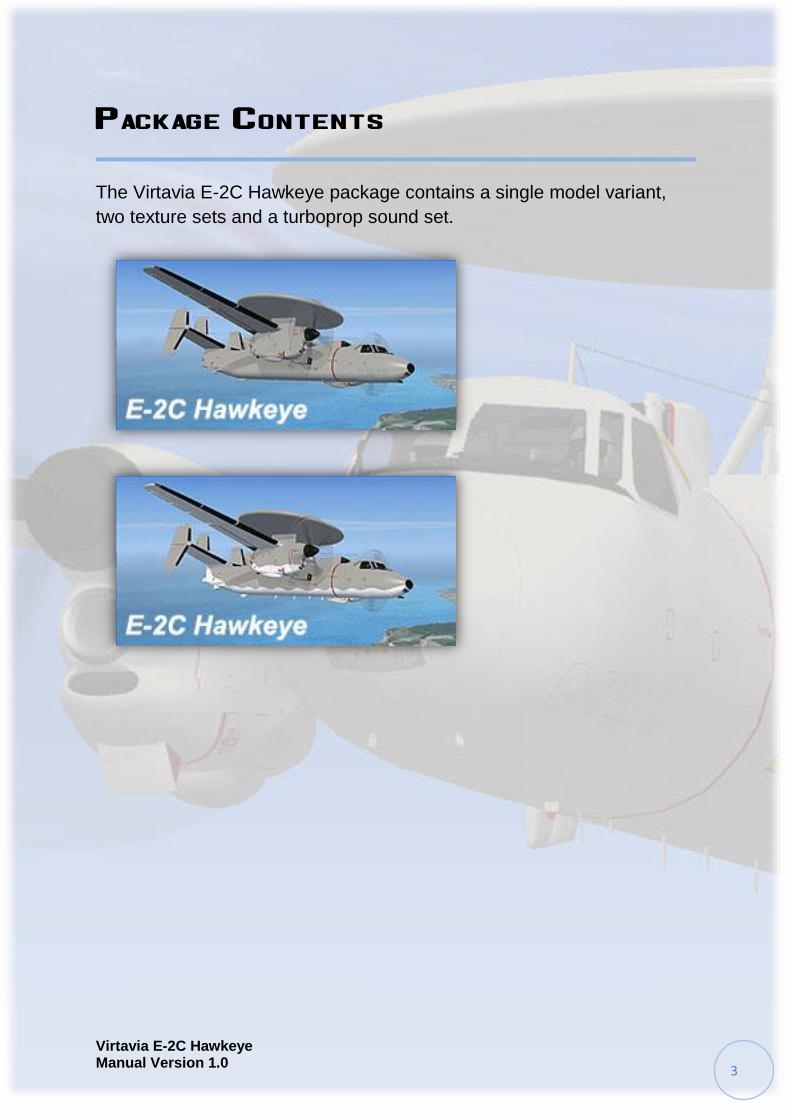
Package Contents
The Virtavia E-2C Hawkeye package contains a single model variant,
two texture sets and a turboprop sound set.

Virtavia E-2C Hawkeye Manual Version 1.0
4
Exterior Model
The exterior model has all the usual animations such as ailerons,
elevators, crew entry hatch, wing fold, tail hook and landing flaps. There
are no speedbrakes fitted to the Hawkeye.
Oil Cooler Flaps
Each engine nacelle is fitted with a ventral oil cooler flap. These are
opened by means of switches on the front vertical area of the pilot’s
overhead console.
Exits
Shift-E opens the crew entry door on the left side of the aircraft.
Crew figures
The crew figures can be toggled using Ctrl-W.
Propellers
The propeller blade pitch is animated through the range from fine to
coarse pitch (ctrl-F1 through ctrl-F4). There are no prop pitch levers in
the Hawkeye, pitch would be controlled automatically, according to
power demand. The keypresses mentioned above can nevertheless be
used. Pressing and holding F2 on landing provides reverse thrust (beta
range). Tap F1 to cancel reverse thrust.

Virtavia E-2C Hawkeye Manual Version 1.0
5
Lighting
Pressing the L key will turn on all lights. You may however wish to turn
them on using the appropriate switches in the cockpit, as the L key also
turns the on navigation and both instrument and cabin flood lighting in
the cockpit, which should ideally be switched separately.
The ventral beacon light is not used as it causes distracting flashing in
the cockpit at night due to a limitation of FSX. It may be enabled if
desired by ‘uncommenting’ its entry in the [Lights] section of the E-2C’s
aircraft.cfg file. The cabin flood light is enabled, but it will partially
illuminate the front of the large dorsal air intake. This bleed-through of
the cabin lighting is a known issue in FSX. This light can also be
commented out in the aircraft.cfg file Lights Section in the same way as
the ventral rotating beacon, if desired.
In common with other US Navy aircraft of this era, the E-2C Hawkeye
was not fitted with landing lights. There are however two taxi lights
mounted inside the nose lights compartment, these have been set up as
landing lights in the model.
Please refer to the cockpit section of this manual for information
regarding light switch location.
Virtavia E-2C Hawkeye Manual Version 1.0
6
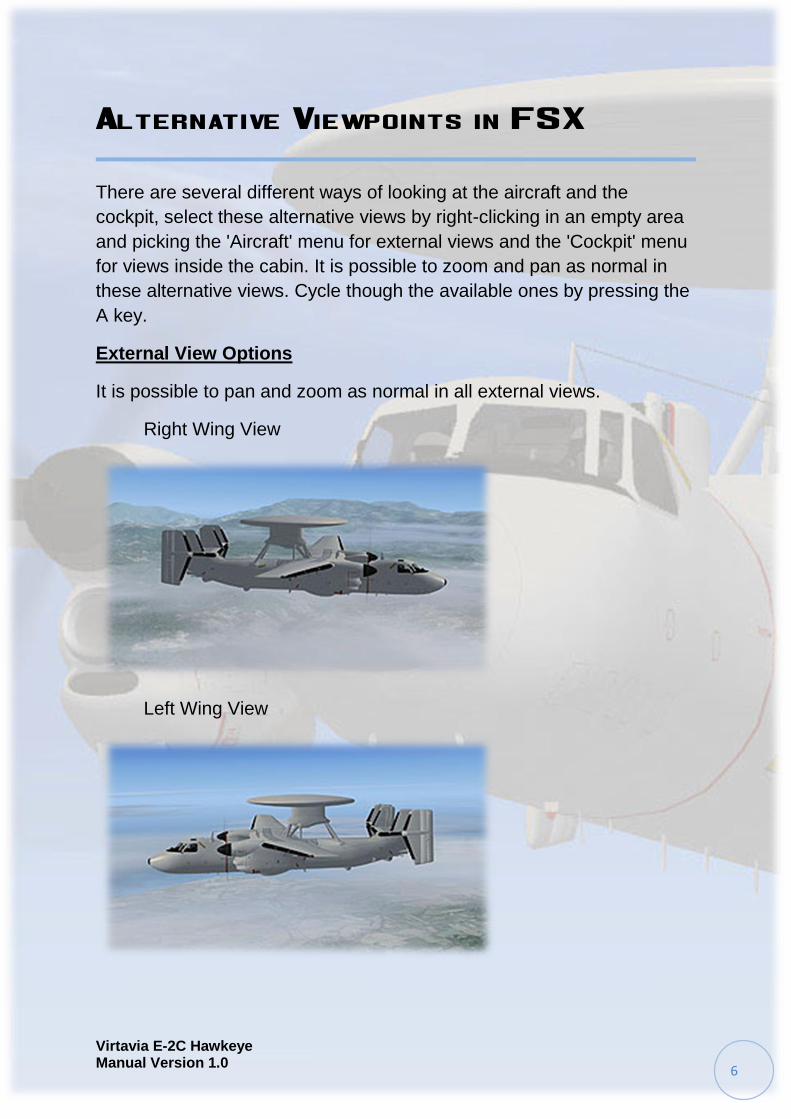
Alternative Viewpoints in FSX
There are several different ways of looking at the aircraft and the
cockpit, select these alternative views by right-clicking in an empty area
and picking the 'Aircraft' menu for external views and the 'Cockpit' menu
for views inside the cabin. It is possible to zoom and pan as normal in
these alternative views. Cycle though the available ones by pressing the
A key.
External View Options
It is possible to pan and zoom as normal in all external views.
Right Wing View
Left Wing View

Virtavia E-2C Hawkeye Manual Version 1.0
7
Tail View
Nose View
Cockpit View, Left
Virtavia E-2C Hawkeye Manual Version 1.0
8
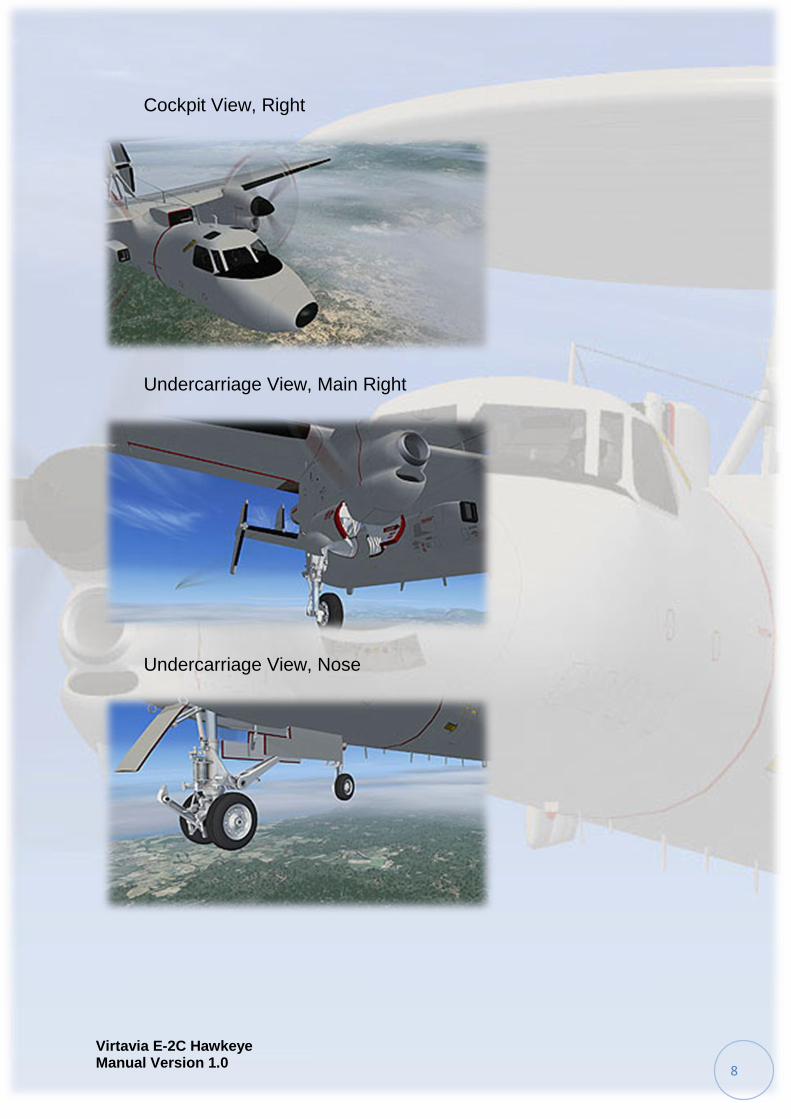
Cockpit View, Right
Undercarriage View, Main Right
Undercarriage View, Nose

Virtavia E-2C Hawkeye Manual Version 1.0
9
Tail Hook View
Interior Views
It is possible to pan and zoom as normal in all interior views.
Virtual Cockpit View
Copilot’s Seat View
Virtavia E-2C Hawkeye Manual Version 1.0
10
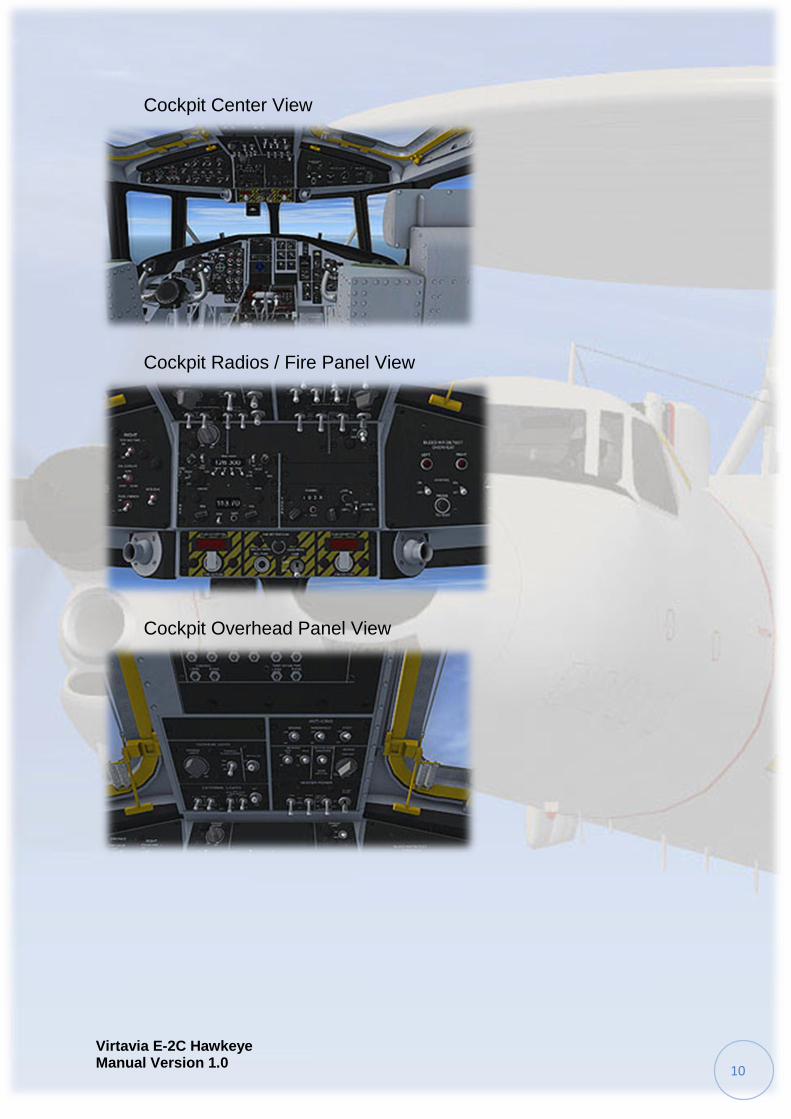
Cockpit Center View
Cockpit Radios / Fire Panel View
Cockpit Overhead Panel View

Virtavia E-2C Hawkeye Manual Version 1.0
11
Cockpit Center Console View
Cockpit Warning Lts / Stormscope View
Moving Around the Cabin
Shift-Enter and Shift-Backspace : moves up and down
Ctrl-Shift-Enter and Ctrl-Shift-Backspace : moves side to side
Ctrl-Enter and Ctrl-Backspace : moves backwards and forwards
Virtavia E-2C Hawkeye Manual Version 1.0
12
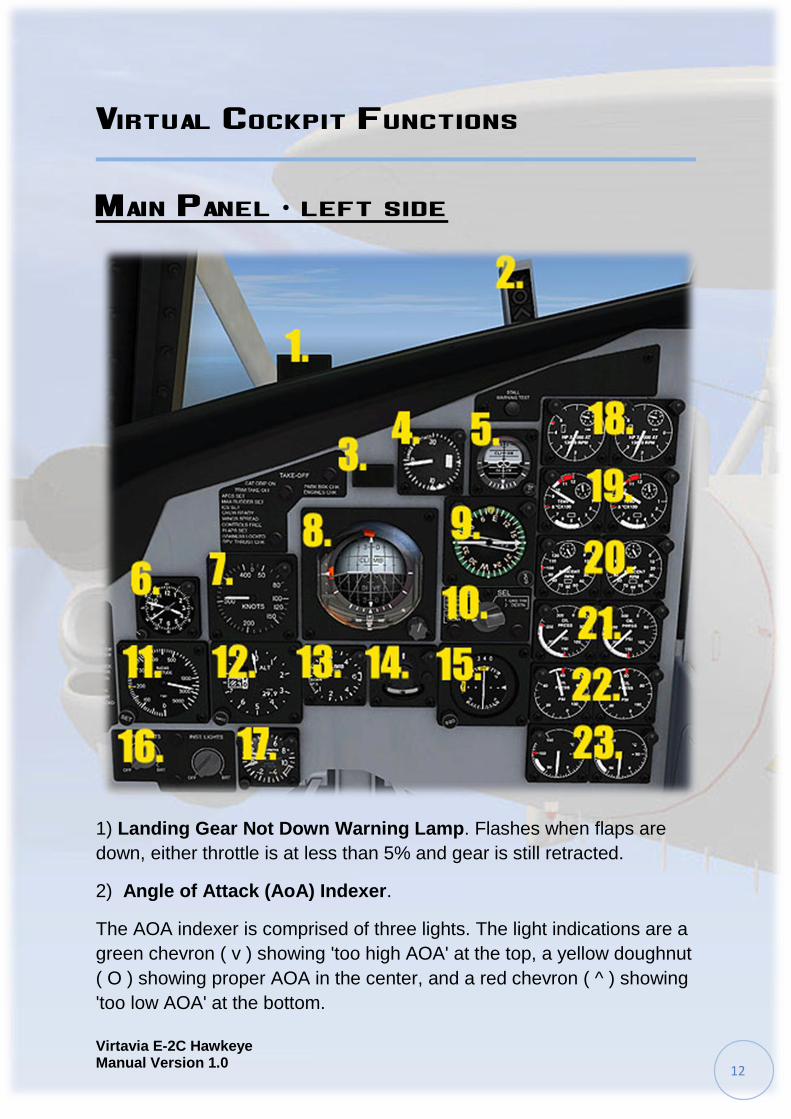
Virtual Cockpit Functions
Main Panel - left side
1) Landing Gear Not Down Warning Lamp. Flashes when flaps are
down, either throttle is at less than 5% and gear is still retracted.
2) Angle of Attack (AoA) Indexer.
The AOA indexer is comprised of three lights. The light indications are a
green chevron ( v ) showing 'too high AOA' at the top, a yellow doughnut
( O ) showing proper AOA in the center, and a red chevron ( ^ ) showing
'too low AOA' at the bottom.

Virtavia E-2C Hawkeye Manual Version 1.0
13
3) Master Caution Light. Linked to the left and right Caution Light
Panels, the Master Caution illuminates when any caution is registered.
Clicking the lamp will reset it, but this should only be done after the
Caution Light panel has been checked to see the cause of the alarm.
4) Angle of Attack Indicator. Shows the AoA in units, not actual
degrees. The correct approach AoA of 20 units is indicated by the
needle pointing at the 3-o'clock position.
5) Standby Artificial Horizon. This instrument provides a simplified
safety backup to the main artificial horizon gauge. The right knob cages
or locks in place both indicators during excessive maneuvering.
6) Clock. The knob can be clicked to toggle Local and Zulu time.
7) Airspeed Indicator. Shows the present airspeed in knots.
8) Main Artificial Horizon. The right side knob calibrates the indicator
‘wings’ vertically. The instrument also has locator and glideslope needles
so can be used for VOR (NAV1) homing, as well as an ILS receiver.
Warning flags display when there is no valid LOC or GS signal, if there is
no power and if the FSX Flight Director is switched on.
A GREEN chevron pointing down indicates ‘too slow’ - the nose must be lowered and/or the throttle setting increased. An AMBER doughnut indicates that AOA is optimum for the approach. A RED chevron pointing up indicates ‘too fast’ - the nose must be raised and/or the throttle setting reduced. At intermediate stages the AOA indexer may also display
two symbols at a time. For example, a doughnut and a
green chevron would indicate that the aircraft is nearing
optimum AOA, providing the nose is lowered further. A
doughnut and a red chevron would indicate the
opposite.
Virtavia E-2C Hawkeye Manual Version 1.0
14
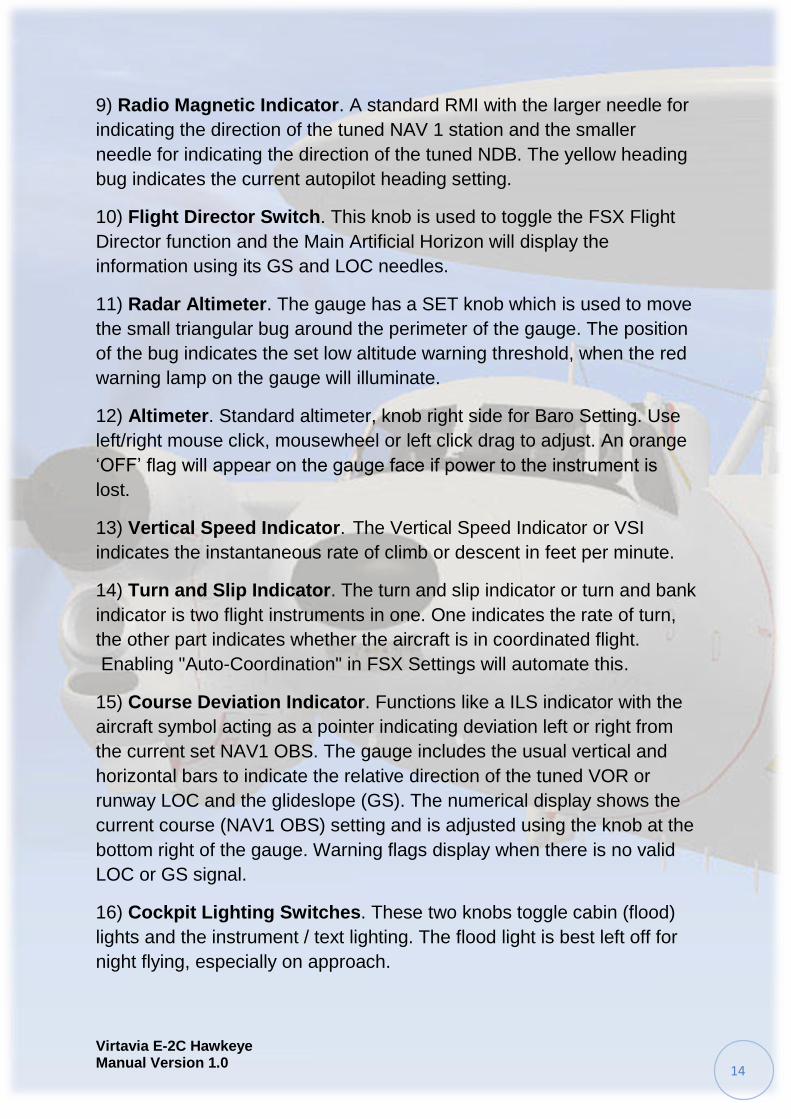
9) Radio Magnetic Indicator. A standard RMI with the larger needle for
indicating the direction of the tuned NAV 1 station and the smaller
needle for indicating the direction of the tuned NDB. The yellow heading
bug indicates the current autopilot heading setting.
10) Flight Director Switch. This knob is used to toggle the FSX Flight
Director function and the Main Artificial Horizon will display the
information using its GS and LOC needles.
11) Radar Altimeter. The gauge has a SET knob which is used to move
the small triangular bug around the perimeter of the gauge. The position
of the bug indicates the set low altitude warning threshold, when the red
warning lamp on the gauge will illuminate.
12) Altimeter. Standard altimeter, knob right side for Baro Setting. Use
left/right mouse click, mousewheel or left click drag to adjust. An orange
‘OFF’ flag will appear on the gauge face if power to the instrument is
lost.
13) Vertical Speed Indicator. The Vertical Speed Indicator or VSI
indicates the instantaneous rate of climb or descent in feet per minute.
14) Turn and Slip Indicator. The turn and slip indicator or turn and bank
indicator is two flight instruments in one. One indicates the rate of turn,
the other part indicates whether the aircraft is in coordinated flight.
Enabling "Auto-Coordination" in FSX Settings will automate this.
15) Course Deviation Indicator. Functions like a ILS indicator with the
aircraft symbol acting as a pointer indicating deviation left or right from
the current set NAV1 OBS. The gauge includes the usual vertical and
horizontal bars to indicate the relative direction of the tuned VOR or
runway LOC and the glideslope (GS). The numerical display shows the
current course (NAV1 OBS) setting and is adjusted using the knob at the
bottom right of the gauge. Warning flags display when there is no valid
LOC or GS signal.
16) Cockpit Lighting Switches. These two knobs toggle cabin (flood)
lights and the instrument / text lighting. The flood light is best left off for
night flying, especially on approach.
Virtavia E-2C Hawkeye Manual Version 1.0
15
17) Accelerometer. The accelerometer measures acceleration (both
negative and positive g-forces) during flight. The button is used to reset
the minimum and maximum needles back to zero.
18) Engine – Torque Horsepower Indicators. The engine torque is
displayed, expressed as Horsepower x 1000.
19) Engine – Turbine Inlet Temperature Indicators. Records the
temperature of the combustion gases as they enter the turbine section.
20) Engine – Tachometers. These instruments indicate propeller and
reduction gear speed in percent of RPM.
21) Engine – Reducton Gear Oil Pressure Indicators. These indicate
the pressure of the reduction gear lubricating oil at the outlet of the oil
pumps.
22) Engine – Power Section Oil Pressure Indicators. These display
the pressure readings at the engine-driven oil pumps.
23) Engine – Power Section Oil Temperature Indicators. These
display the temperature of each engine’s lubricating oil.
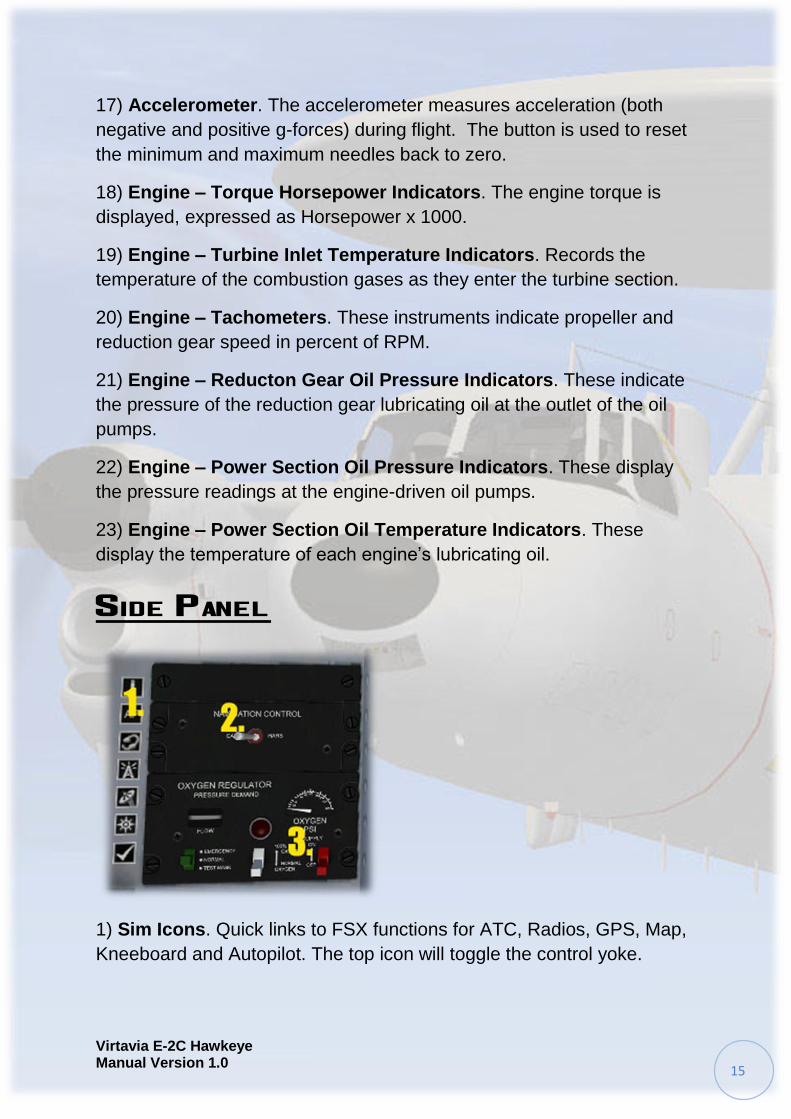
Side Panel
1) Sim Icons. Quick links to FSX functions for ATC, Radios, GPS, Map,
Kneeboard and Autopilot. The top icon will toggle the control yoke.
Virtavia E-2C Hawkeye Manual Version 1.0
16
2) NAV-GPS Switch. Toggles NAV1 and GPS to drive the autopilot
when in CRS mode
3) Pilot Oxygen Supply Switch. Toggles supply on/off. The small meter
above the switch displays the Oxygen pressure. The other two switches
are animated but have no function in the model.
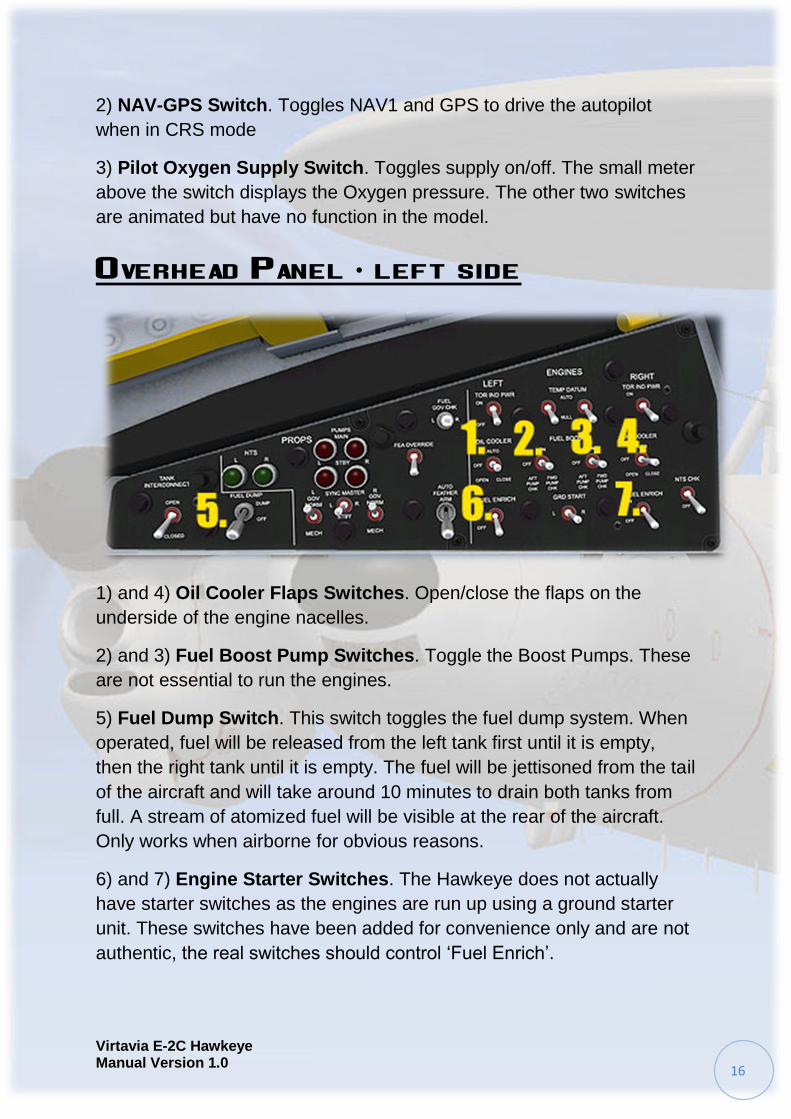
Overhead Panel - left side
1) and 4) Oil Cooler Flaps Switches. Open/close the flaps on the
underside of the engine nacelles.
2) and 3) Fuel Boost Pump Switches. Toggle the Boost Pumps. These
are not essential to run the engines.
5) Fuel Dump Switch. This switch toggles the fuel dump system. When
operated, fuel will be released from the left tank first until it is empty,
then the right tank until it is empty. The fuel will be jettisoned from the tail
of the aircraft and will take around 10 minutes to drain both tanks from
full. A stream of atomized fuel will be visible at the rear of the aircraft.
Only works when airborne for obvious reasons.
6) and 7) Engine Starter Switches. The Hawkeye does not actually
have starter switches as the engines are run up using a ground starter
unit. These switches have been added for convenience only and are not
authentic, the real switches should control ‘Fuel Enrich’.

Virtavia E-2C Hawkeye Manual Version 1.0
17
Overhead Panel - radios and fire
1) COM Radio Frequency Switches. Use left and right mouse clicks at
the base of the switches to adjust the COM 1 active frequency.
2) and 5) NAV Radio Frequency Knobs. Use left and right mouse
clicks to adjust the NAV 1 active frequency.
3) NAV Radio Frequency Select Switch. This switch toggles the
displayed frequency between the Active and the Standby.
4) NAV Radio Swap Button. Pressing the spring-loaded button inserts
the present Standby frequency into the display and sets the original
Active frequency as Standby.

Virtavia E-2C Hawkeye Manual Version 1.0
18
6) and 9) Emergency Engine Shutdown Handles. Pulling the handle
out (left mouseclick) shuts down the engine. The red button which is
then exposed will, when pressed, trigger the fire extinguisher and put out
an engine fire in about 8 seconds.
7) Fire Warning Lamps Test Button. Pressing the spring-loaded button
lights the Fire Warning lamps in the T-Bar handles.
8) Cabin Pressure Dump Switch. Activating this switch will gradually
release the cabin pressure. The effect can be seen on the Cabin
Pressure indicator on the copilot’s panel.
10) Whiskey Compass. The familiar standby magnetic compass.
Overhead Panel - electrics
1) Engine Anti-Icing Switch.
2) Pitot Heater Switch.
3) Instrument Lights Switch.
4) Cabin Lights Switch.
5) Wing & Tail Anti-Icing Switch.
6) Propeller Anti-Icing Switch.

Virtavia E-2C Hawkeye Manual Version 1.0
19
7) Navigation Lights Switch.
8) Rotating Beacon Lights Switch.
9) Landing Lights Switch.
10) Left and Right Engine Generator Switches.
11) Master Battery Switch.
Overhead Panel - left side
1) Bleed Air Overheat Lamps Test Switch.
2) Wing & Tail Anti-Ice Pressure Gauge. The gauge shows a reading
when engine/wing anti-icing is switched on.
3) Wing & Tail Anti-Ice Suction Gauge. The gauge shows a reading
when engine/wing anti-icing is switched on.
4) Prop Anti-Ice Ammeter. The gauge shows a reading when propeller
anti-icing is switched on.

Virtavia E-2C Hawkeye Manual Version 1.0
20
Main Panel - center
1) Caution Lights Test Button. This spring-loaded button will force
illumination of both clusters of caution lights (8), as well as the six ACLS
Message Indicator lights and the Air Data Computer annunciator block
on the center console.
2) Fuel & Oxygen Quantity Gauges Test Button. When pressed, the
gauge needles will fall to zero to indicate proper functioning.
3) Oxygen Quantity Indicator. This gauge also has an ‘OFF’ flag when
there is no power to the instrument.
4) Cabin Pressure Indicator. The gauge will show normal ambient
pressure up to 5,000ft above sea level. The system will then maintain

Virtavia E-2C Hawkeye Manual Version 1.0
21
that value, unless the cabin pressure dump switch on the Fire Panel is
used. In this case, the ambient pressure will be indicated on the gauge.
Setting the dump switch back to ‘ON’ will cause the cabin to be re-
pressurized to 5,000ft ASL.
5) Fuel Quantity Indicators. These show the fuel remaining in pounds
in each of the two tanks.
6) Stormscope. This gauge is a representation only. The real
Stormscope is a form of weather radar. The top-right knob will toggle the
instrument on/off, be prepared to wait for the system to boot up, this will
take only a few seconds. The four buttons on the lower part of the gauge
will display various authentic, but non-functional- screens of the
Stormscope.
7) Fuel Flow Indicators. These show fuel flow to the engines in pounds
per hour.
8) Caution Warning Lamp Clusters. Not all the warnings are supported
by FSX, however the full range can be seen when the Caution Lights
Test Button (1) is pressed.
Virtavia E-2C Hawkeye Manual Version 1.0
22
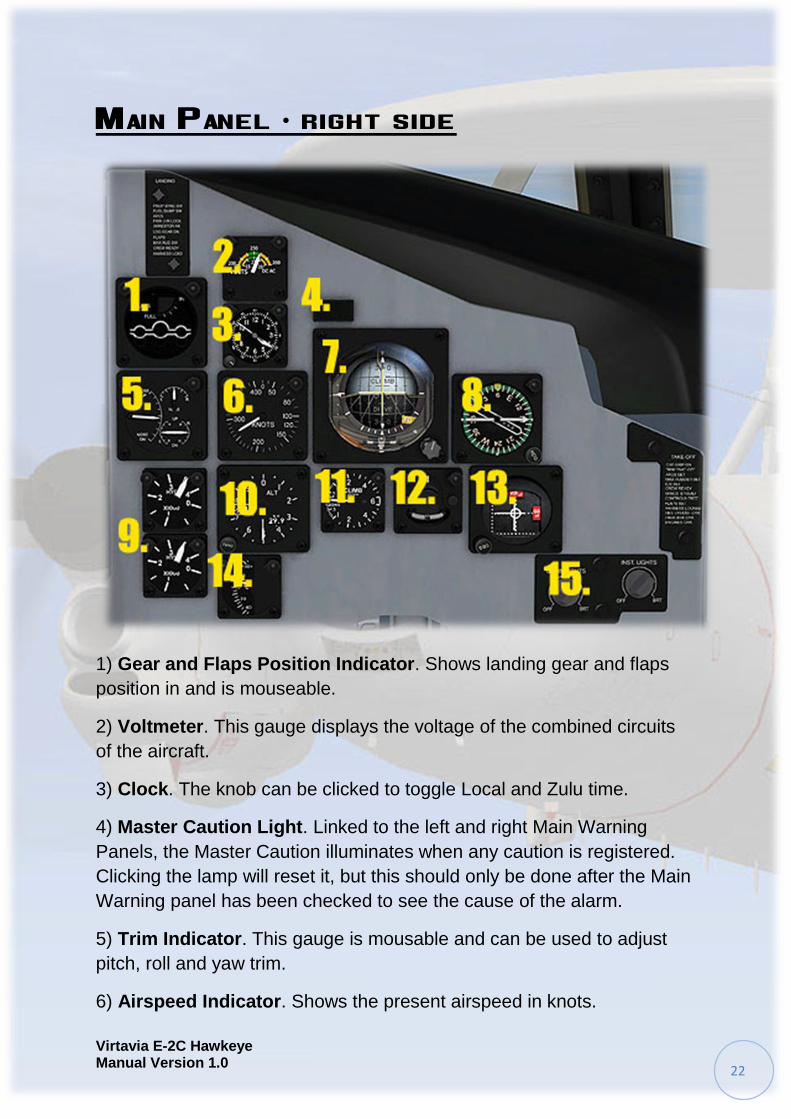
Main Panel - right side
1) Gear and Flaps Position Indicator. Shows landing gear and flaps
position in and is mouseable.
2) Voltmeter. This gauge displays the voltage of the combined circuits
of the aircraft.
3) Clock. The knob can be clicked to toggle Local and Zulu time.
4) Master Caution Light. Linked to the left and right Main Warning
Panels, the Master Caution illuminates when any caution is registered.
Clicking the lamp will reset it, but this should only be done after the Main
Warning panel has been checked to see the cause of the alarm.
5) Trim Indicator. This gauge is mousable and can be used to adjust
pitch, roll and yaw trim.
6) Airspeed Indicator. Shows the present airspeed in knots.

Virtavia E-2C Hawkeye Manual Version 1.0
23
7) Main Artificial Horizon. The right side knob calibrates the indicator
‘wings’ vertically. The instrument also has locator and glideslope needles
so can be used for VOR (NAV1) homing, as well as an ILS receiver.
Warning flags display when there is no valid LOC or GS signal, if there is
no power and if the FSX Flight Director is switched on.
8) Radio Magnetic Indicator. A standard RMI with the larger needle for
indicating the direction of the tuned NAV 1 station and the smaller
needle for indicating the direction of the tuned NDB. The yellow heading
bug indicates the current autopilot heading setting.
9) Hydraulic Pressure Indicators. These gauges display the pressure
of the flight hydraulics and combined hydraulics systems.
10) Altimeter. Standard altimeter, knob right side for Baro Setting. Use
left/right mouse click, mousewheel or left click drag to adjust. An orange
‘OFF’ flag will appear on the gauge face if power to the instrument is
lost.
11) Vertical Speed Indicator. The Vertical Speed Indicator or VSI
indicates the instantanious rate of climb or descent in feet per minute.
12) Turn and Slip Indicator. The turn and slip indicator or turn and bank
indicator is two flight instruments in one. One indicates the rate of turn,
the other part indicates whether the aircraft is in coordinated flight.
Enabling "Auto-Coordination" in FS Settings will automate this.
13) Course Deviation Indicator. The copilot has a simpler ILS
instrument with the vertical locator (LOC) and horizontal glideslope bar
(GS) to aid instrument landings. The gauge is driven by the NAV1 signal
only. Warning flags are displayed when no LOC (VOR) or GS
(glideslope) are being received.
14) Outside Air Temp. Indicator. The mouse tooltip displays the
temperature in both Centigrade and Fahrenheit.
15) Cockpit Lighting Switches. These two knobs toggle cabin (flood)
lights and the instrument / text lighting. The flood light is best left off for
night flying, especially on approach.

Virtavia E-2C Hawkeye Manual Version 1.0
24
Center Console
1) Air Data Computer Displays. Four banks of nixie lights display, from
front to rear : Miles to Destination, Time to Destination, Aircraft Altitude
and Speed, Ambient Wind Speed and Direction.
2) Air Data Computer on/off Switch.
3) Landing Gear Lever. Mousable. Right-click and drag backwards to
extend gear. Right-click and drag forwards to retract gear.

Virtavia E-2C Hawkeye Manual Version 1.0
25
4) Windshield Wiper Switch. Mousable. Click on right side to turn
wipers on and left side to turn them off. The simulation only has one
speed.
5) Engine Condition Levers. Control engine fuel flow. Setting the levers
to the fully back position will shut down the engine. The levers can be
moved independently with the mouse by dragging on any part of the
lever. This does not affect engine performance in FSX.
6) Engine Throttle Levers. Control engine power delivery. The levers
can be moved independently with the mouse by dragging on any part of
the lever.
7) Wing Flaps Lever. Right-click and drag backwards to extend flaps.
Right-click and drag forward to retract flaps. Has three positions,
marked in degrees of rotation.
8) Tail Hook Lever. A Single mouse click will deploy the tail hook.
Clicking again will retract it.
9) Parking Brake Lever. Click to activate the parking brake.
10) Autopilot Controls. Toggle switches left to right control : AP on/off,
Attitude Hold, Approach Hold, Altitude Hold, Heading Hold and Course
(NAV1) Hold. Note, the NAV-GPS switch on the pilot’s left side console
can be used to force CRS to track a GPS course rather than a NAV1
VOR. FSX does not support Speed Hold on turboprops, so careful
management of the throttles is essential at all times.
11) Pitch Trim Adjuster. Use left or right mouse to move the switch
forwards or aft respectively. As the switch is rather awkward to use in
flight, it is recommended to use the keyboard or the Trim Indicator on the
copilot’s panel to adjust pitch trim.

Virtavia E-2C Hawkeye Manual Version 1.0
26
REFERENCE INFORMATION
Virtavia E-2C Hawkeye Procedures
Location of Starter Switches
The starter switches are located on the pilot’s upper panel. They are labelled as ‘FUEL ENRICH’. Mouse over each switch to confirm its function.
Starting Engines
Use Ctrl-E (autostart) to start the aircraft, or:
1. Check Parking Brake ON. 2. Check Crew Entrance Hatch is CLOSED. 3. Check Anti-Ice switches are OFF. 4. Check Generator Switches are ON. 5. Set throttles to IDLE. 6. Check Condition Levers at Air Start position (fully fwd). 7. Check Pitot Heat switch is OFF. 8. Set Prop Pitch to fully FINE (ctrl-F1). 9. Set Master Battery switch ON. 10. Set Navigation Lights switch to ON. 11. Set Rotating Beacon Lights switch to ON. 12. Start Engine 1 using the engine start switch. 13. Monitor engine RPM. Check that engine has not failed to start.
Repeat for engine 2. 14. Check temperatures & pressures.
Taxi
1. Set Pitot Heat ON. 2. Set Anti-Ice (as required) ON. 3. Navaids, Autopilot SET. 4. Set Parking Brake OFF. 5. Advance throttles to begin taxiing.

Virtavia E-2C Hawkeye Manual Version 1.0
27
Takeoff
1. Check Autopilot OFF. 2. Check Wings Spread. 3. Set Pitot Heat ON. 4. Set flaps to takeoff (normal 25 %, 100 % if catapult launched). 5. Set nose-up Pitch Trim as required. 6. Brakes ON, maximum power CHECK. 7. Throttles to IDLE, Brakes OFF. 8. Set Holdback using shift-i (carrier take-off only). 9. Set Prop Pitch COARSE (default FSX setting, ctrl-F4 if needed). 10. Apply power smoothly to full throttle. 11. Press shift-spacebar to trigger catapult (carrier take-off only) 12. Begin Rotation at approx. 100 KTS IAS (land take-off only).
After Takeoff
1. When airborne, raise GEAR. 2. At 125 KTS raise FLAPS. 3. Allow the aircraft to accelerate to normal climb speed 154 KTS.
Cruising
1. Level off at desired cruise altitude. 2. Reduce throttle setting. 3. Adjust speed to cruise at 260 KTS. 4. Use autopilot to set cruise parameters (shift-2).
Descent
1. Begin descent 40 miles from the airfield or carrier. 2. Check Pitot Heat ON. 3. Set descent rate and speed as desired using the autopilot (shift-2).
Approach
1. Set Autopilot OFF. 2. Check Parking Brake OFF. 3. Set Altimeter Baro Pressure to match landing zone pressure. 4. Lower Landing Gear BELOW 190 KTS. 5. Enter downwind leg at 175 KTS. 6. Set Flaps to 25%. 7. Check AOA Indexer to maintain correct attitude. 8. Lower Arresting Hook (if required).
Virtavia E-2C Hawkeye Manual Version 1.0
28
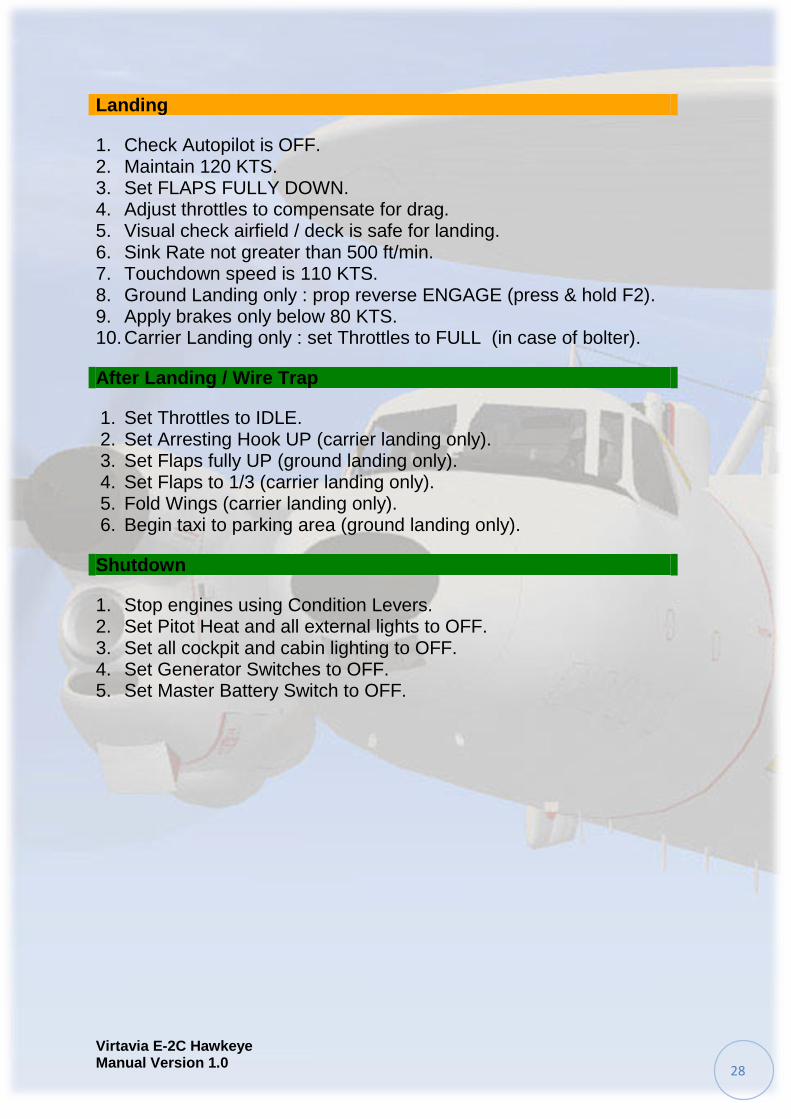
Landing
1. Check Autopilot is OFF. 2. Maintain 120 KTS. 3. Set FLAPS FULLY DOWN. 4. Adjust throttles to compensate for drag. 5. Visual check airfield / deck is safe for landing. 6. Sink Rate not greater than 500 ft/min. 7. Touchdown speed is 110 KTS. 8. Ground Landing only : prop reverse ENGAGE (press & hold F2). 9. Apply brakes only below 80 KTS. 10. Carrier Landing only : set Throttles to FULL (in case of bolter).
After Landing / Wire Trap
1. Set Throttles to IDLE. 2. Set Arresting Hook UP (carrier landing only). 3. Set Flaps fully UP (ground landing only). 4. Set Flaps to 1/3 (carrier landing only). 5. Fold Wings (carrier landing only). 6. Begin taxi to parking area (ground landing only).
Shutdown
1. Stop engines using Condition Levers. 2. Set Pitot Heat and all external lights to OFF. 3. Set all cockpit and cabin lighting to OFF. 4. Set Generator Switches to OFF. 5. Set Master Battery Switch to OFF.

Virtavia E-2C Hawkeye Manual Version 1.0
29
E-2C Hawkeye Specifications and Speed References
Specifications
Crew: 5
Engines: 2 x Allison T56-A-425 Turboprops
Power: 4,600 i.h.p. each
Wingspan: 80' 7" (29’ 4” folded)
Length: 57' 7"
Height: 18' 4”
Empty Weight : 39,561 lbs
Combat Weight : 48,040 lbs
MTOW : 53,000 lbs
Max. Landing Weight : 46,500 lbs (field or arrested)
Flight Reference Data
Maximum speed : 330 kts at 15,000 ft
Average cruising speed / altitude : 260 kts at 25,000 ft
Ferry Range : 1,462 nautical miles
Service Ceiling : 34,700 ft
Max. Fuel Load : 12,220 lbs
Stalling Speed, dirty, max. weight – power off : 93 kts
Stalling Speed, dirty, max weight – power on : 75 kts
Stalling Speed, clean, max. weight – power off : 112 kts
Stalling Speed, clean, max weight – power on : 90 kts