
U N IVE RSAL...universal Compatible with today’s most popular brands. Compatible avec la plupart...
40
universal Compatible with today’s most popular brands. Compatible avec la plupart des marques actuelles. remote U N I V E R S A L Learning Remote LCD Status Display • Provides step-by- step programming instructions; prompts for next steps; validates correct entries. Displays time and the code tables programmed for your components. Learns Commands from Original Remotes • Can store more than 30 key commands for each original remote. SmartMacro ™ Keys • Control multiple commands with two simple keypresses. U N I V E R S A L RCU807 U N I V E R S E L Télécommande intelligente Afficheur d’état ACL • Présente les instructions détaillées de programmation; demande les prochaines étapes; valide les entrées correctes. Affiche l'heure et les tableaux de codes programmés pour vos appareils. Apprend les commandes des télécommandes originales • Peut mémoriser quelque 30 commandes de touches pour chaque télécommande originale. Touches SmartMacro mc • Pour commander plusieurs commandes par deux simples pressions de touches. télécommande RCU807US_IB_REVB 9/26/03 10:18 Page 1
Transcript of U N IVE RSAL...universal Compatible with today’s most popular brands. Compatible avec la plupart...

universal Compatible with today’s most popular brands.Compatible avec la plupart des marques actuelles.
rem
ote
U N I V E R S A L
Learning Remote
LCD Status Display• Provides step-by-
step programminginstructions; prompts for next steps; validatescorrect entries. Displays time and the code tables programmed for your components.
Learns Commands from Original Remotes• Can store more than
30 key commands for each original remote.
SmartMacro™ Keys• Control multiple
commands with twosimple keypresses.
U N I V E R S A L
RCU807
U N I V E R S E L
Télécommande intelligente
Afficheur d’état ACL• Présente les
instructions détaillées de programmation;demande les prochainesétapes; valide les entréescorrectes. Affiche l'heure et les tableaux de codesprogrammés pour vos appareils.
Apprend les commandes destélécommandesoriginales• Peut mémoriser quelque
30 commandes detouches pour chaquetélécommande originale.
Touches SmartMacromc
• Pour commanderplusieurs commandespar deux simples pressions de touches.
télé
com
man
de
RCU807US_IB_REVB 9/26/03 10:18 Page 1

2
Introduction . . . . . . . . . . . . . . . . . . . . . . . . . . . . . . . . . . . . . . . . . . . . . . . . . . . . . . . . . . . . . . . . . . . . . . . . . . .3Battery Information . . . . . . . . . . . . . . . . . . . . . . . . . . . . . . . . . . . . . . . . . . . . . . . . . . . . . . . . . . . . . . . . . . . . .3
Battery Installation . . . . . . . . . . . . . . . . . . . . . . . . . . . . . . . . . . . . . . . . . . . . . . . . . . . . . . . . . . . . . . . . . . .3Battery Saver . . . . . . . . . . . . . . . . . . . . . . . . . . . . . . . . . . . . . . . . . . . . . . . . . . . . . . . . . . . . . . . . . . . . . . . .3Code Saver . . . . . . . . . . . . . . . . . . . . . . . . . . . . . . . . . . . . . . . . . . . . . . . . . . . . . . . . . . . . . . . . . . . . . . . . . .3Power-on Default . . . . . . . . . . . . . . . . . . . . . . . . . . . . . . . . . . . . . . . . . . . . . . . . . . . . . . . . . . . . . . . . . . . .3
Product Diagram . . . . . . . . . . . . . . . . . . . . . . . . . . . . . . . . . . . . . . . . . . . . . . . . . . . . . . . . . . . . . . . . . . . . . . .4LCD Status Display . . . . . . . . . . . . . . . . . . . . . . . . . . . . . . . . . . . . . . . . . . . . . . . . . . . . . . . . . . . . . . . . . . . . .4Setup Routine and Procedures . . . . . . . . . . . . . . . . . . . . . . . . . . . . . . . . . . . . . . . . . . . . . . . . . . . . . . . . . . . .4
Enter Setup Mode . . . . . . . . . . . . . . . . . . . . . . . . . . . . . . . . . . . . . . . . . . . . . . . . . . . . . . . . . . . . . . . . . . . .5Exit Setup Mode . . . . . . . . . . . . . . . . . . . . . . . . . . . . . . . . . . . . . . . . . . . . . . . . . . . . . . . . . . . . . . . . . . . . .5
Code Entry . . . . . . . . . . . . . . . . . . . . . . . . . . . . . . . . . . . . . . . . . . . . . . . . . . . . . . . . . . . . . . . . . . . . . . . . . . . .6Code List Entry . . . . . . . . . . . . . . . . . . . . . . . . . . . . . . . . . . . . . . . . . . . . . . . . . . . . . . . . . . . . . . . . . . . . . .6Code Search . . . . . . . . . . . . . . . . . . . . . . . . . . . . . . . . . . . . . . . . . . . . . . . . . . . . . . . . . . . . . . . . . . . . . . .6-7Code Identification . . . . . . . . . . . . . . . . . . . . . . . . . . . . . . . . . . . . . . . . . . . . . . . . . . . . . . . . . . . . . . . . . . .7Code Identification Chart . . . . . . . . . . . . . . . . . . . . . . . . . . . . . . . . . . . . . . . . . . . . . . . . . . . . . . . . . . . . . .8
Learning . . . . . . . . . . . . . . . . . . . . . . . . . . . . . . . . . . . . . . . . . . . . . . . . . . . . . . . . . . . . . . . . . . . . . . . . . . . . . .8Learning Tips . . . . . . . . . . . . . . . . . . . . . . . . . . . . . . . . . . . . . . . . . . . . . . . . . . . . . . . . . . . . . . . . . . . . . . .8Code Learning . . . . . . . . . . . . . . . . . . . . . . . . . . . . . . . . . . . . . . . . . . . . . . . . . . . . . . . . . . . . . . . . . . . . . . .9Learning Commands . . . . . . . . . . . . . . . . . . . . . . . . . . . . . . . . . . . . . . . . . . . . . . . . . . . . . . . . . . . . . . . . .9Clear All Stored Learned Commands Under a Component Mode . . . . . . . . . . . . . . . . . . . . . . . . . . .10
SmartMacro™ Key Operations . . . . . . . . . . . . . . . . . . . . . . . . . . . . . . . . . . . . . . . . . . . . . . . . . . . . . . . . . . .10Program a SmartMacro . . . . . . . . . . . . . . . . . . . . . . . . . . . . . . . . . . . . . . . . . . . . . . . . . . . . . . . . . . . .10-11Execute a SmartMacro . . . . . . . . . . . . . . . . . . . . . . . . . . . . . . . . . . . . . . . . . . . . . . . . . . . . . . . . . . . . . . .11Delete a Single SmartMacro . . . . . . . . . . . . . . . . . . . . . . . . . . . . . . . . . . . . . . . . . . . . . . . . . . . . . . . .11-12Delete ALL SmartMacros . . . . . . . . . . . . . . . . . . . . . . . . . . . . . . . . . . . . . . . . . . . . . . . . . . . . . . . . . . . . .12
Event Timer . . . . . . . . . . . . . . . . . . . . . . . . . . . . . . . . . . . . . . . . . . . . . . . . . . . . . . . . . . . . . . . . . . . . . . . . . .12Set an Event Timer . . . . . . . . . . . . . . . . . . . . . . . . . . . . . . . . . . . . . . . . . . . . . . . . . . . . . . . . . . . . . . . .12-13Delete or Review an Event Timer . . . . . . . . . . . . . . . . . . . . . . . . . . . . . . . . . . . . . . . . . . . . . . . . . . . . . .13
TV Volume Punch-through . . . . . . . . . . . . . . . . . . . . . . . . . . . . . . . . . . . . . . . . . . . . . . . . . . . . . . . . . . . . . .13VCR/DVD Punch-through . . . . . . . . . . . . . . . . . . . . . . . . . . . . . . . . . . . . . . . . . . . . . . . . . . . . . . . . . . . . . .14Record Key . . . . . . . . . . . . . . . . . . . . . . . . . . . . . . . . . . . . . . . . . . . . . . . . . . . . . . . . . . . . . . . . . . . . . . . . . . .14Additional Features . . . . . . . . . . . . . . . . . . . . . . . . . . . . . . . . . . . . . . . . . . . . . . . . . . . . . . . . . . . . . . . . . . . .14
Set Time for LCD Display . . . . . . . . . . . . . . . . . . . . . . . . . . . . . . . . . . . . . . . . . . . . . . . . . . . . . . . . . . . .14Master Reset . . . . . . . . . . . . . . . . . . . . . . . . . . . . . . . . . . . . . . . . . . . . . . . . . . . . . . . . . . . . . . . . . . . . . . .15RCA All Power Off Feature . . . . . . . . . . . . . . . . . . . . . . . . . . . . . . . . . . . . . . . . . . . . . . . . . . . . . . . . . . .15
Glossary . . . . . . . . . . . . . . . . . . . . . . . . . . . . . . . . . . . . . . . . . . . . . . . . . . . . . . . . . . . . . . . . . . . . . . . . . . .16-17Troubleshooting . . . . . . . . . . . . . . . . . . . . . . . . . . . . . . . . . . . . . . . . . . . . . . . . . . . . . . . . . . . . . . . . . . . . . . .18Limited 90-Day Warranty . . . . . . . . . . . . . . . . . . . . . . . . . . . . . . . . . . . . . . . . . . . . . . . . . . . . . . . . . . . . . . .39Helpline . . . . . . . . . . . . . . . . . . . . . . . . . . . . . . . . . . . . . . . . . . . . . . . . . . . . . . . . . . . . . . . . . . . . . . . . . . . . . .40
Table of Contents
RCU807US_IB_REVB 9/26/03 10:18 Page 2

3
Congratulations on your purchase of the RCU807. This unit is one of the most sophisticated, yet easy to use, remote controls available today. With the RCU807, juggling multiple remote controls is athing of the past! This one unit controls up to eight components, including the most popular brandsof TV, VCR, DVD, PVR, SAT•CBL, CD and AUDIO equipment. The RCU807 has the ability to learncommands from your existing remotes, and the SmartMacro™ feature allows multiple commands tobe executed with two simple keypresses. The RCU807 is easy to use, easy to program, and it givesyou total control—at the touch of your fingertips!
Universal Learning Remote with LCD Status Display
Battery Information
Your RCU807 Universal Learning Remote with LCD Status Display requires four AAA alkalinebatteries (sold separately).
Battery InstallationTo install the batteries:
1. Turn the unit over, lift tab and pick the cover up.
2. Insert the batteries, matching the batteries to the (+) and (-) marks inside the battery case.
3. Replace the battery cover and snap into place.
Battery SaverYour RCU807 saves battery power by automatically turning off if any key is pressed for more than30 seconds. This saves your batteries should your remote get stuck in a place where the keys remaindepressed, such as under a book or between the sofa cushions.
Code SaverWith the RCU807, you don’t have to worry about losing programmed information when you changebatteries. All programmed parameters are retained indefinitely in the event of battery replacement.
Power-on DefaultWhen you replace batteries, your RCU807 remote always powers on in the TV Mode. If your TV,VCR, DVD, or satellite receiver are RCA, PROSCAN or GE brands, you may not even need to set up the RCU807 to control them. In these instances, the remote should work as soon as the batteries are installed.
RCU807US_IB_REVB 9/26/03 10:18 Page 3

4
The LCD (Liquid Crystal Display) status display on your RCU807 provides a visual interfacebetween the user and the remote. This display makes it easy to program and use your remote with many components.
The LCD status display remains blank when the remote is not in use. Pressing any key displays the time and the current component mode. The status display turns off after approximately 15 seconds from the last keypress, except when an Event Timer is set. In this case, the displayremains on until the event has occurred.
RCU807 Product DiagramLiquid CrystalStatus Display(LCD)
MM
MACROLEVEL-
LEARN
2 3
RECORD STOP PAUSE
DELAY DELAY
REVERSE PLAY FORWARD
FUNCTION
CD TAPE TUNER
TV VIDEO1 VIDEO2
CLEARMENU
SELECT
INFOGUIDE
INPUT
LEVEL+
REAR
GO BACK
TEST
DSPDSPON.OFF MODE
CH +
CH
PIP
FRONT
SLEEP
AM FM
L1
AUDIO CD
L2
L3
SWAP
CENTER
SETUPMACRO
VCR
DVD AUX1
TVON OFF
AUX2 SAT CBL
ENTER TV VCR
97 8
6
0
4
1
5
MUTE
VO
L
VO
L
MS
SETUP key
ENTER key
CLEAR key
LEARN keys(L1, L2, L3)
LCD Status Display
Setup Routine and Procedures
MACRO (M) key
The SETUP (S) key is located towards the upper right-hand side of the RCU807 unit. The SETUP (S) key is used to walk you through the steps in setting up the remote. To enter the SetupMode, press and hold the SETUP (S) key for 2-3 seconds until the Setup Mode? Screen is shown.Successive presses of the SETUP (S) key walk you through all the available setup routines.
MACRO 1, 2, 3 keys
RCU807US_IB_REVB 9/26/03 10:18 Page 4

5
The following are the screen selections available in the Setup Mode.
1. Setup Mode?
2. Set Time Display?
3. Timer 1 Mode?
4. Timer 2 Mode?
5. Timer 3 Mode?
6. Timer 4 Mode?
7. Cancel Timer 1(Only appears once Timer 1 has been set.)
8. Cancel Timer 2(Only appears once Timer 2 has been set.)
9. Cancel Timer 3(Only appears once Timer 3 has been set.)
10. Cancel Timer 4(Only appears once Timer 4 has been set.)
11. Learn Mode?
12. Clear Mode?(Only appears after commandshave been learned.)
13. Reset?(Master Reset to clear all settings—return to factory default)
14. Exit
Enter Setup Mode
Exit Setup ModeTo exit the Setup Mode at any time and return to normal operation, follow these steps:
1. Press and release the CLEAR key. The remote is now in normal operation mode.
OR
2. Press and release the SETUP (S) key repeatedly until the status display shows the Exit Screen. Press and release the ENTER key. The remote is now in normal operation mode.
During a Setup function, if no key is pressed for 30 seconds, theunit automatically exits from the Setup mode. The status displayshows the TimeOut Screen for three seconds prior to returning tonormal operation. Any operation that is not completed when thetimeout occurs is not saved.
RCU807US_IB_REVB 9/26/03 10:18 Page 5

6
In order for the RCU807 to control your components (TV, VCR, DVD, etc.), you must program it with the corresponding code from the Code Lists. (Refer to the Code List enclosed.) This enables the remote to control your component with the proper commands. If your TV, VCR, DVD or satellitereceiver is an RCA, PROSCAN or GE brand, the RCU807 may not need any programming to controlit. To program the remote with the codes for your components, you can use one of three methods:Code List Entry, Code Search or Code Autosearch.
You can enter codes in your RCU807 from the Code Lists using the SETUP (S) key. When you enter a valid code for any given mode (e.g., when you enter a valid code for a TV), any previouslyLearned functions for that mode are deleted.
To enter a code directly from one of the Code Lists, follow these steps:
1. Manually turn on the component to be controlled (TV, VCR, DVD, etc.).
2. Press and hold the SETUP (S) key for 2-3 seconds until the LCD display shows the Setup Mode? Screen.
3. Release the SETUP (S) key.
4. Press and release the desired component key (TV, VCR, SAT•CBL, etc.). For AUX1 or AUX2, press and release the AUX1 or AUX2 key followed by the desired component key to be programmed under that key.
Note: If the AUX1 or AUX2 key is selected, the status display will alternate between showing the AUX number (AUX1 or AUX2) and the component label (TV, VCR, SAT•CBL, etc.) at 0.5-second intervals.
5. Enter the three-digit code for your component brand from the corresponding Code Lists at the back of this User’s Guide. If your brand has more than one code listed, begin with the first code. When a valid code from the list is entered, the LCD displays the Success Screen, then returns to the normal time display.
Note: For an invalid code entry, the LCD displays the Invalid Screen for three seconds before returning to the normal time display. In this case, no changes are made.
6. With the component on, aim the RCU807 at the component and press and release the ON•OFF key. If you have entered the correct code number for your component, it responds to the ON•OFF key. If the component responds, no further programming is required. Code List Entry is now complete.
7. If your component does not respond, try the next code in the list for your brand by repeating the procedure starting at step two. If no other codes exist for your brand, try the Code Search or Code Autosearch methods.
Code Entry
Code List Entry
Code Search
If the component you wish to control does not respond to any of the codes you have entered using the Code List Entry method, you can search the entire Code List for a particular componentthat might not be listed in the Code List or might be listed under a different brand.
When you enter a valid code for any given mode (e.g., when you enter a code for a TV), any previously Learned functions for that mode are deleted.
RCU807US_IB_REVB 9/26/03 10:18 Page 6

7
To search for a specific code in one of the Code Lists, follow these steps:
Code Identification allows you to find out what code is currently programmed in the remote under a given mode (TV, VCR, DVD, etc.).
To find the currently programmed code, follow these steps:
1. Manually turn on the component to be controlled (TV, VCR, DVD, etc.).
2. Press and hold the SETUP (S) key for 2-3 seconds until the LCD display shows the Setup Mode? Screen.
3. Release the SETUP (S) key.
4. Press and release the desired component key (TV, VCR, SAT•CBL, etc.). For AUX1 or AUX2, press and release the AUX1 or AUX2 key followed by the desired component key to be programmed under that key.
Note: If the AUX1 or AUX2 key is selected, the status displaywill alternate between showing the AUX number (AUX1 or AUX2) and the component label (TV, VCR, SAT•CBL, etc.) at 0.5-second intervals.
5. The LCD shows the Code Search Screen, which displays the component mode and its current programmed code. Press and release the CH+ or ON•OFF key repeatedly until the component to be controlled responds to the command. Press and release the ENTER key to save the code. After you install this code, any previously Learned commands will be deleted.
Note: The Code Search starts from the currently stored code under that mode. For example, if the component Code List contains 100 codes and the currently stored code is 050, the Code Search starts from 051 and continues to 100 before looping back to 000 and finishing at 050. This speeds up the process of finding the correct code for your component, since you may discover that some codes can turn your component on and off but are not able to control its other functions. This process allows you to bypass codes you’ve already tried. The display will show the End Screen once all code list entries have been searched.
6. If your component responds and you accidentally overshootthat code by pressing the CH+ or ON•OFF key again, pressand release the CH- key to backtrack through the Code List. You can change the direction to forward once again by pressing the CH+ or ON•OFF keys.
7. After pressing the ENTER key in step five, the LCD displays the Success Screen, then returns to the normal time display. The Code Search Entry method is now complete.
Code Identification
1. During normal remote operation, press and hold any component key. The top right corner of the LCD display shows the current code programmed for that component.
2. Release the component key to return the display to normal.
RCU807US_IB_REVB 9/26/03 10:18 Page 7

8
Code Identification Chart
Learning Tips Before transferring commands from your original remote to the RCU807, check out these useful tips on Learning.
1. Make sure you are using fresh batteries in both the RCU807 and your original remote(s).
2. It is recommended that you clear all Learned commands under all component modes before attempting any Learning. (See section on Clear all Stored Learned Commands Under a Component Mode.)
3. Point the top of the original remote at the base of the RCU807 so the IR LED on the original remote is in line with the RCU807 Learn sensor, located at the bottom of the remote.
4. The distance between the two remotes should be approximately 2-3 inches apart.
5. To ensure that your units are compatible and to increase your familiarity with the Learning process, you may wish to experiment by learning two or three keys initially. Then, carry out a Clear all Stored Learned Commands Under a Component Mode operation before learning all the desired functions from your original remote.
6. Incandescent or low-energy light can cause interference with the IR transmissions. When using the Learning function, keep the remotes at least three feet away from such light sources.
7. When learning a key, do not release the key on your original remote until the Success Screen is displayed on the RCU807 status display, which takes approximately 2-3 seconds. Until this occurs, the LCD will display the Learn Screen.
8. Any key on your RCU807 can be programmed with Learned commands, with the exception of the MACRO (M), SETUP (S), INPUT or any component key. In addition, the L1, L2and L3 keys are generic keys to be programmed as you wish.
9. If there is a problem during the Learning process, the Learn Error Screen appears in the display. The unit still remains in Learning Mode.
10. All Learned keys are saved automatically.
11. When the memory is full, the display shows the Full Screen. It is not possible to learn any additional keys without first clearing Learned commands under a component mode.
Enter your code here for easy reference.
AUDIOTuner ❒ AMP ❒ Tape ❒
TV CODE AUX 1 device:______
AUX 2 device:______ CD CODEVCR CODE
SAT•CBL CODE
DVD CODE
Learning
RCU807US_IB_REVB 9/26/03 10:18 Page 8

9
Learning CommandsNow you’re ready to have your RCU807 learn the commands from your existing remote(s). All Learned keys are saved automatically. Remember, only one original remote can be stored under any one mode.
Codes from the Code Lists include basic functionality for each component they control. Once youhave programmed in the code for your specific component, you can customize the RCU807 toinclude certain functions from your original remote(s) that were not embedded in the preset code.
Your RCU807 has the ability to learn and store commands from your original remote(s) under the mode(s) of your choice. The RCU807 can store more than 30 key commands for each originalremote. Only one original remote can be learned under any one mode (i.e., the RCU807 can learn the commands for one TV remote, one VCR remote, one DVD remote, etc.).
Code Learning
1. Gather all the remotes that you want to learn and have them all lined up on a flat surface before going into the Learn IR Mode.
2. Place the first original remote in the Learning position. Point the top of the original remote at the base of the RCU807 so the IR LED on the original remote is in line with the RCU807 Learn sensor, located at the bottom of the remote. The remotes should be positioned 2-3 inches apart.
3. Press and hold the SETUP (S) key for 2-3 seconds until the LCD display shows the Setup Mode? Screen.
4. Release the SETUP (S) key.
5. Press and release the SETUP (S) key repeatedly until the LCD display shows the Learn Mode? Screen.
6. Press and release the desired component key (TV, VCR, SAT•CBL, AUX1, etc.). The Key? Screen is displayed.
7. Press and release the key on the RCU807 that you wish to use to store the Learned commands. The Learn Screen appears.
Note: You cannot learn any commands under the MACRO (M), SETUP (S), INPUT or any component keys.
8. Press and hold the original remote key you want to transfer to the RCU807 until the Success Screen appears in the display. This process can take 2-3 seconds to complete.
9. Release the original remote key. If there is a problem during the Learning process, the LCD displays the Learn Error Screen for three seconds but still remains in the Learning Setup Mode. If this occurs, try adjusting the distance between the remotes slightly and repeat from step 7.
10. Repeat steps 7-9 for other keys to be learned.
11. When all the original remote commands have been learned, press and release the SETUP (S) key. The display returns to the normal time display. At this point, you can learn other keys under another component key by repeating steps 3-9. The Learning process is now complete.
RCU807US_IB_REVB 9/26/03 10:18 Page 9
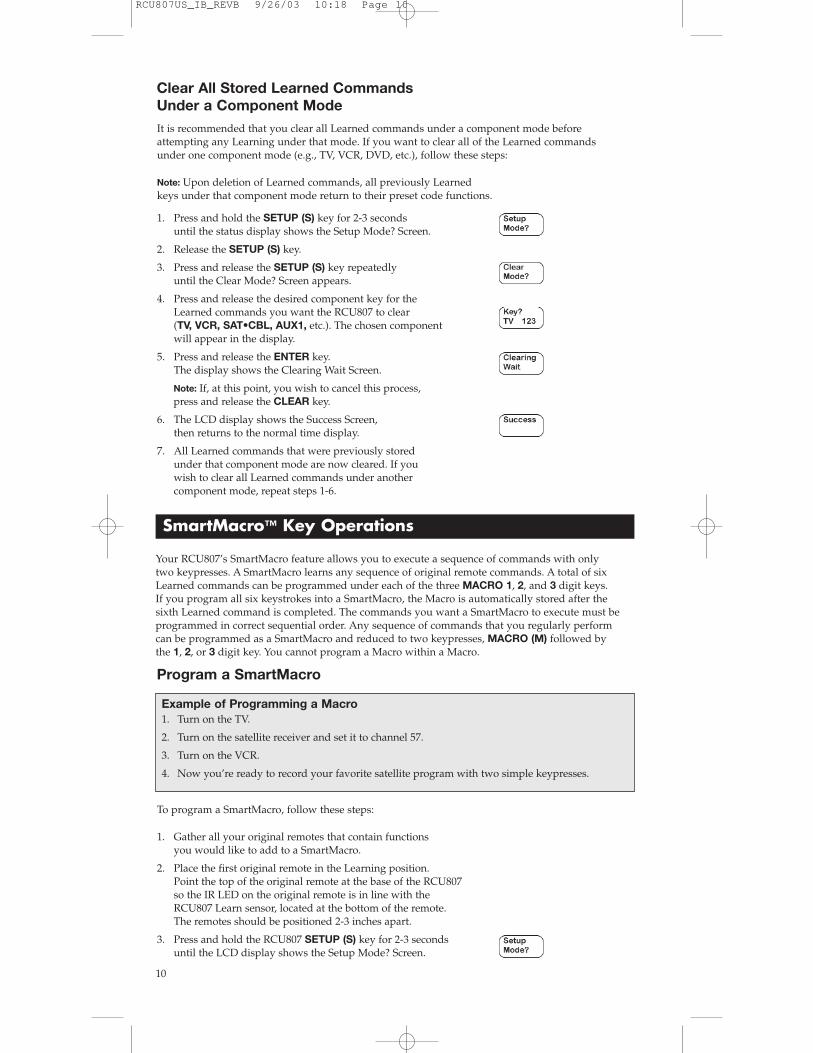
1. Press and hold the SETUP (S) key for 2-3 seconds until the status display shows the Setup Mode? Screen.
2. Release the SETUP (S) key.
3. Press and release the SETUP (S) key repeatedly until the Clear Mode? Screen appears.
4. Press and release the desired component key for the Learned commands you want the RCU807 to clear (TV, VCR, SAT•CBL, AUX1, etc.). The chosen component will appear in the display.
5. Press and release the ENTER key. The display shows the Clearing Wait Screen.
Note: If, at this point, you wish to cancel this process, press and release the CLEAR key.
6. The LCD display shows the Success Screen, then returns to the normal time display.
7. All Learned commands that were previously stored under that component mode are now cleared. If you wish to clear all Learned commands under another component mode, repeat steps 1-6.
10
Your RCU807’s SmartMacro feature allows you to execute a sequence of commands with only two keypresses. A SmartMacro learns any sequence of original remote commands. A total of sixLearned commands can be programmed under each of the three MACRO 1, 2, and 3 digit keys. If you program all six keystrokes into a SmartMacro, the Macro is automatically stored after the sixth Learned command is completed. The commands you want a SmartMacro to execute must beprogrammed in correct sequential order. Any sequence of commands that you regularly perform can be programmed as a SmartMacro and reduced to two keypresses, MACRO (M) followed by the 1, 2, or 3 digit key. You cannot program a Macro within a Macro.
Clear All Stored Learned Commands Under a Component Mode
To program a SmartMacro, follow these steps:
1. Gather all your original remotes that contain functions you would like to add to a SmartMacro.
2. Place the first original remote in the Learning position. Point the top of the original remote at the base of the RCU807 so the IR LED on the original remote is in line with the RCU807 Learn sensor, located at the bottom of the remote. The remotes should be positioned 2-3 inches apart.
3. Press and hold the RCU807 SETUP (S) key for 2-3 seconds until the LCD display shows the Setup Mode? Screen.
SmartMacro™ Key Operations
Program a SmartMacro
Example of Programming a Macro1. Turn on the TV.
2. Turn on the satellite receiver and set it to channel 57.
3. Turn on the VCR.
4. Now you’re ready to record your favorite satellite program with two simple keypresses.
It is recommended that you clear all Learned commands under a component mode before attempting any Learning under that mode. If you want to clear all of the Learned commands under one component mode (e.g., TV, VCR, DVD, etc.), follow these steps:
Note: Upon deletion of Learned commands, all previously Learned keys under that component mode return to their preset code functions.
RCU807US_IB_REVB 9/26/03 10:18 Page 10

11
To execute a SmartMacro that has been previously programmed, follow these steps:
4. Release the SETUP (S) key.
5. Press and release the MACRO (M) key. The Macro Key? Screen is displayed.
6. Press and release the MACRO 1, 2, or 3 digit key under which you want to program the SmartMacro.
7. The LCD now shows the Macro X Setup Screen. Press and release the MACRO (M) key.
8. The Macro X Learn Screen is now displayed. Press and hold the key on the original remote until the Macro X Success Screen is displayed. This process takes 2-3 seconds to complete.
Note: If there is a problem during the Learning process, the Macro X Error Screen is displayed for three seconds but remains in the SmartMacro routine and returns to the Macro X Setup Screen. If no Learned command is detected, the RCU807 will timeout after 30 seconds. In this case, repeat from step 7.
9. Release the original remote key.
10. The Macro X Key Y screen is displayed, where Y is the next Macro sequence count.
Note: It may be necessary to increase the delay between the Macro commands to allow your components time to respond to all commands within the Macro. The default delay is 0.5 seconds. However, if you find this is not sufficient, you can increase the delay. This can be achieved by pressing and releasing the PAUSE key, followed by the number of seconds (using the digit keys) to delay between Macro commands (e.g., for a delay of 2 seconds, press and release the PAUSEkey; then press and release the 2 digit key). Pressing the 0 digit key or CLEAR key programs the default delay of 0.5 seconds.
11. Program additional commands in the order you want them to occur in the SmartMacro. To add commands to the SmartMacro, repeat steps 7-9 above, using the original remotes to program. You can program up to six Learned commands under one SmartMacro.
12. Once you are finished programming the Macro, press and release the ENTER key to save. The LCD will show the Success Screen, then return to the normal time display.
1. Press and release the MACRO (M) key.
2. Press and release the MACRO 1, 2, or 3 digit keycorresponding to the Macro you wish to activate.
Execute a SmartMacro
Delete a Single SmartMacroTo delete a single SmartMacro that has previously beenprogrammed, follow these steps:
1. Press and hold the SETUP (S) key for 2-3 seconds until the status display shows the Setup Mode? Screen.
2. Release the SETUP (S) key.
3. Press and release the MACRO (M) key. The Macro Key? Screen is displayed
4. Press and release the MACRO 1, 2 or 3 digit key to select the previously programmed Macro you wish to delete. The Macro X Setup Screen is displayed where X is the Macro number you’ve selected.
RCU807US_IB_REVB 9/26/03 10:18 Page 11

12
Event Timer
1. Press and hold the SETUP (S) key for 2-3 seconds until the LCD display shows the Setup Mode? Screen.
2. Release the SETUP (S) key.
3. Press and release the MACRO (M) key. The Macro Key?Screen is displayed
4. Press and release the SETUP (S) key. The Macro X Clear? Screen appears in the display. Note: To cancel at this point, press and release the CLEAR key.
5. Press and release the ENTER key to clear ALL the Macros. The Clearing Wait Screen appears in the display.
6. The LCD display shows the Success Screen, then returns to the normal time display. Deletion of ALL SmartMacros is now complete.
5. Press and release the SETUP (S) key. The Macro X Clear? Screen is displayed.
Note: If you are in the process of deleting a SmartMacro and you decide not to delete it, you can cancel the deletion process by pressing and releasing the CLEAR key.
6. Press and release the ENTER key to delete the selected Macro. The Macro X Clearing Screen is displayed.
7. The LCD display shows the Success Screen, then returns to the normal time display. The SmartMacro deletion is now complete.
To delete ALL SmartMacros that have previously been programmed, follow these steps:
Delete ALL SmartMacros
The Event Timer allows you to set your RCU807 to turn a component (TV, VCR, AUDIO, etc.) on or off at the preprogrammed time. For example, you can set your AUDIO equipment to turn musicon, set your TV to turn off at a certain time, or set your VCR to turn on and record. Up to four timer events can be set. However, events you program happen only once, on the day you set them. You cannot set events for future days; they must be on the current day. After setting up your Event Timer, be sure to leave the remote pointed at the component(s) you have set it to control.
Note: The RCU807 also has a SLEEP (ZZZ) key, which can be used to activate the Sleep function inyour TV, if equipped with this feature. You may want to try this before setting up an Event Timer to turn off your TV after a certain time.
To set an Event Timer, follow these steps:
1. Press and hold the SETUP (S) key for 2-3 seconds until the LCD display shows the Setup Mode? Screen.
2. Release the SETUP (S) key.
3. Press and release the SETUP (S) key repeatedly until the Timer 1 Mode? Screen appears.
4. Press and release the desired component key (TV, VCR, SAT•CBL, AUX1, etc.).
5. The Timer Key? Screen is shown. Press and release the key you want to set to activate after a certain time delay. For example, to set your VCR to record, press and release the VCR component key in step four, then the RECORD key.
Note: Any incorrect keypress results in the Invalid Screen being shown in the display.
Set an Event Timer
Delete a Single SmartMacro (continued)
RCU807US_IB_REVB 9/26/03 10:18 Page 12

13
6. The Time Display Screen is shown. The cursor is flashing under the hour (HH) digits. Press and release the LEVEL+/UP ARROW or LEVEL-/DOWN ARROW key to select the desired hour. Press and release the ENTER key.
7. The cursor under the minutes (MM) digits is now flashing. Press and release the LEVEL+/UP ARROW or LEVEL-/DOWN ARROW key to select the minutes. Press and release the ENTER key.
8. The LCD shows the Success Screen.
9. Once the first Event Timer is set, the LCD displays the Timer 2 Mode? Screen for setting the next Event Timer. If you want to set another Event Timer, repeat steps 4-8. If you do not want to set any more Event Timers, press and release the SETUP (S) key repeatedly until the Exit screen is displayed, then press and release the ENTER key. The Set an Event process is now complete.
Note: A symbol (T) will be displayed to signify a Timer is set. The LCD display will remain on until the Timer expires.
TV Volume Punch-through
Delete or Review an Event Timer
Any set Event Timer is indicated by the symbol (T) displayed above the clock on your LCD display. To delete or review an Event Timer, follow these steps:
Note: If no Event Timer has been previously set, this option is not shown in Setup Mode.
1. Press and hold the SETUP (S) key for 2-3 seconds until the LCD display shows the Setup Mode? Screen.
2. Release the SETUP (S) key.
3. Press and release the SETUP (S) key repeatedly until the Cancel X Screen is displayed (X=1, 2, 3, or 4 and corresponds to the timer you wish to delete.).
4. To cancel this event, press and release the ENTER key. The LCD displays the Success Screen.
Note: If you wish to cancel the Timer deletion process, or if you only wish to review a previously set Event Timer and exit from Setup Mode, press and release the CLEAR key.
5. The display returns to either the Cancel X+1 Screen or, if no more Event Timers have been programmed, to the Learn Mode? Screen.
6. Deleting or reviewing an Event Timer is now complete. To exit Setup Mode, press and release the SETUP (S)repeatedly until the Exit Setup Screen is shown, then press and release the ENTER key.
Your RCU807’s Volume Punch-through feature allows you to control the volume and mute functions of your television without the need to place the RCU807 in TV mode. For example, your TV volume can work even when you are in VCR Mode, because it “punches through” from one component to another.
Specifically, the TV VOL+, VOL- and MUTE keys work even when you are in VCR, DVD, CABLE, or SAT Modes. This feature is also available if one of the AUX keys is programmed to control a second VCR, DVD, CABLE, or SAT component.
The LCD shows component changes for the Volume Punch-through keys if they are pressed in other modes (e.g., If you are in CABLE Mode and you press and release the VOL+ key, TV is displayed in the LCD).
Note: All CD/AUDIO Modes take any Volume/Mute keypress commands from the CD/AUDIO code. All other components punch through to the TV Volume/Mute control.
RCU807US_IB_REVB 9/26/03 10:18 Page 13

14
Set Time for LCD DisplayYou can set the time the LCD displays. To set the time for the status display, follow these steps:
1. Press and hold the SETUP (S) key for 2-3 seconds until the LCD display shows the Setup Mode? Screen.
2. Release the SETUP (S) key.
3. Press and release the SETUP (S) key repeatedly until the Clock Setup Screen 1 appears.
4. The cursor under the Hours digits (HH) will be flashing. Press and release the LEVEL+/UP ARROW or LEVEL-/DOWN ARROW keys to select the hour. Press and release the ENTERkey once you have reached the correct hour.
Note: To adjust the AM/PM designation, repeatedly scroll through the hour settings.
5. The cursor under the Minutes digits (MM) now flashes. Press and release the LEVEL+/UP ARROW or LEVEL-/DOWN ARROW keys to select the minutes. Press and release the ENTER key once you have reached the correct minute setting. The LCD display shows the Success Screen, then returns to the normal time display. The time setting is now complete.
VCR/DVD Punch-through
Record Key
Additional Features
Your RCU807 punches through the six transport keys (REVERSE, PLAY, FORWARD, RECORD,STOP and PAUSE) to VCR or DVD Mode, whichever was used most recently. Punch-through toVCR or DVD transport keys is only allowed for TV, VCR, DVD and CABLE Modes. The SAT andCD/AUDIO transport keys are dedicated to their programmed modes.
The LCD shows component changes for the VCR or DVD Punch-through keys if they are pressed in other modes (e.g., If you are in CABLE Mode and you press and release PLAY, either VCR orDVD is displayed in the LCD).
In the VCR and AUDIO/CD Modes (including Punch-through), the RECORD key must be pressedtwice before the command is sent. This is also true if a VCR component is programmed under anyother mode. The exceptions are for TV, DVD, CABLE and SAT codes, where the RECORD keytransmits the command after only a single RECORD keypress.
RCU807US_IB_REVB 9/26/03 10:18 Page 14

15
A Master Reset returns the RCU807 back to the original factory settings. The Master Reset clears all user-programmed codes, Learned commands, Event Timers and SmartMacros.
To perform a Master Reset, follow these steps:
1. Press and hold the SETUP (S) key for 2-3 seconds until the LCD display shows the Setup Mode? Screen.
2. Release the SETUP (S) key.
3. Press and release the SETUP (S) key repeatedly until the Reset Screen appears.
4. Press and release the ENTER key.
5. The LCD displays the Confirm? Screen. Press and release the ENTER key. The Wait Screen appears while entries are being cleared and the LCD returns to the normal time display.
Note: If at this point, you wish to cancel the Master Reset operation, press and release the CLEAR key.
6. All settings are now reset to the factory default.
The RCA All Power Off feature is available in all normal operating modes. If the ON•OFFkey is pressed twice consecutively (within two seconds), all RCA equipment is turned off. The LCD shows the All Off Screen while this routine is active.
Master Reset
RCA All Power Off Feature
RCU807US_IB_REVB 9/26/03 10:18 Page 15

16
AUDIO FEATURESAM•FM KEYThe AM•FM key allows you to select the AM or FM band on your AUDIO system.
CENTER, FRONT, REAR & TEST KEYSYou can adjust the levels of the center, front and rear speakers by using the LEVEL+/UP ARROW or LEVEL-/DOWN ARROW keys. The TEST key is used when you make speaker balance adjustments to maximize the performance of your AUDIO system.
CD, TAPE, TUNER, TV, VIDEO KEYSUse the CD, TAPE, TUNER, TV and VIDEO keys to select the component you want to control.
DSP MODE KEY When the Digital Signal Processing (DSP) Mode is enabled, pressing this key allows you to cycle through the various DSP Modes.
DSP ON.OFF KEYPressing this key allows you to turn the DSP mode on or off.
LEVEL+/UP ARROW AND LEVEL-/ DOWN ARROW KEYSThe LEVEL+/UP and LEVEL-/DOWN ARROW keys are used to make adjustments on delay time, center speaker output level, rear speaker output level, front speaker level or subwoofer level.
COMPONENT KEYSThe component keys change the component currently being controlled by the remote (e.g., TV, VCR, SAT•CBL, DVD, AUDIO, CD, AUX1, AUX2). The AUDIO key allows you to control your TUNER, TAPE and AMP.
ENTER KEYThe ENTER key is used to complete channel selections for some brands of TVs. Sometimes it is also used to complete the highlighted sections when navigating through menu screens. This key is also used during Setup Mode to activate certain functions.
GO BACK KEYThe GO BACK key allows you to go to the previous channel you selected. It operates the same as the Last Channel, Previous Channel or Recall keys on your existing remote.
GUIDE KEYIf your component is equipped with this feature, the GUIDE key brings up the on-screen program listing.
LEARNThe LEARN feature is used to supplement the preprogrammed Code Lists. The standard Code Lists provide most of the functions needed, but you can add a small number of additionalfunctions of your choice.
LIQUID CRYSTAL DISPLAYThe Liquid Crystal Display (LCD) provides a visual interface between the user and the remote. The LCD status display remains blank when the remote is not in use. Pressing any key displays the current component mode and the time. The LCD status display turns off after approximately 15 seconds from the last keypress, except when an Event Timer is set. In this case, the LCD remains on until the event has occurred.
L1, L2, L3 KEYSThe L1, L2, and L3 are generic keys that can be used to store learned commands.
Glossary of Terms
RCU807US_IB_REVB 9/26/03 10:18 Page 16

17
MENU KEYThe MENU key brings up the Main Menu. If you are already in the menu system, press and release the SELECT/OK, ENTER, or MENU keys to select a highlighted choice. Use the NAVIGATION keys (UP, DOWN, LEFT, and RIGHT ARROW keys) to move through the menu selections.NOTE: With some brands, the CH+, CH-, VOL+ and VOL- keys navigate through the highlighted choices.
MUTE KEYThe MUTE key mutes the volume on your component with volume control.
NAVIGATION KEYS & SELECT/OK KEYUse the NAVIGATION keys (UP, DOWN, LEFT and RIGHT ARROW keys) to move through on-screen menu and guides. The NAVIGATION keys may also be used to move through the highlighted choices. The SELECT/OK key chooses the highlighted choice. NOTE: With some manufactured models, the MENU or ENTER key is used to select the highlighted choices.
PIP & SWAP KEYS The Picture-in-Picture (PIP) and SWAP keys operate your TV’s Picture-in-Picture, if equipped with this feature.
PUNCH-THROUGHA Punch-through command has the ability to punch through from one component to another (e.g., pressing the TV VOL+/VOL- keys can work while the remote is in the VCR Mode).
REVERSE, PLAY, FORWARD, RECORD, STOP, PAUSE KEYSThese keys operate the same as your existing remotes.
SETUP (S) KEYThe SETUP (S) key is used to walk you through the steps in setting up the remote. Setup is used for Code List Entry, Code Search, Code Identification and other functions. During a Setup function, if no key is pressed for 30 seconds, the remote automatically exits from the Setup routine.
SLEEP (ZZZ) KEYThe SLEEP (ZZZ) key allows you to turn your TV off automatically, if equipped with this feature.
SMARTMACROWhen programmed, the SmartMacro function causes a series of events to occur in sequential order.Once programmed, pressing the MACRO (M) key and 1, 2, or 3 digit keys activates one of yourprogrammed Macros. An example of a Macro sequence could be “Turn on the TV; then turn on the satellite receiver; then set it to channel 57.” You can program and store three SmartMacros, each consisting of up to six commands.
TIMERThis feature allows an event to happen at a later time on the current day, such as “Turn the TV on at 7:00 PM.” The Timer Mode allows you to set up to four individual commands and must bereprogrammed after each event occurs.
TV•VCR KEYThe TV•VCR key operates the same as the TV/VCR or antenna keys on your original remotes.
VOLUME AND CHANNEL KEYSThe VOLUME and CHANNEL keys (VOL+/VOL-, CH+ and CH- keys) increase and decrease the volume level and channel numbers.NOTE: With some brands, these keys also navigate through the highlighted choices in the menu options.
RCU807US_IB_REVB 9/26/03 10:18 Page 17

PROBLEM
The LCD status display is blank when you press a key.
The remote does not operate your audio or video components.
You have problems programming a TV/VCR,TV/DVD, or VCR/DVD combination unit.
Your VCR is not recording.
You have trouble changing the channels on your TV.
The SELECT/OK key is not responding.
The IR Learning or SmartMacro processes cannot be completed successfully.
SOLUTION
• Check to make sure the batteries are properly installed.
• Replace the batteries with four new AAA alkaline batteries.
• Try all code programming procedures with all the codes from the appropriate part of the Code Lists.
• Make sure the remote is in the correct mode for the component you are attempting tocontrol (TV, VCR, DVD, etc.)
• Make sure the remote is pointed at the component being operated.
• Try the VCR or DVD code for your brand.Some combination units, however, may require both a TV and a VCR and/or DVD code for full operation depending on your unit. To do this, program the TV code underthe TV key and the VCR and/or DVD under the VCR and/or DVD key.
• As a safety feature on your remote, you must press the RECORD key twice.
• If your original remote requires the ENTERkey to be pressed after a channel is selected,press the ENTER key on the RCU807 to select the channel.
• Try using the MENU, GUIDE or ENTERkey to make the selection.
• Replace batteries in the RCU807 and the remote from which you are trying to learn.
• The distance between the remotes should be approximately 2-3 inches.
• Do not conduct the Learning process near an incandescent lamp.
• The memory capacity is full (six Learnedcommands for each of the three Macros).
• The original remote may not be compatible with the Learning procedure.
18
Troubleshooting
RCU807US_IB_REVB 9/26/03 10:18 Page 18

19
universelCompatible avec la plupart desmarques actuelles.
Afficheur d'etat ACL• Présente les
instructions détaillées de programmation;demande les prochainesétapes; valide les entréescorrects. Affiche l'heure et les tableaux de codesprogrammés pour vos appareils.
Apprend les commandes destélécommandesoriginales• Peut mémoriser quelque
30 commandes de touchespour chaque télécommandeoriginale.
Touches SmartMacromc
• Pour commanderplusieurs commandespar deux simples pressions de touches.
U N I V E R S E L
Télécommande intelligente
RCU807US_IB_REVB 9/26/03 10:18 Page 19

20
Table des matières
Introduction . . . . . . . . . . . . . . . . . . . . . . . . . . . . . . . . . . . . . . . . . . . . . . . . . . . . . . . . . . . . . . . . . . . . . . . . . .21Information sur les piles . . . . . . . . . . . . . . . . . . . . . . . . . . . . . . . . . . . . . . . . . . . . . . . . . . . . . . . . . . . . . . . .21
Installation des piles . . . . . . . . . . . . . . . . . . . . . . . . . . . . . . . . . . . . . . . . . . . . . . . . . . . . . . . . . . . . . . . . .21Économiseur de piles . . . . . . . . . . . . . . . . . . . . . . . . . . . . . . . . . . . . . . . . . . . . . . . . . . . . . . . . . . . . . . . .21Sauvegardeur de code . . . . . . . . . . . . . . . . . . . . . . . . . . . . . . . . . . . . . . . . . . . . . . . . . . . . . . . . . . . . . . .21Mise en marche par défaut . . . . . . . . . . . . . . . . . . . . . . . . . . . . . . . . . . . . . . . . . . . . . . . . . . . . . . . . . . .21
Schéma du produit . . . . . . . . . . . . . . . . . . . . . . . . . . . . . . . . . . . . . . . . . . . . . . . . . . . . . . . . . . . . . . . . . . . . .22Afficheur d'état ACL . . . . . . . . . . . . . . . . . . . . . . . . . . . . . . . . . . . . . . . . . . . . . . . . . . . . . . . . . . . . . . . . . . .22Opérations de programmation . . . . . . . . . . . . . . . . . . . . . . . . . . . . . . . . . . . . . . . . . . . . . . . . . . . . . . . . . . .22
Accéder au mode de programmation . . . . . . . . . . . . . . . . . . . . . . . . . . . . . . . . . . . . . . . . . . . . . . . . . . .23Quitter le mode de programmation . . . . . . . . . . . . . . . . . . . . . . . . . . . . . . . . . . . . . . . . . . . . . . . . . . . .23
Entrée de code . . . . . . . . . . . . . . . . . . . . . . . . . . . . . . . . . . . . . . . . . . . . . . . . . . . . . . . . . . . . . . . . . . . . . . . .24Entrée de liste de codes . . . . . . . . . . . . . . . . . . . . . . . . . . . . . . . . . . . . . . . . . . . . . . . . . . . . . . . . . . . . . .24Recherche de code . . . . . . . . . . . . . . . . . . . . . . . . . . . . . . . . . . . . . . . . . . . . . . . . . . . . . . . . . . . . . . . . . .25Identification de code . . . . . . . . . . . . . . . . . . . . . . . . . . . . . . . . . . . . . . . . . . . . . . . . . . . . . . . . . . . . . . . .26Tableau d'identification de code . . . . . . . . . . . . . . . . . . . . . . . . . . . . . . . . . . . . . . . . . . . . . . . . . . . . . . .26
Apprentissage . . . . . . . . . . . . . . . . . . . . . . . . . . . . . . . . . . . . . . . . . . . . . . . . . . . . . . . . . . . . . . . . . . . . . . . . .27Conseils d'apprentissage . . . . . . . . . . . . . . . . . . . . . . . . . . . . . . . . . . . . . . . . . . . . . . . . . . . . . . . . . . . . .27Apprentissage de codes . . . . . . . . . . . . . . . . . . . . . . . . . . . . . . . . . . . . . . . . . . . . . . . . . . . . . . . . . . . . . .27Apprentissage de commandes . . . . . . . . . . . . . . . . . . . . . . . . . . . . . . . . . . . . . . . . . . . . . . . . . . . . . . . . .28Suppression de toutes les commandes apprises sauvegardées sous un mode de composant . . . . .28
Opérations de touche macro intelligente . . . . . . . . . . . . . . . . . . . . . . . . . . . . . . . . . . . . . . . . . . . . . . . . . . .28Programmer une macro intelligente . . . . . . . . . . . . . . . . . . . . . . . . . . . . . . . . . . . . . . . . . . . . . . . . .29-31Exécuter une macro intelligente . . . . . . . . . . . . . . . . . . . . . . . . . . . . . . . . . . . . . . . . . . . . . . . . . . . . . . .31Supprimer une seule macro intelligente . . . . . . . . . . . . . . . . . . . . . . . . . . . . . . . . . . . . . . . . . . . . . . . . .31Supprimer TOUTES les macros intelligentes . . . . . . . . . . . . . . . . . . . . . . . . . . . . . . . . . . . . . . . . . . . . .31
Minuterie d'événement . . . . . . . . . . . . . . . . . . . . . . . . . . . . . . . . . . . . . . . . . . . . . . . . . . . . . . . . . . . . . . . . .32Programmation d'une minuterie d'événement . . . . . . . . . . . . . . . . . . . . . . . . . . . . . . . . . . . . . . . . . . .32Supprimer ou consulter une minuterie d'événement . . . . . . . . . . . . . . . . . . . . . . . . . . . . . . . . . . . . . .33
Transfert de volume de téléviseur . . . . . . . . . . . . . . . . . . . . . . . . . . . . . . . . . . . . . . . . . . . . . . . . . . . . . . . .33Transfert VCR/DVD . . . . . . . . . . . . . . . . . . . . . . . . . . . . . . . . . . . . . . . . . . . . . . . . . . . . . . . . . . . . . . . . . . .33Touche Record . . . . . . . . . . . . . . . . . . . . . . . . . . . . . . . . . . . . . . . . . . . . . . . . . . . . . . . . . . . . . . . . . . . . . . . .34Autres caractéristiques . . . . . . . . . . . . . . . . . . . . . . . . . . . . . . . . . . . . . . . . . . . . . . . . . . . . . . . . . . . . . . . . .34
Régler l'heure de l'afficheur ACL . . . . . . . . . . . . . . . . . . . . . . . . . . . . . . . . . . . . . . . . . . . . . . . . . . . . . .34Rétablissement général . . . . . . . . . . . . . . . . . . . . . . . . . . . . . . . . . . . . . . . . . . . . . . . . . . . . . . . . . . . .34-35Fonction Mise à l'arrêt général RCA . . . . . . . . . . . . . . . . . . . . . . . . . . . . . . . . . . . . . . . . . . . . . . . . . . . .35
Glossaire . . . . . . . . . . . . . . . . . . . . . . . . . . . . . . . . . . . . . . . . . . . . . . . . . . . . . . . . . . . . . . . . . . . . . . . . . . .36-37Dépannage . . . . . . . . . . . . . . . . . . . . . . . . . . . . . . . . . . . . . . . . . . . . . . . . . . . . . . . . . . . . . . . . . . . . . . . . . . .38Garantie limitée de 90 jours . . . . . . . . . . . . . . . . . . . . . . . . . . . . . . . . . . . . . . . . . . . . . . . . . . . . . . . . . . . . .39Assistance téléphonique . . . . . . . . . . . . . . . . . . . . . . . . . . . . . . . . . . . . . . . . . . . . . . . . . . . . . . . . . . . . . . . .40
RCU807US_IB_REVB 9/26/03 10:18 Page 20

21
Télécommande intelligente universelle à afficheur d'état ACLNous vous félicitons d'avoir acheté la télécommande RCU807. Cet appareil est l'une destélécommandes les plus complexes et des plus simples à utiliser sur le marché. Grâce à la RCU807,fini les nombreuses télécommandes encombrantes ! Cette télécommande permet de commander un maximum de huit appareils, dont les marques les plus populaires de téléviseurs, magnétoscopes,lecteurs DVD, PVR, systèmes SAT•CBL, lecteurs CD et appareils AUDIO. La RCU807 peutapprendre des commandes des télécommandes existantes, et la fonction Macro intelligente permetd'exécuter plusieurs commandes par deux simples pressions de touches. La RCU807 est facile àutiliser, facile à programmer et vous donne le plein contrôle — au bout des doigts !
Information sur les piles
Votre télécommande intelligente universelle RCU807 à afficheur d'état ACL est alimentée par quatre piles alcalines AAA (vendues séparément).
Installation des pilesPour installer les piles :
1. Tournez la télécommande, soulevez la languette et enlevez le couvercle.
2. Insérez les piles, en faisant correspondre les marques (+) et (-) à l'intérieur du logement à piles.
3. Remettez le couvercle du logement à piles en place et enclenchez-le.
Économiseur de pilesLa RCU807 économise l'énergie des piles en s'éteignant automatiquement si aucune touche n'estenfoncée pendant plus de 30 secondes. Ceci permet d'économiser les piles si la télécommandereste coincée dans un endroit où les touches demeurent enfoncées, comme sous un livre ou entreles coussins du sofa.
Sauvegardeur de codeGrâce à la RCU807, vous ne vous souciez plus de perdre l'information programmée quand vousremplacez les piles. Tous les paramètres programmés sont conservés indéfiniment en cas deremplacement des piles.
Mise en marche par défautLorsque vous remplacez les piles, la télécommande RCU807 se met toujours en marche en mode TV. Si le téléviseur, le magnétoscope, le lecteur DVD ou le récepteur de satellite sont de marque RCA, PROSCAN ou GE il se peut que vous n'ayez même pas à programmer la RCU807 pour lescommander. Dans ces cas, la télécommande devrait fonctionner dès que les piles sont installées.
RCU807US_IB_REVB 9/26/03 10:18 Page 21

22
Schéma de produit RCU807
Afficheur d'état àcristaux liquides(ACL)
MM
MACROLEVEL-
LEARN
2 3
RECORD STOP PAUSE
DELAY DELAY
REVERSE PLAY FORWARD
FUNCTION
CD TAPE TUNER
TV VIDEO1 VIDEO2
CLEARMENU
SELECT
INFOGUIDE
INPUT
LEVEL+
REAR
GO BACK
TEST
DSPDSPON.OFF MODE
CH +
CH
PIP
FRONT
SLEEP
AM FM
L1
AUDIO CD
L2
L3
SWAP
CENTER
SETUPMACRO
VCR
DVD AUX1
TVON OFF
AUX2 SAT CBL
ENTER TV VCR
97 8
6
0
4
1
5
MUTE
VO
L
VO
L
MS
Touche SETUP
Touche ENTER
Touche CLEAR
Touches LEARN(L1, L2, L3)
Touche MACRO (M)
Afficheur d'état ACL
L'afficheur d'état ACL (affichage à cristaux liquides) de votre RCU807 sert d'interface visuelle entrel'utilisateur et la télécommande. Cet afficheur simplifie la programmation et l'utilisation de votretélécommande avec de nombreux appareils.
L'afficheur d'état ACL demeure vide lorsque la télécommande n'est pas utilisée. L'enfoncement d'unetouche affiche l'heure et le mode actuel du composant. L'afficheur d'état s'éteint environ 15 secondesaprès le dernier enfoncement de touche, sauf quand une minuterie d'événement est programmée.Dans un tel cas, l'afficheur reste en fonction jusqu'à ce que l'événement survienne
Opérations de programmation
La touche SETUP (S) se trouve du côté supérieur droit de la télécommande RCU807. La toucheSETUP (S) permet de parcourir les étapes de programmation de la télécommande. Pour accéder aumode Programmation, maintenez la touche SETUP (S) enfoncée pendant 2 ou 3 secondes, jusqu'à ceque l'écran Setup Mode? apparaisse. Appuyez plusieurs fois sur la touche SETUP (S) pour parcourirtous les choix de programmation disponibles.
Touches MACRO 1, 2, 3
RCU807US_IB_REVB 9/26/03 10:18 Page 22

23
Accéder au mode ProgrammationVoici les éléments à l'écran disponibles en mode Programmation.
1. Setup Mode?
2. Set Time Display?
3. Timer 1 Mode?
4. Timer 2 Mode?
5. Timer 3 Mode?
6. Timer 4 Mode?
7. Cancel Timer 1(Apparaît seulement quand la Minuterie 1 a été programmée.)
8. Cancel Timer 2(Apparaît seulement quand la Minuterie 2 a été programmée.)
9. Cancel Timer 3(Apparaît seulement quand la Minuterie 3 a été programmée.)
10. Cancel Timer 4(Apparaît seulement quand la Minuterie 4 a été programmée.)
11. Learn Mode?
12. Clear Mode?(Apparaît seulement une fois les commandes apprises.)
13. Reset?(Rétablissement général pour annuler tous les réglages–retour aux réglages par défaut d'usine.)
14. Exit
Quitter le mode de programmationProcédez comme suit pour quitter le mode Programmation en tout temps et retourner au fonctionnement normal
1. Appuyez sur la touche CLEAR. La télécommande est maintenant en mode de fonctionnement normal.
OU
2. Appuyez plusieurs fois sur la touche SETUP (S) jusqu'à ce quel'afficheur d'état présente l'écran Exit. Appuyez sur la toucheENTER. La télécommande est maintenant en mode defonctionnement normal.
Durant la programmation, si aucune touche n'est enfoncéependant 30 secondes, la télécommande quitte automatiquement le mode de programmation. L'afficheur d'état montre l'écranTimeOut pendant trois secondes avant de retourner aufonctionnement normal. Toute opération qui n'est pas exécutéeavant le délai prescrit n'est pas sauvegardée.
RCU807US_IB_REVB 9/26/03 10:18 Page 23

24
Entrée de code
Pour que la RCU807 commande vos appareils (téléviseur, magnétoscope, lecteur DVD, etc.), vous devez programmer le code correspondant à partir des Listes de codes. (Voir les Listes de codes des marques les plus populaires à la fin de ce guide de l'utilisateur.) La télécommande peut ainsicorrectement commander votre appareil. Si le téléviseur, magnétoscope, lecteur DVD ou récepteur de satellite est de marque RCA, PROSCAN ou GE, il se peut que la RCU807 n'ait pas à êtreprogrammée pour les commander. Pour programmer la télécommande avec les codes de vosappareils, vous pouvez utiliser une de trois méthodes: Entrée de liste de codes, Recherche de codeou Autorecherche de code.
Vous pouvez utiliser la touche SETUP (S) pour entrer les codes dans la RCU807 à partir des listes de codes. Quand vous entrez un code valide pour un mode donné (ex. : quand vous entrez un codepour un téléviseur), les fonctions déjà apprises pour ce mode sont supprimées.
Pour entrer un code directement de l'une des listes de codes, procédez comme suit :
1. Allumez manuellement l'appareil à commander (téléviseur, magnétoscope, lecteur DVD, etc.).
2. Maintenez la touche SETUP (S) enfoncée pendant 2 ou 3 secondes, jusqu'à ce que l'afficheur ACLaffiche l'écran Setup Mode?.
3. Relâchez la touche SETUP (S).
4. Appuyez sur la touche de l'appareil désiré (TV, VCR, SAT•CBL, etc.). Pour AUX1 ou AUX2, appuyez sur la touche AUX1 ou AUX2, puis sur la touche d'appareil à programmer à cette touche.
Note: Si la touche AUX1 ou AUX2 est choisie, l'afficheur d'état alterne entre le numéro AUX(AUX1 ou AUX2) et l'étiquette d'appareil (TV, VCR, SAT•CBL, etc.) à intervalles de 0,5 seconde.
5. Entrez le code à trois chiffres de la marque de votre appareil à partir des Listes de codes correspondantes à la fin du guide de l'utilisateur. Si votre marque compte plus d'un code, commencez par le premier code. Lorsque vous entrez un code valide de la liste, l'afficheur ACL montre l'écran Success, puis retourne à l'affichage normal de l'heure.
Note: Lorsqu'un code invalide est entré, l'afficheur ACL montre l'écran Invalid pendant trois secondes avant de retourner à l'affichage normal de l'heure. Dans ce cas, aucun changement n'est apporté.
6. Alors que l'appareil est allumé, pointez la télécommande RCU807 en sa direction et appuyez sur la touche ON•OFF. Si vous avez entré le code correspondant à votre appareil, celui-ci réagit à la touche ON•OFF. Si l'appareil répond, aucune autre programmation n'est nécessaire. L'entrée de liste de codes est maintenant terminée.
7. Si l'appareil ne répond pas, essayez le code suivant dans la liste pour votre marque en répétant le processus à partir de l'étape deux. S'il n'existe aucun autre code pour votre marque, essayez la Recherche de code ou l'Autorecherche de code.
Entrée de liste de codes
RCU807US_IB_REVB 9/26/03 10:18 Page 24
25
Si l'appareil que vous souhaitez commander ne répond à aucun des codes entrés par la fonctionEntrée de liste de codes, vous pouvez rechercher toute la liste de codes pour un appareil particulierqui pourrait ne pas figurer dans la Liste de codes ou pourrait figurer sous une autre marque.
Quand vous entrez un code valide pour un mode donné (ex. : quand vous entrez un code pour un téléviseur), les fonctions déjà apprises pour ce mode sont supprimées.
Pour rechercher un code particulier dans la Liste de codes, procédez comme suit
1. Allumez manuellement l'appareil à commander (téléviseur, magnétoscope, lecteur DVD, etc.).
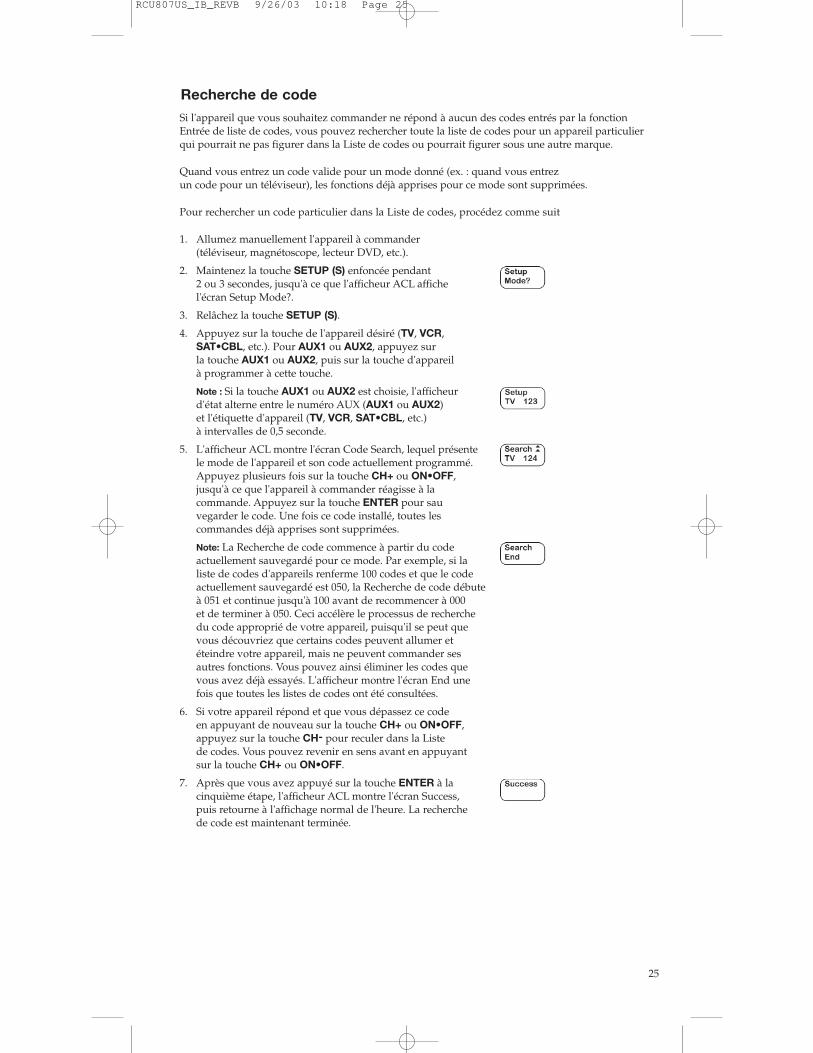
2. Maintenez la touche SETUP (S) enfoncée pendant 2 ou 3 secondes, jusqu'à ce que l'afficheur ACL affiche l'écran Setup Mode?.
3. Relâchez la touche SETUP (S).
4. Appuyez sur la touche de l'appareil désiré (TV, VCR, SAT•CBL, etc.). Pour AUX1 ou AUX2, appuyez sur la touche AUX1 ou AUX2, puis sur la touche d'appareil à programmer à cette touche.
Note : Si la touche AUX1 ou AUX2 est choisie, l'afficheur d'état alterne entre le numéro AUX (AUX1 ou AUX2) et l'étiquette d'appareil (TV, VCR, SAT•CBL, etc.) à intervalles de 0,5 seconde.
5. L'afficheur ACL montre l'écran Code Search, lequel présente le mode de l'appareil et son code actuellement programmé. Appuyez plusieurs fois sur la touche CH+ ou ON•OFF, jusqu'à ce que l'appareil à commander réagisse à la commande. Appuyez sur la touche ENTER pour sauvegarder le code. Une fois ce code installé, toutes les commandes déjà apprises sont supprimées.
Note: La Recherche de code commence à partir du code actuellement sauvegardé pour ce mode. Par exemple, si la liste de codes d'appareils renferme 100 codes et que le code actuellement sauvegardé est 050, la Recherche de code débute à 051 et continue jusqu'à 100 avant de recommencer à 000 et de terminer à 050. Ceci accélère le processus de recherche du code approprié de votre appareil, puisqu'il se peut que vous découvriez que certains codes peuvent allumer et éteindre votre appareil, mais ne peuvent commander ses autres fonctions. Vous pouvez ainsi éliminer les codes que vous avez déjà essayés. L'afficheur montre l'écran End une fois que toutes les listes de codes ont été consultées.
6. Si votre appareil répond et que vous dépassez ce code en appuyant de nouveau sur la touche CH+ ou ON•OFF, appuyez sur la touche CH- pour reculer dans la Liste de codes. Vous pouvez revenir en sens avant en appuyant sur la touche CH+ ou ON•OFF.
7. Après que vous avez appuyé sur la touche ENTER à la cinquième étape, l'afficheur ACL montre l'écran Success, puis retourne à l'affichage normal de l'heure. La recherche de code est maintenant terminée.
Recherche de code
RCU807US_IB_REVB 9/26/03 10:18 Page 25

26
Entrez le code ici pour référence ultérieure.
Identification de code
L'identification de code permet de déterminer les codes qui sont programmés dans la télécommande pour un mode donné (TV, VCR, DVD, etc.).
Pour trouver le code actuellement programmé, procédez comme suit :
1. Pendant le fonctionnement normal de la télécommande, maintenez une touche d'appareil enfoncée. Le code actuellement programmé pour cet appareil apparaît dans le coin supérieur droit de l'afficheur ACL
2. Relâchez la touche d'appareil pour retourner à l'affichage normal
Tableau d'identification de code
CODE DETÉLÉVISEUR
Appareil AUX 1 :______
Appareil AUX 2 :______ CODE CD CODE DEMAGNÉTOSCOPE
CODE SAT/CBL
CODE DVD
AUDIOSyntonisateur ❒ Ampli ❒ Cassette ❒
RCU807US_IB_REVB 9/26/03 10:18 Page 26

27
Les codes des listes de codes comprennent les fonctions de base de chaque appareil qu'ilscommandent. Une fois le code programmé pour l'appareil choisi, vous pouvez personnaliser la télécommande RCU807 de manière à inclure certaines fonctions de la ou des télécommandesoriginales qui n'ont pas été intégrées dans le code préréglé.
La RCU807 peut apprendre et sauvegarder les commandes de la ou des télécommandes originalesdans le ou les modes de votre choix. La RCU807 peut mémoriser plus de 30 commandes de touchepour chaque télécommande originale. Une seule télécommande originale peut être mémorisée dans chaque mode (c.-à-d. que la RCU807 peut apprendre les commandes d'une télécommande de téléviseur, une télécommande de magnétoscope, une télécommande de lecteur DVD, etc.)
Apprentissage de codes
Apprentissage
Conseils d'apprentissage Avant de transférer les commandes de votre télécommande originale à la télécommande RCU807, consultez les conseils pratiques suivants sur l'apprentissage.
1. Assurez-vous que la RCU807 et la ou les télécommandes originales sont alimentées par des piles correctement chargées).
2. On recommande de supprimer toutes les commandes apprises dans tous les modes d'appareils avant de tenter tout apprentissage. (Voir lasection sur la Suppression des commandes apprises mémorisées dans un mode d'appareil).
3. Pointez la partie supérieure de la télécommande originale en direction de la base de la RCU807 afin que le voyant DÉL IR de la télécommandeoriginale soit aligné avec le détecteur d'apprentissage de la RCU807, situé à la partie inférieure de la télécommande.
4. Les deux télécommandes doivent être à une distance d'environ deux à trois pouces l'une de l'autre.
5. Pour vous assurer que les télécommandes sont compatibles et vousfamiliariser davantage avec le processus d'apprentissage, on recommandede tenter des expériences en apprenant d'abord deux ou trois touches.Exécutez alors une Suppression des commandes apprises mémoriséesdans un mode d'appareil avant d'apprendre toutes les fonctions désiréesde votre télécommande originale.
6. Une lampe à incandescence ou une lumière à faible énergie peut perturberles transmissions IR. Lorsque vous utilisez la fonction d'apprentissage,éloignez les deux télécommandes d'au moins trois pieds de telles sourcesde lumière.
7. Lorsque vous programmez une touche, ne relâchez pas la touche de latélécommande originale avant que l'écran Success apparaisse à l'afficheurd'état de la RCU807 (environ 2 ou 3 secondes). L'afficheur ACL présenteentre-temps l'écran Learn.
8. Vous pouvez programmer les commandes apprises à l'une ou l'autretouche de la RCU807, à l'exception des touches MACRO (M), SETUP (S),INPUT ou d'appareil. De plus, les touches L1, L2 et L3 sont des touchesgénériques que vous pouvez programmer comme vous le désirez.
9. En cas de problème durant le processus d'apprentissage, l'écran Learn Error est affiché. La télécommande reste en mode Apprentissage.
10. Toutes les touches apprises sont automatiquement sauvegardées
11. Lorsque la mémoire est pleine, l'afficheur montre l'écran Full. Il est impossible d'apprendre d'autres touches sans d'abord supprimer les commandes apprises dans un mode d'appareil.
RCU807US_IB_REVB 9/26/03 10:18 Page 27

28
La RCU807 est maintenant prête à apprendre les commandes de vos télécommandes existantes.Toutes les touches apprises sont automatiquement sauvegardées. Rappelez-vous que seule latélécommande originale peut être mémorisée dans tout mode.
1. Rassemblez toutes les télécommandes que vous désirez apprendre et alignez-les toutes sur une surface plate avant de passer en mode IR d'apprentissage.
2. Placez la première télécommande originale en mode d'apprentissage. Pointez la partie supérieure de la télécommande originale en direction de la base de la RCU807 afin que le voyant DÉL IR de la télécommande originale soit aligné avec le détecteur d'apprentissage de la RCU807, situé à la partie inférieure de la télécommande. Les télécommandes doivent être placées à 2 ou 3 pouces l'une de l'autre.
3. Maintenez la touche SETUP (S) enfoncée pendant 2 ou 3 secondes, jusqu'à ce que l'afficheur ACLaffiche l'écran Setup Mode?.
4. Relâchez la touche SETUP (S).
5. Appuyez plusieurs fois sur la touche SETUP (S) jusqu'à ce que l'afficheur ACL montre l'écran Learn Mode?.)
6. Appuyez sur la touche de l'appareil désiré ( TV,VCR, SAT•CBL, AUX1, etc.). L'écran Key? est affiché.
7. Appuyez sur la touche de la RCU807 que vous souhaitez utiliser pour mémoriser les commandes apprises. L'écran d'apprentissage apparaît.
Note: Vous ne pouvez apprendre de commandes aux touches MACRO (M), SETUP (S), INPUTou d'appareil.
8. Maintenez enfoncée la touche de la télécommande originale que vous souhaitez transférer à la RCU807 jusqu'à ce que l'écran Success soit affiché. Cette opération prend de 2 à 3 secondes.
9. Relâchez la touche de la télécommande originale. En cas de problème durant le processus d'apprentissage, l'afficheur ACL montre l'écran Learn Error pendant trois secondes, mais reste en mode de programmation d'apprentissage. Essayez alors d'ajuster légèrement la distance entre les télécommandes et répétez l'étape 7.
10. Répétez les étapes 7 à 9 pour d'autres touches à apprendre.
11. Quand toutes les commandes de la télécommande originale sont apprises, appuyez sur la touche SETUP (S). L'afficheur retourne à l'affichage normal de l'heure. À ce point, vous pouvez programmer d'autres touches à une autre touche d'appareil en répétant les étapes 3 à 9. L'apprentissage est maintenant terminé.
Apprentissage de commandes
RCU807US_IB_REVB 9/26/03 10:18 Page 28

On recommande de supprimer toutes les commandes apprises dans un mode d'appareil avant de tenter toute programmation dans ce mode. Pour supprimer toutes les commandes apprises dans un mode d'appareil (c.-à-d. TV, VCR, DVD, etc.), procédez comme suit :
Note : Lors de la suppression des commandes apprises, toutes les touches déjà apprises dans ce mode d'appareil retournent à leurs fonctions à code préréglé.
1. Maintenez la touche SETUP (S) enfoncée pendant 2 ou 3 secondes, jusqu'à ce que l'afficheur ACL affiche l'écran Setup Mode?.
2. Relâchez la touche SETUP (S).
3. Appuyez plusieurs fois sur la touche SETUP (S)jusqu'à ce que l'écran Clear Mode? apparaisse.
4. Appuyez sur la touche d'appareil désirée pour les commandes apprises que la RCU807 doit supprimer (TV, VCR, SAT•CBL, AUX1, etc.). L'appareil choisi est affiché.
5. Appuyez sur la touche ENTER. L'afficheur montre l'écran Clearing Wait. Note : Si, à ce point, vous désirez annuler cette opération, appuyez sur la touche CLEAR.
6. L'afficheur ACL montre l'écran Success, puis retourne à l'affichage normal de l'heure.
7. Toutes les commandes apprises déjà sauvegardées pour ce mode sont désormais supprimées. Pour annuler toutes les commandes apprises dans un autre mode d'appareil, répétez les étapes 1 à 6.
29
La fonction SmartMacro de la RCU807 permet d'exécuter une séquence de commandes avecseulement deux pressions de touches. Une macro intelligente SmartMacro apprend toute séquencede commandes de la télécommande originale. Vous pouvez programmer un maximum de sixcommandes apprises à chacune des trois touches MACRO 1, 2 et 3. Si vous programmez les sixtouches dans une macro SmartMacro, la macro est automatiquement mémorisée après la sixièmecommande apprise. Les commandes que vous souhaitez exécuter avec une macro SmartMacro doit être programmée dans l'ordre approprié. Toute séquence de commandes que vous exécutezrégulièrement peut être programmée sous forme de macro SmartMacro et réduite à deux pressionsde touches : MACRO (M) puis la touche 1, 2 ou 3. Vous ne pouvez programmer une macro dans une macro.
Suppression de toutes les commandes apprises sauvegardées sous un mode de composant
Opérations de touche macro intelligente
Programmer une macro intelligente
Exemple de programmation de macro 1. Allumez le téléviseur.
2. Allumez le récepteur de satellite au canal 57.
3. Allumez le magnétoscope.
4. Vous pouvez maintenant enregistrer votre émission de satellite préférée par deux simplespressions de touches.
RCU807US_IB_REVB 9/26/03 10:18 Page 29

30
Programmer une macro intelligente (suite)Pour programmer une macro SmartMacro, procédez comme suit:
1. Rassemblez toutes vos télécommandes originales qui renferment les fonctions que vous aimeriez ajouter à une macro SmartMacro.
2. Placez la première télécommande originale en mode d'apprentissage. Pointez la partie supérieure de la télécommande originale en direction de la base de la RCU807 afin que le voyant DÉL IR de la télécommande originale soit aligné avec le détecteur d'apprentissage de la RCU807, situé à la partie inférieure de la télécommande. Les télécommandes doivent être placées à 2 ou 3 pouces l'une de l'autre.
3. Maintenez la touche SETUP (S) de la RCU807 enfoncée pendant 2 ou 3 secondes, jusqu'à ce que l'afficheur ACL affiche l'écran Setup Mode?.
4. Relâchez la touche SETUP (S).
5. Appuyez sur la touche MACRO (M). L'écran Macro Key? est affiché.
6. Appuyez sur la touche MACRO 1, 2 ou 3 à laquelle vous désirez programmer la macro SmartMacro.
7 L'écran ACL montre désormais l'écran Macro X Setup. Appuyez sur la touche MACRO (M).
8. L'écran Macro X Learn est maintenant affiché. Maintenez la touche de la télécommande originale enfoncée jusqu'à ce que l'écran Macro X Success soit affiché. Cette opération prend de 2 à 3 secondes.
Note: En cas de problème durant l'apprentissage, l'écran Macro X Error est affiché pendant trois secondes, mais reste en mode SmartMacro et retourne à l'écran Macro X Setup. Si aucune commande apprise n'est détectée, la RCU807 se désactive après 30 secondes. Dans ce cas, recommencez à l'étape 7.
9. Relâchez la touche de la télécommande originale.
10. L'écran Macro X Key Y est affiché, où Y est le compte suivant dans la séquence macro.
Note: Il peut être nécessaire d'accroître le délai entre les commandes macro pour permettre aux appareils de répondre à toutes les commandes de la macro. Le délai par défaut est 0,5 seconde. Si, toutefois, vous constatez que ce délai ne suffit pas, vous pouvez l'augmenter. Pour ce, il suffit d'appuyer sur la touche PAUSE, puis sur le nombre de secondes (avec les touches numériques) que doit durer le délai entre les commandes macro (ex. : pour un délai de 2 secondes, appuyez sur la touche PAUSE ; appuyez ensuite sur la touche numérique 2). Appuyez sur la touche numérique 0 ou sur la touche CLEAR pour programmer le délai par défaut de 0,5 seconde.
11. Programmez d'autres commandes dans l'ordre dans lequel vous désirez les sauvegarder dans la macro SmartMacro. Pour ajouter des commandes à la macro SmartMacro, répétez les étapes 7 à 9 ci-dessus, en utilisant les télécommandes originales pour programmer. Vous pouvez mémoriser un maximum de six commandes apprises dans une macro SmartMacro.
RCU807US_IB_REVB 9/26/03 10:18 Page 30

31
12. Quand vous avez terminé la programmation de la macro, appuyez sur la touche ENTER pour sauvegarder. L'afficheur ACL montre l'écran Success, puis retourne à l'affichage normal de l'heure. La programmation des macros SmartMacro est terminée.
Exécuter une macro intelligentePour exécuter une macro SmartMacro déjà programmée, procédez comme suit:
1. Appuyez sur la touche MACRO (M).
2. Appuyez sur la touche numérique MACRO 1, 2 ou 3 correspondant à la macro à activer.
Pour supprimer une seule macro SmartMacro déjà programmée, procédez comme suit:
1. Maintenez la touche SETUP (S) enfoncée pendant 2 ou 3 secondes, jusqu'à ce que l'afficheur ACL affiche l'écran Setup Mode?.
2. Relâchez la touche SETUP (S).
3. Appuyez sur la touche MACRO (M). L'écran Macro Key? est affiché (Brainstorm: Show Macro Key? Screen)
4. Appuyez sur la touche numérique MACRO 1, 2 ou 3pour choisir la macro déjà programmée à supprimer. L'écran Macro X Setup est affiché, où X est le numéro de la macro choisie.
5. Appuyez sur la touche SETUP (S). L'écran Macro X Clear? est affiché.
Note : Si vous avez entrepris de supprimer une macro intelligente et que vous décidez de ne pas la supprimer, vous pouvez annuler la suppression en appuyant sur la touche CLEAR.
6. Appuyez sur la touche ENTER pour supprimer la macro choisie. L'écran Macro X Clearing est affiché.
7. L'afficheur ACL montre l'écran Success, puis retourne à l'affichage normal de l'heure. La suppression de macro SmartMacro est maintenant terminée.
Supprimer une seule macro intelligente
Supprimer TOUTES les macros intelligentesPour supprimer TOUTES les macros SmartMacro déjà programmées, procédez comme suit:
1. Maintenez la touche SETUP (S) enfoncée pendant 2 ou 3 secondes, jusqu'à ce que l'afficheur ACL affiche l'écran Setup Mode?.
2. Relâchez la touche SETUP (S).
3. Appuyez sur la touche MACRO (M). L'écran Macro Key? est affiché.
4. Appuyez sur la touche SETUP (S). L'écran Macro X Clear? est affiché.
Note: Pour annuler à ce point, appuyez sur la touche CLEAR.
5. Appuyez sur la touche ENTER pour supprimer TOUTES les macros. L'écran Clearing Wait est affiché.
6. L'afficheur ACL montre l'écran Success, puis retourne à l'affichage normal de l'heure. La suppression de TOUTES les macros SmartMacro est maintenant terminée.
RCU807US_IB_REVB 9/26/03 10:18 Page 31

32
La minuterie d'événement permet de programmer la RCU807 pour allumer ou éteindre un appareil(téléviseur, magnétoscope, chaîne stéréo, etc.) à l'heure préprogrammée. Par exemple, vous pouvezprogrammer la chaîne stéréo pour qu'elle s'allume au son de la musique, le téléviseur pour qu'ils'éteigne à une heure donnée ou le magnétoscope pour qu'il s'allume et enregistre. Vous pouvezprogrammer un maximum de quatre événements-minuterie. Toutefois, les événements que vousprogrammez ne surviennent qu'une seule fois, le jour de leur programmation. Vous ne pouvezprogrammer d'événements pour des jours à venir ; ceux-ci doivent survenir le jour de leurprogrammation. Après avoir programmé la minuterie d'événement, n'oubliez pas de laisser latélécommande pointée en direction du ou des appareils pour lesquels vous l'avez programmée.
Note: La RCU807 dispose aussi d'une touche SLEEP (ZZZ) que vous pouvez utiliser pour activer lafonction Sommeil du téléviseur, si ce dernier en est équipé. On recommande d'essayer cette fonctionavant de programmer une minuterie d'événement pour éteindre le téléviseur après un certain temps.
Pour programmer une minuterie d'événement, procédez comme suit:
1. Maintenez la touche SETUP (S) enfoncée pendant 2 ou 3 secondes, jusqu'à ce que l'afficheur ACLaffiche l'écran Setup Mode?.
2. Relâchez la touche SETUP (S).
3. Appuyez plusieurs fois sur la touche SETUP (S)jusqu'à ce que l'écran Timer 1 Mode? apparaisse.
4. Appuyez sur la touche de l'appareil désiré (TV, VCR, SAT•CBL, AUX1, etc.).
5. L'écran Timer Key? apparaît. Appuyez sur la touche à programmer pour qu'elle soit activée après un certain temps. Par exemple, pour programmer le magnétoscope pour enregistrer, appuyez sur la touche d'appareil VCR à la quatrième étape, puis sur la touche RECORD.
Note: L'enfoncement d'une touche incorrecte fait apparaître l'écran Invalid.
6. L'écran Time Display apparaît. Le curseur clignote sous les chiffres des heures (HH). Appuyez sur la touche à FLÈCHE VERS LE HAUT LEVEL+ ou FLÈCHE VERS LE BAS LEVEL- pour choisir l'heure désirée. Appuyez sur la touche ENTER.
7. Le curseur sous les chiffres des minutes (MM) clignote. Appuyez sur la touche à FLÈCHE VERS LE HAUT LEVEL+ ou FLÈCHE VERS LE BAS LEVEL- pour choisir les minutes. Appuyez sur la touche ENTER.
8. L'afficheur ACL montre l'écran Success.
9. Une fois la première minuterie d'événement programmée, l'afficheur ACL affiche l'écran Timer 2 Mode? pour programmer la minuterie d'événement suivante. Pour programmer une autreminuterie d'événement, répétez les étapes 4 à 8.
Si vous ne souhaitez pas programmer d'autres minuteries d'événement, appuyez plusieurs fois sur la touche SETUP (S) jusqu'à ce que l'écran Exit soit affiché, puis sur la touche ENTER. La programmation d'un événement est maintenant terminée.
Note: Un symbole (T) est affiché pour indiquer qu'une minuterie est programmée. L'afficheur ACL reste allumé jusqu'à l'expiration de la minuterie.
Minuterie d'événement
Programmation d'une minuterie d'événement
RCU807US_IB_REVB 9/26/03 10:18 Page 32

33
Les minuteries d'événement programmées sont indiquées par le symbole (T) au-dessus de l'horlogede l'afficheur ACL. Pour supprimer ou consulter une minuterie d'événement, procédez comme suit:
Note : Si aucune minuterie d'événement n'a été programmée, cette option n'apparaît pas en mode Programmation.
1. Maintenez la touche SETUP (S) enfoncée pendant 2 ou 3 secondes, jusqu'à ce que l'afficheur ACL affiche l'écran Setup Mode?.
2. Relâchez la touche SETUP (S).
3. Appuyez plusieurs fois sur la touche SETUP (S)jusqu'à ce que l'écran Cancel X soit affiché (X=1, 2, 3 ou 4 et correspond à la minuterie que vous souhaitez supprimer.)
4. Pour annuler cet événement, appuyez sur la touche ENTER. L'afficheur ACL montre l'écran Success.
Note : Pour annuler le suppression de minuterie, ou si vous ne souhaitez que revoir une minuterie d'événement déjà programmée et quitter le mode Programmation, appuyez sur la touche CLEAR.
5. L'afficheur retourne à l'écran Cancel X+1 ou, si aucune autre minuterie d'événement n'a été programmée, à l'écran Learn Mode?).
6. La suppression ou la consultation d'une minuterie d'événement est maintenant terminée. Pour quitter le mode Programmation, appuyez plusieurs fois sur la touche SETUP (S) jusqu'à ce que l'écran Exit Setup apparaisse, puis sur la touche ENTER.
Supprimer ou consulter une minuterie d'événement
Transfert de volume de téléviseur
La fonction de transfert de volume de la RCU807 permet de commander le volume et le silencieuxdu téléviseur sans avoir à mettre la télécommande RCU807 en mode TV. Par exemple, le volume du téléviseur peut fonctionner même quand vous êtes en mode VCR, parce qu'il est “transféré” d'un appareil à l'autre.
Plus particulièrement, les touches VOL+, VOL- et MUTE du téléviseur fonctionnent même quandvous êtes en mode VCR, DVD, CABLE ou SAT. Cette fonction est aussi disponible si l'une destouches AUX est programmée pour commander un magnétoscope, un lecteur DVD, unCABLOSÉLECTEUR ou un SATELLITE.
L'afficheur ACL montre les changements d'appareil pour les touches de transfert de volume si ellessont enfoncées dans d'autres modes (c.-à-d. que si vous êtes en mode CABLE et que vous appuyezsur la touche VOL+, TV apparaît dans l'afficheur ACL).
Note : Tous les modes CD/AUDIO acceptent les commandes de Volume/Silencieux du code CD/AUDIO. Tous les autres appareils sont reliés à la commande de volume/silencieux du téléviseur.
Transfert VCR/DVD
La RCU807 transfère les six touches de transport (REVERSE, PLAY, FORWARD, RECORD, STOP ET PAUSE) au mode VCR ou DVD, selon celui qui était utilisé le plus récemment. Letransfert aux touches de transport de MAGNÉTOSCOPE ou LECTEUR DVD n'est permis qu'enmodes TV, VCR, DVD et CABLE. Les touches de transport SAT et CD/AUDIO sont dédiées à leurs modes programmés.
L'afficheur ACL montre les changements d'appareil pour les touches de transfert VCR ou DVD si elles sont enfoncées dans d'autres modes (c.-à-d. si vous êtes en mode CABLE et que vous appuyez sur PLAY, VCR ou DVD apparaît dans l'afficheur ACL).
RCU807US_IB_REVB 9/26/03 10:18 Page 33

34
En modes VCR et AUDIO/CD (incluant le transfert), il faut appuyer deux fois sur la toucheRECORD du clavier de caoutchouc avant que la commande soit acheminée. Cela est aussi vrai si un magnétoscope est programmé dans tout autre mode. Les exceptions sont pour les codes TV, DVD, CABLE et SAT, où la touche RECORD transmet la commande après une seule pression de la touche RECORD.
Touche Record
Autres caractéristiques
Régler l'heure de l'afficheur ACLVous pouvez programmer l'heure de l'afficheur ACL. Pour programmer l'heure de l'afficheur d'état, procédez comme suit :
1. Maintenez la touche SETUP (S) enfoncée pendant 2 ou 3 secondes, jusqu'à ce que l'afficheur ACLaffiche l'écran Setup Mode?.
2. Relâchez la touche SETUP (S).
3. Appuyez plusieurs fois sur la touche SETUP (S)jusqu'à ce que l'écran Clock Setup 1 apparaisse.
4. Le curseur sous les chiffres des heures (HH) clignote. Appuyez sur la touche à FLÈCHE VERS LE HAUT LEVEL+ ou FLÈCHE VERS LE BAS LEVEL- pour choisir l'heure. Appuyez sur la touche ENTERquand vous avez atteint l'heure exacte.
Note : Pour régler la désignation AM/PM, faites défiler plusieurs fois les réglages de l'heure.
5. Le curseur sous les chiffres de minutes (MM) clignote. Appuyez sur les touches à FLÈCHE VERS LE HAUT LEVEL+ ou FLÈCHE VERS LE BAS LEVEL- pour choisir les minutes. Appuyez sur la touche ENTERquand vous avez atteint le réglage des minutes exactes. L'afficheur ACL montre l'écran Success, puis retourne à l'affichage normal de l'heure. Le réglage de l'heure est maintenant terminé.
Rétablissement général
Un rétablissement général rétablit la télécommande RCA811 à tous les réglages d'usine originaux Le rétablissement général annule tous les codes programmés par l'utilisateur, les commandesapprises, les minuteries d'événement et les macros SmartMacro.
Pour exécuter un rétablissement général, procédez comme suit :
1. Maintenez la touche SETUP (S) enfoncée pendant 2 ou 3 secondes, jusqu'à ce que l'afficheur ACLaffiche l'écran Setup Mode?.
2. Relâchez la touche SETUP (S).
RCU807US_IB_REVB 9/26/03 10:18 Page 34

35
3. Appuyez plusieurs fois sur la touche SETUP (S)jusqu'à ce que l'écran Reset apparaisse.
4. Appuyez sur la touche ENTER.
5. L'afficheur ACL montre l'écran Confirm?) Appuyez sur la touche ENTER. L'écran Wait apparaît pendant que les entrées sont supprimées et l'afficheur ACL retourne à l'affichage normal de l'heure.
Note : Si, à ce point, vous désirez annuler le rétablissement général, appuyez sur la touche CLEAR.
6. Tous les réglages sont alors rétablis aux réglages par défaut de l'usine.
Fonction Mise à l'arrêt général RCA
La fonction de mise à l'arrêt général RCA est offerte dans tous les modes de fonctionnementnormaux. Si la touche ON•OFF est enfoncée deux fois de suite (dans les deux secondes), tous les appareils RCA s'éteignent. L'afficheur ACL montre l'écran All Off pendant cette opération.
RCU807US_IB_REVB 9/26/03 10:18 Page 35

36
Glossaire
CARACTÉRISTIQUES AUDIOTOUCHE AM•FMLa touche AM•FM permet de choisir la bande AM ou FM du système sonore.
TOUCHES CENTER, FRONT, REAR ET TESTVous pouvez régler les niveaux des enceintes centrale, avant et arrière à l'aide des touchesÀ FLÈCHE VERS LE HAUT LEVEL+ ou À FLÈCHE VERS LE BAS LEVEL-. La toucheTEST est utilisée quand vous réglez l'équilibre des enceintes afin de maximiser lerendement du système sonore.
TOUCHES CD, TAPE, TUNER, TV, VIDEOUtilisez les touches CD, TAPE, TUNER, TV et VIDEO pour choisir l'appareil à commander.
TOUCHE DSP MODE Lorsque le mode DSP (Traitement de signal numérique) est activé, l'enfoncement de cettetouche permet de parcourir les divers modes DSP.
TOUCHE DSP ON.OFFCette touche permet d'activer ou de désactiver le mode DSP.
TOUCHES À FLÈCHE VERS LE HAUT LEVEL+ ET VERS LE BAS LEVEL-Les touches à FLÈCHE VERS LE HAUT LEVEL+ et VERS LE BAS LEVEL- permettent de modifier le délai, le niveau de sortie de l'enceinte centrale, le niveau de sortie del'enceinte arrière, le niveau de l'enceinte avant ou le niveau du sous-grave.
TOUCHES D'APPAREILLes touches d'appareil changent l'appareil actuellement commandé par la télécommande (c,-à-d. TV, VCR, SAT•CBL, DVD, AUDIO, CD, AUX1, AUX2). La touche AUDIO permet de commander le lecteur CD, SYNTONISATEUR, MAGNÉTOCASSETTE et AMPLI.
TOUCHE ENTERLa touche ENTER permet de sélectionner les canaux de certaines marques de téléviseurs. Elle permet parfois d'exécuter les sections en surbrillance pendant la navigation dans les écrans demenus. Cette touche est aussi utilisée en mode Programmation pour activer certaines fonctions.
TOUCHE GO BACKLa touche GO BACK permet de passer au canal précédemment choisi. Fonctionne comme la touche Last Channel, Previous Channel ou Recall de la télécommande existante.
TOUCHE GUIDESi l'appareil dispose de cette fonction, la touche GUIDE affiche l'horaire-télé à l'écran.
APPRENTISSAGE (LEARN)La fonction LEARN permet de compléter les listes de codes préprogrammés. Les listes de codesstandard contient la plupart des fonctions requises, mais vous pouvez ajouter un petit nombred'autres fonctions de votre choix.
AFFICHEUR À CRISTAUX LIQUIDESL'afficheur à cristaux liquides (ACL) sert d'interface visuelle entre l'utilisateur et la télécommande.L'afficheur d'état ACL demeure vide lorsque la télécommande n'est pas utilisée. Appuyez sur unetouche pour afficher le mode d'appareil courant et l'heure. L'afficheur d'état ACL s'éteint environ 15 secondes après le dernier enfoncement de touche, sauf quand une minuterie d'événement estprogrammée. Dans un tel cas, l'afficheur ACL reste en fonction jusqu'à ce que l'événement survienne.
TOUCHES L1, L2, L3L1, L2 et L3 sont des touches génériques qu'on peut utiliser pour mémoriser les commandes apprises.
RCU807US_IB_REVB 9/26/03 10:18 Page 36

37
TOUCHE MENULa touche MENU affiche le menu principal. Si vous vous trouvez déjà dans le système de menus,appuyez sur la touche SELECT/OK, ENTER ou MENU pour choisir un élément en surbrillance.Utilisez les touches NAVIGATION à flèche vers le HAUT, le BAS, la GAUCHE et la DROITE) pour parcourir les éléments du menu.NOTE : Avec certaines marques, les touches CH+, CH-, VOL+ et VOL- permettent de naviguer parmi les choix en surbrillance.
TOUCHE MUTELa touche MUTE supprime le son de l'appareil à commande de volume.
TOUCHES NAVIGATION ET TOUCHE SELECT/OKUtilisez les touches NAVIGATION À FLÈCHE VERS LE HAUT, le BAS, la GAUCHE et la DROITE)pour parcourir le menu et les guides à l'écran. Les touches NAVIGATION permettent aussi de parcourir les choix en surbrillance La touche SELECT/OK permet de choisir l'élément ensurbrillance. NOTE : Pour certains modèles, il faut utiliser la touche MENU ou ENTER pour choisir les éléments en surbrillance.
TOUCHES PIP ET SWAP Les touches d'image sur image (PIP) et de permutation SWAP commandent la fonction Image sur image de votre téléviseur s'il en est équipé.
TRANSFERTUne commande de transfert peut transférer d'un appareil à l'autre (c.-à-d. que les touches VOL+/VOL-du téléviseur peuvent fonctionner pendant que la télécommande est en mode Magnétoscope).
TOUCHES REVERSE, PLAY, FORWARD, RECORD, STOP, PAUSECes touches fonctionnent comme sur les télécommandes existantes.
TOUCHE SETUP (S)La touche SETUP (S) permet de parcourir les étapes de programmation de la télécommande. Le mode de programmation est utilisé pour l'entrée de liste de codes, la recherche de code,l'identification de code et autres fonctions. Durant la programmation, si aucune touche n'est enfoncéependant 30 secondes, la télécommande quitte automatiquement le mode de programmation.
TOUCHE SLEEP (ZZZ)La touche SLEEP (ZZZ) permet d'éteindre automatiquement le téléviseur s'il est doté de cettefonction.
MACRO INTELLIGENTE (SMARTMACRO)La fonction Macro intelligente, lorsque programmée, permet d'exécuter une série d'événements enséquence. Une fois la fonction programmée, si vous appuyez sur la touche MACRO (M) et les touchesnumériques 1, 2 ou 3, vous activez l'une de vos macros programmées. Exemple de séquence macro : “Allumer le téléviseur ; le syntoniser au canal 3 ; allumer le récepteur de satellite ; le syntoniser aucanal 57”. Vous pouvez programmer et mémoriser trois macros intelligentes, chacune constituée d'unmaximum de six commandes.
MINUTERIECette fonction permet à un événement de survenir à une heure ultérieure du jour en cours, comme «Allumer le téléviseur à 19 h ». Le mode Minuterie permet de programmer un maximum de quatrecommandes individuelles et doit être reprogrammé après chaque événement.
TOUCHE TV•VCRLa touche TV•VCR fonctionne comme les touches TV/VCR ou d'antenne de vos télécommandesoriginales.
TOUCHES VOLUME ET CHANNELLes touches VOLUME et CHANNEL (VOL+/VOL-, CH+ et CH-) permettent de monter et de baisser le volume et de changer les canaux.NOTE : Avec certaines marques, ces touches permettent aussi de naviguer parmi les choix en évidence du mode Menu.
RCU807US_IB_REVB 9/26/03 10:18 Page 37

PROBLÈME
L'afficheur d'état ACL est vide quand vous appuyez sur une touche.
La télécommande ne commande pas les appareils audio ou vidéo.
Difficulté à programmation de combiné télé/magnétoscope, télé/DVD oumagnétoscope/DVD.
Le magnétoscope n'enregistre pas.
Difficulté à changer les canaux au téléviseur.
La touche ENTER ne répond pas.
Impossible d'exécuter les fonctionsd'apprentissage IR ou Macro intelligente.
SOLUTION
• Vérifiez que les piles sont correctement installées.
• Remplacez les piles par quatre piles alcalines AAA neuves.
• Essayez toutes les procédures deprogrammation de codes avec tous les codes de la section appropriée de la liste de codes.
• Assurez-vous que la télécommande se trouve dans le mode correspondant à l'appareil que vous tentez de commander (TV, VCR, DVD, etc.).
• Assurez-vous que la télécommande est pointée en direction de l'appareil commandé.
• Essayez le code de magnétoscope ou de DVDde la marque. Certains appareils combinéspeuvent toutefois exiger un code de téléviseuret un code de magnétoscope et/ou de DVDpour assurer un fonctionnemennt completselon votre unité. Pour ce, programmerz lecode de téléviseur à la touche TV et le code de magnétoscope et/ou de DVD à la toucheVCR et/ou DVD
• Par mesure de sécurité, vous devez appuyer deux fois sur le bouton RECORDde la télécommande.
• Si la télécommande originale exigel'enfoncement de la touche ENTER après lasélection d'un canal, appuyez sur la toucheENTER de la RCU807 pour choisir le canal.
• Essayez d'utiliser la touche MENU, GUIDE ou ENTER pour faire la sélection.
• Remplacez les piles de la RCU807 et de la télécommande de laquelle vous tentez d'apprendre.
• La distance entre les télécommandes doit être d'environ deux à trois pouces.
• N'exécutez pas les opérations d'apprentissageprès d'une lampe à incandescence.
• La mémoire est pleine (six commandesapprises pour chacune des trois macros).
• La télécommande originale peut ne pas êtrecompatible avec la méthode d'apprentissage.
38
Dépannage
RCU807US_IB_REVB 9/26/03 10:18 Page 38

39
Limited 90-Day Warranty
Our company (in the U.S.,THOMSON INC. / In Canada, Thomson multimedia Ltd.) will replace this product, regardless of how long you, the original purchaser, own it if found to be defective inmaterials or workmanship. For a prompt, no charge replacement of equivalent product, return thedefective product postage prepaid to the appropriate address.
This replacement is the company’s sole obligation under this warranty. THOMSON INC. / Thomsonmultimedia Ltd. will not be responsible for any incidental or consequential damages or for any lossarising in connection with the use or inability to use this product. Some states/provinces do notallow the exclusion or limitation of incidental or consequential damages, so the above limitation or exclusion may not apply to you. This warranty excludes defects or damage due to misuse, abuse,or neglect. This warranty gives you specific legal rights, and you may also have other rights, whichvary from state to state/province to province.
See card for warranty information regarding products purchased in Mexico or Latin America.
Garantie limitée de 90 jours
GARANTIE À VIE LIMITÉENotre société (aux États Unis, THOMSON INC. / Au Canada, Thomson multimedia Ltd.) remplacera ce produit, quelle que soit la période pendant laquelle vous, l’acheteur d’origine, en êtes le propriétaire s’il est trouvé défectueux en matériaux ou en fabrication. Pour en obtenir un remplacement rapide et gratuit par un produit équivalent, veuillez retourner le produitdéfectueux port payé à l’adresse appropriée.
Ce remplacement du produit représente la seule obligation de la société selon cette garantie.THOMSON INC. / Thomson multimedia Ltd. ne sera pas responsable de tous dommages-intérêtsaccessoires ou indirects ni de toute perte découlant de l’emploi ou de l’incapacité d’employer ceproduit. Quelques états/provinces ne permettent pas l’exclusion ou la limitation des dommages-intérêts accessoires ou indirects, si bien qu’il est possible que la limitation ou l’exclusion ci-dessus ne s’applique pas à votre cas. Cette garantie exclut les défauts ou les dommages occasionnés par un mauvais usage, un abus ou la négligence. Cette garantie vous accorde certains droits légauxspécifiques et il est possible que vous ayez aussi d’autres droits qui peuvent varier selon l’état/laprovince en question.
Voir la carte á l'intérieur pour les renseignements sur la concernant les produits achetés au Mexiqueou en Amérique latine.
In the US:Product Exchange Center11721 Alameda AvenueSocorro TX 79927
In Canada:Thomson multimedia Ltd.6200 Edwards BoulevardMississauga, Ontario Canada L5T 2V7
Aux Éats-Unis:Product Exchange Center11721 Alameda AvenueSocorro TX 79927
Au Canada:Thomson multimedia Ltd.6200 Edwards BoulevardMississauga, Ontario Canada L5T 2V7
RCU807US_IB_REVB 9/26/03 10:18 Page 39

More than 90 Satellite and Cable Box brands!Plus de 90 marques de récepteurs de satellite et câblosélecteurs!
AlphaStar ArcherBell South ChaparralEchostarGemini General Instrument
Goldstar HamlinHitachiHughes NetworkSystems JascoJerrold
JVCMagnavoxMemorexOakPanasonic Philips Primestar
RCARadioShack/Realistic RecotonRegalRegencyRembrandtScientific
AtlantaSonyStarChoice Teleview TocomToshiba UnidenZenith
AdmiralAiwaAkaiAmesApexA-TrendBroksonicCapehartClassicCurtis MathesCyberhome DaewooDenonDigitrexEltaEmersonFisherFunai
GEGoldStarGo VideoGradienteHarmon KardonHitachiHitekerIntegraJBLJVCKenwoodKLBKonkaKossLasonicLGLXIMTC
MagnavoxMarantzMatsushitaMicrosoftMintekMitsubishiMustekNADNakamichiNECOnkyoOptimusOrionOritronPanasonicPenneyPhilcoPhilips
PioneerProlinePROSCANQuasarRCARadioShackRealisticReocSamsungSampoSEGSanyoSearsSharpSherwoodShincoSonySylvania
SymphonicTeacTechnicsTeknikaTevionTheta DigitalToshibaWharfedaleWardsWhite WestinghouseYamahaYamakawaZenith
Consolidate Eight Remotes With One!
Combinez huittélécommandes en une seule!LCD Status Display Screen
• Provides step-by-step programming instructions; prompts for next steps; validates correct entries. Displays time and the code tables programmed for your components.
Learns Commands from Original Remotes• Can store more than 30 key commands
for each original remote.
SmartMacro Keys• Control multiple commands
with two simple keypresses.
Écran d'affichage ACL• Affiche les instructions détaillées de programmation;
demande les prochaines étapes ; valide les entréescorrectes. Affiche l'heure et les tableaux de codesprogrammés pour vos appareils.
Apprend les commandes des télécommandes originales.• Peut mémoriser plus de 30 commandes de touches
pour chaque télécommande originale.
TOUCHES SmartMacromc
• Pour commander plusieurs commandes par deuxsimples pressions de touches.
©2003 THOMSON INC.Product Exchange Center
11721 Alameda AvenueSocorro TX 79927
Made In China.RCU807 US IB REVB
Trademark(s) ®Registered. Marque(s) déposée(s).Marca(s) Registrada(s).
www.rca.com
No Setup Required For Most Models of These Brands
Requires four AAA Batteries (sold separately)
Extensive Universal Code Library! Bibliothèque complète de codes universels! More than 200 TV, DVD and VCR brands!Plus de 200 marques de téleviseurs, lecteurs DVD at magnétoscopes!
More than 70 Amplifier, Receiver, CD Player brands!Plus de 70 marques d’amplificateurs, récepteurs, lecteurs CD!
HelplineIf you need additional setup assistance, please call the Helpline at 1-800-420-7968.
Assistance téléphoniquePour obtenir de l'aide additionnelle sur la programmation, veuillez appeler notre service d'assistance téléphonique au 1-800-420-7968.
Aucune programmation requise pour la plupart des modèles de ces marques.
Quatre piles AAA requises (vendues séparément)
ADCAdcomAiwa BurmesterCaliforniaAudio Labs Capetronics CarverCasio Clarinette Curtis MathesDenon DynatechEmerson Fisher
GarrardGEHarman/KardonHitachiJBLJVCKenwoodLinnLloyd'sLuxmanLXIMagnavoxMarantz
MCSMissionMTC Nakamichi NikkoOnkyoOptimusPanasonicPenneyPhilipsPioneer PROSCANProton
QEDQuasarRCARadioShack RealisticRotelSansuiScottSears Sharp Sherwood Sony Soundesign
Sunfire TascamTeacTechnics ThorensVictorWardsYamahaYorxZenith
RCU807US_IB_REVB 9/26/03 10:18 Page 40