Cook with Kids! California Healthy Kids Resource Center (C.H.K.R.C.)

The Kids Cook MondayEducators’ ToolkitTHE basics
SMstart your week off right, make Monday family night!

2
The Kids cook Monday Educators’ Kit - The basics
© The Monday Campaigns, Inc.
Now Let’s Get started!
1 before You Getstarted: The basics
2 What You’ll Need – Preparing a Kids cooking Kit
3 age appropriate Tasks
4 Hygiene and safety
5 class Outline and Tips
6 Getting Parents involved
7 How to Keep on cooking!
3
6
8
10
11
13
13

3
The Kids cook Monday Educators’ Kit - The basics
© The Monday Campaigns, Inc.
before You Get startedThings to consider when planning your Kids Cook Monday program
1. Finding space and supplies- Pitch your class to schools, community centers, local restaurants,
supermarkets or culinary training programs. Remember, many cooking lessons don’t require a full
kitchen!
2. Finding donations- Ask product manufacturers, local restaurants and grocery stores if they can
donate ingredients and equipment. Seek additional support from government programs, corporations,
after-school services or charitable organizations that focus on culinary education.
3. Advertising your class- Do you need to recruit students? Turn to local newspapers, community
bulletins, parent blogs and other outlets to ensure plenty of participants. Use our free posters
(included in this kit) to help get the word out!
4. Timing is everything- What time will you hold your class and how long will it last? Dinnertime
sessions tend to work best for busy families.1 ½ to 2 hours is usually enough time to teach and cook
together. Be sure to allot time for preparation and cleanup.
5. Number of classes- How many classes will you hold? The goal of the program is to create a
weekly family routine, so ongoing classes are ideal. We recommend at least 4-6 classes to kick-start
the habit, with refresher classes thereafter.
6. Get families involved- Ideally, classes should involve the whole family, but if you’re just working
with kids, plan on take home recipes and exercises, or invite families to join for your final cooking
class.
7. Know your numbers- How many students will you have? If working just with kids, aim to have
one adult helper for every 5 students. If hosting parents and children together, around 4-6 families
usually work best.
8. Always consider safety- Take student skill level, class size, required kitchen steps, and adult
supervision into account when planning your lesson. Brush up on your knowledge of proper hygiene
and food safety procedures and be sure to ask participants about food allergies.
9. Selecting a recipe- Think of your students, class size, kitchen access and available supplies when
picking a culinary lesson. Your class could consist of anything from a simple tasting exercise to advanced
cooking for a small group of older students. See the lesson plans in this kit for some suggestions.

4
The Kids cook Monday Educators’ Kit - The basics
© The Monday Campaigns, Inc.
10. Create a learning experience- Supplement a great culinary lesson with fun facts about nutrition,
portions, fresh foods and exotic dishes. Use the provided lesson plans, or create your own educa-
tional components and take-home materials!
11. Get others involved- You don’t have to go it alone! Improve the educational experience and get
a helping hand by recruiting local chefs, farmer’s markets, supermarket dieticians, community health
leaders, teachers, and college students.
12. Help The Kids Cook Monday grow- We want to hear about your program!
Ask families to share their stories, take pictures (with permission from parents) and write to us at:

5
The Kids cook Monday Educators’ Kit - The basics
© The Monday Campaigns, Inc.
class structure
Before class, it’s important to evaluate your student demographic so you can determine
an appropriate lesson plan. Use the left side of this form to consider your students, class
space and equipment available. Depending on those specifics, use the right side of this
chart to determine which type of cooking class is right for you.
Students and Site
Families or Kid Only? ___________________
Age Range of Kids_____________________
Equipment Available? _________________
Budget_______________________________
Duration of Class________________________
Cooking Class Considerations
* Check all that apply
Nutrition Activity_____________
Cooking Demo______________
Tasting____________________
No Cooking__________________
“Cold” Cooking (no equip)_______
Minimal Equipment____________
Full Kitchen__________________

6
The Kids cook Monday Educators’ Kit - The basics
© The Monday Campaigns, Inc.
Preparing a Kids cooking Kit
Sometimes the venue you secure for your Kids Cook Monday class does not provide all the niceties
of a fully stocked kitchen. Kids cooking teacher Stacey Ornstein shares her must-have supplies for
kids cooking classes.
“Basics” listed are very basic—no cut, no cook, no blend recipes. Check dollar stores in your
neighborhood first; many carry these supplies, often in “mini” form. In general, try to buy stainless
steel over plastic as it will last longer. “A Little Bit More” lists tools that are recipe-specific. Think
about the recipes you’ll be making before investing in these extras.
Basics:
(1) large bin for all supplies
(1) spritz bottle with all-purpose disinfectant cleaner
(1) sponge
(2) kitchen towels
(1) adult cutting board
(1) adult knife
(4) 4-quart mixing bowls
(4) sets, measuring cups
(4) Hand sanitizer spritz bottles
(4) sets, measuring spoons
(4) mixing spoons
plates, napkins, cups, cutlery
A Little Bit More:
(20-30) reusable, light-weight cutting boards
(15-30) knives (Try nylon chef knives for ages K thru 3.)
(1) Hand-held immersion blender
(1) portable electric burner
(1) extension cord
(1) large skillet
(1) flipping spatula
(1) 8-quart stock pot
(1) ladle
(1) small toaster oven w cook tray
(4) bowls
(4) box graters
7
The Kids cook Monday Educators’ Kit - The basics
© The Monday Campaigns, Inc.
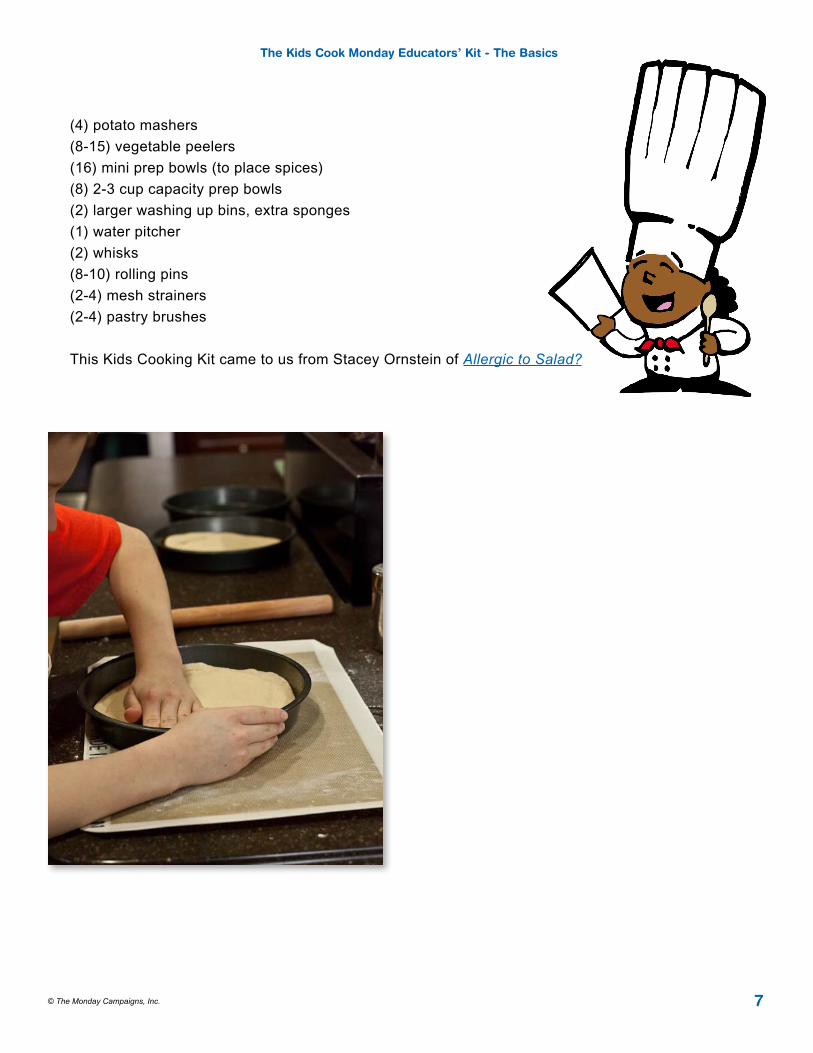
(4) potato mashers
(8-15) vegetable peelers
(16) mini prep bowls (to place spices)
(8) 2-3 cup capacity prep bowls
(2) larger washing up bins, extra sponges
(1) water pitcher
(2) whisks
(8-10) rolling pins
(2-4) mesh strainers
(2-4) pastry brushes
This Kids Cooking Kit came to us from Stacey Ornstein of Allergic to Salad?

8
The Kids cook Monday Educators’ Kit - The basics
© The Monday Campaigns, Inc.
age appropriate Tasks - cooking activities for Different age Groups
The following are suggested tasks for
each age group. Of course, maturity
and dexterity differ in each child.
It’s up to you to determine what’s
appropriate for your class.
2-3 year olds and up
Most toddlers enjoy helping in the
kitchen. They are very tactile and
love the concept of eating their art project. This age group, however, needs very close adult
supervision since their dexterity and motor skills are still developing.
This age group can do the following tasks with minimal
assistance: Squeezing lemons or limes, using a plastic juicer,
washing produce in the sink, drying produce in a salad spinner;
picking fresh herb leaves off stems, ripping them into small pieces;
tearing up lettuce, sprinkling dried herbs and salt, using a pepper
grinder, kneading dough, scooping potatoes or yams out of the skins,
brushing (or “painting”) oil with a pastry brush, using the rolling pin
for dough or puff pastry, whisking together vinaigrettes, squeezing
water out of thawed spinach, stirring, and mashing.
They will need close supervision to: Grate, peel, chop
vegetables and herbs with a knife, and break eggs.
4-5 year olds and up
In this age group, there is a lot of variability in motor skills, inde-
pendence, and the ability to focus, which means that some kids will
continue doing the 2-3 year-old tasks, and others will feel ready to
move on to the 6-7 year-old tasks.
6-7 year olds and up
This age group usually has developed fine motor skills so they can
take on more detailed work, like using measuring spoons and
9
The Kids cook Monday Educators’ Kit - The basics
© The Monday Campaigns, Inc.
forming evenly sized patties. They may still need reminders to watch their fingers during grating and
peeling.
They also excel at: Dicing and mincing vegetables, grating cheese; peeling raw potatoes, ginger,
mangoes and other fruits and vegetables; slicing and scooping out avocados, greasing pans, using
a microplane zester, de-seeding tomatoes and roasted peppers, draining and slicing tofu, rinsing
grains and beans, forming cookies and patties, pouring liquids into small containers, and garnishing
(or “decorating”) dishes.
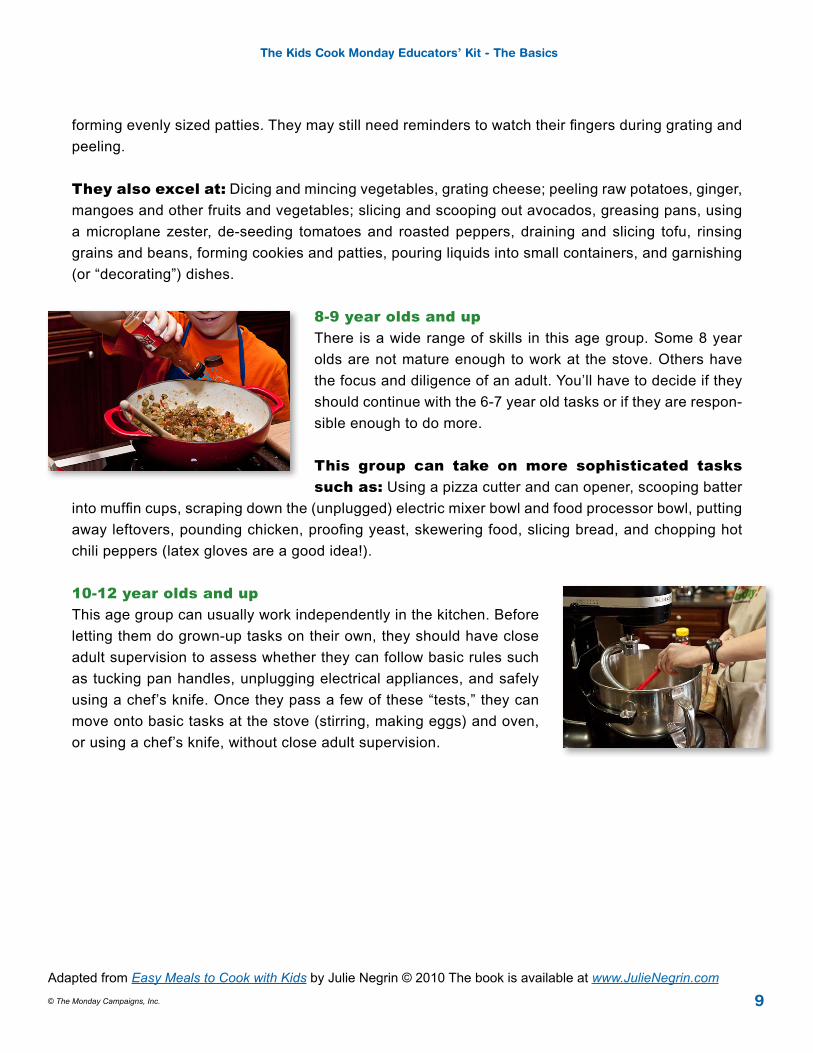
8-9 year olds and up
There is a wide range of skills in this age group. Some 8 year
olds are not mature enough to work at the stove. Others have
the focus and diligence of an adult. You’ll have to decide if they
should continue with the 6-7 year old tasks or if they are respon-
sible enough to do more.
This group can take on more sophisticated tasks
such as: Using a pizza cutter and can opener, scooping batter
into muffin cups, scraping down the (unplugged) electric mixer bowl and food processor bowl, putting
away leftovers, pounding chicken, proofing yeast, skewering food, slicing bread, and chopping hot
chili peppers (latex gloves are a good idea!).
10-12 year olds and up
This age group can usually work independently in the kitchen. Before
letting them do grown-up tasks on their own, they should have close
adult supervision to assess whether they can follow basic rules such
as tucking pan handles, unplugging electrical appliances, and safely
using a chef’s knife. Once they pass a few of these “tests,” they can
move onto basic tasks at the stove (stirring, making eggs) and oven,
or using a chef’s knife, without close adult supervision.
Adapted from Easy Meals to Cook with Kids by Julie Negrin © 2010 The book is available at www.JulieNegrin.com

10
The Kids cook Monday Educators’ Kit - The basics
© The Monday Campaigns, Inc.
Hygiene and safety Guidelines
Hand-washing. It’s important to be strict about hand-
washing. You need to show kids how to use warm water
and soap, scrub well, and dry their hands in order to prevent
spreading germs. The ideal amount of time for hand-washing
is at least 20 seconds. While hand sanitizers are good for
when you’re in a pinch in public, it’s best to teach children
to wash their hands in the sink when they are cooking.
Using knives. Small children, as young as two years old, can use plastic knives, metal butter
knives, and lettuce cutters with close supervision. Keep a close watch on little fingers when they use
these tools!
In case of emergencies. It’s a good idea to store a fire extinguisher in a spot that older children
can reach and teach them how to use it. Remind kids what to do if there is a fire: they should not
throw water on it but, rather, they should find an adult who can cut off its oxygen supply (like putting
a lid on a pot or keeping the oven shut). All children should be taught how to call 9-1-1 in case of an
emergency.
Cross-contamination. It’s important to note that any time you are
working with meat, poultry or fish, you should use a clean plastic or
glass cutting board (versus wood which is porous and can absorb
bacteria). You must never cut animal products and then use the same
knife or cutting board to cut fruits or vegetables. Instead, the knife
and board should be thoroughly cleaned with hot soapy water (or in a
dishwasher) and air dried. Kids should also be reminded to wash their
hands thoroughly after working with meat, poultry, fish, or eggs.
Adapted from Easy Meals to Cook with Kids by Julie Negrin © 2010 The book is available at www.JulieNegrin.com

11
The Kids cook Monday Educators’ Kit - The basics
© The Monday Campaigns, Inc.
class Outline and Tips
Before the Students Arrive (Varies depending on recipe)
· List educational objectives relating to the lesson on a large wipe-off
board or pad of paper.
(See addendum for sample educational objectives.)
· Do any prep not accounted for in the lesson plan.
Introduction & Ice breaker (2 minutes)
· Before you start the class, do a quick icebreaker. Go around the room
and prompt students to say their names and a fun fact, like a fruit or
vegetable that starts with the same letter as their name.
· Review the educational objectives of today’s class.
· Review last week’s recipe (if applicable).
Food Safety/ Hygiene (10 minutes)
· Food Safety and Hygiene should be reviewed, in depth, for 10 minutes during
the first class. If you are teaching a series of classes, conduct a quick, 1 minute
review in future classes.
Explore the Recipe Title (5 minutes)
· Display the recipes written on wipe off board or chart paper.
· Ask student “What can you learn from the recipe title?”
· Based on the name, what do you think is in the food?
· The name of a recipe includes important information about the dish. After we eat we can think of
other names that describe what we like about the dish.
Explore Ingredients (5 minutes)
· All ingredients are listed in the order in which they are used.
· Review each ingredient. Hold up each ingredient as you review them
to ensure students are familiar with them. Pass around a small sample
to touch, smell etc.
Explore Directions (10 minutes)
· Clear instructions are used for every step for preparing, combining and
cooking the ingredients.
· Short sentences are used.

12
The Kids cook Monday Educators’ Kit - The basics
© The Monday Campaigns, Inc.
· If this is a family class, divide the tasks between parent and child. Use the Cooking Tasks for
Different Age Groups to ensure that only parents and older kids are using knives, handling the stove etc.
Preparation (Varies - Anywhere from 15 minutes to one
hour depending on the recipe)
Transform the cooking area into an eating area (during the
preparation)
Enjoying the meal (10 minutes)
· Facilitate a discussion about the food and elicit participants’ creative
descriptions of the foods.
· Reinforce positive messages about eating veggies! Compliment your creative
chefs on a job well done!
· Remind students to not “yuck someone’s yum”
· Encourage students to ask each other about what they did to make
the dish.
Clean-up (10 minutes)
Wrap-up (5 minutes)
· Prompt students to make up different names for the day’s dish.
· Prompt students to share their favorite ingredient from the dish.
Future Classes
· If teaching a series of classes, entice the students by telling them what they will be cooking next week.

13
The Kids cook Monday Educators’ Kit - The basics
© The Monday Campaigns, Inc.
Getting Parents involved
· Open your class up to the entire family! You’ll find
parents will be helpful during ingredient prep,
while working alongside their chefs-in-training.
· If you’re putting on a series of classes, hold a
celebration at the end. Kids become empowered
when they teach their parents what they learned!
· Give the students leftovers to take home and
share with their parents. Encourage them to share
what culinary skills they learned, as well as how
that food affects their bodies.
· Give the students a handout to take home with them after class. Kids are more likely to remember
their new skills when you keep them engaged.
Our students Keep on cooking!
Here are ways to encourage your students to stay engaged with
cooking, even after your class is over.
• Start each week with a Kids Cook Monday family dinner night!
Give students The Kids Cook Monday Toolkit for Families (pdf)
and encourage them to explore it with their parents this week,
and every week thereafter.
• When talking to parents, frame The Kids Cook Monday family dinner night as a way for parents to
check in with their kids about what they did over the weekend and plans for the week to come.
• Sign up for free, weekly Kids Cook Monday recipes at TheKidsCookMonday.org. Each recipe comes
to your inbox with “parent”, “kid” and “together” task suggestions.
• Hold monthly potlucks for your students and their families. Incorporate fun food themes and invite
students to update each other on the past month’s culinary adventures.