THE INTERNATIONAL SKEET GUN MOUNT - Dead … · THE INTERNATIONAL SKEET GUN MOUNT By B J McDaniel...
6
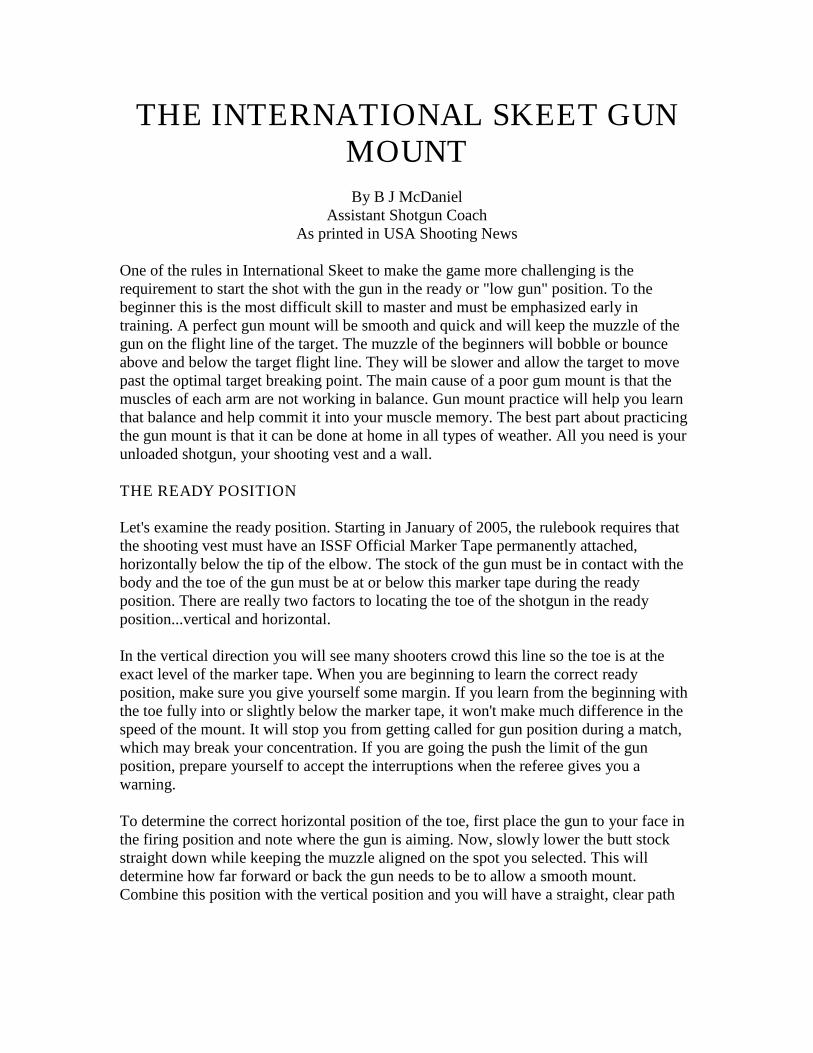
THE INTERNATIONAL SKEET GUN MOUNT By B J McDaniel Assistant Shotgun Coach As printed in USA Shooting News One of the rules in International Skeet to make the game more challenging is the requirement to start the shot with the gun in the ready or "low gun" position. To the beginner this is the most difficult skill to master and must be emphasized early in training. A perfect gun mount will be smooth and quick and will keep the muzzle of the gun on the flight line of the target. The muzzle of the beginners will bobble or bounce above and below the target flight line. They will be slower and allow the target to move past the optimal target breaking point. The main cause of a poor gum mount is that the muscles of each arm are not working in balance. Gun mount practice will help you learn that balance and help commit it into your muscle memory. The best part about practicing the gun mount is that it can be done at home in all types of weather. All you need is your unloaded shotgun, your shooting vest and a wall. THE READY POSITION Let's examine the ready position. Starting in January of 2005, the rulebook requires that the shooting vest must have an ISSF Official Marker Tape permanently attached, horizontally below the tip of the elbow. The stock of the gun must be in contact with the body and the toe of the gun must be at or below this marker tape during the ready position. There are really two factors to locating the toe of the shotgun in the ready position...vertical and horizontal. In the vertical direction you will see many shooters crowd this line so the toe is at the exact level of the marker tape. When you are beginning to learn the correct ready position, make sure you give yourself some margin. If you learn from the beginning with the toe fully into or slightly below the marker tape, it won't make much difference in the speed of the mount. It will stop you from getting called for gun position during a match, which may break your concentration. If you are going the push the limit of the gun position, prepare yourself to accept the interruptions when the referee gives you a warning. To determine the correct horizontal position of the toe, first place the gun to your face in the firing position and note where the gun is aiming. Now, slowly lower the butt stock straight down while keeping the muzzle aligned on the spot you selected. This will determine how far forward or back the gun needs to be to allow a smooth mount. Combine this position with the vertical position and you will have a straight, clear path
-
Upload
vuongtuyen -
Category
Documents
-
view
269 -
download
7
Transcript of THE INTERNATIONAL SKEET GUN MOUNT - Dead … · THE INTERNATIONAL SKEET GUN MOUNT By B J McDaniel...
THE INTERNATIONAL SKEET GUNMOUNTBy B J McDaniel
Assistant Shotgun CoachAs printed in USA Shooting News
One of the rules in International Skeet to make the game more challenging is therequirement to start the shot with the gun in the ready or "low gun" position. To thebeginner this is the most difficult skill to master and must be emphasized early intraining. A perfect gun mount will be smooth and quick and will keep the muzzle of thegun on the flight line of the target. The muzzle of the beginners will bobble or bounceabove and below the target flight line. They will be slower and allow the target to movepast the optimal target breaking point. The main cause of a poor gum mount is that themuscles of each arm are not working in balance. Gun mount practice will help you learnthat balance and help commit it into your muscle memory. The best part about practicingthe gun mount is that it can be done at home in all types of weather. All you need is yourunloaded shotgun, your shooting vest and a wall.
THE READY POSITION
Let's examine the ready position. Starting in January of 2005, the rulebook requires thatthe shooting vest must have an ISSF Official Marker Tape permanently attached,horizontally below the tip of the elbow. The stock of the gun must be in contact with thebody and the toe of the gun must be at or below this marker tape during the readyposition. There are really two factors to locating the toe of the shotgun in the readyposition...vertical and horizontal.
In the vertical direction you will see many shooters crowd this line so the toe is at theexact level of the marker tape. When you are beginning to learn the correct readyposition, make sure you give yourself some margin. If you learn from the beginning withthe toe fully into or slightly below the marker tape, it won't make much difference in thespeed of the mount. It will stop you from getting called for gun position during a match,which may break your concentration. If you are going the push the limit of the gunposition, prepare yourself to accept the interruptions when the referee gives you awarning.
To determine the correct horizontal position of the toe, first place the gun to your face inthe firing position and note where the gun is aiming. Now, slowly lower the butt stockstraight down while keeping the muzzle aligned on the spot you selected. This willdetermine how far forward or back the gun needs to be to allow a smooth mount.Combine this position with the vertical position and you will have a straight, clear path

from the ready position to the firing position.
Begin by standing about four feet from a wall on which a spot has been marked. This spotshould be located about a foot above your head. Align yourself so your Natural Point ofAlignment is at the spot. The exercise begins by assuming a stance with your weightevenly distributed on both legs. Both feet are turned out from the body at the samecomfortable angle and placed equal to or slightly wider than the shoulders. The legs areslightly bent, not in a deep crouch but not stiff or locked. The hips are level and balancedover both legs. The shoulders are level to the ground. The upper body has a slightforward lean to it. If you were to swing on a target a slight nudge from behind would notthrow you off balance. Assume this position with the muzzle of the gun pointing at thespot on the wall and the toe of the gun in the position determined above. There should bea straight line from the eye through the tip of the muzzle to the spot on the wall. You arenow in position to start your gun mounts.
Begin by standing about four feet from a wall on which a spot has been marked. This spot should belocated about a foot above your head. Align yourself so your Natural Point of Alignment is at thespot.

THE GUN MOUNT
The arm that is on the forestock of the gun controls the gun mount. The thumb and indexfinger are parallel to the barrel of while the other fingers are curled around the forestock.The gun must be gripped firmly with this hand. It may feel uncomfortable at first, butlater it will develop into a strong grip, which will enable you to move the gun in anydirection. This is the hand that pushes or pulls the gun towards the target. It is the handthat points the gun. This is why the index finger is pointing the same direction as thebarrel. When doing the gun mounts at the spot on the wall this hand pushes the gunforward toward the spot as the trigger hand guides the gun to the face and later, activatesthe trigger. With the trigger hand the grip is more relaxed. As the gun mount starts thebarrel may dip below the spot. This means that the trigger hand is overpowering theforestock hand and causing the barrel to dip. This is corrected by relaxing the triggerhand and having the forestock hand move towards the spot much like a boxers jab.Control the mount with the forestock hand.
PRACTICING THE GUN MOUNT ON BASELINE TARGETS
The object of this exercise is to learn the precise movements of the gun mount andcommit them into your muscle memory. To achieve this we mount the gun to the facewhile steadily keeping the muzzle aligned on the spot you selected. At first this is donevery slowly, taking 6 - 8 seconds for each mount. By doing it slowly you will feel theinteraction between the muscles of each arm. It will also help you build strength in thosemuscles. When bringing the gun up to your face avoid moving the head to meet the gunand avoid pulling the gun back into the shoulder. The mount must be just one verticalmovement of the butt stock, not a vertical and then horizontal movement. If the stock isnot firmly into your shoulder don't worry, it will be as soon as the gun goes off. Once thegun is to the face and pointed at the spot on the wall you may wish to dry fire the gun.This is fine, just be sure to use snap caps.
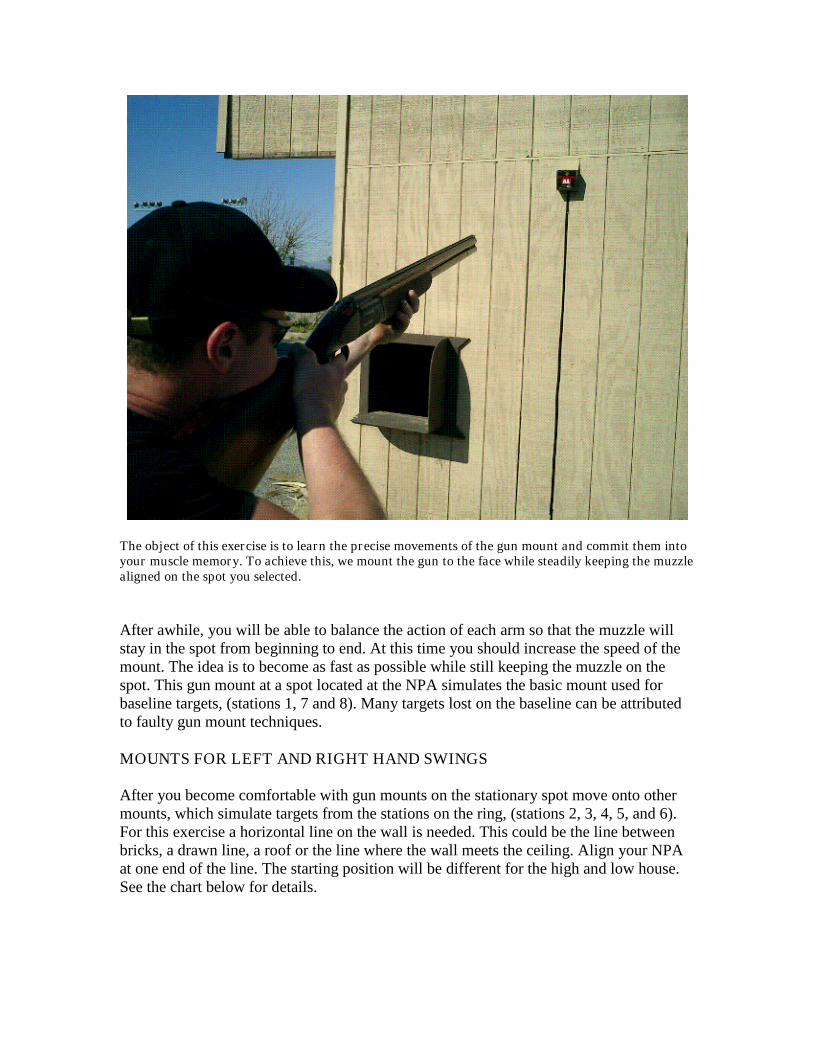
The object of this exercise is to learn the precise movements of the gun mount and commit them intoyour muscle memory. To achieve this, we mount the gun to the face while steadily keeping the muzzlealigned on the spot you selected.
After awhile, you will be able to balance the action of each arm so that the muzzle willstay in the spot from beginning to end. At this time you should increase the speed of themount. The idea is to become as fast as possible while still keeping the muzzle on thespot. This gun mount at a spot located at the NPA simulates the basic mount used forbaseline targets, (stations 1, 7 and 8). Many targets lost on the baseline can be attributedto faulty gun mount techniques.
MOUNTS FOR LEFT AND RIGHT HAND SWINGS
After you become comfortable with gun mounts on the stationary spot move onto othermounts, which simulate targets from the stations on the ring, (stations 2, 3, 4, 5, and 6).For this exercise a horizontal line on the wall is needed. This could be the line betweenbricks, a drawn line, a roof or the line where the wall meets the ceiling. Align your NPAat one end of the line. The starting position will be different for the high and low house.See the chart below for details.
Right-handed shooter
HIGH HOUSE LOW HOUSENPA on right end of line NPA on right end of lineStart swing from left of line Start swing from right of lineSwing clockwise towards NPA Swing counterclockwise away from NPA
Left-handed shooter
HIGH HOUSE LOW HOUSENPA on left end of line NPA on left end of lineStart swing from left of line Start swing from right of lineSwing clockwise away from NPA Swing counterclockwise towards NPA
The object of the exercise is to mount the gun to the face while keeping the muzzle on theline. This simulates the flight line of the target. At first this is done very slowly, taking 6 -8 seconds for each mount. By doing it slowly you will again feel the interaction betweenthe muscles of each arm. Dry firing is encouraged.
Remember, the arm that is on the forestock of the gun controls the gun mount. You gripthe gun firmly with this hand. This is the hand that pushes or pulls the barrel across thetarget line. The trigger hand and grip is relaxed. As the gun mount starts the barrel maydip below the line and then come back to the line. The muzzle forms a check mark. Thismeans that the trigger hand is overpowering the forestock hand and causing the barrel todip. This is corrected by relaxing the trigger hand and having the hand on the forestockpush or pull the barrel across the target line. Again it is like a boxers jab. Control themount with the forestock hand.
After awhile, you will be able to balance the action of each arm so that the muzzle willstay smoothly on the flight line from beginning to end. At this time increase the speed ofthe mount. The idea is to become as fast as possible while still keeping the muzzle on theflight line.
HOME PRACTICE
The gun mounts described above should be practiced daily until mastered and then two orthree times a week during the shooting season. This will keep the movements in yourmuscle memory and enable the gun mount to become a subconscious action. Arecommended practice plan includes 25 baseline mounts, 25 high house mounts, and 25low house mounts for each practice session. When doing high and low house mountsevery third mount should simulate a double. While you are practicing these mounts
pretend or visualize that you are seeing and breaking the target each time. Use this timefor mental practice as well as physical practice.