Samsung Intensity Teardown...Samsung Intensity Teardown Complete Teardown for Samsung Intensity U450...
7
Samsung Intensity Teardown Complete Teardown for Samsung Intensity U450 作成者: David Samsung Intensity Teardown 下書き: 2016-10-17 ガイド ID: 6877 - ã“ã®æ–‡æ›¸ã¯2019-12-29 09:26:05 PM (MST)ã«ä½œæˆã•ã‚Œã¾ã—ãŸã€‚ © iFixit — CC BY-NC-SA jp.iFixit.com ページ7ã®1
Transcript of Samsung Intensity Teardown...Samsung Intensity Teardown Complete Teardown for Samsung Intensity U450...

Samsung Intensity TeardownComplete Teardown for Samsung Intensity U450
作成者: David
Samsung Intensity Teardown 下書き: 2016-10-17ガイド ID: 6877 -
㠓㠮文書㠯2019-12-29 09:26:05 PM (MST)ã «ä½œæˆ ã •ã‚Œã ¾ã —ã Ÿã€‚
© iFixit — CC BY-NC-SA jp.iFixit.com ページ7ã ®1
はじめにはじめに
The Teardown is pretty much the same as other Samsung Slider phones
ツールツール:iFixit Opening Tools (1)Spudger (1)64 Bit Driver Kit (1)
Samsung Intensity Teardown 下書き: 2016-10-17ガイド ID: 6877 -
㠓㠮文書㠯2019-12-29 09:26:05 PM (MST)ã «ä½œæˆ ã •ã‚Œã ¾ã —ã Ÿã€‚
© iFixit — CC BY-NC-SA jp.iFixit.com ページ7ã ®2

手順手順 1 — Samsung Intensity Teardown
Remove the back cover and battery
手順手順 2
Remove the 8 screw that hold theback cover down.
Carefully pry back piece off
Start at the bottom and work towardthe top.
Samsung Intensity Teardown 下書き: 2016-10-17ガイド ID: 6877 -
㠓㠮文書㠯2019-12-29 09:26:05 PM (MST)ã «ä½œæˆ ã •ã‚Œã ¾ã —ã Ÿã€‚
© iFixit — CC BY-NC-SA jp.iFixit.com ページ7ã ®3

手順手順 3
Use the ipod opening tool todisconnect the Connector
手順手順 4
Carefully remove the main board
Make sure to not tear the microphone cable, pry it from the phone carefully
Samsung Intensity Teardown 下書き: 2016-10-17ガイド ID: 6877 -
㠓㠮文書㠯2019-12-29 09:26:05 PM (MST)ã «ä½œæˆ ã •ã‚Œã ¾ã —ã Ÿã€‚
© iFixit — CC BY-NC-SA jp.iFixit.com ページ7ã ®4
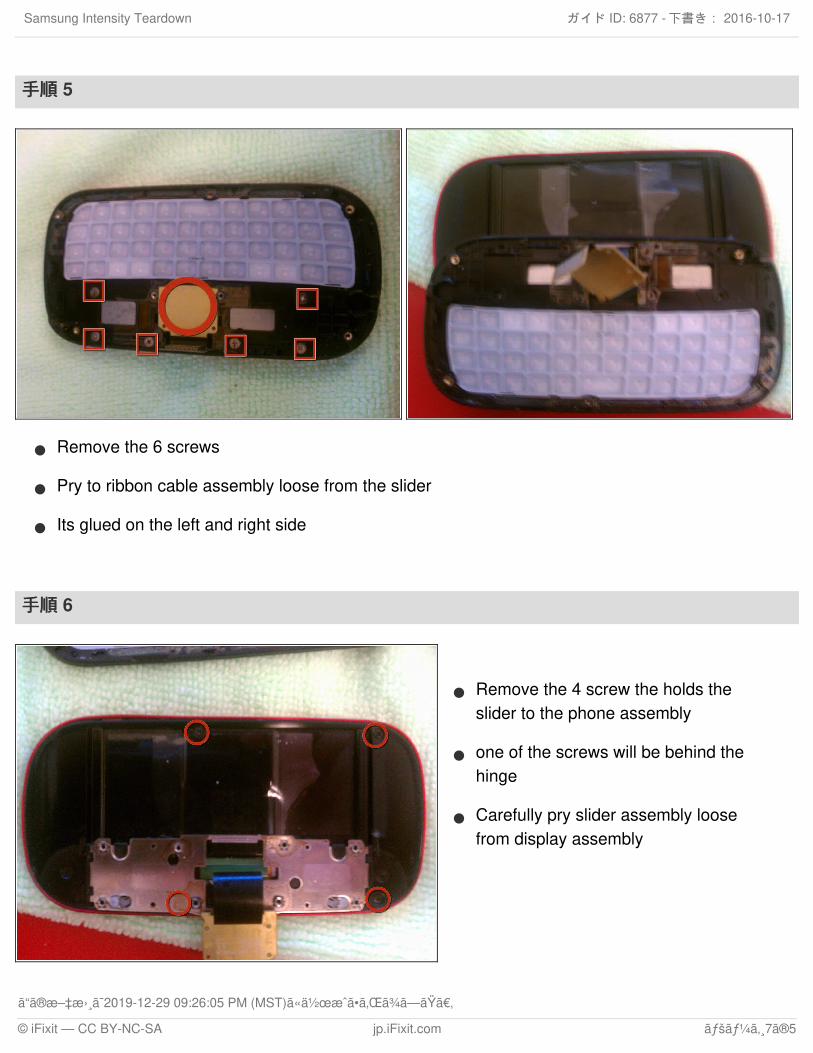
手順手順 5
Remove the 6 screws
Pry to ribbon cable assembly loose from the slider
Its glued on the left and right side
手順手順 6
Remove the 4 screw the holds theslider to the phone assembly
one of the screws will be behind thehinge
Carefully pry slider assembly loosefrom display assembly
Samsung Intensity Teardown 下書き: 2016-10-17ガイド ID: 6877 -
㠓㠮文書㠯2019-12-29 09:26:05 PM (MST)ã «ä½œæˆ ã •ã‚Œã ¾ã —ã Ÿã€‚
© iFixit — CC BY-NC-SA jp.iFixit.com ページ7ã ®5
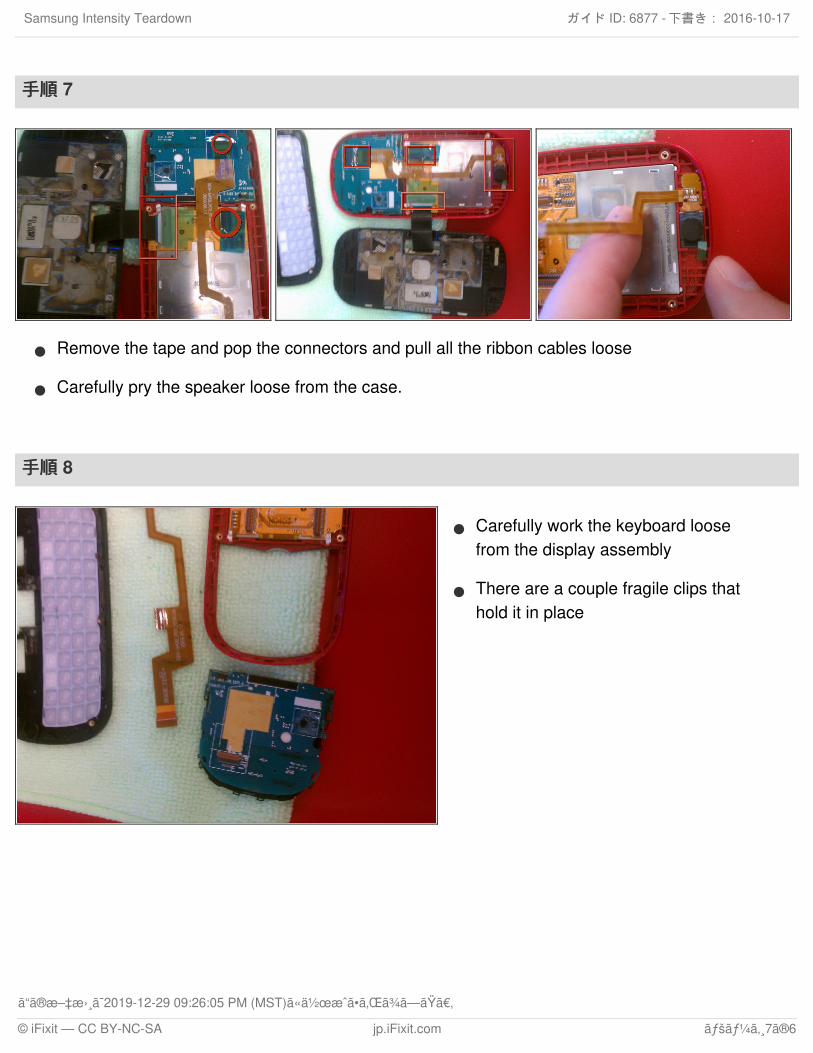
手順手順 7
Remove the tape and pop the connectors and pull all the ribbon cables loose
Carefully pry the speaker loose from the case.
手順手順 8
Carefully work the keyboard loosefrom the display assembly
There are a couple fragile clips thathold it in place
Samsung Intensity Teardown 下書き: 2016-10-17ガイド ID: 6877 -
㠓㠮文書㠯2019-12-29 09:26:05 PM (MST)ã «ä½œæˆ ã •ã‚Œã ¾ã —ã Ÿã€‚
© iFixit — CC BY-NC-SA jp.iFixit.com ページ7ã ®6
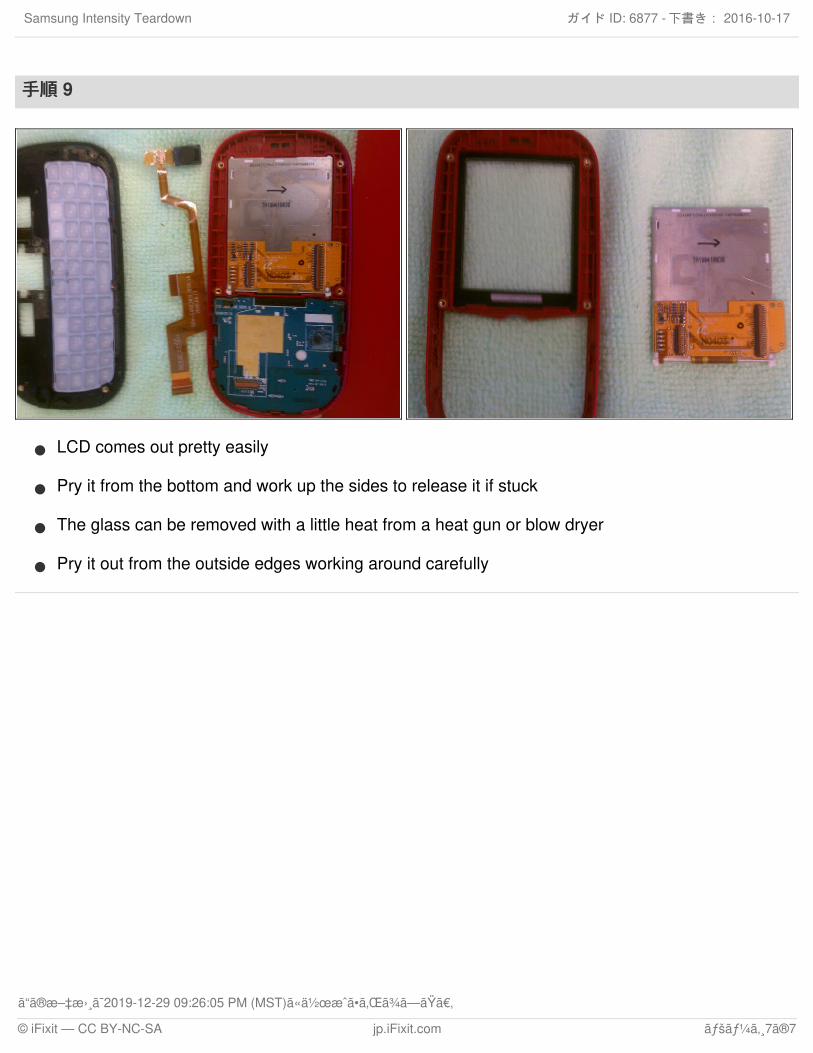
手順手順 9
LCD comes out pretty easily
Pry it from the bottom and work up the sides to release it if stuck
The glass can be removed with a little heat from a heat gun or blow dryer
Pry it out from the outside edges working around carefully
Samsung Intensity Teardown 下書き: 2016-10-17ガイド ID: 6877 -
㠓㠮文書㠯2019-12-29 09:26:05 PM (MST)ã «ä½œæˆ ã •ã‚Œã ¾ã —ã Ÿã€‚
© iFixit — CC BY-NC-SA jp.iFixit.com ページ7ã ®7