QUICKBOOKS 2020 STUDENT GUIDE - Intuit
13
QUICKBOOKS 2020 STUDENT GUIDE Lesson 7 Vendors and Expenses Part 1
Transcript of QUICKBOOKS 2020 STUDENT GUIDE - Intuit
QUICKBOOKS 2020 STUDENT GUIDE
Lesson 7 Vendors and Expenses Part 1
Copyright
Copyright 2020 Intuit, Inc. Intuit, Inc. All rights reserved. 5100 Spectrum Way Mississauga, ON L4W 5S2
Trademarks
©2020 Intuit Inc. All rights reserved. Intuit, the Intuit logo, Intuit ProLine, Lacerte, ProAdvisor, ProSeries and QuickBooks, among others, are trademarks or registered trademarks of Intuit Inc. in the United States and other countries. Other parties’ marks are the property of their respective owners.
Notice to Readers
The publications distributed by Intuit, Inc. are intended to assist accounting professionals in their practices by providing current and accurate information. However, no assurance is given that the information is comprehensive in its coverage or that it is suitable in dealing with a client’s particular situation. Accordingly, the information provided should not be relied upon as a substitute for independent research. Intuit, Inc. does not render any accounting, legal, or other professional advice nor does it have any responsibility for updating or revising any information presented herein. Intuit, Inc. cannot warrant that the material contained herein will continue to be accurate nor that it is completely free of errors when published. Readers should verify statements before relying on them.
Lesson 7 — Vendors and Expenses Part 1 Table of Contents
QuickBooks 2020 Student Guide 3
Table of Contents
Lesson Objectives ............................................................................................................................... 4
Use QuickBooks for Accounts Payable .................................................................................................. 5
Entering Bills ...................................................................................................................................... 6
Accounts Payable Reports ................................................................................................................... 8
Paying Bills ....................................................................................................................................... 10
Entering and Paying Bills — Review Questions ..................................................................................... 11
Review Activities ............................................................................................................................... 12
Answers to Review Activities .............................................................................................................. 13
Lesson 7 — Vendors and Payables Part 1 Lesson Objectives
QuickBooks 2020 Student Guide 4
Lesson Objectives
Discuss the different ways you can handle bills in QuickBooks
Learn how to enter a bill in QuickBooks
Use the Pay Bills window to pay a bill in QuickBooks
Lesson 7 — Vendors and Payables Part 1 Use QuickBooks for Accounts Payable
QuickBooks 2020 Student Guide 5
Use QuickBooks for Accounts Payable
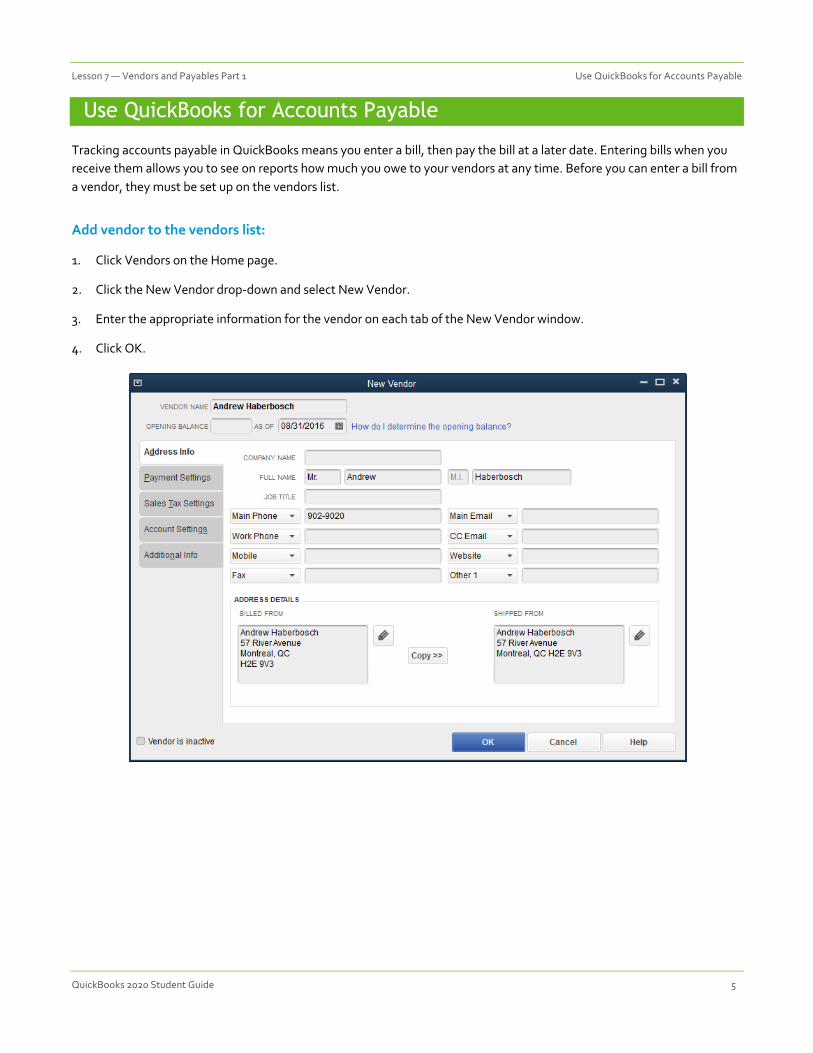
Tracking accounts payable in QuickBooks means you enter a bill, then pay the bill at a later date. Entering bills when you receive them allows you to see on reports how much you owe to your vendors at any time. Before you can enter a bill from a vendor, they must be set up on the vendors list.
Add vendor to the vendors list:
1. Click Vendors on the Home page.
2. Click the New Vendor drop-down and select New Vendor.
3. Enter the appropriate information for the vendor on each tab of the New Vendor window.
4. Click OK.
Lesson 7 — Vendors and Payables Part 1 Entering Bills
QuickBooks 2020 Student Guide 6
Entering Bills
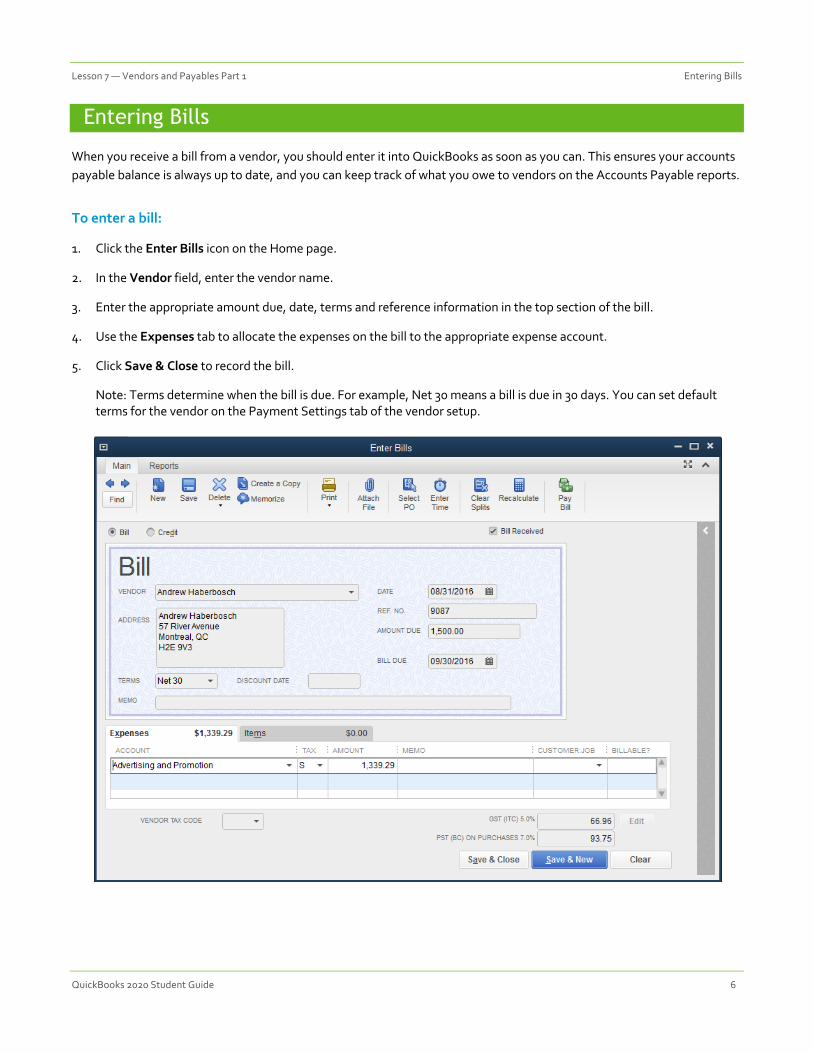
When you receive a bill from a vendor, you should enter it into QuickBooks as soon as you can. This ensures your accounts payable balance is always up to date, and you can keep track of what you owe to vendors on the Accounts Payable reports.
To enter a bill:
1. Click the Enter Bills icon on the Home page.
2. In the Vendor field, enter the vendor name.
3. Enter the appropriate amount due, date, terms and reference information in the top section of the bill.
4. Use the Expenses tab to allocate the expenses on the bill to the appropriate expense account.
5. Click Save & Close to record the bill.
Note: Terms determine when the bill is due. For example, Net 30 means a bill is due in 30 days. You can set default terms for the vendor on the Payment Settings tab of the vendor setup.
Lesson 7 — Vendors and Payables Part 1 Entering Bills
QuickBooks 2020 Student Guide 7
NOTES
Lesson 7 — Entering and Paying Bills Accounts Payable Reports
QuickBooks 2020 Student Guide 8
Accounts Payable Reports
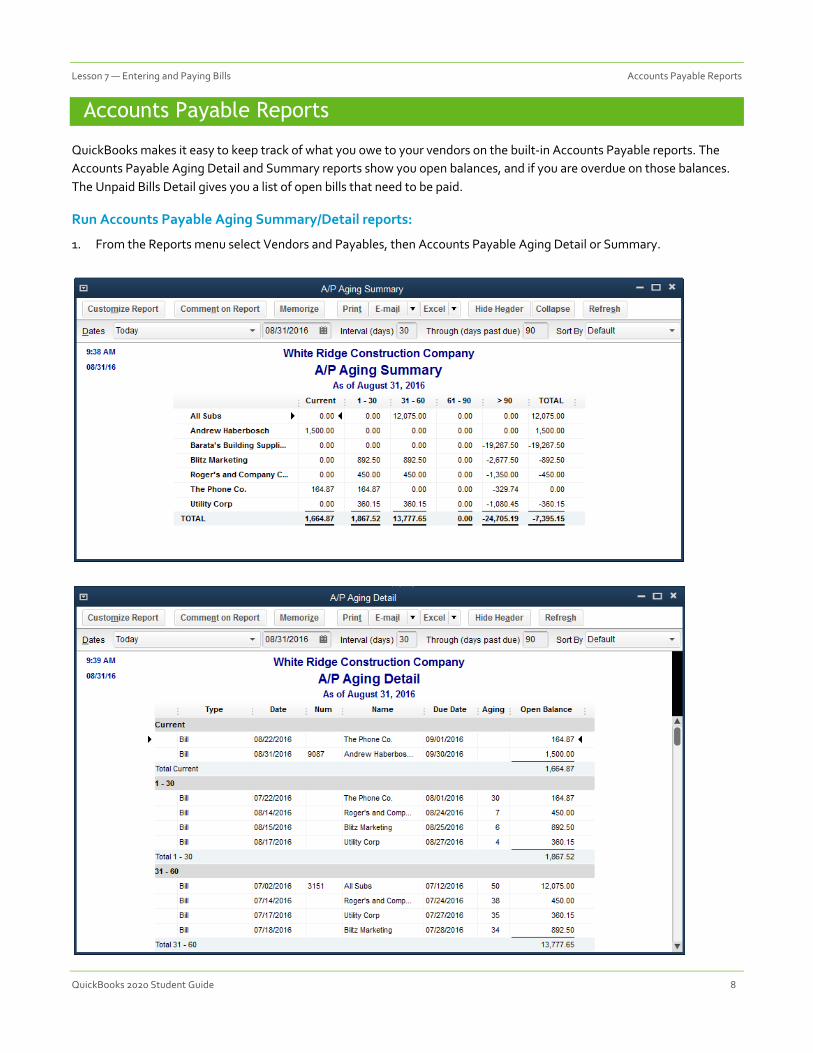
QuickBooks makes it easy to keep track of what you owe to your vendors on the built-in Accounts Payable reports. The Accounts Payable Aging Detail and Summary reports show you open balances, and if you are overdue on those balances. The Unpaid Bills Detail gives you a list of open bills that need to be paid.
Run Accounts Payable Aging Summary/Detail reports:
1. From the Reports menu select Vendors and Payables, then Accounts Payable Aging Detail or Summary.
Lesson 7 — Entering and Paying Bills Accounts Payable Reports
QuickBooks 2020 Student Guide 9
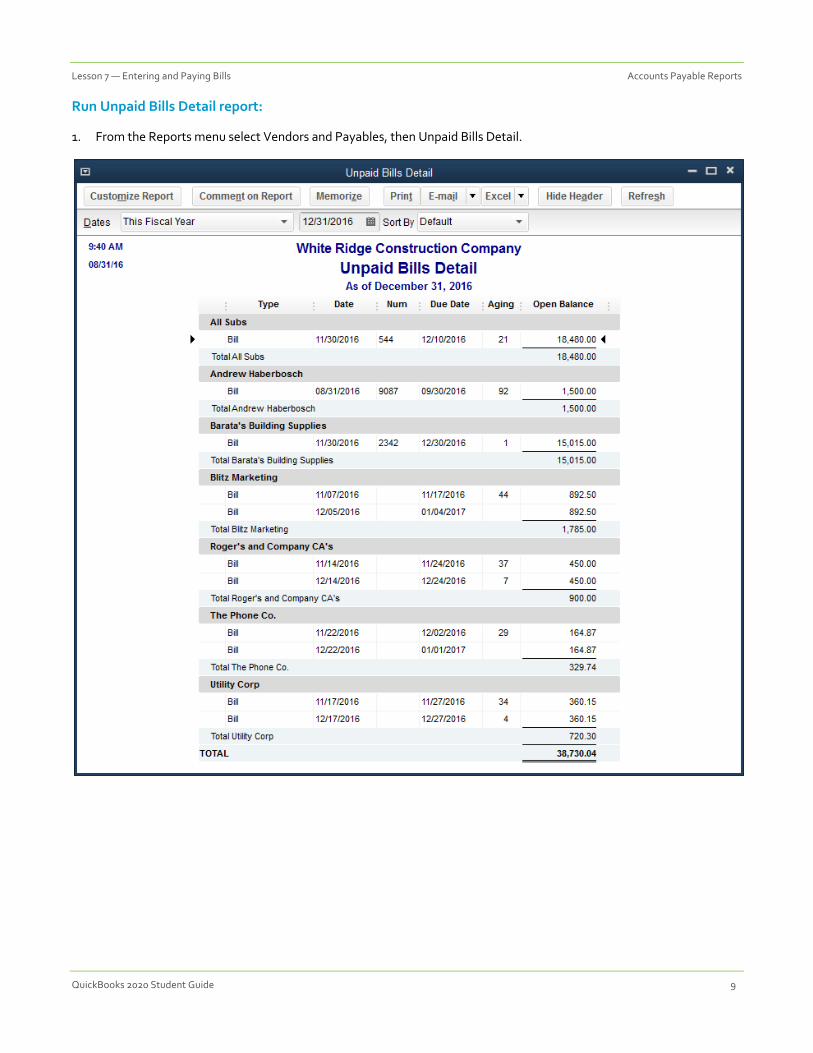
Run Unpaid Bills Detail report:
1. From the Reports menu select Vendors and Payables, then Unpaid Bills Detail.
Lesson 7 — Vendors and Payables Part 1 Paying Bills
QuickBooks 2020 Student Guide 10
Paying Bills
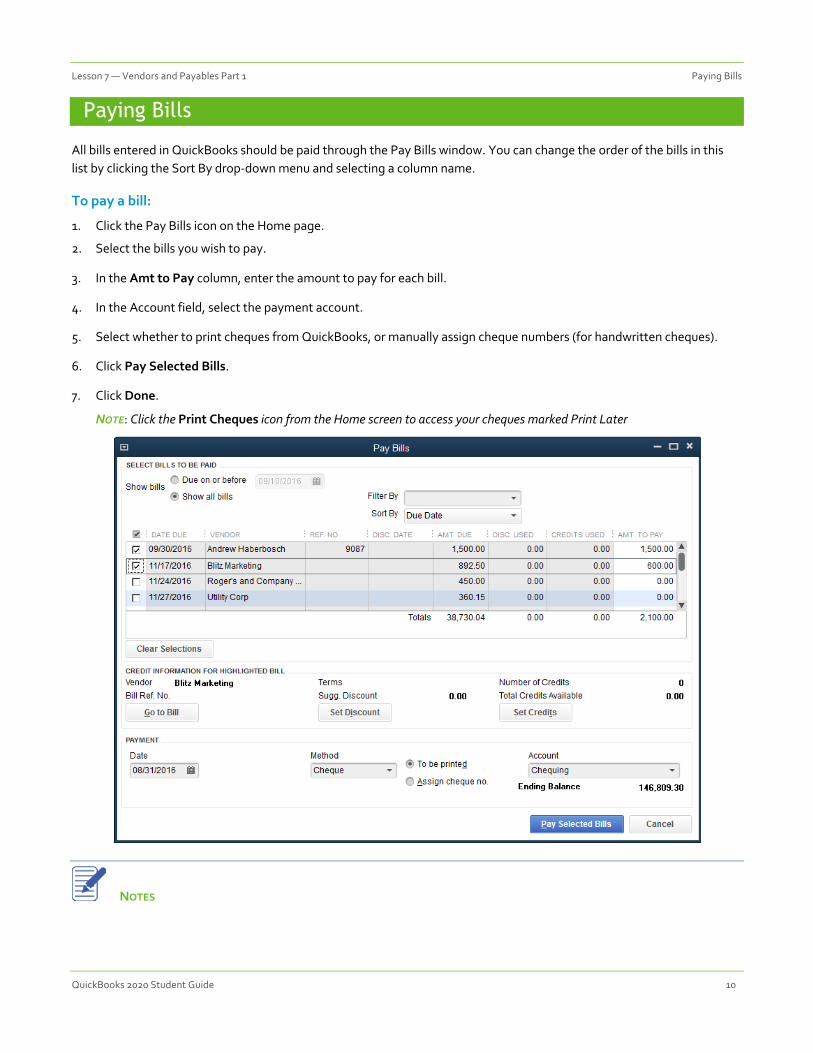
All bills entered in QuickBooks should be paid through the Pay Bills window. You can change the order of the bills in this list by clicking the Sort By drop-down menu and selecting a column name.
To pay a bill:
1. Click the Pay Bills icon on the Home page.
2. Select the bills you wish to pay.
3. In the Amt to Pay column, enter the amount to pay for each bill.
4. In the Account field, select the payment account.
5. Select whether to print cheques from QuickBooks, or manually assign cheque numbers (for handwritten cheques).
6. Click Pay Selected Bills.
7. Click Done.
NOTE: Click the Print Cheques icon from the Home screen to access your cheques marked Print Later
NOTES
Lesson 7 — Vendors and Payables Part 1 Vendors and Payables Part 1 — Review Questions
QuickBooks 2020 Student Guide 11
Entering and Paying Bills — Review Questions
1. You use the ____________________________ account to track money that you owe to vendors.
2. List the two steps involved in using the accounts payable features in QuickBooks:
a. ________________________________________________________________
b. ________________________________________________________________
3. True or false: When tracking accounts payable in QuickBooks, the Enter Bills window is the only place you can enter bills and vendor credits.
a. True
b. False
c.
Lesson 7 — Vendors and Payables Part 1 Review Activities
QuickBooks 2020 Student Guide 12
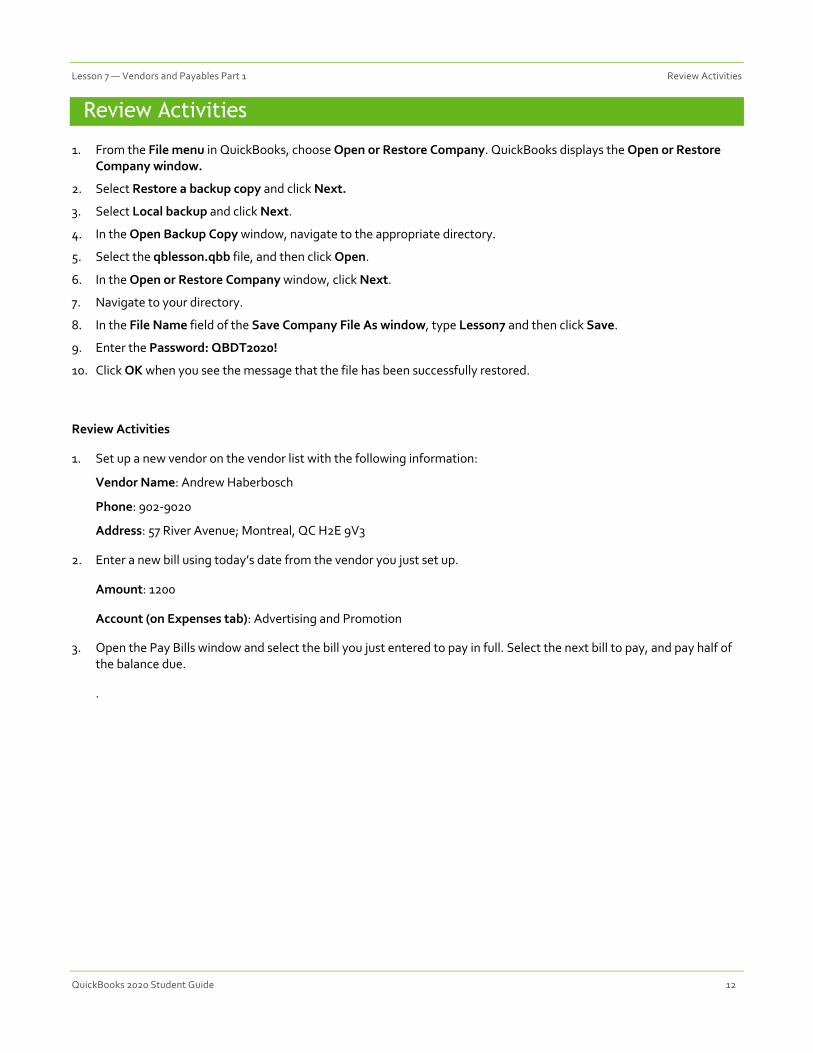
Review Activities
1. From the File menu in QuickBooks, choose Open or Restore Company. QuickBooks displays the Open or Restore Company window.
2. Select Restore a backup copy and click Next.
3. Select Local backup and click Next.
4. In the Open Backup Copy window, navigate to the appropriate directory.
5. Select the qblesson.qbb file, and then click Open.
6. In the Open or Restore Company window, click Next.
7. Navigate to your directory.
8. In the File Name field of the Save Company File As window, type Lesson7 and then click Save.
9. Enter the Password: QBDT2020!
10. Click OK when you see the message that the file has been successfully restored.
Review Activities
1. Set up a new vendor on the vendor list with the following information:
Vendor Name: Andrew Haberbosch
Phone: 902-9020
Address: 57 River Avenue; Montreal, QC H2E 9V3
2. Enter a new bill using today’s date from the vendor you just set up.
Amount: 1200
Account (on Expenses tab): Advertising and Promotion
3. Open the Pay Bills window and select the bill you just entered to pay in full. Select the next bill to pay, and pay half of the balance due.
.
Lesson 7 — Vendors and Payables Part 1 Answers to Review Questions
QuickBooks 2020 Student Guide 13
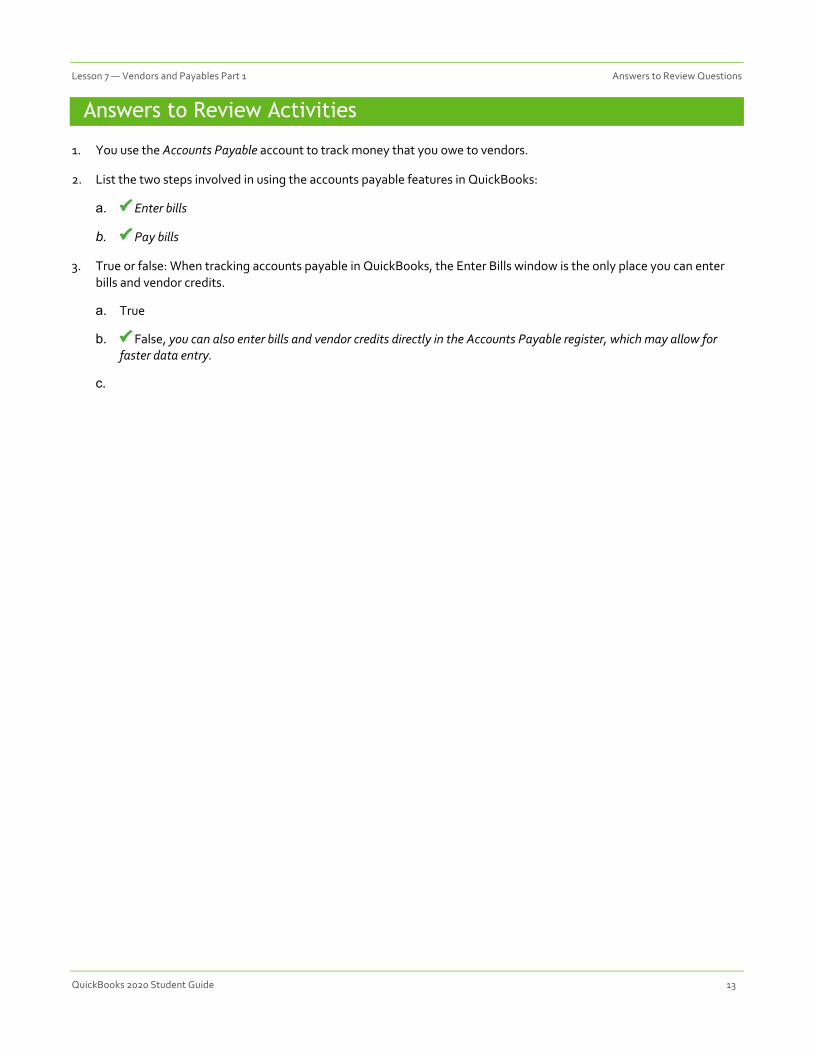
Answers to Review Activities
1. You use the Accounts Payable account to track money that you owe to vendors.
2. List the two steps involved in using the accounts payable features in QuickBooks:
a. P Enter bills
b. P Pay bills
3. True or false: When tracking accounts payable in QuickBooks, the Enter Bills window is the only place you can enter bills and vendor credits.
a. True
b. P False, you can also enter bills and vendor credits directly in the Accounts Payable register, which may allow for faster data entry.
c.