Quark 15 - Digital Publishing
25
QuarkEd 15: Digital Publishing
-
Upload
mikesmith881 -
Category
Documents
-
view
16 -
download
2
description
Quark tutorial
Transcript of Quark 15 - Digital Publishing
QuarkEd 15: Digital Publishing

Contents
Digital publishing..............................................................................315-A. Adding Blio interactivity................................................................................3
Adding a slideshow to a Blio layout................................................................................3
Adding a video to a Blio layout.......................................................................................6
Adding embedded HTML to a Blio layout......................................................................8
Adding live Web content to a Blio layout.......................................................................9
15-B. Creating a Reflow view................................................................................12
Adding pages to Reflow view.......................................................................................12
Adding items to Reflow view.........................................................................................15
Tagging content in Reflow view....................................................................................16
Adding a Blio table of contents....................................................................................18
15-C. Exporting and testing a Blio eBook.............................................................19
Exporting a Blio eBook..................................................................................................19
Testing a Blio eBook.....................................................................................................19
15-D. Exporting an ePUB e-book..........................................................................21
Adding eBook metadata...............................................................................................21
Exporting an ePUB e-book............................................................................................22
Testing an ePUB e-book................................................................................................23
Legal notices...................................................................................25
ii | QUARKED 15: DIGITAL PUBLISHING
CONTENTS

Digital publishing
The digital publishing features in QuarkXPress let you create e-books in two formats:
• eBooks for Blio® eReader
• ePUB e-books
The process of creating Blio eBooks and ePUB e-books is very similar. The main difference
is that there are some features available in the Blio eBook format that are not available in
the ePUB feature. For example, you can add various types of interactivity — including
sound, video, and slideshows — to a layout that will exported as a Blio eBook. Both formats,
however, support a viewing mode called reflow view, which makes it easy to read text.
If you export a layout as a Blio eBook, you can then sell that eBook through the Blio
bookstore, assuming you meet their publishing requirements.
If you export a layout as an ePUB e-book, you can make it available on e-readers such as
the iPad®, Sony® Reader, and NOOK®. You can also submit ePUB e-books to Amazon®
for conversion to a format that can be delivered on the Kindle®.
Prerequisites: QuarkXPress Basics.
15-A. Adding Blio interactivity
The exercises in this lesson show you how to add slideshows, video, embedded HTML,
and Web views to a layout.
Adding a slideshow to a Blio layout
In this exercise, you will open a QuarkXPress project and add a Blio slideshow to the layout.
1 Open the "15-A Blio Interactivity.qpt" file in the "Module 15" folder, and then save the
file as "EvolvedMechanics.qxp" in the "Module 15" folder.
If the Nonmatching Preferences dialog box displays when you open an exercise file, always
click Keep Project Settings.
If the Missing Fonts dialog box displays when you open an exercise file, always click
Continue.
QUARKED 15: DIGITAL PUBLISHING | 3
DIGITAL PUBLISHING

2 Go to page 6.
Page 6
3 Draw a picture box and set its coordinates and size as follows. This is the box the slideshow
will display in.
• X: .75"
• Y: .63"
• W: 5.5"
• H: 4.4"
4 | QUARKED 15: DIGITAL PUBLISHING
DIGITAL PUBLISHING
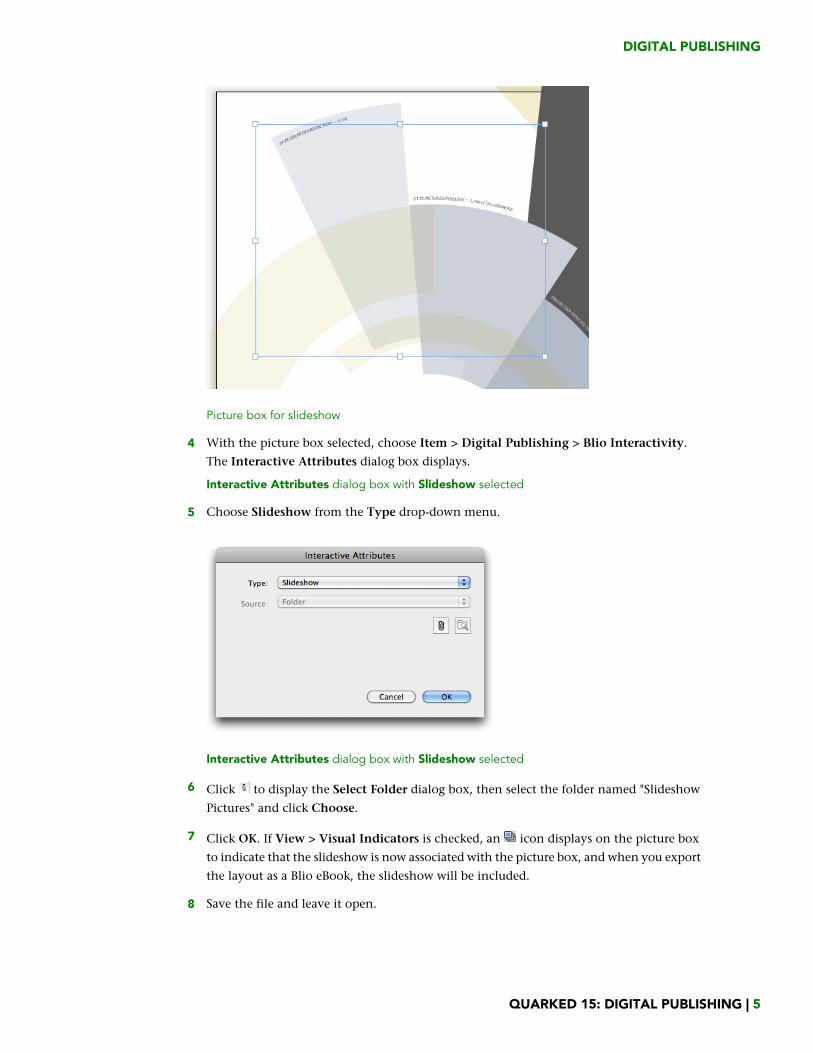
Picture box for slideshow
4 With the picture box selected, choose Item > Digital Publishing > Blio Interactivity.
The Interactive Attributes dialog box displays.
Interactive Attributes dialog box with Slideshow selected
5 Choose Slideshow from the Type drop-down menu.
Interactive Attributes dialog box with Slideshow selected
6 Click to display the Select Folder dialog box, then select the folder named "Slideshow
Pictures" and click Choose.
7 Click OK. If View > Visual Indicators is checked, an icon displays on the picture box
to indicate that the slideshow is now associated with the picture box, and when you export
the layout as a Blio eBook, the slideshow will be included.
8 Save the file and leave it open.
QUARKED 15: DIGITAL PUBLISHING | 5
DIGITAL PUBLISHING

If you want a picture to display where the picture box is during the short amount of time
it takes for the slideshow to display, you can import a picture into the picture box. The
slideshow will display in front of it.
Adding a video to a Blio layout
In this exercise, you will add a video to the Blio layout.
1 Go to page 4.
Page 4
2 Draw a picture box and set its coordinates and size as follows. This is the box the video
will display in.
• X: 1.5"
• Y: 5.205"
• W: 5"
• H: 3.795"
6 | QUARKED 15: DIGITAL PUBLISHING
DIGITAL PUBLISHING

Picture box for video
3 With the picture box selected, choose Item > Digital Publishing > Blio Interactivity.
The Interactive Attributes dialog box displays.
4 Choose Video from the Type drop-down menu.
Interactive Attributes dialog box with Video selected
5 Click to display the Select Video dialog box, then select the file named
"EvolvedMechanics.mp4" and click Choose.
6 Click OK. If View > Visual Indicators is checked, an icon displays on the picture box
to indicate that the video is now associated with the picture box, and when you export
the layout as a Blio eBook, the video will be included.
7 Save the file and leave it open.
If you want a picture to display where the picture box is during the short amount of time
it takes for the video to display, you can import a picture into the picture box. The video
will display in front of it.
QUARKED 15: DIGITAL PUBLISHING | 7
DIGITAL PUBLISHING

Adding embedded HTML to a Blio layout
In this exercise, you will add an embedded Web page to the Blio layout.
1 Go to page 6.
2 Draw a picture box and set its coordinates and size as follows. This is the box the HTML
will display in.
• X: .75"
• Y: 6"
• W: 5.5"
• H: 2.5"
Picture box for HTML
3 With the picture box selected, choose Item > Digital Publishing > Blio Interactivity.
The Interactive Attributes dialog box displays.
4 Choose Embedded HTML from the Type drop-down menu.
5 Click to display the Select HTML dialog box. Open the folder named "Web Content,"
select the file named "index.htm" and click Open.
6 Make sure the Export Entire Parent Folder box is checked. This ensures that all files in
the "Web Content" are included when you export the layout.
8 | QUARKED 15: DIGITAL PUBLISHING
DIGITAL PUBLISHING

Interactive Attributes dialog box with Embedded HTML selected
7 Click OK. If View > Visual Indicators is checked, an icon displays on the picture box
to indicate that the HTML file is now associated with the picture box, and when you export
the layout as a Blio eBook, the HTML file and the rest of the files in its folder will be
included.
8 Save the file and leave it open.
If you want a picture to display where the picture box is during the short amount of time
it takes for the HTML to display, you can import a picture into the picture box. The HTML
will display in front of it.
Adding live Web content to a Blio layout
In this exercise, you will add a URL that points to a Web page to the Blio layout.
1 Go to page 9.
QUARKED 15: DIGITAL PUBLISHING | 9
DIGITAL PUBLISHING

Page 9
2 Draw a picture box and set its coordinates and size as follows. This is the box the HTML
will display in.
• X: 2"
• Y: 1.75"
• W: 4.5"
• H: 3.3"
10 | QUARKED 15: DIGITAL PUBLISHING
DIGITAL PUBLISHING

Picture box for URL
3 With the picture box selected, choose Item > Digital Publishing > Blio Interactivity.
The Interactive Attributes dialog box displays.
4 Choose URL from the Type drop-down menu.
5 Enter http://en.wikipedia.org/wiki/Robot in the URL field.
Interactive Attributes dialog box with URL selected
6 Click OK. If View > Visual Indicators is checked, an icon displays on the picture box
to indicate that the URL file is now associated with the picture box. When you view this
page of the exported eBook in the Blio eReader, the Web content will display in this box.
7 Save the file and leave it open.
QUARKED 15: DIGITAL PUBLISHING | 11
DIGITAL PUBLISHING
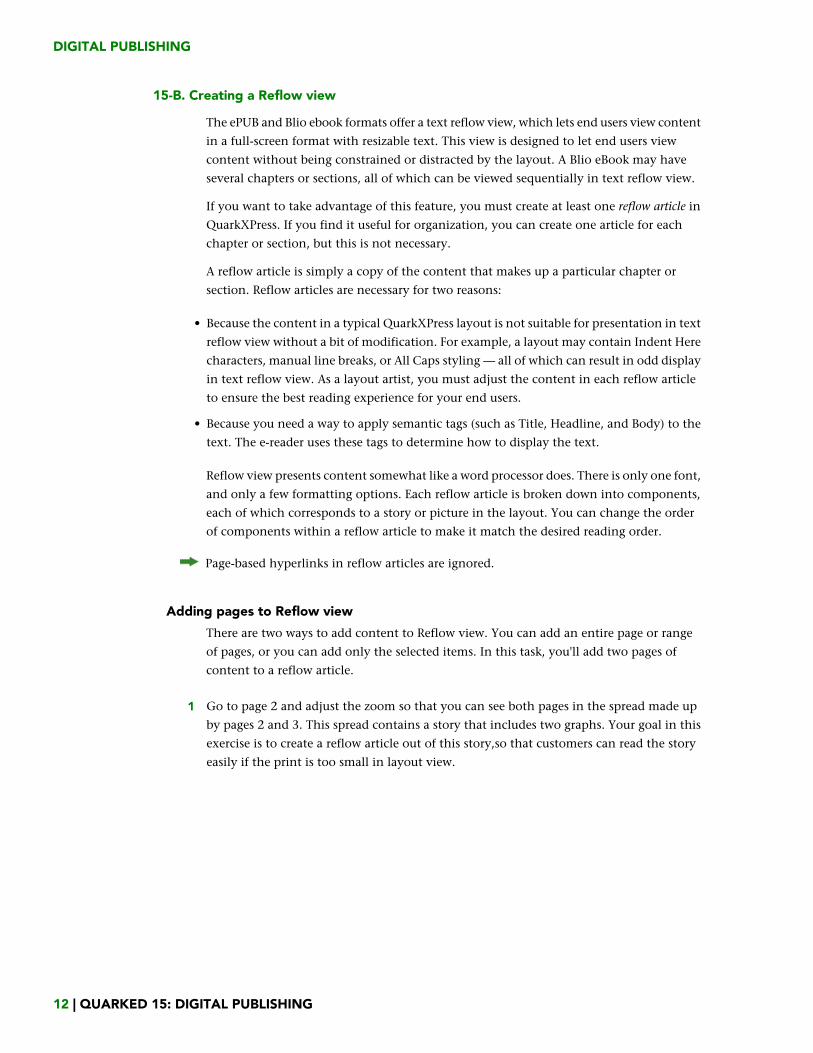
15-B. Creating a Reflow view
The ePUB and Blio ebook formats offer a text reflow view, which lets end users view content
in a full-screen format with resizable text. This view is designed to let end users view
content without being constrained or distracted by the layout. A Blio eBook may have
several chapters or sections, all of which can be viewed sequentially in text reflow view.
If you want to take advantage of this feature, you must create at least one reflow article in
QuarkXPress. If you find it useful for organization, you can create one article for each
chapter or section, but this is not necessary.
A reflow article is simply a copy of the content that makes up a particular chapter or
section. Reflow articles are necessary for two reasons:
• Because the content in a typical QuarkXPress layout is not suitable for presentation in text
reflow view without a bit of modification. For example, a layout may contain Indent Here
characters, manual line breaks, or All Caps styling — all of which can result in odd display
in text reflow view. As a layout artist, you must adjust the content in each reflow article
to ensure the best reading experience for your end users.
• Because you need a way to apply semantic tags (such as Title, Headline, and Body) to the
text. The e-reader uses these tags to determine how to display the text.
Reflow view presents content somewhat like a word processor does. There is only one font,
and only a few formatting options. Each reflow article is broken down into components,
each of which corresponds to a story or picture in the layout. You can change the order
of components within a reflow article to make it match the desired reading order.
Page-based hyperlinks in reflow articles are ignored.
Adding pages to Reflow view
There are two ways to add content to Reflow view. You can add an entire page or range
of pages, or you can add only the selected items. In this task, you'll add two pages of
content to a reflow article.
1 Go to page 2 and adjust the zoom so that you can see both pages in the spread made up
by pages 2 and 3. This spread contains a story that includes two graphs. Your goal in this
exercise is to create a reflow article out of this story,so that customers can read the story
easily if the print is too small in layout view.
12 | QUARKED 15: DIGITAL PUBLISHING
DIGITAL PUBLISHING

Pages 2-3
2 Choose Layout > Add Pages to Reflow View. The Add Pages to Reflow dialog box displays.
Add Pages to Reflow dialog box
3 Click From, enter 2 in the first field and 3 in the second field, and then click OK.
QuarkXPress adds the contents of the two pages to a new reflow article.
4 To view the reflow article, choose View > Reflow View. The reflow article displays in a
new window, and the Reflow Tagging palette displays.
QUARKED 15: DIGITAL PUBLISHING | 13
DIGITAL PUBLISHING

A new reflow article
What you see here is a reflow article that consists of several components. The main story
is one component, each graph is a component, each graph caption is a component, and
the headline is a component. In the main window, each component displays as a collapsible
section in the article. In the Reflow Tagging palette, the article displays at the top (New
Article), and each component displays beneath it.
You'll probably notice two things that are wrong:
• The components are in the wrong order. This is because QuarkXPress doesn't know what
order the components should be in until you tell it.
• There are a couple of extra componnetns at the bottom of the list. These components
represent the boxes that contain the page numbers and the text "A REMARKABLE YEAR"
on the sides.
The point of this exercise is that the Layout > Add Pages to Reflow View command can
be useful if you have several pages of content you want to quickly convert to a reflow
article, but you have to be careful because it copies everything on the page into reflow
view. In the next exercise, we'll look at a different way to add content to Reflow view.
5 To delete this reflow article, click the article name (New Article) at the top of the Reflow
Tagging palette, then click Delete Item . The reflow article is deleted and focus returns
to the layout.
6 Save the file and leave it open.
14 | QUARKED 15: DIGITAL PUBLISHING
DIGITAL PUBLISHING

Adding items to Reflow view
In this exercise, we'll add only the items we want to Reflow view.
1 Select the headline box, the boxes that contain the story, and the graphics and their
captions. Do not select the page numbers and the boxes that contain the text "A
REMARKABLE YEAR" on the sides.
2 Choose Item > Digital Publishing > Add to Reflow View > New Article.
3 Choose View > Reflow View to display the reflow article. This time, only the components
we wanted have been added to the reflow article.
4 The order of the components depends on the order in which you selected the items they
came from, but it's likely that the components are in the wrong order. To fix this, select
the components in the Reflow Tagging palette and move them up and down in the list
with the up and down arrow buttons at the top of the palette until they look like this:
Properly ordered components in the Reflow Tagging palette
5 The last thing we want to do is split the story so that one of the graphs can display in the
middle of it. To do this, we'll create a new component and then move hallf of the story
into that new component. To begin, click New Component in the Reflow Tagging
palette. An empty component is added to the end of the reflow article.
6 Use the up and down arrows in the Reflow Tagging palette to move the new component
up above the component named Graph_02.jpg.
QUARKED 15: DIGITAL PUBLISHING | 15
DIGITAL PUBLISHING

New component in the proper position in the Reflow Tagging palette
7 In the main reflow window, select all of the text from "Syrtes Lucide Suffragarit" to the
end of the story and choose Edit > Cut.
8 In the main reflow window, click in the new component. It should be named New
Article:Component 7.
New component in the main reflow window
9 Choose Edit > Paste. The content in the reflow article is now in the order you want it to
be in.
10 Save the file and leave it open.
Tagging content in Reflow view
Text in Reflow view cannot be formatted with specific fonts and sizes, because the font
and size used to view that text is determined by the device where it is being viewed.
However, you can control the display of text to a certain degree by tagging it according
to what kind of text it is. For example, if you tag a paragraph as a Headline, the device will
most likely display that paragraph in a large, bold font. You can also apply limited type
styling (for example, bold, italic, and underlining).
In this exercise, you will use tagging to indicate what type of text each paragraph is.
1 Scroll to the top of the main reflow window and select all of the text in the first component.
If you look at the bottom half of the Reflow Tagging palette, you can see that this
component has been tagged as Body, and that bold and italic have been applied to it.
16 | QUARKED 15: DIGITAL PUBLISHING
DIGITAL PUBLISHING

Tagging applied to the first component
2 To remove the bold and italic from the headline, click the bold and italic buttons in the
Reflow Tagging palette.
3 To tag the headline as a headline, click Headline in the Reflow Tagging palette.
Tagging applied to the first component
4 To tag the story's byline as a byline, select the first paragraph in the next component, click
Byline (Author) in the Reflow Tagging palette, and then remove the italic formatting
from that paragraph's text.
Tagging applied to the byilne in the second component
QUARKED 15: DIGITAL PUBLISHING | 17
DIGITAL PUBLISHING

5 The story contains three subheads, which are currently bold. Tag these as Headline 2 and
remove the bold from them.
6 Remove the italic formatting from the two caption components and tag them as Figure
Caption.
7 Save the file and leave it open.
Changes you make to content in Reflow view do not change anything about the
corresponding content in layout view. In fact, if you wanted to, you could make the content
in Reflow view completely different from the content in Layout view.
What happens if you need to do a major rewrite of the content in the layout? After you
do, you can Control+click/right-click on the item in layout view, then choose Digital
Publishing > Replace Content in Reflow View. Just be aware that if you do this, you'll
have to redo any manual tagging and editing you added in Reflow view.
Adding a Blio table of contents
If you want to make it easy for your customers to navigate the various parts of your eBook,
you must add a table of contents. A Blio table of contents is very simple — essentially it's
just a list of section names and page numbers. To create a Blio table of contents:
1 Choose View > Layout View to switch to the layout view window.
2 Choose Window > Blio Table of Contents. The Blio Table of Contents palette displays.
3 Click Add at the top of the palette. The Add Title dialog box displays.
4 Enter Main Article in the Title field and 2 in the Page Index field. Note that the Page
Index field accepts only absolute page numbers.
Add Title dialog box
5 Click OK.
6 Add three more entries: Features on page 4, Growth on page 6, and Robots on page 8.
When you're done, the palette should look like this.
18 | QUARKED 15: DIGITAL PUBLISHING
DIGITAL PUBLISHING

The final table of contents
7 Save the file and leave it open.
15-C. Exporting and testing a Blio eBook
Once you've finished preparing a layout for Blio export, the next step is to export and test
the Blio eBook.
Exporting a Blio eBook
To export the Evolved Mechanics layout you've prepared as a Blio eBook:
1 Choose File > Export > Layout as Blio eBook. The Export as Blio eBook dialog box
displays.
2 In the Save As field, enter EvolvedMechanics.xps.
3 Navigate to the desktop and click Save. If a dialog box displays, indicating that some of
the pictures or interactive resources in the layout are missing or modified, it probably
means your project file is not in the "Module 15" folder. Click Cancel, save the QuarkXPress
project file to the "Module 15" folder, and then start this task over.
4 Save and close the QuarkXPress project.
Testing a Blio eBook
Once you've exported your eBook, the next step is to test it in the Blio eReader. To do so:
1 Download the Blio eReader from the Blio Web site at http://blio.com and install it on a
computer. (Note that at the time of this writing, the Blio eReader is available for Windows,
but not for Mac OS.)
2 Launch the Blio eReader.
QUARKED 15: DIGITAL PUBLISHING | 19
DIGITAL PUBLISHING
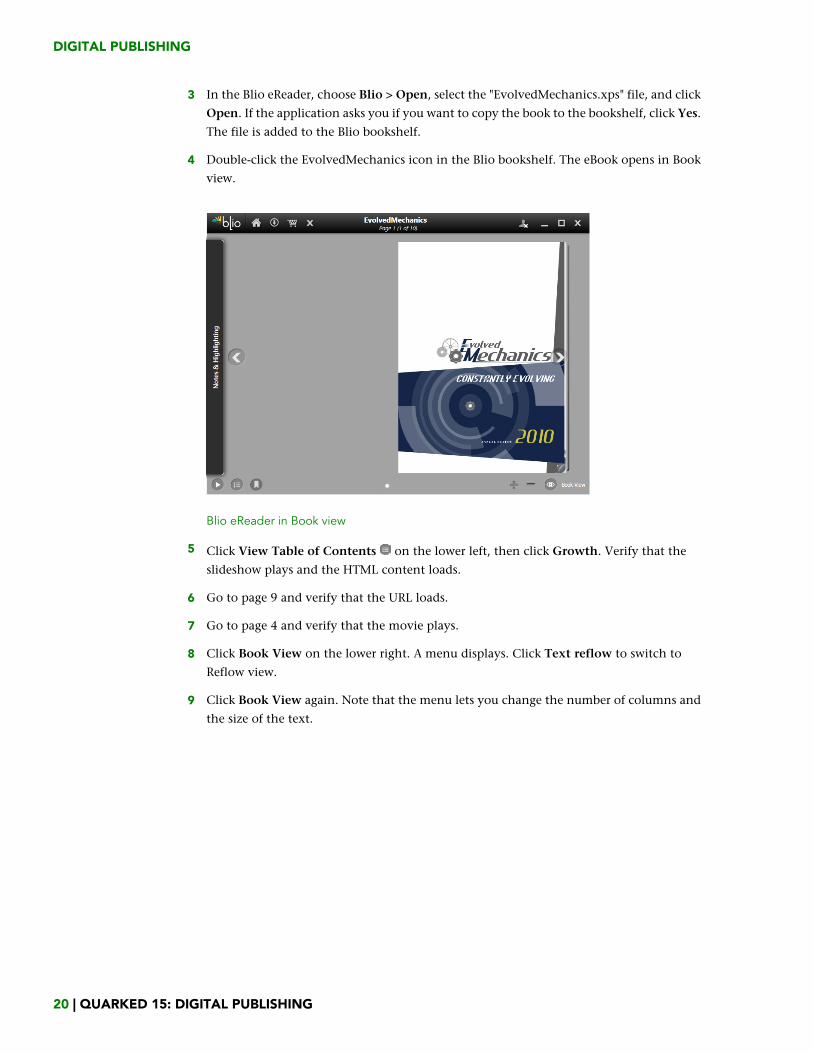
3 In the Blio eReader, choose Blio > Open, select the "EvolvedMechanics.xps" file, and click
Open. If the application asks you if you want to copy the book to the bookshelf, click Yes.
The file is added to the Blio bookshelf.
4 Double-click the EvolvedMechanics icon in the Blio bookshelf. The eBook opens in Book
view.
Blio eReader in Book view
5 Click View Table of Contents on the lower left, then click Growth. Verify that the
slideshow plays and the HTML content loads.
6 Go to page 9 and verify that the URL loads.
7 Go to page 4 and verify that the movie plays.
8 Click Book View on the lower right. A menu displays. Click Text reflow to switch to
Reflow view.
9 Click Book View again. Note that the menu lets you change the number of columns and
the size of the text.
20 | QUARKED 15: DIGITAL PUBLISHING
DIGITAL PUBLISHING

Blio Book View menu
10 Quit Blio eReader. Your eBook is ready to go.
15-D. Exporting an ePUB e-book
An ePUB e-book contains a reflow view but no layout view. This section explains how to
create, export, and test an ePUB e-book.
Adding eBook metadata
Most ePUB e-book readers display a certain amount of information about each e-book
without requiring the reader to open the e-book. This information is referred to as metadata.
To add metadata to a layout that you plan to export as an ePUB e-book:
1 Open the "15-D Coffee.qpt" file in the "Module 15" folder, and then save the file as
"Coffee.qxp" in the "Module 15" folder.
If the Nonmatching Preferences dialog box displays when you open an exercise file, always
click Keep Project Settings.
If the Missing Fonts dialog box displays when you open an exercise file, always click
Continue.
2 Choose Layout > eBook Metadata. The eBook Metadata dialog box displays.
QUARKED 15: DIGITAL PUBLISHING | 21
DIGITAL PUBLISHING

eBook Metadata dialog box
3 Note that most of the fields are already filled out. All you need to do is supply a title. Enter
All About Coffee in the Title field, then click OK.
4 Save the file and leave it open.
Exporting an ePUB e-book
The ePUB format supports only Reflow view. Consequently, a layout must have at least
one reflow article before you can export it in ePUB format.
Reflow view works the same way for ePUB e-books as it does for Blio eBooks. Consequently,
we won't cover it again here. For information on how to create reflow articles, see "15-B.
Creating a Reflow view."
In this exercise, you will open a layout with an existing reflow article and export that
layout as an ePUB e-book.
1 If the Reflow Tagging palette is not displayed, choose Window > Reflow Tagging to
display it. Note that this layout has already been tagged for reflow view.
22 | QUARKED 15: DIGITAL PUBLISHING
DIGITAL PUBLISHING

Reflow Tagging palette with existing reflow articles
2 Choose File > Export > Layout as ePub. The Export as ePUB dialog box displays.
Export as ePUB dialog box
3 To have QuarkXPress automatically create a table of contents, check Create Table Of
Contents. The table of contents will contain one entry for each reflow article in the layout.
4 Navigate to the desktop and click OK. If an alert displays, indicating that some tagged
pictures are missing or modified, click OK. The file is saved.
5 Save and close the QuarkXPress project.
Testing an ePUB e-book
To test an ePUB e-book, you need an ePUB reader. There are quite a few of these available.
If you have an iPad, you can add the ePUB file to your iBooks library in iTunes, sync the
iPad book collection with the iPad, and test it on the iPad. For information on how to
QUARKED 15: DIGITAL PUBLISHING | 23
DIGITAL PUBLISHING

view ePUB content in the Firefox Web browser, see
https://addons.mozilla.org/en-us/firefox/addon/epubreader/. Whichever ePUB reader you use,
you should be able to view the contents of the "Coffee.epub" file.
24 | QUARKED 15: DIGITAL PUBLISHING
DIGITAL PUBLISHING

Legal notices
© 1986-2011 Quark, Inc. and its licensors. All rights reserved.
Protected by the following United States Patents: 5,541,991; 5,907,704; 6,005,560;
6,052,514; 6,081,262; 6,633,666 B2; 6,947,959 B1; 6,940,518 B2; 7,116,843; and other
patents pending.
Quark, the Quark logo, QuarkXPress, QuarkCopyDesk, Quark Publishing System, and QPS
are trademarks or registered trademarks of Quark, Inc. and its affiliates in the U.S. and/or
other countries. All other marks are the property of their respective owners.
QUARKED 15: DIGITAL PUBLISHING | 25
LEGAL NOTICES