primary solutions 5 - David and Torben for D&T small tasks the focused practical tasks the big task...
31
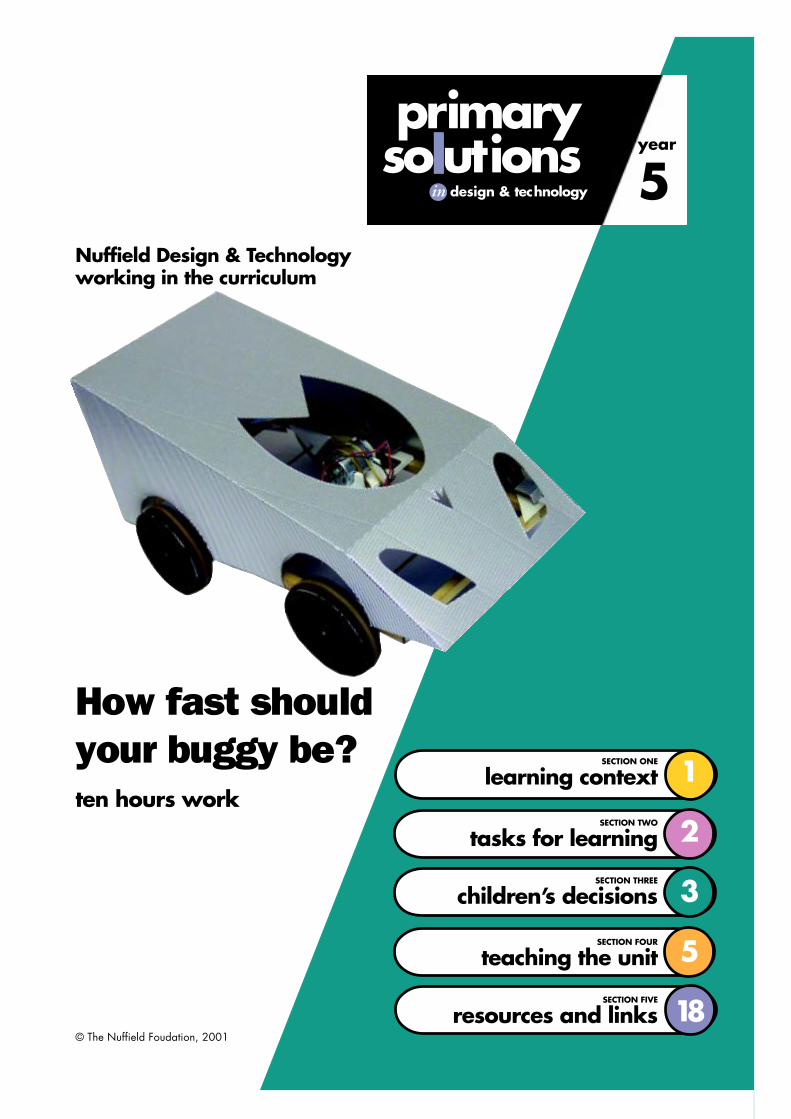
Nuffield Design & Technology working in the curriculum How fast should your buggy be? ten hours work SECTION ONE learning context SECTION TWO tasks for learning SECTION THREE children’s decisions SECTION FOUR teaching the unit SECTION FIVE resources and links 1 2 3 5 18 primary year 5 solutions in design & technology © The Nuffield Foudation, 2001
-
Upload
doankhuong -
Category
Documents
-
view
214 -
download
0
Transcript of primary solutions 5 - David and Torben for D&T small tasks the focused practical tasks the big task...
Nuffield Design & Technologyworking in the curriculum
How fast shouldyour buggy be?ten hours work
SECTION ONE
learning context
SECTION TWO
tasks for learning
SECTION THREE
children’s decisions
SECTION FOUR
teaching the unit
SECTION FIVE
resources and links
1
2
3
5
18
primaryyear
5solutions in design & technology
© The Nuffield Foudation, 2001

SECTION 1
learning context
1
design context
learning purposes
Most children enjoy playing with toyvehicles of one sort or another fromsimple push-along toys when they areyoung to radio-controlled racers whenthey are older. In this unit the children inyour class are able to design and make abattery-powered toy vehicle forthemselves or for slightly youngerchildren. While not as sophisticated as aradio-controlled toy, it represents arealistic technical challenge to which theyare likely to respond enthusiastically. Thetoy can be based on an actual vehicle,on a vehicle from a book or film, or it canbe a fantasy vehicle developed from thechildren’s imagination. The appearanceof the vehicle should appeal to the groupor individual who will use it, but whateverthe final form of the toy it must have thebasic elements of control – an on/offswitch with which to control forwardmovement. The context can be extendedto develop other control features –backward movement as well as forward,fast and slow travelling speeds, lightingand sound effects.
In this unit children will learn:
t to develop their ideas throughsketching and working with technicalcomponents, wooden strip, paper,card and found materials;
(Sessions 1, 2 and 4)
t to develop their designs by thinkingabout the purpose of the toy and theneeds of possible users;
(Session 1)
t to mark, measure, cut and joinmaterials with increasing accuracy;
(Sessions 2–5)
t to use a variety of tools with precisionand care;
(Sessions 2, 3, 6 and 7)
t to use simple mechanisms to provide atransmission system;
(Sessions 4, 6 and 7)
t to use simple electrical circuits tooperate motors, lights and buzzers.
(Sessions 4, 6 and 7)
the small tasksthe focused practical tasks
the big taskthe design and make task
2
1 Exploring moving toys30 minutes
2 Making a simple picture frame60 minutes
3 Making spinning tops60 minutes
4 Exploring technical systems90 minutes
5 Exploring networks and surfacedecoration
60 minutes
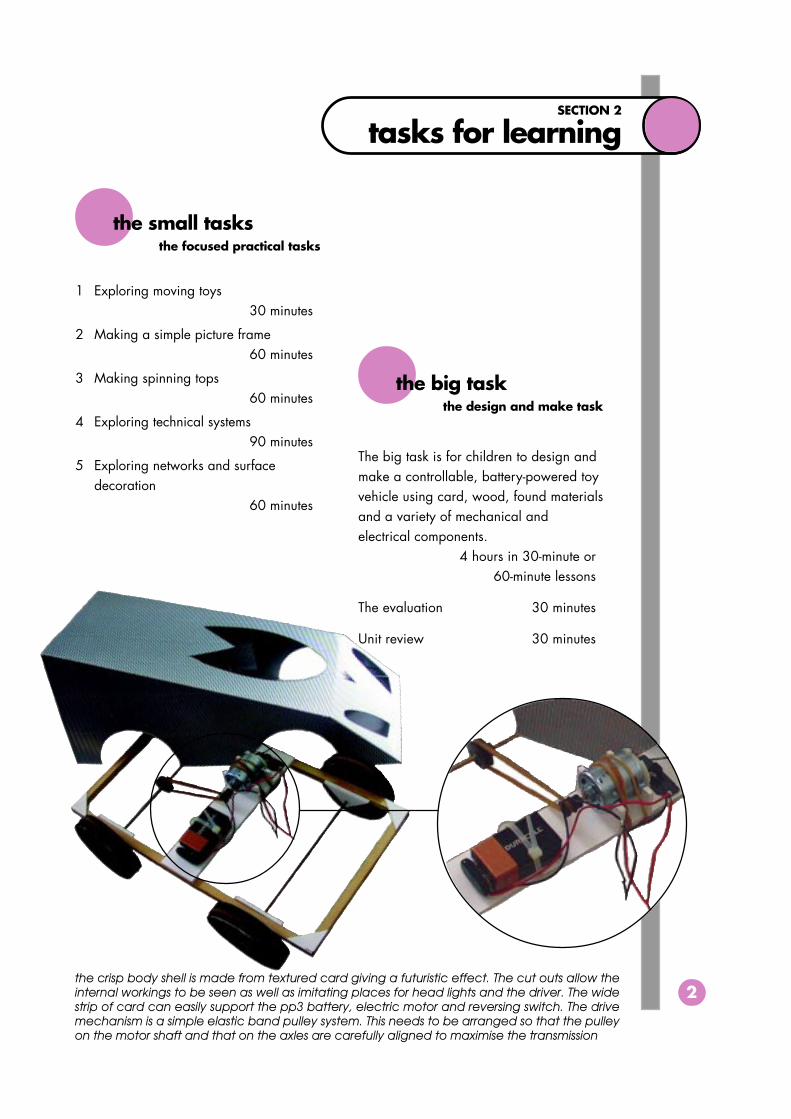
The big task is for children to design andmake a controllable, battery-powered toyvehicle using card, wood, found materialsand a variety of mechanical andelectrical components.
4 hours in 30-minute or60-minute lessons
The evaluation 30 minutes
Unit review 30 minutes
SECTION 2
tasks for learning
the crisp body shell is made from textured card giving a futuristic effect. The cut outs allow theinternal workings to be seen as well as imitating places for head lights and the driver. The widestrip of card can easily support the pp3 battery, electric motor and reversing switch. The drivemechanism is a simple elastic band pulley system. This needs to be arranged so that the pulleyon the motor shaft and that on the axles are carefully aligned to maximise the transmission
SECTION 3
children’s decisions
design decisions
3
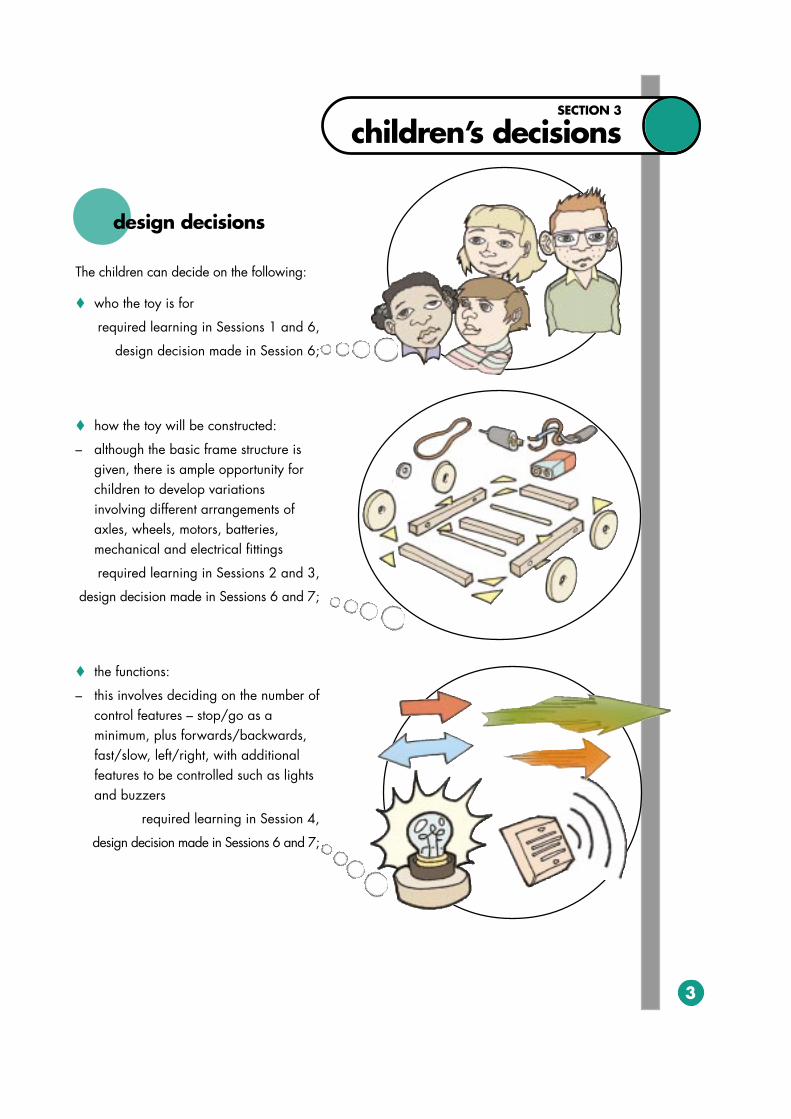
The children can decide on the following:
t who the toy is for
required learning in Sessions 1 and 6,
design decision made in Session 6;
t how the toy will be constructed:
– although the basic frame structure isgiven, there is ample opportunity forchildren to develop variationsinvolving different arrangements ofaxles, wheels, motors, batteries,mechanical and electrical fittings
required learning in Sessions 2 and 3,
design decision made in Sessions 6 and 7;
t the functions:
– this involves deciding on the number ofcontrol features – stop/go as aminimum, plus forwards/backwards,fast/slow, left/right, with additionalfeatures to be controlled such as lightsand buzzers
required learning in Session 4,
design decision made in Sessions 6 and 7;
SECTION 3
children’s decisions
design decisions
4
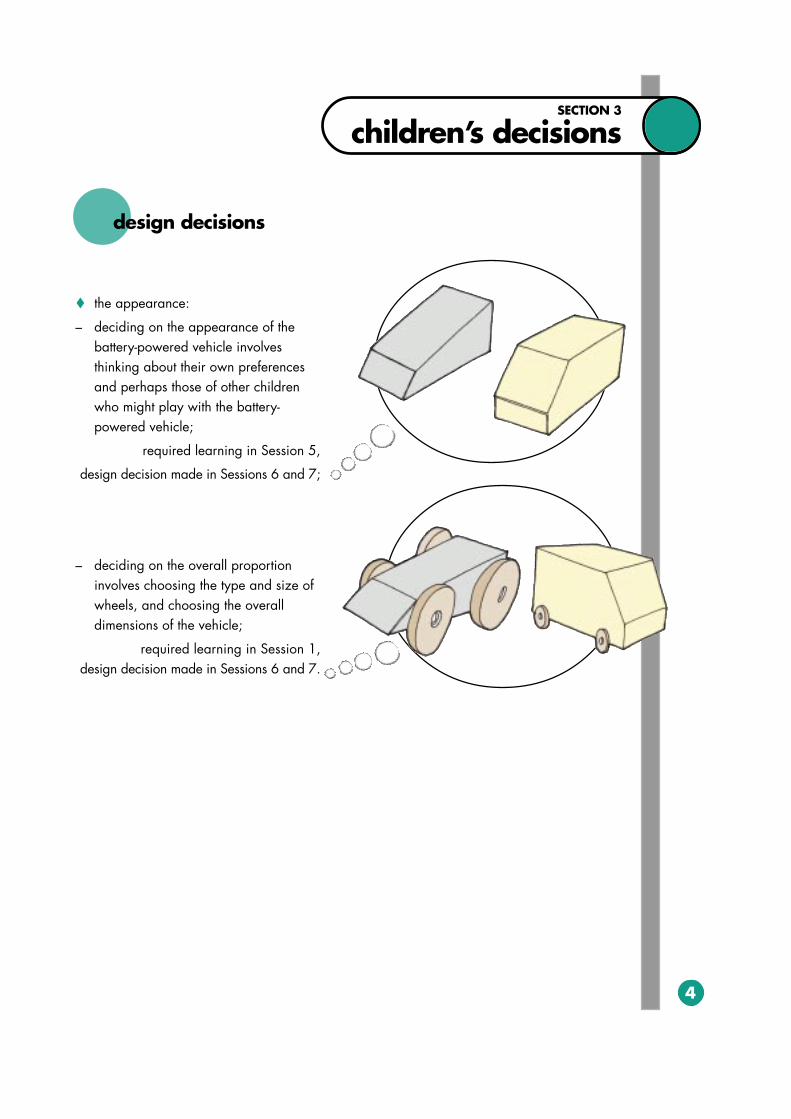
t the appearance:
– deciding on the appearance of thebattery-powered vehicle involvesthinking about their own preferencesand perhaps those of other childrenwho might play with the battery-powered vehicle;
required learning in Session 5,
design decision made in Sessions 6 and 7;
– deciding on the overall proportioninvolves choosing the type and size ofwheels, and choosing the overalldimensions of the vehicle;
required learning in Session 1,design decision made in Sessions 6 and 7.
exploring moving toys
5
suggested timing30 mins
sessionone
Teacher input
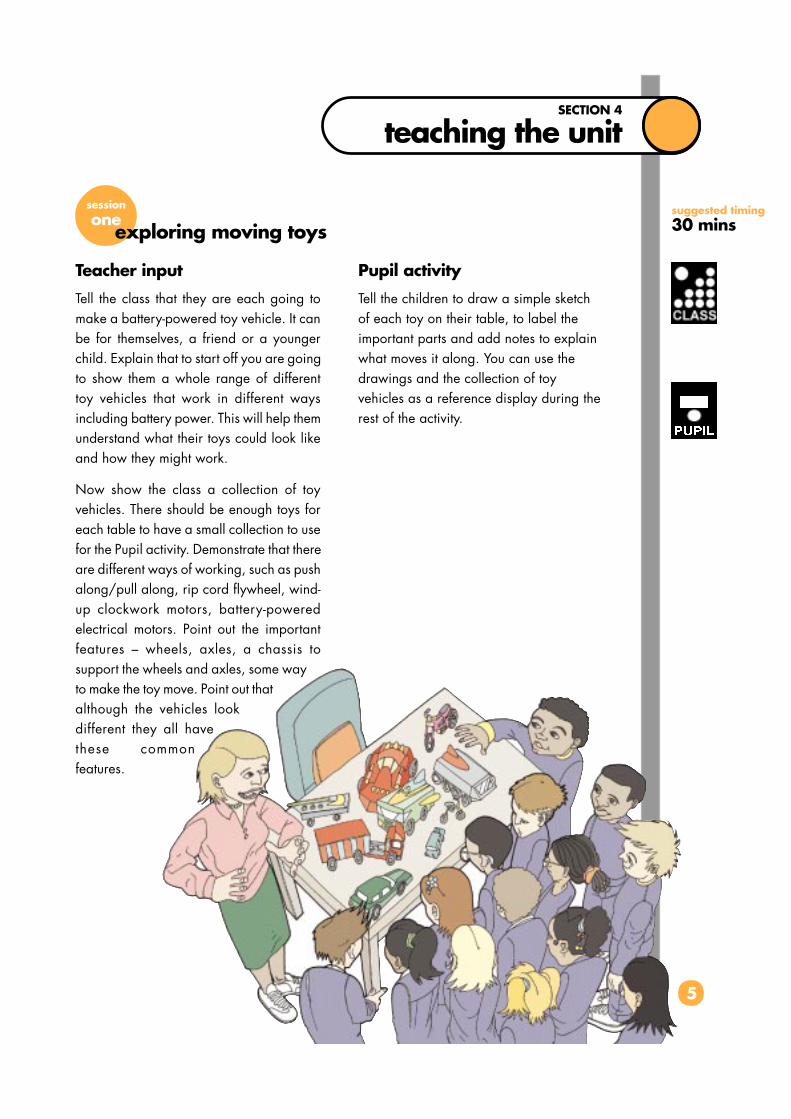
Tell the class that they are each going tomake a battery-powered toy vehicle. It canbe for themselves, a friend or a youngerchild. Explain that to start off you are goingto show them a whole range of differenttoy vehicles that work in different waysincluding battery power. This will help themunderstand what their toys could look likeand how they might work.
Now show the class a collection of toyvehicles. There should be enough toys foreach table to have a small collection to usefor the Pupil activity. Demonstrate that thereare different ways of working, such as pushalong/pull along, rip cord flywheel, wind-up clockwork motors, battery-poweredelectrical motors. Point out the importantfeatures – wheels, axles, a chassis tosupport the wheels and axles, some wayto make the toy move. Point out thatalthough the vehicles lookdifferent they all havethese commonfeatures.
Pupil activity
Tell the children to draw a simple sketchof each toy on their table, to label theimportant parts and add notes to explainwhat moves it along. You can use thedrawings and the collection of toyvehicles as a reference display during therest of the activity.
SECTION 4
teaching the unit
6
sessionone
exploring moving toys (continued)
Teacher input
Tell the children that they will have todecide on the following:
t who the toy vehicle is for;
t what it should look like;
t what it should do.
They should write down suggestions forthis although this is not a final decision asthere are things they need to find out andlearn before they can decide for sure.
Resources
Stimulus: a variety of different types of moving, wheeled and battery-powered vehicles;
Consumables: paper;
Tools: pencils and rubbers.
Health and safety check
Discuss the hazards and risks involved in working as a group and handling other people’s propertyand how the risks can be controlled by the way the children behave and treat the items on display.
Homework
Each child should try to find out what thepossible user of the toy vehicle might like.This could involve posing the questions tothemselves or the person who will be usingthe toy. Ask every child to bring in afavourite postcard or small picture that theywill be able to frame next session.
SECTION 4
teaching the unit
SECTION 4
teaching the unit
sessiontwo
7
suggested timing60 minsmaking a simple picture frame
Teacher input
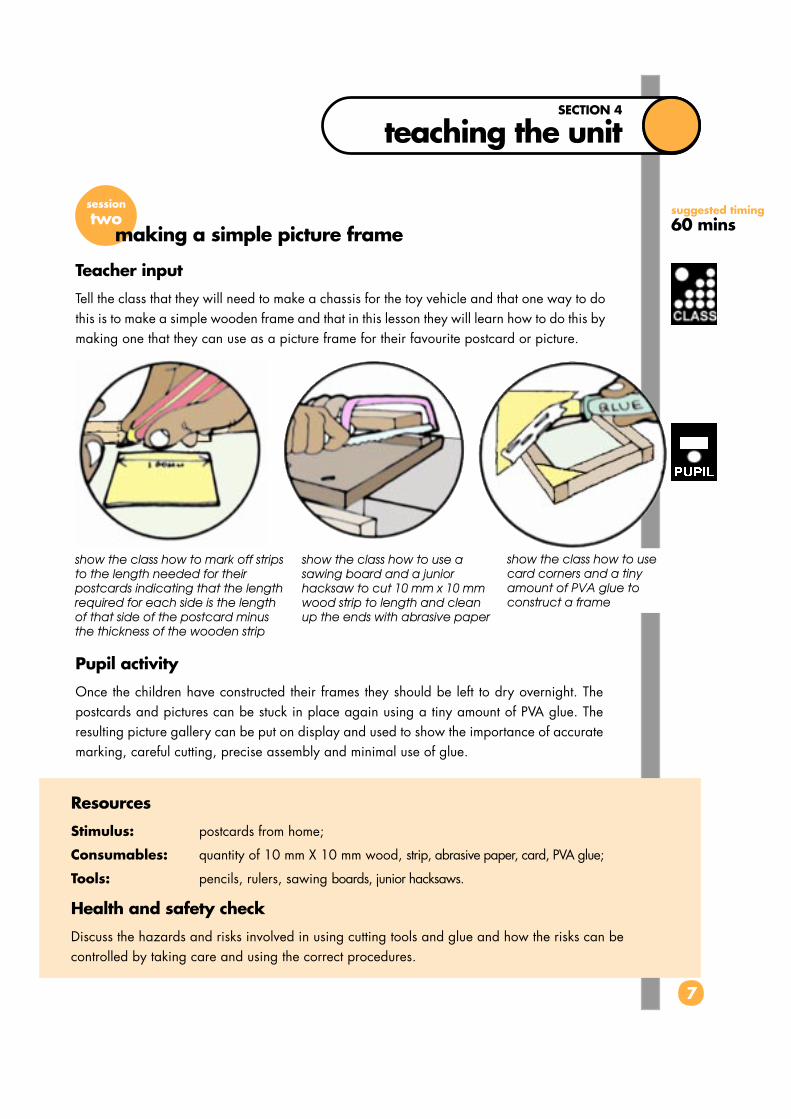
Tell the class that they will need to make a chassis for the toy vehicle and that one way to dothis is to make a simple wooden frame and that in this lesson they will learn how to do this bymaking one that they can use as a picture frame for their favourite postcard or picture.
Pupil activity
Once the children have constructed their frames they should be left to dry overnight. Thepostcards and pictures can be stuck in place again using a tiny amount of PVA glue. Theresulting picture gallery can be put on display and used to show the importance of accuratemarking, careful cutting, precise assembly and minimal use of glue.
show the class how to use asawing board and a juniorhacksaw to cut 10 mm x 10 mmwood strip to length and cleanup the ends with abrasive paper
show the class how to usecard corners and a tinyamount of PVA glue toconstruct a frame
show the class how to mark off stripsto the length needed for theirpostcards indicating that the lengthrequired for each side is the lengthof that side of the postcard minusthe thickness of the wooden strip
Resources
Stimulus: postcards from home;
Consumables: quantity of 10 mm X 10 mm wood, strip, abrasive paper, card, PVA glue;
Tools: pencils, rulers, sawing boards, junior hacksaws.
Health and safety check
Discuss the hazards and risks involved in using cutting tools and glue and how the risks can becontrolled by taking care and using the correct procedures.
SECTION 4
teaching the unit
sessionthree
8
making spinning topssuggested timing60 mins
Teacher input
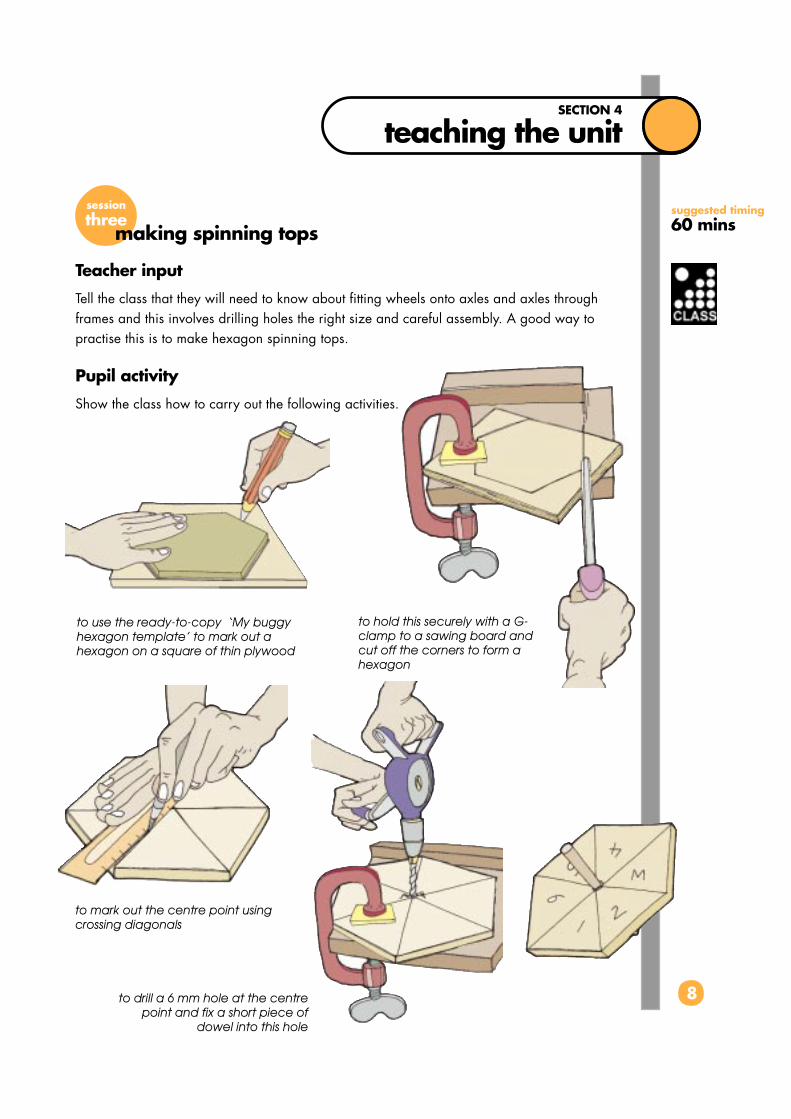
Tell the class that they will need to know about fitting wheels onto axles and axles throughframes and this involves drilling holes the right size and careful assembly. A good way topractise this is to make hexagon spinning tops.
Pupil activity
Show the class how to carry out the following activities.
to use the ready-to-copy ‘My buggyhexagon template’ to mark out ahexagon on a square of thin plywood
to hold this securely with a G-clamp to a sawing board andcut off the corners to form ahexagon
to mark out the centre point usingcrossing diagonals
to drill a 6 mm hole at the centrepoint and fix a short piece of
dowel into this hole
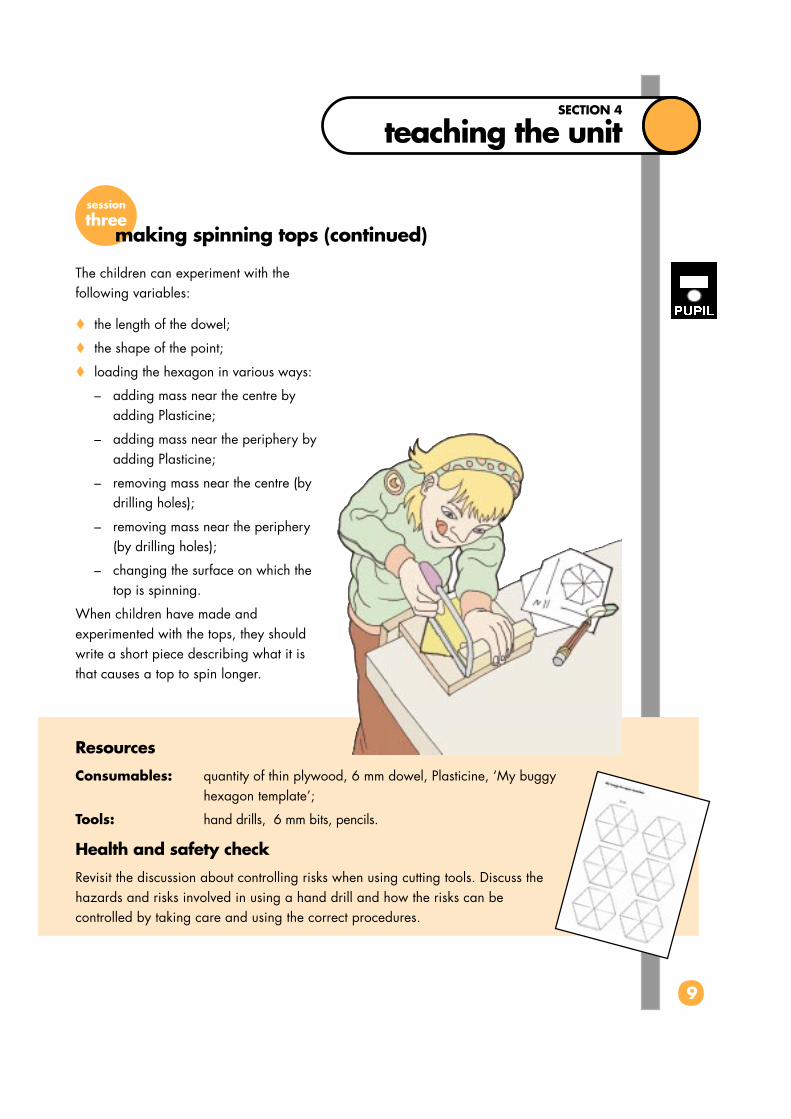
The children can experiment with thefollowing variables:
t the length of the dowel;
t the shape of the point;
t loading the hexagon in various ways:
– adding mass near the centre byadding Plasticine;
– adding mass near the periphery byadding Plasticine;
– removing mass near the centre (bydrilling holes);
– removing mass near the periphery(by drilling holes);
– changing the surface on which thetop is spinning.
When children have made andexperimented with the tops, they shouldwrite a short piece describing what it isthat causes a top to spin longer.
SECTION 4
teaching the unit
sessionthree
9
making spinning tops (continued)
Resources
Consumables: quantity of thin plywood, 6 mm dowel, Plasticine, ‘My buggyhexagon template’;
Tools: hand drills, 6 mm bits, pencils.
Health and safety check
Revisit the discussion about controlling risks when using cutting tools. Discuss thehazards and risks involved in using a hand drill and how the risks can becontrolled by taking care and using the correct procedures.

exploring technical systemssuggested timing1.5 hours(or 3 x 30mins)
sessionfour
SECTION 4
teaching the unit
Teacher input
Tell the class that there are three differentstations in the room with examples of technicalsystems that will be useful in getting their toyvehicles to work. At each station there arethings to look at with worksheets explainingwhat to do. There are three ready-to-copy ‘Mybuggy exploring technical systems’ sheets inthe Resources section. If you wish to reducethe technical opportunities available to thechildren you can reduce the number of stationsavailable and the contents of each station.
Pupil activityAt Station 1 there are examples of fivetransmission systems:t a simple belt drive;
t a compound belt drive;
t a wheel and worm system;
t a simple gear train;
t a compound gear train.
Tell the children that they will need tothink about which one is likely to be theeasiest for them to build into their toy.
At Station 2 there are three examples ofdifferent switches in simple circuits tocontrol electric motors:t a circuit using a push-to-make switch;
t a circuit using an on/off switch;
t a circuit using a reversing switch.
Tell the children they will need to thinkabout how they might use each sort ofswitch to control their toy.
10

11
exploring technical systems
sessionfour
SECTION 4
teaching the unit
Resources
Stimulus: examples of simple belt drives, compound belt drives, wheel and worm systems,simple and compound gear trains; circuits using a push-to-make switch, an on/off switch, a reversing switch to controll a motor, a push-to-make switch tocontrol a buzzer, an on/off switch to control a flashing LED; circuits with 2 lightbulbs in series controlled by an on/off switch, two light bulbs in parallelcontrolled by an on/off switch;
Consumables ‘My buggy exploring technical systems’ sheets 1–3.
Health and safety check
Revisit the discussion about controlling risks when working in groupsin the context of investigating a range of delicate technical systems.
You can purchase components to construct thesetechnical systems from Technology Teaching Systems.
At Station 3 there are five examples ofcircuits to control lights and buzzers:t a circuit using a push-to-make switch to
control a buzzer;
t a circuit using a push to break switchto control a light bulb;
t a circuit using an on/off switch tocontrol a flashing LED;
t a circuit with two light bulbs in seriescontrolled by an on/off switch;
t a circuit with two light bulbs in parallelcontrolled by an on/off switch.
Tell the children they will need to thinkabout how they might build light andsound effects into their toys.
Pupils should work in pairs and co-operate inlearning about these technical systems.

12
sessionfive
SECTION 4
teaching the unit
Teacher input
Explain to the class that in this session theyhave two tasks. The first is to make a simplenet to give them practice at producing acard body shell they could use to give thetoy its overall appearance. There are threedifferent nets available as ready-to-copymasters – ‘Wedge net’, ‘Double wedge net’and ‘Bus net’. When enlarged to A3 sizethey can be used as template for actualbody shells. Note that for their toys theycan adapt existing boxes if this is moreappropriate. Whatever they use they will
cut out net.
exploring networks and surface decorationsuggested timing60 mins
carefully crease thefolds.
add aluminium foil toshow radiator grill.
add sand to gluepatches on bonnet.
stick dark paper intocut outs to show darkwindows.
add stick on gofaster stripes.
need to decorate it so that it does not looklike card or packaging; therefore, thesecond task is to decorate the net to give avariety of effects that might be useful.
Pupil activity
Show the class how to cut out a net andto crease it carefully so that it can beassembled into the form of a small bodyshell but do not fix into its final form assurface decoration is much more easilyapplied whilst the net is flat.

13
sessionfive
SECTION 4
teaching the unit
exploring networks and surface decoration (continued)
Explain to the class that they should try tocreate the following decorative effects:
t shiny like metal by carefully sticking onaluminium foil;
t rough like some rocks by putting on smallamounts of glue and shaking on sand;
t dark glass windows by cutting outappropriate shapes;
t striped by sticking on coloured strips.
It is useful if children work in pairs andco-operate in learning about thesedecoration techniques.
You can put the resulting decorated bodyshells on display to show the care andattention needed to get effective surfacedecoration.
Resources
Consumables: ‘Wedge net’, ‘Double wedge net’ and ‘Bus net’, paper,card, aluminium foil, PVA glue, sand, coloured gummedpaper;
Tools: pencils, rulers, rubbers, scissors.
Health and safety check
Revisit the discussion about controlling risks when using scissors and glue.

14
sessions6-7
SECTION 4
teaching the unit
the big task: designing and making the buggysuggested timing4 hours(2 x 2 hours)
Teacher input
Explain to the class that now each one ofthem is going to use all that they havelearned to design and make a toyvehicle, either for themselves, a friend ofabout the same age or a younger child.Remind them that they thought about thisat the beginning in terms of:
t who the toy vehicle is for;
t what it should look like;
t what it should do.
Now they have to make firm decisions.
Pupil activity
Each pupil should write a complete specifi-cation using the following starter sentences.
t The toy vehicle is for …
t The toy vehicle will be like a …
t The toy vehicle will …
t The toy vehicle will look like this …
With some children you may wish to use“My buggy specification’ available as aready-to-copy sheet.
Encourage the children to make a quicksketch to show what their toy will looklike.
Teacher input
Remind the class that they have to makedesign decisions in ways that will meetthe specification about the following.
a) Develop a chassis complete with axlesand wheels so that the toy rolls along.
b) Add an electric motor, battery, switchand transmission system so that theelectric motor can make the vehiclemove forward in a straight line;
c) Develop a card body shell that willgive the desired appearance.

15
sessions6-7
SECTION 4
teaching the unit
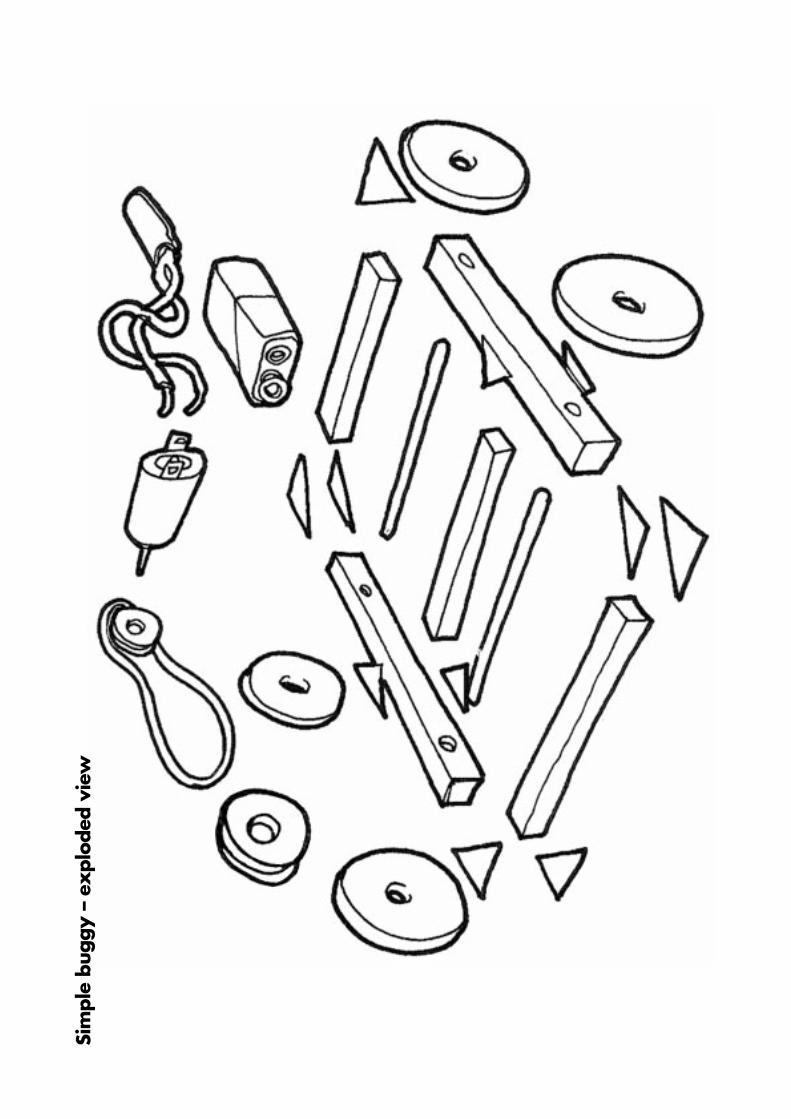
You may wish to use the ready-to-copy‘Simple buggy – exploded view’ sheetwith some children.
Note also that the A4 nets ‘Wedge net’,‘Double wedge net’ and ‘Bus net’, can beenlarged to A3 and used as startingtemplates for body shells. Children whouse these can design the chassis using abest-fit approach to measurement.
Resources
Consumables: ‘My buggy specification’ or paper, ‘Simple buggy – exploded view’,quantity of 10 mm X 10 mm wood strip, abrasive paper, card, PVA glue, 6 mmdowel, wooden wheels, pulley wheels, gear wheels, worm gears, rubber bands,card, aluminium foil, sand, coloured gummed paper, insulated wire, crocodileclips, electrical switches, 6v bulbs, bulb holders, buzzers, low voltage dc electricmotors, garden ties, paper fasteners, drawing pins, paperclips, lollipop sticks;
Tools: pencils, rulers, scissors, sawing boards, junior hacksaws, hand drills and 6 mm bits.
Health and safety check
Revisit the discussion about controlling risks when using the tools, materials and components availablefor making their buggy.
the big task (continued)
Extension work
Children who finish early or who requirean extra challenge might be asked to dothe following.
Extend the specification of the toy to meetadditional movement features such as:
t move forwards and backwards in astraight line;
t move at one speed;
t move at different speeds.
Extend the specification of the toy to meetadditional light and sound effects.
16
suggested timing30 mins
sessioneight
evaluating the final product
SECTION 4
teaching the unit
Teacher input
Positive aspects of the children’s designs mustbe valued but the children must also learn tobe critical – working in groups during theirevaluation should make this easier.
Pupil activity
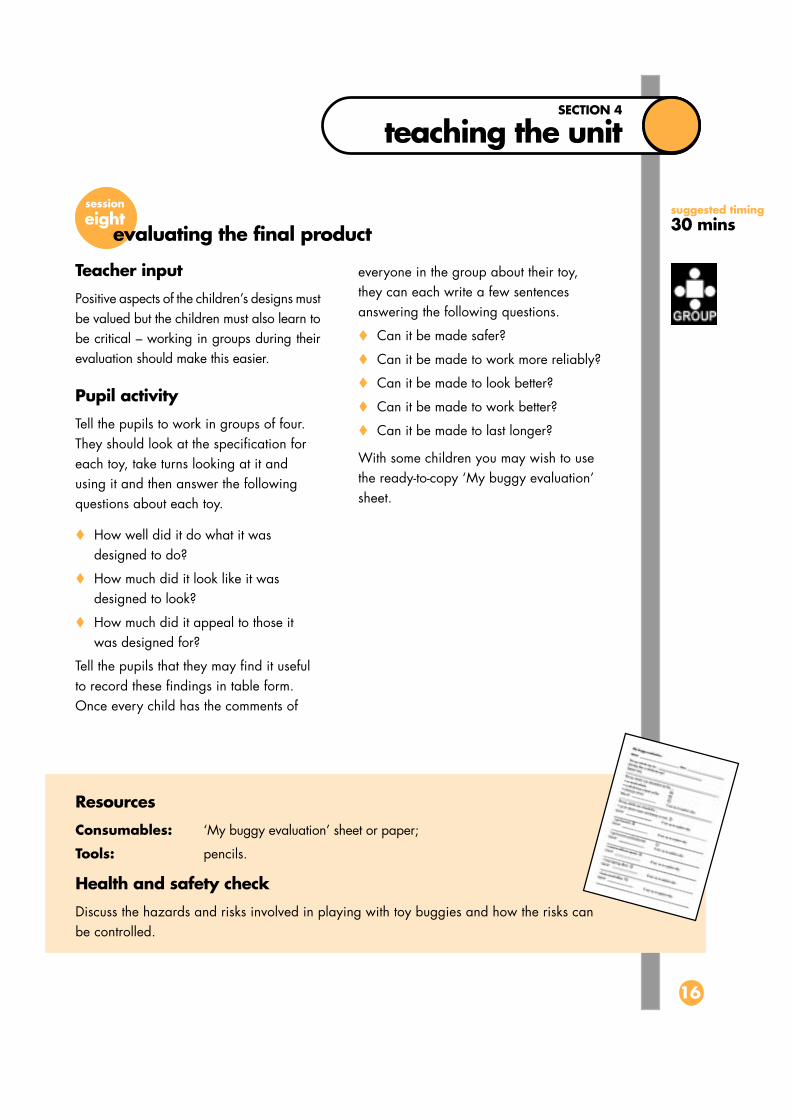
Tell the pupils to work in groups of four.They should look at the specification foreach toy, take turns looking at it andusing it and then answer the followingquestions about each toy.
t How well did it do what it wasdesigned to do?
t How much did it look like it wasdesigned to look?
t How much did it appeal to those itwas designed for?
Tell the pupils that they may find it usefulto record these findings in table form.Once every child has the comments of
everyone in the group about their toy,they can each write a few sentencesanswering the following questions.
t Can it be made safer?
t Can it be made to work more reliably?
t Can it be made to look better?
t Can it be made to work better?
t Can it be made to last longer?
With some children you may wish to usethe ready-to-copy ‘My buggy evaluation’sheet.
Resources
Consumables: ‘My buggy evaluation’ sheet or paper;
Tools: pencils.
Health and safety check
Discuss the hazards and risks involved in playing with toy buggies and how the risks canbe controlled.
17
sessionnine
SECTION 4
teaching the unit
suggested timing30 mins
Teacher input
Explain to the class that it is important tothink about how to get better at design&technology and that they can do this bydiscussing the following questions.
t What did you enjoy most?
t What did you find easy?
t What did you find difficult?
t What did you get better at?
t Did you help each other?
t What could have been done better?
t How could these be done better?
unit review
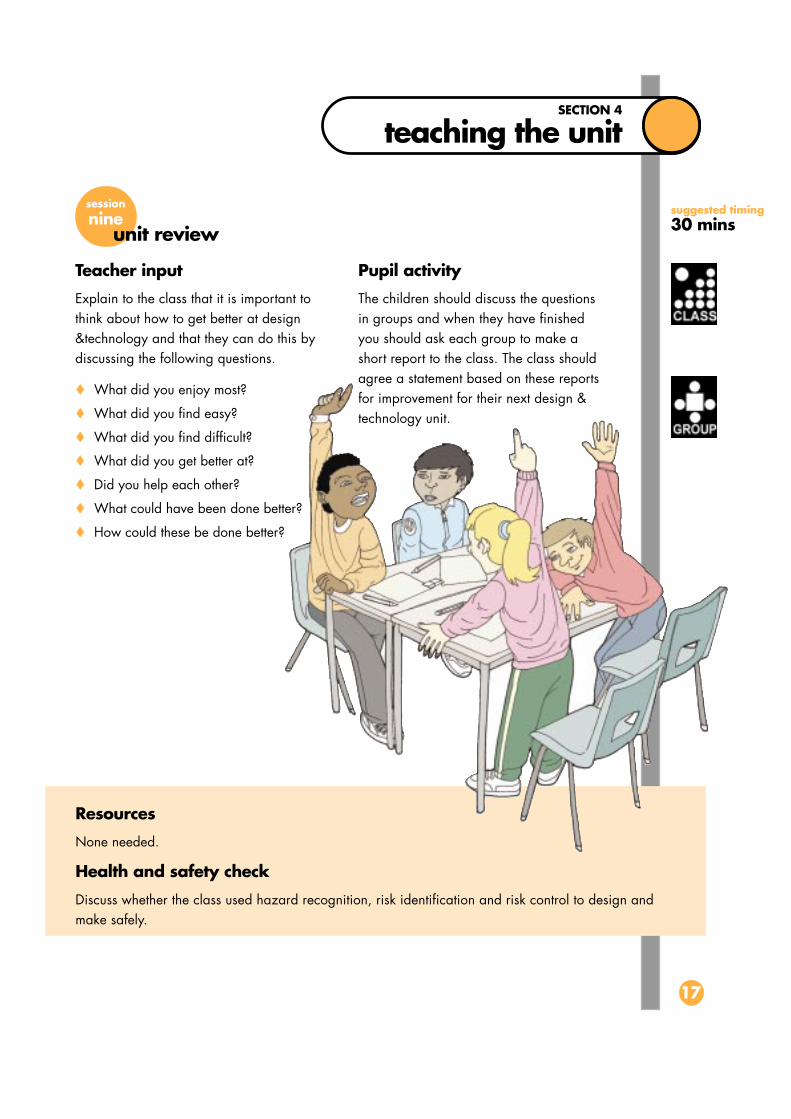
Pupil activity
The children should discuss the questionsin groups and when they have finishedyou should ask each group to make ashort report to the class. The class shouldagree a statement based on these reportsfor improvement for their next design &technology unit.
Resources
None needed.
Health and safety check
Discuss whether the class used hazard recognition, risk identification and risk control to design andmake safely.
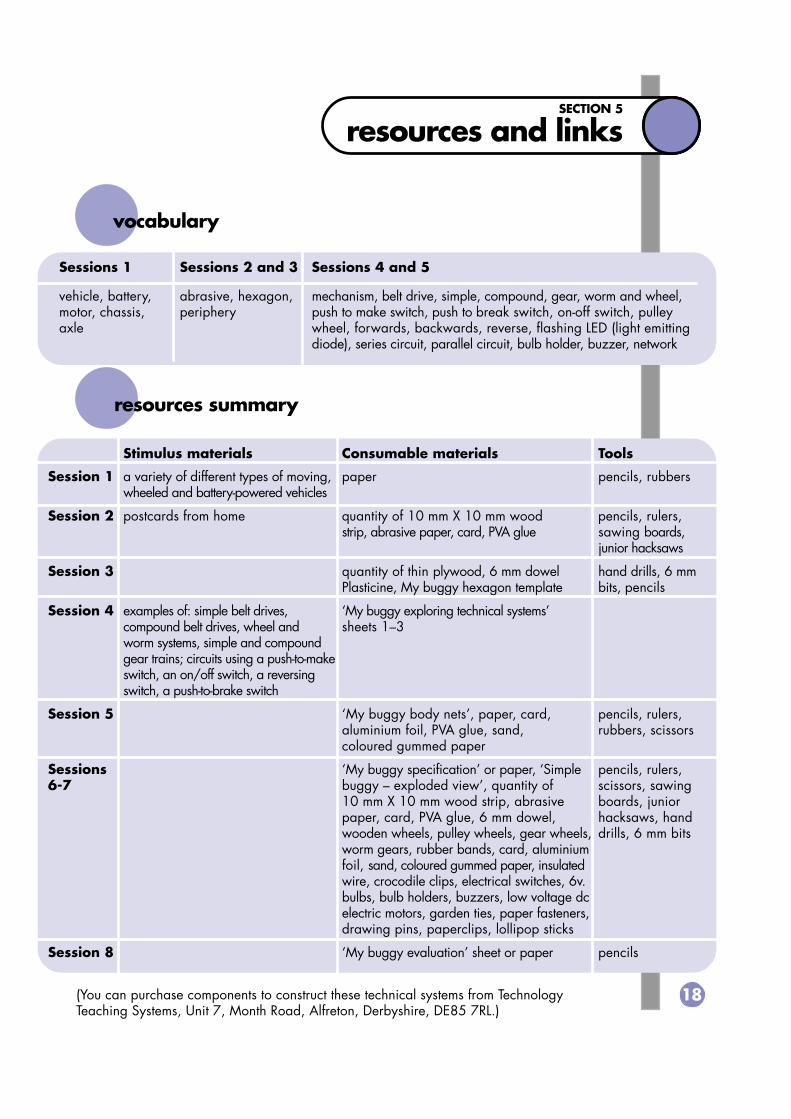
Sessions 1 Sessions 2 and 3 Sessions 4 and 5
vehicle, battery, abrasive, hexagon, mechanism, belt drive, simple, compound, gear, worm and wheel,motor, chassis, periphery push to make switch, push to break switch, on-off switch, pulleyaxle wheel, forwards, backwards, reverse, flashing LED (light emitting
diode), series circuit, parallel circuit, bulb holder, buzzer, network
Stimulus materials Consumable materials Tools
Session 1 a variety of different types of moving, paper pencils, rubberswheeled and battery-powered vehicles
Session 2 postcards from home quantity of 10 mm X 10 mm wood pencils, rulers,strip, abrasive paper, card, PVA glue sawing boards,
junior hacksaws
Session 3 quantity of thin plywood, 6 mm dowel hand drills, 6 mmPlasticine, My buggy hexagon template bits, pencils
Session 4 examples of: simple belt drives, ‘My buggy exploring technical systems’compound belt drives, wheel and sheets 1–3worm systems, simple and compoundgear trains; circuits using a push-to-makeswitch, an on/off switch, a reversingswitch, a push-to-brake switch
Session 5 ‘My buggy body nets’, paper, card, pencils, rulers,aluminium foil, PVA glue, sand, rubbers, scissorscoloured gummed paper
Sessions ‘My buggy specification’ or paper, ‘Simple pencils, rulers,6-7 buggy – exploded view’, quantity of scissors, sawing
10 mm X 10 mm wood strip, abrasive boards, juniorpaper, card, PVA glue, 6 mm dowel, hacksaws, handwooden wheels, pulley wheels, gear wheels, drills, 6 mm bitsworm gears, rubber bands, card, aluminiumfoil, sand, coloured gummed paper, insulatedwire, crocodile clips, electrical switches, 6v.bulbs, bulb holders, buzzers, low voltage dcelectric motors, garden ties, paper fasteners,drawing pins, paperclips, lollipop sticks
Session 8 ‘My buggy evaluation’ sheet or paper pencils
SECTION 5
resources and links
vocabulary
resources summary
18(You can purchase components to construct these technical systems from TechnologyTeaching Systems, Unit 7, Month Road, Alfreton, Derbyshire, DE85 7RL.)
19
links to other subjects
SECTION 5
resources and links
Literacy
This module offers links to explanatorywriting as in term 2. The explanationcould be about how a simple orcompound gear train works or how awheel and worm system works. At theend of the module an explanation of howmy buggy works could be written anddisplayed alongside the model. Thiswould give an appropriate audience andpurpose for this relatively difficult genre.
Numeracy
There are several opportunities to practiseskills and apply mathematical knowledgein this module. The children will be ableto experience for a real purposemeasuring accurately to the nearestmillimetre. Opportunities will be given tomake shapes and to demonstrate anincreasing accuracy in doing so. Thereare also opportunities for visualising 3Dshapes from 2D drawings and identifyingdifferent nets. A display could be set upwith pictures of buggies, their 3D shapesand the nets, and children could try tomatch all three together.
Science
The work on finding how to make aspinner spin for the longest amount oftime offers many scientific opportunities.
The PoS for science state that it isimportant to test ideas using evidencefrom observation and measurement,which is what this activity offers.
The children will be able to apply theirskills of planning, obtaining andpresenting evidence and considering theevidence and evaluating when theyinvestigate how to make a spinner spinfor the longest length of time.
This activity also offers the opportunity ofrevising circuits from the QCA SoW 4F‘Circuits and conductors’.

My buggy hexagon template
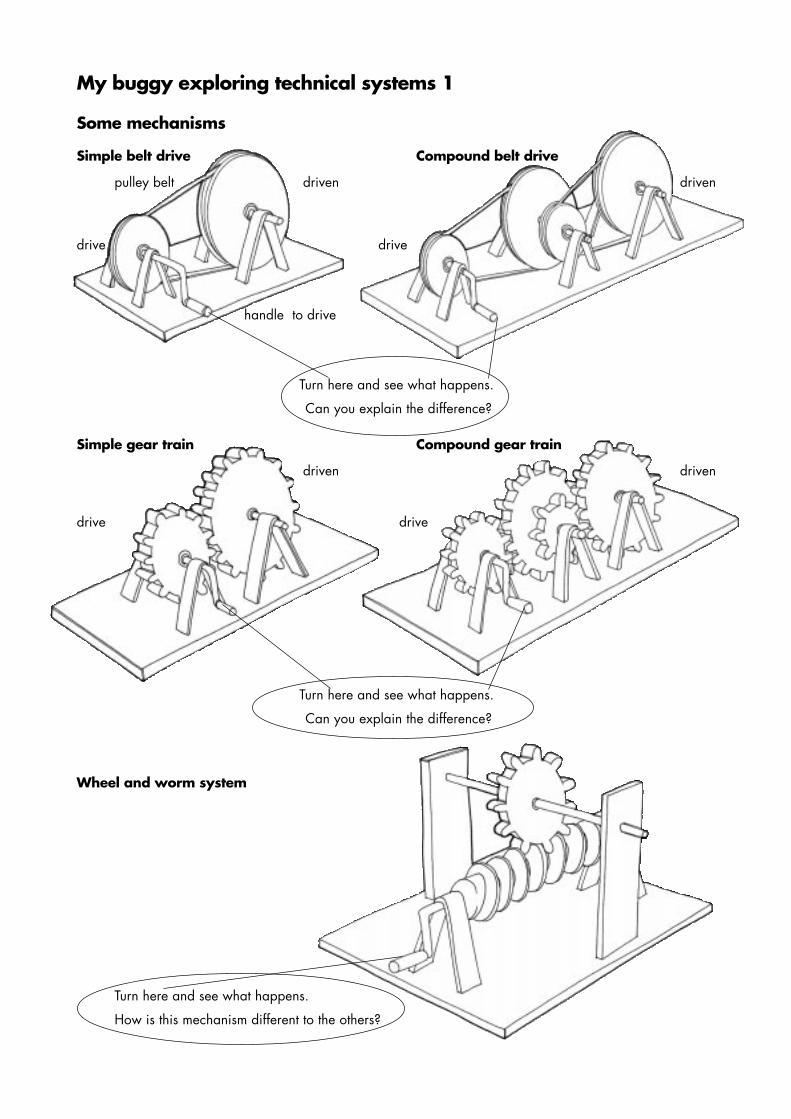
My buggy exploring technical systems 1
Some mechanisms
Simple belt drive Compound belt drive
pulley belt driven driven
drive drive
handle to drive
Turn here and see what happens.
Can you explain the difference?
Simple gear train Compound gear train
driven driven
drive drive
Turn here and see what happens.
Can you explain the difference?
Wheel and worm system
Turn here and see what happens.
How is this mechanism different to the others?
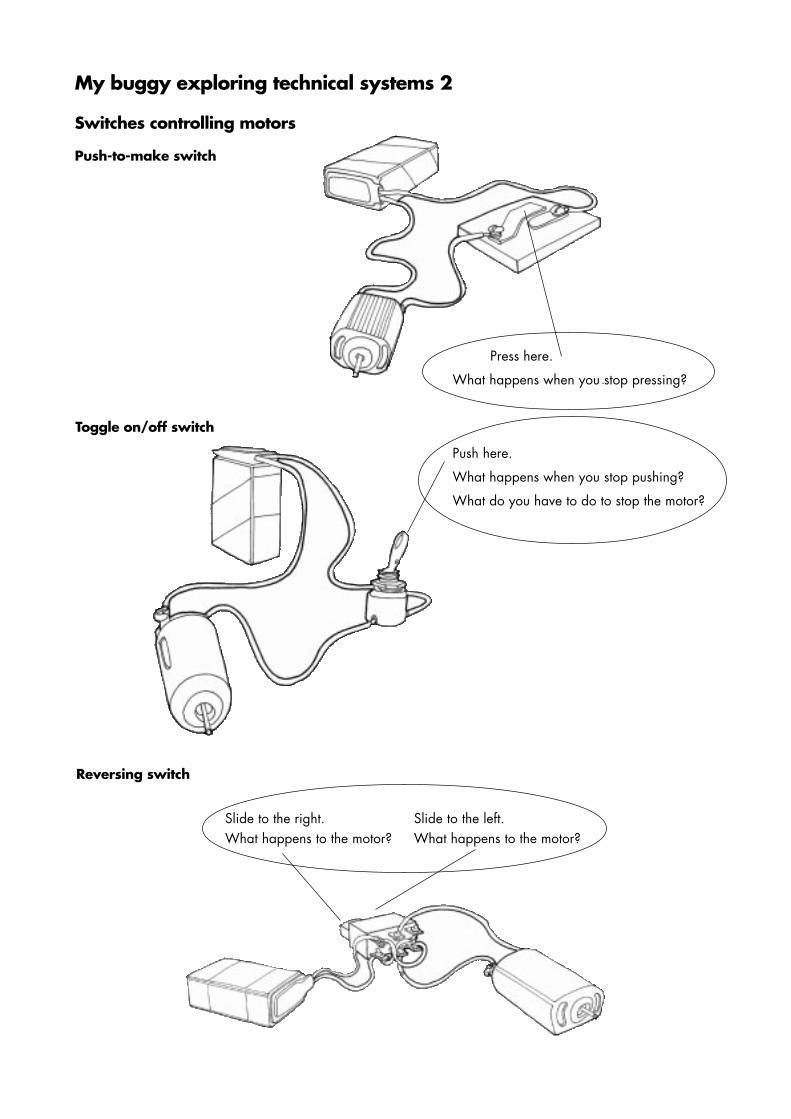
My buggy exploring technical systems 2
Switches controlling motors
Push-to-make switch
Press here.
What happens when you stop pressing?
Toggle on/off switch
Push here.
What happens when you stop pushing?
What do you have to do to stop the motor?
Reversing switch
Slide to the left.What happens to the motor?
Slide to the right.What happens to the motor?

My buggy exploring technical systems 3
Controlling lights and buzzersPush-to-make switch Push-to-break switch
Parallel circuit Series circuit
Push here
What happens to the light bulbs?
Can you explain the difference?
What do you have to do to turnthe light bulbs off?
Toggle on-off switch
Push here.
What happens when youstop pushing?
What do you have to do tostop the LED from flashing?
What happens to the buzzer when you press here?
What happens when you stop pressing?
What happens to the bulbwhen you press here?
What happens when youstop pressing?

My buggy wedge net
cut along solid lines
fold along dotted lines
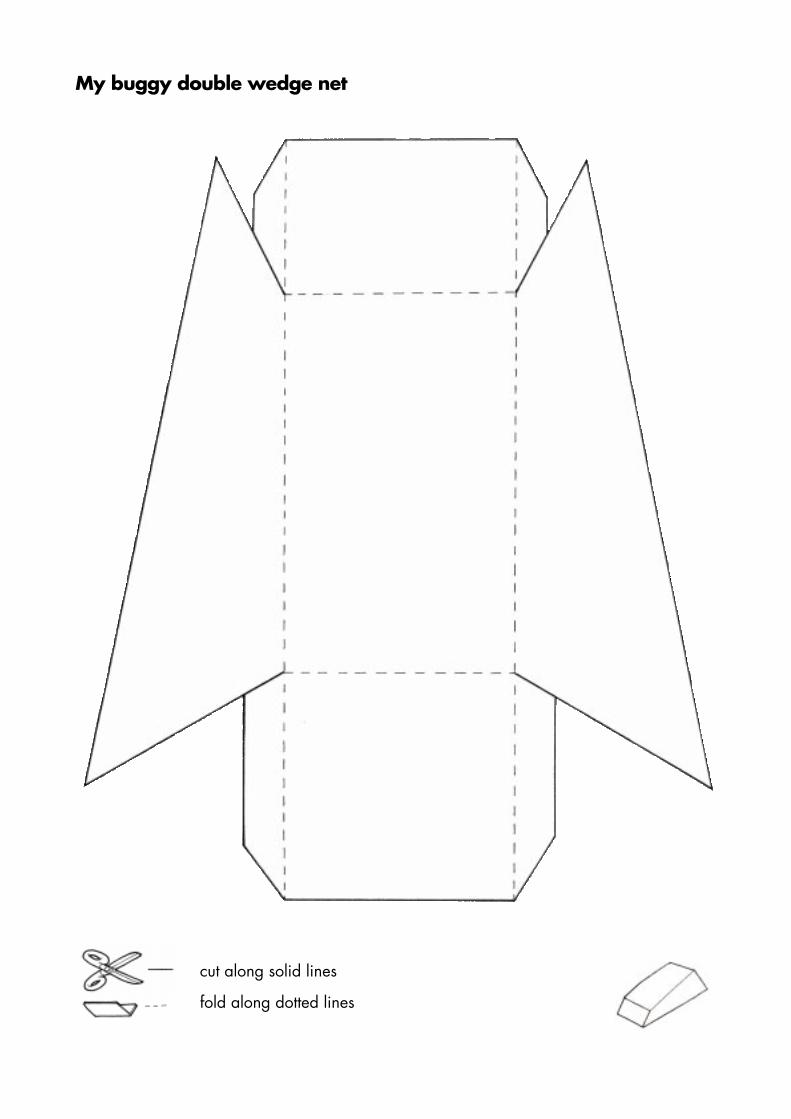
My buggy double wedge net
cut along solid lines
fold along dotted lines
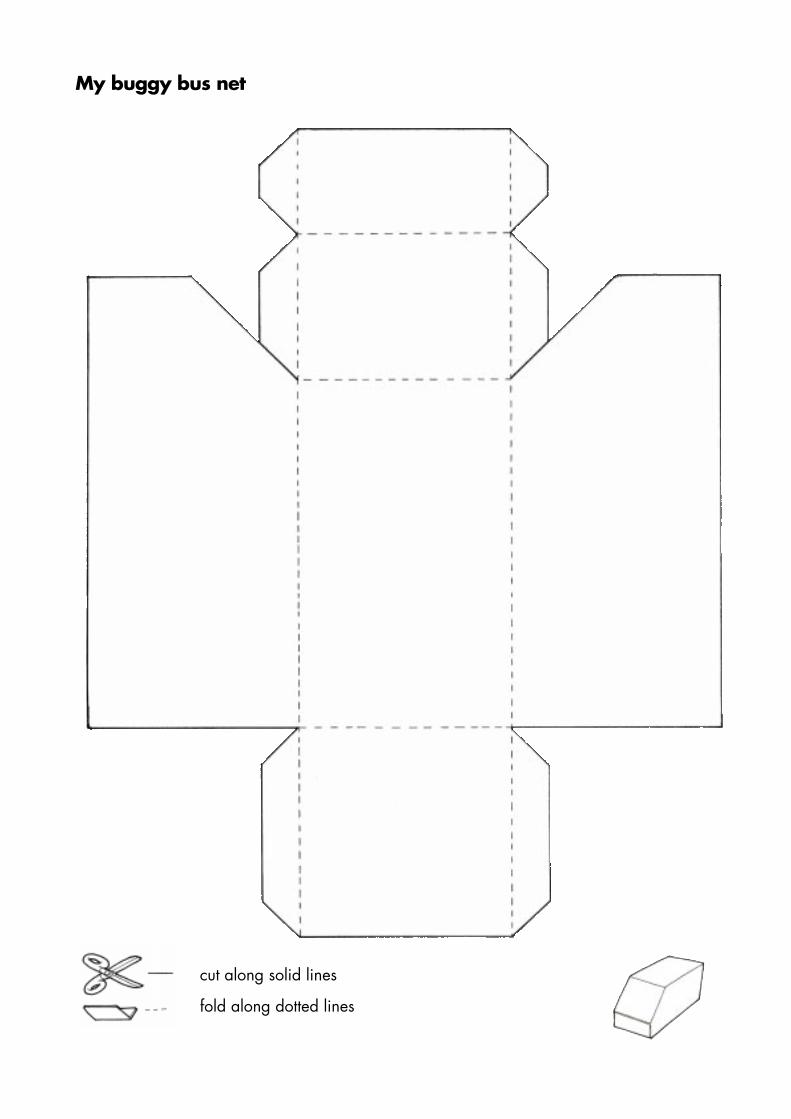
My buggy bus net
cut along solid lines
fold along dotted lines
Sim
ple
bug
gy
– ex
plo
ded
vie
w

My buggy specification
Name Class
The toy vehicle is for …Me q
Someone else qWho?
The toy vehicle will be like …
• an actual vehicle q• a vehicle from a book or filmq• a fantasy vehicle q
The toy vehicle will …• use an electric motor and battery to work q
• go forwards q
• go forwards and backwards q• travel at different speeds q• have lighting effects q• have sound effects q
The toy vehicle will look like this:
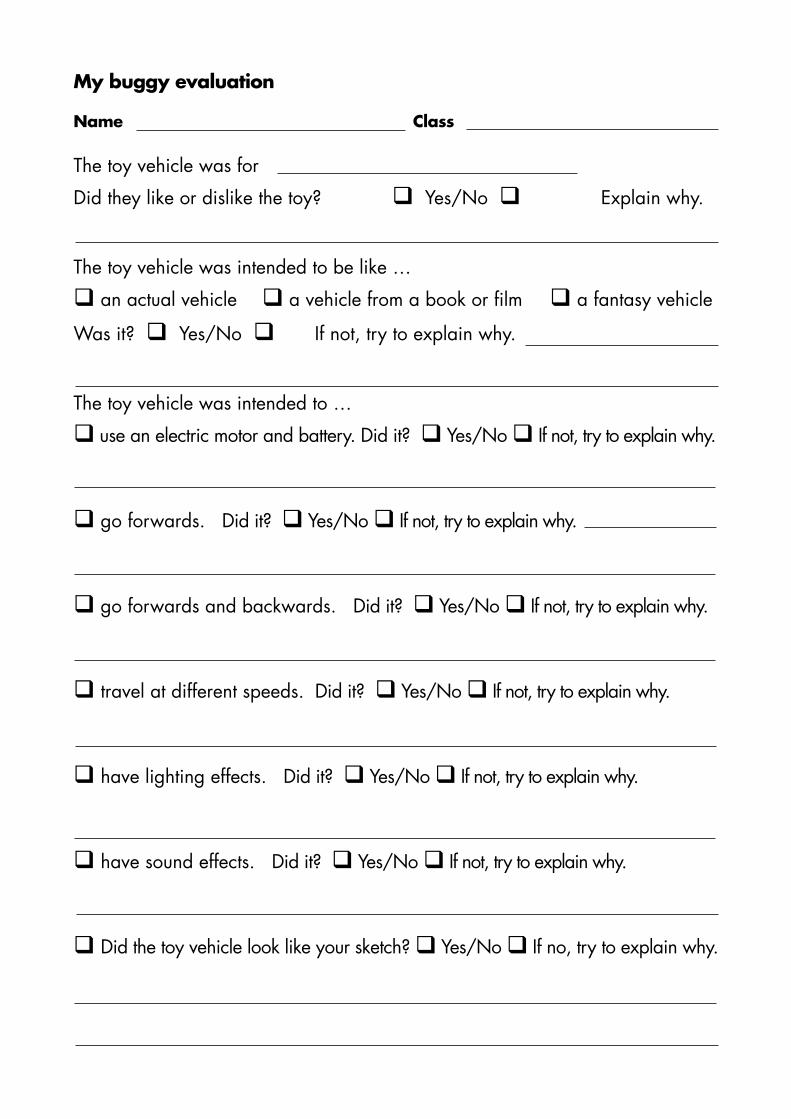
My buggy evaluation
Name Class
The toy vehicle was for
Did they like or dislike the toy? q Yes/No q Explain why.
The toy vehicle was intended to be like …
q an actual vehicle q a vehicle from a book or film q a fantasy vehicle
Was it? q Yes/No q If not, try to explain why.
The toy vehicle was intended to …
q use an electric motor and battery. Did it? q Yes/No q If not, try to explain why.
q go forwards. Did it? q Yes/No q If not, try to explain why.
q go forwards and backwards. Did it? q Yes/No q If not, try to explain why.
q travel at different speeds. Did it? q Yes/No q If not, try to explain why.
q have lighting effects. Did it? q Yes/No q If not, try to explain why.
q have sound effects. Did it? q Yes/No q If not, try to explain why.
q Did the toy vehicle look like your sketch? q Yes/No q If no, try to explain why.
Acknowledgements
Nuffield Curriculum Project Centre Team
David Barlex, Director Nuffield D&T Senior Lecturer Brunel University
Jane Mitra, Deputy Director and Educational Consultant
Nina Towndrow, Project Administrator
Authors and contributors
Eileen Birkenhead, Educational Consultant
Daniel Davies, Bath University
John Garvey, Brunel University
Rob Johnsey, Warwick University
Teresa Linton, Grasmere C of E Primary School
Lynne Orford, Holtspur School, Beaconsfield
Chris Purdie, Townsville Junior Grammar School, Queensland, Australia
Cy Roden, Educational Consultant
Marion Rutland, Roehampton Institute University of Surrey
Joy Simpson, Whipton Barton Middle School, Exeter
John Twyford, Exeter University
Design
Dave Mackerell, Studio Communications
Evaluation
Patricia Murphy and Marion Davidson of the Open University
Health and Safety guidance
Anna Wojtowicz and Caroline Reynolds from the Health and Safety Executive
Illustration and 2D/3D model making
Nathan Barlex
Proof reading
Joanne Jessop, Sue Byrne
The Project appreciates the efforts of all those teachers who taught trial units of work and provided valuablefeedback. The Project is grateful for all the support it has received from the Advisory Services.