PREPRUFE SCS - gcpat.com · Product Advantages Installation The PREPRUFE SCS System is intended to...
13
PREPRUFE SCS Blindside waterproofing system for shotcrete foundation walls Product Description PREPRUFE SCS is a unique blindside waterproofing system specifically developed to provide a high performance waterproofing solution for shotcrete foundation walls. The waterproofing system consists of the following: The PREPRUFE SCS Composite Sheet Membrane is applied vertically to timber lagging or other soil retention systems. Shotcrete is then placed directly against the geotextile side of the membrane. Unlike conventional waterproofing systems, PREPRUFE SCS waterproofing system has injection ports to facilitate grout injection into a pre-created cavity space, forming an in-situ monolithic grout membrane with uniform thickness. After shotcrete placement, injection of the specially formulated PREPRUFE SCS Hydrophilic Grout fills and seals the system, thus providing ultimate waterproofing protection. All components of the specially developed PREPRUFE SCS System work together to form a continuous and integral bond to the structure, eliminating lateral water migration between the membrane and the shotcrete. When properly installed and grouted, the PREPRUFE SCS System will protect against water ingression. ® ® PREPRUFE SCS Membrane consisting of a polymer mesh-reinforced cavity backed by a plastic film facing the soil retention system, and faced with a non-woven, semi-permeable geotextile acting as a shotcrete barrier while allowing grout to bond to the shotcrete. ® PREPRUFE SCS Grout Injection Ports installed prior to shotcrete placement to facilitate hydrophilic grout injection. ® PREPRUFE SCS Hydrophilic Grout post-injected under pressure into composite sheet through injection ports left protruding through the shotcrete. The shotcrete side of the membrane enables grout to bond with shotcrete across the permeable geotextile. ® ® ® ® ® ® Product Data Sheets Page 1 of 13
Transcript of PREPRUFE SCS - gcpat.com · Product Advantages Installation The PREPRUFE SCS System is intended to...

PREPRUFE SCSBlindside waterproofing system for shotcrete foundation walls
Product Description
PREPRUFE SCS is a unique blindside waterproofing system specifically developed to provide a highperformance waterproofing solution for shotcrete foundation walls. The waterproofing system consists ofthe following:
The PREPRUFE SCS Composite Sheet Membrane is applied vertically to timber lagging or other soilretention systems. Shotcrete is then placed directly against the geotextile side of the membrane. Unlikeconventional waterproofing systems, PREPRUFE SCS waterproofing system has injection ports to facilitategrout injection into a pre-created cavity space, forming an in-situ monolithic grout membrane with uniformthickness. After shotcrete placement, injection of the specially formulated PREPRUFE SCS HydrophilicGrout fills and seals the system, thus providing ultimate waterproofing protection. All components of thespecially developed PREPRUFE SCS System work together to form a continuous and integral bond to thestructure, eliminating lateral water migration between the membrane and the shotcrete. When properlyinstalled and grouted, the PREPRUFE SCS System will protect against water ingression.
®
®
PREPRUFE SCS Membrane consisting of a polymer mesh-reinforced cavity backed by a plastic filmfacing the soil retention system, and faced with a non-woven, semi-permeable geotextile acting as ashotcrete barrier while allowing grout to bond to the shotcrete.
®
PREPRUFE SCS Grout Injection Ports installed prior to shotcrete placement to facilitate hydrophilicgrout injection.
®
PREPRUFE SCS Hydrophilic Grout post-injected under pressure into composite sheet through injectionports left protruding through the shotcrete. The shotcrete side of the membrane enables grout to bondwith shotcrete across the permeable geotextile.
®
®
®
®
®
®
Product Data Sheets
Page 1 of 13

Product Advantages
Installation
The PREPRUFE SCS System is intended to be installed by GCP trained applicators only. For a list of trainedapplicators, please contact your GCP representative. All PREPRUFE SCS System materials shall be suppliedby GCP Construction Products, and applied strictly in accodance with their instructions. Refer to thePREPRUFE SCS waterproofing systems installation manual for detailed application instructions.
Substrate Preparation
It is essential to create a sound and solid substrate to eliminate movement during the shotcrete placement.Substrates must be regular and smooth with no gaps or voids greater than 1/2 in. (12 mm). Grout around allpenetrations such as utility conduits, etc. for stability.
If necessary, apply plywood, rigid insulation, HYDRODUCT 220 drainage composite or other approvedfacing to substrate, to provide support to the membrane. Board systems such as timber lagging must beclose butted to provide support and not more than 1/2 in. (12 mm) out of alignment. For areas close tofinished grade, where steel soldier piles and wood lagging will be removed, install a protection layer of 1/2 in.(12 mm) thick cementitious wall board centered over the steel soldier piles.
Durable system designed specifically to withstand the force of shotcrete placementPost-injected grout fills and seals, providing ultimate waterproofing protectionAggressive bond to shotcrete resists lateral water migrationExcellent resistance to hydrostatic pressure
®
®
®
®
Product Data Sheets
Page 2 of 13

Apply PREPRUFE 300R membrane below all horizontal slabs and rafts (i.e. mud slabs) extending a minimumof 18 in. (457 mm) beyond the top of slab and protect from over splash. Refer to the PREPRUFE 300Rmembrane Product Information for more detailed installation instructions. If PREPRUFE 300R membranewill not be used below the slab, consult your GCP representative.
Membrane Installation
The PREPRUFE SCS Membrane can be applied at temperatures of 40°F (4°C) or above. The membranemay be installed in any convenient length but is best installed vertically the full length of the soil retentionsystem leaving an additional 12 in. (305 mm) of membrane at the top to tie into the horizontalwaterproofing when necessary. With the geote tile side facing towards the shotcrete placement, attach themembrane to the substrate with staples, approved by GCP, spaced at 24 to 36 in. (610 to 914 mm) ocdown the middle of the membrane. Ensure the plastic film extension and the underside of the succeedingsheet are clean, dry and free from contamination before attempting to overlap. Apply the PREPRUFE DetailTape at the center of the film extension. Overlap the seams 2 1/2 in. (64 mm) minimum with membraneand ensure the top piece of membrane has only the geotextile extension (not plastic film) on the top of theexisting membrane. Remove the release liner from the PREPRUFE Detail Tape and roll the membrane firmlyat the seam with a hand roller to ensure a good seal. Mechanically fasten the seam on the geotextile overlapwith staples spaced at 12 to 18 in. (305 to 457mm) oc.
Roll ends and cut edgesRoll ends and cut edges - Place PREPRUFE CJ Tape under the membrane with adhesive side facingmembrane, centered along ends/cut edges. Secure strip to the substrate by staples. Ensure the underside ofmembrane is clean, dry and free from contamination. Butt joint membrane and roll firmly at the seam with ahand roller to ensure a good seal. Apply PREPRUFE SCS Geotextile Strip centered over the butt joint andsecure on the top and bottom of butt joint with staples at 12 to 18 in. (305 to 457 mm) oc.
Penetrations
For Service Pipes, Rebar, All-Thread, Metal Dowels, etc. - follow these steps to seal around penetrations:
®
®
®
®
®
®
®
®
Clean loose dust or dirt from the penetration and the surrounding substrate surface using a clean, drycloth or brush. Remove rust, if applicable, with a wire brush and wipe clean.Cut the PREPRUFE SCS Membrane tight to within 1/2 in. (12 mm) of the penetration. If the membraneis 1 in. (25 mm) or more from the penetration, install a cut-to fit “filler strip” of the membrane to coverthe gap following the membrane repair guidelines until the membrane is within 1/2 in. (12 mm) of thepenetration.
®
Apply PREPRUFE Hydrophilic Sealant to cover the gap and form a minimum 1/4 in. (6 mm) but no morethan 1 in. (25 mm) thick continuous fillet between the plastic film side of the membrane and the base ofthe penetration. Extend a 90 mil (2.2 mm) continuous coating of sealant onto the surface of themembrane overlapping a minimum of 1 in. (25 mm).
®
Product Data Sheets
Page 3 of 13

Tiebacks
Prior to membrane installation, fasten PREPRUFE Tieback Cover ABS base to the substrate to cover thetieback. Apply the PREPRUFE Detail Tape around the outside edge of the ABS base. Install the PREPRUFE SCS Membrane over the ABS base and then cut out the membrane 1/2 in. to 1 in. (12 mm to 25 mm)around the dome hemisphere. Remove the release paper on the PREPRUFE Detail Tape and press themembrane firmly to the ABS base. Roll the membrane firmly at the joint with a hand roller to ensure a goodseal. Position PREPRUFE Tieback Cover on top of the ABS base and mechanically fasten the PREPRUFE dome. Apply PREPRUFE Tape (LT or HC) over the top edge of the tieback cover.
Terminations
Position PREPRUFE CJ Tape under the membrane along the termination, centered along the membrane cutedges/roll ends. Secure half of the tape under the membrane to the substrate with staples. Press themembrane firmly onto the tape and fold over the membrane. Roll the folding area with a hand roller toensure a good seal. Remove the release paper. Mechanically fasten by staples at 12 in. (305 mm) oc alongthe top edge of the PREPRUFE CJ Tape.
Tie-ins of PREPRUFE SCS Membrane to PREPRUFE 300R Sub Slab Waterproofing
Install PREPRUFE 300R membrane over the prepared substrate as detailed in PREPRUFE 300R membraneinstallation guide. If PREPRUFE 300R membrane will not be used below the slab, consult your GCPrepresentative
Preprufe SCS Figure 1
®
® ®
®
® ®
®
®
®
® ®
® ®
®
Figure 1
Product Data Sheets
Page 4 of 13

Apply a continuous length of the PREPRUFE Detail Tape to the top edge of the PREPRUFE 300Rmembrane. Remove the release liner. Apply a horizontal strip of the PREPRUFE SCS Membrane over thePREPRUFE 300R membrane with the plastic film extension facing up and the bottom of the membraneresting on the poured concrete slab. Press the PREPRUFE SCS Membrane to the tape and roll firmly with ahand roller. PREPRUFE SCS Membrane installation continues vertically up the wall as outlined above. Ifnecessary, apply 4 in. (102 mm) pieces of PREPRUFE Detail Tape at 4 ft (1219 mm) oc to the bottomedge of the PREPRUFE SCS Membrane to secure to the PREPRUFE 300R membrane. Do not usemechanical fasteners through the PREPRUFE 300R membrane.
Membrane Repair
Inspect the membrane before and after installation of reinforcement steel.
Repair damage by wiping the area with a damp cloth to ensure the area is clean and free from dust and allowto dry. Repair small punctures (1/2 in. (12 mm) or less] and slices by applying PREPRUFE HydrophilicSealant centered over the damaged area. Repair large holes and punctures by first cutting out the damagedarea. Next, prepare a length of PREPRUFE CJ Tape at least 3 in. (76 mm) wider than the damaged area oneach side. Overlap the PREPRUFE CJ Tape with 3 in. (76 mm) overlap to make a large piece if necessary.Center the PREPRUFE CJ Tape under the damaged area with adhesive side facing the membrane. Securethe tape with staples. Ensure the membrane overlaps at least 3 in. (76 mm) on the tape on each side. Applya patch of membrane with plastic film removed and geotextile side facing shotcrete extended 6 in. (150mm) beyond the damaged area. Secure the patch with staples at 4 in. (100 mm) oc on each side.
Injection Port Installation
Install injection port assembly after installation of reinforcement steel and before shotcrete placement.
Pre-assemble injection port assembly by cutting a piece of PREPRUFE SCS Injection Tube 4 in. (100 mm)longer than the thickness of the wall and twisting the tube into a PREPRUFE SCS Injection Base until a tightconnection is made.
The injection port assembly spacing shall be 4 feet in any direction with 2 feet offset every vertical step. Thetop and bottom layer of injection port assemblies shall be two feet in spacing, located one foot from theedge of the membrane. All vertical corners and terminations shall have port assemblies spaced 4 feetvertically, located one foot from the corner or termination. To allow existing water to drain from the systemprior to grout injection, install additional port assemblies 1 in. (25 mm) above the bottom of the membraneat 20 feet (6.1 m) oc (refer to Figure 1). All tie-back covers shall have one injection port assembly installed,located on the membrane directly above the tieback (not shown in the Figure).
Position the injection port assembly adjacent to the intersection of the reinforcing steel. Press injection portassembly tightly against the membrane and screw the injection base into the membrane by turning thenozzle clockwise. The port assembly should be twisted until it cannot turn any further (usually 1/4 - 1/2rotation, although more may be needed). If the port assembly does not snag the geotextile or stop rotating,it has not been attached to the membrane properly. Repeat with a new injection base. Tie the tubing to boththe inside and outside layer of reinforcing steel with rebar ties. Cover the tubing end with duct tape toprevent blockage during the shotcrete placement.
® ®
®
®
®
®
®
® ®
®
®
®
®
®
®
®
Product Data Sheets
Page 5 of 13

Shotcrete Placement
Inspect the port installation before the placement of shotcrete to ensure all ports are still attached to themembrane. Reinstall any damaged or loose ports.
It is recommended that shotcrete be placed within 56 days (42 days in hot climates) of the membraneinstallation. Shotcrete must be placed in accordance with ACI 506.2. Never use a sharp object to consolidatethe concrete. Avoid putting large force on injection tubing during shotcrete surface finishing. Shotcretesurface finish around all injection ports should be the same as the rest of the wall, avoiding any rough areasor projections adjacent to the ports.
Grouting Procedure
Safety
PREPRUFE SCS Hydrophilic Grout products must be handled properly. Refer to product label and SDS(Safety Data Sheet) before use. All users should acquaint themselves with this information prior to workingwith the material. Users must be aware that the equipment used for the PREPRUFE SCS WaterproofingSystem operates under pressure. Only trained individuals should operate this equipment. Installationpersonnel should utilize all necessary personal protective gear. In the event of an EMERGENCY call: CHEM-TREC 800-424-9300.
General Guidelines
PREPRUFE SCS Hydrophilic Grout can be injected into the PREPRUFE SCS membrane a minimum of sevendays to a maximum of 6 months after the shotcrete placement. This minimum wait period allows theshotcrete to gain sufficient compressive strength. A minimum concrete compressive strength of 1500 psi(10 N/mm2) is recommended prior to grout injection.
Port Preparation
Cut the tubing flush to the shotcrete surface and install the PREPRUFE SCS Injection Packer into the tubing.Allow all water to gravity drain from the bottom “drainage ports” prior to installing the packer. Tightenpackers using a ratchet, or open-end wrench, by turning clockwise until firm and secure. Packers aresupplied with a one-way check valve to minimize back flow during the injection procedure.
Grout Injection
The pump mix manifold and clutch that will be used for injecting the PREPRUFE SCS Hydrophilic Groutshould be flushed with flushing agent prior to beginning the grout operation. By flushing you lubricate thesystem. After injecting, the pump mix manifold and clutch should be flushed to remove any liquid groutresidue. The general injection technique is as follows:
®
®
® ®
®
®
Product Data Sheets
Page 6 of 13

If excessive pumping pressures are needed to cause grout flow or manifold pressure changes significantly,discontinue injection, flush the pump mix manifold and clutch, and notify your GCP representativeimmediately. Avoid sudden application of high pressures during the injection process. Grouting pressurebefore the mixing head shall not exceed 500 psi. After the grout cures, the packers can be removed and theports cut off flush with the concrete surface. If a finished surface is required, drill the first 2 in. (51 mm) ofthe ports using a 5/8 in. diameter drill bit and patch with PREPRUFE SCS Port Patch or a non-shrinkcementitious grout.
Environmental Conditions
Precautions
Prior to application, a GCP representative should be consulted to verify that site conditions are appropriatefor the PREPRUFE SCS System.
The PREPRUFE SCS System includes injection of grout at high pressures. The Project Structural Engineershould evaluate the site for potential affects on adjacent building elements. Injection has the potential tocause hidden damage if installed incorrectly.
Limitations
Low temperatures will significantly elongate set times. Bring product up to a minimum temperature of 50°Ffor a minimum period of 24 hours prior to use. If site temperatures are extremely low, material should beheld in a warm area before and during use to maintain the product’s temperature. Allow no water into opencontainers. DO NOT EXCEED 90 ºF WHEN WARMINGDO NOT EXCEED 90 ºF WHEN WARMING . (CAUTION—pH NOTICE. Water used on site toactivate grouts must be in a range of pH 5.5–7 for optimum grout quality. Varying water pH will cause thereaction times to change. Test ground water for pH and consult with the manufacturer to ensure the pH fallswithin the threshold limitations.)
Storage & Handling
All PREPRUFE SCS waterproofing system Grout components should be shipped and stored in a dry place attemperatures between 40°F and 90°F. Do not thin with solvents. Warning! Do not let Part A Activator andWarning! Do not let Part A Activator andPart B Activator Part B Activator come into contact with each other prior to field mixing. A very exothermic reactiongenerating noxious gases may result. STORE COMPONENTS SEPARATELY FROM EACH OTHER.
Measure the materials temperature and refer to chart in the detailed installation manual for usage ofActivators A and B to get 60–90 seconds setting time. All results are based on laboratory tests. Site trialsshould always be carried out to determine the actual setting time.Determine the pumping volume per port as outlined in the detailed installation manual.Begin injection from bottom to top. Start injection from one end to the other end or any convenientdistance at each horizontal level, then switch to the next level and follow the same sequence.If the pump sits idle (no grout being injected) for more than 30 seconds, flush the pump mix manifoldand clutch with flushing agent.
®
®
®
®
Product Data Sheets
Page 7 of 13

Physical Properties
PROPERTYPROPERTY TYPICAL VALUETYPICAL VALUE TEST METHODTEST METHOD
Thickness 0.17 in. ASTM D6525
Elongation at ultimate break 200% ASTM E154
Tensile strength 300 psi ASTM E154
Peel adhesion to concrete 5 pli ASTM D903
Resistance to hydrostatic head 200 ft (60 m) ASTM D5385
Puncture resistance 200 lbs (890 N) ASTM E154
Impact resistance, membrane No change in appearance SAE J400
1
2
Footnotes:Footnotes:
1. Hydrostatic head tests are performed by casting concrete against the geotextile side of membrane with a lap then injecting grout into membrane
space. The cured block is cracked and then placed in a chamber where water is introduced to the membrane surface including the lap up to 231 ft
(70 m) head.
2. The tests are performed by projecting 3/8 in. gravel by means of 100 psi air blast onto geotextile side of membrane.
Product Data Sheets
Page 8 of 13

Supply of Components
Membrane Installation
PRODUCT NAMEPRODUCT NAME DESCRIPTIONDESCRIPTION SUPPLYSUPPLY
PREPRUFE SCS Membrane A unique composite sheet membrane applied
vertically to the soil retention system serving
as a channel to contain the flow of the post-
injected grout.
Rolls, 40 in. (1 m) x 100 ft, with a lap
extension on both sides to provide continuous
membrane between rolls
PREPRUFE Detail Tape A two-sided, highly aggressive adhesive tape
for sealing side laps and other miscellaneous
details.
Rolls, 2 in. x 50 ft, 18 rolls per box
PREPRUFE SCS Geotextile Strip A semi-permeable geotextile for covering cut
edges and roll ends
Rolls, 12 in. x 1000 ft, 1 roll per box
PREPRUFE CJ Tape (LT or HC)* A reinforced pressure sensitive tape for
sealing cut edges, roll ends, and terminations.
Rolls, 8 in. x 49 ft, 4 rolls per box
PREPRUFE Hydrophilic Sealant A caulk-applied hydro-swelling mastic for
sealing around pipe penetrations, rebar, utility
conduits, etc.
10.5 oz cartridges, 12 per box
PREPRUFE 300R A composite sheet membrane for transitions
to other GCP waterproofing systems (top,
bottom, sides).
Refer to GCP PREPRUFE 300R data sheet
Injection Port Assembly Installation
PRODUCT NAMEPRODUCT NAME DESCRIPTIONDESCRIPTION SUPPLYSUPPLY
PREPRUFE SCS Injection Base A specially designed component used to
mechanically attach the injection tube to the
membrane.
1000 bases per bo
PREPRUFE SCS Injection Tube A durable, flexible tube used to deliver the
grout to the membrane after shotcrete
placement.
100 lf coils, 5 coils per box
®
®
®
®
®
® ®
®
®
Product Data Sheets
Page 9 of 13

Grout Injection
PRODUCT NAMEPRODUCT NAME DESCRIPTIONDESCRIPTION SUPPLYSUPPLY
PREPRUFE SCS Injection Packer Button-head, backflow prevention packer
used to connect the grout pump to the
injection tube.
500 packers per box
PREPRUFE SCS Hydrophilic Grout Part A Grout part A for injection into PREPRUFE SCS
Membrane providing ultimate waterproofing
protection.
5 gallon pails
PREPRUFE SCS Hydrophilic Grout Part A
Activator
Activator used for Part A to provide for
temperature flexibility during installation.
28 fl oz cans
PREPRUFE SCS Hydrophilic Grout Part B Grout part B for injection into PREPRUFE SCS
Membrane providing ultimate waterproofing
protection.
50 gallon drums or 5 gallon pails
PREPRUFE SCS Hydrophilic Grout Part B
Activator**
Activator used for Part B to provide for
temperature flexibility during installation.
2 lb jars
Ancillary Products (if required)
PRODUCT NAMEPRODUCT NAME DESCRIPTIONDESCRIPTION SUPPLYSUPPLY
PREPRUFE Tieback Cover A specially designed, two-part cover used to
maintain waterproofing integrity at soil
retention tieback heads.
Refer to GCP PREPRUFE Tieback Cover data
sheet
PREPRUFE Tape (LT or HC)* A reinforced pressure sensitive tape for
sealing PREPRUFE Tieback Cover.
Rolls, 4 in. x 49 ft, 4 rolls per box
HYDRODUCT 220 Drainage Composite A prefabricated geocomposite drain for use as
a combined drainage and protection layer.
Refer to GCP Hydroduct 220 data sheet
PREPRUFE SCS Port Patch A rapid curing, Portland cement based product
used to repair port holes after injection.
5 gallon pails
Related articles
®
® ®
®
® ®
®
® ®
®
®
®
®
* LT denotes Low Temperature (between 25°F (-4°C) and 86°F (+30°C)); HC denotes Hot Climate (50°F (>+10°C))
** Part B Activator is shipped as hazmat: corrosive
Product Data Sheets
Page 10 of 13
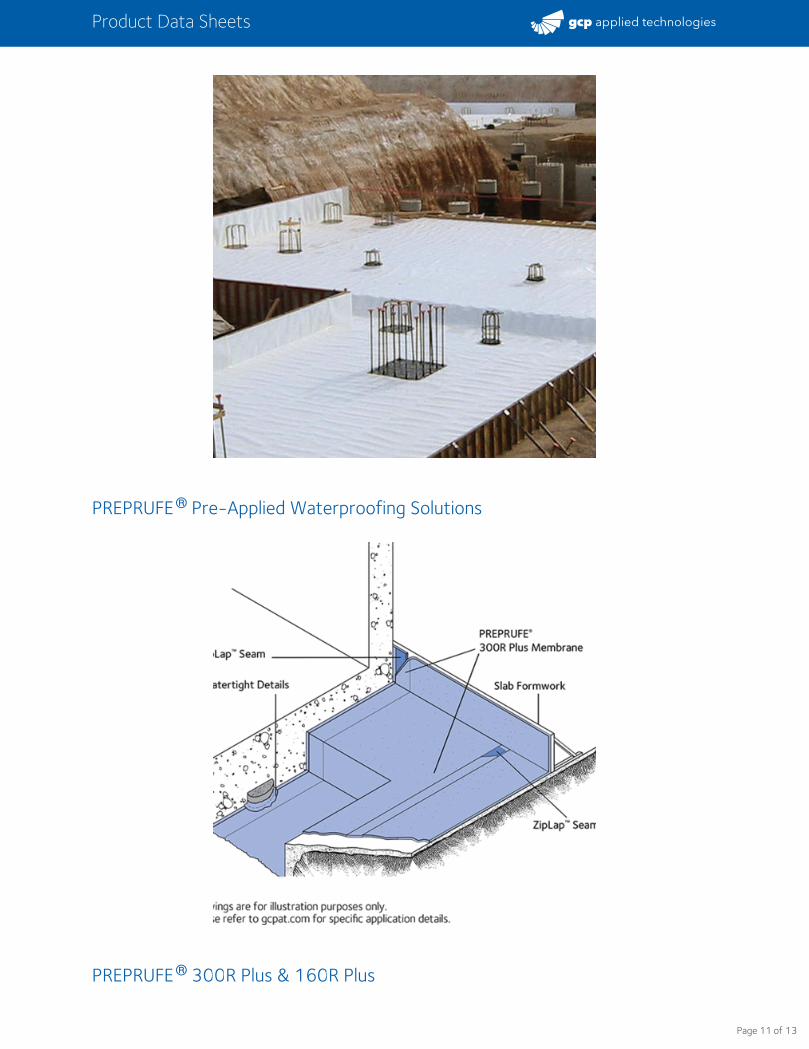
PREPRUFE Pre-Applied Waterproofing Solutions
PREPRUFE 300R Plus & 160R Plus
®
®
Product Data Sheets
Page 11 of 13
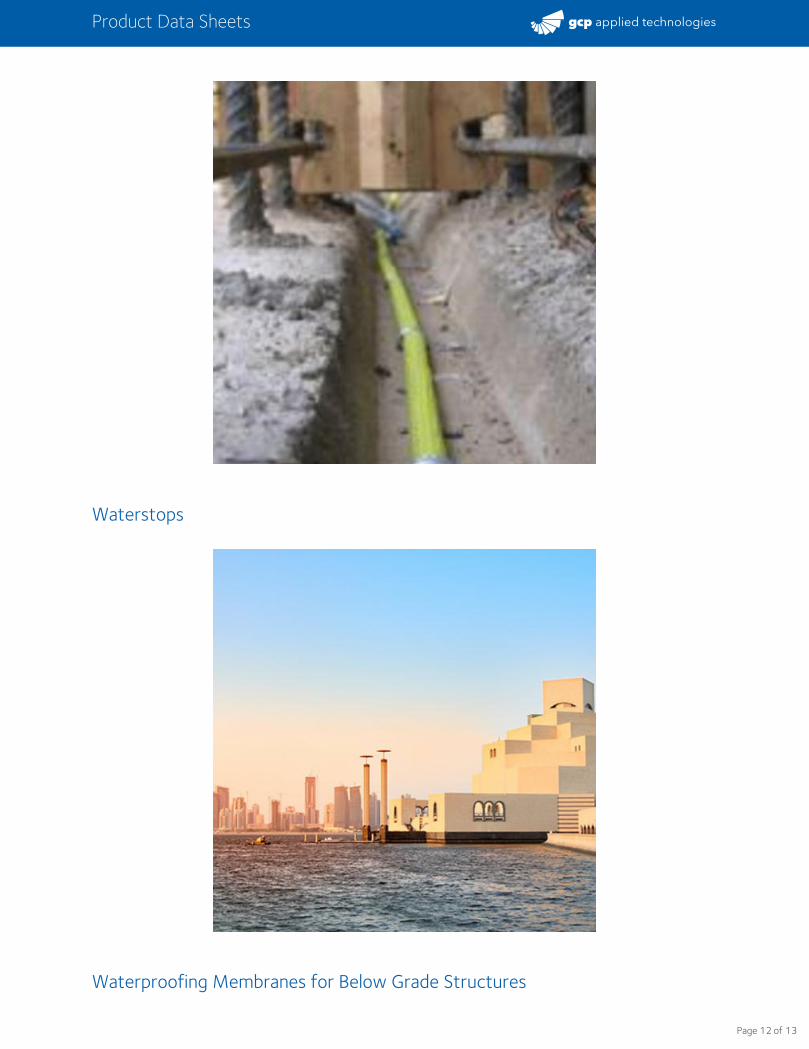
Waterstops
Waterproofing Membranes for Below Grade Structures
Product Data Sheets
Page 12 of 13
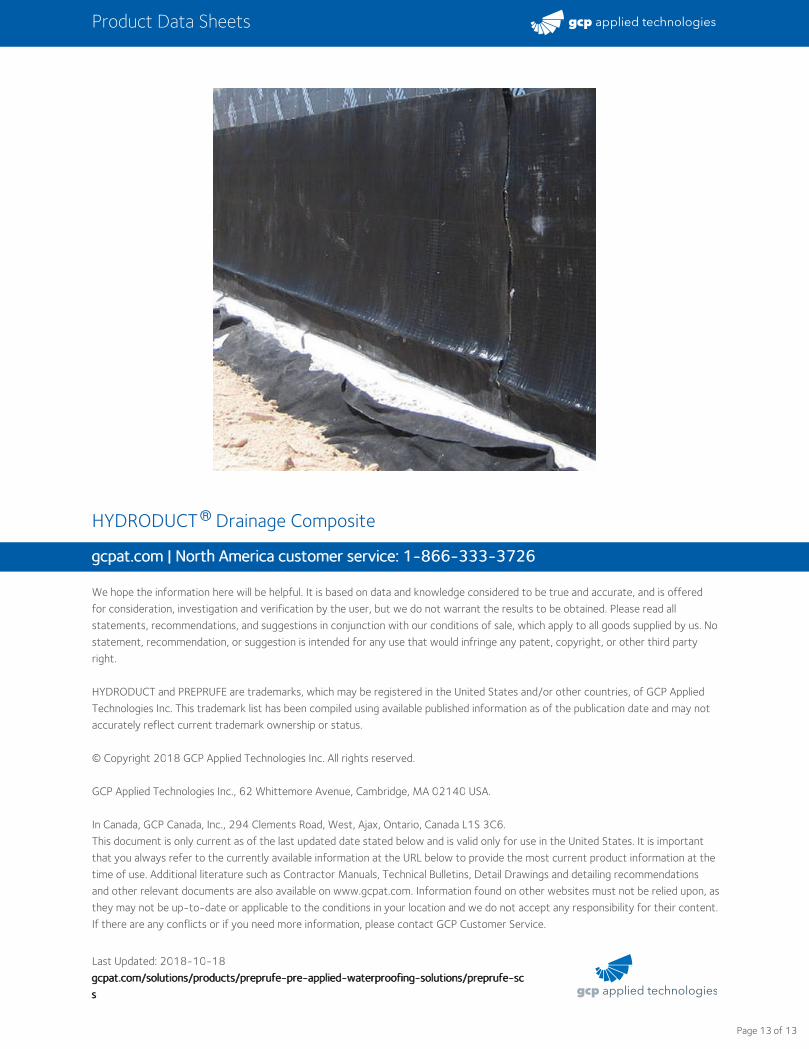
HYDRODUCT Drainage Composite®
gcpat.com | North America customer service: 1-866-333-3726gcpat.com | North America customer service: 1-866-333-3726
We hope the information here will be helpful. It is based on data and knowledge considered to be true and accurate, and is offeredfor consideration, investigation and verification by the user, but we do not warrant the results to be obtained. Please read allstatements, recommendations, and suggestions in conjunction with our conditions of sale, which apply to all goods supplied by us. Nostatement, recommendation, or suggestion is intended for any use that would infringe any patent, copyright, or other third partyright.
HYDRODUCT and PREPRUFE are trademarks, which may be registered in the United States and/or other countries, of GCP AppliedTechnologies Inc. This trademark list has been compiled using available published information as of the publication date and may notaccurately reflect current trademark ownership or status.
© Copyright 2018 GCP Applied Technologies Inc. All rights reserved.
GCP Applied Technologies Inc., 62 Whittemore Avenue, Cambridge, MA 02140 USA.
In Canada, GCP Canada, Inc., 294 Clements Road, West, Ajax, Ontario, Canada L1S 3C6.This document is only current as of the last updated date stated below and is valid only for use in the United States. It is importantthat you always refer to the currently available information at the URL below to provide the most current product information at thetime of use. Additional literature such as Contractor Manuals, Technical Bulletins, Detail Drawings and detailing recommendationsand other relevant documents are also available on www.gcpat.com. Information found on other websites must not be relied upon, asthey may not be up-to-date or applicable to the conditions in your location and we do not accept any responsibility for their content.If there are any conflicts or if you need more information, please contact GCP Customer Service.
Last Updated: 2018-10-18gcpat.com/solutions/products/preprufe-pre-applied-waterproofing-solutions/preprufe-scgcpat.com/solutions/products/preprufe-pre-applied-waterproofing-solutions/preprufe-scss
Product Data Sheets
Page 13 of 13