Plan for Implementing 21st Century Skills in a Primary...
44
1 Plan for Implementing 21 st Century Skills in a Primary Classroom Written By: Michelle DeSilva College Park Elementary School 2014-2015 School Year Rationale & Description The world we live in is fast-paced and ever changing; it is our duty as educators to provide students with the necessary skills to strive in the 21 st century. Students need to have the ability to confidently use web-based software, wisely navigate the Internet, and create and publish items on a global level. Students must be taught the 4C’s: critical thinking, collaboration, communication and creativity (Partnership for Learning, www.p21.org/4Cs). In order for students to become thriving 21 st century citizens, it is critical that we start giving them the necessary tools and skills to succeed at a young age. What follows is a plan for introducing and implementing new technology in a primary classroom. Please note that activities should be modified to meet the needs of your specific primary classroom. Activities outlined below are cross curricular. Grade Level Activities are geared towards meeting curriculum expectations for an Ontario grade two classroom, and are primarily aligned with NAD Technology standards for kindergarten through grade two. NAD Curriculum Standards T.3-5.IDL.1: Use age-appropriate software to generate new ideas and create products. T.K-2.IDL.2: Use technology in multiple subjects to find answers to questions. T.K-2.IDL.3: Play with technology and discuss observations. T.K-2.TF.1: Use developmentally appropriate digital tools to communicate ideas with others. T.K-2.TF.3: Know basic technological vocabulary and use a variety of age- appropriate hardware and software. T.K-2.TF.5: Identify, match, and use computer keys through informal experiences. T.K-2.GDC.1: Recognize how a Christian uses technology as a responsible citizen. T.K-2.GDC.3: Understand what personal information should not be shared online. T.K-2.GDC.4: Use technology to communicate respectfully with others. Scope & Sequence In order to successfully implement 21 st century skills in a primary classroom we will have a two-pronged approach: one branch will focus on teacher training and development, the second will focus on student instruction. Teacher development activities will be geared to inspiring and informing teachers. The plan’s primary focus will be on student instruction. Skills will be presented in a scaffolded manner with instruction and assigned tasks building upon previous knowledge and learning. The following is the suggested plan of action outlined month by month:
Transcript of Plan for Implementing 21st Century Skills in a Primary...

1
Plan for Implementing 21st Century Skills in a Primary Classroom Written By: Michelle DeSilva
College Park Elementary School 2014-2015 School Year
Rationale & Description The world we live in is fast-paced and ever changing; it is our duty as educators to provide students with the necessary skills to strive in the 21st century. Students need to have the ability to confidently use web-based software, wisely navigate the Internet, and create and publish items on a global level. Students must be taught the 4C’s: critical thinking, collaboration, communication and creativity (Partnership for Learning, www.p21.org/4Cs). In order for students to become thriving 21st century citizens, it is critical that we start giving them the necessary tools and skills to succeed at a young age. What follows is a plan for introducing and implementing new technology in a primary classroom. Please note that activities should be modified to meet the needs of your specific primary classroom. Activities outlined below are cross curricular. Grade Level Activities are geared towards meeting curriculum expectations for an Ontario grade two classroom, and are primarily aligned with NAD Technology standards for kindergarten through grade two. NAD Curriculum Standards T.3-5.IDL.1: Use age-appropriate software to generate new ideas and create
products. T.K-2.IDL.2: Use technology in multiple subjects to find answers to questions. T.K-2.IDL.3: Play with technology and discuss observations. T.K-2.TF.1: Use developmentally appropriate digital tools to communicate ideas
with others. T.K-2.TF.3: Know basic technological vocabulary and use a variety of age-
appropriate hardware and software. T.K-2.TF.5: Identify, match, and use computer keys through informal experiences. T.K-2.GDC.1: Recognize how a Christian uses technology as a responsible citizen. T.K-2.GDC.3: Understand what personal information should not be shared online. T.K-2.GDC.4: Use technology to communicate respectfully with others. Scope & Sequence In order to successfully implement 21st century skills in a primary classroom we will have a two-pronged approach: one branch will focus on teacher training and development, the second will focus on student instruction. Teacher development activities will be geared to inspiring and informing teachers. The plan’s primary focus will be on student instruction. Skills will be presented in a scaffolded manner with instruction and assigned tasks building upon previous knowledge and learning. The following is the suggested plan of action outlined month by month:

2
Month Student Target Objectives September The Basics
Ensure students can turn on and turn off a computer accurately
Ensure students understand the difference between putting a computer to sleep and shutting down a computer
Ensure students can identify and are familiar with the following basic parts of a computer: monitor, keyboard, and mouse
Introduce students to a web browser. Ensure students understand where to type in web addresses
Media Literacy: Ensure students are given guidance and tips for Internet safety (Going Safe Places & Safety Online)
Standards: T.K-2.IDL.3, T.K-2.TF.3 October Introducing Web-based Programs & Sites
Introduce students to various web-based programs, such as typingpal.com, mathletics.com, and raz-kids.com
Ensure students can add the above-mentioned sites to their tools menu bar for easy access in the future
Ensure students are comfortable with log in procedures Implement a plan for students to keep track of their log-in
information for various websites Media Literacy: Define media and describe the various types
of media, ensure students are comfortable with terms like target audience and purpose, teach students to evaluate the purpose of media – is it to persuade, inform or entertain?
Standards: T.K-2.TF.3, T.K-2.TF.5 November Kid-Friendly Search Engines & Google Slides Presentations
Introduce students to kid-friendly research resources on the web, For example: kids.nationalgeographic.com, www.kidsclick.org/, kidfriendlysearch.com/,
www.safesearchkids.com/google Have students use one of the above mentioned search
engines to research an animal of their choice. Research materials should be incorporated into a Google Slides presentation
Introduce students to Google Slides presentations Ensure students are comfortable inserting slides, pictures,
titles and text into a Google Slides presentation Media Literacy: Information Literacy Focus (ABC’s of
Searching, Using Key Words, Sites I Like) Standards: T.K-2.IDL.1, T.K-2.IDL.2, T.K-2.TF.3
December Privacy & Security, Google Docs
Introduce using Google Docs for publishing writer’s workshop stories
Media Literacy: Privacy and Security Focus (Keep It Private, Follow the Digital Trail, Powerful Passwords)
Standards: T.K-2.IDL.1, T.K-2.TF.1, T.K-2.GDC.3

3
January Introduction To Blogging
Media Literacy: Relationships & Communication Focus (Screen Out Mean, My Online Community, show respect online, writing good emails)
Ensure students understand what a blog is. Provide students with opportunities to begin blogging
Standards: T.K-2.IDL.1, T.K-2.TF.1, T.K-2.GDC.1, T.K-2.GDC.4 February Group Project: Country Embedding Videos
Country Group Project: Students will use previously taught skills to research a country, co-write a report on the country using Google Docs, and co-create a presentation using Google Slides. The group will present their report and presentation to the class
Ensure students can embed videos into Google Slides presentations
Standards: T.K-2.IDL.1, T.K-2.IDL.2, T.K-2.TF.1 March Digital Story Telling & iMovie
Introduce students to Digital Story Telling Ensure students understand the 7 elements of a Digital Story Familiarize students with iMovie, ensure students are
comfortable with using iMovie Option 1: Invite students to choose their favourite writer’s
workshop story to create their own digital story Option 2: Assign class groupings the task of creating an
Easter-themed or Biblical Digital Story Standards: T.K-2.IDL.1, T.K-2.TF.1, T.K-2.TF.3
April, May & June Cementing Skills
Year-End Culminating Projects: Flat Stanley Adventure Reports & Grandparent Digital Stories
Students will use all media and tech knowledge to create a digital story that illustrates one of the two above-mentioned year-end projects. Photos, video clips and dialogue should be incorporated into their digital stories. These will be posted in the class blog or website
Students will continue to contribute daily to the Class Blog on a rotational basis
Standards: T.K-2.IDL.1, T.K-2.TF.1
September – The Basics Please note it may take more than one class period to complete each session listed below.
Session 1: Parts of a Computer & More (Login, Shutdown, Sleep) Preparation & Materials:
Teacher Enrichment: Please watch the following short video clips: Above and Beyond – www.youtube.com/watch?v=zTbuFN8_D_s 21st Century Skills – www.youtube.com/watch?v=qwJIhZcAd0I

4
Smart Board – What kind of technology do you use at home? Graph (a bar graph on a regular whiteboard can also work)
Video: Parts of a Computer at www.brainpopjr.com o Note: Login is required. NAD teachers can contact their administrators
for log-in information. Book Computer Lab Time
Standards:
T.K-2.IDL.3: Play with technology and discuss observations. T.K-2.TF.3: Know basic technological vocabulary and use a variety of age-
appropriate hardware and software. Introduction: In order for students to begin to use computers they must first be taught the basics. Often times a student will enter my classroom and they will be fairly tech savvy (as in they can operate a Smartphone and iPad) but they seem to be missing the very basics. In this series of mini-lessons you will:
Familiarize your students with the basic components of a computer Teach students how to turn a computer on and off Explain the difference between shutting a computer down and putting it to
sleep Allow students to explore a web-browser and ensure they know where to
type in a web address Define media, types of media, and media terms (target audience, purpose,
persuade, inform, entertain) Activity Descriptions:
1. Tell students that today we are going on an exciting adventure. I am going to give you some clue about where we are going and see if you can guess our mystery fieldtrip. Clue 1: We are going somewhere in the school, Clue 2: We are going somewhere that will allow us to visit other places, Clue 3: We are going somewhere where each of you will have your own work area, Clue 4: In this place you can play games, find information, talk with friends, watch videos, and do a lot more. Allow students to guess where we might be going. Tell students: we will be going on a fieldtrip to the computer lab!
2. Say: Before we go to the computer lab I need to get an idea of what you already know about technology and how you use it at home. I would like each of you to come up to the smartboard and highlight a square indicating the kind of technology you use at home; if you use more than one kind of technology then you may highlight more than one square. I have created a bar graph to help us gather data on what technology you use at home. (See sample graph below. Students approach smartboard, one at a time, and use highlighter function to create a bar graph or creative smiley face pen to create a picture graph by colouring in one box in each column representing a form of technology they use at home.) Discuss results.

5
3. Tell students that before we go to the lab we are going to watch a video on brainpopjr.com called “Parts of a Computer”. Discuss video. Take online quizzes provided – done interactively as a class on the Smart Board.
4. Tell students that now we will head to the computer lab. Go over rules for computer lab etiquette to ensure students know what is expected.
5. Allow each student to choose a workstation. Play a mini-game of Simon says to check students’ understanding of parts of the computer.
6. Tell students that today we are going to learn how to properly start a computer and log on to our school computers. Go through the process for your school computers.
7. Have the students gather in the centre of the computer lab to discuss and give the computers time to go to sleep. Ask: Can anyone tell me what it means when a computer goes to sleep? What normally happens? Let the students describe what they have observed at home. Ask: How do you wake up a computer? (Wiggle mouse, press on track pad – like giving a sleeping person a little shake.) What if someone falls into a deep sleep then what? (Firmer shake, calling out to the person – re-entry of login). Give students the opportunity to try ‘waking-up’ their computers.
8. Ask: Now what if it is the end of the day and you no longer plan on using your computer, what should you do? Model the proper steps for shutting down a computer. If possible project these steps on a screen for students to reference as they try.
9. Discuss computer lab etiquette – remind students to slide in keyboard trays, tuck in chairs and pick up all their belongings.
Assessment: For this lesson assessment will take the form of anecdotal notes. Teacher will observe the students while they play the Simon Says computer parts game. Teacher

6
will also make note of how students do on the online Brain Pop Jr. quiz (easy & hard) at the end of the Brain Pop Jr. presentation. Session 2: Going Safe Places Preparation & Materials:
Lesson Plan: Going Safe Places Online (download from website listed below) Preview Video: My Online Neighbourhood (website below) www.commonsensemedia.org/educators/lesson/going-places-safely-k-2
o Note: Login is required. NAD teachers can contact their administrators for
log-in information.
Crayons, markers and hand-outs Internet connections for exploring one of these two websites: (Book
Computer Lab) o Destination Modern Art: o www.moma.org/interactives/destination o The San Diego Zoo: o kids.sandiegozoo.org
Introduction: Before students can be let loose on the Internet it is important that they are taught some Internet safety protocols. For this lesson we will be using Common Sense Media’s ready-made K-2 lesson called: Going Safe Places (www.commonsensemedia.org). This lesson plan, including a video and worksheets, can be downloaded at the above-mentioned link. In this detailed lesson students will discover that the Internet is a fantastic tool for visiting distant places, compare neighbourhood safety to web safety and will learn the rules for safe travelling on the Internet. This lesson takes approximately 45 minutes to complete. Activity Description: Please see downloaded lesson notes. Assessment: Teacher worksheets provided in the Common Sense Media lesson plan could be used for assessment. Also, class discussion and observations of future Internet browsing habits could be recorded in informal assessment notes. Session 3: Staying Safe Online Preparation & Materials:
Lesson Plan: Staying Safe Online (download from website listed below) o Note: Login is required. NAD teachers can contact their administrators for
log-in information.
7
Chalkboard, white board or Interactive Whiteboard A long piece of string or tape Red, yellow, and green markers or crayons Copy the Website Traffic Light Student Handout (one per student)
Introduction: The essential question asked in this lesson is: How do you stay safe when you visit different websites? For this lesson we will be using Common Sense Media’s ready-made K-2 lesson called: Staying Safe Online (www.commonsensemedia.org) This lesson plan will impress upon students’ minds the importance of choosing appropriate websites and avoiding those that are not. This lesson takes approximately 45 minutes to complete. Activity Description: Please see downloaded lesson notes. Assessment: The Common Sense Media lesson plan provides a short assessment sheet.
October – Introducing Web-based Applications & Sites *Sessions listed below are designed to take up one class period.
Session 4: Introduction of Typingpal.com Preparations & Materials:
Teacher Enrichment: Please watch the following two short Typing Pal videos using these links: www.youtube.com/watch?v=J43nIk4Kvf4 and www.youtube.com/watch?v=aVwK0Pt6zIY
Input student names and set up your class in: school.typingpal.com o Note: Login is required. NAD teachers can contact their administrators for
log-in information. Print out parent information letter including child’s login name and
password Set up student passwords (For this class all students will have the same
password: type2) Interactive Whiteboard Book Computer Lab Time
Standards:
T.K-2.TF.3: Know basic technological vocabulary and use a variety of age-appropriate hardware and software.
T.K-2.TF.5: Identify, match, and use computer keys through informal experiences.
Introduction:

8
In order for students to effectively communicate using tools such as Google Docs and other word processing tools, students must have good keyboarding skills. Typing Pal is a completely web-based tool that allows students to practice their keyboarding skills from any computer where they have Internet access. It is flexible, age-appropriate and engaging. Activity Description:
1. Say: Let’s play a little game. I would like you to tell me something you would like me to type on the Smart Board and see if I can type it without looking at the Smart Board and without looking at my keyboard. Allow several students the opportunity to challenge you with typing a word or phrase. Ask: How did I do?
2. Ask: What did you notice about how I typed? Did I look at the keys? Allow students to share.
3. Say: Now I’m going to show you what I noticed about how most of you type. Do an imitation of students’ current typing skills. Ask: What differences do you see between my typing and your typing?
4. Say: Today I am going to introduce you to a new program that will transform you from “chicken pecker” keyboarders to keyboarding geniuses! Explain the chicken pecking analogy – chicken pecks for food, awkward motions versus fingers on the home row keys working fluidly together.
5. Using the interactive whiteboard, model how to log in to school.typingpal.com. Explain to students that we will want to add this to our tool bar so that we can easily access it in the future.
6. To facilitate login procedure, create a bookmark that links to your school’s personalized login site; this will ensure your students do not need to submit their school code at each login. Model adding an item to the tool bar using these steps: Click on Bookmark in the top menu, Click on Add a Bookmark, Click on drop arrow to change the location to the Bookmarks Toolbar, Click on Done. Tell students we will be doing this in the computer lab.
7. Take students to the computer lab and have them enter school.typingpal.com in the web browser. (Display this address on the chalk board/interactive white board so that students can refer to it for the correct spelling.) This will take them to Typing Pal’s Login Page. Say: Because we will be using this web application often we will include it in our Tools Bar at the top of the page. Discuss the value of adding an item to the Tools bar. Go through steps assisting students as needed.
8. Tell students to log in using the username and password that you have provided them with.
9. Tell all students to click on the yellow hot air balloon to watch the “7 Keys to Success When Learning to Type’ presentation
10. Instruct students to click on the blue door and click on the first apple in the sequence.
11. Distribute Parent Letters, place in front agenda pockets. Assessment:

9
Typing Pal has built in assessment tools that provide students’ with instant feedback as to which fingers they are using incorrectly and letters they are typing incorrectly. Typing Pal can also generate reports for the teacher as to how a student is progressing and where they might be struggling. Session 5: Introduction of Mathletics.com Preparations & Materials:
Teacher Enrichment: Please watch the following Introduction to Mathletics video using this link: www.youtube.com/watch?v=EK5_y3Cs9fY
Input student names and set up your class in: www.mathletics.com o Note: Login is required. NAD teachers can contact their administrators for
log-in information. o Tip: Be sure to remove all the strands you are not teaching and assign
correct grade level. Print out parent information letter including child’s login cards with assigned
usernames and passwords (Enclose in front agenda pocket) Interactive Whiteboard Book Computer Lab Time
Standards:
T.K-2.TF.3: Know basic technological vocabulary and use a variety of age-appropriate hardware and software.
Introduction: Mathletics is a web-based application that allows students to practice their math skills in a fun and engaging manner. The teacher can set up the class Mathletics site to tailor-made student needs. Teacher can choose to display activities for all math strands or just the strand they are focusing on in class. Teacher can assign specific assignments to different students. Activity Description:
1. Say: Today I am going to introduce you to a new program that will help us in practicing our math skills in a new and fun way.
2. Using the interactive whiteboard, model how to login to www.mathletics.com Explain to students that we will want to add this to our tool bar so that we can easily access it in the future.
3. Ask students if anyone remembers how to add an item to the Tools bar. Allow a student to model adding an item to the tool bar using these steps: Click on Bookmark in the top menu, Click on Add a Bookmark, Click on drop arrow to change the location to the Bookmarks Toolbar, Click on Done. Tell students we will be doing this in the computer lab.
4. Once logged on, go into the Teacher Demonstration mode and explore Mathletics with the students. Show students what it will look like if they have

10
an assigned task. Explain they will have to complete the task before going to any other area. Allow students to take turns completing the assigned task.
5. Take students to the computer lab and have them enter www.mathletics.com in the web browser. (Display this address on the chalk board/interactive white board so that students can refer to it for the correct spelling.) Say: Because we will be using this web application often we will include it in our Tools Bar at the top of the page. Discuss the value of adding an item to the Tools bar. Go through steps assisting students as needed.
6. Tell students to login using the username and password that you have provided them with on their Mathletics cards.
7. Instruct students to follow the prompts to create their avatar (i.e. Click on boy or girl, choose hair colour, background etc.)
8. Let student’s complete the assigned task and then challenge a classmate or world student to an electronic math challenge.
9. Distribute Parent Letters, place in front agenda pockets. Assessment: Students are given instant feedback on their assignments and teachers can generate a variety of reports to assist in assessment and instructional planning. Session 6: Introduction of Raz-kids.com Preparations & Materials:
Teacher Enrichment: Please watch the following Introduction to Raz-Kids video using this link: www.youtube.com/watch?v=L1gioIYERwo
Input student names and set up your class in: www.raz-kids.com o Note: Login is required. NAD teachers can contact their administrators for
log-in information. o Tip: Call students individually to select their two login-icons before
session begins Print out parent information letter including child’s login cards with assigned
usernames and icon passwords (Enclose in front agenda pocket) Interactive Whiteboard Book Computer Lab Time
Standards:
T.K-2.TF.3: Know basic technological vocabulary and use a variety of age-appropriate hardware and software.
Introduction: This web-based application provides students with a host of levelled reading books to choose from for their personal reading. Using the benchmark reading books you can assess each of your student’s reading ability and assign them a reading level. Students will then log in to the website and find a host of books waiting for them to

11
listen to, read, record and then take a comprehension quiz on. As students complete reading books in their assigned level they are advanced to the next reading level where they will encounter more challenging reading materials. Students accrue points and stars that they can spend purchasing items to deck out their Raz-rockets. Activity Description:
1. Say: Today I am going to introduce you to a new program that will give you lots of new and interesting books to read.
2. Using the interactive whiteboard, model how to login to raz-kids.com Explain to students that we will want to add this to our tool bar so that we can easily access it in the future.
3. Ask students if anyone remembers how to add an item to the Tools bar. Allow a student to model adding an item to the tool bar using these steps: Click on Bookmark in the top menu, Click on Add a Bookmark, Click on drop arrow to change the location to the Bookmarks Toolbar, Click on Done. Tell students we will be doing this in the computer lab.
4. Once logged on, go into Raz-kids, explore the different features with students. 5. Take students to the computer lab and have them enter www.raz-kids.com
in the web browser. (Display this address on the chalk board/interactive white board so that students can refer to it for the correct spelling.) Say: Because we will be using this web application often we will include it in our Tools Bar at the top of the page. Ask: What is the value of adding an item to the Tools bar? Go through steps assisting students as needed.
6. Tell students to log in using the username and password that you have provided on their Raz-kids cards.
7. Let students choose a book to listen to, read and answer a quiz. 8. Distribute Parent Letters, place in front agenda pockets
Assessment: At the end of each book students take a multiple choice comprehension quiz. The results of these quizzes are recorded for the teacher. You can then generate reports that indicate where each child is struggling (i.e. sequence, detail, cause & effect, fact vs. opinion, main idea and supporting details, etc.) Session 7: What is Media? Preparations & Materials:
“What is Media?” Smart Notebook file “Media Intro – Read, Look, Listen Sort” Smart Notebook file Various examples of media: picture books, dictionaries, magazines, posters,
logos, audio commercial, TV commercial, traffic sign pictures, etc. Interactive Whiteboard

12
Standards: T.K-2.TF.3: Know basic technological vocabulary and use a variety of age-
appropriate hardware and software. Introduction: Media is all around us. Media messages constantly bombard our students. It is in everything our students see, listen to, watch and read. There are many different kinds of media. Children need to recognize media so that they can critically assess and evaluate what they are seeing and hearing. In today’s lesson we will be defining media and sorting various categories. For example, what we read, look at, watch or listen to. We will also sort media into categories such as text and pictures, text only, pictures only, etc. Activity Description: 1. Use “What is Media?” Smart Notebook file to help students define media. Have a
different student read each slide and discuss images in the slides. Have students provide additional examples of the media each slide discusses.
2. Use “Media Intro – Read, Look, Listen Sort” Notebook file to review and check for understanding. In this activity you will provide students with several hands-on examples of media for them to manipulate. Initially students will sort items into these categories: What I Can Read, What I Can Look At, What I Can Listen To. Students should quickly realize that items often overlap.
3. Next have students resort items into these categories: Words, Pictures, and Sounds. Ask do any of these items overlap?
Assessment: Assessment for this activity will be informal and will take the form of observation and anecdotal notes. Session 8: Identifying Target Audience & Purpose (Television Media Focus) Preparations & Materials:
“Target Audience” Smart Notebook file Interactive Whiteboard
Standards:
T.K-2.TF.3 Know basic technological vocabulary and use a variety of age-appropriate hardware and software.
Introduction: It is critical that students realize that each piece of media has an author/creator and a target audience. Students must be taught to critically analyze media to assess the author’s intent – are they trying to persuade you, entertain you or inform you? In
13
today’s lesson students will evaluate different pieces of media to determine their target audience and purpose. Activity Description:
1. Say: Let’s begin by reviewing. What is media? Allow students an opportunity to share.
2. Use “Target Audience” Smart Notebook file to guide today’s discussion. 3. Say: Today we are going to be talking a bit more about the messages in media
that we see on TV. 4. Ask: What are some of your favourite TV shows? 5. Talk about some of the different types of shows mentioned. For example,
cartoons, sitcoms, game shows, mystery shows. 6. Ask: What comes in between shows or in the middle of shows?
(Commercials) Ask: Have you ever noticed that your TV shows commercials are different than the ones that might be on when your parents are watching the news or their shows? Why do you think that is?
7. Say: Each piece of media is designed for a target audience. (Use bullseye analogy. The target audience of any piece of media is the center of the bullseye; it is what the creators are aiming for. For example, a McDonald’s happy meal with My Little Ponies is targeting young girls, ages 4-7. They may reach others but their bullseye target is this particular group). Do the Smart Notebook – “Who’s the target audience?” activity.
8. Educate students to the purpose of all media. Say: Media is used for one of three reasons – to persuade, to entertain or to inform.
9. Use the four commercial links on the last slide and ask students to figure out the target audience and purpose for each one. Encourage discussion.
Assessment: Assessment for this activity will be informal and will take the form of observation and anecdotal notes.
November – Searching the Web and Google Slides
Session 9: Searching the Internet
Preparation & Materials: Preview Internet Safety Video on www.brainpopjr.com
o Note: Login is required. NAD teachers can contact their administrators for
log-in information. Review the following websites and choose one or two for this lesson:
o www.kidsclick.org/, kidfriendlysearch.com/, www.safesearchkids.com/google, kids.nationalgeographic.com
Schedule computer lab time Interactive Whiteboard

14
Searching the Web Animal Research sheet (1 per student)
Standards: T.K-2.IDL.2: Use technology in multiple subjects to find answers to questions. T.K-2.TF.3: Know basic technological vocabulary and use a variety of age-
appropriate hardware and software. Introduction: So far the students have only used the Internet to access specific learning sites. Today they will be introduced to using the Internet as an information gathering search tool. For the purpose of this lesson student will be researching an animal of their choice. Students will be asked to navigate different websites and find out what the animal looks like, where it lives and what it likes to eat. Activity Description:
1. Ask: What are some of the things you like to do on the Internet? Allow for students to respond.
2. Say: Today we are going to be looking for information on the Internet but when you explore different sites on the Internet sometimes you run into things you shouldn’t be seeing. Let’s look at this safety video first (Internet Safety Video – www.brainpopjr.com)
3. Say: Most of you mainly use the Internet for playing games and doing assigned schoolwork (Mathletics, Raz-kids, Typing Pal, etc.). Today we are going to use the Internet to learn about a topic. The Internet is a great research tool. There is a lot of information on the Internet but you do have to be sure that you are on appropriate sites. Today I am going to show you a couple of kid-friendly websites.
4. Using the Smart Board go to several of the listed websites and explore them with the class.
5. Tell students that you will be assigning partner groups and each group will be responsible for researching an animal. Assign groups and distribute animal research sheet. Ask students to work together to complete the sheet.
Assessment: Assessment for this activity will be informal and will take the form of observation and anecdotal notes. Animal research sheets will also be collected and informally assessed as this is the students’ first attempt at web-based research.
Session 10: Using Key Words
Preparation & Materials:
Lesson Plan: Using Key Words (download from website listed below) www.commonsensemedia.org/sites/default/files/uploads/classroom_curric
ulum/k-2-unit2-usingkeywords.pdf

15
o Note: Login is required. NAD teachers can contact their administrators for
log-in information. Paper, Pencils, Highlighters Choose your Key Words student handout (1 for every 2 students) Review search sites listed in Teach 2 Common Sense Media Lesson and
choose one for today’s lesson
Standards: T.K-2.TF.3: Know basic technological vocabulary and use a variety of age-
appropriate hardware and software. Introduction: For this lesson we will be using Common Sense Media’s ready-made K-2 lesson called: Using Key Words (www.commonsensemedia.org). Students will be taught to go over a piece of reading material and pick out key words to use to guide their research. Activity Description: Please see downloaded lesson notes. Assessment: The Common Sense Media lesson plan provides a short assessment sheet.
Session 11: Sites I Like
Preparation & Materials: Lesson Plan: Sites I Like (download from website listed below) www.commonsensemedia.org/sites/default/files/uploads/classroom_curric
ulum/k-2-unit2-sitesilike.pdf o Note: Login is required. NAD teachers can contact their administrators for
log-in information. Rate My Site Student Handout (1 per student) Preview the websites listed in Teach 1 and prepare to show one to the class
Introduction: For this lesson we will be using Common Sense Media’s ready-made K-2 lesson called: Sites I Like (www.commonsensemedia.org). Students will be taught to evaluate a children’s information website. They will discuss features they like and features they do not like. Students will realize that websites also have a target audience and not everyone may enjoy the same website they do. Activity Description: Please see downloaded lesson notes.

16
Assessment: The Common Sense Media lesson plan provides a short assessment sheet.
Session 12: An Introduction to Google Slides for Presentations
Preparation & Materials: Teacher Enrichment: Preview the following website to familiarize yourself
with the benefits of Google Apps for Education www.google.com/enterprise/apps/education/benefits.html
Teacher Enrichment: Preview the following video to become more familiar with Google Apps for Education K-12 www.youtube.com/watch?v=OAfzcYWh5Gg
Teacher Enrichment: How to Create a Presentation in Google Slides www.youtube.com/watch?v=exlPqBCZIKA
Book Computer Lab Time Talk with your school administrator to obtain or create a list of student login
names and passwords for Google Educational Apps Checklist sheet (1 for each student) Interactive White Board
Standards: T.K-2.IDL.1 Explore and use teacher-selected software to create a product. T.K-2.TF.3 Know basic technological vocabulary and use a variety of age-
appropriate hardware and software. Introduction: Now that students have learned how to safely gather information from the Internet the next step is to convert the gathered information into a format in which it can be shared. Today we will be teaching students how to create a Google Slides Presentation. This Google Docs App is similar to creating a presentation in Keynote or PowerPoint. Students will be using the Animal Research information they gathered in Session 9 to create a Google Slides Presentation. By the end of this session students should be familiar with inserting slides, pictures, titles and text into a Google Slides presentation.
Activity Description: 1. Ask: How many of you remember using the Internet to look up information
with a partner? 2. Say: Today we are going to be learning how to use a new web-based
application to help you create a presentation to share the information you gathered. Your presentation will be very similar to the ones you have seen me use on the Smart Board in class.
17
3. Using the Smart Board, model login in to Google Apps for Education using the link given to you by your administrator. Once logged in, they should click on Google Slides to proceed.
4. Take students on a tour of the Google Slides app and model step by step how to create a presentation. (Highlight: Choosing a template, Name Document, Inserting Text, Inserting Images, etc.)
5. Take students to the computer lab and provide students with an opportunity to create a presentation using Google Slides. Distribute checklist sheet.
6. Each presentation should have a minimum of three slides, including text and images. Encourage students to experiment and have fun!
Assessment: This is the students’ first time using Google Slides so there will not be a summative evaluation. Assessment for this session will consist of observation and anecdotal notes. Students will also be given a checklist to use to ensure they try using several features of Google Slides Presentation. (Please see this checklist in the Additional Resources Section of this document, Page 27.)
Session 13: Animal Research Project
Preparation & Materials: List of potential research animals (for students who cannot decide which
animal to choose and to minimize repeats) Animal Research #2 Activity Sheet (one per student) Rubrics (one per student) Schedule Computer Lab time Pencils and paper
Standards: T.K-2.IDL.1: Explore and use teacher-selected software to create a product. T.K-2.IDL.2: Use technology in multiple subjects to find answers to questions. T.K-2.TF.1: Use developmentally appropriate digital tools to communicate
ideas with others. T.K-2.TF.3: Know basic technological vocabulary and use a variety of age-
appropriate hardware and software. Introduction: Now that students have had an opportunity to explore Google Slides, they will be required to use their newfound skills to create an animal presentation, which they will share with their classmates. Each student will choose an animal to research using one of the following kid-friendly search engines:
kids.nationalgeographic.com www.kidsclick.org/ kidfriendlysearch.com/ www.safesearchkids.com/google

18
Once students have completed their Google Slides Presentation they will present their presentation to their classmates. Please note this assignment may take several days to complete. Activity Description:
1. Tell students that they will be using Google Slides to create a presentation on an animal of their choice.
2. Distribute the Animal Research #2 Planning Sheet. Ensure students understand all terms and required components of the presentation. This can be located at the end of this document in the Additional Resources section, on page 29.
3. Distribute the Animal Research Google Slides Presentation Rubrics and ensure students understand assignment components. This can be found under Additional Resources, on page 30 at the end of the document.
4. Ask students to find their pencils and choose a station to work at in the computer lab. Ensure students understand they must gather all their information first before they can proceed to creating their Google Slides presentation. Students should show you their completed Animal Research #2 sheet before opening up Google Slides.
5. Inform students that this assignment may take several days to complete.
Assessment: This assignment will be assessed using the rubrics found in the Additional Resources section of this document. See page 30 of this document.
December - Privacy & Security, Google Docs
Session 14: Keep It Private
Preparation & Materials: Lesson Plan: Keep It Private (download from website listed below)
https://www.commonsensemedia.org/sites/default/files/uploads/classroom_curriculum/k-2-unit1-keepitprivate.pdf
o Note: Login is required. NAD teachers can contact their administrators for
log-in information. Prepare to show students an example of an online form, like the checkout
page on a site like Amazon (www.amazon.com), or the registration page for Google Plus
Preview the websites Secret Builders (www.secretbuilders.com/gameplay/gameplyer.html), Scholastic’s The Stacks (www.scholastic.com/kids/stacks), and LEGO (www.lego.com) and prepare to show them to students.
Paper and Pencils

19
Standards:
T.K-2.GDC.3: Understand what personal information should not be shared online.
Introduction: For this lesson we will be using Common Sense Media’s ready-made K-2 lesson called: Keep it Private (www.commonsensemedia.org). In this lesson, students will learn that many websites ask for private information. Students will learn what information is private and should not be shared on the Internet without an adult’s permission. Activity Description: Please see downloaded lesson notes. Assessment: The Common Sense Media lesson plan provides a short assessment sheet.
Session 15: Follow the Digital Trail
Preparation & Materials: Lesson Plan: Follow the Digital Trail (download from website listed below)
www.commonsensemedia.org/sites/default/files/uploads/classroom_curriculum/k-2-unit2-followthedigitaltrail.pdf
o Note: Login is required. NAD teachers can contact their administrators for
log-in information. Cut out the Digital Trail Squares found at the end of the Common Sense Media
Lesson Animal Tracks Student Handout (1 per every group of four students)
Standards:
T.K-2.TF.3: Know basic technological vocabulary and use a variety of age-appropriate hardware and software.
T.K-2.GDC.3 Understand what personal information should not be shared online.
Introduction: For this lesson we will be using Common Sense Media’s ready-made K-2 lesson called: Following the Digital Footprint (www.commonsensemedia.org). Students will learn that the information they put online leaves a digital footprint. They will follow two fictional characters’ footprints and come to conclusions regarding the size and appropriateness of each footprint. The essential question answered by this lesson is: What information is appropriate in a digital footprint?
20
Activity Description: Please see downloaded lesson notes. Assessment: The Common Sense Media lesson plan provides a short assessment sheet.
Session 16: Powerful Passwords
Preparation & Materials: Lesson Plan: Powerful Passwords (download from website listed below)
www.commonsensemedia.org/sites/default/files/uploads/classroom_curriculum/k-2-unit3-powerfulpasswords.pdf
o Note: Login is required. NAD teachers can contact their administrators for
log-in information. Do’s and Don’ts of Powerful Passwords (one for every four students) Interactive Whiteboard/Chalk board/ White Board Blank index cards/Strips of Paper (4 per student) Review the online password generator Dinopass (www.dinopass.com)
Introduction: For this lesson we will be using Common Sense Media’s ready-made K-2 lesson called: Powerful Passwords (www.commonsensemedia.org). This lesson asks the essential question: How do you create a secure password? Students will discover why people use passwords, create their own passwords and test the strength of their passwords. Activity Description: Please see downloaded lesson notes. Assessment: The Common Sense Media lesson plan provides a short assessment sheet.
Session 17: Google Docs for Word Processing
Preparation & Materials: Interactive Whiteboard Schedule Computer Lab Time Students’ selected stories to be published
Standards:
T.K-2.IDL.1: Explore and use teacher-selected software to create a product. T.K-2.TF.1: Use developmentally appropriate digital tools to communicate
ideas with others.

21
T.K-2.TF.3: Know basic technological vocabulary and use a variety of age-appropriate hardware and software.
T.K-2.GDC.4: Use technology to communicate respectfully with others. Introduction: Students were already introduced to Google Educational Apps when they created their Animal report presentations. This time students will be introduced to the word processing feature of Google Docs. They will type up stories they have already written, share them electronically with two friends to edit them and then publish their finished copy. Activity Description:
1. Say: Well class, it’s time to publish another story but this time we are going to do it differently. This time we will type up our stories using Google Docs.
2. Using the Interactive White board demonstrate logging on to Google Docs. Walk the students through the steps and features of Google Docs (Title, Fonts, Alignment, Spacing, Naming a document, etc.)
3. Demonstrate how you would share a document and give someone editing rights. Inform students that once they are done typing up their stories they will be sending them to two of their peers to edit them.
4. Distribute students’ selected writer’s workshop stories and allow students to go to the computer lab to start typing up their stories.
5. Rotate the computer lab to assist students.
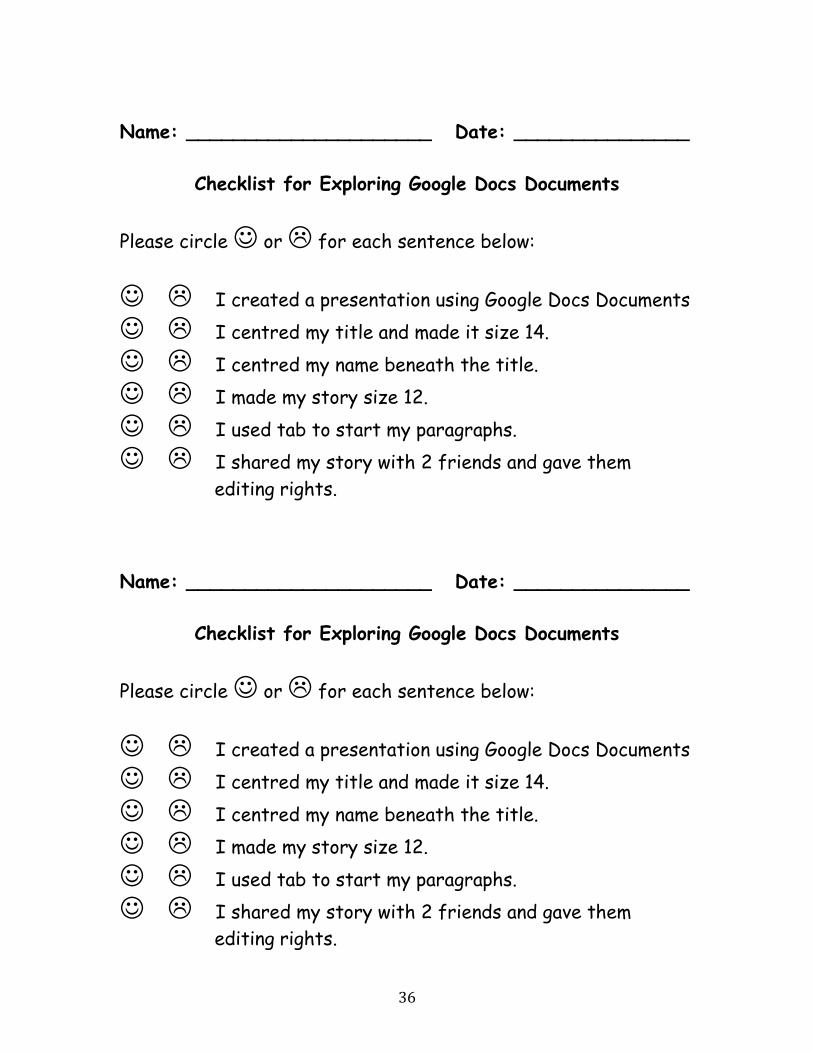
Assessment: This is the students’ first time using Google Docs word processing application so there will not be a summative evaluation. Assessment for this session will consist of observation and anecdotal notes. Students will also be given a checklist to use to ensure they try using several features of Google Docs Documents. (Please see this checklist in the Additional Resources Section of this document, page 31.)
January – Introduction to Blogging & Online Presence
Session 18: Screen Out Mean
Preparation & Materials: Lesson Plan: Screen Out Mean (download from website listed below)
https://www.commonsensemedia.org/sites/default/files/uploads/classroom_curriculum/k-2-unit2-screenoutthemean.pdf
o Note: Login is required. NAD teachers can contact their administrators for
log-in information. STOP Cyberbullying Student Handout (one per student) Preview Scenario in Teach 2 and be prepared to share with class
Standards:

22
T.K-2.TF.3: Know basic technological vocabulary and use a variety of age-appropriate hardware and software.
T.K-2.GDC.1 Recognize how a Christian uses technology as a responsible citizen.
Introduction: For this lesson we will be using Common Sense Media’s ready-made K-2 lesson called: Screen Out Mean (www.commonsensemedia.org). This lesson asks the essential question: What can you do when someone is mean to you online? Students will read a scenario that describes online bullying and discover that sometimes people can be online bullies. Students will define online bullying, learn what to do if they encounter an online bully and create several tips for dealing with online bullies. Activity Description: Please see downloaded lesson notes. Assessment: The Common Sense Media lesson plan provides a short assessment sheet.
Session 19: My Online Community
Preparation & Materials: Lesson Plan: My Online Community (download from website listed below)
https://www.commonsensemedia.org/sites/default/files/uploads/classroom_curriculum/k-2-unit3-myonlinecommunity.pdf
o Note: Login is required. NAD teachers can contact their administrators for
log-in information. Preview: “What is the Internet?” Video using the link below and prepare to
show it: https://www.commonsensemedia.org/educators/lesson/my-online-community-k-2
Copy the “Online Community Student Map“ Handout (1 per student) Scratch paper, pencils and crayons
Standards:
T.K-2.GDC.1: Recognize how a Christian uses technology as a responsible citizen.
Introduction: For this lesson we will be using Common Sense Media’s ready-made K-2 lesson called: My Online Community (www.commonsensemedia.org). This lesson asks the essential question: How does the internet connect you with others? Students will explore the concept of how although the Internet is not a ‘real’ place it is made up of real people using the same tool that connects them all together.

23
Activity Description: Please see downloaded lesson notes.
Assessment: The Common Sense Media lesson plan provides a short assessment sheet. Session 20: Show Respect Online Preparation & Materials:
Lesson Plan: Show Respect Online (download from website listed below) https://www.commonsensemedia.org/sites/default/files/uploads/classroom_curriculum/k-2-unit3-showrespectonline.pdf
o Note: Login is required. NAD teachers can contact their administrators for
log-in information. Preview & Download “Mindful Messaging” video using the following link:
https://www.commonsensemedia.org/educators/lesson/show-respect-online-k-2
Email Edit Student Handout (1 per student) Standards:
T.K-2.GDC.1: Recognize how a Christian uses technology as a responsible citizen.
Introduction: For this lesson we will be using Common Sense Media’s ready-made K-2 lesson called: Show Respect Online (www.commonsensemedia.org). This lesson asks the essential question: How can I make sure my emails are clear and respectful? Activity Description: Please see downloaded lesson notes.
Assessment: The Common Sense Media lesson plan provides a short assessment sheet. Session 21: Writing Good Emails
Preparation & Materials: Lesson Plan: Writing Good Emails (download from website listed below)
https://www.commonsensemedia.org/sites/default/files/uploads/classroom_curriculum/k-2-unit3-writinggoodemails.pdf
o Note: Login is required. NAD teachers can contact their administrators for
log-in information.

24
Preview Brainpopjr.com “Email” video o Note: Login is required. NAD teachers can contact their administrators for
log-in information. Chalkboard/White board/Interactive Whiteboard Schedule Computer Lab Time
Standards:
T.K-2.TF.1: Use developmentally appropriate digital tools to communicate ideas with others.
T.K-2.TF.3: Know basic technological vocabulary and use a variety of age-appropriate hardware and software.
T.K-2.GDC.4: Use technology to communicate respectfully with others. Introduction: For this lesson we will be using Common Sense Media’s ready-made K-2 lesson called: Writing Good Emails (www.commonsensemedia.org). This lesson asks the essential question: How is writing an email similar or different to writing a letter? Students will review the parts of a letter/email and the importance of editing before sending an email. Students will then be giving the opportunity to compose and send an email to the teacher.
Activity Description: Please see downloaded lesson notes.
Assessment: The Common Sense Media lesson plan provides a short assessment sheet.
Session 22: Blog
Preparation & Materials: Teacher Enrichment:
o Benefits of Student Blogging: www.youtube.com/watch?v=aWESkdrd_gc
o How to Create a Classroom Blog: www.youtube.com/watch?v=wqYBa-zGsNQ
Preview brainpopjr.com video called ‘What is a Blog?’ o Note: Login is required. NAD teachers can contact their administrators for
log-in information. o Preview the following classroom blogs and sample one or two:
watson-jones.blogspot.ca/ mfeist.edublogs.org/ www.psdblogs.ca/tleavell/
Set up your classroom blog.

25
Interactive Whiteboard
Standards: T.K-2.IDL.1: Explore and use teacher-selected software to create a product. T.K-2.TF.1: Use developmentally appropriate digital tools to communicate
ideas with others. T.K-2.TF.3: Know basic technological vocabulary and use a variety of age-
appropriate hardware and software. T.K-2.GDC.4 Use technology to communicate respectfully with others.
Introduction: Ensure students understand a blog is like an online journal in which you can share your thoughts and information. Tell students that you have created a classroom blog. This will be a place where we will publish posts daily or weekly. Sometimes students will respond to a question posted on the blog, other times we will assign students special topics to report on. This will be a forum for sharing their thoughts on a global level. Once students are comfortable with blogging we will invite parents to become followers of our class blog and participate in a dialogue with students. Activity Description:
1. To introduce students to blogs show the Brainpopjr video “What is a blog?” 2. Discuss – What is a blog? What are some items you can find in a blog? What
are the parts of a blog? What is a tag? What is a comment? What are some safety rules we should remember when using blogs?
3. Explore some of the classroom blogs you have previewed with your students. Point out key features.
4. Say: We are going to create a classroom blog. Each day different students will be assigned to post an entry.
5. Show students your classroom blog. Model going to the blog. Read the first blog question, model how you would respond to the question using the interactive whiteboard.
6. Take students to computer lab and ask each of them to post a response to the question on the blog. (Potential questions: What is your favourite thing to do in the winter? Tell why. What do you like best about grade two? Tell why. Etc.)
Assessment: This is the students’ first time using the Classroom Blog so there will not be a summative evaluation. Assessment for this session will consist of observation and anecdotal notes.

26
February – Embedding Videos & Group Project
Session 23: How to Embed a Video
Preparation & Materials: Teacher Enrichment: Watch “Videos in Google Docs Presentation” at the
following link: www.youtube.com/watch?v=lc789-VsPZs Teacher Enrichment Video: “How to embed a video in Blogger” Use the
following link: www.youtube.com/watch?v=oCHrSjm02l4 Google Slides presentation on Praise and Worship (teacher-created) Worship song from youtube.com (teacher-chosen) Interactive Whiteboard Schedule Computer Lab Time
Standards:
T.K-2.TF.3: Know basic technological vocabulary and use a variety of age-appropriate hardware and software.
Introduction: Now that students have been using Google Docs and blogging for a while, it is time to teach them to embed a video into their blog post or Google Slides presentation. Students watch videos online all the time. Teaching students how to embed a video will facilitate watching a video without having to leave a presentation or website to go to another. Activity Description:
1. Say: Today we are going to learn how to embed (put) a video from Youtube into a Google Slides presentation.
2. Say: The first thing that we need to do is find a video that we really enjoy in www.youtube.com
3. Say: I have chosen one of my favourite worship videos from www.youtube.com to embed into a Praise and Worship presentation that I was creating.
4. Say: Before I can embed my video I need to login in to my Google account. Who would like to help me get started? Choose a student or several to take turns logging into my Google account. (Type in your own password and emphasize the privacy of your password.)
5. Once in Google Slides, have students take turns creating a presentation, naming the presentation, selecting the theme, etc.
6. Model inserting a text box that says, “Please join me in singing my favourite worship song!”
7. Model embedding a video into the presentation from www.youtube.com. Click ‘insert’, Click ‘insert video’ in drop down menu, type in title in new box, enter, click on video you want, click on select,

27
8. Take students to the computer lab and ask them to practice embedding a video of their choice into a presentation. Instruct them to share this video with you with ‘commenting’ rights.
Assessment:
This is the students’ first time embedding a video so there will not be a summative evaluation. Assessment for this session will consist of observation and anecdotal notes. Teacher will also provide students with feedback comments on their video once they have shared it.
Optional Special Project:
Country Group Project Introduction: In Ontario, Grade 2 students study countries and cultures of the world. Students will be assigned into small groups consisting of 3-4 classmates. They will use previously taught skills to research a country, co-write a report on the country using Google Docs, and co-create a presentation using Google Slides. Their presentation should include text, pictures and an embedded video. The small groups will present their country report and presentation to the class. This activity will be a great tie-in to our Flat Stanley project that naturally has students thinking about and exploring other countries.
Standards: T.K-2.IDL.1: Explore and use teacher-selected software to create a product. T.K-2.IDL.2: Use technology in multiple subjects to find answers to questions.
Preparation & Materials:
Create small groups consisting of 3-4 people Copy Project Instructions, Document Rubrics and Presentation Rubrics (one
per student – Additional Resources, pages 32-36), divided into folders for each group
Schedule Computer Lab Time consistently for next 2 weeks Pre-cut list of countries (one for each continent)
Activity:
1. Say: I am very excited about a special project that we are going to start today. As you know we have been learning about many countries and different cultures around the world. Can anyone think of some of the interesting things we have learned so far? Allow students an opportunity to share.
2. Say: I will be placing you into small groups and I have pre-selected some countries that we will be researching. I have chosen some of the countries represented in our class and other well-known countries in the world. We

28
will have one country representing each continent. (Optional: Students may pick their own countries, must come to a consensus. No duplicates allowed.)
3. Distribute Project Instructions sheet. Say: Let’s go over the expectations for this project (See in Additional Resources Section, page 32-36)
4. Say: Each person will be responsible for researching and writing one portion of the document. You will be responsible for editing the document jointly using Google Docs.
5. Say: Once you have completed your research and document and I have approved it, then you will begin working on a Google Slides Presentation. At that point I will meet with your group and go over the Presentation rubrics to ensure you understand the requirements. The group will work together to create a presentation, assigning different individuals speaking parts.
6. Say: Once all groups are done their presentations we will present them to our classmates.
7. Say: Now that I have given you an overview of the project, I would like you to sit in your assigned groups. Review your classroom procedure for group work and assign team members specific roles to ensure groups work well together. Suggested roles:
a. Team Captain b. Team Scribe – note taker. c. Team Encourager – Ensure everyone has what they need to succeed,
provides encouragement, and monitors time. d. Liaison Specialist – only person allowed to leave the group to bring
the group’s concerns and needs to the teacher. Comes to ask teacher for assistance at the request of team captain. This role limits having 20 students approaching you at once.
8. Say: Now we will be selecting countries and assigning research responsibilities. Team Captains please come up and collect your team folders.
9. Let students begin working!
Assessment: See Rubrics in Additional Resources Section of this document, page 36.
March – Digital Story Telling & iMovie (This session will take several class periods to complete.)
Session 24: Introduction to Digital Story Telling
Preparation & Materials: Teacher Enrichment: Watch “Digital Story Telling in the Elementary
Classroom” at this link: https://www.youtube.com/watch?v=rUZXBc6yRhU Teacher Enrichment: Watch “What is Digital Story Telling” at this link:
https://www.youtube.com/watch?v=dKZiXR5qUlQ

29
Teacher Enrichment: Watch “How to Use iMovie for Beginners” at this link: https://www.youtube.com/watch?v=lfX0ptAA10Q
Teacher Enrichment: Watch this video to learn about the 7 Elements of Digital Story Telling. Use this link: digitalstorytelling.coe.uh.edu/page.cfm?id=27&cid=27&sublinkid=31
Schedule Computer Lab Time Preview several digital stories and choose one to show the students. Digital Story (teacher-created) Handout “Digital Story-telling: 7 Things to Remember” (1 per student –
Additional Resources, page 37) Digital Story Planning Sheet (1 per student – Additional Resources, page 38)
Standards:
T.K-2.IDL.1: Explore and use teacher-selected software to create a product. T.K-2.TF.1: Use developmentally appropriate digital tools to communicate
ideas with others. T.K-2.TF.3: Know basic technological vocabulary and use a variety of age-
appropriate hardware and software. Introduction: Digital storytelling is a great way to engage students in telling stories in a new and fresh way. Before having students start their digital stories, introduce students to the Seven Elements of Digital Storytelling (Centre for Digital Storytelling). They are: point of view, dramatic question, emotional content, voice, soundtrack, economy and pacing. Discuss each one and ensure understanding then have students start writing their digital stories before adding the technology piece.
Activity Description: 1. Ask: How many of you love listening to a good story? Allow students to share. 2. Ask: What makes a story a good one? Allow students to share. 3. Say: Today we are going to learn about a different kind of story – a digital
story. Ask: Does anyone know what a digital story is? 4. Show students your chosen example of a digital story. 5. Ask: What did you notice about this digital story? (Pictures, Video, Text,
someone talking, sound effects, music in the background) 6. Say: There are 7 important things to remember when making a digital story. 7. Distribute the “Digital Story-telling: 7 Things to Remember” Handout –
Discuss each element. (See page 37 of this document). 8. Say: I’m just starting to learn how to make digital stories. Here is one I
created. Let’s see how many of the elements I thought about. Challenge students to check off each item used.
9. Say: Before we start, we need to plan what pictures/ video we need and what we will say for each picture. (Distribute planning sheets and explain/model how to use. See page 38 of this document.)
30
10. Say: If some of you are having a hard time thinking of a story here are three options for you: Option 1: Choose your favourite story you have written this year. Option 2: Create an Easter Themed Digital Story Option 3: Choose your favourite Bible story
11. Allow students time to complete their digital story-telling planning sheets. (This may take several days.) Allow time for peer editing and teacher editing.
12. Introduce students to iMovie. This should be done in a whole class session. 13. Model using your digital planning sheet and finding images (in your files, and
on the internet), model adding sounds effects, planning transitions, etc. Give students ample time to ‘play and explore’ with iMovie. Allow students an opportunity to create mini- experimental digital stories. Once students are fairly comfortable, have students use their story plans to begin to create their own digital stories.
Assessment: Students will be assessed based on their planning sheets and their consideration of the 7 elements of digital story telling. A sample rubric has been enclosed in the Additional Resources section of this document, page 39.
April, May, June – Cementing Skills
During the last three months of school students will basically be cementing their newfound skills. Students would continue their rotation of daily blogging and participate in other cross-curricular activities. The following are two potential year-end culminating projects that students could work on:
1. Flat Stanley Adventure Presentations & Digital Stories
Flat Stanley is a project based on the Flat Stanley reading series. Students create flat versions of themselves and mail them to a relative/friend. This individual keeps the flat person and photographs them at numerous locations. The photographs and flat person are returned after two weeks. Students can then use the collected photos to create a digital story.
2. Grandparent Digital Stories
The last Pathways unit (SDA Language Arts curriculum) focuses on Grandparents. The idea is to have students collect photos, and perhaps audio to create a digital story/tribute to their grandparents. This can even become a whole class project that can be presented at Grandparents day, etc.

31
Students will use all media and technology knowledge to create a digital story or presentation that illustrates one of the two above-mentioned year-end projects. Photos, video clips and dialogue should be incorporated into their digital stories or presentation. These will be posted in the class blog or website.
Management
For this age level, students will use very basic management techniques for keeping track of all their new accounts and passwords. Students will create a username and password log in the front pocket of their agenda. This will be a hard copy. Teacher should use provided online Raz-kid, Typing Pal, and Mathletics student information as an electronic back up for misplaced student hard copies.
Additional Resources
Please look below for all additional resources referenced in this document.

32
Name: _____________________ Date: _______________
Checklist for Exploring Google Slides Presentation
Please circle or for each sentence below:
I created a presentation using Google Slides.
I gave my presentation a name.
I inserted a picture in my presentation.
I inserted a text box in my presentation.
I choose a background for my presentation. I liked using Google Slides Presentation.
Name: _____________________ Date: _______________
Checklist for Exploring Google Slides
Please circle or for each sentence below:
I created a presentation using Google Slides.
I gave my presentation a name.
I inserted a picture in my presentation.
I inserted a text box in my presentation.
I choose a background for my presentation. I liked using Google Slides Presentation.

33
Name: _____________________ Date: _______________
Animal Research #1 Use some of the following websites to help you answer the questions below:
www.kidsclick.org/,
kidfriendlysearch.com/,
www.safesearchkids.com/google,
kids.nationalgeographic.com
1. Name of your animal: __________________________
2. Describe your animal’s habitat. Where does it live?
_________________________________________________
_________________________________________________
3. What does your animal like to eat?
_________________________________________________
_________________________________________________
4. Describe your animal. What does it look like?
_________________________________________________
_________________________________________________
5. Draw your animal in its habitat:

34
Name: _____________________ Date: _______________
Animal Research #2 Use one or two of the following websites to help you gather
information on your animal: (Circle the websites you used.)
www.kidsclick.org
kidfriendlysearch.com
www.safesearchkids.com/google
kids.nationalgeographic.com
Name and Classification of Animal Physical Description: What does it
look like?
Habitat: Where does it live?
Food: What does it eat?
Describe your animal’s life cycle.
What is one interesting fact about
your animal?

35
Name: _______________________________ Score: _____________
Animal Research Google Slides Presentation Rubrics
Out of this
World
Excellent
4
Flying High
Very Good
3
Taking Off
Good
2
Ready Set Go!
Needs Some
Work
1
Title Slide Slide has all 4
required elements:
name, classification,
picture, and title.
Slide has only 3 of
the required
elements.
Slide has only 2 of
the required
elements.
Has only 1 of the
required elements.
Content Includes 6 slides
covering all required
information: name,
classification, food,
habitat, life cycle,
interesting fact.
Presentation covers
4-5 pieces of the
required
information.
Presentation covers
3 pieces of the
required
information.
Presentation covers
2 or less pieces of
the required
information.
Appearance Presentation is neat
and attractive. It
does not have any
distracting
elements.
Background is
attractive.
Presentation is neat
and attractive. It
does have some
distracting
elements.
Presentation is neat
but super
attractive. It
doesn’t POP!
Background is
unattractive or
distracting.
Presentation is
messy and
unattractive.
Background is
distracting.
COPS –
Capitals,
Overall,
Punctuation
& Spelling
Presentation does
not contain any
spelling, punctuation
or grammar
mistakes.
Presentation
contains 1 or 2
spelling, punctuation
or grammar
mistakes in total.
Presentation
contains 3 or 4
spelling, punctuation
or grammar
mistakes in total.
Presentation
contains 5 or more
spelling, punctuation
or grammar
mistakes in total.
Comments:
36
Name: _____________________ Date: _______________
Checklist for Exploring Google Docs Documents
Please circle or for each sentence below:
I created a presentation using Google Docs Documents
I centred my title and made it size 14.
I centred my name beneath the title.
I made my story size 12.
I used tab to start my paragraphs.
I shared my story with 2 friends and gave them
editing rights.

37
Name: ___________________________ Date: ___________________
Country Group Project Instructions
& Group Planning Sheet
Country Chosen: __________________________
Please assign a person in your group to research each of the following:
Assigned Person Research Question:
Where is your country? What continent is your
country located in?
What does your country look like? Describe it.
(Mountainous, Flat, Farmland, Rivers, Lakes)
What is the weather (climate) like in your country?
What are some of the main industries/jobs in your
country?
What are the traditional foods of your country? What
do the people like to eat?
What are some special holidays or traditions that are
celebrated in your country?
Remember: When you find some of the information, keep a list of where you
found it below:
Source 1:
_________________________________________________________
Source 2:
_________________________________________________________
Once you are ready to start typing up your presentation in Google Slides
here are some important things to remember.
Make sure your font is easy to read!
Title Font should be size 14.
Body Font should be size 12.
Double-space your document.

38
Name: ___________________________ Country Group Project Notes:
Use this sheet to create a concept web. Write one of the questions from the
Group Planning Sheet in each bubble below. Then, gather facts and make
smaller bubbles with one fact per bubble, connecting each new bubble to the
question it goes with.
Question:
Question:

39
Group Country Project Presentation Rubrics
Group Members: ________________________ Score: _____________
Out of this
World
Excellent
4
Flying High
Very Good
3
Taking Off
Good
2
Ready Set Go!
Needs Some
Work
1
Title Slide Slide has all 4
required elements:
name of country,
flag picture, second
picture, all group
member names.
Slide has only 3 of
the required
elements.
Slide has only 2 of
the required
elements.
Has only 1 of the
required elements.
Content Includes 6 slides
covering all required
information:
Country location,
Description,
Climate, Industries,
Food, Holidays
Presentation covers
4-5 pieces of the
required
information.
Presentation covers
3 pieces of the
required
information.
Presentation covers
2 or less pieces of
the required
information.
Appearance Presentation is neat
and attractive. It
does not have any
distracting
elements.
Background is
attractive.
Presentation is neat
and attractive. It
does have some
distracting
elements.
Presentation is neat
but super
attractive. It
doesn’t POP!
Background is
unattractive or
distracting.
Presentation is
messy and
unattractive.
Background is
distracting.
COPS –
Capitals,
Overall,
Punctuation
& Spelling
Presentation does
not contain any
spelling, punctuation
or grammar
mistakes.
Presentation
contains 1 or 2
spelling, punctuation
or grammar
mistakes in total.
Presentation
contains 3 or 4
spelling, punctuation
or grammar
mistakes in total.
Presentation
contains 5 or more
spelling, punctuation
or grammar
mistakes in total.
Comments:

40
Oral Presentation Rubric This rubric will be used when assessing your group’s oral presentation.
CATEGORY
Excellent
Good
Satisfactory Needs Improvement
Content
Fully addresses all
components of the
assigned topic with
elaboration.
Addresses most of
the components of
the assigned topic
with elaboration.
Addresses some of
the components of the
assigned topic.
Addresses a few or none of
the components of the
assigned topic.
Speaks Clearly
Speaks clearly and
distinctly all of the
time and
mispronounces no
words.
Speaks clearly and
distinctly most of
the time but may
mispronounce one
word.
Speaks clearly and
distinctly most of the
time but may
mispronounce up to 2
words.
Often mumbles or cannot
be understood and/or may
mispronounce more than 2
words.
Posture and Eye
Contact
Stands up straight,
looks relaxed and
confident.
Establishes eye
contact with the
audience.
Stands up straight
and establishes eye
contact with the
audience.
Sometimes stands up
straight and establish
eye contact.
Slouches and/or does not
look at people during the
presentation.
Volume Volume is loud
enough to be heard
by all audience
members
throughout the
presentation.
Volume is loud enough
to be heard by all
audience members
most of the time.
Volume is loud enough
to be heard by all
audience members
some of the time.
Volume is often too soft to
be heard by all audience
members.
Preparedness
Student is
completely
prepared and has
obviously
rehearsed.
Student seems
pretty prepared but
might have needed a
couple more
rehearsals.
Student is somewhat
prepared, but it is
clear that rehearsal
was lacking.
Student does not seem
prepared to present and/or
presents a day or more
late.
Props
(Could include
costume, poster
board, Google
Slides
presentation and
pictures.)
Student uses
several props that
show considerable
work/creativity
and which make
the presentation
better.
Student uses at least
one prop that shows
considerable
work/creativity and
which make the
presentation better.
Student uses at least
one prop, which makes
the presentation
better.
Student uses no props, the
props detract from or are
unrelated to the
presentation, and/or the
props are never referred
to during the presentation.
Enthusiasm
in others.
Facial expressions
and body language
generate a strong
interest and
enthusiasm about
the topic in others.
Facial expressions
and body language
sometimes generate a
strong interest and
enthusiasm about the
topic in others.
Facial expressions and
body language are
used to a small degree
to try to generate
enthusiasm.
Very little use of facial
expressions or body
language. Did not generate
much interest in the topic
being presented.

41
Group Country Project Report Rubrics
Group Members: ________________________ Score: _____________
Out of this
World
Excellent
4
Flying High
Very Good
3
Taking Off
Good
2
Ready Set Go!
Needs Some
Work
1
Content Includes all 6 pieces
of required
information:
Country location,
Description,
Climate, Food,
Industries, Holidays
Report covers 4-5
pieces of the
required
information.
Report covers 3
pieces of the
required
information.
Report covers 2 or
less pieces of the
required
information.
Word Choice Language is clear
and descriptive.
Interesting verbs
and adjectives are
used.
Language is clear
and descriptive.
Language is clear
but not overly
interesting.
Vague and
repetitive language
is used.
Mechanics Document does not
contain any spelling,
punctuation or
grammar mistakes.
Document contains 1
or 2 spelling,
punctuation or
grammar mistakes
in total.
Document contains
3 or 4 spelling,
punctuation or
grammar mistakes
in total.
Document contains
5 or more spelling,
punctuation or
grammar mistakes
in total.
Voice Document is easy to
read and extremely
engaging to the
reader.
Document is easy to
read and engaging
to the reader.
Document is
readable but not
overly interesting.
Document is dull and
uninteresting.
Comments:

42
Digital Story-telling
7 Things to Remember
1. Point of View
What is the main point of your story? What is your perspective?
2. Dramatic Question – Da, Da, Da, Dum!
Have a key question that keeps your audience’s attention and will
be answered by the end of the story.
3. Emotional Content
Make your story come alive in a personal and powerful way and
connects the audience to the story. Show feelings!
4. The Gift of Your Voice
Telling your story using your voice is a way to make it personal
and helps your audience understand your story.
5. The Power of the Soundtrack
Music or other sounds effects can make your story better!
6. Economy
Using just enough information (and not too much) so you don’t
overload the viewer.
7. Pacing
Keep in mind the rhythm of the story and how slowly or quickly
it progresses.
Source: digitalstorytelling.coe.uh.edu/page.cfm?id=27&cid=27&sublinkid=31

43
Digital Story Telling
Planning Sheet Image/Picture:
Image/Picture:
Image/Picture:
Speaking Part: Speaking Part: Speaking Part:
Image/Picture:
Image/Picture:
Image/Picture:
Speaking Part: Speaking Part: Speaking Part:

44
Name: __________________________________ Score: _______
Digital Story Rubric
Out of this
World
Excellent
4
Flying High
Very Good
3
Taking Off
Good
2
Ready Set Go!
Needs Some
Work
1
Point of View
The main point of
the story is very
clear.
The main point of
the story is clear.
The main point of
the story is
somewhat clear.
The main point of
the story is
unclear.
Dramatic
Question – Da,
Da, Da, Dum!
Story begins with
an excellent
question that
keeps the
reader’s
attention. Story
ends with a clear
answer to the
question.
Story begins with
a good question –
may or may not
keep readers
attentions.
Question is
answered.
Story begins with
a question but the
end of the story
does not answer
the question.
Story does not
begin with a
question.
Emotional
Content
Story is personal
and powerful.
Show emotions.
Story shows
emotion.
Story has emotion
but feelings are
unclear.
Story lacks
emotion.
The Gift of Your
Voice
Voice used to
make story
personal –
excellent
expression.
Voice used to
make story
personal – good
expression.
Voice used to
make story
personal but lacks
expression.
No use of voice.
The Power of the
Soundtrack
Music and sound
effects used to
improve story.
Music or sound
effects used to
improve story.
Music or sound
effects used but
are somewhat
distracting.
No use of sound
effects or
soundtrack.
Economy Story has just
the right amount
of information.
Does not overload
viewer.
Story is clear!
Story has a good
amount of
information.
Story has too
much or too little
information but
viewer can
somewhat follow
the story.
Story contains
too little or too
much information-
making story
confusing and
difficult to
understand.
Pacing
Story has great
rhythm – not too
slow or too quick.
Story has good
rhythm – not too
slow or too quick.
Story has rhythm
but may be too
slow or too quick
at times.
Story lacks
rhythm.