Pervasive 2000 Service Pack 3 - Service Technologies Corp
13
Pervasive 2000 – Service Pack 3 Workstation Edition Installation Instructions Installing from the Pay-Ware CD: 1. Insert Pay-Ware CD into your CD Rom Drive 2. Go to Start – Run – Browse and Browse to your CD drive 3. Go to the folder “WSE” 4. Choose “Setup” and Double click OK The Pervasive 2000 SP 3 Workstation install will begin Click Next to continue
Transcript of Pervasive 2000 Service Pack 3 - Service Technologies Corp

Pervasive 2000 – Service Pack 3 Workstation Edition
Installation Instructions
Installing from the Pay-Ware CD:
1. Insert Pay-Ware CD into your CD Rom Drive 2. Go to Start – Run – Browse and Browse to your CD drive 3. Go to the folder “WSE” 4. Choose “Setup” and Double click OK The Pervasive 2000 SP 3 Workstation install will begin
Click Next to continue

Click Yes to Accept the License Agreement
Choose Typical and then Click Next to continue

Choose drive and location for installation. You should accept the default of C:\PVSW
Click next to continue
Wait for the system to complete the analysis – Then click next to see the results
Click Next to continue
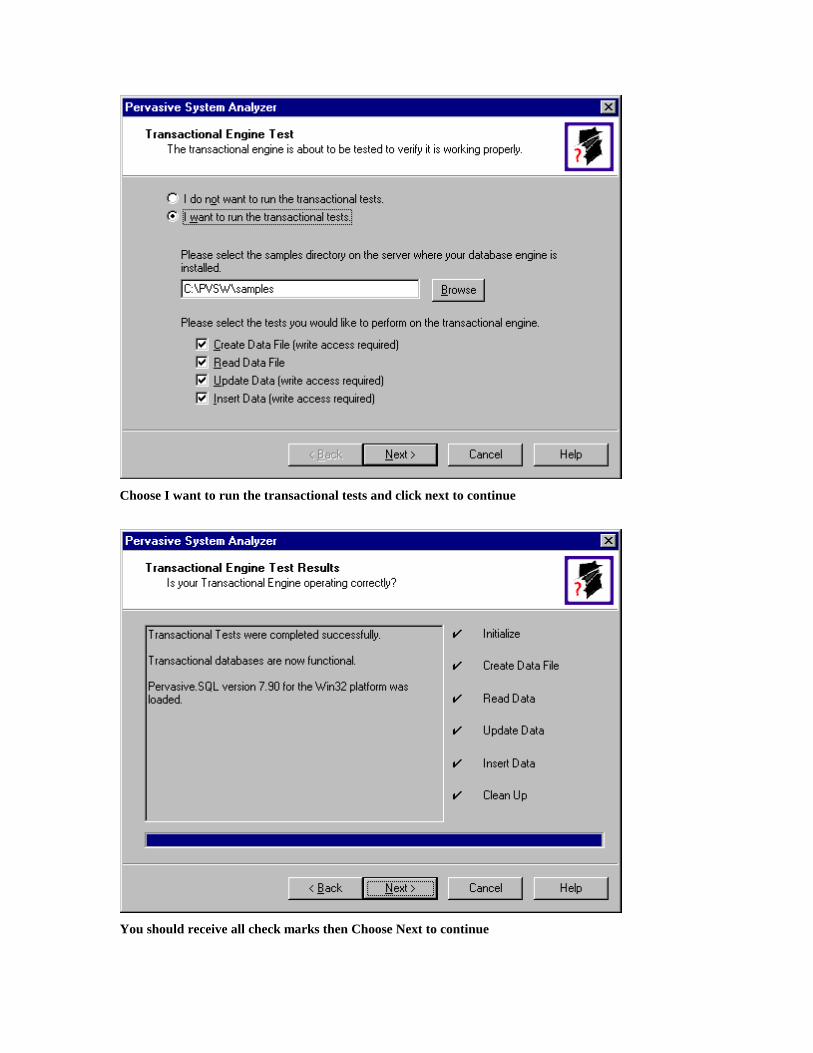
Choose I want to run the transactional tests and click next to continue
You should receive all check marks then Choose Next to continue

Choose I want to run the relational tests then click Next to continue
You should receive all check marks then click Next to continue
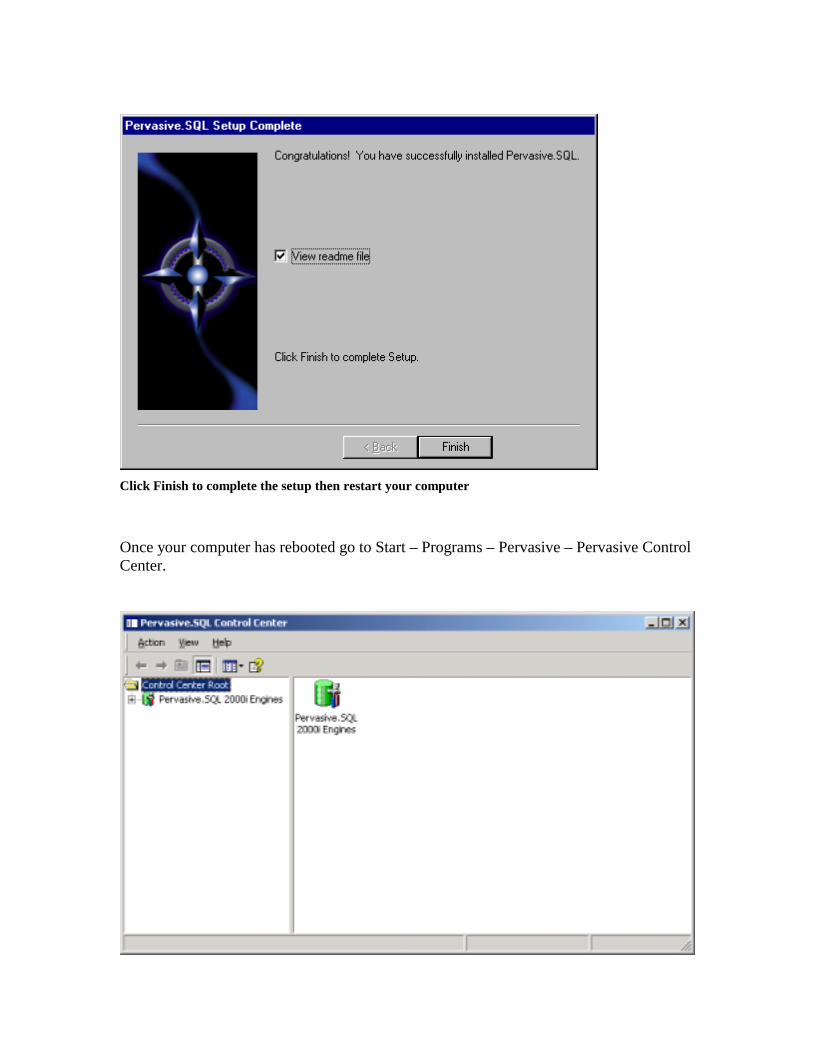
Click Finish to complete the setup then restart your computer
Once your computer has rebooted go to Start – Programs – Pervasive – Pervasive Control Center.

Click on the + sign next to Pervasive SQL 2000i Engines
Click on the + sign next to Configuration
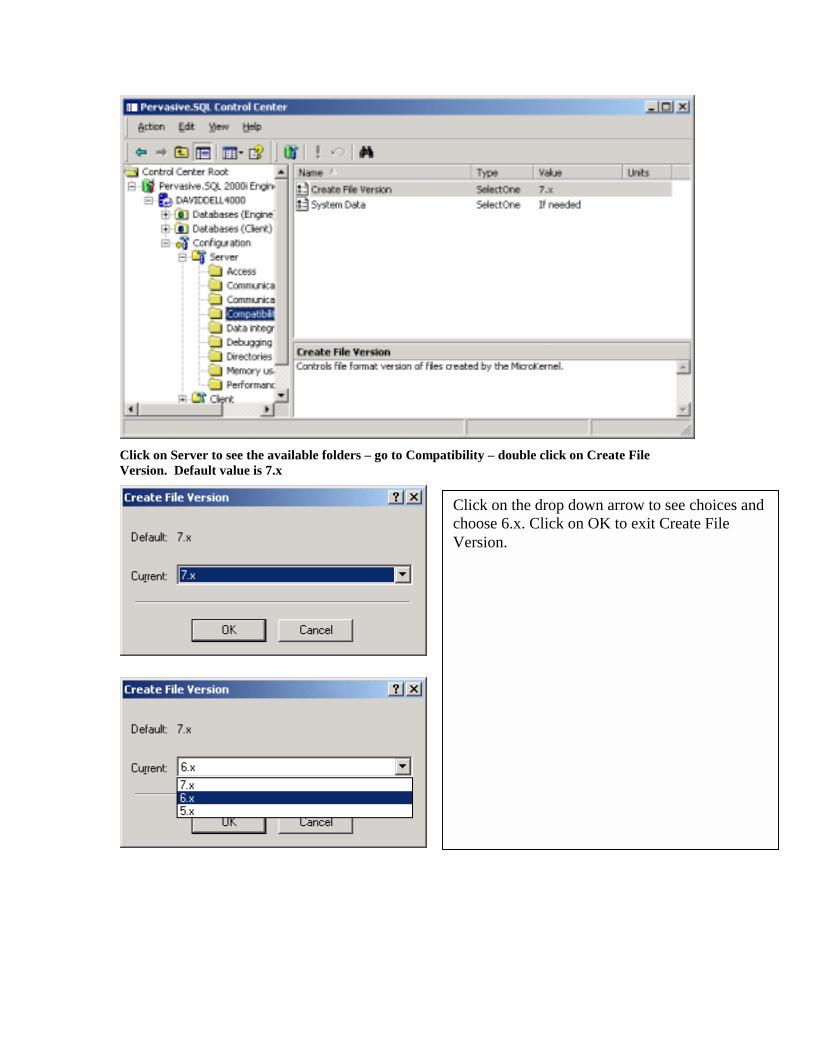
Click on Server to see the available folders – go to Compatibility – double click on Create File Version. Default value is 7.x
Click on the drop down arrow to see choices and choose 6.x. Click on OK to exit Create File Version.
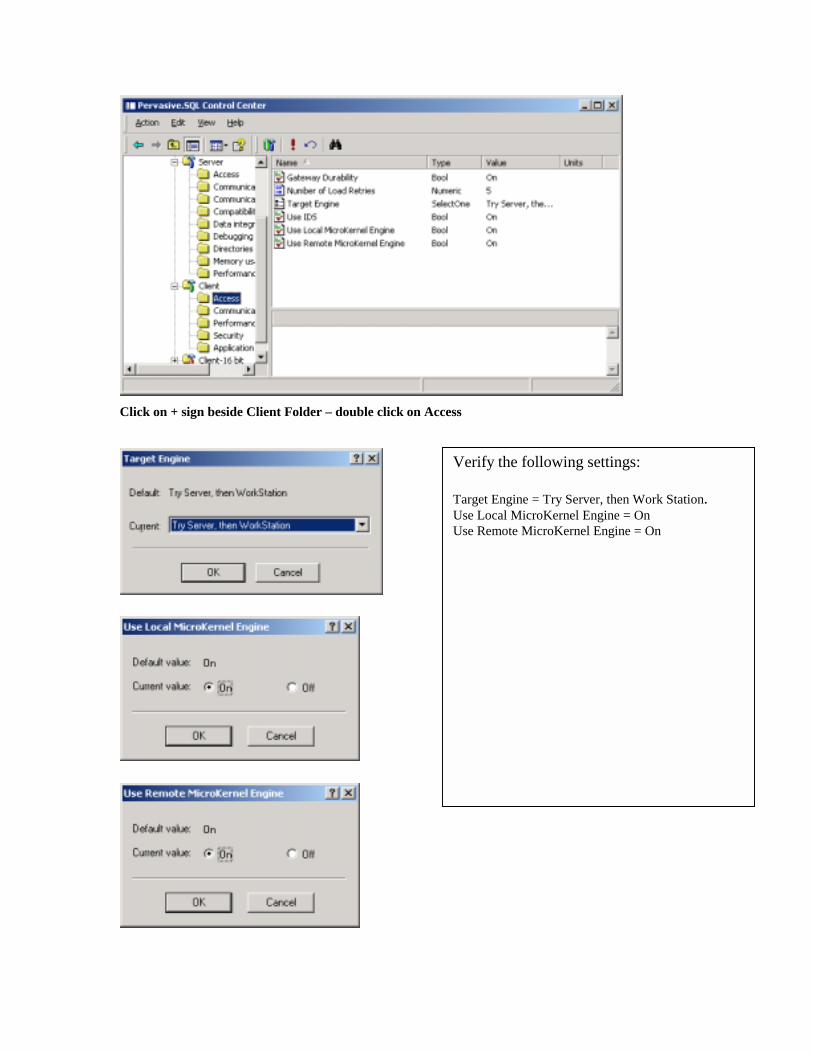
Click on + sign beside Client Folder – double click on Access
Verify the following settings: Target Engine = Try Server, then Work Station. Use Local MicroKernel Engine = On Use Remote MicroKernel Engine = On

Click on Communication Protocols Folder
Choose Protocol based on your network configuration
General Protocol Rules: a. Windows NT or Windows 2000 Server – Choose Microsoft TCP/IP b. Novell Server – Choose Novell SPX or Microsoft SPXII
Note: choosing the wrong protocol will cause your Pervasive application not to function correctly – if your application does not appear to work correctly you can go back into the Pervasive Control Center and change the setting.
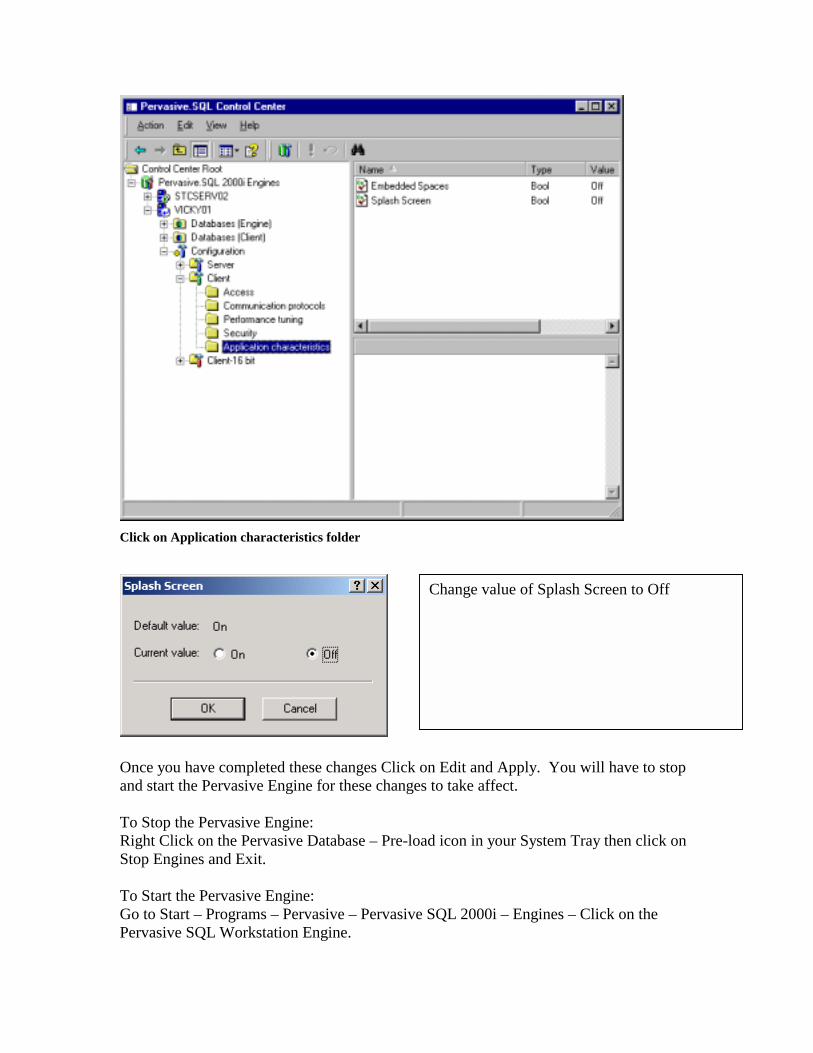
Click on Application characteristics folder
Once you have completed these changes Click on Edit and Apply. You will have to stop and start the Pervasive Engine for these changes to take affect. To Stop the Pervasive Engine: Right Click on the Pervasive Database – Pre-load icon in your System Tray then click on Stop Engines and Exit. To Start the Pervasive Engine: Go to Start – Programs – Pervasive – Pervasive SQL 2000i – Engines – Click on the Pervasive SQL Workstation Engine.
Change value of Splash Screen to Off

Next you will need to Edit the BTI.ini file. This file is located in the C:\Windows directory for Windows 95, 98 or ME and in the C:\Winnt directory for Windows NT and Windows 2000 Professional and can be opened with notepad.
Settings should be as follows:
Section Item Value to be set Btrieve local no Btrieve requester no Btrieve thunk yes Btrieve Requester Splash Screen no Microkernel Router local yes Microkernel Router requester yes Microkernel Router thunk yes If the above section is not in the file – you may add it by using [ ] around the section heading and then listing the item below.