
PARTNERSHIPS CAPACITY supporting STUDENTS TECHNOLOGY
37
developing PARTNERSHIPS ⚫ building CAPACITY ⚫ supporting STUDENTS ⚫ implementing TECHNOLOGY
Transcript of PARTNERSHIPS CAPACITY supporting STUDENTS TECHNOLOGY

developing PARTNERSHIPS ⚫ building CAPACITY ⚫ supporting STUDENTS ⚫ implementing TECHNOLOGY

developing PARTNERSHIPS ⚫ building CAPACITY ⚫ supporting STUDENTS ⚫ implementing TECHNOLOGY
November, 2019Abbotsford School District
Boardmaker Online
developing PARTNERSHIPS ● building CAPACITY ● supporting STUDENTS ● implementing TECHNOLOGY
We acknowledge that we are gathered on the traditional, ancestral, unceded shared territory of the Matsqui First Nation and Sumas First Nation. The Sema:th and Matsqwi are part of the Sto:lo Nation and have lived in the Fraser Valley for over10, 000 years.

developing PARTNERSHIPS ● building CAPACITY ● supporting STUDENTS ● implementing TECHNOLOGY
Housekeeping
1. Sign-in
2. Name tags
3. Handouts
4. Post-workshop survey

developing PARTNERSHIPS ● building CAPACITY ● supporting STUDENTS ● implementing TECHNOLOGY
About Me…
Hi! I’m Lorena DuranProvincial Teacher (Tier 3 Services)
https://learningnetwork.setbc.org/sd34boardmaker/

developing PARTNERSHIPS ⚫ building CAPACITY ⚫ supporting STUDENTS ⚫ implementing TECHNOLOGY
Agenda
9:00am – 10:30am• Tech support• Intro to Boardmaker visual supports10:30am – 10:45am• Coffee break10:45am – 12:00pm• Explore BMO Supports• Pre-made activities from BMO communities• Downloading from resourceSET• Time to make materials

developing PARTNERSHIPS ⚫ building CAPACITY ⚫ supporting STUDENTS ⚫ implementing TECHNOLOGY

developing PARTNERSHIPS ⚫ building CAPACITY ⚫ supporting STUDENTS ⚫ implementing TECHNOLOGY
Workshop Goals
• Participants will learn how to create and edit visual supports.
• Participants will explore and learn how to use pre-made templates and activities.

developing PARTNERSHIPS ● building CAPACITY ● supporting STUDENTS ● implementing TECHNOLOGY
• Provincial Outreach Program
• Goal: to assist BC school districts (K-12) build their capacity to use technology to support the diverse needs of their students
Professional Development(District-Based)
Classroom-Based
Student-Based

developing PARTNERSHIPS ⚫ building CAPACITY ⚫ supporting STUDENTS ⚫ implementing TECHNOLOGY

developing PARTNERSHIPS ⚫ building CAPACITY ⚫ supporting STUDENTS ⚫ implementing TECHNOLOGY
Concreteness fading / math sense

developing PARTNERSHIPS ⚫ building CAPACITY ⚫ supporting STUDENTS ⚫ implementing TECHNOLOGY
Visual support for next week
What visual support do you want to make today?
Type of support: __________________
Subject area: _____________________

developing PARTNERSHIPS ⚫ building CAPACITY ⚫ supporting STUDENTS ⚫ implementing TECHNOLOGY
Getting into Boardmaker Online
Login Credentials
• If you have not yet logged in, please go ahead!
• Trouble with credentials? Tech support will assist.
Once you have logged in…
• Click on “Home” (left side)
• Wait there

developing PARTNERSHIPS ⚫ building CAPACITY ⚫ supporting STUDENTS ⚫ implementing TECHNOLOGY
How to make and edit buttons
1. Log-in
2. Click on “My Boardmaker”
3. Click on “Create Activity”
4. Click on “New Blank Activity”
5. Click on the button tool
6. Put your arrow cursor in the top left
corner of the board. Click and position your
cursor in the corner of you button and drag
to resize your button.

developing PARTNERSHIPS ⚫ building CAPACITY ⚫ supporting STUDENTS ⚫ implementing TECHNOLOGY
How to make and edit buttons
7. Navigate to the right hand side of your screen. Make sure the ‘Properties’ tab is selected. Scroll down to ‘Border’. Select 2pt and black. Notice that the button boarder changes on your board.
8. Click on the Spray tool.
9. Select the button that you drew on your board. Drag the cells all over the page.
10. Click on the bottom white part of your board to de-select the buttons.

developing PARTNERSHIPS ⚫ building CAPACITY ⚫ supporting STUDENTS ⚫ implementing TECHNOLOGY
How to make and edit buttons
11. Click on the top left corner button. Select the symbol tool.
12. Navigate to the right hand side of your screen. Notice that the symbol tab is selected. Type an image keyword in the symbol search bar.
13. Click on the symbol that you want to use and drag it to the button you want to put it in.
14. Now, you can edit the button label to your preference, or move onto the next button you want to edit.

developing PARTNERSHIPS ⚫ building CAPACITY ⚫ supporting STUDENTS ⚫ implementing TECHNOLOGY
15. Navigate to the right hand side of your screen. Select the ‘Properties’ tab. Click the text box under ‘label’. Delete and re-type the label to suit your student’s needs.
How to make and edit buttons
16. Select the next button to edit. Navigate to the right hand side of your screen. Make sure that the properties tab is selected. Select ‘choose symbol’.
17. Click on the ‘Web Search’ tab. Type an image keyword in the symbol search bar. Chose the image you want and press ‘Select’. Once it has loaded, it will appear in the button you had selected on your board.

developing PARTNERSHIPS ⚫ building CAPACITY ⚫ supporting STUDENTS ⚫ implementing TECHNOLOGY
18. Ensure that the button you are working on is still selected. Navigate to the right hand side of your screen. Click on ‘Edit Symbol’. The edit page will open.
How to edit buttons with Symbol Editor
19. Navigate to the top left hand side of the edit page. Select the ‘Marquee" Tool’. Click on the image near the part that you want to cut out of the symbol. Choose the scissors to cut.

developing PARTNERSHIPS ⚫ building CAPACITY ⚫ supporting STUDENTS ⚫ implementing TECHNOLOGY
20. Next, navigate to the top right hand side of your screen. Select the ‘cut’ tool. The selected area will be removed. Click on ‘Save to Activity’. Navigate back to the top left hand side of your screen and click on ‘Back to Editor’. The button will now reflect your edit.
How to edit buttons with Symbol Editor

developing PARTNERSHIPS ⚫ building CAPACITY ⚫ supporting STUDENTS ⚫ implementing TECHNOLOGY
How to edit orientation with Symbol Editor
21. Select the next button to edit. Navigate to the left hand side of your screen. Select the symbol tool. Type ‘arrow’ in the search bar. Select the small, black arrow. Click and drag it to the button that you have selected.
22. Select the properties tab. Click on ‘Edit Symbol’. Navigate to the centreof the edit tool bar and select the ‘Rotate Tool’. The properties side bar appears on the right hand side of the screen. Click on ‘Rotate Right’.

developing PARTNERSHIPS ⚫ building CAPACITY ⚫ supporting STUDENTS ⚫ implementing TECHNOLOGY
23. Click on ‘Save to Activity’ or "Save to My Media." Navigate back to the top left hand side of your screen and click on ‘Back to Editor’. The button will now reflect your edit.
24. The properties tab should still be selected. Delete the label ‘arrow’ in the ‘Label’ box. Scroll down to the ‘Border’ heading. Select white as the border colour. Now, you have a directional arrow that can be used in a behavior map or task analysis.
How to edit orientation with Symbol Editor

developing PARTNERSHIPS ⚫ building CAPACITY ⚫ supporting STUDENTS ⚫ implementing TECHNOLOGY
25. Select the next button to edit. Navigate to the left hand side of your screen. Select the symbol tool. Type ‘music room’ in the search bar. Select the symbol with the green chalkboard. Click and drag it to the button that you have selected.
How to group symbols into one button
26. Type ‘circle time’ in the search bar. Select the first symbol that populates and drag it to the music room button. A message will pop up on your screen. Click ‘add to’.

developing PARTNERSHIPS ⚫ building CAPACITY ⚫ supporting STUDENTS ⚫ implementing TECHNOLOGY
27. Size the image to fit in the area. Then, select the text ‘music room’ and change the text to ‘music class’ in the label box.
How to group symbols into one button

developing PARTNERSHIPS ⚫ building CAPACITY ⚫ supporting STUDENTS ⚫ implementing TECHNOLOGY
How to save and print activities
1. Go to ‘File’
2. Select 'Save Activity As'
3. Give your file a name.
4. Select ‘Print Activity’
5. Destination; Change;
‘Save as PDF’

developing PARTNERSHIPS ⚫ building CAPACITY ⚫ supporting STUDENTS ⚫ implementing TECHNOLOGY
Power user: video demo
• https://tobiidynavox-2.wistia.com/medias/ygrilmoqgv
• BM to BMO Series Moving from V6 to Boardmaker Online
• Pages panel

developing PARTNERSHIPS ⚫ building CAPACITY ⚫ supporting STUDENTS ⚫ implementing TECHNOLOGY

developing PARTNERSHIPS ⚫ building CAPACITY ⚫ supporting STUDENTS ⚫ implementing TECHNOLOGY
Your turn
• Take 15 minutes to explore making and editing buttons. Discuss with
your colleagues.

developing PARTNERSHIPS ⚫ building CAPACITY ⚫ supporting STUDENTS ⚫ implementing TECHNOLOGY

developing PARTNERSHIPS ⚫ building CAPACITY ⚫ supporting STUDENTS ⚫ implementing TECHNOLOGY
Boardmaker supports
• Activities• Community Activities
• Community• Browse Groups
• Curriculum
• Core First Learning
• Reading Avenue
• Expedition Education
developing PARTNERSHIPS ⚫ building CAPACITY ⚫ supporting STUDENTS ⚫ implementing TECHNOLOGY
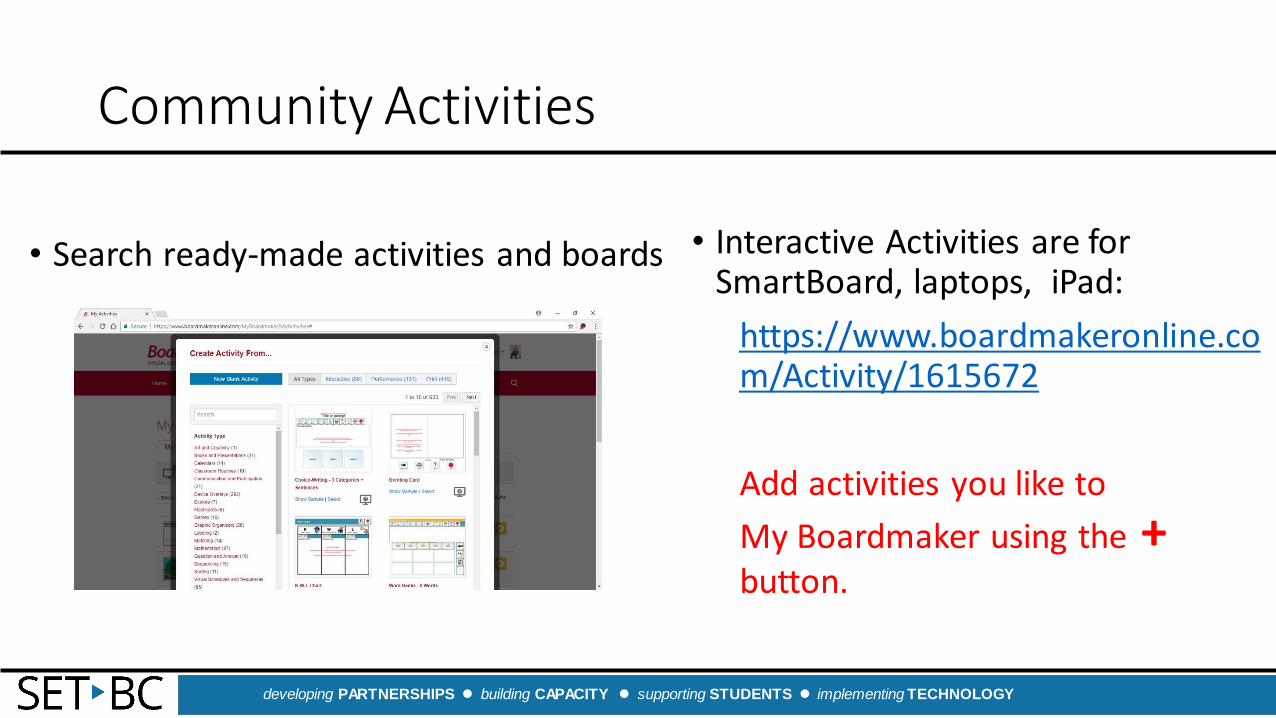
Community Activities
• Search ready-made activities and boards • Interactive Activities are for SmartBoard, laptops, iPad:
https://www.boardmakeronline.com/Activity/1615672
Add activities you like to
My Boardmaker using the +button.

developing PARTNERSHIPS ⚫ building CAPACITY ⚫ supporting STUDENTS ⚫ implementing TECHNOLOGY
Uploading activities to your BMO
• https://www.setbc.org/resourceset/
1. Open ‘Formats’ drop down menu.
2. Select Boardmaker and PDF templates.
3. Download the activity to your computer.
4. Go to My Boardmaker and select Upload Activity.
5. Select Browse.
6. Navigate to the activity and click Open.
7. Click Upload File.

developing PARTNERSHIPS ⚫ building CAPACITY ⚫ supporting STUDENTS ⚫ implementing TECHNOLOGY
Work time
• Create student-specific and class-specific resources. Take this time to collaborate with your co-workers.
• Tip: Upload your activity to a group.

developing PARTNERSHIPS ● building CAPACITY ● supporting STUDENTS ● implementing TECHNOLOGY
Questions

developing PARTNERSHIPS ⚫ building CAPACITY ⚫ supporting STUDENTS ⚫ implementing TECHNOLOGY
Please complete the survey
Image from: pixabay.com
https://forms.gle/HTGKZBa8Jrnduern9

developing PARTNERSHIPS ⚫ building CAPACITY ⚫ supporting STUDENTS ⚫ implementing TECHNOLOGY

developing PARTNERSHIPS ● building CAPACITY ● supporting STUDENTS ● implementing TECHNOLOGY
Aftershare resources
• Boardmaker Template guide
• http://tdvox.web-downloads.s3.amazonaws.com/Boardmaker/documents/BMO%26Studio_TemplateGuide_Nov2018.pdf
• BMO Learning Resources page https://goboardmaker.com/pages/learning-resources
• Creating an activity from scratch https://goboardmaker.com/blogs/videos/creating-an-activity-from-scratch
• Boardmaker online symbol editor https://goboardmaker.com/blogs/videos/boardmaker-online-symbol-editor

developing PARTNERSHIPS ● building CAPACITY ● supporting STUDENTS ● implementing TECHNOLOGY