Part III –Review of key information from ST79,...
33
3M Medical Template v2 7.13.07 1 Infection Prevention Division Attest ™ Sterile U Network © 3M 2011. All Rights Reserved. Part III – Review of key information from ST79, Sections 10 - 12 July 14, 2011 Welcome! Topic: Part III – Review of key information from ST79, Sections 10 - 12 Facilitator: Jamie Meilahn, 3M Marketing Diane Koch, 3M Marketing Speaker: Dorothy Larson, Technical Services Housekeeping Questions Mute feature (*7 = unmute; *6 = mute) “Chat” feature Technical difficulties CE Credits Post session follow-up For more information: www.3M.com/3MSterileU © 3M 2011. All Rights Reserved. Dorothy Larson Technical Service Representative 3M Infection Prevention Division [email protected] 3M Sterilization Tech Line 1-800-441-1922 Option “2” Disclosure Statement © 3M 2011. All Rights Reserved.
Transcript of Part III –Review of key information from ST79,...

3M Medical Template v2 7.13.07
1
Infection Prevention Division
Attest™ Sterile U Network
© 3M 2011. All Rights Reserved.
Part III – Review of key information from ST79, Sections 10 - 12
July 14, 2011
Welcome!Topic: Part III – Review of key information from ST79,
Sections 10 - 12
Facilitator: Jamie Meilahn, 3M Marketing
Diane Koch, 3M Marketing
Speaker: Dorothy Larson, Technical Services
Housekeeping
� Questions
� Mute feature (*7 = unmute; *6 = mute)
� “Chat” feature
� Technical difficulties
� CE Credits
� Post session follow-up
For more information: www.3M.com/3MSterileU© 3M 2011. All Rights Reserved.
Dorothy Larson
Technical Service Representative
3M Infection Prevention Division
3M Sterilization Tech Line 1-800-441-1922 Option “2”
Disclosure Statement
© 3M 2011. All Rights Reserved.

3M Medical Template v2 7.13.07
2
Objectives
� Describe the various sterilization process monitoring
devices, including PCDs
� Describe how to put the monitoring tools into
practice
© 3M 2011. All Rights Reserved.
ST79, Section 10 – Quality control
� General rationale (10.1)
� Monitoring of mechanical cleaning equipment (10.2)
� Product identification and traceability (10.3)
� Overview of sterilization process monitoring (10.4)
� Sterilization process monitoring devices (10.5)
� Routine load release (10.6)
� Routine sterilizer efficacy monitoring (10.7)
� Qualification testing (10.8)
� Periodic product quality assurance testing of routinely processed items (10.9)
� Periodic quality assurance testing of rigid sterilization container systems (10.10)
� Product recalls (10.11)
© 3M 2011. All Rights Reserved.
Monitoring of mechanical cleaning equipment (10.2, Annex D)
� Verification methods include use of devices that � Directly test instruments for residual soils
� Challenge cleaning effectiveness with standardized test methods
� Measure specific key parameters to evaluate the functionality of the cleaning equipment (time, temperature)
� Key performance outcomes� Clean surfaces
� Adequate fluid flow in equipment that has adaptors for lumened devices
© 3M 2011. All Rights Reserved.

3M Medical Template v2 7.13.07
3
© 3M 2011. All Rights Reserved.
Monitoring of mechanical cleaning equipment (10.2)
Frequency of testing
� Upon installation
�Weekly (preferably daily) during routine use
� After major repairs
Monitoring of mechanical cleaning equipment (10.2)
� “A major repair is a repair that is outside the scope of routine preventive maintenance and that significantly affect the performance of the equipment.”
� Examples include replacement of:
� Water pump(s)� Detergent delivery system � Heating system� Water delivery system� Water treatment system� Computer control � Upgrade of software
© 3M 2011. All Rights Reserved.
Monitoring of mechanical cleaning equipment (10.2)
� Document monitoring
� Review and initial digital readouts for each cycle
printout and save
� “Ideally, cleaned medical devices should be
traceable to the patients on whom they are used.”
© 3M 2011. All Rights Reserved.

3M Medical Template v2 7.13.07
4
© 3M 2011. All Rights Reserved.
Product identification and traceability(10.3.1, 10.3.3)
�Labeling on product
Lot or load control number
• Date of processing
• Sterilizer number
• Cycle number
Expiration date or statement:
“Contents sterile unless package is open or damaged. Please check before using.”
© 3M 2011. All Rights Reserved.
Product identification and traceability(10.3.2)
�Record keeping documents
• Materials that have been processed
• Results of the sterilization process monitoring
�Includes;
• Load labels/package
• Paper log systems
• Electronic log systems
• Filed as individual document
© 3M 2011. All Rights Reserved.
� Sterilizer and load records- Load contents
- Date and time of cycle
- Exposure time and temperature
- Initials of operator
- Biological results
- Chemical indicator results
� Records of sterilizer repair, maintenance and calibration
� Maintain records for time determined by risk manager
Product identification and traceability(10.3.2)

3M Medical Template v2 7.13.07
5
For immediate-use sterilization (flash), a lot number
should be assigned to each load, incl. sterilizer ID and
cycle number
Information on each load
• Item(s) processed
• Cycle parameters used (e.g., temperature, duration of cycle)
• Day and time cycle is run
• Operator information
• Reason for immediate use (flash) sterilization
© 3M 2011. All Rights Reserved.
Product identification and traceability(10.3.1)
Steam Sterilization Cycles (8.6.1)
� Gravity DisplacementIncoming steam displaces air
� Dynamic-Air-RemovalPrevacuum - Series of pressure and
vacuum excursions
Steam-flush pressure-pulse (SFPP) A series of steam flushes and pressure pulses above atmospheric pressure
© 3M 2011. All Rights Reserved.
Immediate-Use Steam Sterilization (Flash)
© 3M 2011. All Rights Reserved.
“Process designed for the steam sterilization of patient care items for immediate use.”
-High temperature (270-275°F/ 132-135°C)
-Gravity or dynamic-air-removal
-No dry time; No storage
Packaging- Perforated, mesh bottom, open surgical tray
- Rigid sterilization container system
- Protective organizing case- Single-wrapped surgical tray
Photo courtesy of Rose Seavey, The Children's Hospital - Denver
Steam sterilization cycles(Introduction, 8.6.2)

3M Medical Template v2 7.13.07
6
Extended cycles
� Cycles whose time is extended beyond the minimum steam sterilization cycles
� Sterilization of specialty instruments and devices, i.e. drills, could require extended exposure times
- some manufacturers do not recommend immediate-use sterilization
� Device manufacturer’s written instructions should be followed!
© 3M 2011. All Rights Reserved.
Steam sterilization cycles (8.6.3)
© 3M 2011. All Rights Reserved.
�Four levels of testing
Routine load release Testing of each non-implant and implant load
Routine sterilizer efficacy
monitoringEstablishing a regular pattern of testing the efficacy of
the sterilization process
Sterilizer qualification testingTesting of the sterilizer after events occur which could
affect the ability of the sterilizer to perform
Periodic product testing
Testing of routinely processed items to ensure the
effectiveness of the sterilization process and to avoid
wet packs
Overview of sterilization process monitoring (10.4, Table 6, Table 7)
© 3M 2011. All Rights Reserved.
� Monitoring Tools
- Physical monitors
- Chemical indicators
- Biological indicators
- Process challenge devices
(PCDs) - also referred to as
test or challenge pack
Overview of sterilization process monitoring (10.4)

3M Medical Template v2 7.13.07
7
� Physical Monitors
Verify the parameters of sterilization cycle are met
- Provides real-time assessment of the sterilization cycle conditions, and a permanent record of recordings and printouts
• Recording charts / Gauges
• Tape / Printouts
• Digital displays
Sterilization process monitoring devices (10.5.1)
© 3M 2011. All Rights Reserved.
© 3M 2011 All Rights Reserved.
� Physical monitors
• Mark with correct date and sterilizer identification at beginning of cycle
• Read & verified by initialing at end of cycle
• If not correct, do not release load
Sterilization process monitoring devices (10.5.1)
© 3M 2011. All Rights Reserved.
�Physical monitors
Limitations
• Generally only monitor one location in the sterilizer
• Conditions not revealed in the temperature recording, such as:
Improper packaging
Improper loading procedures
Sterilization process monitoring devices (10.5.1)

3M Medical Template v2 7.13.07
8
© 3M 2011. All Rights Reserved.
Class 1 Process Indicators
Class 2 Indicators for use in Specific Tests
Class 3 Single Variable Indicators
Class 4 Multi-variable Indicators
Class 5 Integrating Indicators
Class 6 Emulating Indicators
ANSI/AAMI/ISO 11140-1, 2005 Sterilization of health care products-Chemical indicators - Part 1: General requirements
Chemical Indicators (10.5.2)
© 3M 2011. All Rights Reserved.
Chemical Indicators (10.5.2)
Class 1: Process Indicators (External CIs)
� Use with individual units to indicate that the unit has been directly exposed to the sterilization process
- (e.g., indicator tape, indicating label, indicating printed legend)
� Distinguishes between processed and unprocessed units
� Designed to react to one or more of the critical process variables
© 3M 2011. All Rights Reserved.
Class 2: Indicators for Specific Tests
Testing sterilizer performance
- Bowie-Dick Test monitors efficacy
of air removal and steam penetration in 270-275°F dynamic-air removal sterilizers (i.e., vacuum assisted sterilizers)
Chemical Indicators (10.7.6)

3M Medical Template v2 7.13.07
9
© 3M 2011. All Rights Reserved.
Class 2: Indicators for Specific Tests
• Bowie-Dick tests can detect:
Air leaks
Inadequate air removal
Inadequate steam penetration
Presence of non-condensable gases: air or gases from
boiler additives
• Used for routine daily testing and qualification testing
Chemical Indicators (10.7.6)
© 3M 2011. All Rights Reserved.
Chemical Indicators (10.7.6)
Class 2: Bowie-Dick Test
© 3M 2011. All Rights Reserved.
Class 2: Bowie-Dick Test
• Uniform color change – Use
• If not uniform, shut down and call repair person
• Re-qualify if major repair
Chemical Indicators (10.7.6)

3M Medical Template v2 7.13.07
10
Attest™ Sterile U Network
Presentation Title
Infection Prevention Division
Questions ?
© 3M 2011. All Rights Reserved.
© 3M 2011. All Rights Reserved.
Internal chemical indicators
Class 3, 4, 5, or 6
• Tests conditions inside individual packs
• Place inside each pack, wrapped tray, flash tray or container in area least accessible to sterilant:
- identifies sterilant penetrated
Chemical Indicators (10.5.2)
© 3M 2011. All Rights Reserved.
Key Definitions
�Critical Variables
- Parameters identified as being essential to the sterilization process (and required monitoring)
- For example, the critical variables for steam sterilization to be effective
ANSI/AAMI/ISO 11140-1, 2005 (Mfrs. Standard)
Time Temperature Steam

3M Medical Template v2 7.13.07
11
© 3M 2011. All Rights Reserved.
Key Definitions
Stated Value (SV) - “value or values of a critical variable at which the indicator is designed to reach its endpoint as defined by the manufacturer”
End Point - “point of the observed change as defined by the manufacturer occurring after the indicator has been exposed to specified stated values”
�Migration�Color change
ANSI/AAMI/ISO 11140-1, 2005 (Mfrs. Standard)
121°C 128°C 135°C
22.1 5.7 2.1
Lot 2012-09 JT
© 3M 2011. All Rights Reserved.
Class 3: Single-Variable Indicators
(Internal CIs)
� Designed to react to one of the critical variables
� Do not provide as much information as Class 4, 5, or 6
Chemical Indicators (10.5.2)
© 3M 2011. All Rights Reserved.
Class 4: Multi-variable Indicators (Internal CIs)
• Designed to react to two or more of the critical variables
• Indicates exposure to a sterilization cycle at stated values of the chosen variables
Chemical Indicators (10.5.2)

3M Medical Template v2 7.13.07
12
© 3M 2011. All Rights Reserved.
Class 5: Integrating Indicators (Internal CIs)
• Designed to react to all critical variables
• Stated values equivalent to the performance requirements for BIs (ISO 11138 series: 2006)
- Response must correlate to a BI at three
time/temperature relationships : 250°F/121°C, 275°F/135°C , and at one or more temperatures in between
- Stated value at 250°F/121°C must be >16.5 min
Chemical Indicators (10.5.2)
Class 6: Emulating Indicators (Internal CIs)
• Designed to react to all critical variables
• Stated value generated from the critical variables of the specific sterilization process
• Cycle verification indicators
© 3M 2011. All Rights Reserved.
Chemical Indicators (10.5.2)
© 3M 2011. All Rights Reserved.
Internal chemical indicators
� The contents of a package with a non-responding chemical indicator should not be used
� Quarantine remainder of load until BI results are known
� If no BI, decide on recall based on physical monitors and other CI results
Chemical Indicators (10.5.2)

3M Medical Template v2 7.13.07
13
• Biological Indicators (BIs)
Test system containing viable microorganisms providing a defined resistance to a specified sterilization process
- BIs are intended to demonstrate whether the conditions were adequate to achieve sterilization
- BIs are the only sterilization process monitoring device that provides a direct measure of the lethality of the process.
Biological Indicators (10.5.3)
© 3M 2011. All Rights Reserved.
© 3M 2011. All Rights Reserved.
How they work . . .
�Spores are exposed to the sterilization process
�After processing, exposed spores immersed in optimized recovery media and incubated at optimal temperature
• Spore strips are transferred to medium using aseptic technique
• Self-contained designs allow immersion without transfer
• If spores are viable, process failure
Biological Indicators (10.5.3)
© 3M 2011. All Rights Reserved.
Biological Indicators (10.5.3)
�With enzyme-based early-readout (AAMI)
• Fluorescence in 1 to 3 hours
• Visual color change in 24 to 48 hours for steam
�Conventional
• Visual color change in 24-48 hours
�Manufacturer’s incubation instructions should be followed
�“Periodic verification of the early-readout with spore growth should be performed in accordance with the manufacturer’s instructions and facility policy and procedures.”
�The final incubation time is the time needed to ensure a negative
biological indicator.

3M Medical Template v2 7.13.07
14
© 3M 2011. All Rights Reserved.
Control BI - Incubate a positive BI control each day a test vial
is incubated in each incubator or auto-reader
�From same lot number as test BI
Purpose is to validate the test system is working and ensure
� Correct incubation conditions
� Viability of spores
� Capability of medium to promote growth
� Proper functioning of auto-reader and incubator
Good Science
Biological Indicators (10.7.2.3, 10.7.3.3, 10.7.4.3)
� Process Challenge Device (PCD) –
Item designed to constitute a defined resistance to a sterilization process and used to assess performance of the process.
� Representative of load and creates the greatest challenge
� Equal to or greater than the most difficult item to sterilize
Process Challenge Devices (10.5.4)
© 3M 2011. All Rights Reserved.
© 3M 2011. All Rights Reserved.
�User assembled
Challenge test pack or tray (e.g., AAMI 16-
towel pack, flash tray)
�Commercially available – FDA
Cleared PCD
Process Challenge Devices (10.5.4)

3M Medical Template v2 7.13.07
15
� Depending on the application…
� a BI,
� a BI and a Class 5 integrating CI,
� a Class 5 integrating CI
� a Class 6 emulating indicator
• Place in most difficult area in sterilizer for the sterilant to
penetrate
43© 3M 2010. All Rights Reserved.
Process Challenge Devices (10.5.4)
© 3M 2011. All Rights Reserved.
Process Challenge Devices (10.5.4)
�Sterilizer Cycle Variation
Expertise of prep/pack personnel
Expertise of sterilizer operator
Condition of sterilizer equipment
Available Utilities
Usage
The less frequent the
sterilizer is used the
greater chance that an
unnoticed event could
affect sterilization
Attest™ Sterile U Network
Presentation Title
Infection Prevention Division
Putting the monitoring tools into practice!
© 3M 2011. All Rights Reserved.

3M Medical Template v2 7.13.07
16
© 3M 2011. All Rights Reserved.
Four levels of testing:
Routine load release Testing of each non-implant and implant load
Routine sterilizer efficacy
monitoringEstablishing a regular pattern of testing the efficacy of
the sterilization process
Sterilizer qualification
testing
Testing of the sterilizer after events occur which could
affect the ability of the sterilizer to perform
Periodic product testing
Testing of routinely processed items to ensure the
effectiveness of the sterilization process and to avoid
wet packs
Overview of sterilization process monitoring (10.4, Table 6, Table 7)
© 3M 2011. All Rights Reserved.
Routine Load Release Nonimplants - (Table 6)
� Physical monitors
� External process indicator (Class 1) on every package
� Internal CI (Class 3, 4, 5, 6) inside every package
� Optional monitoring of load with a PCD containing a
• BI
• BI and a Class 5 CI
• Class 5 integrating indicator
• Class 6 emulating indicator
� Evaluation of all data by an experienced, knowledgeable person
� Do not distribute load if any data suggests a sterilization process failure
© 3M 20101. All Rights Reserved.
Routine Load Release Implants – (10.6.3)
� Physical monitors
� External process indicator (Class 1) on every package
� Internal CI (Class 3, 4, 5, 6) inside every package
� A PCD containing a BI and a Class 5 integrating indicator
� Optional: Class 6 PCD (Note: Load release decision is still only based on BI, or Class 5 CI in an emergency)
� Evaluation of all data by an experienced,
knowledgeable person
� Do not distribute load if any data suggests
a sterilization process failure

3M Medical Template v2 7.13.07
17
© 3M 2011. All Rights Reserved.
�“Releasing implants before the BI results are known is unacceptable and should be the exception, not the rule.”
Routine Load Release Implants – (10.6.3)
© 3M 2011. All Rights Reserved.
� BI PCD should contain a Class 5 integrating indicator
� Class 5 integrating indicator used to release implant in emergency situations
� “Emergency situations should be defined”
Routine Load Release Implants – (10.6.1, 10.6.3)
© 3M 2011. All Rights Reserved.
Early Release Implant Loads
�If documented medical exceptions dictate release of implant before BI result
• Use implant log and an exception form
�Critical that this documentation be fully traceable to the patient
Routine Load Release Implants – (10.6.3, Annex L)

3M Medical Template v2 7.13.07
18
© 3M 2011 All Rights Reserved.
� Exception Form for Premature
Release of Implantable Device/Tray
• Name of implant
• Name of patient
• Name of surgeon
• Reason for premature release
• What could have prevented the premature release
Routine Load Release Implants – (10.6.3, Annex L)
Immediate-Use Steam Sterilization (Flash Cycles)
© 3M 2011 All Rights Reserved.
Routine Load Release Implants – (Intro, 10.5.4, 10.6.2)
� Flash sterilization should not be used for implantable devices(AAMI Intro – Garner and Favero, 1985; CDC, 2003a, 2003b)
� The load should be quarantined until the results of the BI testing are available
(CDC, 2003a)
Emergency situations - Class 5 CI should be used to release implant
� Critical that all implants are traceable to the patient
Attest™ Sterile U Network
Presentation Title
Infection Prevention Division
Questions ?
© 3M 2011. All Rights Reserved.

3M Medical Template v2 7.13.07
19
© 3M 2011. All Rights Reserved.
Routine Sterilizer Efficacy Monitoring (10.7)
Monitoring recommendations
� Routine load release
Nonimplants; Implants
� Routine sterilizer efficacy monitoring
� Sterilizer qualification testing
� Periodic product QA testing
© 3M 2011 All Rights Reserved.
Routine Sterilizer Efficacy Monitoring &Sterilizer Qualification Testing (10.7)
Divided into sections
• Sterilizers larger than 2
cubic feet
• Table-top sterilizers
• Flash sterilization cycles
Photo courtesy of Rose Seavey, The Children's Hospital - Denver
Establishing a regular pattern of testing the efficacy of the
sterilization process
“Biological indicators should be used within PCDs for
routine sterilizer efficacy monitoring at least weekly, but
preferably every day that the sterilizer is in use.” (10.5.3.2)
Routine Sterilizer Efficacy Monitoring (10.7)
© 3M 2011. All Rights Reserved.

3M Medical Template v2 7.13.07
20
Test each type of cycle with a BI PCD
Gravity-displacement 132°C to 135°C 270°F to 275°F
Gravity-displacement 121°C 250°F
Dynamic-air-removal 132°C to 135°C 270°F to 275°F
Routine Sterilizer Efficacy Monitoring (10.7)
© 3M 2011. All Rights Reserved.
“NOTE - If a sterilizer will run the same type of cycle (e.g., dynamic-air-removal at 132°C to 135°C [270°F to 275°F] for different exposure times (e.g., 4 minutes and 10 minutes), then only the shortest cycle time needs to be tested.”
Sterilizers larger than 2 cubic feet
� Bowie-Dick Test Pack
Daily in an empty cycle
Before BI PCD
� BI PCD: Use a Commercially available disposable, FDA cleared BI PCD, or AAMI 16 towel pack
Full load on bottom shelf over drain
Weekly, preferably daily
Routine Sterilizer Efficacy Monitoring (10.7)
© 3M 2011. All Rights Reserved.
Table-Top sterilizers
BI PCD
� Representative of package or tray routinely
processed and most difficult to sterilize
� Contain items normally present during routine
sterilization
Full load in cold point (check with sterilizer manufacturer)
Weekly, preferably daily
© 3M 2011. All Rights Reserved.
Routine Sterilizer Efficacy Monitoring (10.7)

3M Medical Template v2 7.13.07
21
Immediate-Use Steam Sterilization (Flash cycles)
� Run Bowie-Dick test, if dynamic-air-removal
� Run a representative BI PCD*, along with a CI, in the empty tray configuration (no instruments)
Perforated, mesh bottom, open surgical tray
Rigid sterilization container system
Protective organizing case
Single-wrapped surgical tray
� Each type of tray configuration used should be testedPlaced on bottom shelf over the drain in otherwise empty chamber
Weekly, preferably daily
* No commercial BI PCDs are available for flash sterilization© 3M 2011. All Rights Reserved.
Routine Sterilizer Efficacy Monitoring (10.7)
© 3M 2011. All Rights Reserved.
Routine Sterilizer Efficacy Monitoring Sterilizers > 2 cubic ft
�You’ve been hired as a consultant by a new surgery
center which will be doing daily BI PCD monitoring
�The surgery center will be running the cycles listed on
the next slide
© 3M 2011. All Rights Reserved.
CycleMonitor with BI PCD?
Gravity, 250°F, 40 min cycle
Gravity, 250°F, 60 min cycle
Prevacuum, 270°F, 4 min cycle
Prevacuum, 270°F, 10 min cycle
Routine Sterilizer Efficacy Monitoring Sterilizers > 2 cubic ft
Which cycles do you recommend they routinely monitor?

3M Medical Template v2 7.13.07
22
© 3M 2011. All Rights Reserved.
CycleMonitor with BI PCD?
Gravity, 250°F, 40 min cycle
Gravity, 250°F, 60 min cycle
Dynamic-air-removal, 270°F, 4 min cycle
Dynamic-air-removal, 270°F, 10 min cycle
Routine Sterilizer Efficacy Monitoring Sterilizers > 2 cubic ft
© 3M 2011. All Rights Reserved.
Air-Removal Method Temperature Monitor with BI PCD?
Gravity-Displacement
“Immediate-Use(Flash)”
270°F - 275°F
Gravity-Displacement
“Terminal”
250°F
Prevacuum “Immediate-
Use (Flash)”
270°F - 275°F
Prevacuum “Terminal” 270°F - 275°F
Routine Sterilizer Efficacy Monitoring Sterilizers > 2 cubic ft
Which cycles do you recommend they routinely monitor?
© 3M 2011. All Rights Reserved.
Air-Removal Method Temperature Monitor with BI PCD?
Gravity-Displacement
“Immediate-Use(Flash)”
270°F - 275°F
Gravity-Displacement
“Terminal”
250°F
Prevacuum “Immediate-
Use (Flash)”
270°F - 275°F
Prevacuum “Terminal” 270°F - 275°F
Routine Sterilizer Efficacy Monitoring Sterilizers > 2 cubic ft

3M Medical Template v2 7.13.07
23
© 3M 2011. All Rights Reserved.
Routine Sterilizer Efficacy Monitoring Sterilizers > 2 cubic ft
Using the cycles listed on previous slide, routine testing is done,
as follows:
1) First, run an empty chamber warm-up cycle to preheat the sterilizer
2) Then, run the Bowie-Dick test pack in an otherwise empty chamber
3) Next, test the “Flash” cycles using a BI PCD - testing is done in an
empty chamber
4) And with the first terminal loads ran at 250 deg. F. Gravity and 270
deg. F. Prevacuum, run a BI PCD in with the load.
© 3M 2011. All Rights Reserved.
Tools:
�Figure 12— Decision tree for conducting investigations of steam sterilization process failures
�Table 8 -- Checklist for identifying reasons for steam sterilization process failures
Actions to take when biological indicators, chemical indicators, or physical monitors indicate failure (10.7.5)
Actions to take when biological indicators, chemical indicators, or physical monitors indicate failure (10.7.5)
If cause of failure not identified
� Quarantine load, recall all items processed since last negative BI
� Take sterilizer out of service
� Determine cause of failure
� Minor repair →return sterilizer to service
� Major repair → perform sterilization qualification testing
If cause of failure immediately identified and confined to one load or item (e.g., using incorrect sterilization cycle)
� No recall, correct problem and reprocess load
© 3M 2011. All Rights Reserved.

3M Medical Template v2 7.13.07
24
Major repairs of steam
sterilizer
Repairs outside the scope of normal maintenance
Examples:
• Weld repairs of pressure vessel
• Replacement of chamber door or piping assembly
• Rebuilds or upgrades of controls
Major repairs of utilities Changes to the utilities connected to the sterilizer
Examples:
Water-main break
•Annual boiler maintenance
•Additional equipment loads
•Installation of new boilers
Sterilizer Qualification Testing (10.8)
© 3M 2011. All Rights Reserved.
© 3M 2011. All Rights Reserved.
Sterilizer Qualification Testing (10.8)
Monitoring recommendations
� Routine load release
� Nonimplants, Implants
� Routine sterilizer efficacy monitoring
� Sterilizer qualification testing
� Periodic product QA testing
Testing of sterilizer after events occur that affect
the ability of the sterilizer to perform
� Sterilizer installation
� Relocation
� Malfunction
� Major repairs of sterilizer or utilities
� Sterilization process failures
© 3M 2011. All Rights Reserved.
Sterilizer Qualification Testing (10.8)

3M Medical Template v2 7.13.07
25
Sterilizers larger than 2 cubic feet
BI PCD: Commercially available disposable, FDA cleared BI PCD, or an AAMI 16 towel pack
•Empty load on bottom shelf over drain
- Run three consecutive cycles
•Follow with BD testing (empty load)
- Run three consecutive cycles
Sterilizer Qualification Testing (10.8)
© 3M 2011. All Rights Reserved.
Table-Top Sterilizers
BI PCD
� Representative of package or tray routinely processed and
most difficult to sterilize
� Contain items normally present during routine sterilization
Full load in cold point (check with sterilizer manufacturer)
Three consecutive cycles
Quarantine the loads until the BI results are known
Sterilizer Qualification Testing (10.8)
© 3M 2011. All Rights Reserved.
Immediate-Use Steam Sterilization (Flash cycles)
Representative BI PCD* using one or more BIs and one or more CIs
Select one representative tray configuration
�Place on bottom shelf over the drain in otherwise emptychamber
�Run three consecutive cycles
�If dynamic air-removal (e.g. prevacuum) , run a Bowie-Dick test pack in three consecutive cycles
* No commercial BI PCDs are available for flash sterilization
© 3M 2011. All Rights Reserved.
Sterilizer Qualification Testing (10.8)

3M Medical Template v2 7.13.07
26
© 3M 2011. All Rights Reserved.
Monitoring recommendations
� Routine load release
Nonimplants, Implants
� Routine sterilizer efficacy monitoring
� Sterilizer qualification testing
� Periodic product quality assurance testing
Periodic product quality assurance testing of routinely processed items (10.9)
© 3M 2011. All Rights Reserved.
� The standardized BI PCD presents a known challenge
BUT…doesn’t necessarily reflect the same challenge as
routinely processed items
� Product testing is recommended for complete assurance:� Verify sterilization effectiveness
� Avoid wet packs
Periodic product quality assurance testing of routinely processed items (10.9)
© 3M 2011. All Rights Reserved.
� Conduct periodic product QA testing of routinely processed items on the “master product” from each product family.
- Before using newly purchased or loaner sets
- After any changes: Product family or master product; Sterilization instructions; Packaging materials (wraps, containers, etc.); Load configuration
� Product Family
“Group or subgroup of product that is characterized by similar attributes, such
as mass, material, construction, set weight, shapes, lumens, and packaging system, and that presents a similar challenge to the sterilization process”.
�Master ProductThe most difficult-to-sterilize device in each group
Periodic product quality assurance testing of routinely processed items (10.9)
3M Medical Template v2 7.13.07
27
© 3M 2011. All Rights Reserved.
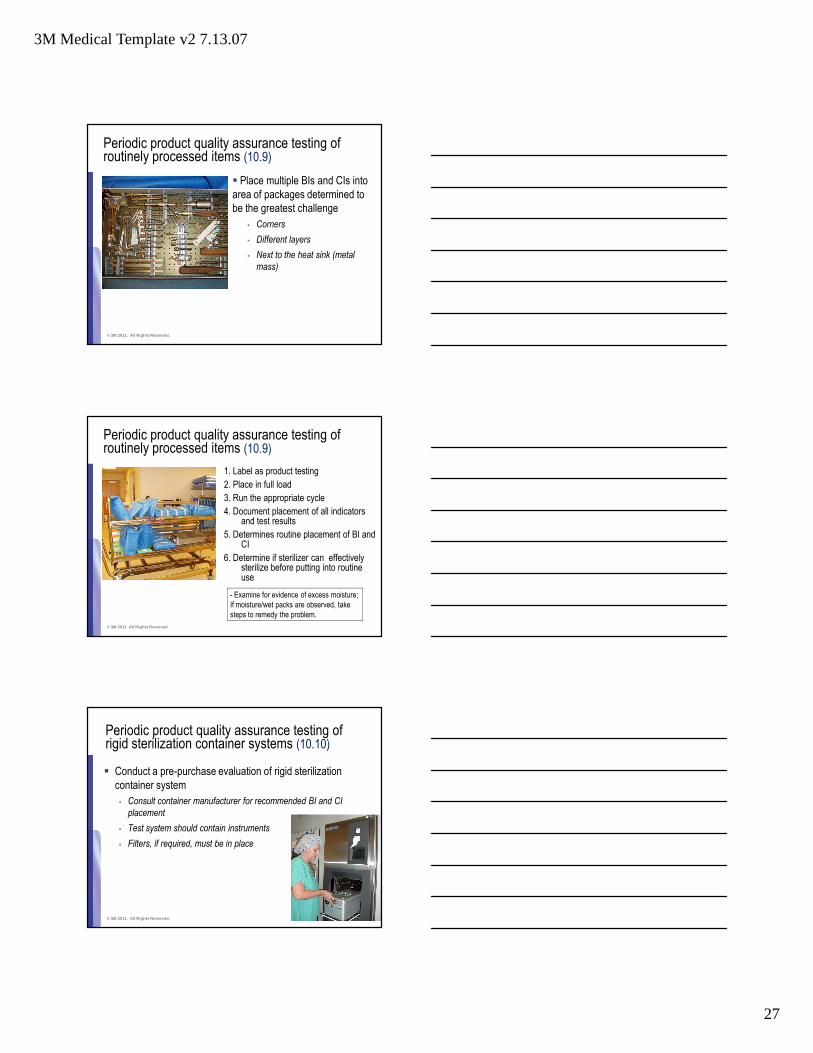
� Place multiple BIs and CIs into
area of packages determined to
be the greatest challenge
� Corners
� Different layers
� Next to the heat sink (metal mass)
Periodic product quality assurance testing of routinely processed items (10.9)
© 3M 2011 All Rights Reserved.
1. Label as product testing
2. Place in full load
3. Run the appropriate cycle
4. Document placement of all indicators and test results
5. Determines routine placement of BI and CI
6. Determine if sterilizer can effectively sterilize before putting into routine use
Periodic product quality assurance testing of routinely processed items (10.9)
- Examine for evidence of excess moisture;
If moisture/wet packs are observed, take
steps to remedy the problem.
Periodic product quality assurance testing of rigid sterilization container systems (10.10)
� Conduct a pre-purchase evaluation of rigid sterilization
container system
� Consult container manufacturer for recommended BI and CI placement
� Test system should contain instruments
� Filters, if required, must be in place
© 3M 2011. All Rights Reserved.

3M Medical Template v2 7.13.07
28
Periodic product quality assurance testing of rigid sterilization container systems (10.10)
� Prepurchase evaluation test protocols
� Dynamic-air-removal steam sterilizers
� Gravity-displacement steam sterilizers
� To assess
� Air removal from the container system
� Steam penetration into the contents of the container system
� Sterilization cycle conditions
� Drying
� Sterility maintenance
© 3M 2011. All Rights Reserved.
Attest™ Sterile U Network
Presentation Title
Infection Prevention Division
Questions ?
© 3M 2011. All Rights Reserved.
Product recalls (10.11)
� A recall procedure should be established
� Outlines when necessary to do a recall
� Expedites the retrieval of processed items suspected to be nonsterile
� Ensures patient safety and compliance
� Ensures follow-up actions: quarantine of the sterilizer, notification of physicians and affected clinical departments, and surveillance of patients
� Ensures proper documentation
© 3M 2011. All Rights Reserved.

3M Medical Template v2 7.13.07
29
ST79, Section 11
Quality process improvement
� General rationale (11.1)
� Quality process (11.2)
General considerations
Risk analysis
Decontamination
Rigid sterilization container systems
Flash sterilization
� Functional areas for product and process improvements (11.3)
� Implementing product and process improvements (11.4)
© 3M 2011. All Rights Reserved.
© 3M 2011. All Rights Reserved.
Quality Process Improvement General considerations (11.2.1)
� Recalls
� BI Monitoring Frequency
� Managing Loaner Instrumentation
� Cleaning Verification
� TASS
© 3M 2011. All Rights Reserved.
Quality Process Improvement Risk Analysis (11.2.2)
Risk analysis =
Risk assessment + risk management + risk communication
� Perform at least annually
� Reevaluate whenever significant changes occur

3M Medical Template v2 7.13.07
30
© 3M 2011. All Rights Reserved.
Quality Process Improvement Risk Analysis (11.2.2)
�Risk assessment
• Identify sources of potential sterilization failures
• Estimate likelihood that each failure will occur
• Assess the consequences if that failure does occur
© 3M 2011. All Rights Reserved.
Quality Process Improvement Risk Analysis (11.2.2)
�Risk management • Determine which of the potential sterilization failures
identified require management
• Select and implement the plans or actions needed to ensure those failures are controlled
• AAMI ST79 describes the accepted means of managing these risks
© 3M 2011. All Rights Reserved.
Quality Process Improvement Risk Analysis (11.2.2)
�Risk communication (report actions taken to
eliminate identified risk)
� SPD, OR and ICP (recall procedures)

3M Medical Template v2 7.13.07
31
© 3M 2011. All Rights Reserved.
Quality Process Improvement Functional areas for product and process improvements (11.3)
� Evaluating and monitoring the effectiveness of a process should
be an ongoing effort
�Written procedures should be reviewed
� Current practices should be audited for compliance
Examples:
Training and continuing education, medical device processing protocols, maintenance of sterilizers, product identification and traceability, sterilizer physical monitoring records, sterilization process indicator records, sterilizer efficacy monitoring and qualification testing records, and product testing records
ST79, Section 12
New product evaluation
� General rationale (12.1)
� Considerations (12.2)
© 3M 2011. All Rights Reserved.
“2.79 new product: A new product/technology that has been FDA
approved but for which AAMI does not offer guidance for application.”
Attest™ Sterile U Network
Presentation Title
Infection Prevention Division
Questions ?
© 3M 2011. All Rights Reserved.

3M Medical Template v2 7.13.07
32
Reference:
Association for the Advancement of Medical Instrumentation (AAMI)
Comprehensive guide to steam sterilization and sterility assurance in health care facilities. ANSI/ANSI/AAMI ST79: 2010 & A1:2010
© 3M 2011. All Rights Reserved.
ST79:2010 & A1:2010 Ordering Info
Contact AAMI to order ANSI/AAMI ST79:2010 & A1:2010,
Comprehensive guide to steam sterilization and sterility assurance in health care facilities (Consolidated Text)
� Order Code: ST79 or ST79-PDF by credit card
� Price/AAMI Member Price: $240/$120 (available at member price through AORN)
� Call 1- 877-249-8226
� Internet: http://marketplace.aami.org
� Fax: 301-206-9789
� Mail: AAMI Publications, P.O. Box 0211, Annapolis Junction, MD 20701-0211
© 3M 2011. All Rights Reserved.
Other Resources:
� 3M™ Sterile U
� www.3M.com/3MSterileU
� 3M Helpline: 1-800-228-3957
� 3M Sterilization Techline: 1-800-441-1922 option “2”
� AAMI: www.aami.org
� AORN: www.aorn.org
© 3M 2011. All Rights Reserved.

3M Medical Template v2 7.13.07
33
Attest™ Sterile U Network
Presentation Title
Infection Prevention Division
Thank You
© 3M 2011. All Rights Reserved.