Original Research Article Prin ciples of panoramic ... · techniques are associated with an...
6
How to site this article: Arvind Takle et al. Prin Trends in Science and Technology. October 201 Original Research Article Principles of panor (orthopantography Arvind Takle 1* , Suresh Maru 2 , 1 Professor, 2 Assistant Professor, 3,4,5,6 Resident, De Sangli-416414, Maharashtra, INDIA. Email: [email protected] Abstract Guidance for technician for p film artifact. Keywords: Radiation Source Plane, Camper Plane, Exposu * Address for Correspondence: Dr Arvind Takle, Department of Radio-Diagnosi INDIA. Email: [email protected] Received Date: 12/08/2015 Revised Date: 28/09 INTRODUCTION The radiation source (right) the image r (left) move in the clockwise direction aro while image receptor (IR) itself moves direction behind the secondary slotted d central ray falls upon the counter orbiting having first passed through the pr diaphragm, then through vertical slot near receptor. The central ray is guided in an over three pivotal points C, B, A, Like planes of rotation with flat bundle of rays slice can be adapted according to the pati of jaws. It changes 9mm in anterior regi the region of TM joint. Object distortion in front of plane not sharply depicted & ar while objects behind the plane are also expanded in size. The slot technique provi but at the cost of higher radiation exposure Access this article online Quick Response Code: Website: www.statperso DOI: 24 Oc 2015 nciples of panoramic radiography (orthopantography). Internatio 15; 16(3): 628-633 http://www.statperson.com (accessed 26 Oct ramic radiography y) , Amol Karagir 3 , Digvijay Ghodake 4 , Nilofar Muja epartment of Radio-Diagnosis, Bharati VIdyapeeth Deemed Uni proper radiography different factors affecting the quality and ana e, Receptor Plane of Focus, TM Joint, Object Distortion, Slot ure, Artifacts. is, Bharati VIdyapeeth Deemed University Medical College, San 9/2015 Accepted Date: 18/10/2015 receptor holder ound the skulls in the opposite diaphragm. The g image receptor rimary slotted rest the image n elliptical track e three vertical s. The shape of ients age, shape ion & 20mm in in OPG: object re reduction size not sharp and ides clear image e. In short OPG is based on slot technique in that zonography with varying depth of Figure 1 a: Principle of the tomogra Figure 1 b: Attenuation metho These diagrams illustrate the ba (blurring): AB= path of the rad counter-orbiting path of the ima plane of the tomographic slice, S U= desired detail in the targeted l be in sharp focus), U1 = unde on.com ctober 5 onal Journal of Recent tober 2015). awar 5 , Advait Takle 6 iversity Medical College, atomy on x-ray and different t Technique, Chin, Occlusal ngli-416414, Maharashtra, t it is an elliptoid shaped f field. aphic technique ods for tomography asis of linear attenuation diation source, A1/B1 = age receptor(film), SE= SW = angle of the slice, layer (black dot that will esired detail outside the
Transcript of Original Research Article Prin ciples of panoramic ... · techniques are associated with an...

How to site this article: Arvind Takle et al. Princi
Trends in Science and Technology. October 2015; 16(3): 628
Original Research Article
Principles of panoramic radiography
(orthopantography)
Arvind Takle1*
, Suresh Maru2, Amol Karagir
1Professor,
2Assistant Professor,
3,4,5,6Resident, Departm
Sangli-416414, Maharashtra, INDIA.
Email: [email protected]
Abstract Guidance for technician for proper radiography
film artifact.
Keywords: Radiation Source, Receptor Plane of Focus, TM Joint, Object Distortion, Slot Technique, Chin, Occlusal
Plane, Camper Plane, Exposure, Artifacts
*Address for Correspondence: Dr Arvind Takle, Department of Radio-Diagnosis, Bharati VIdyapeeth Deemed University Medical College, Sangli
INDIA.
Email: [email protected]
Received Date: 12/08/2015 Revised Date: 28/09/2015
INTRODUCTION The radiation source (right) the image receptor holder
(left) move in the clockwise direction around the skulls
while image receptor (IR) itself moves in the opposite
direction behind the secondary slotted diaphragm. T
central ray falls upon the counter orbiting image receptor
having first passed through the primary slotted
diaphragm, then through vertical slot nearest the image
receptor. The central ray is guided in an elliptical track
over three pivotal points C, B, A, Like three vertical
planes of rotation with flat bundle of rays. The shape of
slice can be adapted according to the patients age, shape
of jaws. It changes 9mm in anterior region & 20mm in
the region of TM joint. Object distortion in OPG: object
in front of plane not sharply depicted & are reduction size
while objects behind the plane are also not sharp and
expanded in size. The slot technique provides clear image
but at the cost of higher radiation exposure.
Access this article online
Quick Response Code:
Website:
www.statperson.com
DOI: 24 October
2015
Principles of panoramic radiography (orthopantography). International Journ
October 2015; 16(3): 628-633 http://www.statperson.com (accessed 26 October 2015
ciples of panoramic radiography
(orthopantography) , Amol Karagir
3, Digvijay Ghodake
4, Nilofar Mujawar
Department of Radio-Diagnosis, Bharati VIdyapeeth Deemed Univer
Guidance for technician for proper radiography different factors affecting the quality and anatomy on x
Radiation Source, Receptor Plane of Focus, TM Joint, Object Distortion, Slot Technique, Chin, Occlusal
Plane, Camper Plane, Exposure, Artifacts.
Diagnosis, Bharati VIdyapeeth Deemed University Medical College, Sangli
Revised Date: 28/09/2015 Accepted Date: 18/10/2015
The radiation source (right) the image receptor holder
(left) move in the clockwise direction around the skulls
while image receptor (IR) itself moves in the opposite
direction behind the secondary slotted diaphragm. The
central ray falls upon the counter orbiting image receptor
having first passed through the primary slotted
diaphragm, then through vertical slot nearest the image
receptor. The central ray is guided in an elliptical track
A, Like three vertical
planes of rotation with flat bundle of rays. The shape of
slice can be adapted according to the patients age, shape
of jaws. It changes 9mm in anterior region & 20mm in
Object distortion in OPG: object
ront of plane not sharply depicted & are reduction size
while objects behind the plane are also not sharp and
technique provides clear image
but at the cost of higher radiation exposure. In short OPG
is based on slot technique in that it is an elliptoid shaped
zonography with varying depth of field.
Figure 1 a: Principle of the tomographic technique
Figure 1 b: Attenuation methods for tomography
These diagrams illustrate the basis of linear attenuation
(blurring): AB= path of the radiation source, A1/B1 =
counter-orbiting path of the image receptor(film), SE=
plane of the tomographic slice, SW = angle of the slice,
U= desired detail in the targeted layer (black dot that will
be in sharp focus), U1 = undesired detail outside
www.statperson.com
24 October
2015
International Journal of Recent
(accessed 26 October 2015).
, Nilofar Mujawar5, Advait Takle
6
VIdyapeeth Deemed University Medical College,
ity and anatomy on x-ray and different
Radiation Source, Receptor Plane of Focus, TM Joint, Object Distortion, Slot Technique, Chin, Occlusal
Diagnosis, Bharati VIdyapeeth Deemed University Medical College, Sangli-416414, Maharashtra,
that it is an elliptoid shaped
zonography with varying depth of field.
Principle of the tomographic technique
Attenuation methods for tomography
These diagrams illustrate the basis of linear attenuation
of the radiation source, A1/B1 =
orbiting path of the image receptor(film), SE=
plane of the tomographic slice, SW = angle of the slice,
U= desired detail in the targeted layer (black dot that will
be in sharp focus), U1 = undesired detail outside the
International Journal of Recent Trends in Science And Technology, ISSN 2277-2812 E-ISSN 2249-8109, Volume 16, Issue 3, 2015 pp 628-633
Statperson Publications, International Journal of Recent Trends in Science And Technology, ISSN 2277-2812 E-ISSN 2249-8109, Volume 16, Issue 3 2015
target layer (gray dot and blurred figure on the image
receptor). This will be more or less completely attenuated
depending upon its distance from the plane of focus. The
thickness of the slice depends upon the selected slice
angle. A small angle (short path, blue) will image a
thicker plane than will a larger angle (longer path, red). If
the layer in focus is thicker than 5 mm, the procedure is
referred to as zonography, and if less than 3 mm,
tomography. Fig. 1b Attenuation methods for
tomography. a linear, b circular, c elliptical, d
hypocycloidal and e spiral attenuation with contra-
rotating image receptor motion. The method of spiral
attenuation (with the longest pathway) provides the best
results with the thinnest layers in focus and the least
amount of volume artifacts, especially in skull
radiographs. Fig. 2a Principle of panoramic radiography
(orthopantography). The radiation source (right) and the
image receptor holder (left) move in the clockwise
direction around the skull, while the image receptor (IR)
itself moves in the opposite direction behind the
secondary slotted diaphragm. The central ray falls upon
the counter-orbiting image receptor, having first passed
through the primary slotted diaphragm, then through the
vertical slot nearest the image receptor, According to the
original version by Paatero, the central ray is guided in an
elliptical track over three pivotal points from C over B
after A. It would be better to think of these three pivotal
points as three vertical axes of rotation within a flat
bundle of rays. Fig. 2b Midline of the slice thickness.
With modern radiographic equipment, the shape of the
slice can be adapted (+) according to the patients age and
shape of the jaws. The thickness changes from about 9
mm in the anterior region up to approximately 20 mm in
the region of the temporomandibular joints. This imaging
procedure can be categorized as zonography with
different depths of field in different segments of the jaws.
Structures outside of the plane are not completely
eliminated, so that a summation effect from the third
dimension may lead to improper interpretation of the two-
dimensional radiographic image. Fig. 3a Object
distortions in panoramic radiographs. In this example of
the anterior region of the mandible, it becomes clear that
objects in front of the plane are not sharply depicted and
are reduced in size, while objects behind the plane are
also not sharply depicted but are expanded in size. A
metal sphere positioned in front of the plane of focus, for
example during implant simulations, appears blurred and
vertically oval in shape, while a metal sphere behind the
plane appears blurred but laterally oval. Fig. 3b Principle
of the slot- technique. Conventional skull radiographic
techniques are associated with an inevitable pattern of
scatter radiation. The slot-technique provides clearer
images, but at the cost of higher radiation exposure. The
skull can be effectively scanned vertically or horizontally
with narrow, continuously applied “lines” of radiation,
via focus-near (primary) diaphragms and secondary
diaphragms slotted nearer the image receptor, the
panoramic radiography described by Paatero is therefore
actually based on the slot-technique, in that it is an
eliptoid-shaped zonography with varying depths of field.
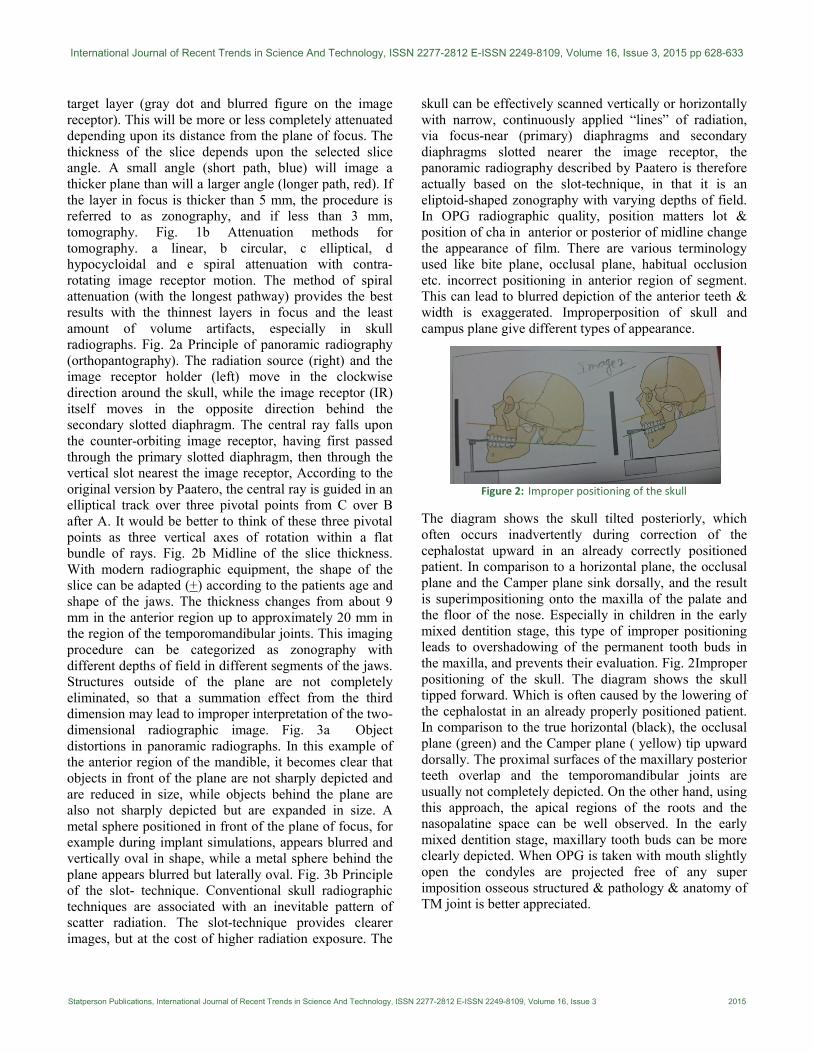
In OPG radiographic quality, position matters lot &
position of cha in anterior or posterior of midline change
the appearance of film. There are various terminology
used like bite plane, occlusal plane, habitual occlusion
etc. incorrect positioning in anterior region of segment.
This can lead to blurred depiction of the anterior teeth &
width is exaggerated. Improperposition of skull and
campus plane give different types of appearance.
Figure 2: Improper positioning of the skull
The diagram shows the skull tilted posteriorly, which
often occurs inadvertently during correction of the
cephalostat upward in an already correctly positioned
patient. In comparison to a horizontal plane, the occlusal
plane and the Camper plane sink dorsally, and the result
is superimpositioning onto the maxilla of the palate and
the floor of the nose. Especially in children in the early
mixed dentition stage, this type of improper positioning
leads to overshadowing of the permanent tooth buds in
the maxilla, and prevents their evaluation. Fig. 2Improper
positioning of the skull. The diagram shows the skull
tipped forward. Which is often caused by the lowering of
the cephalostat in an already properly positioned patient.
In comparison to the true horizontal (black), the occlusal
plane (green) and the Camper plane ( yellow) tip upward
dorsally. The proximal surfaces of the maxillary posterior
teeth overlap and the temporomandibular joints are
usually not completely depicted. On the other hand, using
this approach, the apical regions of the roots and the
nasopalatine space can be well observed. In the early
mixed dentition stage, maxillary tooth buds can be more
clearly depicted. When OPG is taken with mouth slightly
open the condyles are projected free of any super
imposition osseous structured & pathology & anatomy of
TM joint is better appreciated.

Arvind Takle et al.
International Journal of Recent Trends in Science And Technology, ISSN 2277-2812 E-ISSN 2249-8109, Volume 16, Issue 3, 2015 Page 630
Figure 3:
Positioning in early childhood requires patience & it
deviates from normal position for adults. The occulusal
plane & also Camper plane should be position more
steeply in order to permit clear vision of location of
permanent tooth buds.
Figure 4: Positioning in early childhood
Taking a panoramic radiograph of a child will require
patient positioning that deviates somewhat from the
normal position for adults. The occlusal plane and child,
it is prudent to position the vertical, lateral light guide at
the level of the deciduous therewith also the Camper
plane should be positioned somewhat more steeply, in
order to permit clear vision of the location of the
permanent tooth buds, i.e., to prevent superposition of the
structures of the floor of the nose and the palatal roof. To
insure a high quality radiograph, it is also important that
the tongue position be correct, and this can only be
achieved with children using appropriate patience! From
the lateral viewpoint it must be kept in mind that the
primordial of the permanent dentition lie high and behind
the deciduous teeth. If the deciduous teeth are aligned in
the focal plane, the permanent tooth buds, especially the
anterior teeth, will appear enlarged and, depending upon
distance from the focal plane, will appear more or less
blurred and distorted. When taking a panoramic
radiograph of a small canines.
Figure 5: Panoramic radiograph-Tongue in proper position
The burnt out effect in radiography can be avoided if
tongue is pressed firmly against the palate. It acts as
radiation diminishing factors breath holding during
expose causes effacement of structures of angle of
mandible. Asymetric position arks with incomplete jaw
closure resulting in aparent enlargement of the right side
ramus, zygomatic bone Improper positioning of median
sagital plane also given errors
Figure 6: Asymmetric positioning errors
This panoramic view resulted from asymmetric
positioning with incomplete jaw closure, resulting in
apparent enlargement of the right side, ramus and zygo.
matic bone, which are far lingual in the focal plane. A
visual left – to – right of both mandible and maxilla on
this side appear enlarged and they overlap each other. The
furcations of the right mandibular molars exhibit “enamel
pearls” due to the overlapping. Foreign body within the
central ray different types of artifact& affect quality of
films. Jewellary, ear rings, nose rings r wires neck less,
metal frames and eye glasses, metal zippers of dresses,
improperly positioned protetive lead vest etc are.
Figure 7: Foreign body within central ray
Motion artifact – if patient moves the mandible during
exposure the radiograph will depicit like transverse
facture of mandible
Figure 8: Movement during exposure
International Journal of Recent Trends in Science And Technology, ISSN 2277-2812 E-ISSN 2249-8109, Volume 16, Issue 3, 2015 pp 628-633
Statperson Publications, International Journal of Recent Trends in Science And Technology, ISSN 2277-2812 E-ISSN 2249-8109, Volume 16, Issue 3 2015
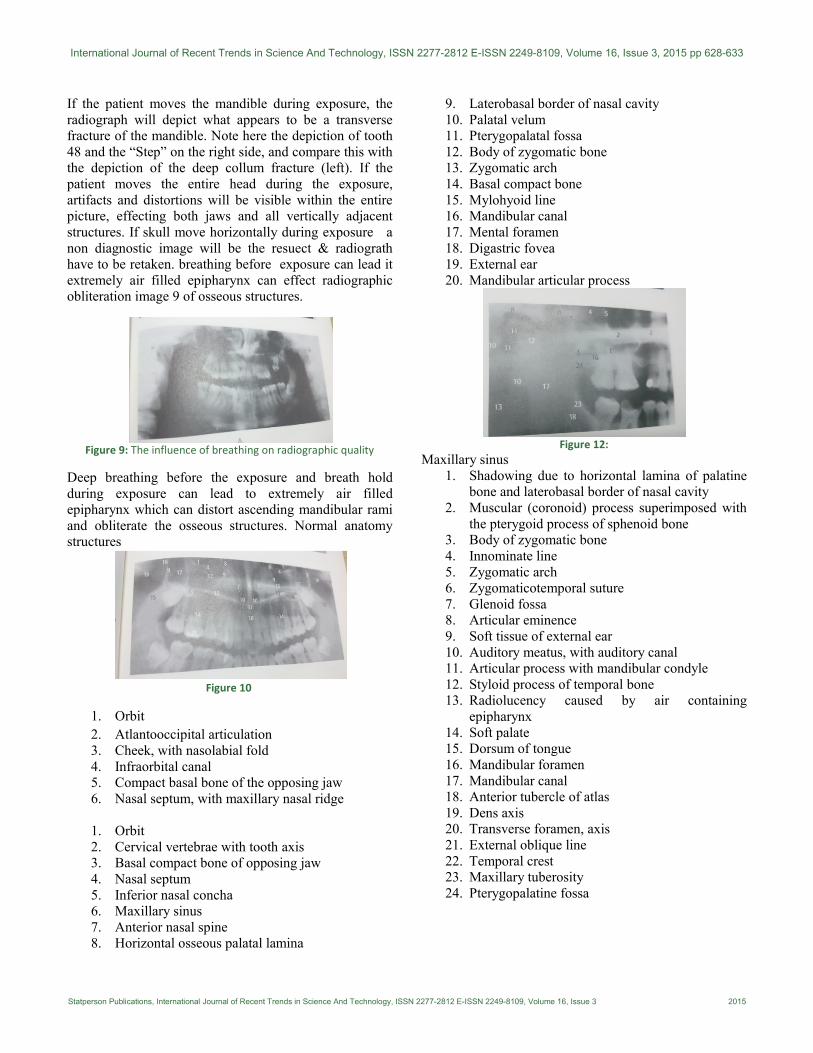
If the patient moves the mandible during exposure, the
radiograph will depict what appears to be a transverse
fracture of the mandible. Note here the depiction of tooth
48 and the “Step” on the right side, and compare this with
the depiction of the deep collum fracture (left). If the
patient moves the entire head during the exposure,
artifacts and distortions will be visible within the entire
picture, effecting both jaws and all vertically adjacent
structures. If skull move horizontally during exposure a
non diagnostic image will be the resuect & radiograth
have to be retaken. breathing before exposure can lead it
extremely air filled epipharynx can effect radiographic
obliteration image 9 of osseous structures.
Figure 9: The influence of breathing on radiographic quality
Deep breathing before the exposure and breath hold
during exposure can lead to extremely air filled
epipharynx which can distort ascending mandibular rami
and obliterate the osseous structures. Normal anatomy
structures
Figure 10
1. Orbit
2. Atlantooccipital articulation
3. Cheek, with nasolabial fold
4. Infraorbital canal
5. Compact basal bone of the opposing jaw
6. Nasal septum, with maxillary nasal ridge
1. Orbit
2. Cervical vertebrae with tooth axis
3. Basal compact bone of opposing jaw
4. Nasal septum
5. Inferior nasal concha
6. Maxillary sinus
7. Anterior nasal spine
8. Horizontal osseous palatal lamina
9. Laterobasal border of nasal cavity
10. Palatal velum
11. Pterygopalatal fossa
12. Body of zygomatic bone
13. Zygomatic arch
14. Basal compact bone
15. Mylohyoid line
16. Mandibular canal
17. Mental foramen
18. Digastric fovea
19. External ear
20. Mandibular articular process
Figure 12:
Maxillary sinus
1. Shadowing due to horizontal lamina of palatine
bone and laterobasal border of nasal cavity
2. Muscular (coronoid) process superimposed with
the pterygoid process of sphenoid bone
3. Body of zygomatic bone
4. Innominate line
5. Zygomatic arch
6. Zygomaticotemporal suture
7. Glenoid fossa
8. Articular eminence
9. Soft tissue of external ear
10. Auditory meatus, with auditory canal
11. Articular process with mandibular condyle
12. Styloid process of temporal bone
13. Radiolucency caused by air containing
epipharynx
14. Soft palate
15. Dorsum of tongue
16. Mandibular foramen
17. Mandibular canal
18. Anterior tubercle of atlas
19. Dens axis
20. Transverse foramen, axis
21. External oblique line
22. Temporal crest
23. Maxillary tuberosity
24. Pterygopalatine fossa
Arvind Takle et al.
International Journal of Recent Trends in Science And Technology, ISSN 2277-2812 E-ISSN 2249-8109, Volume 16, Issue 3, 2015 Page 632
Figure 13:
1. External oblique line
2. Madibular crest with retromolar triangle
3. Mandibular foramen
4. Mandibular canal
5. Mental foramen
6. Angular process of masseteric tuberosity
7. Angle of mandible
8. Basal compact bone
9. Hyoid bone, with greater horn of hyoid bone
10. Cervical vertebra exhibiting clearly dense
osseous plates on each vertebra
11. Maxillary sinus
12. Dorsum of tongue
13. Condyle(medial pole)
14. Condyle(lateral pole)
15. Muscular process in superimposition with
pterygoid process
16. Neck of condyloid process of mandible
17. Soft palate
18. Radiopacity caused by roof of palate and floor of
nasal sinus
19. Epipharynx
20. Long,ossified styloid process with its jointed
connection
21. Radiopacity cause by compact bone of
contralateral jaw
Figure 14: Panoramic radiograph of 9yrs old female
All permanent incisiors have erupted ,but their apical
foramina, especially in maxilla, have not yet assumed the
normal diameter, indicating incomplete maturation at this
point. Age of denture Image 15
Figure 15: Panoramic radiograph of 20 yrs old female
development of dentition is complete .apical foramnia
Figure 16: localization by changing the direction of central ray
Detcominalia of object localization in OPG. By changing
the direction of central ray. An occlusal radiograph of
maxilla which can only be taken with oblique projection
because of anatomic constraints clearly reveals totally
impacted tooth11, depicted axially in this projection
Figure 17: Contamination
Films artifacts which are now elimination CR system.
Artifacts in form of “lightening bolts”. such artifacts
result if cassette film is removed too quickly from film
pack, in low humidity.
Figure 18: Over exposed films.
Out of date cassette film-will exhibit clearly elevated
background haze and produce final films with poor
contrast.

International Journal of Recent Trends in Science And Technology, ISSN 2277-2812 E-ISSN 2249-8109, Volume 16, Issue 3, 2015 pp 628-633
Statperson Publications, International Journal of Recent Trends in Science And Technology, ISSN 2277-2812 E-ISSN 2249-8109, Volume 16, Issue 3 2015
CONCLUSION Proper understanding of Radiography and positioning of
patient and setting of proper technical factor and
elimination of artefact will produce good quality OPG
film making easy for interpretation.
REFERENCES 1. Perquin DA,Dorr PJ,Craen AJ,Helmerhorst FM.Routine
use of hysterosalpingography prior to laparoscopy in the
fertility workup;A multicenter randomized controlled
trail.Hum Reprod 2006;21:1227-31.
2. Simpson Wl Beitia LG, Mester J.
Hysterosalpingography:A reemerging
study.Radiographics 2006;26:419-31
3. Nitin P Ghonge, Sanchita Dube.
Hysterosalpingography:An obituary or a new
beginning…?The Indian Journal Of Radiology &
Imaging. 2008;18,175-178.
Source of Support: None Declared
Conflict of Interest: None Declared