MOLD TEST KIT - mymolddetective.com · surface that you want to test. ... una silla para poner la...
16
INSTRUCTION GUIDE MOLD TEST KIT TEST YOUR HOME OR OFFICE FOR MOLD WITH OUR REUSABLE PUMP.
Transcript of MOLD TEST KIT - mymolddetective.com · surface that you want to test. ... una silla para poner la...

INSTRUCTION GUIDE
MOLD TEST KIT
TEST YOUR HOME OR OFFICE FOR MOLD WITH OUR REUSABLE PUMP.

UNIT FEATURES
Rubber Feet
Start Button
Lid Clasp
Lid
Air Sample Inlet Tray
Contact Us [email protected] | www.MyMoldDetective.com

WELCOME & RECOMMENDATIONS
Thank you for purchasing My Mold Detective®. For best results, please read and follow instructions carefully. For the most up-to-date instructions, FAQsand videos, visit MyMoldDetective.com.
U.S. Patent | Made in China | Assembled in the U.S.A.
1-Year Manufacturer’s Limited Warranty
RECOMMENDED STEP (Optional): Take digital photos of your sampling locations in action. Upload your photos to your online report during the registration process. This will provide a more customized and documented report.
Testing Instructions Start Here: Customize your report

STEP 1: TAKE AIR SAMPLES
Required Outdoor Air Sample:• On one cassette, mark the box labeled “Outside Sample.” (This will be your REQUIRED control sample.)
• Ensure you have a power outlet to plug in to. You may need an extension cord.
• Take sample when it’s not raining or snowing, in an open area 10 ft. away from any structures and overhangs, 3 to 5 ft. off the ground. (i.e. Use a chair to set the pump on.)
a
b• Remove both tape flaps from top and bottom of the air cassette. (Save flaps for resealing cassettes.)
• Open the pump lid. (This will remain open during testing.)
• Insert cassette onto the air sample inlet tray and secure firmly in place.

• Push the green button to start the sample. The button will illuminate during testing.
• The pump will shut off automatically after 5-minute sample is complete.
• Reseal top and bottom of air cassette with tape flaps after air sampling is complete.
Indoor Air Sample:• Mark the remaining air cassette(s) with the room name. All indoor sample(s) should be taken in the middle of the room, 3 to 5 ft. off the ground.
• Repeat steps (b) through (d) outlined in Outdoor Air Sample section.
• Indoor sampling should be performed immediately after outdoor air sample.
Note: Air Cassette limited to one use. Do not reuse cassettes. Take indoor air samples within 15 minutes of the outdoor air sample. Outdoor air sample must be repeated for all future testing sessions.
c d

STEP 2: TAKE SURFACE SAMPLES
• Write the surface location name on the tape lift.
*The serial number is required during the online registration process.
* Visit MyMoldDetective.com for surface sampling instruction video.
• Peel off the white backing to expose the tape’s tacky surface.
a
b
• Align clear window on the tape lift directly onto the suspect surface that you want to test.
• Firmly press the window of the tape onto the suspect surface while keeping a corner lifted for easy removal.
• Remove tape lift from surface.
c

• Apply sticky tape to glass slide as shown on image.
• Insert glass slide into plastic case provided.
• Ensure the plastic case is securely sealed before mailing.
Note: Tape lifts are for single use only. Once tape lift is removed from surface tested, do not reapply to any surface.
d
e

STEP 4: MAIL SAMPLES
STEP 3: REGISTER ONLINE
• Insert air samples and surface samples into the FedEx mailing envelope provided and mail to laboratory.
b
Note: Sending more than one envelope or package may cause samples to arrive separately and cause possible delays with analysis.
FedEx Express Shipping: 1-2 days to reach the laboratory
FedEx Express is trackable and convenient. Call 1.800.GOFEDEX to schedule a free FedEx pickup from your location, Monday through Friday. You can also drop off your package at any FedEx location.
REGISTERSAMPLES
• Before mailing samples to the lab, visit MyMoldDetective.com to register your samples.
• Click the “Register Samples” button at the top of the homepage and follow the instructions.
• Create a new account or log in.
• Complete payment for the lab analysis and note your confirmation number.
a
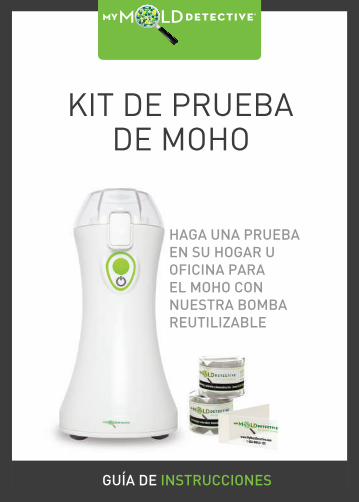
GUÍA DE INSTRUCCIONES
KIT DE PRUEBA
HAGA UNA PRUEBAEN SU HOGAR UOFICINA PARAEL MOHO CONNUESTRA BOMBAREUTILIZABLE
DE MOHO

CARACTERISTICAS DE UNIDADES
Patas de goma
Botón de inicio
Cierre de la tapa
Tapa
Bandeja de entrada de la muestra de aire
Contá[email protected] | www.MyMoldDetective.com

BIENVENIDA Y RECOMENDACIONES
Gracias por comprar My Mold Detective®. Para lograr mejores resultados por favor leer y seguir cuidadosamente las instrucciones. Para obtenerinstrucciones, FAQs y videos actualizadas, visitar a MyMoldDetective.com.
Patente de EE.UU. | Hecho en China | Ensamblada en EE.UU.
Garantía Limitada del Fabricante de 1 año
PASO RECOMENDADO (Opcional):Tome fotos digitales de su punto de muestreo en acción y subirlo a su reporte digitales durante el proceso de registro para un reporte más detallado.
Instrucciones de prueba comienzan aquí: Personalizar su reporte

PASO 1: TOMA MUESTRAS DEL AIRE
Muestra del Aire Exterior Obligatorio: • Marca la caja que dice “Outside Sample” sobre el cartucho para muestras de aire. (Esto sera su muestra de control OBLIGATORIO.)
• Asegúrate de tener un tomacorriente para enchufar. Una extensión eléctrica puede ser necesaria.
• No tomes la muestra del aire si está lloviendo o nevando en una área abierta y despejada que esté a 10 pies de distancia de estructuras y los voladizos y 3 a 5 pies sobre el suelo. (i.e. utilizar una silla para poner la bomba en.)
a
b• Despega las solapas desde la parte superior e inferior del cartucho. (Salvar las solapas para volver a sellar.)
• Abre la tapa de la bomba para el muestreo del aire. [La tapa permanecerá abierta mientras la bomba esté funcionando.]
• Inserta el cartucho en la bandeja de entrada de la muestra de aire, asegúralo con firmeza en su lugar.

• Presiona el boton para empezar la muestra de aire. El boton se encenderá durante la prueba.
• La bomba se apagará automáticamente después de 5 minutos aun cuando la prueba está completa.
• Vuelve a sellar la cinta en la parte superior e inferior del cartucho cuando la prueba está completa.
Muestra del Aire Interior:• Marcar el cartucho para la muestra de aire restante con el nombre del lugar de la habitación donde se tomará la muestra. La muestra en el interior debe tomarse en el medio de la habitación y de 3 a 5 pies aproximadamente del suelo.
• La muestra en el interior debe tomarse inmediato desues de la muestra del aire exterior.
• Repite pasos (b) a (d) detallado en la sección Muestra del Aire Exterior.
Nota: Cartucho limitado a un uso. No vuelva a utilizar cartuchos. Tomar muestras de interior entre 15 minutos de la muestra exterior. Una muestra del aire exterior obligatorio por cada sesión de prueba.
c d

PASO 2: TOMAR MUESTRAS DEL LA SUPERFICIE
• Alinear el cuadro claro sobre la area sospechosa.
• Presiona la adhesiva sobre la superficie. Aferrarse a una esquina para quitarlo fácilmente.
• Despega la adhesiva desde la superficie.
• Despega la funda que la cubre para exponer la superficie pegaosa.
• Escribe el nombre del lugar en la etiqueta de la cinta para muestras.
• Es requirido a usar el número de serie que esta sobre la cinta durante el proceso de registro.
*Visitar a MyMoldDetective.com para ver el video instructivo.
a
b
c

• Pegar la cinta adhesiva usada sobre la diapositiva de cristal incluido.
Nota: Solo una muestra de la superficie por cada cinta. Aun cuando despegas la adhesiva, no vuelva a aplicar a ninguna superficie.
• Inserta la diapositiva de cristal con la muestra adentro de la cubierta. • Asegurar que la tapa de la cubierta esta firmemente cerado antes de enviar.
.
d
e

PASO 4: ENVIA LAS MUESTRAS
Nota: Él envió de más de un sobre o paquete puede causar muestras a llegar al laboratorio separados y causar retrasos en el análisis.
PASO 3: REGISTRATE POR INTERNET
• Poner cartuchos de muestras en el sobre incluido y enviarlo por correo al laboratorio.
a
b
• Antes de enviar las muestras, visitar MyMoldDetective.com para registrar sus muestras.
• Haz clic en el icono “Register Samples” en la parte superior de la página de inicio y sigue las instruciones.
• Crear una cuenta nueva o iniciar sesión.
• Completar el pago para el análisis de laboratorio y guardar su numero de confirmacion.
REGISTERSAMPLES
FedEx Express Shipping: 1-2 dias laboral para llegar al laboratorio.
FedEx Express es rastreable y conviniente. Por su conveniencia, llame 1.800.GOFEDEX para programar una recolección gratis lunes a viernes. También se puede dejar en cualquier oficina de FedEx.