Module: 301 Set Up Issuer Accounts on NMHIX. It is recommended that all issuers using NMHIX should...
31
NEW MEXICO HEALTH INSURANCE EXCHANGE TRAINING Module: 301 Set Up Issuer Accounts on NMHIX
-
Upload
basil-cole -
Category
Documents
-
view
218 -
download
0
Transcript of Module: 301 Set Up Issuer Accounts on NMHIX. It is recommended that all issuers using NMHIX should...

NEW MEXICO HEALTH INSURANCE EXCHANGE
TRAINING
Module: 301 Set Up Issuer Accounts on NMHIX

INTRODUCTION

Who Should Take this Training?
It is recommended that all issuers using NMHIX should take this course.
Learning Objectives
Set security and verify access to NMHIX Review and confirm basic information in
your Issuer profile Enter and verify bank information Enter details for Company and SHOP
profiles Review and verify QHPs and SADPs Add an Authorized Representative
Upon completion of this training, you will be able to:

Topics Covered:
Validating your Issuer Profile Adding Financial Information Creating Customer Facing Profiles
The following topics are covered in this training:

LESSON 1:
Creating an Issuer Profile

Email Created in NMHIXAn NMHIX Issuer Administrator will create an account based on information received directly from the Issuer.
When the account is created in NMHIX system,
ISSUER
The systems knows where to send the email because the email address was entered when the account was created.
an email is automatically created and sent to the issuer’s mailbox.

Login Email from NMHIXTo start the process of creating your issuer account, you will receive an email that looks similar to this.
1. Click the blue underlined hyperlink.

Set Up Issuer Account on NMHIX
Clicking the hyperlink in the Login email brings you to the Issuer Portal on NMHIX.
1. To set up your account, click the I don’t have an account radio button.
2. Then click Continue.
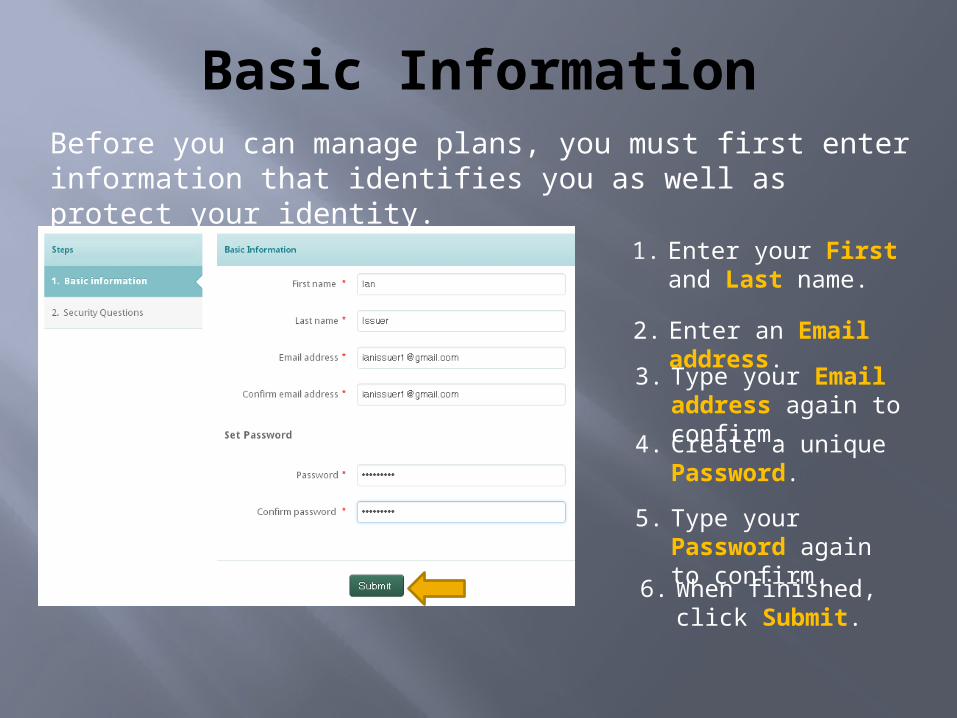
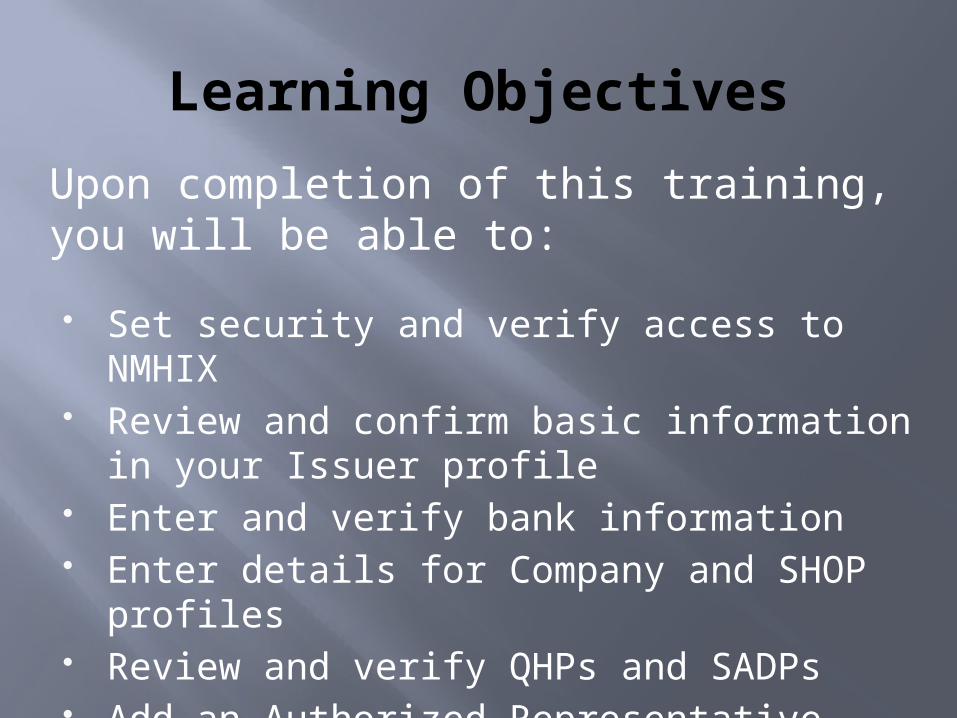
Basic InformationBefore you can manage plans, you must first enter information that identifies you as well as protect your identity.
1. Enter your First and Last name.
2. Enter an Email address.v 3. Type your Email address again to confirm.4. Create a unique Password.
5. Type your Password again to confirm.6. When finished, click Submit.

Security QuestionsTo add the first layer of security to your identity, you will be required to select three different security questions.
1. Click the drop down on Security Question 1.2. Select a question from the list.
3. Then type your answer to the question.4. Repeat steps 1 through 3 for questions 2 and 3.5. After all the questions and answers have been entered, click Continue.
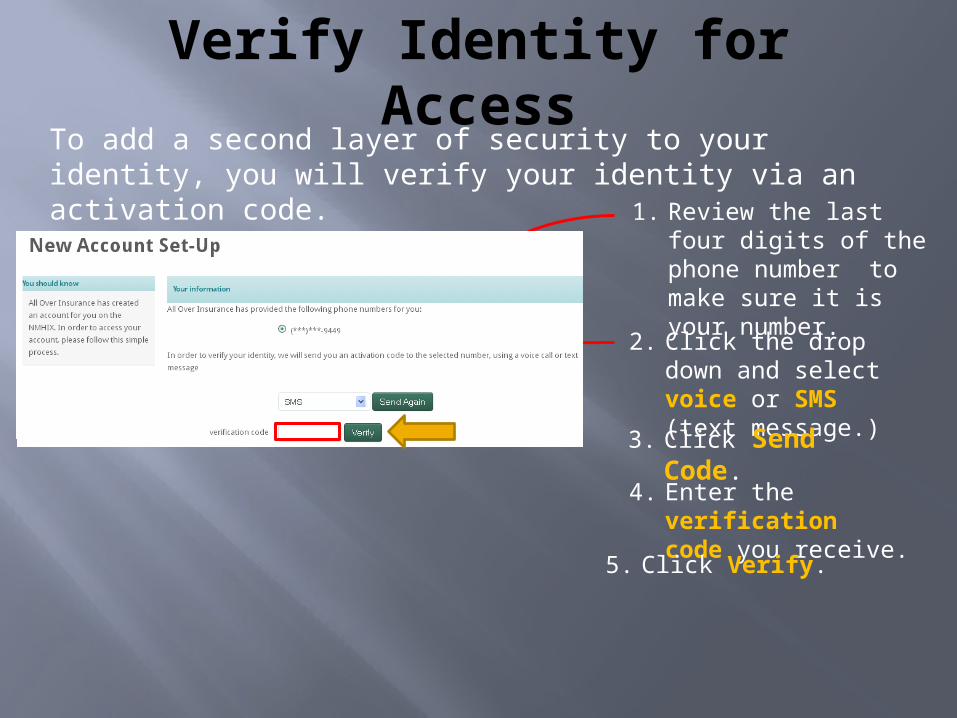
Verify Identity for AccessTo add a second layer of security to your identity, you will verify your identity via an activation code.
1. Review the last four digits of the phone number to make sure it is your number.
2. Click the drop down and select voice or SMS (text message.) 3. Click Send Code.
4. Enter the verification code you receive.
5. Click Verify.

Review New Issuer ProfileThe data on this screen was input by the NMHIX Issuer Administrator
2. Next, click Financial Information.
1. Verify the information on this screen is correct.

LESSON 2:
Adding Financial Information

Add a Payment Method
1. Click Add New Payment Method. This refers to setting up bank information.
You will set up the bank account for receiving premium payments from the SHOP Exchange.
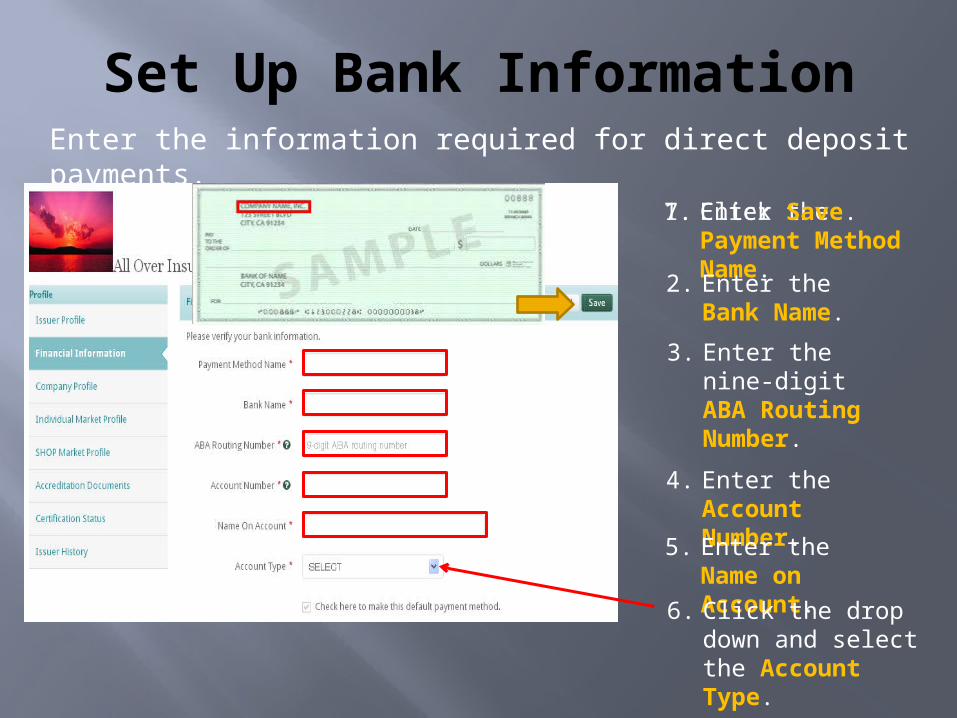
Set Up Bank InformationEnter the information required for direct deposit payments.
1. Enter the Payment Method Name.
2. Enter the Bank Name.3. Enter the nine-digit ABA Routing Number.
4. Enter the Account Number.5. Enter the Name on Account.6. Click the drop down and select the Account Type.
7. Click Save.

LESSON 3:
Creating Customer Facing Profiles

Login to the Issuer PortalNow that your issuer account has been certified by NMHIX, continue the set up process by logging back into NMHIX.
1. Enter your email address.
2. Then enter your password.
3. Click Login.

Continue SetupWhen you log back in, your home page displays:
Previously, we created your Issuer Profile and Financial Information.Now its time to complete the remaining setup.
Click Company Profile.

Company ProfileHere is where you display information about your company for enrollees to review:
1. To enter details, click Edit.
2. Choose a file and upload a Company Logo.3. Click the drop down and select State of Domicile.4. Enter the Company Address, including state and zip code.5. Enter the Issuer and Customer Website addresses.
Next we click on SHOP Market Profile.
6. Click Save.

SHOP Market ProfileThis is where employers and employees will find contact information about you.
1. To enter details, click Edit.
2. Enter your Customer Service Phone number and Extension if it applies.
3. Enter your Customer Service Toll Free Phone number.4. Enter your Customer Service TTY phone number.
5. Enter your Customer Website Address (URL.)
6. Click Save.

Review PlansNext we will explore how to review your plans.
At the upper left of the Issuer Home page:1. Click the
drop down for Plans.
2. Click Manage QHPs.
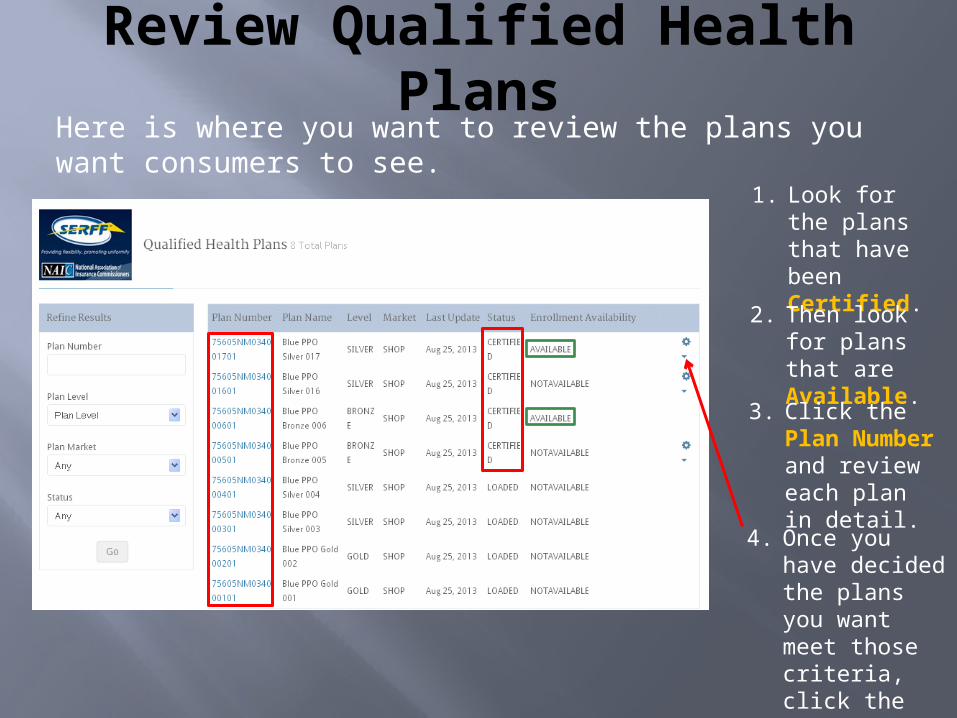
Review Qualified Health Plans
Here is where you want to review the plans you want consumers to see.
1. Look for the plans that have been Certified.
2. Then look for plans that are Available.
4. Once you have decided the plans you want meet those criteria, click the Plan drop down.
3. Click the Plan Number and review each plan in detail.

Verify Qualified Health Plans
Now that you have determined which plans you want, you must verify your decision.
1. Select Verify.

Plan DiscrepanciesIf you discover there is a problem with a plan and you don’t want to verify the plan,
1. Click the drop down for Get Assistance.2. Call the Help Center at 1-855-996-6449 and report the problem.

Issuer Verification of the QHP
Assuming your plan looks correct, the next step would be to confirm and declare that the plans are correct.
1. Read the Statement.2. Click the box I have read and agree with the above statement.
3. Enter your First and Last Name.4. Type your full name as your eSignature.
5. Click Submit.

Your Plan is VerifiedThe way you can tell that your plan has been verified:
1. The Status is CERTIFIED.
2. The Enrollment Availability is AVAILABLE.
3. The plan drop down is no longer displayed. Meaning this plan has been verified.

Verify Standalone Dental PlansReviewing and verifying SADPs are the same as QHPs except for one difference.
1. Click the drop down for Plans.
2. Select Manage SADPs.
During the first release of the exchange, only Pediatric plans, consumers 18 years or younger plans will be certified by NMHIX and therefore available for verification by Issuers.
The steps for review and verification are the same.

LESSON 4:
Adding Representatives

Add Authorized RepresentativeYou can add individuals as representative that can act as a delegate for your company.
1. Click the drop down for Account.
2. Click Authorized Representatives.3. Click Add Representative.
4. Enter First and Last Name.
5. Enter the Phone Number with area code.6. Enter an Email Address.
7. Click Save.

Congratulations!This concludes the Set Up Issuer Accounts on NMHIX course.You should now be able to: Enter basic information in your Issuer
profile Set security and verify access to NMHIX Enter and verify bank information Enter details for Company and SHOP
Market profiles Review and verify QHPs and SADPs Add an Authorized Representative