LUGGIE series - storage.googleapis.com€¦ · attempting to operate your Scooter for the first...
33
OPERATION COMFORT MAINTENANCE CHARGING LUGGIE series - USERS INSTRUCTION MANUAL -
Transcript of LUGGIE series - storage.googleapis.com€¦ · attempting to operate your Scooter for the first...

OPERATION COMFORT MAINTENANCE CHARGING
LUGGIE series- USERS INSTRUCTION MANUAL -

FOREWORD
Please read and follow all instructions in this Users Instruction Manual before attempting to operate your Scooter for the first time. If there is anything in this manual that you do not understand, or if you require additional assistance for setting it up, contact your authorised Luggie dealer. Using your product safely depends upon your diligence in following the warnings, cautions and instructions in this manual.Using your Scooter safely also depends upon your good judgment and / or common sense, as well as that of your Provider, Carer or Health Professional.
FEATURES TABLE
Model Speed Weight Capacity
Lithium battery Suspension Fully
Folding
Luggie 6.4 kph 4 mph 250lbs ● ●
Luggie Elite 6.4 kph 4 mph 320lbs ● ●
Luggie Elite Plus 6.4 kph 4 mph 320lbs ● ● ●
Luggie Elite Plus 4W 6.4 kph 4 mph 320lbs ● ●
Luggie Super 6.4 kph 4 mph 360lbs ● ●
Luggie Super Plus 7.5 kph 4.7 mph 360lbs ● ● ●
Luggie Super Plus 4W 7.5 kph 4.7 mph 360lbs ● ●
Luggie ECO 6.4 kph 4 mph 250lbs Lead-acid
battery ●
Luggie Classic 6.4 kph 4 mph 320lbs Lead-acid
battery ●
1
EN
2
SAFETY GUIDELINES . . . . . . . . . . . . . . . . . . . . . . . . . . . . . . . . . . . . . . . . . . 2
I. SAFETY . . . . . . . . . . . . . . . . . . . . . . . . . . . . . . . . . . . . . . . . . . . . . . . . . 3
II. YOUR LUGGIE SCOOTER . . . . . . . . . . . . . . . . . . . . . . . . . . . . . . . . .8
III. BATTERY AND CHARGING . . . . . . . . . . . . . . . . . . . . . . . . . . . . . . . .11
IV. OPERATION . . . . . . . . . . . . . . . . . . . . . . . . . . . . . . . . . . . . . . . . . . . . . 14
V. COMFORT ADJUSTMENTS . . . . . . . . . . . . . . . . . . . . . . . . . . . . . . . .19
VI. FREQUENTLY ASKED QUESTIONS . . . . . . . . . . . . . . . . . . . . . . .20
VII. BASIC TROUBLESHOOTING . . . . . . . . . . . . . . . . . . . . . . . . . . . . . 26
VIII. CARE AND MAINTENANCE . . . . . . . . . . . . . . . . . . . . . . . . . . . . . . .28
VIIII. OPTIONAL ACCESSORIES. . . . . . . . . . . . . . . . . . . . . . . . . . . . . . . .31
SAFETY GUIDELINES
These symbols below are used in this User' s Manual to identify warnings and cautions. It is very important for you to undertanding them.
WARNINGFailure to obey and follow the warning in this User's Manual may result in personal injury.
CAUTIONFailure to observe the cautions in this User's Manual may result in damage to your scooter.
CONTENTS
EN
I. SAFETY
NOTE: Your Luggie scooter is fitted with a number of safety warning & instruction labels see page 7. These labels communicate important warnings. Please familiarize yourself with their locations on your scooter.
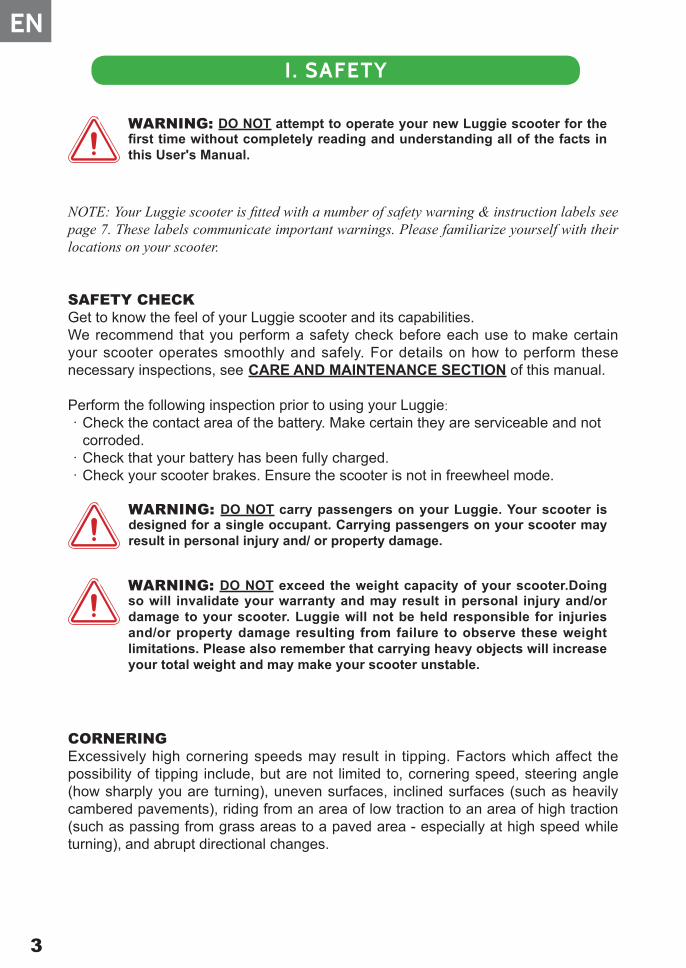
SAFETY CHECKGet to know the feel of your Luggie scooter and its capabilities. We recommend that you perform a safety check before each use to make certain your scooter operates smoothly and safely. For details on how to perform these necessary inspections, see CARE AND MAINTENANCE SECTION of this manual.
Perform the following inspection prior to using your Luggie:・Check the contact area of the battery. Make certain they are serviceable and not corroded.・Check that your battery has been fully charged.・Check your scooter brakes. Ensure the scooter is not in freewheel mode.
CORNERINGExcessively high cornering speeds may result in tipping. Factors which affect the possibility of tipping include, but are not limited to, cornering speed, steering angle (how sharply you are turning), uneven surfaces, inclined surfaces (such as heavily cambered pavements), riding from an area of low traction to an area of high traction (such as passing from grass areas to a paved area - especially at high speed while turning), and abrupt directional changes.
3
EN
WARNING: DO NOT attempt to operate your new Luggie scooter for the first time without completely reading and understanding all of the facts in this User's Manual.
WARNING: DO NOT carry passengers on your Luggie. Your scooter is designed for a single occupant. Carrying passengers on your scooter may result in personal injury and/ or property damage.
WARNING: DO NOT exceed the weight capacity of your scooter.Doing so will invalidate your warranty and may result in personal injury and/or damage to your scooter. Luggie will not be held responsible for injuries and/or property damage resulting from failure to observe these weight limitations. Please also remember that carrying heavy objects will increase your total weight and may make your scooter unstable.

I. SAFETY
BRAKINGYour Luggie scooter is equipped with two powerful brake systems:1. Regenerative: This uses the electricity generated in your Luggie drive motor to
rapidly slow your scooter when the wig-wag lever is returned to the stop position.2. Electric/Mechanical Disc Brake: This activates mechanically after the
regenerative brake slows your scooter to a near stop, or when power is removed from the drive system. Brake engagement is far more abrupt at higher speeds. It is important that you anticipate when the brakes will engage and that you are braced for the resulting deceleration.
OUTDOOR DRIVING SURFACESYour Luggie scooter is designed to provide optimum stability under normal driving conditions i.e. dry, level surfaces composed of concrete or asphalt. There will be times when you will encounter other surfaces such as packed soil, grass and gravel. These surfaces may not be sound and fail to give good traction, caution should be considered before driving on these types of surface to prevent stability problems resulting in injury or damage to you and your scooter. Please always reduce your scooters speed when driving on uneven terrain or soft surfaces by turning the speed control knob (located on the left side of the top console) away from you while seated (toward the turtle mode).
4
EN
CAUTION: Never drive down slopes at full speed. Please always adjust your speed to the driving condition and allow for gradual descents on inclines no more than six degrees.
CAUTION: Avoid driving in long and unsafe grass that can become tangles in the gears of your scooter.
CAUTION: Avoid snow. This can quickly build up around your wheels.
CAUTION: Avoid loosely packed sand and gravel. If you feel unsure about a driving surface, please avoid that surface. Your scooter is a motorized device. Use your good judgment when traveling to avoid injury and damage to yourself, the scooter and properties of others.

INSURANCEAlthough it is not a legal requirement for accident insurance coverage (third party), it is a sensible precaution. Your insurance company will be able to advise you of the available options. Your authorised Luggie dealer will be able to give you details of specialist insurance companies or your own insurance company will be able to advise you.
WEATHER PRECAUTIONS
MOTOR VEHICLE TRANSPORTATIONCurrently there are no standards approved for "tie down" systems in a moving vehicle of any type to transport a person while seated in a scooter.
MODIFICATIONSLuggie scooter has been designed to provide maximum mobility. A range of accessories are available from your authorised Luggie dealer to further customize your scooter needs. Under no circumstances should you modify, add, remove or disable any feature, part or function of your mobility scooter.
5
I. SAFETY
EN
WARNING: DO NOT operate your scooter in icy or slippery conditions or on salted surfaces i.e. roads and pavements. Such use may result in accident, personal injury or adversely affect the performance and safety of your scooter.
WARNING: It is recommended that you DO NOT expose your scooter to any type moisture at any time i.e. heavy rain, snow or power washer. Such exposure may damage your scooter. Never drive through deep water or expose your scooter to sea water. DO NOT operate your scooter if it has been exposed to heavy moisture until it has been thoroughly dried out.
WARNING: DO NOT sit on your scooter while it is in a moving vehicle.Personal injury may result. Please always make certain that your Luggie is properly secured when being transported. Failure to comply may result in personal injury and/or damage to your scooter.
WARNING: Failure to observe the above warning may result in personal injury and/or damage to you, your scooter and properties.

INCLINES
6 degrees maximum inclineMore and more modern buildings are designed with disability access in mind. Ramps have specified percentage of incline designed for easy and safe access. Some ramps may have turning switchbacks (180 degree turns) that require you to have good cornering skills on your scooter. Proceed with extreme caution as you approach the downgrade of a ramp or other incline. Please always sit with your back on the back rest of your seat, brace your hands on the handlebars and position your feet on the floorboard of your scooter.
Take a wide arc with your Luggie around tight corners. Your rear wheels will follow preventing you from cutting the corner short and bumping or getting hung up on raised curbs. When descending an incline, keep your speed adjustment set to the slowest speed to ensure a safely controlled descent. Please always drive down an incline facing forward ONLY. If your scooter descent is quicker than you anticipated, allow the scooter to completely stop, then progress at a slower speed setting.
STAIRS AND ESCALATORS
DISPOSAL OF ELECTRO-MOBILE SCOOTERIn time when your scooter becomes unusable it must be disposed of in accordance with the laws implemented at that time. For further information regarding the recycling arrangements for this type of vehicle and its batteries, contact your local authority or government department.
6
I. SAFETY
EN
WARNING: Luggie scooter is not designed to travel up or down stairs or escalators. Please always use an elevator. Failure to observe this warning may result in injury to yourself and others and damage your scooter.

SAFETY WARNING & INSTRUCTION LABLESThe following labels are positioned on your Luggie. These labels communicate important warnings or instructions regarding the safe operation of you scooter. Please familiarize yourself with their location.
● Located on front wheel cross member
● Located on top console ● Located on top of pull lever
● Located on tiller ● Located on side of chassis
● Located on front of chassis ● Located on middle of chassis
● Located on the rear chassis cover
7
Speed adjustment dial
WARNINGBefore driving please check:
1.Do not use before reading user’s manual. 2.Each folding frame to keep on stable.3.Handle is locked and adjusted in position. 4.Seat is locked on seat frame and engaged. 5.Limit for one person and do not stand up when operating scooter.6.Maximum capacity is xxx lbs.
Read the owner’s manual before operating scooter
Lithium battery installment
SERIAL NO: XXXXXXXXXXXXXX
4656545644565f12dsdafshsgvsgqmsgMAX. USER WEIGHT: XXX KG
BRAND NAME: XXXXXXTYPE: FRXXX
CROP.MADE IN TIWAN
I. SAFETY
EN
8
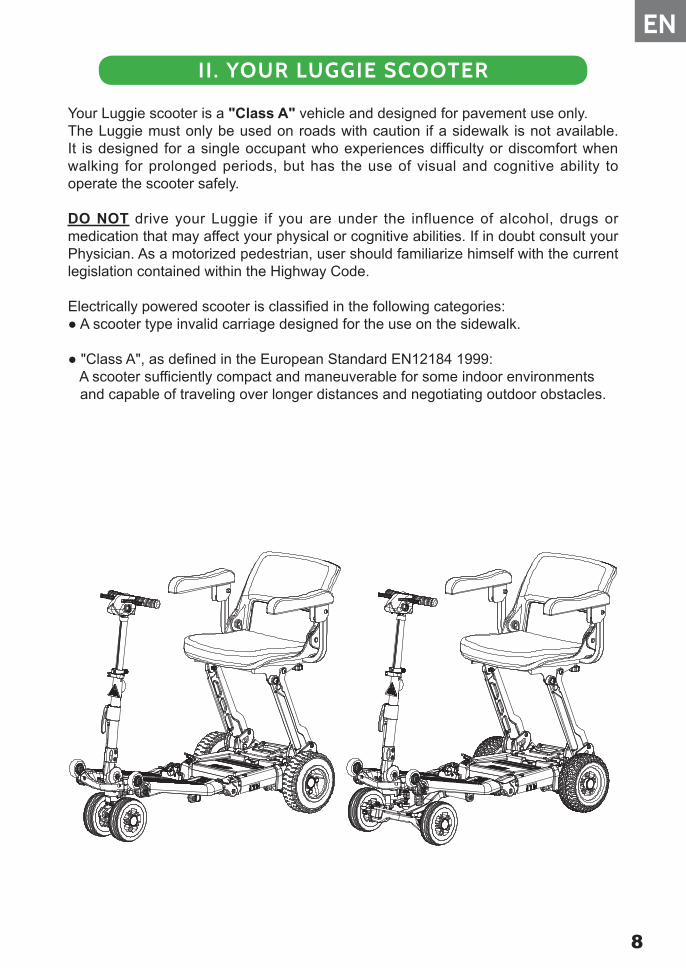
Your Luggie scooter is a "Class A" vehicle and designed for pavement use only. The Luggie must only be used on roads with caution if a sidewalk is not available. It is designed for a single occupant who experiences difficulty or discomfort when walking for prolonged periods, but has the use of visual and cognitive ability to operate the scooter safely.
DO NOT drive your Luggie if you are under the influence of alcohol, drugs or medication that may affect your physical or cognitive abilities. If in doubt consult your Physician. As a motorized pedestrian, user should familiarize himself with the current legislation contained within the Highway Code.
Electrically powered scooter is classified in the following categories:● A scooter type invalid carriage designed for the use on the sidewalk.
● "Class A", as defined in the European Standard EN12184 1999: A scooter sufficiently compact and maneuverable for some indoor environments and capable of traveling over longer distances and negotiating outdoor obstacles.
II. YOUR LUGGIE SCOOTER
EN

9
1. Top Console2. Tiller Adjustment Clamp3. Folding Trigger4. Transport wheel5. Front Bumper6. Chassis Hook
7. Charging Socket8. Battery Release Button9. Lithium Battery10. Magnetic Brake Release11. Rear Bumper12. Seat
1
2
3
4
5 6
7
8
10
9
11
12
II. YOUR LUGGIE SCOOTER
EN
Your Luggie scooter is delivered in a strong carton. When unpacking the carton, remove and dispose of all of the sharp metal staples which are located on the top to avoid injury. Remove all packing materials and follow the steps outlined in THE QUICK START GUIDE shipped with your Luggie scooter.
We recommend you keep the outer box, packing inserts and battery box for future transport use. Safely dispose of all other packaging materials. If you need assistances with disposal, contact your local waste disposal authority for advice on properly disposing methods.
● SERVICE - Your Luggie has been designed to be service friendly. Sealed lithium battery which is virtually maintenance-free will give your Luggie the power it requires. Should you need to take your battery pack on an aircraft, use the battery box originally shipped with your Luggie scooter for transport. The battery box has been specially designed to safely carry lithium battery of this size in accordance with the International Air Transport Association(IATA). Please consult your carrier of choice for additional details.
● SAFETY - The speed controller has been designed with extensive self-checking circuits to give you the maximum 'state-of-the-art' safety technology.The Luggie comes with a fully automatic braking system for peace of mind in any environment.
● CHARGING - Your Luggie is fitted with a battery indicator on the top console. When the battery meter is in the red zone, it is advised that you charge your battery.
10
CAUTION: DO NOT power off when the scooter is in motion; this will automatically activate the motor parking brake and could place you in a dangerous situation.
II. YOUR LUGGIE SCOOTER
EN

11
Your Luggie has a lot of power. Keeping Luggie working to its maximum potential means that its battery must be maintained at full potential. Nightly recharging, after use, will help giving the battery a longer life and will ensure your Luggie is always ready to go when you are.
BATTERY PACKYour Luggie scooter is shipped with a lithium battery, designed specifically for the Luggie.
Follow the steps as outlined below:1. Position battery pack into the scooter battery compartment under the seat as
outlined in THE QUICK START GUIDE.2. Switch on your scooter. The battery meter will now move to show the state of
charge in the battery. If the needle of your battery meter is in the green zone, your scooter is ready to drive.
For air travel, please consult your carrier prior to departure. They will need advance warning that you wish them to carry the lithium battery. Please note that each carrier reserves the right not to carry what may be termed Hazardous cargo. FreeRider cannot be held responsible for their final decision.
● Lithium battery installation
Slide lithium battery with Luggie logo against the edge of the battery compartment under the seat before snapping it into place to lock.
III. BATTERY AND CHARGING
EN
WARNING: DO NOT attempt to open the covering of the battery. Failure to observe this warning will invalidate your battery warranty.

12
SAFE & LASTING BATTERY1. For longest battery life, your battery should be re-charged when the battery
meter indicator is in the red region or after use whenever possible.2. If your Luggie battery will not be used for an extended period, fully charge
the battery and disengage from the battery compartment of the Luggie before storage. Fully discharging the battery pack before extended storage will put your battery in a “sleep mode” which could render it un-chargeable when you are ready to use your scooter. Battery charge will gradually deplete with time. Please do a refresh charge every month when the battery has been stored for an extended period of time.
3. Every six months, check the connection on the battery pack. Make sure the connection area is clean.4. Your battery carries a limited manufacturer warranty which is subject to a
stringent wear and tear clause. Any gradual deterioration in performance is normally associated with fair wear and tear. Misuse or accidental damage is not covered by the manufacturer's warranty.
REMEMBER: Keeping your battery charged will help extend the life of your battery and ensure that the Luggie is ready to go when you are.
To charge your batteries follow these simple steps:1. Switch off your Luggie.2. Your charger has two leads exiting from it. Plug the 3-prong plug to charging
socket located on the rear chassis of your scooter and the second lead to the charger unit before plugging it into the wall socket.
NOTE: If you need to use an extension cord for your main electric supply, make certain that it is safe and suitable for the charge current.
NOTE: Your Luggie will not drive if the charger is connected.
BATTERY CHARGERThe battery charger is designed especially for your Luggie. It may not be suitable for any other powered mobility product. Only use the chargers shipped with your Luggie scooter. The use of other chargers may permanently damage your battery and would invalidate the warranty.
LUGGIE CHARGER STATUS LIGHT INDICATOR:● Orange: charging● Solid Green: charging complete
GENERALDepending on the depth of discharge, the minimum time to recharge serviceable batteries fully will vary from 1 hour up to 2 hours. Please note that recharge time will vary between the minimum and maximum times indicated due to the varying states of battery use. Please be patient.
III. BATTERY AND CHARGING
EN

13
TROUBLE SHOOTING1. If the green indicator is off, check the AC input. If the AC input works normally, the
battery charger may be defective.2. If the charging indicator (orange) is still off when charging, the battery charger
may be defective.3. If the charging indicator (orange) does not turn green (charged state), the
battery is not being charged normally. Please stop charging and have the battery repaired or checked by an authorized Luggie service center.
4. If the charging indicator goes from orange to green (fully charged state) immediately, the battery may be fully charged.
5. If the battery does not charge, the battery may be defective. Have it checked by an authorized Luggie service center.
ADVISORY NOTES1. Disconnect your plug from the wall socket before removing the 3-pin charge plug
from the charge socket of your Luggie.2. The Luggie charger is for indoor use only. DO NOT expose it to rain or moisture.3. DO NOT smoke or expose your Luggie near open flame while the battery is being
charged.4. DO NOT use an extension cord to connect the charger onto the charging unit
of your Luggie unless absolutely necessary. Use of an improper extension lead could result in fire and/or electric shock.
5. DO NOT use the charger if it has received a sharp blow, been dropped or otherwise misused in anyway.
6. DO NOT dismantle the charger, poke or drop objects through the slots in the charger case.
7. DO NOT unplug or interrupt the recharge cycle until the charging cycle has been completed. Failure to observe this instruction can damage the integrity of the battery.
8. There is a drive inhibit function on your scooter. The scooter cannot be driven when the charger is plugged into your Luggie.
9. Avoid exposure to heat when charging your battery.
CHARGING YOUR BATTERY AWAY FROM YOUR SCOOTERIn circumstances when your scooter is stowed in your car, your battery can be recharged away from your scooter with the optional Luggie home docking station. Simply connect the 3-pin plug on your charger to the home docking station before connecting it to the wall socket. Insert your Luggie battery onto the home docking station to start charging the battery away from your scooter.
III. BATTERY AND CHARGING
EN

14
IV. OPERATION
Before setting out on your Luggie, you need to make sure that your seat is in the correct riding position. Set the seat to your desired height for your needs.
UNFOLD LUGGIE SCOOTEROn certain models, you can unfold your Luggie - Models Luggie / Elite / Elite Plus / Super / Super Plus / ECO / Class. Please refer to the FEATURES TABLE (page 1).
1. Make sure your Luggie is on flat ground before adjusting the height of the seat. With the scooter upright as shown in (FIG 1), pull the chassis locking release ring to your scooter to separate the front and rear chassis. Once the front and rear chassis are disengaged, guide the scooter down by holding the base of the seat with both hands. Refer to the enclosed THE QUICK START GUIDE for additional details. Your scooter should now look like (FIG 2) when unfolded.
2. Pull backward on the seat lock handle to adjust the height of the seat while simultaneously lifting the seat. (FIG 3)
NOTE: Please make sure that the seat is properly locked and secured before sitting on the Luggie. There are two windows on either side of the seat lock handle that will appear red when the seat is locked and properly secured. Securing the seat adjustment will help prevent accidents or tilting of the seat.
3. Fasten the chassis hooks or security locks on each side of the joint of front and rear chassis. (FIG 4)
FIG 3
FIG 1 FIG 2
FIG 4
EN
15
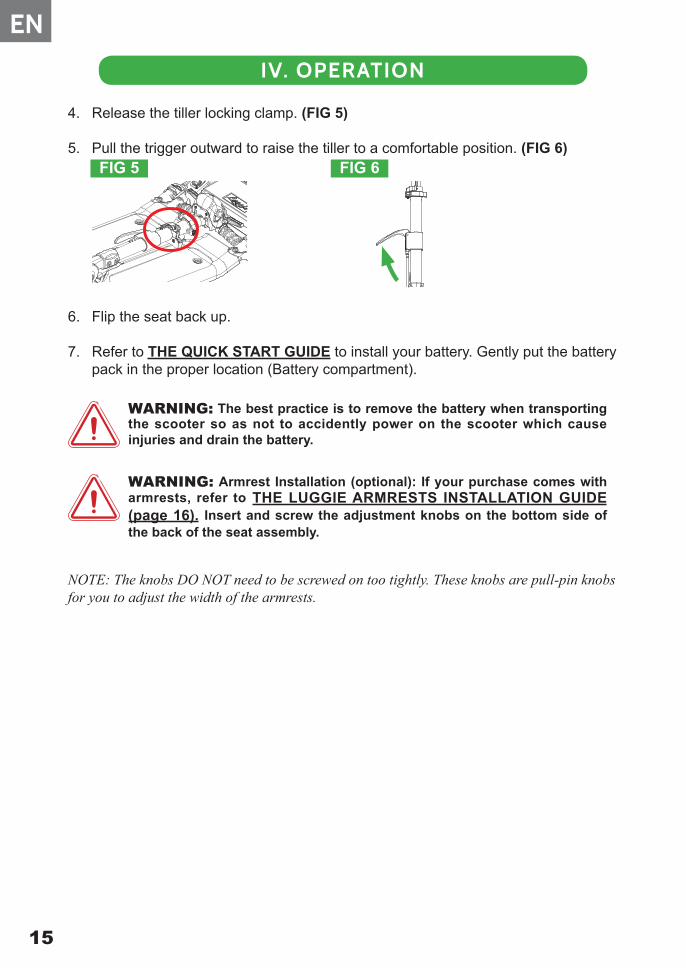
4. Release the tiller locking clamp. (FIG 5)
5. Pull the trigger outward to raise the tiller to a comfortable position. (FIG 6)
6. Flip the seat back up.
7. Refer to THE QUICK START GUIDE to install your battery. Gently put the battery pack in the proper location (Battery compartment).
NOTE: The knobs DO NOT need to be screwed on too tightly. These knobs are pull-pin knobsfor you to adjust the width of the armrests.
IV. OPERATION
FIG 5 FIG 6
EN
WARNING: The best practice is to remove the battery when transporting the scooter so as not to accidently power on the scooter which cause injuries and drain the battery.
WARNING: Armrest Installation (optional): If your purchase comes with armrests, refer to THE LUGGIE ARMRESTS INSTALLATION GUIDE (page 16). Insert and screw the adjustment knobs on the bottom side of the back of the seat assembly.

IV. OPERATION
THE LUGGIE ARMRESTS INSTALLATION GUIDE
INSTALLATION ARMRESTS
Locate the armrests and adjustment knobs included with your Luggie scooter order.The adjustment knobs can be found wrapped around each of the armrests.
1. Insert and screw the adjustment knobs on the back, bottom side of the seat assembly as pictured on the left.
NOTE: The knobs do not need to be screwed in too tightly. These knobs are pull pin knobs that will allow you to αdjust the width of your armrests.
2. Lock the left armrest, pull down on the adjustment knob while inserting the armrest into the opening as pictured on the left with the 4 pin holes on the bottom. Adjust the desire width of the armrest by pulling on the adjust ment knobs to adjust the armrest to your desired width.
Repeat the above steps to install the right armrest.
16
ADJUSTMENT PIN HOLES(bottom side of armrest)
RIGHTARMREST
LEFTARMREST
ADJUSTMENT KNOBS
EN
17
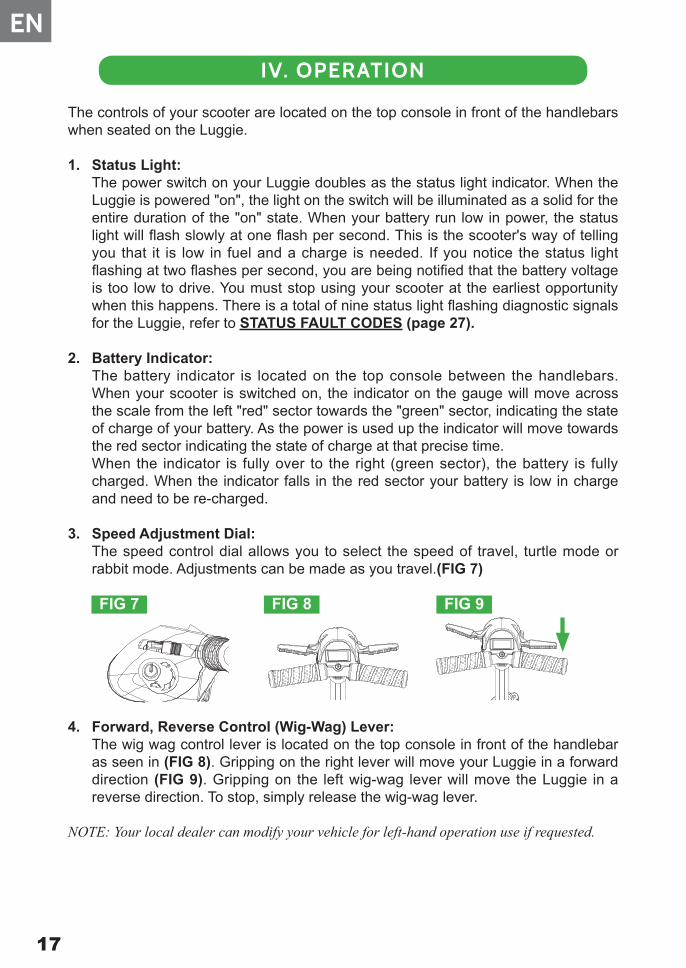
The controls of your scooter are located on the top console in front of the handlebars when seated on the Luggie.
1. Status Light: The power switch on your Luggie doubles as the status light indicator. When the
Luggie is powered "on", the light on the switch will be illuminated as a solid for the entire duration of the "on" state. When your battery run low in power, the status light will flash slowly at one flash per second. This is the scooter's way of telling you that it is low in fuel and a charge is needed. If you notice the status light flashing at two flashes per second, you are being notified that the battery voltage is too low to drive. You must stop using your scooter at the earliest opportunity when this happens. There is a total of nine status light flashing diagnostic signals for the Luggie, refer to STATUS FAULT CODES (page 27).
2. Battery Indicator: The battery indicator is located on the top console between the handlebars.
When your scooter is switched on, the indicator on the gauge will move across the scale from the left "red" sector towards the "green" sector, indicating the state of charge of your battery. As the power is used up the indicator will move towards the red sector indicating the state of charge at that precise time.
When the indicator is fully over to the right (green sector), the battery is fully charged. When the indicator falls in the red sector your battery is low in charge and need to be re-charged.
3. Speed Adjustment Dial: The speed control dial allows you to select the speed of travel, turtle mode or
rabbit mode. Adjustments can be made as you travel.(FIG 7)
4. Forward, Reverse Control (Wig-Wag) Lever: The wig wag control lever is located on the top console in front of the handlebar
as seen in (FIG 8). Gripping on the right lever will move your Luggie in a forward direction (FIG 9). Gripping on the left wig-wag lever will move the Luggie in a reverse direction. To stop, simply release the wig-wag lever.
NOTE: Your local dealer can modify your vehicle for left-hand operation use if requested.
IV. OPERATION
FIG 7 FIG 8
EN
FIG 9

18
5. Sleep Time: When your Luggie scooter has been idle for 15 minutes or more, it will
automatically go into sleep mode to conserve battery charge. There are 2 ways to wake the Luggie in sleep mode. One way to wake Luggie is to toggle the
.wig-wag a couple of times.The recommended way to wake the Luggie is to power off the scooter before powering it back on.
FREEWHEELING YOUR LUGGIEYour scooter is equipped with a manual freewheel device for your convenience whenyou need to push the scooter.
1. To put your scooter in freewheel mode, locate the magnetic brake release (red handled lever) located in the rear right hand side of your scooter under your seat as pictured. (FIG 10)
2. Make certain the Luggie power switch located under the right handlebar is switched off.
3. Push forward the magnetic brake release (red handled lever) (FIG10) until a distinct click is felt to disengage the magnetic brake. You can now push your Luggie with ease.
NOTE: When your scooter stops in the freewheel mode while pushing, it is not stuck or broken. The safety feature on the scooter will automatically trigger when the scooter is pushed quicker than a slow walking speed.
IV. OPERATION
FIG 10
D=Drive
N=Neutarl
EN
WARNING: DO NOT hang bags or other belongings over the steering handlebars, doing so may interfere with the movement of your control lever. Failure to observe this warning could put you in a dangerous situation.
WARNING: If you are not an accomplished outdoors powered vehicle driver, we strongly recommend that you first practice in an open, safe area, free from traffic, preferably with a care provider who can assist you.
WARNING: DO NOT sit on your Luggie scooter with the freewheel device in the disengage position. Your Luggie scooter has limited braking while in freewheel mode.

A great deal of thought and consideration have gone into the design of your state-of-the-art, life-changing Luggie scooter. Your Luggie will help increase your mobility; thus, give you more time to enjoy life. The Luggie scooter is a compact, three wheeled vehicle that will allow you to navigate obstacles in confined areas. Aside from this, your scooter offers the following:COMFORT - The contoured seat helps cushion you from vibrations of your journey, giving you maximum comfort. The Luggie comes with a speed controller which delivers you a smooth, jerk-free ride. For added peace of mind, the Luggie comes with an automatic braking system.
VERSATILITY - The Luggie seat assembly has 3 height adjustments (locked & 2 additional height adjustments) for added comfort and versatility. The steering column (tiller) has multiple height adjustments controlled by the trigger.
Before setting out on your Luggie, you need to make sure that your seat is in the correct riding position. Set the seat to your desired height for your needs.
TILLER ADJUSTMENTS 1. The tiller of your Luggie is designed to allow you to position the handlebars in a
comfortable driving position. It can be locked into numerous positions for your comfort and ease of transport.
2. To adjust the angle of the tiller (angle the handlebars), locate the trigger. Pull the black lever (trigger), outward to adjust the angle of the tiller.
To lock the tiller in your desired position, simply release the trigger or the black lever.
HANDLEBAR ADJUSTMENTS (If Equipped)1. The handlebars of certain models are designed to adjust in width for added
comfort when driving.2. To adjust the handlebars of your Luggie simply pull the grips outward on either
ends, turn forward and let go to lock.3. To re-adjust the handlebars to its shorten position reverse the steps above.
V. COMFORT ADJUSTMENTS
FIG 12 FIG 13FIG 11
19
EN
WARNING: Please always make certain the trigger or black lever on the tiller is fully down in a locked position and the tiller height is securely locked in place before driving your scooter. To make service adjustment to these parts, refer to the "Care and Maintenance" section of this manual.
WARNING: Please always retract the handlebars (shorten position) before folding the tiller down to the locking clamp.

20
VI. FREQUENTLY ASKED QUESTIONS▲about SAFETY
Q1: Are there safety modes in place even when the magnetic brake release has been disengaged?A1: Yes. If the attendant pushes the scooter too quickly while the magnetic brake
release is disengaged, the scooter will brake or stop. If this happens, come to a complete stop to allow the safety mechanism to reset before starting again. If the attendant pushes slowly, the scooter will move easily without braking.
Q2: What if my Luggie stops for no apparent reason?A2: Your battery may not be working properly. Contact your authorised Luggie
dealer.
Q3: What if my Luggie does not slow down or behave erratically? A3: Switch off the power and contact your local dealer.
▲about OPERATION
Q4: What if my Luggie doesn't start?A4: (a) Check to see that the battery is installed properly in the battery compartment
before turning on the power switch.(b) If the battery is installed properly, check the battery indicator to see if the
battery is fully charged. If the indicator is in the red zone or if the power switch flashes once per second your battery is low in power. Please charge your battery.
(c) If the power switch flashes 5 times per second and your battery indicator is in the green zone (charged state) make sure the magnetic brake release hasn't been disengaged. If the magnetic brake release is disengaged, turn off the power switch, engage the magnetic brake release then turn on he power switch before driving.
Q5: What if the status light on the power switch fail to operate when the switch is in the 'on' position?
A5: Make sure the charger is not plugged into the charge socket of your scooter. When your scooter being charged, you will not be able to drive.
Q6: Where can I drive Luggie?A6: The Luggie was designed to provide optimum stability under normal driving
conditions for indoor use on dry, level surfaces. We realize that there will be times when you will encounter other surfaces. Please take caution when driving in any conditions. Luggie is not recommended for uneven terrain, rain, snow, steep inclines, sand gravel or uneven surfaces.
EN

Q7: How do I move forward, reverse and stop on the Luggie scooter?A7: Gripping the right wig-wag lever let you move forward on Luggie scooter.
Gripping on the left wig-wag lever allows you to move in reverse. To stop, simply let go of the wig-wag lever.
Q8: How do I ensure my seat is locked in position?A8: Check to see that the seat lock indicator is red on both the right and left side to
ensure your seat is locked in place.
Q9: How do I fold my Luggie? A9: On certain models equipped with fully folding features. Models Luggie / Elite /
Elite Plus / Super / Super Plus / ECO / Class. Please refer to the FEATURES TABLE (page 1). (a) Close the clamps of the tiller completely.(b) Lower the tiller by lifting the trigger to lower the tiller.(c) Lock the tiller in the tiller locking clamp.(d) Unhook the chassis hook.(e) Bring down the chair by simultaneously squeezing on the seat lock handle
as you guide down your seat.(f) Pull up on the base of the chair until the front chassis locks with the back
chassis.
Q10: How do I unfold my Luggie scooter?A10: Refer to the THE QUICK START GUIDE provided in your packaging or the
User's manual on unfolding your new scooter.
Q11: How should I fold the Luggie to check it for air travel? A11: The best way to fold the Luggie and check it for air travel is to retract the tiller
and fold both the tiller down to the base of the scooter along with the seat. By making the scooter flat (folding down both the tiller & the seat ), it is easier for airline crew to handle and transport the scooter without damaging the scooter.
▲about ADJUSTMENT
Q12: Am I able to adjust the speed of my Luggie scooter?A12: You can adjust the speed of your Luggie by adjusting the speed control dial located on the left of the top console. When the dial is adjusted to the turtle mode, the scooter is at its slowest. As you adjust the dial toward the rabbit icon on the speed control dial, the speed of the Luggie will increase to the top
speed.
Q13: What's the recommended way to adjust the angle of the tiller?A13: It is recommended that you lift the trigger upward completely before adjusting
the angle of the tiller so as not to unnecessarily wear the mechanism.
VI. FREQUENTLY ASKED QUESTIONS
21
EN

22
▲about BATTERY AND CHARGING
Q14: When should I charge my battery?A14: Charge your battery when the battery indicator is in the red region on the
battery indicator on the top console of your scooter.
Q15: How long will it take to fully charge the battery?A15: The time required to fully charge your battery will depend on the depth of
discharge on the battery. The minimum time taken to recharge the battery fully will vary between 4 to 6 hours.
Q16: How long will my lithium battery last?A16: The life of your lithium battery will depend on use and care. Like any
consumable product, the battery will deteriorate in performance and reduce in range with time and use. Battery tend to deteriorate in performance and reduce in range when left in a discharged state, left in cold conditions for extended periods or worn due to heavy use.
Q17: How do I remove the battery from the battery compartment?A17: To remove the battery from its compartment, press the battery release button all
the way in, while pulling on the back edge of the battery to release the battery from the locked position.
Q18: Do I need to remove the battery when I travel via air?A18: According to the International Air Transport Association (IATA) the removal
of the lithium battery is required before your Luggie scooter can be checked without restrictions. According to IATA each passenger is allowed the capacity of one Luggie lithium battery. If you would like to travel with additional batteries, please ask your travel companion to carry it for you or check with your airline of travel for additional details.
NOTE: It is recommended that you check with your airline of travel prior to traveling in regard to checking your Luggie scooter. Please be advised that different airlines may handle the situation differently.
VI. FREQUENTLY ASKED QUESTIONS
EN
Q19: What should I do if my battery doesn't charge?A19: Call the customer service department to trouble shoot. DO NOT REMOVE
THE SEAL FROM THE BATTERY. YOUR BATTERY WARRANTY WILL BE VOID IF THE SEAL IS BROKEN. If the battery is faulty and still under warranty, request a RMA (Return Merchandise Authorization) number from your Authorized Luggie Dealer before shipping back the battery for replacement. If the battery is no longer under warranty, properly dispose of the old faulty battery and purchase a new Luggie battery from an authorised Luggie dealer.
Q20: Will my battery deplete in power when it is in sleep mode?A20: Yes, your Luggie battery will deplete in power even in sleep mode. If your
scooter is idle for an extended period of time, it is recommended that you power off the scooter completely to conserve battery power.
Q21: Does the Luggie go to sleep when it is idle for a long period of time? A21: Yes, the Luggie will go to sleep when idle for over 15 minutes.
Q22: How do I wake the Luggie once it is in sleep mode?A22: There are 2 ways to wake the Luggie in sleep mode.
(1) One way to wake the Luggie is to toggle the wig-wag a couple of times to wake the scooter.
(2) The recommended way to wake the Luggie is to power off the scooter before powering it back on.
Q23: How can I ensure maximum battery life?A23: Simply put, a fully charged battery is a happy battery! A fully charged battery will
provide reliable performance and extended battery life, so keep your battery fully charged whenever possible. Extra care must be taken when handling batteries, if you decide to fold your vehicle for transportation etc. Dropped battery, even from a very small height, can lead to damage of the internal components, causing premature battery failure. DO NOT open the battery casing, doing so will void the warranty.
DISPOSAL
VI. FREQUENTLY ASKED QUESTIONS
23
EN
CAUTION: Used batteries must be disposed of properly. Please contact your local electronic waste facility to dispose of used batteries properly.
24
BATTERY WARRANTYThe battery shipped with your Luggie has a limited warranty to be free of material defect or workmanship for a period for 12 months. Any battery faults due to a defect in manufacture or materials will be obvious within a few weeks of use. The condition of your battery will be dependent on the actual use of the scooter and how often the battery is cycled ie discharged and charged. Gradual deterioration in performance and reduction in range is normal and associated with fair wear and tear, misuse or accidental damage. Under these circumstances, the warranty will not apply. Some users due to their hectic lifestyle, weight or operating conditions, may wear their battery out during the original battery manufacturer's guarantee period due to extensive use of their scooter. The battery has a defined number of discharge cycles it can make. The more times you use your scooter the more cycles your battery will make; the shorter their life span.
REMEMBER: The longevity of your battery will be dependent on your care in breaking in the battery.
Best practice for new battery:1. Fully charge new battery prior to your initial use. This will bring your
battery up to about 88% performance.2. Ride your vehicle around the house or garden. DO NOT venture too
far away until you become accustomed to the controls and feel of the scooter. This will gently break in your battery.
3. Give your battery another full charge and run the scooter again. The battery will now perform to over 90% of their full potential.
4. After ten to fifteen charging cycles, the battery will top off at 100% charge and last for an extended period. It is important that you follow the steps outlined above for the longevity of your battery.
Q24: How can I get the maximum operating time per charge?A24: Rarely do we have the ideal driving situation (smooth, flat, hard terrain with no
wind or curves and warm temperatures). More often, we are presented with hills, uneven and loosely packed surfaces, curves, wind, cold and heavy loads. Conditions described above will affect the distance or running time of your battery charge.
Here are a few suggestions for obtaining the maximum range per charge:1. Always charge your battery fully prior to your trip.2. Plan your trip in advance to avoid inclines, curbs and soft surfaces.3. Limit your baggage weight to essential items.4. Try to maintain an even speed to avoid stop and start driving.5. Ensure recommended routine servicing of the vehicle's components.
VI. FREQUENTLY ASKED QUESTIONS
EN
VI. FREQUENTLY ASKED QUESTIONS
▲about SERVICE
Q25: Who do I contact if I need replacement parts for my Luggie scooter?A25: Contact your authorised Luggie dealer for replacement parts on your Luggie
scooter.
Q26: Where can I purchase accessories and/or replacement parts for the Luggie scooter?
A26: You can purchase accessories and Luggie parts from your local dealer.
Q27: What is the return policy on my Luggie scooter? A27: Contact your authorized Luggie dealer on return policy.
Q28: Where do I find the serial number for my Luggie scooter?A28: The serial number for your scooter can be found on the underside of the
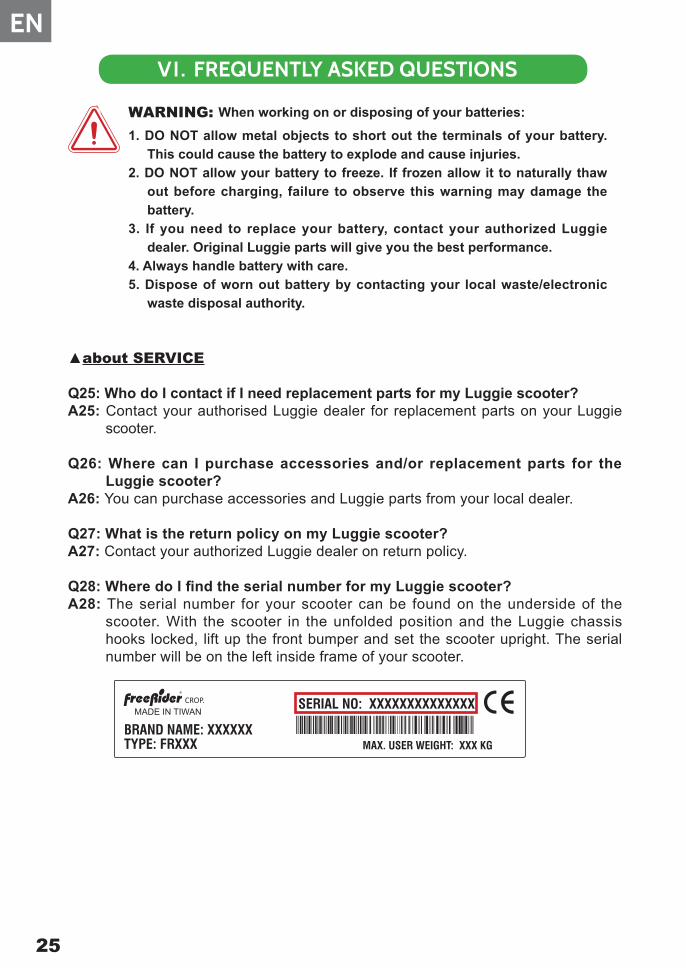
scooter. With the scooter in the unfolded position and the Luggie chassis hooks locked, lift up the front bumper and set the scooter upright. The serial number will be on the left inside frame of your scooter.
25
EN
SERIAL NO: XXXXXXXXXXXXXX
4656545644565f12dsdafshsgvsgqmsgMAX. USER WEIGHT: XXX KG
BRAND NAME: XXXXXXTYPE: FRXXX
CROP.MADE IN TIWAN
WARNING: When working on or disposing of your batteries:
1. DO NOT allow metal objects to short out the terminals of your battery.This could cause the battery to explode and cause injuries.
2. DO NOT allow your battery to freeze. If frozen allow it to naturally thaw out before charging, failure to observe this warning may damage the battery.
3. If you need to replace your battery, contact your authorized Luggie dealer. Original Luggie parts will give you the best performance.
4. Always handle battery with care.5. Dispose of worn out battery by contacting your local waste/electronic
waste disposal authority.
26
VII. BASIC TROUBLESHOOTING
When the battery voltage is low, the 'status' indicator light situated on power switch will flash slowly as a warning for you to recharge your batteries. If the 'speed controller' detects a fault, the light will flash more rapidly, with the number of flashes indicating the nature of the fault. If your scooter is switch 'on' but not operated for a set period of time (15 minutes approximately) the speed controller system will automatically turn itself 'off' to conserve valuable battery energy. This fault can be cleared when you power off then power back on.
FAULT DIAGNOSISFaults with the main speed controller are rare. Most faults on powered scooter are associated with wiring or bad connections due to poor maintenance or incorrect installation of connectors when assembling the scooter after transporting the scooter. If your Luggie scooter fails to operate refer to the status fault codes on the following page for reference. If in doubt, consult the dealer from whom you purchased your Luggie scooter.
DO NOT OPEN THE BATTERY HOUSING. BREAKING THE BATTERY SEAL VOIDS THE WARRANTY AUTOMATICALLY!
EN

VII. BASIC TROUBLESHOOTING
Flash Description Meaning
1 Battery Low The batteries are running low. → Recharge the batteries.
2 Low Battery FaultThe batteries have run out of charge. → Recharge the batteries.→ Check the battery and associated connections and wiring.
3 High Battery Fault
Battery voltage is too high. This may occur if overcharged and/or travelling down a long slope.→ If travelling down a slope, reduce your speed to minimize the amount of regenerative charging.
4 Current Limit Time-out
The motor has been exceeding its maximum current rating for too long.→ The scooter may have stalled. Turn the controller off, leave for a few minutes and turn back on again.→ The motor may be faulty. Check the motor and associated connections and wiring.
5 Park Brake Fault
Either a park brake release switch is active or the park brake is faulty. → Check the park brake and associated connections and wiring.→ Ensure any associated switches are in their correct positions.
6 Throttle OONAPU
Either a Stop function is active or a Charger Inhibit or OONAPU condition has occurred.→ Release the Stop condition (seat raised etc.) → Disconnect the Battery Charger→ Ensure the throttle is in neutral when turning the controller on.→ The Throttle may require re-calibration.
7 Speed Pot FaultThe throttle, speed limit pot, SRW or their associated wiring may be faulty.→ Check the throttle and speed pot and associated connections and wiring.
8 Motor Voltage FaultThe motor or its associated wiring is faulty. → Check the motor and associated connections and wiring.
9 Other error The controller may have an internal fault. → Check all connections and wiring.
27
STATUS FAULT CODES
EN

28
METAL WORKComponents, such as the frame work and bright metal parts require special attention and may deteriorate in certain conditions. Moisture and salt may corrode parts if left unattended. Auto cleaner polishes should be used to prevent long term damage. Failure to clean and protect these components may void your warranty.
PAINT WORKThis warranty does not cover deterioration of paint resulting from the lapse of time i.e. natural fading. It is the user’s responsibility to clean and protect the painted surfaces.
SPEED CONTROLLERServicing of the speed controller or battery charger must ONLY be carried out by your authorised Luggie dealer. Any attempt to open or dismantle these items render the warranty void on that item immediately.
BATTERYBatteries carry a limited 12 months warranty from the original manufacturer which is subject to a stringent wear and tear clause. Any battery faults due to a defect in the original manufacture will normally become obvious within the first two months of use. (See BATTERIES AND CHARGING SECTION of this manual for additional details.) Any gradual deterioration in the performance after this period is normal and associated with fair wear and tear, misuse or accidental damage and as such is not covered by the manufacturer’s warranty. (Battery is warranted as a single part, ONLY the failed part is replaceable.)
SERVICE CHECKSIn line with all mobility vehicles, your Luggie will benefit from regular service inspections to keep it in pristine condition. The frequency of these service inspections will depend on the amount of use of your vehicle. We strongly recommend you contact your local dealer to arrange for a service visit. It is recommended that you fully service your Luggie at least every 12 months or more frequently depending on use. The warranty on your Luggie may not apply if routine maintenance is not carried out as defined in THE CARE AND MAINTENANCE SECTION of the manual.
VIII. CARE AND MAINTENANCE
EN
WARNING: DO NOT attempt to open the battery. Breaking the battery seal will void the warranty on the battery.
VIII. CARE AND MAINTENANCE
SERVICE CHECKS AND WARRANTY SERVICEIf your Luggie should need attention due to failure as defined under the warranty terms, please contact the dealer from whom you purchased your scooter. The Luggie shown and described in this manual may not be exactly identical in every detail as your own Luggie. However, all instructions are still entirely relevant, irrespective of detail differences. If you are unsure of any details mentioned in this manual, please consult your authorised Luggie dealer before driving your scooter. Warranty service checks must be performed by an Authorized dealer and will generally be valid at the location where purchased. All transportation costs and shipping damage incurred while submitting parts for repair or replacement are the responsibility of the purchaser.
WARRANTY TERMSPlease keep a note of your serial number.(This is located on the front frame, under the front chassis cover).
The frame of your scooter is warranted for 36 months, 12 months from the date of purchase against faults arising due to defects in manufacture or materials on electronic components. This warranty does not detract from, but is in addition to your legal rights. Parts replaced or repaired under the terms of this warranty will be covered for the balance of the period. This warranty applies ONLY to parts supplied or approved by your Authorized Luggie Dealer. Refer to your warranty sheet for additional details. Due to the individual prescription nature of this product, this warranty is not transferable.
NOTE: Optional extended warranty insurance may be available from your local dealer.
EXCLUSIONS: This warranty does not extend to consumable items which may need replacing due to normal wear and tear, namely tires, punctures, lubrication, mats, oil seals, gaskets, screws, upholstery, motor brushes ,fuses, batteries, handgrips etc. or to damage to the product caused by misuse, neglect or accident. This warranty does not apply if your Luggie shows signs of excessive wear and abuse, or has been modified without the authority of your local dealer.The following items are not covered by your warranty:
1. Any noise or vibration, which does not affect the quality and function of the scooter.
2. Damage due to lack of maintenance or improper use or operation or storage.3. Fees for the regular service inspection and maintenance.4. Any fees incurred as a result of warranty repair, losses or compensation because
of the inability to use the scooter (telephone use, shipping, car rental, travel fees etc.).
29
EN
30
VIII. CARE AND MAINTENANCE
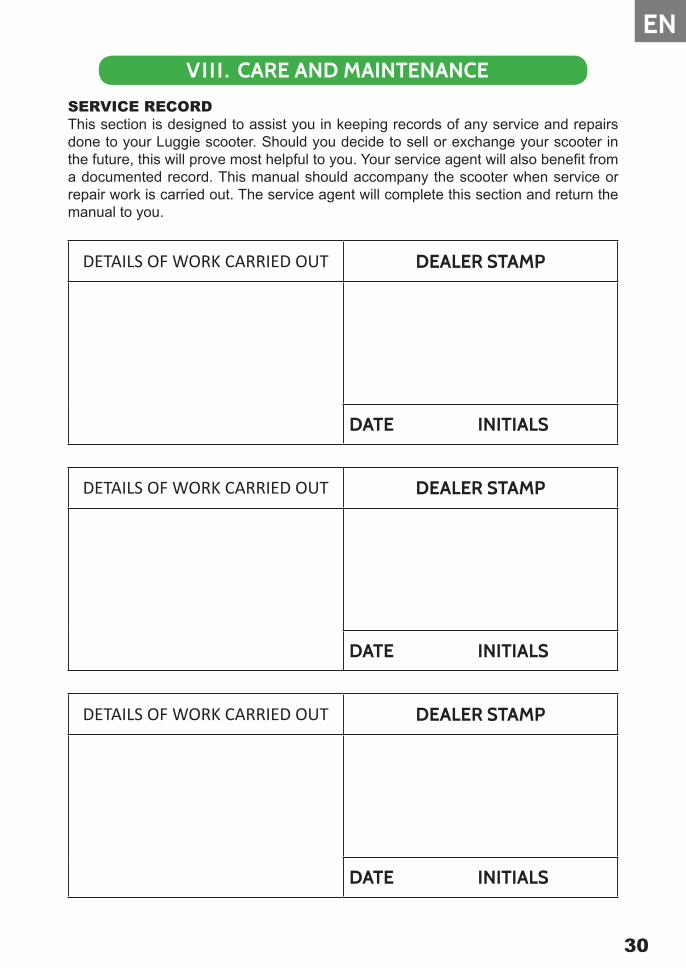
SERVICE RECORDThis section is designed to assist you in keeping records of any service and repairs done to your Luggie scooter. Should you decide to sell or exchange your scooter in the future, this will prove most helpful to you. Your service agent will also benefit from a documented record. This manual should accompany the scooter when service or repair work is carried out. The service agent will complete this section and return the manual to you.
DETAILS OF WORK CARRIED OUT DEALER STAMP
DATE INITIALS
DETAILS OF WORK CARRIED OUT DEALER STAMP
DATE INITIALS
DETAILS OF WORK CARRIED OUT DEALER STAMP
DATE INITIALS
EN

VIIII. OPTIONAL ACCESSORIES
Luggie is a one piece foldable mobility scooter with optional accessories for your convenience. For information regarding these optional accessories listed below, please contact your authorized Luggie dealer.
Photo Item
Home Docking Station
Battery Bag
Adjustable armrests
31
EN
WARNING: DO NOT over load accessories as this will affect the weight capacity of your scooter and decrease stability.

Headquarter and Kaohsiung Facility:
No.22, Bengong 5th Rd., Gangshan Dist., Kaoshiung City 820, Taiwan(R.O.C.)
TEL: 886-7-6223093 FAX: 886-7-6230373
EMAIL: [email protected]
www.freerider.com.tw
www.luggie.com.tw
2019.03.20 V1
Y O U R L O C A L D E A L E R
T O B E F I L L E D I N B Y L O C A L D E A L E R
PL90-0514