Lesson 0. Getting Started - Adafruit Learning System
29
Arduino Lesson 0. Getting Started Created by Simon Monk https://learn.adafruit.com/lesson-0-getting-started Last updated on 2021-11-15 05:53:18 PM EST ©Adafruit Industries Page 1 of 29
Transcript of Lesson 0. Getting Started - Adafruit Learning System
Arduino Lesson 0. Getting StartedCreated by Simon Monk
https://learn.adafruit.com/lesson-0-getting-started
Last updated on 2021-11-15 05:53:18 PM EST
©Adafruit Industries Page 1 of 29
3
3
17
19
23
25
28
Table of Contents
Overview
Parts
• Part
• Qty
Breadboard
Installing Arduino (Windows)
Installing Arduino (Mac and Linux)
Boards and Ports
The Lessons
©Adafruit Industries Page 2 of 29
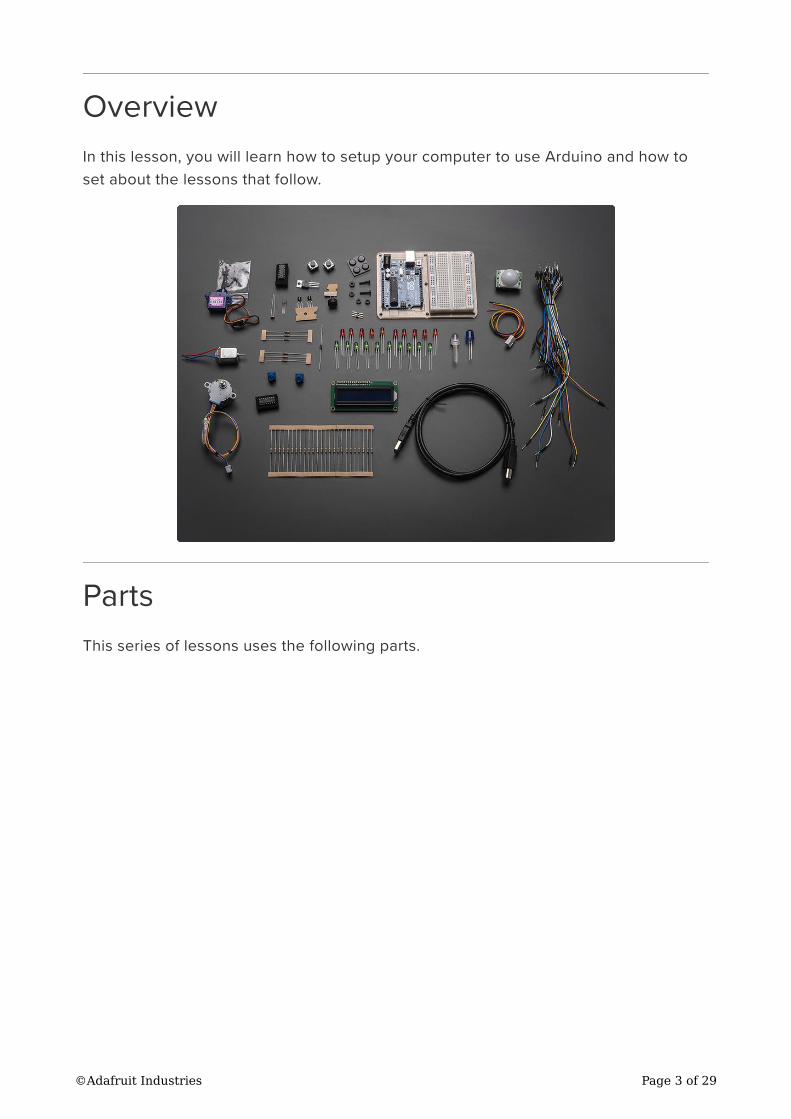
Overview
In this lesson, you will learn how to setup your computer to use Arduino and how to
set about the lessons that follow.
Parts
This series of lessons uses the following parts.
©Adafruit Industries Page 3 of 29

PartQty
Arduino Uno R3
1
USB Lead
1
©Adafruit Industries Page 4 of 29

Half-size Breadboard
1
5mm Red LED
8
©Adafruit Industries Page 5 of 29

Diffused RGB LED
1
270 Ω Resistor (red, purple, brown stripes)
8
470 Ω Resistor (yellow, purple, brown stripes)
1
©Adafruit Industries Page 6 of 29
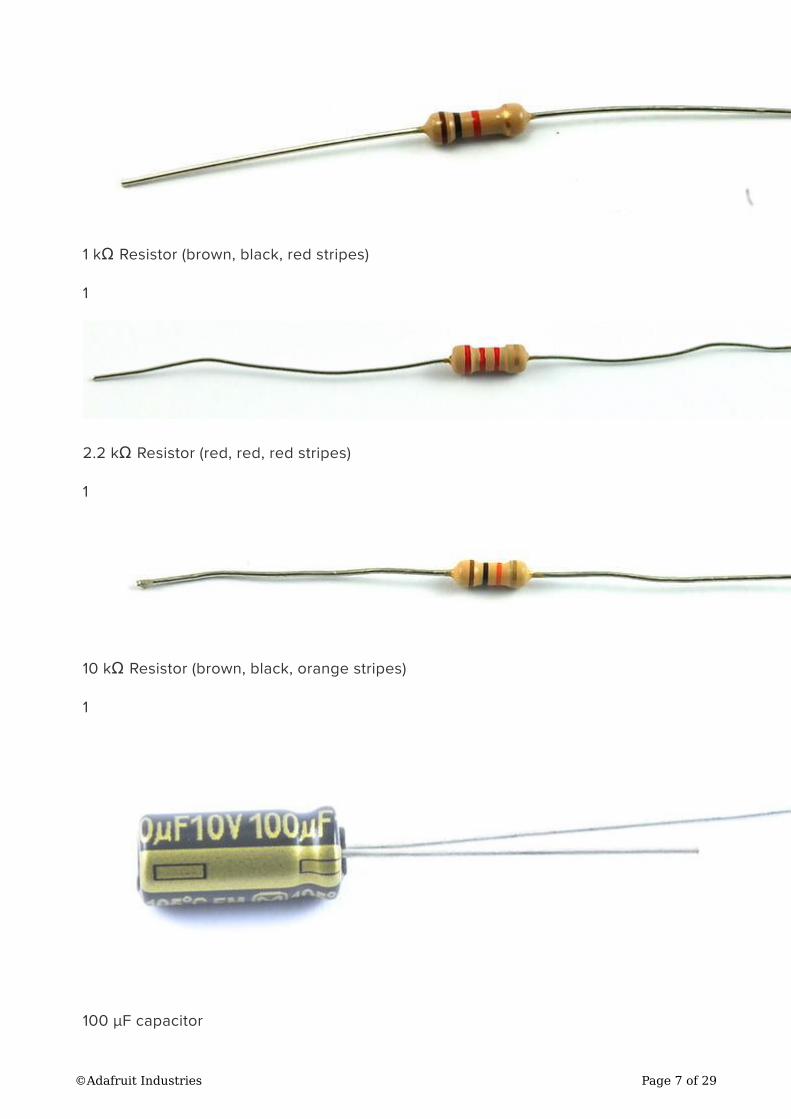
1 kΩ Resistor (brown, black, red stripes)
1
2.2 kΩ Resistor (red, red, red stripes)
1
10 kΩ Resistor (brown, black, orange stripes)
1
100 µF capacitor
©Adafruit Industries Page 7 of 29

1
74HC595 Shift Register
1
©Adafruit Industries Page 8 of 29

L293D IC
1
©Adafruit Industries Page 9 of 29
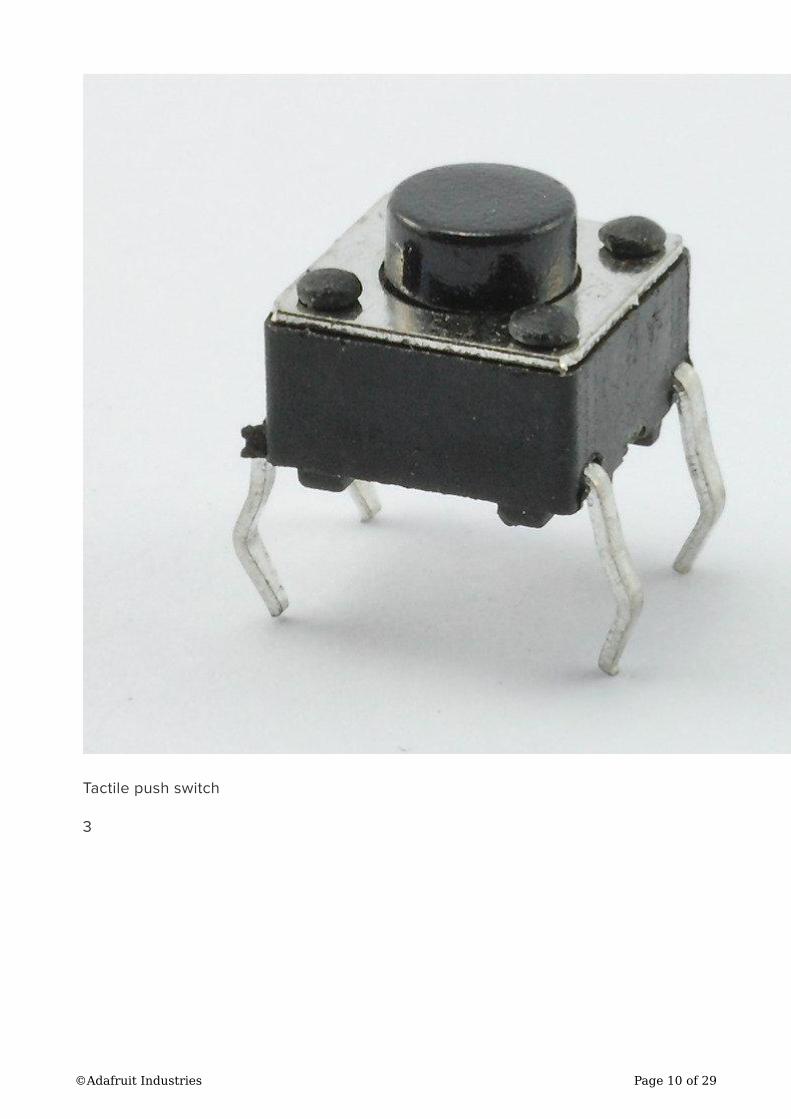
Tactile push switch
3
©Adafruit Industries Page 10 of 29

10 kΩ variable resistor (pot)
1
©Adafruit Industries Page 11 of 29
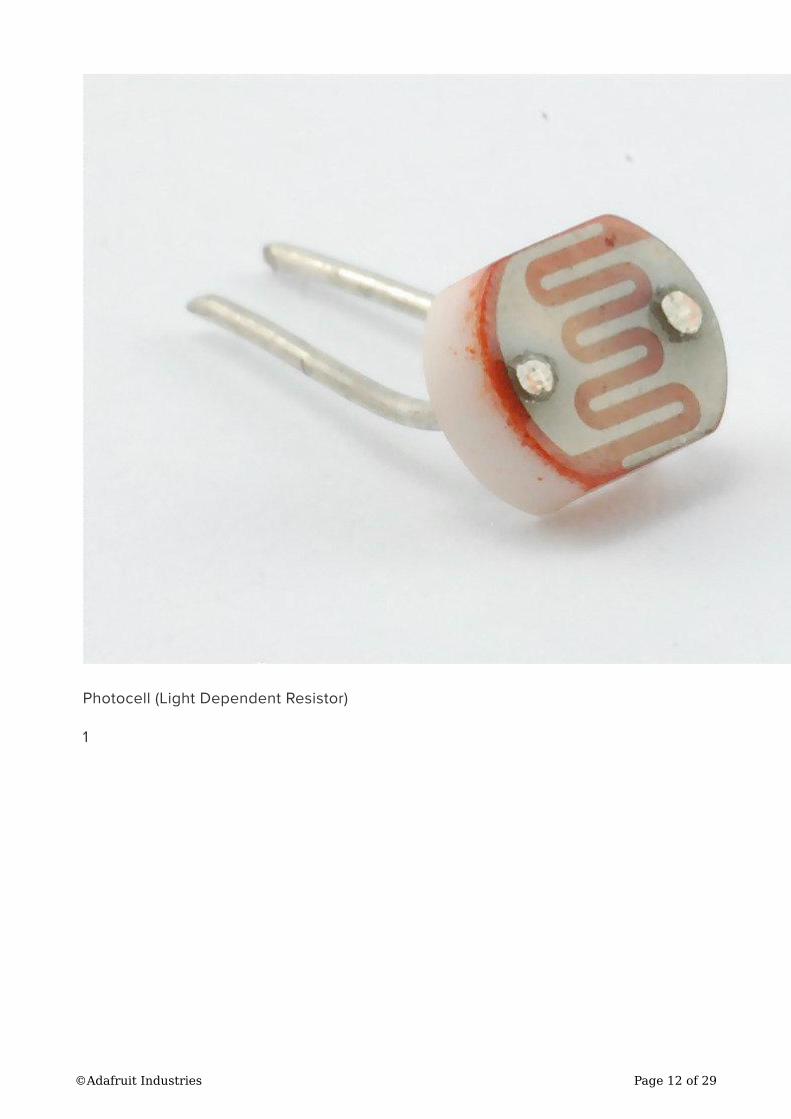
Photocell (Light Dependent Resistor)
1
©Adafruit Industries Page 12 of 29

Piezo sounder
1
©Adafruit Industries Page 13 of 29
LCD Display (16x2 characters)
1
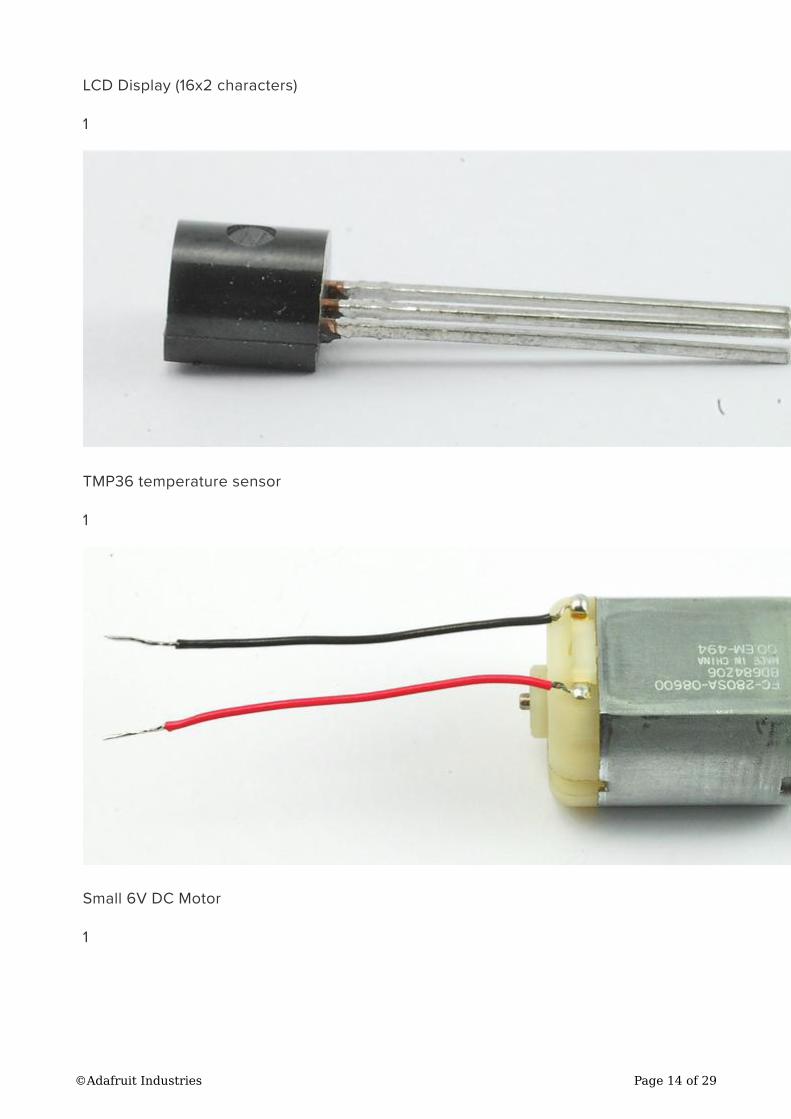
TMP36 temperature sensor
1
Small 6V DC Motor
1
©Adafruit Industries Page 14 of 29

5V Stepper Motor
1
©Adafruit Industries Page 15 of 29

Servo Motor
1
©Adafruit Industries Page 16 of 29
Breadboard
The projects in this series of lessons all use something called Breadboard, or more
accurately, Solderless Breadboard.
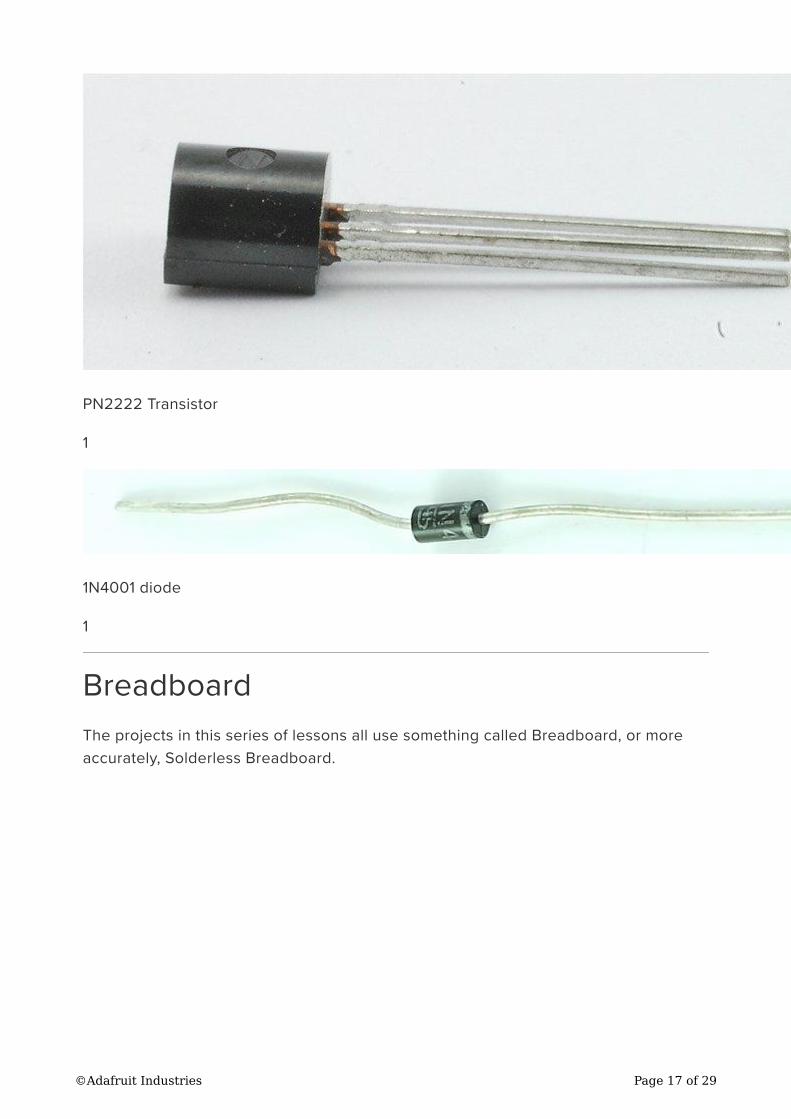
PN2222 Transistor
1
1N4001 diode
1
©Adafruit Industries Page 17 of 29
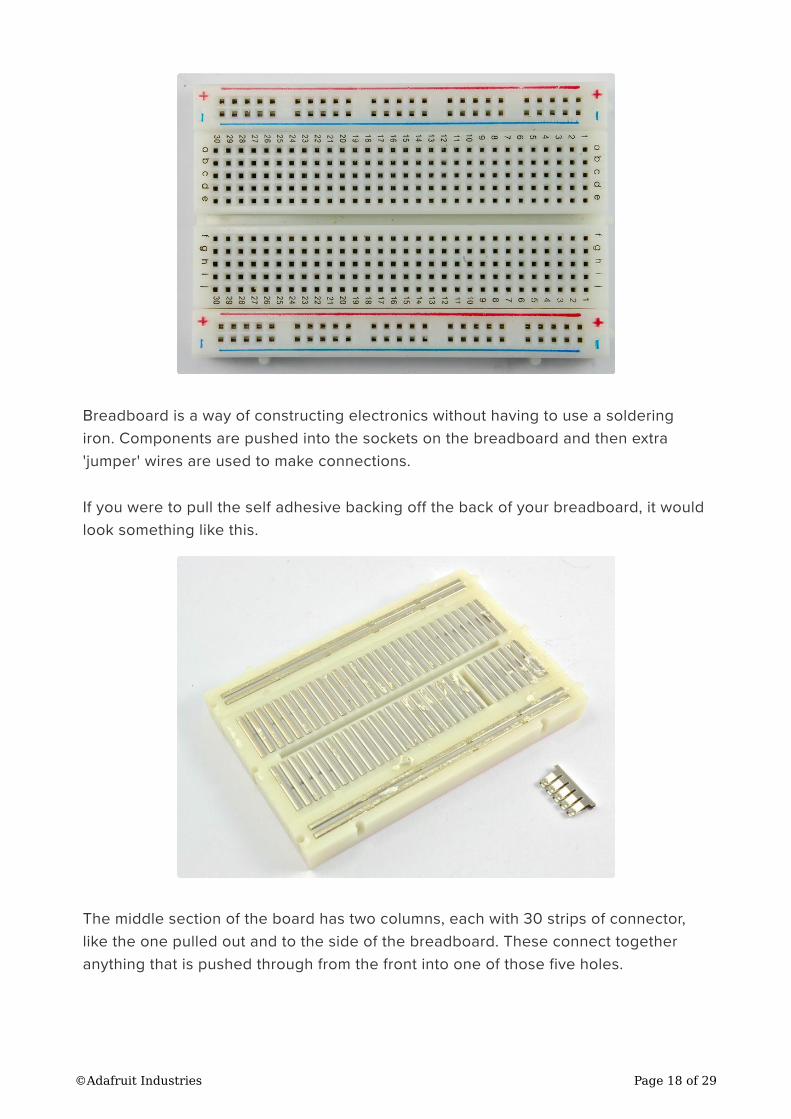
Breadboard is a way of constructing electronics without having to use a soldering
iron. Components are pushed into the sockets on the breadboard and then extra
'jumper' wires are used to make connections.
If you were to pull the self adhesive backing off the back of your breadboard, it would
look something like this.
The middle section of the board has two columns, each with 30 strips of connector,
like the one pulled out and to the side of the breadboard. These connect together
anything that is pushed through from the front into one of those five holes.
©Adafruit Industries Page 18 of 29
On either edge of the board are much longer sections of clip that join together the
columns of holes marked by the blue and red lines on the front of the breadboard.
These are generally used for GND (blue) and 5V (red).
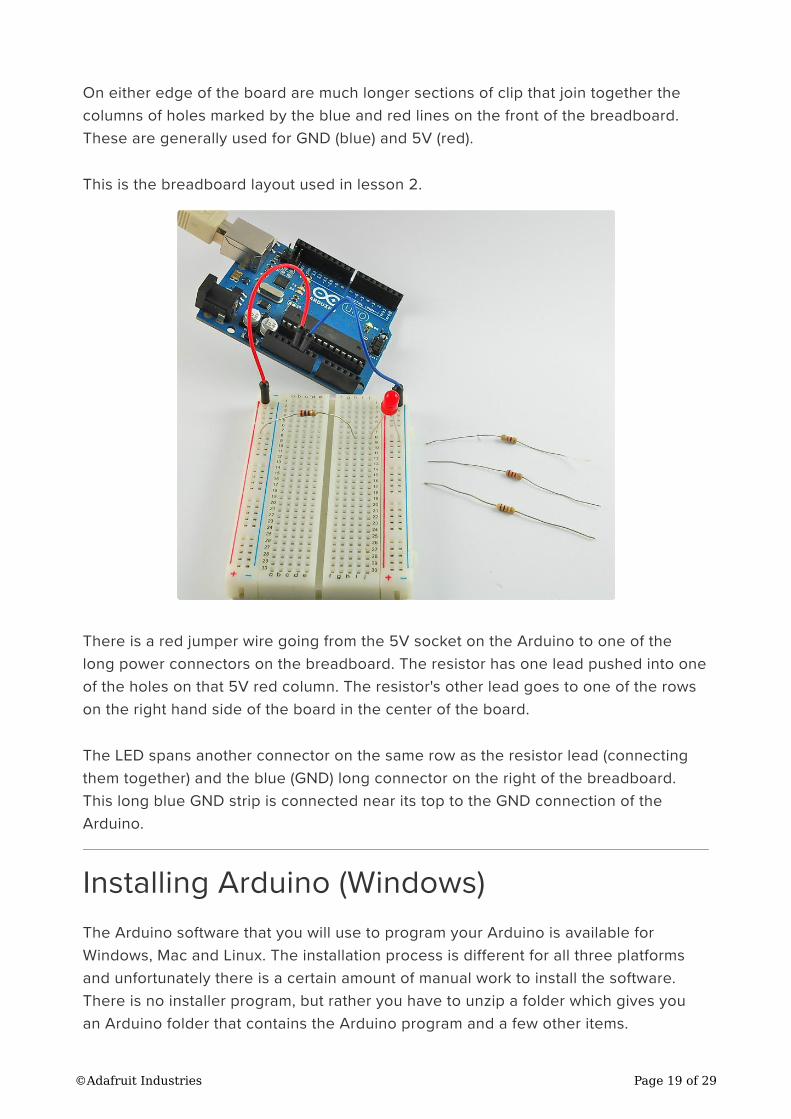
This is the breadboard layout used in lesson 2.
There is a red jumper wire going from the 5V socket on the Arduino to one of the
long power connectors on the breadboard. The resistor has one lead pushed into one
of the holes on that 5V red column. The resistor's other lead goes to one of the rows
on the right hand side of the board in the center of the board.
The LED spans another connector on the same row as the resistor lead (connecting
them together) and the blue (GND) long connector on the right of the breadboard.
This long blue GND strip is connected near its top to the GND connection of the
Arduino.
Installing Arduino (Windows)
The Arduino software that you will use to program your Arduino is available for
Windows, Mac and Linux. The installation process is different for all three platforms
and unfortunately there is a certain amount of manual work to install the software.
There is no installer program, but rather you have to unzip a folder which gives you
an Arduino folder that contains the Arduino program and a few other items.
©Adafruit Industries Page 19 of 29

In a separate step, you must then install USB drivers, which is the only bit that is a bit
fiddly.
Get started by visiting the Arduino.cc (https://adafru.it/aHs) website. As of April 2014
we suggest v1.05 as 1.5 is still in beta. If 1.5 is no longer in beta when you read this
you can try it out!
Start by downloading the the zip file for Windows. There is only one version of the
software, whether you are using Windows XP through to Windows 7.
When the zip file has downloaded, extract the contents onto the Desktop, by right-
clicking on the file and selecting 'Extract All...' from the pop-up menu.
©Adafruit Industries Page 20 of 29
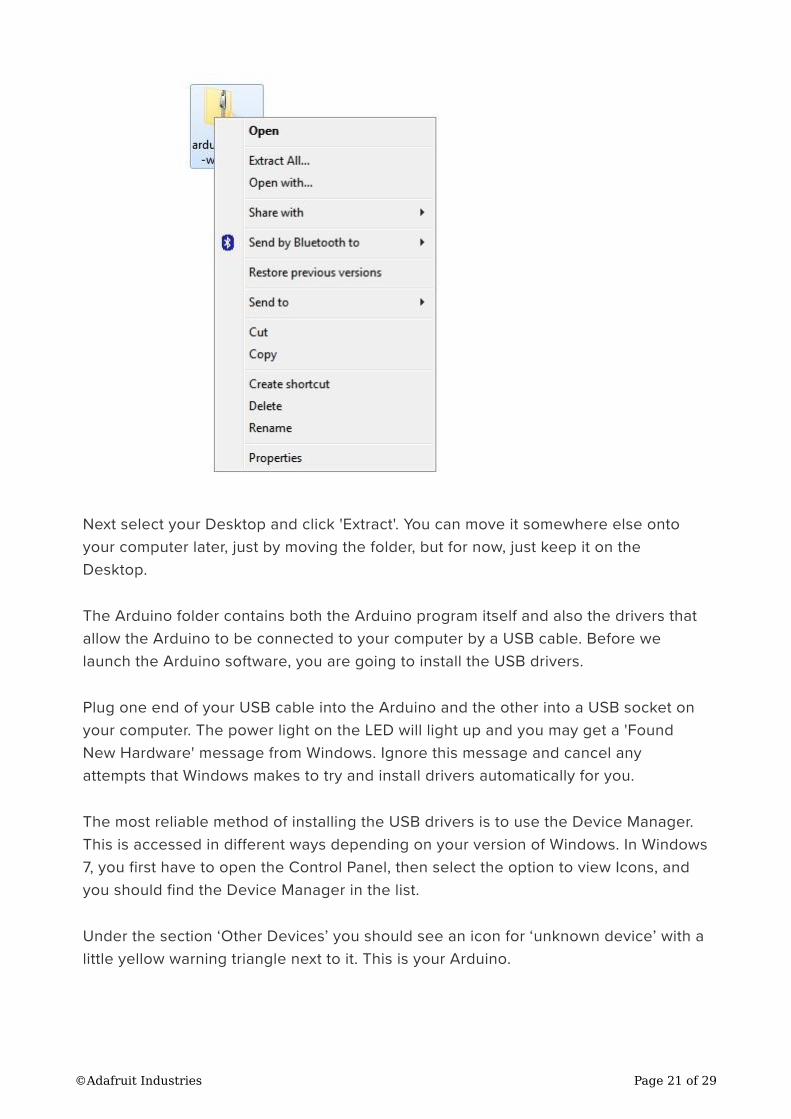
Next select your Desktop and click 'Extract'. You can move it somewhere else onto
your computer later, just by moving the folder, but for now, just keep it on the
Desktop.
The Arduino folder contains both the Arduino program itself and also the drivers that
allow the Arduino to be connected to your computer by a USB cable. Before we
launch the Arduino software, you are going to install the USB drivers.
Plug one end of your USB cable into the Arduino and the other into a USB socket on
your computer. The power light on the LED will light up and you may get a 'Found
New Hardware' message from Windows. Ignore this message and cancel any
attempts that Windows makes to try and install drivers automatically for you.
The most reliable method of installing the USB drivers is to use the Device Manager.
This is accessed in different ways depending on your version of Windows. In Windows
7, you first have to open the Control Panel, then select the option to view Icons, and
you should find the Device Manager in the list.
Under the section ‘Other Devices’ you should see an icon for ‘unknown device’ with a
little yellow warning triangle next to it. This is your Arduino.
©Adafruit Industries Page 21 of 29
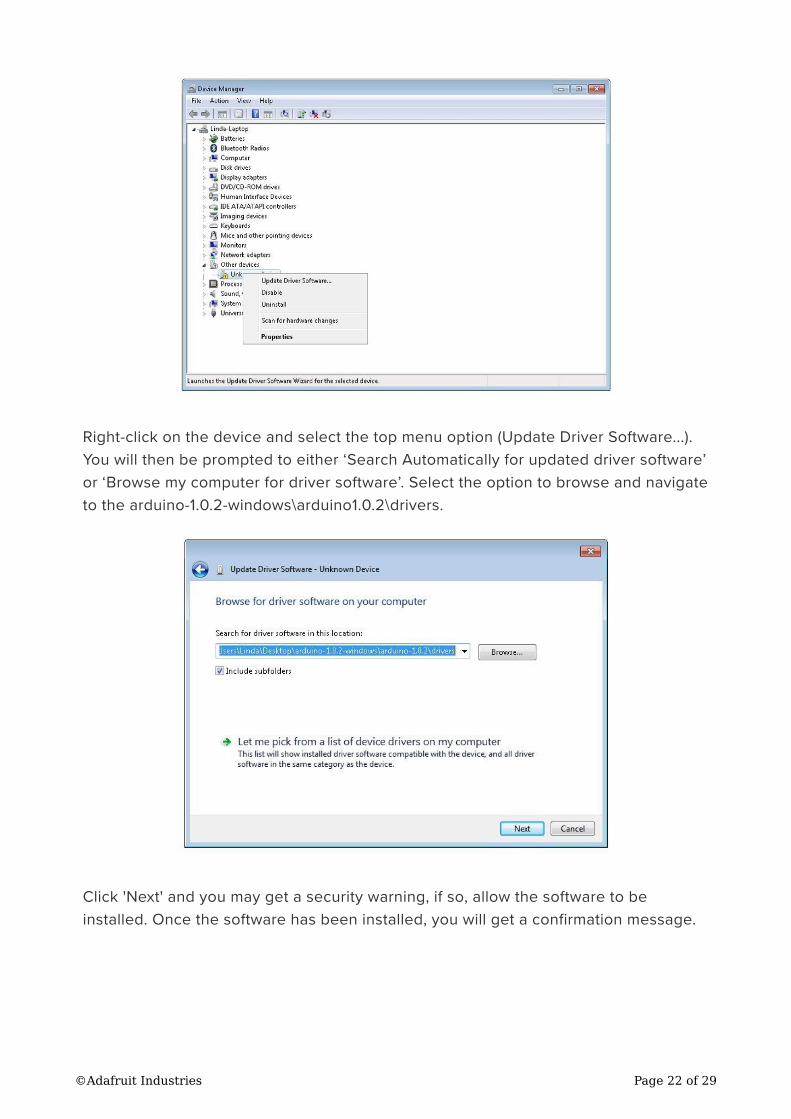
Right-click on the device and select the top menu option (Update Driver Software...).
You will then be prompted to either ‘Search Automatically for updated driver software’
or ‘Browse my computer for driver software’. Select the option to browse and navigate
to the arduino-1.0.2-windows\arduino1.0.2\drivers.
Click 'Next' and you may get a security warning, if so, allow the software to be
installed. Once the software has been installed, you will get a confirmation message.
©Adafruit Industries Page 22 of 29

That's it, you are now ready for action, so Skip the next section on installation on Mac
and Linux and move straight on to 'Boards and Ports'.
Installing Arduino (Mac and Linux)
Get started by visiting the Arduino.cc (https://adafru.it/aHs) website and downloading
the matching IDE for your operating system. As of April 2014 we suggest v1.05 as 1.5
is still in beta. If 1.5 is no longer in beta when you read this you can try it out!
Save the install software to your desktop or wherever
©Adafruit Industries Page 23 of 29

The process for installing the Arduino software on the Mac is a lot easier than on the
PC. As before, the first step is to download the file. In the case of the Mac, it is a zip
file.
Once downloaded, double-click on the zip file, which will extract a single file called
‘Arduino.app’. This is the whole Arduino application, just drag it into your Applications
Folder.
©Adafruit Industries Page 24 of 29

You can now find and launch the Arduino software in your Applications folder. As you
are going to use it frequently, you may wish to right-click its icon in the dock and set it
to Keep In Dock.
There are many different LINUX distributions and the instructions for each distribution
are a little different. The Arduino community has done a great job of putting together
sets of instructions for each distribution. So follow the link below and select one of
the ten or more distributions on offer.
Boards and Ports
You are now ready to start the Arduino Software, so whatever platform you are using,
open the Arduino folder and open the Arduino application contained within it.
©Adafruit Industries Page 25 of 29
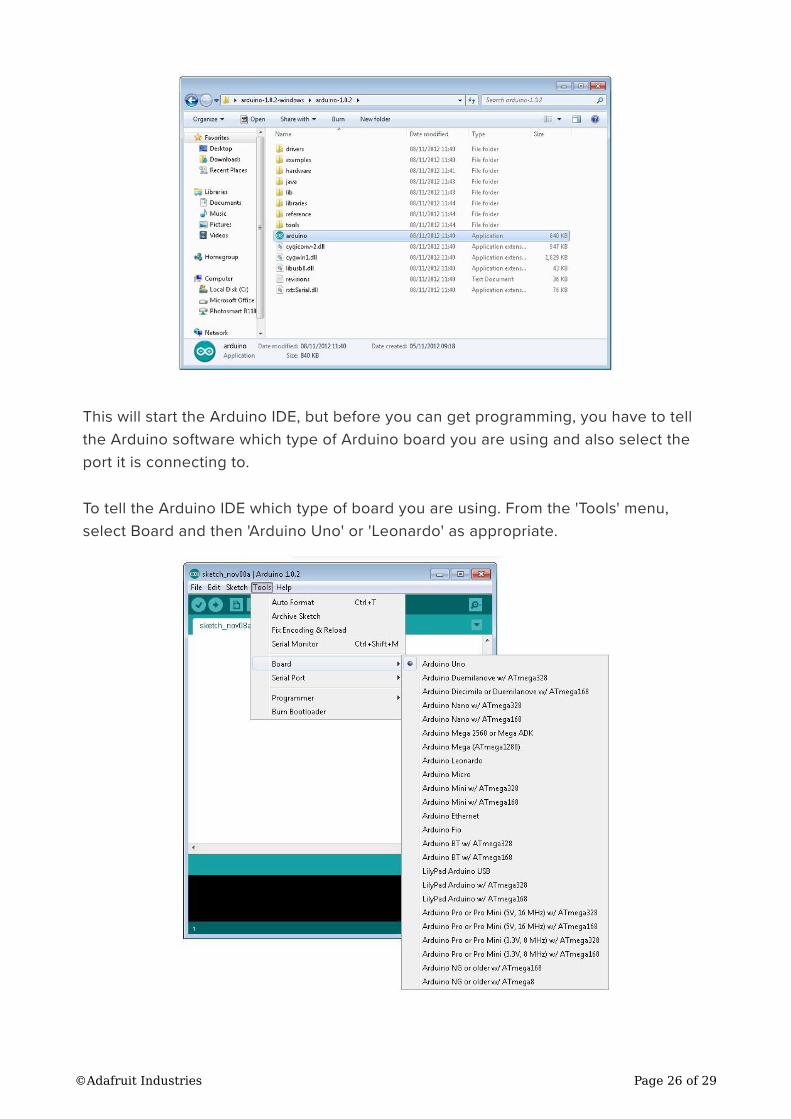
This will start the Arduino IDE, but before you can get programming, you have to tell
the Arduino software which type of Arduino board you are using and also select the
port it is connecting to.
To tell the Arduino IDE which type of board you are using. From the 'Tools' menu,
select Board and then 'Arduino Uno' or 'Leonardo' as appropriate.
©Adafruit Industries Page 26 of 29
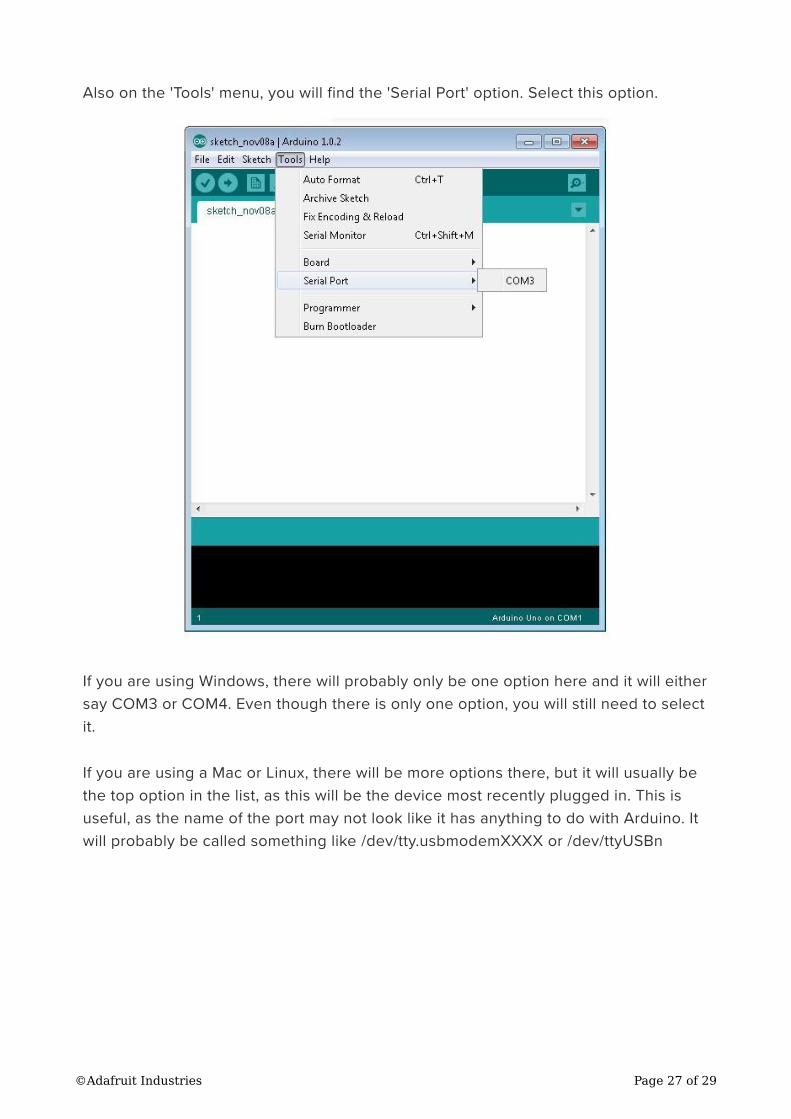
Also on the 'Tools' menu, you will find the 'Serial Port' option. Select this option.
If you are using Windows, there will probably only be one option here and it will either
say COM3 or COM4. Even though there is only one option, you will still need to select
it.
If you are using a Mac or Linux, there will be more options there, but it will usually be
the top option in the list, as this will be the device most recently plugged in. This is
useful, as the name of the port may not look like it has anything to do with Arduino. It
will probably be called something like /dev/tty.usbmodemXXXX or /dev/ttyUSBn
©Adafruit Industries Page 27 of 29
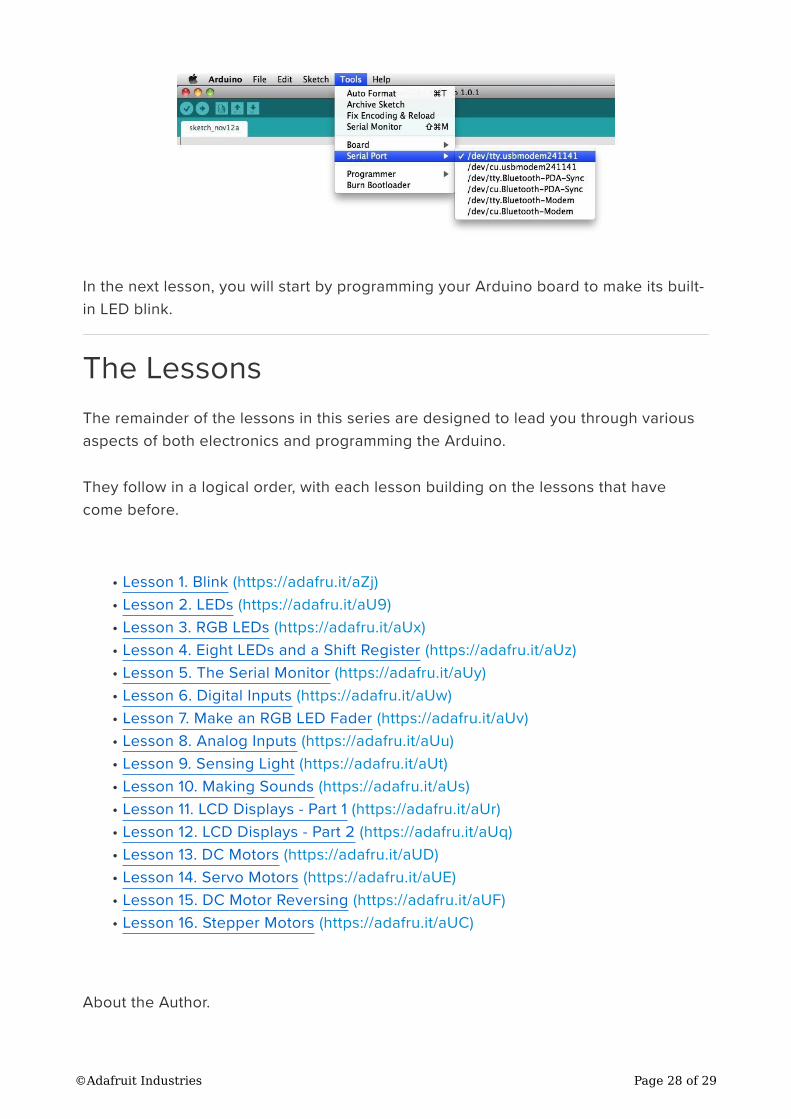
In the next lesson, you will start by programming your Arduino board to make its built-
in LED blink.
The Lessons
The remainder of the lessons in this series are designed to lead you through various
aspects of both electronics and programming the Arduino.
They follow in a logical order, with each lesson building on the lessons that have
come before.
Lesson 1. Blink (https://adafru.it/aZj)
Lesson 2. LEDs (https://adafru.it/aU9)
Lesson 3. RGB LEDs (https://adafru.it/aUx)
Lesson 4. Eight LEDs and a Shift Register (https://adafru.it/aUz)
Lesson 5. The Serial Monitor (https://adafru.it/aUy)
Lesson 6. Digital Inputs (https://adafru.it/aUw)
Lesson 7. Make an RGB LED Fader (https://adafru.it/aUv)
Lesson 8. Analog Inputs (https://adafru.it/aUu)
Lesson 9. Sensing Light (https://adafru.it/aUt)
Lesson 10. Making Sounds (https://adafru.it/aUs)
Lesson 11. LCD Displays - Part 1 (https://adafru.it/aUr)
Lesson 12. LCD Displays - Part 2 (https://adafru.it/aUq)
Lesson 13. DC Motors (https://adafru.it/aUD)
Lesson 14. Servo Motors (https://adafru.it/aUE)
Lesson 15. DC Motor Reversing (https://adafru.it/aUF)
Lesson 16. Stepper Motors (https://adafru.it/aUC)
About the Author.
•
•
•
•
•
•
•
•
•
•
•
•
•
•
•
•
©Adafruit Industries Page 28 of 29

Simon Monk is author of a number of books relating to Open Source Hardware. The
following books written by Simon are available from Adafruit: Programming Arduino (h
ttp://adafru.it/1019), 30 Arduino Projects for the Evil Genius (http://adafru.it/868) and Pr
ogramming the Raspberry Pi (https://adafru.it/aM5).
©Adafruit Industries Page 29 of 29