Large display alarm clock with shaker Réveil grand écran ...
21
Wakenshake gti Large display alarm clock with shaker Réveil grand écran avec vibreur User guide p.2 Notice d’utilisation p.12 GB F A l a r m C l o c k
Transcript of Large display alarm clock with shaker Réveil grand écran ...
������������ ��
Large display alarm clock with shaker
Réveil grand écran avec vibreur
User guide p.2Notice d’utilisation p.12
GBF �
��������
��������
�������
��������
���
���

2

DESCRIPTION
3
Snooze key / Flash
PM LED indicator
Alarm LED indicator
PM
AL
Alarm tone
Alarm + ring / Off / Ring functionswitch
Alarm off for 24H.Set hours & minutes
Shaker Lo / Hi switchAlarm mode switch
Set alarm
Set clock
Alarm and ringvolume
(*) Adaptor jack
Dimmer switch
(*) Shaker jack(*) Modular jack
(*) Classified TVN-3 according to EN60950 standard.
3
4
1(**) 230V
PTT plug
AC adaptor
Shaker
23
4
5
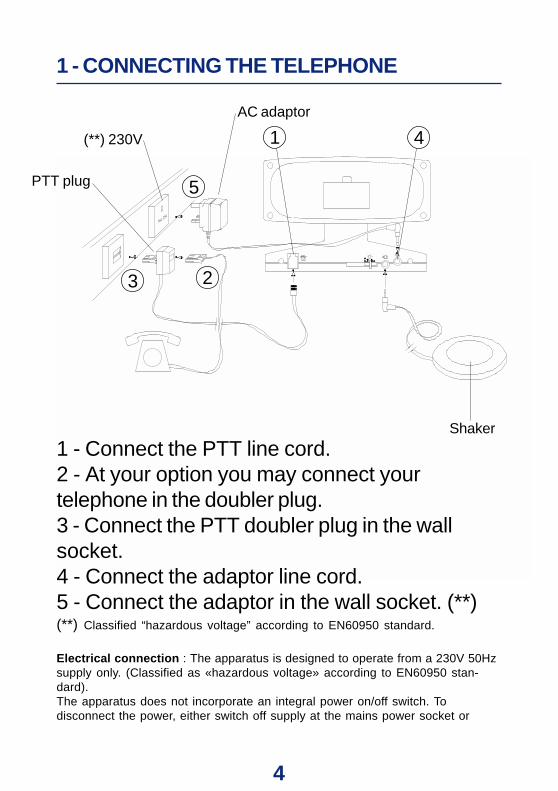
1 - CONNECTING THE TELEPHONE
1 - Connect the PTT line cord.2 - At your option you may connect yourtelephone in the doubler plug.3 - Connect the PTT doubler plug in the wallsocket.4 - Connect the adaptor line cord.5 - Connect the adaptor in the wall socket. (**)(**) Classified “hazardous voltage” according to EN60950 standard.
Electrical connection : The apparatus is designed to operate from a 230V 50Hzsupply only. (Classified as «hazardous voltage» according to EN60950 stan-dard).The apparatus does not incorporate an integral power on/off switch. Todisconnect the power, either switch off supply at the mains power socket or
unplug the AC adaptor. When installing the apparatus, ensure that the mainspower socket is readily accessible.Telephone connection : Voltages present on the telecommunication network areclassified TNV-3 (Telecommunication Network Voltage) according to theEN60950 standard.
2 - SETTING THE TIME ( )
- Press and hold (set clock) button.- Press H (hour) and M (minute) until correcthour and minutes appear on the display.- Release (set clock) button.- For p.m. hours, the p.m. indicator will appearon the display near the inscription PM.
3 - SETTING THE ALARM TIME ( )
- Press and hold (set alarm) button.- Press H (hour) or M (minute) until correct hourand minutes appear on the display.- Release (set alarm) button.- Press , H and M to reset the alarm clock to12.
5
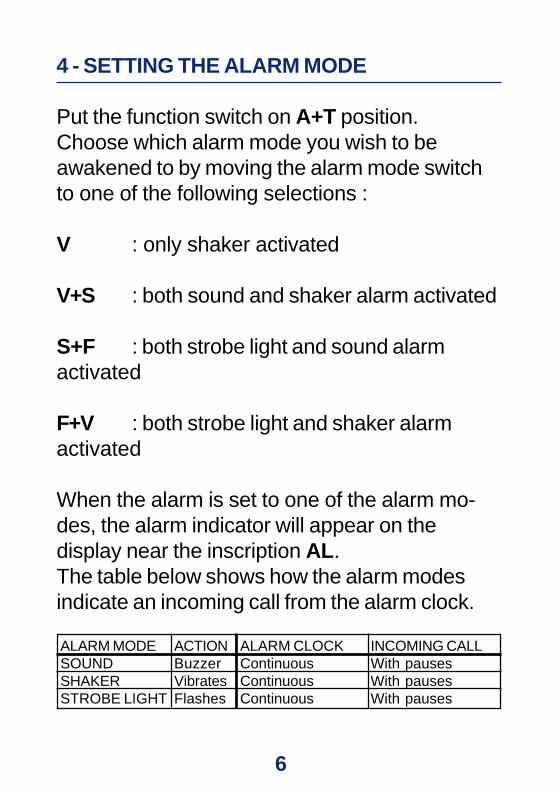
4 - SETTING THE ALARM MODE
Put the function switch on A+T position.Choose which alarm mode you wish to beawakened to by moving the alarm mode switchto one of the following selections :
V : only shaker activated
V+S : both sound and shaker alarm activated
S+F : both strobe light and sound alarmactivated
F+V : both strobe light and shaker alarmactivated
When the alarm is set to one of the alarm mo-des, the alarm indicator will appear on thedisplay near the inscription AL.The table below shows how the alarm modesindicate an incoming call from the alarm clock.
ALARM MODESOUNDSHAKERSTROBE LIGHT
ACTIONBuzzerVibratesFlashes
ALARM CLOCKContinuousContinuousContinuous
INCOMING CALLWith pausesWith pausesWith pauses
6
5 - SNOOZE KEY ( )
When the alarm mode you have chosen isswitched on by the alarm time setting, pressingthe button will stop the alarm mode forapproximately 9 minutes. The alarm will thenswitch the alarm mode on again for a further 9minutes. This sequence can be carried out forup to 2 hours after which the alarm mode will beautomatically switched off.
6 - SWITCHING THE ALARM OFF FOR 24H.(OFF)
Press the alarm off button (OFF), the alarm willthen operate at the same time the next day. Thealarm if not switched off will continue to soundfor up to 2 hours and then be automaticallyswitched off.
7 - RINGER On/Off SWITCH ( A+T / OFF / T )
- A+T (alarm + telephone) : for the alarm andtelephone ring position.- OFF : alarm and ring off.- T (telephone) : for the telephone ring position.
7
8 - TELEPHONE OPERATION
- Ensure that the telephone has been set up inaccordance with the telephone userguide andhas been connected as shown in the installationsection.- Select the ringer On/Off switch on the A+T or Tposition for the ring.- Choose which of the alarm modes you wish toalert you of your incoming telephone calls (seepage 6 : V, V+S, S+F or F+V).- When the alarm mode selected indicates thereis an incoming telephone call, lift the telephonehandset and answer the call. When you havefinished the call replace the handset and thealarm will be ready to indicate the next call.
9 - DIMMER SWITCH ( )
Adjust the brightness of the display by movingthe control at the rear of your Wake nShake GTI.
10 - VOLUME (VOLUME)
Sets the volume of the ring and the alarm sound.
8

11 - TONE (TONE)
Sets the tone of the alarm sound.
12 - SHAKER SWITCH ( - / + )
Sets the motion of the shaker to Lo (-) or Hi (+).
13 - BATTERY BACK-UP
It’s not necessary to insert a battery for theclock to function. With battery back-up installed,the clock will keep the time and alarm settings inthe event of a power cut or the AC adaptor beingunplugged.Check the battery condition after one year,replacing old battery. A leaking battery candestroy your clock.
9
10
GUARANTEE
From the moment your Geemarc product is purchased,Geemarc guarantee it for the period of one year. During thistime, all repairs or replacements (at our option) are free ofcharge.Should you experience a problem then contact ourhelpline or visit our website at www.geemarc.com.Theguarantee does not cover accidents, negligence orbreakages to any parts. The product must not be tamperedwith or taken apart by anyone who is not an authorisedGeemarc representative.The Geemarc guarantee in no waylimits your legal rights.
IMPORTANT: YOUR RECEIPT IS PART OF YOUR GUARANTEEAND MUST BE RETAINED AND PRODUCED IN THE EVENTOF A WARRANTY CLAIM
Please note: The guarantee applies to the United Kingdomonly.
Declaration: Hereby Geemarc Telecom SA declares that thisproduct is in compliance with the essential requirements andother relevant provisions of the Radio and TelecommunicationsTerminal Equipment Directive 1999/5/EEC and in particular ar-ticle 3 section 1a, 1b and section 3.
Caution: Radio frequency interference may cause discerniblesound on the unit. The sound will end when the interferencestops.

11
For product support and help visit ourwebsite
at www.geemarc.comtelephone 01707 384438
or fax 01707 372529

12

DESCRIPTION
Fonction sommeil / Flash
Indicateur des horaires d’après-midi
Indicateur de l’état de l’alarme
PM
AL
Tonalité de l’alarme
Alarme + sonnerie / Arrêt / Sonnerie
Arrêt de l’alarme pour 24H.
Réglage des heures et minutes
Réglage du vibreur Faible / FortSélection du mode alarme
Réglage de l’alarme
Réglage de l’heure
Volume de l’alarmeet de la sonnerie
(*) Adaptateur
Réglage de l’intensité lumineuse
(*) Vibreur(*) Entrée téléphone
(*) Classé TNT-3 selon la norme EN60950.
13

1(**) 230V
Prise PTT
Adaptateur
Vibreur
23
4
5
14
1 - BRANCHEMENT DU TELEPHONE
1 - Branchez le cordon PTT.2 - Branchez votre prise téléphonique dans laprise double PTT.3 - Branchez la prise double téléphonique dansvotre prise téléphonique murale.4 - Branchez le cordon de l’adaptateur secteur.5 - Branchez l’adaptateur secteur au réseauélectrique. (**)(**) Classé “tension dangereuse” selon la norme EN60950.
Raccordement électrique : l’appareil est prévu pour fonctionner uniquementavec l’adaptateur secteur 230V 50Hz fourni. (Tension classée “dangereuse”selon les critères de la norme EN60950).Par précaution en cas de danger, le bloc alimentation secteur sert de dispositif

de sectionnement de l’alimentation 230V. Il doit être installé à proximité dumatériel et être aisément accessible.Raccordement téléphonique : les tensions présentes sur ce réseau sontclassées TRT-3 (Tension de Réseau de Télécommunication) au sens de lanorme EN60950.
2 - REGLAGE DE L’HEURE ( )
- Appuyez et maintenez la touche .- Appuyez sur la touche H (heure) puis sur latouche M (minute) pour régler l’heure.- Relâchez la touche .- Un voyant s’allume sur l’écran près de l’inscrip-tion PM lorsqu’il s’agit d’heures de l’après-midi.
3 - REGLAGE DE L’ALARME ( )
- Appuyez et maintenez la touche .- Appuyez sur la touche H (heure) puis sur latouche M (minute) pour régler l’heure del’alarme.- Relâchez la touche .- Appuyez sur les touches , H et M pourremettre l’alarme à 12H.
15
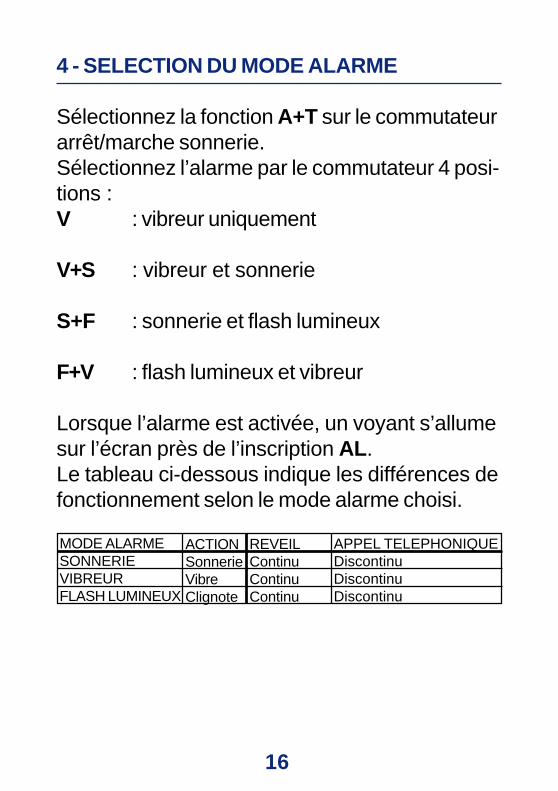
4 - SELECTION DU MODE ALARME
Sélectionnez la fonction A+T sur le commutateurarrêt/marche sonnerie.Sélectionnez l’alarme par le commutateur 4 posi-tions :V : vibreur uniquement
V+S : vibreur et sonnerie
S+F : sonnerie et flash lumineux
F+V : flash lumineux et vibreur
Lorsque l’alarme est activée, un voyant s’allumesur l’écran près de l’inscription AL.Le tableau ci-dessous indique les différences defonctionnement selon le mode alarme choisi.
16
MODE ALARMESONNERIEVIBREURFLASH LUMINEUX
ACTIONSonnerieVibreClignote
REVEILContinuContinuContinu
APPEL TELEPHONIQUEDiscontinuDiscontinuDiscontinu
5 - TOUCHE SOMMEIL ( )
Lorsque l’alarme est en fonctionnement, un ap-pui sur la touche arrête l’alarme pendant 9minutes. Les 9 minutes écoulées, l’alarme seremet en service. Après 2 heures, l’alarme estautomatiquement arrêtée.
6 - ARRET DE L’ALARME POUR 24H. ( OFF )
Appuyez sur la touche OFF, l’alarme est arrêtée.Elle se remettra en service le lendemain à lamême heure.Après 2 heures, l’alarme est automatiquementarrêtée.
7 - ARRET / MARCHE SONNERIE(A+T / OFF / T)
- A+T (alarme + téléphone) : alarme et détectionde sonnerie activés.- OFF : arrêt de l’alarme et de la détection desonnerie.- T (téléphone) : détection de sonnerie activée.
17

8 - FONCTIONNEMENT AVEC UN TELEPHONE
- Assurez-vous que votre téléphone fonctionnecorrectement et effectuez le branchement decelui-ci comme indiqué sur le shéma (p. 14).- Sélectionnez le mode alarme à l’aide du com-mutateur 4 positions.- Activez la détection de sonnerie en position-nant le commutateur A+T / OFF / T situé sur laface avant de votre Wake N Shake GTI sur laposition T (Téléphone) ou A+T (Alarme + Télé-phone).- Lorsqu’un appel téléphonique vous parvient,décrochez votre téléphone pour parler à votrecorrespondant.
9 - REGLAGE DE LA LUMINOSITE
DE L’ECRAN ( )
Réglez la luminosité à l’aide du commutateursitué à l’arrière de votre Wake n Shake GTI.
10 - VOLUME (VOLUME)
Réglage du volume de l’alarme et de la sonnerie.
18

11 - TONALITE (TONE)
Réglage de la tonalité de l’alarme.
12 - REGLAGE DU VIBREUR ( - / + )
Réglage Faible (-) / Fort (+) du vibreur.
13 - PILE DE SAUVEGARDE
La pile n’est pas nécessaire au fonctionnementde votre Wake n Shake, elle permet simplementde sauvegarder l’heure et le réglage de l’alarmeen cas de coupure secteur.Vérifiez l’état de la pile au moins une fois par an.
19

GARANTIE
Cet appareil est garanti 1 an pièces et main-d'oeuvre. La dated'achat figurant sur le ticket de caisse fera foi. Cette garanties'exerce sous réserve d'une utilisation normale de l'appareil.Les dommages occasionnés par les surtensions électriques,la foudre ou par un choc sur l'appareil ne peuvent en aucuncas être couverts par la garantie. En cas de problème fonc-tionnel et avant de nous retourner votre appareil, contacteznotre service après vente de : 8h30 à 12h30 et de 14h00 à17h00 du Lundi au Jeudi et de 8h30 à 12h30 et de 14h00 à16h30 le Vendredi.
DECLARATION : Ce produit respecte les exigences de com-patibilité électro-magnétique et de sécurité électrique deman-dées par la directive européenne RTTE.
Par ailleurs, il est compatible avec les différents réseaux télé-phoniques européens (normes TBR21/37/38).
20

Parc d’Activités du Basroch2, rue Galilée
59760 Grande SyntheTEL. SERVICE APRES VENTE :
03 28 58 75 99www.geemarc.com
21