Lacrosse Field Guides - Mira Costa High School Mustangs ... · Positions on a Girls' Lacrosse Team...
67
Girls Lacrosse Field Guide A collections of articles about Lacrosse In this guide I have collected Internet articles that I feel would be handy for leaning the game of Girls Lacrosse. Bruce Difley 11/2/2010
Transcript of Lacrosse Field Guides - Mira Costa High School Mustangs ... · Positions on a Girls' Lacrosse Team...

Girls Lacrosse Field Guide A collections of articles about Lacrosse In this guide I have collected Internet articles that I feel would be handy for leaning the game of Girls Lacrosse. Bruce Difley 11/2/2010

Table of Contents How Women’s Field Lacrosse Differs from Men’s Field Lacrosse ............................................................ 5
Part of the Lacrosse For Dummies Cheat Sheet ................................................................................... 5
Positions on a Girls' Lacrosse Team .......................................................................................................... 6
Goalie .................................................................................................................................................... 6
Point ...................................................................................................................................................... 6
Cover point ............................................................................................................................................ 6
Third player ........................................................................................................................................... 6
Left and right defensive wings .............................................................................................................. 7
Center .................................................................................................................................................... 7
Left and right attack wings .................................................................................................................... 7
Third home ............................................................................................................................................ 7
Second home ........................................................................................................................................ 7
First home ............................................................................................................................................. 7
Getting in Gear: Lacrosse Equipment ....................................................................................................... 9
What all players use ...................................................................................................................................... 9
What boys wear ............................................................................................................................................ 9
What girls wear ........................................................................................................................................... 10
What boys' and girls' goalies wear .............................................................................................................. 10
What parents usually provide ..................................................................................................................... 10
Becoming a Better Lacrosse Player ......................................................................................................... 12
Stretching to be your best .................................................................................................................. 12
Running ............................................................................................................................................... 12
Weight training ................................................................................................................................... 13
Mentally preparing for lacrosse .......................................................................................................... 13
10 Important Girls’ Lacrosse Rules for Beginners ................................................................................... 15
Girls' Lacrosse Coaching: Tips for Offensive Success .............................................................................. 17
Stepping onto the Lacrosse Field as Coach ............................................................................................. 19
Planning and executing practices ........................................................................................................... 19
Handling game‐day duties ...................................................................................................................... 19

How to Play Attack/Midfield in Girl's Lacrosse ....................................................................................... 21
How to Run the Motion Offense in Lacrosse .......................................................................................... 25
Instructions ......................................................................................................................................... 25
GENERAL OFFENSE RULES ........................................................................................................................... 26
Teaching Zone Defense ........................................................................................................................... 29
How to Play Girls’ Lacrosse Defense Effectively ..................................................................................... 35
Girls’ Lacrosse Defense: To Check or Not to Check? .......................................................................... 36
Girls’ Lacrosse Defense: Dictate Attacking Movement ....................................................................... 36
Girls’ Lacrosse Defense: Hold the Rope ............................................................................................. 36
Playing Goalie in Girls' Lacrosse ........................................................................................................ 38
"Crossing The English Channel" .............................................................................................................. 40
Jailbreak Lacrosse Drill ............................................................................................................................ 41
Star Drill ...................................................................................................................................................... 43
Star Drill ...................................................................................................................................................... 43
Learn How To Scoop ................................................................................................................................... 43
Quick Stick ................................................................................................................................................... 44
FOOT WORK ................................................................................................................................................ 44
Learn How To Cradle ................................................................................................................................... 45
Shoot and Score .......................................................................................................................................... 46
Obstacles ..................................................................................................................................................... 46
Steal the Bacon ........................................................................................................................................... 46
Give and Go ................................................................................................................................................. 47
Bowling........................................................................................................................................................ 47
The Weave .................................................................................................................................................. 47
Relays .......................................................................................................................................................... 48
Against the Wall .......................................................................................................................................... 48
Rapid Fire .................................................................................................................................................... 48
One‐on‐One ................................................................................................................................................ 49
Line drills ..................................................................................................................................................... 49
Passing/Clearing Drill .................................................................................................................................. 50
Pivot Points ................................................................................................................................................. 51
Walking triangle .......................................................................................................................................... 51

Fake the bucket ........................................................................................................................................... 52
Color Drill .................................................................................................................................................... 52
Hand Toss .................................................................................................................................................... 53
Wall Drill ...................................................................................................................................................... 54
Goalie Wall Drill .......................................................................................................................................... 55
Switching Hands .......................................................................................................................................... 55
The Iron Crosse ........................................................................................................................................... 56
Touchdown Drill .......................................................................................................................................... 57
Bucket Relay Cradle ............................................................................................................................ 57
On the Run ............................................................................................................................................ 57
Ground Ball Hoop ................................................................................................................................. 58
Switching It Up ...................................................................................................................................... 58
How to Take a Draw in Girls Lacrosse .............................................................................................. 58
Tips .................................................................................................................................................... 59
edit Warnings .................................................................................................................................. 59
The PEP Program ..................................................................................................................................... 59
The PEP Program: Prevent injury and Enhance Performance ............................................................ 60

How Women’s Field Lacrosse Differs from Men’s Field Lacrosse By James Hinkson and Joe Lombardi
Part of the Lacrosse For Dummies Cheat Sheet
Women’s field lacrosse is exploding in popularity — there are three times as many women’s collegiate lacrosse programs today as there were in 1990. The women’s field game differs from the men’s field game in some critical ways:
• Physical contact: The main difference between men’s and women’s lacrosse comes down to contact. In the men’s game, body-checking is legal — and encouraged (especially by coaches) — while in the women’s game, it is not. As a result, there is far less protective equipment in the women’s game: Men wear helmets, mouth guards, gloves, shoulder pads, elbow pads, and often ribs pads, whereas women wear mouth guards and protective eyewear, but (with the exception of goalies) no helmets or padding.
• Number of players: In the men’s game, ten players are on the field — three attackmen, three midfielders, three defensemen, and a goaltender. In the women’s game, there are 12 players on the field — offensive players (first home, second home, third home, and two attack wings) and defensive players (center, two defensive wings, point, cover point, third man, and goalie).
• Sticks: Unlike men’s lacrosse, mesh is not permitted for the pockets of women’s sticks; the pockets must be strung in the traditional way. Also, the top of the ball must be above the sidewall when it’s in the pocket. As a result, stick handling and shooting are more difficult in the women’s game.
• In addition, the standard stick length in men’s field lacrosse is 40 to 42 inches from the end of the head to the end of the handle; sticks for defensive players (as well as one midfielder) can measure 52 to 72 inches in length, and the goalie’s stick can be 40 to 72 inches long. Women’s lacrosse sticks must measure 35½ to 43¼ inches in length; the goalie’s stick must measure 35½ to 48 inches in length.
• Field size: In men’s lacrosse, the field measures 110 yards long and 60 yards wide. In women’s lacrosse, the field is a bit bigger: 120 yards long and 70 yards wide.
Read more: http://www.dummies.com/how‐to/content/how‐womens‐field‐lacrosse‐differs‐from‐mens‐field‐.html#ixzz13mueAPMS

Positions on a Girls' Lacrosse Team By National Alliance for Youth Sports and Greg Bach
One of the significant differences between girls' and boys' lacrosse is that more players take the field in a regulation game on a girls' team. The following are the positions in the girls' game and the responsibilities that go along with them.
Goalie
The primary role of this position is keeping balls out of the net. A goalie must be quick on her feet and willing to go after loose balls around the crease area. The more confident your goalie is, the more effective she'll be at turning away the different types of shots she'll face.
Point
After the goaltender position, point is the most defensive-oriented position on the field. The player handling this position works closely with the goalie, communicating what the opponent is doing and orchestrating where players need to be on the field to counter the attack.
Your point player must be a good communicator to help prevent defensive breakdowns from occurring. Because the point player doesn't stray far from the net, she's often in position to intercept passes to the middle of the field while defending an attack.
Cover point
This player's main task is to cover the opposition's second home. Good footwork is an asset for excelling in this position because the player must stick with the opponent to deny passes and shots on goal.
The cover point player is also relied on to make clearing passes, so she must be proficient at catching passes from the goalie and quickly turning upfield to look for teammates who can receive the ball.
Third player
This player's key responsibility is covering the opposing team's third home. Important attributes for doing well in this position are good reflexes, the ability to read the opponent's attack, and the ability to jump into the passing lanes to intercept balls.

Left and right defensive wings
These positions require substantial running, as the players' primary responsibility is to guard the opponent's left and right attack wings.
Center
This position is a magnet of activity on both offense and defense. Because the position requires strong play both with and without the ball, as well as a variety of other skills, the team's best player usually handles this position.
The center patrols the middle of the field. When her team has control of the ball, she looks to step up into the action, where she can feed the ball to the first, second, and third home players. When her team is on defense, she retreats to her team's defensive half of the field, providing coverage against the opponent's center, disrupting the passing lanes, and looking to intercept balls delivered by the attack wings.
Left and right attack wings
These positions cover a lot of territory as the players carry out supportive roles at the offensive end of the field — most notably, feeding the ball to the players manning the first, second, and third home positions. They also must hustle back on defense to help out the left and right defensive wings.
Third home
A team's offensive prowess is enhanced whenever its third home player is an efficient passer. She can feed the ball to the first and second home players, as well as the right and left attack wings. She also takes shots on goal when scoring opportunities arise and creates openings for herself to shoot or pass.
Second home
This position is similar to the point guard position in basketball, because the second home orchestrates the offense and makes the passes that help the offense run smoothly and effectively. In lacrosse, this player should be an excellent ball handler, because she'll likely have the ball on her stick more than most of the other players.
The offense will be more difficult to defend if the second home player is a threat to score goals, too.
First home
This position represents the most offensive play on the lacrosse field. The first home's main responsibilities are to score goals and to deliver accurate passes to teammates who are in scoring position.

To excel in this position, a youngster must be quick and have sound ball-control skills.
Read more: http://www.dummies.com/how‐to/content/positions‐on‐a‐girls‐lacrosse‐team.html#ixzz13muW5uhw

Getting in Gear: Lacrosse Equipment By National Alliance for Youth Sports and Greg Bach
The physical nature of lacrosse requires players to wear a wide assortment of protective gear. To do its job, the equipment must be in good condition, meet appropriate safety standards, and fit the youngsters properly. The following sections examine the different types of equipment used in boys' and girls' lacrosse.
What all players use
Players typically use the following equipment when they take the field:
• Stick: Sticks come in a variety of lengths and styles. Check with your league director to determine whether any specific styles are required.
• Mouth guard: This guard protects valuable teeth (and helps save parents from taking their children on unwanted trips to the dentist for repairs).
• Shoes: Check with the league director regarding the types of cleats that are allowed, and let parents know so they can purchase the correct shoes for their child.
• Gloves: Gloves help players hold on to the stick and also protect their fingers and hands from the ball or other sticks. Some girls' leagues don't require players to wear gloves.
What boys wear
Here is a rundown of the equipment that boys wear for lacrosse:
• Lacrosse helmet with face guard: The helmet and guard protect a player's head and eyes. All helmets and face masks should be approved by the National Operating Committee on Standards for Athletic Equipment (NOCSAE).
• Shoulder pads: As the name implies, these pads protect the shoulders.
• Elbow pads: These pads protect the elbows when players fall or get knocked down.
• Rib pads: Rib pads usually are optional at the younger levels of play but are recommended to help protect kids' ribs from being whacked.
• Cup and holder: These pieces are appropriate for older players and cost about $10.

What girls wear
Here is a look at the equipment that girls wear for lacrosse:
• Lacrosse goggles: Goggles protect the eyes. They feature an eye shield and a band that wraps around the back of the player's head to hold them in place.
• Sports bra/support bra: These items are appropriate for older players.
What boys' and girls' goalies wear
Because goalies have to face a ball that's being shot at them, they wear some different protective equipment, in addition to some of the pieces detailed above, to help them play their positions safely:
• Chest protector: This garment protects the player's upper body.
• Shin guards: These items are worn to protect the shins.
• Knee pads: Knee pads come in handy, because goalies often must drop to the ground to block shots.
• Goalie stick: These sticks are larger than the other players' sticks, which helps the goalie block the opposition's shots.
• Helmet: In both boys' and girls' lacrosse, goalies wear helmets with a throat protector.
What parents usually provide
Because every lacrosse program is different, check with your league director in advance to find out what equipment it provides and what the parents need to purchase. Parents typically provide the following items:
• Water bottle: Each player should bring a clearly labeled water bottle to practices and games.
• Mouth guard: Coaches can request that parents purchase the same color to help promote team unity.
Make sure that parents understand that they're responsible for purchasing certain items before your first practice. You don't want kids showing up without mouth guards — and being forced to watch from the sidelines — because their parents thought you'd be handing them out. Read more: http://www.dummies.com/how-to/content/getting-in-gear-lacrosse-equipment.html#ixzz13mv72JKA


Becoming a Better Lacrosse Player To play lacrosse successfully, you need physical qualities, such as strength, endurance, quick-as-a-cat agility, flexibility, and quickness. In this article, you'll discover how to improve these qualities and how to get into shape to be a better lacrosse player (hopefully, so you'll stay injury-free — injuries can make or break a season).
Lacrosse players are among the fittest athletes in the world. They must have speed and quickness, plus strength in their upper body to take all the pounding in a box lacrosse game, whether it's a cross-check, a body check, or a crunch into the boards. You should do your best to be in game-ready shape when your team gathers to start workouts for an upcoming season. These training camps don't always focus on getting into shape; instead, they concentrate on skills and team play.
Here are a few more things to keep in mind as you get in playing shape:
• No rest for the weary, so train to minimize weariness. The nature of a lacrosse game consists of endurance running, short bursts of speed, stop‐and‐start running with high intensity, and a lot of body and stick contact thrown in, with only brief rests on the bench while waiting for your next shift.
• Practice sprint marathoning. Lacrosse players have to run shorts bursts of speed over a long period of time, so players have to train for both types of running.
• Even a flat surface has its ups and downs. In a lacrosse game, if you're in shape, you feel like you're running downhill; if you're not in very good shape, the game feels like drudgery, and you feel like you're running uphill.
Stretching to be your best
As with any physical conditioning, your best workout is only as effective as your best pre-workout stretch. Stretching helps to reduce strains, sprains, spasms, and the muscle tears that happen when muscles are tight and inflexible. Stretching also helps prevent injuries common to running, such as pulled muscles, shin splints, hamstring pulls, ankle sprains, pulled groins, and Achilles tendonitis. Stretching before and after practices and games will keep you flexible — it reduces muscle tension by increasing your range of motion, which makes you a better lacrosse player.
Running
You have to run both long and short distances in lacrosse. All that running requires you to stay in running shape with long-distance conditioning, spring conditioning to increase speed, and endurance training. While you can run for game-shape conditioning at any time during the year, long-distance and endurance training are best reserved for the off-season or during preseason training, and conditioning for speed is ideal for in-season workouts.

Usually, a good long distance run lasts from 12 to 15 minutes. To increase speed efficiency, stress short strides to begin with, starting with running on your toes and the middle of your foot, but then generate more speed by opening up your stride (thus increasing your stride length and moving your legs faster).
Endurance, or interval, training during the season can be tailored to your lacrosse practices. Focus the workouts on simulating lacrosse game conditions — that is, going for short intensive spurts of activity before a period of rest. Box lacrosse players play in shifts and each shift requires continuous bursts of speed over short distances with little recovery time. The shorter your workout period, the higher its intensity should be.
Weight training
Strength is one of the keys to success in lacrosse, and strength can be best developed through a properly organized weight-training program. Players are hit into the boards going after loose balls; they are cross-checked hard across their upper body and arms to stop them from going to the net; they are slashed by a lacrosse stick to steal the ball; they are stopped from cutting into the middle of the floor to score. In all these situations, weight training will help players improve their performance by increasing their endurance, their flexibility, their agility, their running speed, and their overall physical strength. Weight training also helps to prevent injuries.
As with any training that you take on, keep a record or chart to gauge your progress, as well as to motivate you to greater heights.
Mentally preparing for lacrosse
Being in game-shape includes a mental challenge for lacrosse players. You should be able to stay in the "zone" that encourages great performance. Here are a few tips to get started:
• Be positive. Lacrosse is, after all, a game, and your mental attitude toward it should be a positive one. Remember, too, that it's easy to stay positive when you're winning; the tough part is staying positive after losing or after making mistakes. It's all part of the lacrosse learning curve.
• Accept the challenge. Look forward to each upcoming game, to the challenge of the opponent (both your team's opponent and any particular individual opponent you have in mind), and to the fundamentals of the conflict ahead.
• Plan for success. Find a lacrosse player who anticipates that each game will be a good game, and you'll find a successful lacrosse player.
• Use your nervousness. You should try to calm and quiet your mind before the game. However, it's also okay to feel a little bit nervous (but not overly so). Use your nerves to help you get physically energized and ready to play; let your mind keep things loose.
• Have fun. Lacrosse is a game. Enjoy yourself.

The result of these good feelings is that you get into what is called the zone. Being in the zone means that you play alert and can anticipate things before they happen — all the activity around you seems to happen in slow motion. Your mental focus is totally absorbed in playing the game and blocking out all distractions. You play with self-confidence, and you're emotionally controlled. Being in the zone helps you play the game effortlessly, and you react by instinct.
Read more: http://www.dummies.com/how‐to/content/becoming‐a‐better‐lacrosse‐player.html#ixzz13muxrg7w
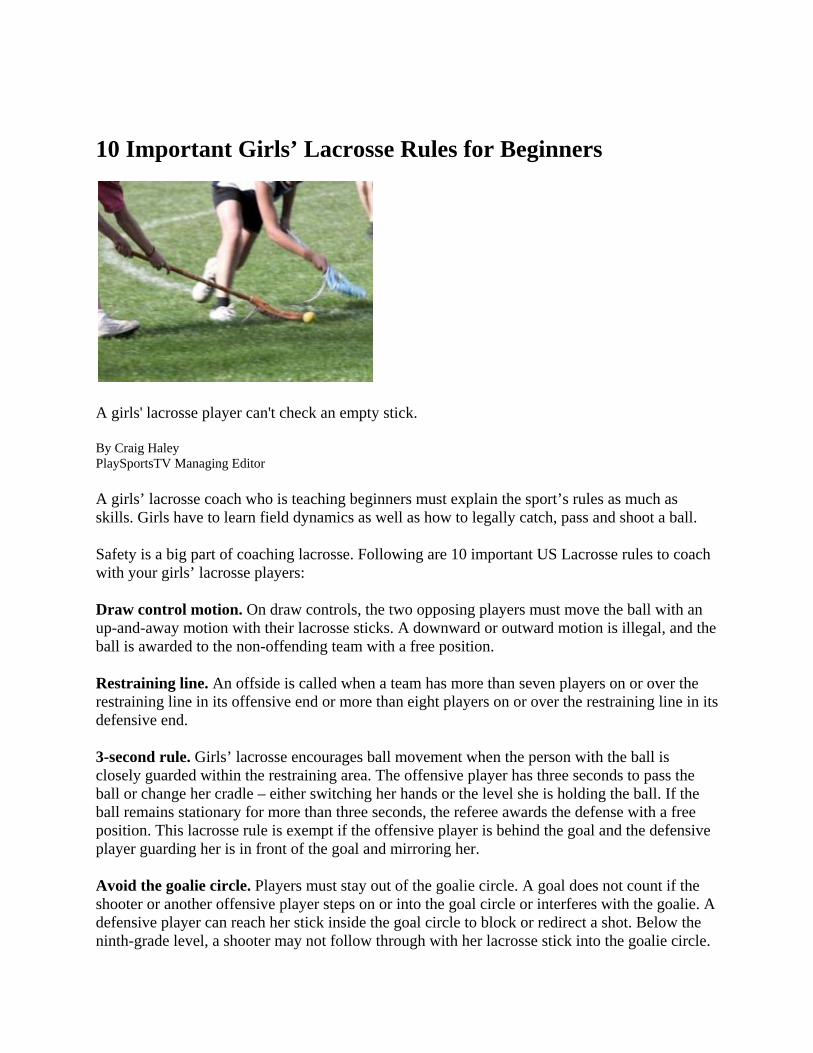
10 Important Girls’ Lacrosse Rules for Beginners
A girls' lacrosse player can't check an empty stick.
By Craig Haley PlaySportsTV Managing Editor
A girls’ lacrosse coach who is teaching beginners must explain the sport’s rules as much as skills. Girls have to learn field dynamics as well as how to legally catch, pass and shoot a ball.
Safety is a big part of coaching lacrosse. Following are 10 important US Lacrosse rules to coach with your girls’ lacrosse players:
Draw control motion. On draw controls, the two opposing players must move the ball with an up-and-away motion with their lacrosse sticks. A downward or outward motion is illegal, and the ball is awarded to the non-offending team with a free position.
Restraining line. An offside is called when a team has more than seven players on or over the restraining line in its offensive end or more than eight players on or over the restraining line in its defensive end.
3-second rule. Girls’ lacrosse encourages ball movement when the person with the ball is closely guarded within the restraining area. The offensive player has three seconds to pass the ball or change her cradle – either switching her hands or the level she is holding the ball. If the ball remains stationary for more than three seconds, the referee awards the defense with a free position. This lacrosse rule is exempt if the offensive player is behind the goal and the defensive player guarding her is in front of the goal and mirroring her.
Avoid the goalie circle. Players must stay out of the goalie circle. A goal does not count if the shooter or another offensive player steps on or into the goal circle or interferes with the goalie. A defensive player can reach her stick inside the goal circle to block or redirect a shot. Below the ninth-grade level, a shooter may not follow through with her lacrosse stick into the goalie circle.
Free position or indirect free position. The penalty for fouls is a free position. When a team is awarded the ball after a foul, the player can run, pass or shoot it. However, an indirect free position is awarded for minor defensive fouls inside the 12-meter fan, and the player who restarts the ball can’t shoot until a defensive player or a teammate touches it. Only a goalie can take a free position within the 8-meter circle and no free position can be taken within four meters of a field boundary.
Major or minor fouls. All players must stand at least four meters away from the player restarting a free position or indirect free position. On a major foul, the offending player must stand four meters behind the player taking the free position. On a minor foul, the offending player stands four meters away in the direction from which she approached before committing the foul.
Empty stick check. A girls’ lacrosse player can’t check another player’s stick that isn’t in contact with the ball. This applies only when the opponent could have gained possession of the ball.
Offensive charging. A girls’ lacrosse player with the ball cannot push into a defensive player who has established position. This major foul often occurs within the 12-meter fan when a player is going toward the goal.
Dangerous propelling. A player cannot maneuver the ball in her lacrosse stick in a dangerous manner and without regard to the people around her.
Pick or screen? An illegal screen occurs when a player without the ball, by her positioning, forces an opponent to take another route. To be legal, the player must be set within the visual field of the opponent, allowing the defender time and space to change her direction.

Girls' Lacrosse Coaching: Tips for Offensive Success
Girls' Lacrosse Coaching: Tips for Offensive Success
By Anthony Coleman PlaySportsTV Contributor Through her lacrosse instruction, Julie Reisig tries to use a little bit of everything. The head girls’ lacrosse coach at Hightstown (N.J.) High School uses fast breaks, set plays and settled plays during a game with the purpose of scoring a goal. “I love to do things without pressure first,” Reisig says of implementing strategies during practices. “I can't really add pressure until they get the concept. “I usually will give them a visual on paper or a white board, then explain the concept we will be utilizing and then walk through it. Once they get it, I add pressure variables such as defenders and time constraints.” Perhaps the simplest forms of girls’ lacrosse offense is scoring on a fast break off the draw or in transition following a turnover. This is purely instinctive when the players are running hard to goal, utilizing passing and shooting skills learned through lacrosse drills. “If you do (take the ball hard to goal), you are likely to force someone to slide to the ball to help slow down the forward’s momentum towards the goal, thus leaving another attacker open for a pass and a shot on goal,” Reisig says. To implement this in practice, her girls’ lacrosse team starts with a draw or a manufactured turnover or interception. Reisig prefers using a scramble. “Another thing to do is practice from a 'scramble', where the kids don't know who is going or how many until the whistle blows,” she says. “The kids, tapped by the coach, run out on two teams. First to ball goes to goal. I love that, because it forces them to work hard to come up with the ball and communicate. I get more talking on that drill than anything.’’ Since girls’ lacrosse does not have the physical contact of boys’ lacrosse, many set and settled

offensive plays start with the ball behind the net in the lacrosse stick of a feeder. The feeder’s job is to get the ball to an attacker cutting towards the goal since the goalie will be playing facing the feeder with her back to the attackers. Stacks are just vertical lines of people, in no particular order, which cut in either a random or pre-determined pattern across the circle, hoping for a feed from behind the cage or somewhere else on the arc, from a feeder. “It makes the defenders chase the cutter and causes confusion, because (the stackers) sometimes go all at once or in rapid succession,” Reisig says. “Defenders have to make a decision as to which girl to cover, so there is room for exploiting a mental error on the defender's part or a hesitation of any kind.” Muddles look like a blob or an amoeba. They don't give a clear indication of who will cut first. “I think they just cause more confusion for the defenders,” Reisig continues. “Girls will call a play, get in the muddle and then make either random or pre-determined cuts, hoping for a quality feed if they lose their defender.” Stacks and muddles sometimes allow a team to switch the matchups since teams are most likely to place their best defender on the best offensive player. Reisig said lacrosse coaches have to make sure the defense communicates with each other by saying, “I’ll take first (cutter); you take the second cutter.” Having girls practice on the fan without defense will allow players to gain a sense of where they have to go on the cuts. After understanding the concept, coaches can add defenders, which then will force the players to adjust their cuts to the movement of the defense. This is a where lacrosse drills such as passing and catching come into play. Using those skills to pass the ball around the perimeter in a slow manner is “designed to lull the defenders into a false state of security and then take the best calculated matchup.” An impatient defense could be forced to come out farther from the arc to contest passes or pressure the attacker. The offense can take advantage of the numbers if the attacker beats that defender. Reisig gives an example of one her team’s set play Hightstowns. “We had another where everyone would get on one side of the arc and run across to the other side at the same time, taking the defenders with them,” she says. “ Someone, who was a lefty, would cut back and receive a lefty pass from the feeder behind the net and shoot.”
###

Stepping onto the Lacrosse Field as Coach By National Alliance for Youth Sports and Greg Bach
Seeing kids running up and down the lacrosse field with smiles on their faces, watching them learn and improve skills, and helping them develop a love of lacrosse make all those hours you volunteer worthwhile. During your time with the kids, what you say to them and how you say it have significant impact on their experience. Based on your interactions with your players, you wield the power to fuel their passion for the game or to drive them away in disappointment.
Planning and executing practices Game day is what young lacrosse players look forward to most, but the bulk of their skill development takes place during practices, so you need to design quality practices and use drills that meet all the kids' needs and allow them to see improvement in their play. Well-planned practices pay big dividends in fun and player development, whereas those that are simply thrown together in a couple of minutes squash the team's potential.
To make each practice productive, keep the following tips in mind:
• Make the setting fun. The most effective practices are enjoyable; fun is emphasized, and mistakes aren't viewed as catastrophic. Let the kids know at the first practice of the season that mistakes are part of playing lacrosse and that everyone makes them. Make sure they all know that all you ask is that they listen to your instructions and give their all during practices and games. Kids who know that they can make mistakes without being humiliated or yanked out of the game will be much more relaxed on the field and will have much more fun. A relaxed atmosphere also helps the kids pick up skills faster and learn more aspects of the game.
• Be creative. When you're putting together drills, look for clever ways to enhance the fun. Visualize going through the drill, and ask yourself what would make it more interesting. Challenge yourself to run practices that the kids can't wait to get to. You want your players to have so much fun at practice that they hate it when the session comes to a close.
When you're putting together your practice plan, go with those drills that keep the kids on the move and that match their skill levels. Drills that force kids to stand in line or spend more time watching than participating kill energy levels, as well as sabotage learning, development, and that all-important fun factor.
Handling game-day duties Coaching a youth lacrosse team on game day is all about being prepared, adapting to ever-changing situations, and providing a constant source of positive motivation. You have to make a

wide range of decisions, often with little time to think about them and while juggling other issues. You have pre-game, halftime, and post-game talks to deliver; playing time to monitor; substitutions to make; and strategies to employ. Yes, game day brings a lengthy list of responsibilities, but don't lose any sleep over it.
Game day allows you to get across some important points beyond just using new lacrosse skills, such as working as a team, displaying good sportsmanship toward opponents and officials, abiding by the rules, doing their best at all times — and having fun regardless of the numbers on the scoreboard.
Read more: http://www.dummies.com/how‐to/content/stepping‐onto‐the‐lacrosse‐field‐as‐coach.html#ixzz13mvKUUBm

How to Play Attack/Midfield in Girl's Lacrosse originated by:Emily, Tom Viren, Zack, Ben Rubenstein
Know the attack positions.
• 1st Home: This position is closest to the opposing team's goal, and she is marked by the opposing team's Point defender. Her main priority is to score or open up scoring opportunities for her attack. She rarely has to play defense except when the opposing team's goalie is making a clear which happens after your teams shoots and the goalie makes a save, or if the opposing defense intercepts causing a turnover. Even so, 1st home never goes past the restraining line and pretty much never even comes close to the halfway line. 1st Home should have excellent stick work and be able to think fast and make decisions as to where to cut, how to dodge defenders, or whether to shoot or pass. Often she calls out pre‐planned offensive plays or picks. Being a superfast runner or having good endurance isn't necessary, but flawless catching and passing and excellent ambidextrous stickwork are important.
• 2nd Home: Along with first home, you help make things happen by goal. This position is second closest to goal and is marked by the opposing team's Coverpoint defender. Both home positions should watch out for these defenders who are oftentimes excellent stick checkers (depends on what level you are playing at too)and be able to focus and make smart decisions while under pressure. When your midfield or defense transitions the ball, you need to be ready to receive it and create passing opportunities. Nothing is more frustrating to a tired defender who has just done the work of preventing a goal, only to find that no one is open or ready to receive. This player should have good speed since she may do a lot of ball carrying towards goal.
• 3rd Home: This position is third closest to the goal and lines up with the opposing team's Third Man defensive player. She must be a very smart player ready to transition the ball from the defense or midfield and up to attack. This person should be physically very quick and great at explosive cutting and dodging. This position is more versatile then the others and sometimes if an attack wing (midfield) moves to a different role on the field the third home must see this and be ready to fill in her role.
TIP
• Don't be afraid of the ball. If you are, you will never be able to catch effectively, and if you can't do this you can't play the game. If you are currently afraid, it isn't hopeless. Go to a wall and throw hard against it with your stick. This will give you practice for catching hard passes that come; allowing the ball to hit you a few times will make you realize that it is deadly, in fact it gives you giant bruises and hurts so much!
• If the center attackman goes behind the goal, or next to it, chances are the defenders will not follower her, giving her a chance to back up goals.
• Communicate with the other players. • Make sure to spread out. Methods such as using the 12 meter line as a clock can help (12 o'clock
being directly in front of the goal). • The "breakaway" goal is something that should never happen to your team. This goal is
scored when a defender or other opposing player runs to goal with an unobstructed path

either because no one anticipated her running all the way to goal or because your team made critical communication mistakes. Although the homes don't typically make defense a priority, should a defender close to you receive the ball, call out "got ball!" unless some else already has and mark them, continuing to mark them even if it means going past the restraining line, until one of your defenders picks her up. Also remember that to avoid offensive off sides there must be at least 4 offensive players behind the restraining line in front of your own goal at all times.
• Sometimes there will be a time when people miss their shots. As a home, it is somewhat your duty to be behind the net, or nearby. If this occurs, be ready to SPRINT and recover the ball.
• When the centers start the game, right when the whistle blows move to open space. Often times, third home will run to foreward towards the center. Second and third home can split up and take different sides. Imagine alley ways, and each of the three get their own alley. Left, center, and right.

Offensive Drills [email protected]
University of New Haven
RLine Possession Drill
Four attackers and defenders match up at midfield between the restraining lines with a ball. Two more pairs of attack and defense match up down low, in front of the goal. On the whistle, the attack and defense in the midfield play possession within this space. At any time, the coach can blow the whistle, which signals the ball carrier to cross over the restraining line to fast break toward goal. Only the ball carrier and her defender can cross this line to create a 3 v. 3 fast break opportunity, which they play out until attack scores or possession changes.
• Shooting Box
Set players up in a box around the goal cage, 2 at the 20 yard line, and two more on the goal line extended with lines behind them. The four players must pass the ball around the box, each player touching the ball, before the last player can go to goal. The passing pattern goes diagonal to straight (up or down), diagonal and then straight up or down. The first pass should start at a different point each time, going in a clockwise pattern, to change the direction of the passing sequence. (Can also use five lines, and no pattern. Only rule is that every player must touch the ball, last player shoots.)
• Cut-Throat
Break the group up into 3 teams with one feeder at the restraining line. Two teams play within the restraining line to goal, while one waits at the goal line extended. If the attacking team scores, they run back to the restraining line to receive a new ball from the feeder, while the defense runs off and switches with the third team waiting at the goal line. Play then continues with the new team as defense. If the goalie makes a save, she clears to the defensive team who runs the ball to the restraining line, turns and becomes attack while the offensive teams switches out for new defense.
• 3 vs. 2 from behind
3 lines of attack behind cage player at X has ball. Two defenders on either side of the crease on the goal line extended. Make sure all three attackers start in a line, play begins with a pass from X to one of the wings and must be passed back to X. Attacker at X has the ball and must read the defensive slides to find open player or can drive to cage. Two

remaining attackers must sprint up and touch the “elbow” of the 8 m before they can become involved in the play. Ball carrier should look to attack one side of the cage while looking for other options created by their teammates and slides of the defense.
• Slow-Break Shooting Drill
4 players needed for each run of the drill. See set up below. X1 starts with a ground ball and a pass to X2. X4 is timing a quick cut up from the goal line to receive and turn to the outside of the field. On her turn, X3 times her cut behind the cage, receives and changes directions attacking the cage from the side she just came from. While X3 is changing sides, X1 is timing a cut into the 8M to receive for a shot. -----------X1-------------------------------------------
X2
X3 X4
• High Pressure Shooting Drill
See set up below. On a whistle coach/feeder at the top is looking to feed A1 on a curl cut into the 8. D1 is moving the same time A1 does looking to put pressure on the shot from behind. A1 is making a good cut in receiving and releasing the shot at a good angle, as quickly as possible to avoid being checked from behind. Repeat on the other side with A2 and D2. Be sure shooters are using the appropriate hand to receive and shoot. Feeder D2 A2 A1 D1

How to Run the Motion Offense in Lacrosse By an eHow Contributor
When run properly, the motion offense is one of the most effective systems in lacrosse. It confuses defenses, creates a balanced attack and gives you multiple options. With a little practice and imagination, your team can effectively be running the motion offense in a matter of weeks.
Read more: How to Run the Motion Offense in Lacrosse | eHow.com http://www.ehow.com/how_2292771_run‐motion‐offense‐lacrosse.html#ixzz13myPuF7v
Instructions
1. Form a triangle with the midfielders close to the top of the box. One middie needs to be in front of the net. Put another one with the attackmen, with one attackman behind the net, known as the X area.
2. Swing the ball around the perimeter to create offensive opportunities. Players should be reacting and moving according to where the ball is thrown.
3. Have players make tight V-cuts in and out of the middle of the box to draw defenders and create offensive opportunities. If each player has at least two options to pass to with the ball, then the motion is being run effectively.
4. Move as a unit. When a player makes a dodge and heads towards the goal, the other players must rotate to give him space and keep the field balanced.
5. One of the most effective motion plays is dodge-pass-pass-dodge. One midfielder jukes a defender and runs towards the net. Once defenders swarm to the carrier, he passes back out to the perimeter. They pass the ball to the other side of the field. This player then dodges the defender and shoots on the goal.
Read more: How to Run the Motion Offense in Lacrosse | eHow.com http://www.ehow.com/how_2292771_run-motion-offense-lacrosse.html#ixzz13myKged8

6 V 6 OFFENSE
Darryl Delia, Assistant Head Coach, Fairfield Lacrosse
GENERAL OFFENSE RULES
1) Make your defenseman play you and you alone at all times. Always keep moving so that he must focus his attention on you and not be in position to cover two men and help out his fellow defensemen.
2) Fire all your passes!!!!
3) Make all passes sharp and on the mark. Place them to the outside and away from the defenseman.
4) When carrying the ball, never stand still or jog. Move your feet at all times.
5) Move to all passes.
6) Stick protection is vital.
7) Always look for the give and go.
8) Never pass and stand. Always pass and cut.
9) Move the ball within two steps of picking up a ground ball.
10) Keep your spacing on the field.
11) Always balance up the field.
12) Make cuts full speed. Clear through once you do not get the ball.
13) Always run the picket fence when you are carrying.
14) Change of speeds, levels and angles are important.

Offense units should always have rules that they can incorporate into their 6 on 6 play. The rules that were previously discussed are mandatory for success and offensive flow. 1) Spacing- In every set it is vital that each player understands and recognizes proper spacing. 2) Timing- With every dodge, there is a good time to dodge and a bad time to dodge. Example: Starting the dodge when there is no backup or outlets. 3) Match Up- Although there is no such thing as a bad match up. It is important that you get the talented dodgers dodging. 4) Outlets- In every sequence it is important that you always have two outlets for the dodger. 5) Angles- We must always dodge with proper angles. Dodging from up top or the wing. 6) Off Ball- Movements off ball will lead to the success of the dodger as well as your team. 7) Beat your man- If the dodger can not beat his defender it will allow the defense to hold their slides. 8) Drawing the slide- This is of the utmost importance. Without this there will be no movement. 9) Vision- By dodging with your head up it allows you to see the open man. 10) Roll back- This is the most effective way to beat a defense. MULTIPLE FORMATIONS: The ability to switch formations allows you to disguise what you’re actually trying to accomplish. By starting in one formation and finishing up in another will confuse some defenses. It will also help with ball possession. CIRCLE FORMATION:

When running out of the circle set it allows the players to identify what your opponent’s slide packages are: NEAR MAN, ADJACENT OR CROSS CREASE. 1-3-2 to 2-3-1: 1-3-2 to 1-4-1: 2-3-1 to 1-4-1: 1-3-2 to 2-3-1: 2-1-3 to 2-2-2:

Teaching Zone Defense Why Play Zone:
Force a team to play together to beat you – this could be especially effective at the high school level where often times teams rely on one or two players to generate the bulk of their offense.
Multiple defensive looks – opportunity to double team is increased. Also you have increased opportunity to win ground balls dropped in the 8m.
If you have a good goalie and/or limited defenders – By playing a zone you attempt to limit the quality of shot by an opponent while hiding your weaknesses and not exposing your team to 1v1 scenarios.
Most importantly, allows you to FAST BREAK! Players are free to break out with out being matched up with an opponent right away. We have a fast team so we encourage a quick break out and chance to push the ball.
Introducing Zone;
Know WHY you want your team to play a zone. COMMIT the time to teaching it – we work on it for at least 15 minutes every
practice from day one. By teaching zone you are not only expanding the capability of your defense but
you’re helping your offense learn how to BEAT zone defense. Identify the strengths and weaknesses of the zone – “This is what we are taking
away and this is what we are willing to give up” o Giving up: outside lane shots o Taking away: the middle of the 8M – the “sweet spot”
Identify “vocal” leaders and “thinkers” and put them in key spots – the crease, rover, or top center.
Different types of Zone:
1-4-2 (Sagging Defenese)
• 1 = defender pressuring ball; 4 = defenders shelling the top of the 8M; 2 = low crease defenders
• Shell the 8M with 7 Defenders • Allows for maximum ball pressure which helps to disguise open looks in
the 8M. • 1 player is pressuring ball, 2 adjacents are stepping to ball, looking to
double on challenge while juggling cutters as well, 4 other players sagging toward ball to take cutters or help with a challenge.

1-3-1-2 (Zone w/ Rover)
• 1 = player pressuring ball; 3 = defenders shelling the top of the 8M; 1 = Rover; 2 = low crease defenders
• More conservative – completely focused on defending the 8M • 6 players (4 on top and 2 on the crease) shell the 8M and 1 player (the
rover) works just around the 8M, picking up cutters to allow shell players to get back to their spots faster.
• Rover position is very demanding – if you have a smart, athletic player who can handle chaos than try it.
• This zone does not require the extent of shifting and bumping of the other zone.
Getting into the Zone:
Option 1: Concede the midfield and drop in right away – a good option if you have slow midfielders and a weak goalie.
Option 2: Pressure to the 30 yd line and then drop in once the opponent has settled the ball. Must have attackers who will redefend. Zone starts with the low attackers. They buy time for defenders to get in position.
Practicing Zone: (many of these concepts are the same as player to player defense. Try to make this connection and Zone will not feel so foreign and uncomfortable)
Start with Passing off cutters – elbow to opposite crease • Need 2 defenders and 2 attackers, and a goalie. One attacker, standing at
the top of the 12M has the ball and will feed if the cutter is open for a pass in the 8M. Cutter goes ½ speed from the opposite corner to the crease. Defenders are working on perfecting the details of the handoff and not allowing for a open pass. If a pass gets in, play it out with a shot.. Defenders should take about 5 attackers through before switching in other people.
• Emphasize body position (defender plays ball side – not goalside- defense – They must get in front of the cutter and force her to change her cut rather than escorting her through the 8M), stick position (stick to stick – defenders must pass off by touching sticks), talk (got her, take her, etc. – make sure you emphasis LOUD talk and be sure they are using the names of their teammates and the right vocabulary) and returning to your zone quickly – without any hestitation..
Pinching In – work on doubling the challenge.
• Need 2 defenders and one attacker and a goalie

• Defenders are working on defending the drive. One defender greets the ball and forces her to the other defender – you must mark off the middle of the 8M with cones and limit the Attack to only challenging from the side of the 8M where the 2 top defenders are. This will force attack to challenge defenders and defenders must work on applying a good double team and pressure on the shot.
• Defenders adjacent to the ball must take a step towards the ball and away from the 8M. This puts them in the right place to help defend the drive.
• Important adjacents don’t drift from ball as they take cutters.
Crease to Elbow hand off • This is one of the weakest points in the zone – be sure it is a quick and
efficient hand off. • Start off with 2 defenders, 2 attackers and a goalie. Attack is working on
a crease roll from behind. Both attackers start behind the goal and one attempts a crease roll while the other makes a “follow me” cut. This will force your crease defender to get back once the hand off to the elbow defender has occurred. If she doesn’t get back in time, the following attacker will be able to sneak under the defense as an open player.
• Don’t want crease defender to get pulled up to the elbow – this takes total priority! Elbow players must prioritize this help and the defender next to them must recognize the situation and assist with cutters.
• You can add another pair of attack and defense. Have the third defender next to the elbow player and place the third attacker just off the elbow. When the crease roll happens and the elbow defender has to help, have the attacker on the wing cut through and tell the adjacent defender it’s her job to pick her up.
• This will help your defense recognize this play and will give them confidence to deal with it.
Finally, when you work in all seven defenders, you MUST put limitations on the
attack. • First they can ONLY perimeter pass. • Then, they are only permitted to cut from one elbow to the opposite
crease. This will help limit the confusion for the defense and also build their confidence.
• The confidence of the defensive unit it key to their success. They are only as good as they think they are.
Be prepared to stop the action and discuss issues. Zone defense requires defenders to make decisions and the more they understand how to manage all of the confusion by prioritizing certain things they will be a better defense. For example, ball has to be the #1 priority – defenders when they first start will often leave their ball responsibility to pick up an open cutter – you must address this. Also, encourage them to stay on double teams when they occur. If an attacker challenges, is doubled by the adjacent zone defender and starts to back out, tell

defenders they must stay on the double team and apply lots of pressure. This is where the zone pays off in creating opportunities for maximum pressure and possible turnovers. TENETS of the Zone:
Sticks up – take away the space: important visual cue to the offense. Also asserts the attitude of the defense and can be intimidating. It literally can make someone seem covered when really a defender might be a step behind.
See Ball, See Zone – Swivel head mentality. Very critical skill – must always be
looking around and evaluating danger.****I cannot emphasize this enough. If players struggle with this skill, you will see constant back door cuts – work with defenders to constantly check ball, check cutters***
Cover the Crease – low defenders are key to making the Zone work! They not only
take care of crease challenges but they are relied up to be mini-rovers: that is to take all of the cutters from the top so that top defenders can get back to their zones. They are also CRITICAL to the collapse when the ball does get inside the 8M. Low D has to be very careful that they don’t ball watch – need to be aware of players behind the goal and not get back doored by these cutters.
***CUT THE CUTTER*** This is the single most important skill you can teach your
high school players. Virtually zero first-years in college are capable of doing this skill to the extent that we ask them. It is the most critical factor in asserting the power of the defender and dictating the play! (This skill is explained in the body position part of practicing the zone).
Shift Ball Side as Zone – important to overload to the ballside so that there appear to be
fewer options. If they do choose to skip pass you have plenty of time to adjust when the ball is in the air.
Bump – this is a movement of the zone that requires shifting to teammates zone areas.
This can happen if you’re pressuring the ball and you attempt to hand off and there is no one to hand off to - ie. Your adjacent has taken a cutter and vacated her zone. You must stay with ball and your teammate will recover to your spot. Requires extreme COMMUNICATION.
COLLAPSE – Hugely important – essentially why you play a zone. This skill ensures
that all shots will be contested to a certain degree. Players must collapse on opponents who have penetrated the “sweet spot” – the 8M – either by driving with the ball or receiving a feed. All seven defenders (or at least the four closest) must collapse and contest the shot, further diminishing the quality of the opportunity.
TRINITY ZONE DEFENSE: (1-4-2)

Zone Defense is about protecting the “SWEET SPOT” in the 8M Why we play zone?
• Forces a team to play together to beat us • Creates lots of ground ball opportunities • Most importantly…WILL ALLOW US TO FAST BREAK
How do we get into the zone?
• We will NOT concede the midfield to drop into zone • We WILL pressure to the 30 yd line and then drop in. (we will practice this)
Tenets of the Zone:
1. STICKS UP – TAKE AWAY SPACE 2. SEE BALL – SEE ZONE – AWARENESS (Swivel Head) 3. COVER THE CREASE – Low Defenders are Key to making the ZONE work!
4. SHIFT BALL SIDE AS ZONE – encourage skip pass
*when shifting, adjust when ball is in the air
5. CUT THE CUTTER – Deny cutters access to the 8M – change her cut!!
6. BUMP – If there is no one to pass off your cutter to – then BUMP (we will talk much more about this and when it’s appropriate)
7. COLLAPSE – this is critical to success of zone.
8. “If you see her, take her” – Don’t assume other people are covering open cutters!!
9. COMMUNICATION
“Big things are accomplished only through the perfection of minor details”
Take care of the details, Bants!!


How to Play Girls’ Lacrosse Defense Effectively
Playing defense in girls' lax has its challenges
By Anthony Coleman PlaySportsTV.com Contributor Girls’ lacrosse coach Brooke Crawford Record has a positive attitude when it comes to teaching players how to play defense. Defense in girls’ lacrosse is a difficult proposition because the offensive players have a great advantage. The slightest mistake by the defender in the offensive zone can lead to a score or an eight-meter free position shot on the goalie.
“It is difficult playing defense in lacrosse, but it’s not impossible,” says Record, head coach of the highly regarded Academy of Notre Dame (Pa.) girls’ lacrosse program.
“With the players we have, we tell them good defense starts with good footwork and body positioning and is not necessarily all about your stick and trying to strip the ball from the attacker. I think that is the wrong way to look at it. I think if you get good defensive positioning and you force them in a certain direction, one, the offensive player can take a bad shot or, two, wind up dropping the ball whether it is with good defense or a good double-team or will distribute (the ball) to somebody else who may or may not maintain possession. I think good defense starts with not good 1 v. 1 defense, but limits the attacker in what she can or cannot do.”
Record gets joy out of coaching lacrosse defense.
“Probably my favorite play to see is when someone is able to take a charge,” she says. “To me, that is sometimes even better than a great goal. Nothing is more exciting than causing a turnover. It’s harder to do. In high school lacrosse, there are about 15 goals in a game. To take a charge is a lot harder.
“To get a good double-team and come up with the ball, that doesn’t happen too often. That can be the spark that ignites a team. That allows the offense to have possession of the ball and score. To me, that is very exciting and very necessary. They say defense wins championships; that holds true in lacrosse.”

Girls’ Lacrosse Defense: To Check or Not to Check?
Whether to teach checking is perhaps the biggest decision a coach faces with defensive instruction. Trying to check the ball is the easiest way to commit a violation and leads to a free-position shot (thus placing extra pressure on the lacrosse goalie). Slashing or shots to the head are often the result, so it takes very skilled players to pull off the move legally.
“In terms of a philosophy, I don’t encourage my players to go for checks,” Record says. “Like I said, it starts with foundational footwork. You can use your stick to dictate and, if the check presents itself, to take the check but not committing body weight with that.”
Record has a warning for coaches who teach checking as a main defensive philosophy.
“(Officials) do call it a lot tighter (in high school lacrosse) than the college game,” she says. “In the college game, you are allowed some physical play whereas in the high school game, they are quick to call it if the stick goes horizontal and if there is any swinging involved, whether it’s over the head or too close to the face.”
Girls’ Lacrosse Defense: Dictate Attacking Movement
Record teaches “dictate attacking movement.” She believes the defender will have the advantage if she dictates the attacker’s movement instead of reacting to the attacker. For example, if the attacker’s dominant side is her right-handed shot, the defender will force her to the left. This will allow the weak-side help, slide or double-team to come from the defender’s right while keeping the ball on the attacker’s weaker left-handed side.
“If you can step up and force the attacker in a direction, dictate on the 1 v. 1 and dictate on the cutter, I think (the defense) feels a little more – not ownership – but feel more confident in their play,” she says. “They are able to control the attacking movement.”
Girls’ Lacrosse Defense: Hold the Rope
While one-on-one defense is key, Record coaches team defense. Her lacrosse players rely heavily on double-teams, slides, help and perhaps a second slide.
“You cover for one another,” she says. “We have a philosophy that we use called `hold the rope.’ Everybody holds the rope for one another. I think it is very applicable defensively, because you are there to cover. If one person gets beat, somebody else can slide – a better terminology might be `help’ – that defender.”
Obviously, 1 v. 1, 2 v. 2 and 3 v. 3 lacrosse drills are the best way to work on defense. In 2 v. 2 and 3 v. 3, the defenders have to work together. In 3 v. 3, the second defender is the help, while the third is the slide. At the same time, the initial defender is trying to dictate the attacker’s movement.

Record also works with defenders on being tight with the attackers and cutters who are off the ball. She teaches “stick on stick” to make sure the defenders are tight enough, because, “if you give them a couple of inches, they are good at catching and scoring. Again, you want to be tight on that person so you take away their cut so you are taking away their strong side.”

Playing Goalie in Girls' Lacrosse
Playing Goalie in Girls' Lacrosse
By Anthony Coleman PlaySportsTV Contributor Pam Edwards has been fortunate to find girls’ lacrosse players who enjoy playing goalie. The head coach of the Hopewell Valley High School girls’ lacrosse team in Hopewell, N.J., realizes the position isn’t always fun. There’s the helmet, the oversized lacrosse stick, balls whizzing at you at an unbelievable speed and from all types of angles. “I would say playing goalie is the toughest position,” Edwards says. “I think the goalie has to be a real, true team player, because not everybody wants to play goalie. It is a tough position. “In the middle schools, (goalie) is one of the harder spots to fill, because not everyone has a concept of what it is to be a lacrosse goalie. You have all of that equipment on. The ball is shot pretty fast. It’s hard as a younger kid trying to learn how to clear the ball (with the oversized head of the lacrosse stick). The toughest part about playing goalie is having a headshot taken at you and having that ball bounce off your helmet. The kids today can shoot the ball pretty fast.” So in finding the right player for the all-important position, Edwards looks for certain qualities. Edwards believes the goalie is the most athletic player on the field. So she begins by looking for the lacrosse player who displays the best agility, hand-eye coordination, reaction and footwork. The championship-winning coach works footwork, reaction and clearing lacrosse drills with her goalies — both with equipment on and off. As an example of reaction drills, the coach uses different color tennis balls and throws it at the player. The player must deflect a certain color while ignoring the others. In addition, lacrosse drills can focusing on defending specific shooting styles and angles — high shots, snap shots and shots coming around the crease — which aim to improve the goalie.

Girls’ lacrosse is different from boys’ lacrosse in the sense that if a defensive foul is committed in the offensive zone, the offense gets an eight-meter free position shot on the goalie (with no other defender within four meters of the shooter). In boys’ lacrosse, it is similar to ice hockey, where the defense plays a man down with a certain amount of time (depending on the severity of the penalty). Of all the sports which require a goalie, girls’ lacrosse gives the offensive player a greater advantage. So a goalie is going to give up some goals — in fact, a lot. A player must handle this mentally. “You definitely have to be mentally tough,” Edwards said. “They need to know they are going to get scored upon. A lacrosse goalie is going to get scored upon more so probably than in a lot of other sports because of the nature of the game.” Edwards feels the best way to approach it is to continually work with the goalie on lacrosse drills to better herself and attack weaknesses. “What you want to do is set goals, like increasing the amount of saves each time out,” she says. “If you get scored upon, OK, try to shut down that shot the next time down. But I also want them to know it was the team that was scored upon. We are a team, and everyone has a job to do.” Edwards also puts onus on the offense by stressing the importance of capitalizing at the offensive end, because at the other end, the opposing team will have a good chance of scoring, too. Also, girls’ lacrosse defenders should be drilled in the importance of coming up with groundballs as protection for their goalie.
###
For more great girls' lacrosse tips, check out PSTV's complete collection of girls' lacrosse videos.

"Crossing The English Channel" It's called "Crossing the English Channel" and it's a great way to improve your team's defensive body positioning and footwork.
Here's how it works:
Mark off a "channel" on the ground 10 yards by 20 yards with cones or lines.
Match your players into pairs and give 1 player in each twosome the ball, the other player is the defender and doesn't have a stick.
The player with the ball starts at one end of the channel.
The defender starts halfway across the channel, facing the ball carrier.
On the word "GO", the defender tries to close the gap between himself/herself and the ball while trying to force the oncoming ball carrier to their weak side, or to a sideline.
The ball carrier's goal is to make it across the channel without going out of bounds.

Jailbreak Lacrosse Drill This is a great drill to work on 6V6 in transition, ball movement and team defense in a fast paced fun drill. Special thanks to Head Coach Scott Marr from Albany!! I heard him talk about the drill in our podcast interview and had our kids doing the drill within a week. They loved it, and it enhances a lot of key transition skills or what he referred to as building "Anticipation" on both sides of the ball. This is a fantastic drill for players of all ages.
So often, we as coaches have a tendency to work in "Even" situations in kind of a static half-field scenario. I might even call it a little boring, but I do want to offend you this early in the article. This drill is more game-like (emulating game-like situations is critical for all our drills) in that, although it is a 6V6 Drill it begins in a transition setting and includes finding the ball, ground balls, transition offense and transition defense, and is a great way to include a lot of players in running, recognizing and conditioning.
It is basically a 6V6 Drill that begins at the Midfield Line. Six Offensive Players are lined up facing the offensive end or the cage and "behind" them are six Defensive players. Coach Marr has his defenders begin with their heads down so they are not aware initially of where the ball has been rolled or tossed by the coach. We actually had our defenders facing the coach, rather than the cage, so that their backs are turned to the action.
From the Midfield line, the coach tosses or rolls the ball into the offensive end. The offensive players all sprint into action on the toss or on a whistle. The offensive players need to first locate the ball. Then as an offensive player picks up the ground ball the others must identify appropriate passing lanes or open space. Coach Marr has his players drive or pass to an open man, and immediately initiate offense to the cage.
From the Midfield line about 3 yards behind the offensive players the defensive players also turn and sprint on the toss or on the whistle. Potentially, one of the defensive players may think that they can chase down the ground ball before the offense identifies the location, however, the drill is designed for the defense to first sprint to the "hole" then very quickly identify who is covering who, with strong communication.
Coach Marr talks a lot about anticipation, as both offensive as well as defensive players need to not only think quickly, but perhaps more importantly, think quickly as a unit. This entire drill is fast paced and designed to quickly go to the cage. Then the players on the field return via outside the action area to the midfield area, while another group of 6V6 is ready to go immediately. We usually run ours in 30 to 40 second maximum sessions or less and immediately get the next group in action.
A tip that worked better for us, (we like fast practices), was to have the next group line up immediately after the first group of 6V6 is in play, to keep it all moving quickly. Not time to talk or be bored.
We also had some fun by adding a few nuances to the drill. First and foremost we look for a quick pass or two passes to shoot. If the shot off a pass is not there, immediately we have the

offensive unit go to a 2-2-2 or 1-4-1, or my favorite, identify a match-up where we have shorty on a shorty and "Invert" to "X" and play. This is also done all in the 30-40 second interval (or less!).
In games, these types of "Jailbreak" hectic, unsettled scenarios, are where we often find the mismatch we wanted. But we need to quickly find it as a team and possibly exploit it before the defense can switch or get aligned the way they want to be aligned. But it really is tough to coach this from the sideline. So this drill can also be great for teaching players and getting the players thinking and identifying match-up opportunities via an "Invert" or a "Set."
When the offense does a great job of recognizing or creating space in an unsettled situation, make sure they are recognized. When the defense does a great job of keeping it together in the unsettled fast-paced 30 seconds, make sure they too are recognized. We also recommend not beating this drill to death, and keeping the entire drill in a 7-12 minute duration to keep the kids interested and engaged.
A drawing of this drill is on our site, Mike Muetzel is the founder of laxcoachmike.com. Coach Mike has over 30 years of experience with Boys Lacrosse, the 2007 US Lacrosse Coach of the Year in Georgia and a member of the Lacrosse Industry Council. He shares his experiences from State Championship games through coaching U13 in a community of lacrosse coaches getting better at coaching. This unique site features nationally recognized College and HS Coaches sharing their secrets with podcasts, articles, DVDs (Coaching U15 Lacrosse with College Drills), ebooks and download tools to help all lacrosse coaches improve.

Star Drill By: Maximumlax
This lacrosse drill is used to develop soft hands with regards to receiving and making passes. I usually have the girls NOT cradle the ball when catching and passing. This helps them concentrate on making quick passes and also helps them concentrate on the catch. I have noticed the tendancy among my players to do a quick hard cradle after they catch the ball and this drills helps them realize it is easier to catch and pass without a cradle in between. It also works as a quick stick drill. Have your players get into a star formation with 5 players. Have the players pass the ball around the star. Have your players count how many times there are successfull catches and passes. You can also have players waiting to step in and replace a player who has made a bad pass or catch. You will need one ball for the drill and also have a couple in the middle of the star for the ones that inadvertenly go astray... I use 5 players for each star and usually have 4-5 stars going at once. A variation is to have 2 ball going at once. Short passing skills are sharpened and so is the ability to catch a close in pass. Quick stick skills are also sharpenend is you tell the players they cannot cradle after a catch. A suggestion is to have the offense create stars and have the defense create their own stars. Have a competition of consective catches. You might be surprised when the defense wins a couple.
Learn How To Scoop By: LC
A lacrosse scoop drill for beginners. Need 1 Stick & Ball For Every 4 Kids This is the hardest lacrosse drill (although you’d think it was the easiest). It’s also one of the most important. I like to tell the kids the team that wins the most ground balls usually wins the game. Have the groups face each other across HALF of the gym floor. (Using the full gym floor won’t work with beginners.) The first kid rolls the ball (with his hand) to the kid in the other line who tries to pick up the ball as it comes to him. This is called picking up a ground ball or scooping a loose ball. The key to picking up a ground ball is (1) staying low to the ground with knees bent like you were picking up a grounder in baseball. The difference in lacrosse is you’ve got your right foot forward and left foot back if scooping with your right hand (similar to shoveling snow) and reversed if scooping with your left hand. One advanced variation would be alternating scoops with your right hand and left hand. Another advanced variation would be teaching the kids to scoop with the lacrosse ball rolling away from them. For beginners, it can’t be done. In this drill the second kid in line rolls the ball out for the first kid to chase down and

scoop from behind. (Use the full gym for this drill.) After scooping, the kid cradles the lacrosse ball and sprints to the end line. When he gets to the next line, he hands off the ball to the second kid in line who rolls it out for the first kid in that line. Both lines are facing each other and alternating the scoop drill. Good luck with this one, but remember it’s a lot of fun and extremely enjoyable for the kids. This drill continues for 10-15 minutes.
Quick Stick By: Unknown
This is a lacrosse scoring drill that's lots of fun, but in a game situation it must be used in only the most perfect of circumstances. There are many ways to lose possession of the ball doing a Quick Stick. There is one line at the top of the fan. One player or the coach stands behind the goal with all of the lacrosse balls. The players sprint one at a time straight toward the goal and the coach lobs a ball high just as the advancing player enters the arc. The player lets the ball sink lightly into his stick, after which he quickly whips it into the goal. There is no cradling, and the ball is never brought under full control. Make sure that the player's lacrosse stick does not enter the circle.
FOOT WORK By: Unknown
Drop a lacrosse stick on the ground and: 1) with the stick horizontally in front of you, step over the stick with one foot, then the next. Then step backwards with the next foot, and follow with the other. Basically, you're running in place very quickly, back and forth over your lacrosse stick. Make sure that you're knees are high. 2) with the stick still horizontally in front of you, squat down a little and slide to the side of the stick, step forward so you're in front of it, then slide to the other side of the stick and step back behind it. Repeat this so you're really just sliding around the lacrosse stick, but the squat position makes you're quads do a lot of the work and your constant forward position makes your feet get a great workout. 3) with the lacrosse stick vertically in front of you, jump over it with both feet, then again to the other side. It's like you're slalom skiing. Again, make sure that you're knees are high. 4) with several lacrosse sticks in front of you, line them up about a foot apart and step forward between the sticks with your knees as high as possible. It's like that drill you see football players doing stepping through tires. See what other drills you can make up using your stick to improve your footwork, for example:

Place the stick in front of you vertically. Stand at the bottom of the stick and jump (with feet together) forward, then over the stick, then back to the bottom, and then over to where you started. you are jumping in a box around your lacrosse stick (do these drills for about 1 minute).
Learn How To Cradle By: LC [Comments (1)]
Teach the basics first. Need One Stick And Ball For Every 8 Kids The kids are going to run with two hands on the stick and the ball in the stick. Some kids hold the stick up close to their head; some hold it close to their waist. Whichever way is most comfortable for them, just let them run and develop a feel for the ball in the stick. Kids should have one hand close to the head of the stick (top hand). The top hand grabs the stick with the palm facing up. The other hand (bottom hand) holds the end of the stick with the palm facing down. Cradling is the back and forth motion of bringing the stick from your waist up to your head and back down or bringing the stick from your right side across your body to your left side and back again. Have the kids try both cradling styles and EXAGERATE the motions. Have the kids try right handed and left handed cradles (by switching the top hand from the right hand to the left hand). Then have the kids start running and the cradling motion will feel natural for them. As the kids get better with practice, the cradling motion will get smaller and smaller – the arm will barely move and just the wrist of the top hand will move back and forth. The best beginner’s drill is to split into groups of four and have the groups face each other across the gym floor. Have one kid run to the other group and pass off the stick to the person in the front of that line. The first kid goes to the back of that line. When the second kid gets to the first group, he hands off the stick again and moves to the back of that line. That way, there will always be four kids in each group. This drill continues for 10-15 minutes. One advanced variation is to have the kids carry the stick in their right hand going one way and carry it in their left hand going back. Another advanced variation is to setup an obstacle course with cones and have the kids run through it. When finished, they hand off their stick to the next kid and move to the end of the line.
Article Source: http://www.sportspracticedrills.com
Shoot and Score By: Unknown
The first step is to position an attack man behind the goal and have a midfielder about 15 yards away. Have the midfielder throw the lacrosse ball to the attack man and have him run towards the goal. The attack man should give him the ball about five yards away from the goal and the midfielder should crank shot. This drill should be done 50 times a practice or until the midfielder can position the ball where he wants to in the net. The two players can switch roles half-way through - this will help them understand each other’s roles.
Article Source: http://www.sportspracticedrills.com
Obstacles By: Unknown
A cradling lacrosse drill. Make a line with about 10 players standing about 4 yards apart. The rest of the players line up with all the lacrosse balls. One by one, each player weaves in between the other players, back and forth, cradling from one side to the other. If the player is dodging a person to their left, then they cradle to the right and vice versa.
Article Source: http://www.sportspracticedrills.com
Steal the Bacon By: Unknown
A fun lacrosse drill for young players. A lacrosse ball is placed at midfield and the players are divided into two teams. Each team spreads out along opposing lines about 25 yards away from the ball (or around the circle). Each player has a number and the numbers on one team coincide with those on the other. The coach calls a number and the two players who have those numbers sprint for the lacrosse ball in the center. The player who picks up the ball must then cradle and cross his own line when a point is scored. Variations Call two numbers to have four players fighting for the lacrosse ball. Make the players pass once before they can attempt to score.
Article Source: http://www.sportspracticedrills.com

Give and Go By: Unknown
There are three lines at the 50 yard-line: two at center, and one a wing position. One of the lines in the center is for defensemen, the other center line starts with the lacrosse ball. The first player in the defense line comes out to about 10 yards in front of the first player in the ball line. The players start down the field toward the goal, and the defender attempts to check the center's lacrosse stick and to slow him down by body checking. Once the defender has been drawn closely to the player with the ball, and the center senses he's in trouble, he will pass it to the wing. The defense sprints to defend the wing, and when he has been drawn away, the wing will pass it back to center who has sprinted ahead for the goal. Variations Add a pivot point.
Article Source: http://www.sportspracticedrills.com
Bowling By: Unknown
A drill to practice picking up the lacrosse ball. There are two lines at the 50 yard-line and one person between them with all of the balls. The middle person rolls a ball out ahead of both players and the first players in both lines sprint for the lacrosse ball, bending deep to scoop it. Whoever comes up with the ball goes for the goal, while the other plays defense. This drill can also be done with the balls rolling toward the two players. The center person can either roll the ball straight through the middle, or to either side to compensate for the difference in speed between the two lacrosse players.
Article Source: http://www.sportspracticedrills.com
The Weave By: Unknown
A lacrosse passing drill. There are three lines of players (A, B and C) at the fifty yard-line facing the goal. The middle line (line B) is supplied with all of the lacrosse balls. The first players in each line start down the field, the middle line cradling the ball. Player B passes the ball to his left to player C, and runs behind him to take his place at the left wing position. When player C receives the ball, he crosses the field to pass to player A, then runs behind him to take the right wing position. When player A receives the ball, he crosses the field and passes to player B, then runs behind him to take his position, and player B crosses again to pass to player C.

Get it? It's hard to explain, but in broad terms, it's a lacrosse drill in which the attack wings making long, leading passes across the field while advancing toward the goal. The extra person just makes each line replenish itself. Variations Add 1, 2 or 3 defensemen Finish with a shot on goal
Article Source: http://www.sportspracticedrills.com
Relays By: Unknown
Lacrosse pick-up drill. There are four people in each line (make as many lines as you need). Four balls, each about 20 yards apart, are placed in front of both lines all the way up to the opposite end-line. When the whistle is blown, the first person in line sprints for the ball, picks it up and brings it back to his line. As soon as he has crossed the line, the next player sprints for the next lacrosse ball, scoops it up and brings it back to his line. This continues until the last ball has been brought back and the one who reaches the line first wins.
Article Source: http://www.sportspracticedrills.com
Against the Wall By: Unknown
A simple lacrosse cradling drill. Stand with your back to a wall and cradle. Try to make your lacrosse stick touch the wall on both sides without dropping the ball. This is a drill to practice keeping your stick vertical and to make sure you cradle completely from side to side.
Article Source: http://www.sportspracticedrills.com
Rapid Fire By: Unknown
About 15-20 lacrosse balls are lined up on the top of the arc. A player begins at one end of the line of balls (depending on whether he is right- or left-handed), and when the whistle is blown, he quickly scoops the ball and shoots at goal. He goes around the top of the arc, shooting each ball one by one.
If this lacrosse drill is done sloppily, it won't do much good. Make sure that each player bends low to get good control of the ball, takes a cradle or two and shoots accurately at the corners. Variations Put targets in the corners of the goals. Put a goalie in. Limit the time in which each lacrosse player has to shoot all of the balls. Shovel shots.
Article Source: http://www.sportspracticedrills.com
One‐on‐One By: Unknown
A lacrosse shooting drill. There are two lines: one at the 50 yard-line (A), and one behind the goal (B). Line B has all of the lacrosse balls. Player A runs toward the goal, and player B makes a long pass to him. Player B advances to defend player A after he catches the ball. Player A attempts to dodge and out-run the defender to score, while player B tries to check and body-check player A to prevent a goal. Note: Player B must defend closely to player A while in the arc to prevent a "blocking the shooting space" or "three seconds" call in a game. Variations Add more than one attack line and/or defense line Have the goalie make the initial throw Add a pivot point
Article Source: http://www.sportspracticedrills.com
Line drills By: Unknown
Lacrosse passing drill. Two lines face each other, the player at the head of one line has the ball. The first two players in each line run towards each other and the player with the lacrosse ball passes to the other. When the ball is received, the next player in the first line comes out and the ball is passed again. After

each player's turn is finished, they run to the end of the line to which they threw. Variations Add defense. After a player passes the ball, he immediately plays defense against the person he threw to. Underhand throws. Ground balls Left-handed Make more than one set of lines doing the lacrosse drill with 6 players to a set.
Article Source: http://www.sportspracticedrills.com
Passing/Clearing Drill By: LC
A passing and clearing lacrosse drill for goalies. What you need: Goalie Stick Gloves Helmet Brick Wall (Side of the Gymnasium at school is best) Procedure: Stand 20-25' away from the wall. Mark out a brick that is about eye level and straight in front of you. As you stand 20-25' away from the wall, start to wind up as if it were a clear and try to hit that brick you are aiming at. Remember to step into the pass for this will help your accuracy if your body is leaning into it. This is a clearing/passing drill and will help your aim and hand/eye coordination. The key is the brick being eye level and straight in front of you because if you don't, then the ball will just bounce in the complete opposite direction. You would like to be doing this at 75% power at first then as you continue to do better and are hitting the brick constantly, turn it up a notch. Continue this until you have a good feel for your stick's throwing capabilities. I suggest going on for about 2 hours. Remember, don't think about throwing the ball, just do it. You want to create some muscle memory for throwing the ball. This is essential to not worrying about thinking about throwing the ball or completing the pass. It is a work-out, trust me. Also, as the ball is returning, stop it like you would a save. This will help you learn to save, reset yourself, and clear: all of what goalies are expected to do. This is an excellent drill if you just restrung your stick and are unfamiliar with its characteristics.

Article Source: http://www.sportspracticedrills.com
Pivot Points By: Unknown
A pivot point is a spot where a lacrosse player will stop all forward movement with one foot forward and turn around by twisting his body instead of taking extra steps. If a player pivots on his left foot, for instance, he will stop with his left foot forward, and swing his cradle strong to his right, almost over his head, while twisting around and facing the way he came. Pivot points can be crucial in shaking a defender during a lacrosse game because the speed and direction is changed so quickly. Pivot points can be added to just about any lacrosse drill, especially relays.
Article Source: http://www.sportspracticedrills.com
Walking triangle By: Maximumlax
Place players according to their skills into triangle shapes. Place a cone at each persons foot. Give one of the players a lacrosse ball and place a couple of balls in the middle. On your whistle have them start walking around the triangle while passing the ball. You will need three cones per triangle. One ball for passing and two in the middle for to replace errant passes. Each triangle can will have three players. The skills that will be improved are leading passes, receiving passes while on the run/walk, and depending on the size of your triangle, proper spacing for passes will be learned. Variations of the drill include placing a player in the center so the players moving around the triangle will need to be careful and accurate with their passes. When a ball is dropped the center player moves into the triangle and the offending player moves into the center of the triangle. I would suggest starting the drill with a triangle that has 20 foot lines and then move them out as the season progresses. Place your players that will be in regular contact during a game together. You can reverse the circle to work different hands.
Article Source: http://www.sportspracticedrills.com
Carmel Girl's Lacrosse indylax.com/carmel_team.html

Fake the bucket By: Maximumlax
Grils Lacrosse Drill. Since it is much more difficult to keep the ball in a girl's lacrosse stick, each player needs to learn to move and retain the ball during rolls and dodges. Using a bucket or box you can work on your dodge fakes and rolls. Left and right hands will be used and developed. Have a girl place a bucket (any Walmart) in front of them. Think of when you used to move around your driveway dribbling a basketball around the invisible defender. In this drill the bucket provides a point of reference for the offensive player. Have the player dodge around the bucket with both right and left hands. Have them fake shots and then move to the side of the bucket and shoot fromt the hip area. It will be surprising how many times the ball falls out while working on this drill in the beginning. Several balls, a bucket, stick, and a girl. One player per bucket. Cradling skills will be improved the most, but you will see your players develop the knack for hanging onto the ball when making dodges and rolls. A players balance will also be improved. It is very difficult to explain which way the face of the stick should be facing while performing a move and this drills helps them realize how to hold the stick to retain the ball. Have the player actually shoot on a goal after making 3 successfull moves around the bucket. In the beginning, this drill will provide a lot of entertaining moments, ones you will openly laugh at, but eventually you will see the girls become more confindent and comfortable with their sticks and with making one on one moves. This is also a great at home drill for those players who really want to shine.
Article Source: http://www.sportspracticedrills.com
Color Drill By: LC
A lacrosse drill for goalies. You need: 2 shooters Goalie A net Ten balls Step 1: Color a band around each ball in a different color (similar to the stripe on a pool ball) or use different color balls.

Step 2: Have a shooter stand at x with all ten of the lacrosse balls. The goalie stands in the goal facing the midline with the second shooter about ten yards out. Step 3: The feeder throws the ball to the shooter who shoots ball. Step 4: When shot is taken, the goalie must call out the color of the lacrosse ball. Hows this drill helps?: It forces the goalie to focus on the ball and not the stick, it also forces the goalie to watch the ball all the way into the stick.
Article Source: http://www.sportspracticedrills.com
Hand Toss By: Maximumlax
Teach your new lacrosse players how to catch without the fear of someone hitting them with the ball in passing drills. New players feel strange enough with a funky stick, goggles, mouth piece, and cleats. We need to help them become comfortable with the idea of catching without the fear of a painful miss. Have players line up between 7-10 feet away from each other. One player will have her lacrosse stick and the other player will have a couple of balls. The player with the balls will underhand toss a ball to the catcher. The person catching the ball will be able to get used to the idea of catching a ball without fear of getting hit. Have the catching player move her hand up to the top of the stick if she is struggling with catching. This will allow more of a hand-eye coordination with the catch. If they have played softball/baseball before this is a good example to share with them. A couple of balls, some sticks. Two girls or a girl and a parent. Catching skills will be improved quickly. So will confidence in the girls that they can catch after all! This drill needs only be used for the first week with most new players. A variation for the drill is to have the player tossing the ball toss it to the other players off side so they can work on both hands. We should remember one hard hit to the face of a new player may cause flinch reations for years to come. We know eventually every girl will get hit with the ball, but later is much better than sooner.
Article Source: http://www.sportspracticedrills.com

Wall Drill By: Unknown
"Your lacrosse stick should become part of your body!" To become proficient in passing and shooting, the player must be able to propel the ball from the stick with the wrist "snap." Many beginning players pass and shoot with an arm motion, or "push" the ball, which causes the ball to leave the stick on a low trajectory resulting in a low pass or shot. An excellent way to develop the wrist snap is to utilize the wall. For this lacrosse drill, go to a cinderblock or brick wall and stand approximately 3 to 5 yards away. Any wall will work (no windows), but a smooth concrete surface at least 10 feet tall is the best. You can and will observe daily improvement if proper lacrosse technique is maintained. Increase the reps as wrists become stronger. Aim for as many reps as possible with desired form, however. This is a lefty-righty work out. Attempt to do as many reps as possible. Remember, your goal is to strengthen the wrists, to become proficient in releasing the ball with the snap of the wrists, to gain hand speed, and to develop a quick release. Do this routine as much as 4-5 times a week for 15-20 minutes (no more). Beginning lacrosse players should start at 30 reps with each hand before moving to a different part of the drill. Your goal should be to get through the entire drill (50 reps with each hand) with each hand in under 20 minutes. If you only get through part of the drill, it is easy to set a goal for next time. Proper 1 hand technique: Wearing lacrosse gloves, hold the stick in one hand at its balance point and then place the head of the stick in the "box" area next to the ear. Then with one hand, "snap" the wrist which will cause the ball to come out of the stick in a straight line and bounce off the wall straight back into the stick kept in the box area. This will be difficult at first. Do not take shortcuts. Keep the head of the stick in the box and not down off the shoulder. Proper 2 hand technique: Wearing gloves, hold the stick with your top hand approximately half way down the shaft of the stick. Your opposite hand should cover the end cap. Snap the top wrist while bringing the bottom hand towards your dominant arm pit. This will help to keep your stick in a vertical postion. Try to keep the head of the lacrosse stick in the box at all times. Passing is like casting a fishing line. Be ready for the ball to return in a hurry. Change your foot stance as you change your hands, that is lead with your left foot if passing from the right, and so forth. Stick protection is important. Proper Cross hand technique: This is the similar to two hand technique. Hold the stick such that the dominant hand is across your body. The head of the lacrosse stick should be kept in the "box" near the opposite ear. This will be awkward at first but only the advanced players will get to this stage. DRILLS: (Beginners 30 reps with each hand)

1. 1 hand: catch and 1 cradle 2. 2 hands: catch and 1 cradle 3. 2 hands: quick stick 4. 2 hands: split drill -catch righty, switch and throw lefty/ catch lefty switch and throw righty 5. 2 hands: catch, face dodge, and throw 6. 2 hands: catch, fake, and throw You must be at 50 reps with each hand before passing this point. 1. 2 hands: cross handed 2. 2 hands: behind the back 3. 2 hands: running along the wall throwing and catching. 4. Be creative: if you get to this stage, you have earned the right to! Remember the above must be performed in the correct manner, that is: stick in the box, overhand motion, wrist snap. If your form is sloppy, such as letting the stick hang down off the shoulder, you will be slinging the lacrosse ball and thus wasting your time. CORRECT FORM MUST BE ADHERED TO, OR YOUR EFFORTS WILL BE WASTED.
Article Source: http://www.sportspracticedrills.com
Goalie Wall Drill By: LC
A lacrosse drill for goalies. Place a goal about 10 yards away from the wall and have your coach/teammate take shots from either side of the goal, behind the goal, whatever. You don't need tape for them to aim because that will give you a hint of where the lacrosse ball is going. This drill is for reflexes, not for saving. The key to this is that you are reacting to the ball, seeing the ball and moving to the ball. This drill, again, is not about saving the ball (though it is encouraged to save the ball in this drill, don't get me wrong) but about seeing the ball.
Article Source: http://www.sportspracticedrills.com
Switching Hands By: Unknown
Working on his lacrosse stick skills can separate a good player from a bad player. A good drill for youth players. A great lacrosse drill is to set up ten cones in a line 5 yards away from each other. Have the
lacrosse player run through the cones switching hands at each cone. The important thing for the lacrosse player to do is work on his left hand more than his right.
Article Source: http://www.sportspracticedrills.com
The Iron Crosse By: Coach Bob
Set up a lane of cones as wide as the goal and perpendicular to it, straight out in front, leading to the goal. This lane should be 5-10 yards long. The lane should end 1-3 yards in front of the crease. Place two cones at top of the lane, several to mark the sides of the lane and two where you want the lane to end. An offensive player starts with the ball at the top of the lane, behind the first set of cones. In line with the final two cones in front of the crease, make two more lanes parallel to the goal, one going left and one going right. These should be as long as the offensive lane. These are the defensive lanes. They should be as wide as the offensive lane. A defender starts at the cones in these lanes furthest from the goal. The correct set up makes a cross with an offensive lane intersecting with two defensive lanes and the goal as the top section of the cross. At the whistle, the offensive player runs down his lane and attempts to make it to the last cones before the crease before he is allowed to shoot. The boys on defense race in down their lanes to stop the shooter. They cannot jump or cut cones to get to the offensive player. Both the offensive and defensive players must stay in their lanes. For younger players, no body checking is allowed, only stick checks. This drill teaches defensive players to protect the front of the goal. For offensive players, it teaches them to dodge and work for the shot in traffic. For coaches, it is a great drill to prevent opposing teams from sending their best player down the middle to shoot without passing, typcial of U-11 play. A great drill--the boys will love it. Be sure to keep it under control--your hockey players will want to get rough fast.
Article Source: http://www.sportspracticedrills.com

Touchdown Drill By: Wayne Gebelein
This lacrosse drill is designed for both the offensive player and defensive player. It teaches several skill sets for both. Go to the end line between the restraining box and side line. Measure ten yards from the end line and place two cones (one on side line and one on restraining line ten yards from the end line. Divide the team into two. Positions don't matter, you will switch. The object of the drill is to have the offensive player score a 'touchdown' by crossing the end line with the ball in his stick without running or being forced out of bounds. The defensive player must maintain position between the ball handler and the goal line for 10 seconds (coach keeps time), dislodge the ball, or force the offensive player out of bounds. This drill teaches defensive intensity for 10 seconds (game simulation), position, and side line awareness. The offensive player learns dodging intensity, change of direction and speed, cradling, as well as side line awareness.
Article Source: http://www.sportspracticedrills.com
Bucket Relay Cradle This drill develops several skills like cradling and ball handling. You need two teams of players, a cone, and a bucket for each of the teams. The girls line up with the bucket placed near the start of the line. The cone for each team is placed several feet away from the bucket. One by one, the members of the teams cradle a ball, run towards the cone, and go around it. Once they pass the cone, they return to the starting area of the line where the bucket is located. Once they reach the bucket, they dump the ball into the bucket and then the next player can proceed to doing the same. The first team to have all players do the task is declared the winner. This relay can prove to be a fun game for girls.
On the Run This drill develops a girl's skills in throwing and catching the ball while running, which is something that they will be doing a lot in a real game scenario. A wall is needed to do this drill. A girl starts on one end of the wall, then proceeds to run and throw the ball to a specific point along the wall. As the ball bounces back, the girl needs to catch and cradle it, then she throws it back again. The girl will do this as she runs through to the

other end of the wall. Once she reaches it, she will turn around and do it again. This practices her ability to throw and pass on either side of her body.
Ground Ball Hoop This is another fun lacrosse drill where girls can develop their cradling, passing, and scooping skills. The drill requires a hula hoop. The trainer or coach holds the hula hoop in a vertical position. The girls line up and one by one, they cradle the ball and run towards the hula hoop. As they reach the hula hoop, they make a pass of the ball through the hula hoop and then they immediately move past the hula hoop to catch and scoop the ball. The players can do several rounds of this drill, so they can also improve their stamina.
Switching It Up While cradling the ball with her stick, the girl stands 15 feet away from the wall. A specific area or point on the wall is designated and the girl throws the ball to hit that area or point. As the ball bounces back, the girl needs to catch it with the same arm she used to throw it. As she cradles the ball, she switches the stick to the other hand and does the drill again. The drill focuses on a player's ability to easily and efficiently switch the stick between their hands during the game.
Read more: http://www.brighthub.com/health/fitness/articles/79208.aspx#ixzz14AEL1pAS
How to Take a Draw in Girls Lacrosse The draw may seem insignificant, but ball control is the name of the game, and it all starts with the draw.
Push Draw
put the stick in your right hand 2
When the ref sets you and your opponent up for the draw, "crank" your hand forward, aka lift your wrist that is closest to the butt of the stick. Your hand should be perpendicular to your shaft. 3
When the ref blows the whistle, push your cranked wrist down slightly to "lock" the ball in your stick. 4
Push the ball to one of your team mates, or up in the air if you want to draw to yourself (if you are tall and can catch well, drawing to yourself can really work!).

Pull Draw
Put the stick in your left hand
When the ref sets you up for the draw, "crank" your wrist closest to the butt of your stick down, aka lower your wrist as far as it can go (don't move your stick from where the ref has set it. you may have to lift up your hand to crank) 3
When the ref blows the whistle, push your cranked wrist up slightly to "lock" the ball in your stick. 4
Then, pull your stick and the ball should go over your shoulder, or you can pull straight up to give the ball to yourself.5
both of these draws are great, although everyone has their preference. just practice both draws a few times to see which one is right for you
Tips
• before you go up to take the draw, punch in the strings on the back of your stick to make a pocket for the ball
• also pinch in the strings on the sides in towards the frame • when the ref walks up, present your stick to him/her. they will put the ball in your stick, and Hey! you
already have the ball • plant your feet so your stable and comfortable • while planting your feet, think about where you want the ball to go. twist your body in that direction so
when you win the draw, you already have your opponent boxed out • watch the ref. they may take a breath or put their hand on the whistle before they blow it. this will give
you a bit of a warning.
edit Warnings
• don't draw to an opponent! draw to the stick side of your team mate
The PEP Program The Santa Monica Orthopaedic and Sports Medicine Research Foundation

The PEP Program: Prevent injury and Enhance Performance This prevention program consists of a warm-up, stretching, strengthening, plyometrics, and sport specific agilities to address potential deficits in the strength and coordination of the stabilizing muscles around the knee joint. It is important to use proper technique during all of the exercises. The coaches and trainers need to emphasize correct posture, straight up and down jumps without excessive side-to-side movement, and reinforce soft landings. This program should be completed 3 times a week. The field should be set up 10 minutes prior to the warm-up. This will allow for a smooth transition between the activities. A sample field set-up has been included in your packet. This program should take approximately 15 – 20 minutes to complete. Along side each exercise you will notice a box with the approximate amount of time that should be spent on each activity. This will serve as a guideline to you in order to conduct your warm-up in a time efficient manner. 1. Warm-up: Warming up and cooling down are a crucial part of a training program. The purpose of the warm- up section is to allow the athlete to prepare for activity. By warming up your muscles first, you greatly reduce the risk of injury. A. Jog line to line (cone to cone): Elapsed Time: 0 - .5 minute Purpose: Allows the athletes to slowly prepare themselves for the training session while minimizing the risk for injury. Educate athletes on good running technique; keep the hip/knee/ankle in straight alignment without the knee caving in or the feet whipping out to the side. Instruction: Complete a slow jog from near to far sideline B. Shuttle Run (side to side) Elapsed Time: .5 to 1 minute Purpose: engage hip muscles (inner and outer thigh). This exercise will promote increased speed. Discourage inward caving of the knee joint. Instruction: Start is an athletic stance with a slight bend at the knee. Leading with the right foot, sidestep pushing off with the left foot (back leg). When you drive off with the back leg, be sure the hip/knee/ankle are in a straight line. Switch sides at half field. C. Backward Running Elapsed Time: 1 – 1.5 minutes Purpose: continued warm- up; engage hip extensors/hamstrings. Make sure the athlete lands on her toes. Be sure to watch for locking of the knee joint. As the athlete brings her foot back, make sure she maintains a slight bend to the knee. Instruction: Run backwards from sideline to sideline. Land on your toes without snapping the knee back. Stay on your toes and keep the knees slightly bent at all times. 2. Stretching: It is important to incorporate a short warm-up prior to stretching. Never stretch a “cold muscle”. By doing the exercises outlined here, you can improve and maintain your range of motion, reduce stiffness in your joints, reduce post-exercise soreness, reduce the risk of injury and improve your overall mobility and performanc e. • Do a large muscle warm- up such as brisk walking for five to 10 minutes before stretching. • Don't bounce or jerk when you stretch. Gently stretch to a point of tension and hold. • Hold the stretch for 30 seconds. Concentrate on lengthening the muscles when you're stretching. • Breathe normally. Don't hold your breath. A. Calf stretch (30 seconds x 2 reps) Elapsed Time: 1.5 to 2.5 minutes

Purpose: stretch the calf muscle of the lower leg Instruction: Stand leading with your right leg. Bend forward at the waist and place your hands on the ground (V formation). Keep your right knee slightly bent and your left leg straight. Make sure your left foot is flat on the ground. Do not bounce during the stretch. Hold for 30 seconds. Switch sides and repeat. B. Quadricep stretch (30 seconds x 2 reps) Elapsed Time: 2.5 to 3.5 minutes Purpose: stretch the quadricep muscle of the front of the thigh Instruction: Place your left hand on your partner’s left shoulder. Reach back with your right hand and grab the front of your right ankle. Bring your heel to buttock. Make sure your knee is pointed down toward the ground. Keep your right leg close to your left. Don’t allow knee to wing out to the side and do not bend at the waist. Hold for 30 seconds and switch sides. C. Figure Four Hamstring stretch (30 sec x 2 reps) Elapsed Time: 3.5 – 4.5 min Purpose: To stretch the hamstring muscles of the back of the thigh. Instruction: Sit on the ground with your right leg extended out in front of you. Bend your left knee and rest the bottom of your foot on your right inner thigh. With a straight back, try to bring your chest toward your knee. Do not round your back. If you can, reach down toward your toes and pull them up toward your head. Do not bounce. Hold for 30 seconds and repeat with the other leg. D. Inner Thigh Stretch (20 sec x 3 reps) Elapsed Time: 4.5 – 5.5 min Purpose: Elongate the muscles of the inner thigh (adductor group) Instruction: Remain seated on the ground. Spread you legs evenly apart. Slowly lower yourself to the center with a straight back. You want to feel a stretch in the inner thigh. Now reach toward the right with the right arm. Bring your left arm overhead the stretch over to the right. Hold the stretch and repeat on the opposite side. E. Hip Flexor Stretch – (30 sec x 2 reps) Elapsed Time: 5.5- 6.5 min Purpose: Elongate the hip flexors of the front of the thigh. Instruction: Lunge forward leading with your right leg. Drop your left knee down to the ground. Placing your hands on top of your right thigh, lean forward with your hips. The hips should be square with your shoulders. If possible, maintain your balance and lift back for the left ankle and pull your heel to your buttocks. Hold for 30 seconds and repeat on the other side. 3. Strengthening: This portion of the program focuses on increasing leg strength. This will lead to increased leg strength and a more stable knee joint. Technique is everything; close attention must be paid to the performance of these exercises in order to avoid injury. A. Walking Lunges (3 sets x 10 reps) Elapsed Time: 6.5 – 7.5 min Purpose: Strengthen the thigh (quadriceps) muscle. Instruction. Lunge forward leading with your right leg. Push off with your right leg and lunge forward with your left leg. Drop the back knee straight down. Make sure that your keep your front knee over your ankle. Control the motion and try to avoid you front knee from caving inward. If you can’t see your toes on your leading leg, you are doing the exercise incorrectly. B. Russian Hamstring (3 sets x 10 reps) Elapsed Time: 7.5 –8.5 min Purpose: Strengthen hamstrings muscles

Instruction: Kneel on the ground with hands at your side. Have a partner hold firmly at your ankles. With a straight back, lead forward leading with your hips. Your knee, hip and shoulder should be in a straight line as you lean toward the ground. Do not bend at the waist. You should feel the hamstrings in the back of your thigh working. Repeat the exercise for 3 sets of 10, or a total of 30 reps. C. Single Toe Raises (30 reps x 2 reps) Elapsed Time: 8.5 – 9.5 min Purpose: This exercise strengthens the calf muscle and increases balance. Instruction: Stand up with your arms at your side. Bend the left knee up and maintain your balance. Slowly rise up on your right toes with good balance. You may hold your arms out ahead of you in order to help. Slowly repeat 30 times and switch to the other side. As you get stronger, you may need to add additional repetitions to this exercise to continue the strengthening effect of the exercise. 4. Plyometrics – These exercises are explosive and help to build, power, strength and speed. The most important element when considering performance technique is the landing. It must be soft! When you land from a jump, you want to softly accept your weight on the balls of your feet slowly rolling back to the heel with a bent knee and a straight hip. These exercises are basic, however, it is critical to perform them correctly. Please take the time to ensure safe and correct completion of these exercises. A. Lateral Hops over Cone (20 reps) Elapsed Time: 9.5 – 10min Purpose: Increase power/strength emphasizing neuromuscular control Instruction: Stand with a 6” cone to your left. Hop to the left over the cone softly landing on the balls of your feet land bending at the knee. Repeat this exercise hopping to the right. B. Forward/Backward Hops over cone (20 reps) Elapsed Time: 10 – 10.5 min Purpose: Increase power/strength emphasizing neuromuscular control Instruction: Hop over the cone/ball softly landing on the balls of your feet and bending at the knee. Now, hop backwards over the ball using the same landing technique. Be careful not to snap your knee back to straighten it. You want to maintain a slight bend to the knee. Repeat for 20 reps. C. Single Leg hops over cone (20 reps) Elapsed Time: 10.5 – 11 min Purpose: Increase power/strength emphasizing neuromuscular control. Instruction: Hop over the cone/ball landing on the ball of your foot bending at the knee. Now, hop backwards over the ball using the same landing technique. Be careful not to snap your knee back to straighten it. You want to maintain a slight bend to the knee. Repeat for 20 reps. Now, stand on the left leg and repeat the exercise. Increase the number of repetitions as needed. D. Vertical Jumps with headers (20 reps) Elapsed Time: 11 – 11.5 min Purpose: Increase height of vertical jump. Instruction: Stand forward with hands at your side. Slightly bend the knees and push off jumping straight up. Remember the proper landing technique; accept the weight on the ball of your foot with a slight bend to the knee. Repeat 20 times and switch sides. E. Scissors Jump (20 reps) Elapsed Time: 11.5 – 12 min Purpose: Increase power and strength of vertical jump. Instruction: Lunge forward leading with your right leg. Keep your knee over your ankle. Now, push off with your right foot and propel your left leg forward into a

lunge position. Be sure your knee does not cave in or out. It should be stable and directly over the ankle. Remember the proper landing technique; accept the weight on the ball of your foot with a slight bend to the knee. Repeat 20 times. 5. Agilities A. Shuttle run with forward/backward running Elapsed Time 12 – 13 min Purpose: Increase dynamic stability of the ankle/knee/hip complex Instruction: Starting at the first cone, sprint forward to the second cone, run backward to the third cone, sprint forward to the fourth cone (etc…). B. Diagonal runs (3 passes) Elapsed Time 13 – 14 min Purpose: To encourage proper technique/stabilization of the outside planted foot to deter the position from occurring. Instruction: Face forward and run to the first cone on the left. Pivot off the left foot and run to the second cone. Now pivot off the right leg and continue onto the third cone. Make sure that the outside leg does not cave in. Keep a slight bend to the knee and make sure the knee stays over the ankle joint. C. Bounding run (44 yds) Elapsed Time 14 – 15 min Purpose: To increase hip flexion strength/increase power/speed Instruction: Starting on the near sideline, run to the far side with knees up toward chest. Bring your knees up high. Land on the ball of your foot with a slight bend at the knee and a straight hip. Increase the distance as this exercise gets easier. 6. Alternative Exercises – Warm Down and Cool Down We all know how imperative a cool down is. Please don’t skip it. It allows the muscles that have been working hard throughout the training session to elongate and deters the onset of muscle soreness. Please emphasize the importance of adequate fluid intake (optimally water). Athletes should have a water bottle by their side during the cool down. The cool down should take approximately 10 minutes. It should begin with a slow jog to allow the heart rate to come down before stretching. This should be followed by some light strength training exercises. We are recommending two strengthening exercises (see below). Finally, stretch the hamstrings, calves, inner thigh, quadriceps, and low back (all of these are explained in the protocol). In addition to those basic stretches, we are offering some additional stretches to target 3 muscle groups that are often forgotten. A. Bridging with Alternating Hip Flexion (30 reps) Purpose: Strengthen outer hip muscles (Hip abductors, flexors) and buttocks Instruction: Lie on the ground with your knees bent with feet on the ground. Raise your buttocks up off the ground and squeeze. Now, lift your right foot off the ground and make sure that your right hip does not dip down. Lower your right foot and now lift your left foot making sure your left hip does not dip down. Repeat 30 times on each side. As you get stronger, you will place your feet on top of a ball and repeat the exercise. B. Abdominal Crunches (30 reps x 2 reps) Purpose: Strengthe n the abdominals (rectus abdominus, obliques) Instruction: Lie on the ground with you knees bent. Place your hands behind your head with your elbows out wide. Support your neck lightly with your fingers. Take a deep breath in and slowly contract your abdominal muscles as you exhale. Repeat 30 times. Drop your legs off to the right side. Slowly crunch up with your elbows out wide. You should feel your oblique muscles working on the side of

your waist. Repeat 30 times and switch to the other side. C. Single and Double Knee to Chest (supine) (30 sec x 2 reps) Purpose: Elongate the low back muscles Instruction: Lie on your back. Bring your right knee toward your chest and hug firmly. Keep your left leg out straight in front of you. You should feel a stretch along your low back and into your buttocks. Hold the stretch for 30 seconds and switch sides. Now bring both knees to chest. If you feel any pain in the low back, discontinue the stretch and inform your coach/trainer. D. Figure Four Piriformis stretch- supine (30 sec x 2 reps) Purpose: Elongate the rotators of the hip. Instruction: Lie on your back and bend both of your knees. Fold your left ankle over your right knee. Place your hands behind your right thigh and pull your right knee to chest. You should feel a good stretch in the left gluteals region and the side of the thigh. Hold for 30 seconds and repeat on the other side. If you experience and low back pain with this stretch, slowly lower your legs down and let your coach/trainer know. E. Seated Butterfly stretch - seated (30 sec x 2 reps) Purpose: Elongate the inner thigh muscles (adductors). Instruction: Sit up bringing your feet in so that the soles of your feet are touching. Gently place your elbows on your knees and slowly push down. You should feel a good stretch of the inner thigh. Hold this for 30 seconds and repeat 2 to 3 times. If you have any questions or concerns regarding this program, please contact Holly Silvers, MPT at (310) 315-0292 ext. 1283 or via email: [email protected].

TODAY'S DRILL: Inside Out (ages 8‐12)
Movement and passing are combined in this drill
=> What you need...
Create an area that is about 20 yards by 20 yards, with 5 players (with balls) inside the square area, and 5 players (without balls) outside the square area.
=> How this drill works ‐ Players must move around the square area maintaining good control of the ball.
When the coach blows the whistle, the players inside the square must prepare to pass the ball to a player outside the square.
Once the players outside the square secure the pass, they must move inside the square, and the players inside must follow their pass outside the square.
If two players pass to the same person, whichever person's pass doesn't get caught, that person is out of the drill.

I Believe In Me!
I believe in me
This is what I'll be
A leader who is strong and confident
(clap clap)
When I wake up feeling low
I get up and go!
STEP UP and stand tall
because I'll achieve it all
With obstacles in my way
Here is what I'll say
I'm determined
I'm bright
You know dats right
You know DATS right
YOU KNOW DATS RIGHT!!
Stick to My Guns, Hon!
I don’t follow, I take the lead
I’m independent and powerful indeed!
I STICK, STICK, STICK TO MY GUNS HON!
You wanna change me, go ahead and try it

I am who I am, I won’t buy it!!
I STICK, STICK, STICK TO MY GUNS HON!
When challenges come at me
I won’t back down, I’ll STEP UP you see!
I STICK, STICK, STICK TO MY GUNS HON! (I SAID)
I STICK, STICK, STICK TO MY GUNS HON!
Put ‘em up…….that’s what’s up!!