KISI-KISI SOAL LKS SMK TINGKAT NASIONAL TAHUN 2020 IT ...
30
KISI-KISI SOAL LKS SMK TINGKAT NASIONAL TAHUN 2020 IT NETWORK SYSTEMS ADMINISTRATION
Transcript of KISI-KISI SOAL LKS SMK TINGKAT NASIONAL TAHUN 2020 IT ...

KISI-KISI SOAL LKS SMK
TINGKAT NASIONAL TAHUN 2020
IT NETWORK SYSTEMS
ADMINISTRATION

LOMBA KOMPETENSI SISWA
SEKOLAH MENENGAH KEJURUAN
TINGKAT NASIONAL XXVIII 2020
TEST PROJECT
MODUL LINUX
IT NETWORK SYSTEMS
ADMINISTRATION
LKS2020_LINUX_Pre

CONTENTS
Part I – Basic Configuration 2
Part II – Infrastructure Management 3
Part III – Security and Maintenance 4
Part IV Remote Connectivity 6
Part V Company Services 6
PART I – BASIC CONFIGURATION
All of our servers and clients are debian 10.X server with pre-configured hostname and
IP-address as specified in the topology. All of our clients uses the default GNOME
Desktop Environment. The following tools have been installed on each server and clients :
curl, ssh, smbclient, ftp, dnsutils, and sudo.
The following requirements must be applied to all servers.
Make sure root login is not allowed.
Make a user ‘kertarajasa’ with sudo privilege with password, as specified in the
appendix.
Please configure the domain-name and DNS resolver accordingly.
PART II – INFRASTRUCTURE MANAGEMENT
Nusantara, inc. requires you to setup the following services with specified requirements.
Company web server at private.nusantara.id
Use nginx, and please make sure it can serve php files.
Serve internal.nusantara.id that requires LDAP authentication.
o Display internal.php file by default with content listed in the appendix.
Serve public.nusantara.id that is accessible without authentication.
o Display index.php file by default with content listed in the appendix.
Sync all the files to the company backup server.
Company file server at file.nusantara.id
Using NFS version 4, please share the ‘/udd/home/’ directory for internal network.
Permit root and/or owner of respective directories to read and write inside the
directory.
Create samba share /share/smb/ that requires LDAP authentication.
o Make sure only the user ‘fatmawati’ that able to delete any file. Other users
only allowed to upload and download files.
Company authentication server at file.nusantara.id
Serve LDAP authentication backend.
Create all users with all attributes listed in the appendix, along with their respective
home directories.

Make sure our internal services and/or clients are able to authenticate using this
server.
Company mail server at private.nusantara.id
Serve smtps at mail.nusantara.cloud port 465 with postfix.
Serve imaps at mail.nusantara.cloud port 993 with dovecot.
Make sure its accessible either via internal or external network.
Use our Authentication Server to authenticate users, make sure their email address
are usable like specified in the appendix.
Encrypt these connections with self-signed SSL Certificate.
Company DNS at file.nusantara.id
Create A records for all of Nusantara’s internal servers.
Create A records necessary for our websites and web-interface of our monitoring
service.
Create A records and MX records necessary for our email.
Company monitoring service at private.nusantara.id
Please use icinga2 and enable the web-interface at monitor.nusantara.id
Monitor website accessibility of both internal.nusantara.id and
public.nusantara.id
Monitor our LDAP service availability.
Monitor our site-to-site VPN tunnel connectivity.
Configure email notification to [email protected] when any of these
service are DOWN as soon as possible.
PART III – SECURITY AND MAINTENANCE
The following are setup outside of Nusantara internal servers.
ITNSA backup server at se02.itnsa.id
We recommend you to use ssh and scp for this task. However, you can also use
other tools; as far as it works, we wouldn’t complain.

Configure our (Nusantara’s) web server to upload their ‘/var/www/’ content into
this server at ‘/backup/www/’.
o Do not change the directory structure
o Using tools of your choice, make sure to sync as soon as possible (we
tolerate max. ten seconds delay)
Backup our LDAP database into ‘/backup/ldap/’ every odd-hour using cron.
Company Firewall at fw.nusantara.id
The company requests you to use iptables
Configure so that it will DROP all traffic by default
Configure so that every internal service that requires access to outside are granted
Configure nat for our client.nusantara.id internet access
Majapahit Firewall at fw.majapahit.net
The company requests you to use iptables even at this site.
Configure so that it will DROP all traffic by default
Configure so that every internal service that requires access to outside are granted
Configure nat for our Gajahmada-PC internet access

PART IV REMOTE CONNECTIVITY
VPN Tunneling
Configure openvpn site-to-site tunneling to connect Majapahit to our company.
Use UDP port 1945 for connection.
Use certificate authentication, create self-signed certificate as you wish.
Make sure client.nusantara.id able to access all resource on Majapahit Zone
Block traffic from Gajahmada-PC to Nusantara Zone via tunnelling
Make sure Gajahmada-PC still able to access internet
Remote Access VPN
Configure remote access on openvpn for Jane-laptop. Use TCP port 1708 for this
connection. Make sure the VPN Connection in Jane-laptop is available in the network
manager with name Krakatau. Use LDAP for authentication. Make sure Jane-laptop able
to access all resource on Nusantara Zone and Majapahit Zone after connection established.
PART V COMPANY SERVICES
Webmail Service on sa01.majapahit.net
Use roundcube web-mail, and any web server of your choice.
Use SSL self-signed certificate to serve HTTPS
Make sure this webmail is accessible at the internet address
https://webmail.majapahit.net
o you need to configure Majapahit firewall to make this work.
At login prompt, user are able to choose 2 MAIL server, Nusantara and ITNSA.
If Nusantara is chosen, user will connect to Nusantara’s mail server. You may need
configure the Nusantara firewall in order to make this work.
If ITNSA is chosen, user will connect to ITNSA’s mail server on the internet.
make sure user can send/receive email to/from ITNSA and Nusantara mail servers.
FTP Service on sa01.majapahit.net
Use proftpd
Publish this ftp so that it is accessible via the internet address of ftp.majapahit.net

Allow both implicit ftps and plain ftp
Disallow anonymous login, use local user database to authenticate users. Please
refer to appendix.
Permit download and upload of new file for users, make sure they cannot delete
any file(s) on the server.
Public Mail service on se01.itnsa.id
Use dovecot and postfix
Serve smtps at mail.itnsa.id port 465 with postfix. Use STARTTLS Auth.
Serve imaps at mail.itnsa.id port 993 with dovecot. Use STARTTLS Auth.
Use local user database to authenticate users, please refer to appendix. Make sure
user’s email address are the same as the one listed in appendix.
Encrypt these connections with self-signed SSL Certificate.
Configure an autoreply user [email protected], whenever this user receives an
email, an automatic reply must be sent immediately.
o The message subject is Automatic Reply from itnsa.id
o The message body is :
Your inquiry has not been read by any of our personnel. Kindly visit
http://itnsa.id for more information on how to contact us.
Public DNS on ITNSA Zone.
Use bind9
Serve records for itnsa.id domain. Create subdomains needed for mail service to
work, both A record and MX record.
Serve records for majapahit.net domain. Create subdomains needed for webmail
service and ftp to work, both A record and MX record.
Create master-slave relationship with following detail:
o Master: se01.itnsa.id
o Slave: se02.itnsa.id
o Encrypt slave-master zone updates using DNSSec key – Transaction
Signature.
o Whenever record at the master is updated/changed, the record at the slave
must also be updated/changed.

DHCP Service
Majapahit DHCP Server (sa01.majapahit.net)
Create pool for Majapahit clients with following requirements:
Range : 10.20.19.10-10.20.19.100
DNS : 172.45.80.3
Set gateway accordingly
Nusantara DHCP Server (fw.nusantara.id)
Create static IP lease for Jane-laptop (178.45.80.4/28). Configure DNS and
Gateway accordingly.
o Enable Dynamic DNS to the DNS service at ITNSA zone. Secure the
transaction using DNSSec and make sure the record is automatically
replicated to the slave DNS.
Create pool for Nusantara clients. There are no specific rule, just make sure the
client can access our services without any problems.
Nusantara Remote Login
Allow the PC client.nusantara.id to login with LDAP credentials stored in the
company’s Authentication Server
Disable local user to login on this PC, so the user will be forced to use their
company account stored in the Authentication Server. root should still be able to
login just fine on the terminal. Note: on the GUI, root login is disabled by default,
you shouldn’t mess with this.
Mount the NFS share at our file server automatically to ‘/udd/home’ upon boot.
This will be the LDAP users’ homedir when they login remotely, so please
configure the permissions accordingly and make sure it works like usual homedir.

Appendix
LDAP_Users
username password homedirectory emailaddress
fatmawati Skill39 /udd/home/fatmawati [email protected]
malakatan Skill39 /udd/home/malakatan [email protected]
soedirman Skill39 /udd/home/soedirman [email protected]
mohhatta Skill39 /udd/home/mohhatta [email protected]
Local_Users
username password homedirectory emailaddress
kertarajasa Skill39 /home/kertarajasa [email protected]
internal.php
<?php
echo “Internal access only. Hosted on ” . gethostname();
?>
index.php
<?php
echo “Welcome to Nusantara public access.”;
?>

se01.itnsa.id(172.45.80.3/28)
Jane-laptop(178.45.80.4/28)
fw.majapahit.net(178.45.80.1/28)(10.20.19.1/25)(10.20.18.1/25)
file.nusantara.id(10.20.20.10/25)
sa01.majapahit.net(10.20.18.10/25)
private.nusantara.id(10.20.21.10/25)
Gajahmada-PC(10.20.19.x/25)
fw.nusantara.id(178.45.80.2/28)(10.20.20.1/25)(10.20.21.1/25)
ITNSA ZONE
NUSANTARA ZONE MAJAPAHIT ZONE
Mail DNS
Samba NFS LDAP DNS
Firewall VPN DHCP
Firewall VPN
Mail Web Monitoring
FTP WEB DHCP
site to site VPN
se02.itnsa.id(172.45.80.4/28)
Backup DNS
vSwitch
client.nusantara.id(dhcp client)

LOMBA KOMPETENSI SISWA
SEKOLAH MENENGAH KEJURUAN
TINGKAT NASIONAL XXVIII 2020
TEST PROJECT
MODUL NETWORK
IT NETWORK SYSTEMS
ADMINISTRATION
LKS2020_NETWORK_Pre

BASIC CONFIGURATION
1. Configure hostnames for ALL devices according to the topology.
2. Configure domain name lksn2020.id for ALL network devices on the topology.
3. Create user lksn2020 on ALL devices.
(a) Remote and local console authentication should use local username database.
(b) After successful authentication user should automatically land in privileged mode
(level 15)
4. Configure privileged mode access on FW-01 and TOF using username’s password.
E.g. username lksn2020 with password indonesia should be able to enter privileged
mode with password indonesia.
5. Create all necessary interfaces, subinterfaces and SVIs on ALL devices. Use IP
addressing according to the table below.
Device Interface IP address
MOW Gi0/0 132.87.2.100/24
G0/1 192.168.254.1/30
KVX Gi0/0 94.121.72.18/24
G0/1 192.168.30.254/24
YKS Gi0/0 18.31.192.12/24
G0/1 192.168.40.254/24
FW-01 G1/0/1 192.168.254.2/30
Vlan 10 192.168.10.254/24
Vlan 20 192.168.20.254/24
DSW-01 Vlan 10 192.168.10.11/24
DSW-02 Vlan 20 192.168.20.12/24
RTK Gi1/0/1 100.10.9.6/30
Gi1/0/2 94.121.72.96/24
Gi1/0/8 132.87.2.1/24
Gi1/0/21 100.71.60.254/29
Gi1/0/24 18.31.192.71/24
Gi1/0/9 172.40.20.254/24
Gi1/0/10 193.166.9.254/24
TOF Gi1/6 100.10.9.5/30
Gi1/2 172.16.100.254/24
TJM-01 Gi1/2 100.71.60.252/29
Gi1/3 172.20.0.251/24
TJM-02 Gi1/2 100.71.60.251/29
Gi1/3 172.20.0.252/24

HQ AND BRANCH LAN
1. Create VLANs on DSW-01 and DSW-02, assign names and ports according to the
topology diagram. When adding any new VLAN to DSW-01, this VLAN should be
automatically distributed to DSW-02.
2. DSW-01 should initiate trunk negotiation via DTP and be STP root in ALL VLANs.
Use non-default STP protocol. Make necessary configuration to prevent STP root
change attacks.
3. Configure link aggregation between DSW-01 and DSW-02. Use any LAG protocol.
4. Make sure that end user devices are not waiting for STP recalculation when plugged
into the network.
5. Configure DHCP scopes on Moscow, Kazan, Tyumen, Yakutsk and Sakhalin sites.
Use IP address of Yandex VM as a DNS server.
6. Ensure protection from DHCP attacks as well as from ARP-spoofing attacks on
Moscow site.
PUBLIC INTERNET
1. Configure internet routing domain according to the topology diagram. Use BGP with
AS numbers from 65000-65005
2. Make sure that end user virtual machines can access internet resources
(www.yandex.com).
ENTERPRISE ROUTING
1. Configure enterprise routing domain according to the topology diagram. Use any
dynamic routing protocol.
2. All traffic must be encrypted with IPsec while traversing via public internet.
3. Ensure end-to-end connectivity between all end user virtual machines inside
enterprise routing domain.
SERVICES INTEGRATION
1. Synchronize time on all network equipment using NTP (time zone WITA +8). Use
RTK as the root NTP server. Configure hierarchical NTP infrastructure use MOW
as a corporate NTP server.
2. Client machines in Kazan should receive IP addresses via DHCP service from server
DC.

3. Add MOW router and DSW-01 switch to the Observium network monitoring
platform via SNMP.
4. For MOW router Implement configuration backup to TFTP server located on
NetOps virtual machine. New backup copy should be created each time
configuration is saved on a device.
5. Enable SSH on all network devices and implement local user lksn2020 with
password Passw0rd$ with privilege level 15 (use only for VTY lines). Make sure
SSH is accessible via anywhere.
6. For TJM-01 and TJM-02 only users of DL-Net-Admins group in garuda.id
domain must be able to login remotely. After login users should automatically land
in privileged mode (level 15). Use local authentication in case remote authentication
server is not available.
UNIFIED COMMUNICATIONS INFRASTRUCTURE
On MOW router configure Call Manager Express:
1. Configure custom system message MOW-CME.
2. Customize Soft Phones so that username is shown in the upper right corner instead of
extension number. Make sure that when calling another extension, username is
displayed instead of extension number.
3. Configure Local Directory Services so that users can lookup other users’ extension
number via the Directory catalog.
4. Configure conferencing services to support at least three parties in a conference call.
5. Configure Call Park on extension 999 to allow any user to park the call so that any
user can pick up the call upon dialing the call park extension.
6. On Jone softphone upon pressing second line-button, Ivan's softphone should
automatically answer the call-in speakerphone mode with mute activated and Ivan
should hear Jone’s conversation.
7. Both Yuri and Boris should automatically answer the call-in speakerphone mode
when dialing extension 888.
8. On Jane configure second line-button to speed dial Yuri.
9. Configure Music-on-Hold. Use MOH3.au file located on flash of MOW router.

TOPOLOGY

Routing Diagram

LOMBA KOMPETENSI SISWA
SEKOLAH MENENGAH KEJURUAN
TINGKAT NASIONAL XXVIII 2020
TEST PROJECT
MODUL WINDOWS
IT NETWORK SYSTEMS
ADMINISTRATION
LKSN2020_WINDOWS_Pre

Introduction to Test Project
Contents
This Test Project proposal consists of the following documentation/files:
1. LKSN2020_Windows_Pre.docx
This implementation uses nested virtualization and all project VM’s are hosted inside a
“Host” machine; credentials for the Host machine are administrator\Skills39
You are the IT consultant responsible for Skill39. Use the password
"Passw0rd$"(without quotes) when no specific password has given. Use the password
"Skills39" for local accounts.
You have inherited a Windows Domain with some users and configurations already set
up but have decided to perform further tasks to improve the network. You will need to
host a number of websites securely for people inside and outside the domain to access.
In order to do this, you have decided to provide a high availability system based on
Hyper-V amongst other improvements. You will use this Hyper-V infrastructure to
improve the server infrastructure in the existing domain. Please follow the instructions
that follow to complete the project.

DESCRIPTION OF PROJECT AND TASKS
PART 1. INTRANET
You need to upgrade the infrastructure in the network to the existing domain. Some
machines will need to be installed from scratch, some machines will exist in a BASE
condition (installed, updated, sysprepped and generalized to save time, but still require
all other configuration), and some will be completely pre-installed and already
configured. Examine the diagrams at the end of this project and the VM Configuration
Table for clarification. Some of the tasks will need to be completed after all of the
infrastructure and servers have been added, be sure to return to the earlier tasks to make
sure you have completed all requirements.
DC1– PREINSTALLED AND PRECONFIGURED
Configure existing machine to match the requirements
● This server is pre-configured as the domain controller of garuda.id.
● Configure Active Directory.
Fix the PowerShell script and import users from included excel file. Accounts
should be enabled, have the properties listed in the spreadsheet including group
membership, and NOT be required to change password at first login.
● Configure DNS service.
Create all appropriate A records for all servers on 192.161.139.0/24 subnet.
Create all appropriate CNAME records according to the tasks.
o A record of 192.161.139.101
- adfs
o CNAME record of dc2.garuda.id:
- work
o CNAME records of web.garuda.id:
- csweb, www, intra, extra
Configure root hint as "ns.msftncsi.com" and remove other root hints.
Create a reverse lookup zone creating PTR records for all servers.
● Configure DHCP service.
Configure failover scope with DC2 once it is installed. Set DC1 as the active
server.
Total scope Range: 192.161.139.51 - 192.161.139.75
Give DC1 70% of this scope to DC1, and the rest to DC2
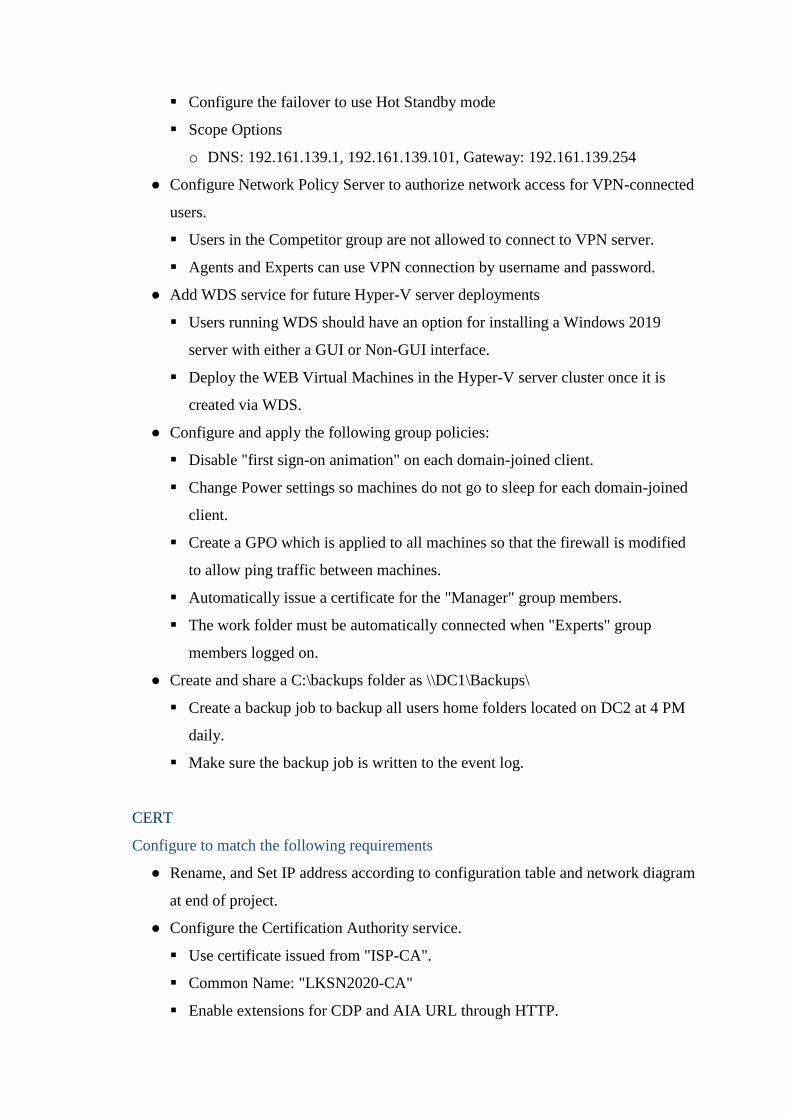
Configure the failover to use Hot Standby mode
Scope Options
o DNS: 192.161.139.1, 192.161.139.101, Gateway: 192.161.139.254
● Configure Network Policy Server to authorize network access for VPN-connected
users.
Users in the Competitor group are not allowed to connect to VPN server.
Agents and Experts can use VPN connection by username and password.
● Add WDS service for future Hyper-V server deployments
Users running WDS should have an option for installing a Windows 2019
server with either a GUI or Non-GUI interface.
Deploy the WEB Virtual Machines in the Hyper-V server cluster once it is
created via WDS.
● Configure and apply the following group policies:
Disable "first sign-on animation" on each domain-joined client.
Change Power settings so machines do not go to sleep for each domain-joined
client.
Create a GPO which is applied to all machines so that the firewall is modified
to allow ping traffic between machines.
Automatically issue a certificate for the "Manager" group members.
The work folder must be automatically connected when "Experts" group
members logged on.
● Create and share a C:\backups folder as \\DC1\Backups\
Create a backup job to backup all users home folders located on DC2 at 4 PM
daily.
Make sure the backup job is written to the event log.
CERT
Configure to match the following requirements
● Rename, and Set IP address according to configuration table and network diagram
at end of project.
● Configure the Certification Authority service.
Use certificate issued from "ISP-CA".
Common Name: "LKSN2020-CA"
Enable extensions for CDP and AIA URL through HTTP.

o URL for CDP: • URL for CDP:
http://cert.garuda.id/CertEnroll/<CaName><CRLNameSuffix><DeltaCRLA
llowed>.crl
URL for AIA: • URL for AIA:
http://cert.garuda.id/CertEnroll/<ServerDNSName>_<CaName><Certificat
eName>.crt
Create these templates:
o "_RU_Manager"
- For users in the "Manager" group.
o "_RU_Server"
- To provide a certificate for servers/services ingaruda.id domain.
o "_External_Client"
- To provide a certificate for computers on the Internet.
- Enable key-based renewal.
- Enable certificate manager approval to issue a certificate.
DC2
Configure to match the following requirements
● Rename, and Set IP address according to configuration table and network diagram
at end of project.
● Configure this server as a second domain controller for the garuda.id domain.
● Configure DNS service.
The records of Active Directory-Integrated zones should be replicated.
● Configure DHCP service.
Configure failover scope - refer to the description for DC1.
● Configure Active Directory Federation Service.
This server provides federation service.
URL: "https://adfs.garuda.id"
Display Name: "LKSN2020-Kazan Single Sign-On"
● Add three extra 10G drives
● Format the attached disks with NTFS into a single RAID 5 array (G:\) and enable
de-duplication on this volume.
● Create file share for user's home drives.
Access URL: dc2.garuda.id\homes

Local path: "G:\homes\"
● Configure Work Folders.
Access URL: https://work.garuda.id/
Local path: "G:\work\"
● Create a file share for each group.
Access URL: dc2.garuda.id\WSC
Local path: "G:\WSC\"
Create three subfolders and configure access control:
o Junior Skills
- Allow read-only access for users who have "Junior" as the job title.
- Allow full access to the users who are also part of the "WSJ"
organizational unit and also belong to the "Manager" group.
o Secret Challenges
- Allow access only for "Agent" group.
- This folder should be hidden for the user who has insufficient
permission.
o Public
o Allow read-only access for domain users.
o Create a file share for local path G:\witness and share it as \\DC2\witness.
INTCLIENT – BASE Install
Configure to match the following requirements
Rename, and Set IP address according to configuration table and network diagram
at end of project.
Join to garuda.id domain.
Use this machine to:
● Test access to Manager/Intranet/Extranet websites.
● Test GPOs.
● Test home and Work Folders.
● Ensuring users have been imported correctly.

PART 2. VIRTUALIZED SERVER FARM
You have completed the core domain infrastructure configuration. You now need to
configure your virtualized server farm to provide further infrastructure and application
services through a high-availability configuration. Follow the instructions given to
complete the task.
STORAGE – BASE INSTALL
Configure to match the following requirements
● Rename, and Set IP address according to configuration table and network diagram
at end of project.
● IP Address: 192.168.1.10
● Configure the iSCSI target.
Add new disk of 200 G for storing the virtual machines.
o Format disk using ReFS and mount as "E:\" drive.
Create 100GB of iSCSI virtual disk "E:\iSCSIVirtualDisks\LKSN2020-
VM.vhdx".
Configure the target name as "LKSN2020-TGT".
Create an SMB based witness disk on DC2 on \\DC2\witness.
HYPERV1 and HYPERV2
Install HyperV1 with physical attributes that match HyperV2 and configure both Hyper-
V servers to match the following requirements
Rename, and Set IP address according to configuration table and network diagram
at end of project.
Configure iSCSI Initiator.
● Connect iSCSI disk "LKSN2020-VM" and create ReFS partition using
maximum available size.
● Mount the volume as "V:\" drive.
Configure Failover Cluster.
● Name: HYPERV-CLUS
● IP address: 192.161.139.200
● Create role "LKSN2020-Infra" contains the virtual machines.
● Set affinity so that LKSN2020-Infra role runs in HYPERV1 unless it fails.
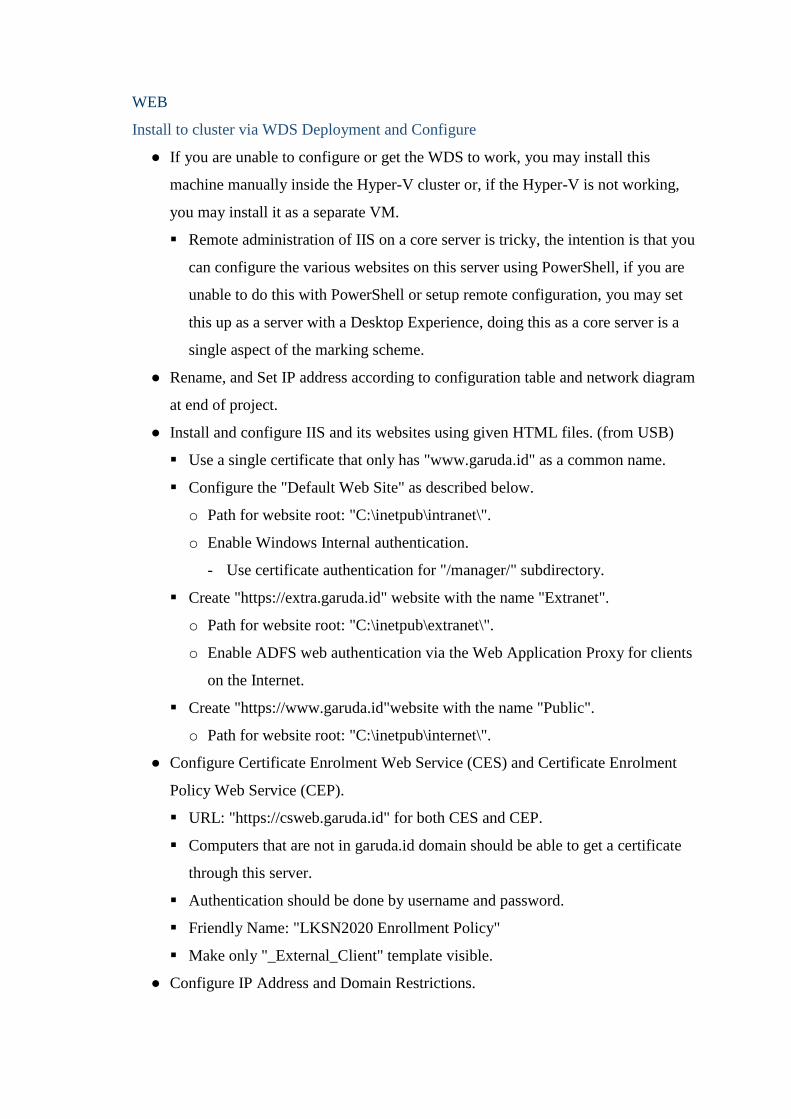
WEB
Install to cluster via WDS Deployment and Configure
● If you are unable to configure or get the WDS to work, you may install this
machine manually inside the Hyper-V cluster or, if the Hyper-V is not working,
you may install it as a separate VM.
Remote administration of IIS on a core server is tricky, the intention is that you
can configure the various websites on this server using PowerShell, if you are
unable to do this with PowerShell or setup remote configuration, you may set
this up as a server with a Desktop Experience, doing this as a core server is a
single aspect of the marking scheme.
● Rename, and Set IP address according to configuration table and network diagram
at end of project.
● Install and configure IIS and its websites using given HTML files. (from USB)
Use a single certificate that only has "www.garuda.id" as a common name.
Configure the "Default Web Site" as described below.
o Path for website root: "C:\inetpub\intranet\".
o Enable Windows Internal authentication.
- Use certificate authentication for "/manager/" subdirectory.
Create "https://extra.garuda.id" website with the name "Extranet".
o Path for website root: "C:\inetpub\extranet\".
o Enable ADFS web authentication via the Web Application Proxy for clients
on the Internet.
Create "https://www.garuda.id"website with the name "Public".
o Path for website root: "C:\inetpub\internet\".
● Configure Certificate Enrolment Web Service (CES) and Certificate Enrolment
Policy Web Service (CEP).
URL: "https://csweb.garuda.id" for both CES and CEP.
Computers that are not in garuda.id domain should be able to get a certificate
through this server.
Authentication should be done by username and password.
Friendly Name: "LKSN2020 Enrollment Policy"
Make only "_External_Client" template visible.
● Configure IP Address and Domain Restrictions.

The "https://intra.garuda.id" website can be accessible from:
192.161.139.0/24, 192.168.219.0/24
PART 3. PERIMETER AND INTERNET
You need to build a web application proxy and remote access service that allows you to
use the internal resources of the domain outside the domain. Follow the instructions to
complete the task.
FIREWALL – BASE
Configure to match the following requirements
● Rename, and Set IP address according to configuration table and network diagram
at end of project.
● Enable routing.
● Configure DNS server for the public Internet.
Create primary zone "garuda.id" and add these A records of 192.161.140.100.
o ns, vpn, csweb, extra, work.
Add an A record "www.garuda.id" of 192.161.139.103
SOA record of the "garuda.id" should be "ns.garuda.id".
● Configure Routing and Remote Access Service.
Users and computers on the Internet should be able to establish VPN
connection to this server.
IKEv2 clients can connect to the intranet through this server.
Authorize VPN access through the NPS.
IP address pool for remote access clients: 192.168.219.1 - 192.168.219.254
● Configure the Web Application Proxy.
Clients on the Internet should be able to:
o Access "https://extra.garuda.id" website after passing the ADFS web
authentication.
o Access "https://csweb.garuda.id" to reach to the Certification Enrolment
Policy and Certification Enrolment Service.
o Access "https://work.garuda.id" to use work folders for each user.
o Configure firewall rules to prevent unauthorized access.
o Allow HTTPS traffic from 192.161.140.0/24 to 192.161.139.103.

o Block any other traffics sourced from 192.161.140.0/24 to
192.161.139.0/24.
REMCLIENT - BASE
Configure to match the following requirements
Rename, and Set IP address according to configuration table and network diagram
at end of project.
Join in garuda.id domain through VPN.
Configure the Always-on VPN/Device tunnel.
● Domain users should be able to log in via this tunnel.
● Only the dc1 and dc2 can be accessed through this tunnel (not other
servers/resources).
Deploy App-triggered VPN.
Create an IKEv2 VPN connection named "AppVPN" for "Managers" group
members only that automatically connects to "vpn.garuda.id" when a member of
the Managers group runs Internet Explorer."
After connection to the VPN, the user should have access to all resources of the
intranet.
Use bitlocker to encrypt the drive of REMCLIENT. Save the bitlocker recovery
key to your USB.
PUBCLIENT – NOT INSTALLED
Install/Configure
Install, rename, and set IP address according to configuration table and network
diagram at end of project.
Do not join this client to the domain.
Set the firewall on this machine to allow inbound and outbound “ping” traffic.
Set the power settings to “never sleep”.
Test Work Folders service is available via "https://work.garuda.id".
● ADFS web authentication should be work.
● Work Folders should be accessible and writable.
This client should be able to receive a certificate from CES.
● Create a local Enrolment Policy.
● Get a certificate contains CN=PUBCLIENT from CES.

Create an IKEv2connection "LKSN2020-VPN" for test purpose and make don't
remember credential.
INET – Preconfigured
Verify configuration if required
● This machine is preconfigured for your use, if you wish to, you may re-install and
configure this machine to these specifications.
● Host NCSI website.
Clients on the Internet should indicate network connection as the "Internet".
● Configure DNS server.
Create zones and records for NCSI.
Add an A record "cs.msftncsi.com" of 192.161.140.1.
Add an A record "ns.msftncsi.com" of 192.161.140.1.
SOA record of the "msftncsi.com" should be "ns.msftncsi.com".
Create a root zone(.) to simulate the root DNS server.
o Create appropriate delegations to resolve DNS records.
● Configure DHCP service.
Range: 192.161.140.151 - 192.161.140.175
DNS: 192.161.140.1
Gateway: 192.161.140.100
● Configure the Certification Authority.
Common name: ISP-CA
Enable extensions for CDP and AIA URL through HTTP.
o URL for CDP: http://cs.msftncsi.com/CertEnroll/ISP-CA.crl
o URL for AIA: http://cs.msftncsi.com/CertEnroll/ISP-CA.crt
Issue certificate request for LKSN2020-CA.

APPENDIX
Configuration Table
Hostname Operation System Domain IP Address(es) Preinstalled
DC1 Windows Server 2019Desktop garuda.id
x` 192.161.139.1
Yes -
Configured
DC2 Windows Server 2019Core garuda.id 192.161.139.101 BASE
CERT Windows Server 2019Desktop garuda.id 192.161.139.100 BASE
INTCLIENT Windows 10 Enterprise garuda.id DHCP BASE
HYPERV1 Windows Server 2019Core garuda.id 192.161.139.10
192.168.1.1
No – manual
install
HYPERV2 Windows Server 2019Desktop garuda.id 192.161.139.20
192.168.1.2 BASE
STORAGE Windows Server 2019Desktop WORKG
ROUP 192.168.1.10 BASE
WEB Windows Server 2019Core garuda.id
192.161.139.103 No-WDS
Deployment
FIREWALL Windows Server 2019Desktop WORKG
ROUP
192.161.139.254
192.161.140.100 BASE
REMCLIENT Windows 10 Enterprise garuda.id DHCP BASE
PUBCLIENT Windows 10 Enterprise WORKG
ROUP DHCP No
INET Windows Server 2019Desktop WORKG
ROUP 192.161.140.1
Yes -
Configured
Machines indicated as being preinstalled with "Yes" will have the operating system
installed.
Machines indicated as being preinstalled with "Yes - Configured" will have the
operating system installed and pre-configured for Competitor use. Competitors may
need to do further configuration to match the specifications laid out in this document.
Machines indicated as “BASE” are standard installs which have been sysprepped and
generalized to save installation time across the project, they will still need to be
configured.

TOPOLOGY