Introduzione a OMNeT++
80
Intro TicToc tutorial Collecting results Visualizing the results Introduzione a OMNeT++ Dott. Ing. Carlo Crociani; Dott. Ing. Luca Filipponi Dipartimento di informatica e sistemistica A.Ruberti May 26, 2008 Dott. Ing. Carlo Crociani; Dott. Ing. Luca Filipponi Introduzione a OMNeT++
Transcript of Introduzione a OMNeT++
Intro TicToc tutorial Collecting results Visualizing the results
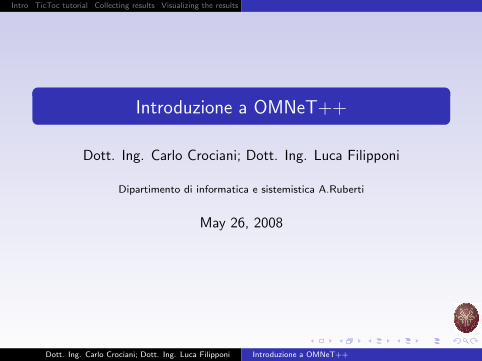
Introduzione a OMNeT++
Dott. Ing. Carlo Crociani; Dott. Ing. Luca Filipponi
Dipartimento di informatica e sistemistica A.Ruberti
May 26, 2008
Dott. Ing. Carlo Crociani; Dott. Ing. Luca Filipponi Introduzione a OMNeT++
Intro TicToc tutorial Collecting results Visualizing the results
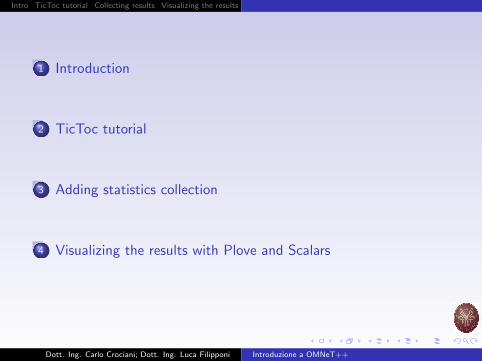
1 Introduction
2 TicToc tutorial
3 Adding statistics collection
4 Visualizing the results with Plove and Scalars
Dott. Ing. Carlo Crociani; Dott. Ing. Luca Filipponi Introduzione a OMNeT++
Intro TicToc tutorial Collecting results Visualizing the results
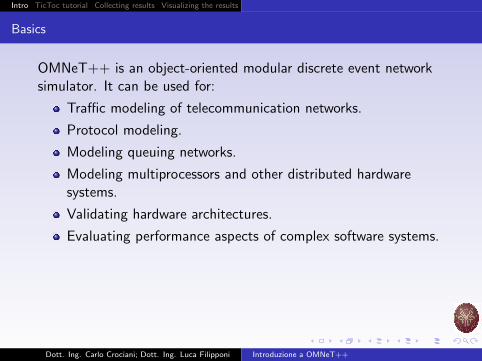
Basics
OMNeT++ is an object-oriented modular discrete event networksimulator. It can be used for:
Traffic modeling of telecommunication networks.
Protocol modeling.
Modeling queuing networks.
Modeling multiprocessors and other distributed hardwaresystems.
Validating hardware architectures.
Evaluating performance aspects of complex software systems.
Dott. Ing. Carlo Crociani; Dott. Ing. Luca Filipponi Introduzione a OMNeT++
Intro TicToc tutorial Collecting results Visualizing the results
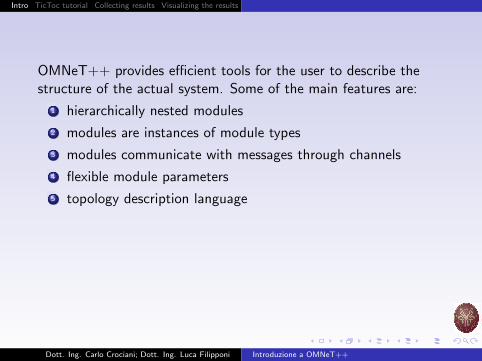
OMNeT++ provides efficient tools for the user to describe thestructure of the actual system. Some of the main features are:
1 hierarchically nested modules
2 modules are instances of module types
3 modules communicate with messages through channels
4 flexible module parameters
5 topology description language
Dott. Ing. Carlo Crociani; Dott. Ing. Luca Filipponi Introduzione a OMNeT++

Intro TicToc tutorial Collecting results Visualizing the results
Modeling concepts
An OMNeT++ model consists of hierarchically nestedmodules, which communicate by passing messages to eachanother. The depth of module nesting is not limited; this allowsthe user to reflect the logical structure of the actual system in themodel structure.
Dott. Ing. Carlo Crociani; Dott. Ing. Luca Filipponi Introduzione a OMNeT++
Intro TicToc tutorial Collecting results Visualizing the results
Type of Modules
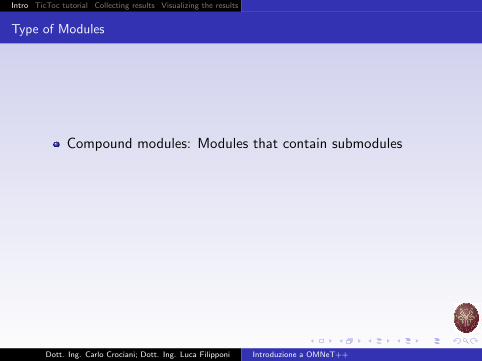
Compound modules: Modules that contain submodules
Simple modules:contain the algorithms in the model,implemented in C++, using the OMNeT++ simulation classlibrary.
Dott. Ing. Carlo Crociani; Dott. Ing. Luca Filipponi Introduzione a OMNeT++
Intro TicToc tutorial Collecting results Visualizing the results
Type of Modules
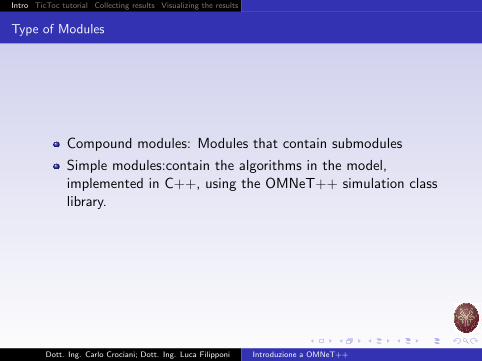
Compound modules: Modules that contain submodules
Simple modules:contain the algorithms in the model,implemented in C++, using the OMNeT++ simulation classlibrary.
Dott. Ing. Carlo Crociani; Dott. Ing. Luca Filipponi Introduzione a OMNeT++
Intro TicToc tutorial Collecting results Visualizing the results
Messages
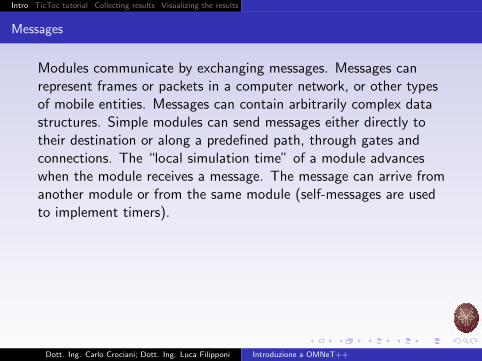
Modules communicate by exchanging messages. Messages canrepresent frames or packets in a computer network, or other typesof mobile entities. Messages can contain arbitrarily complex datastructures. Simple modules can send messages either directly totheir destination or along a predefined path, through gates andconnections. The “local simulation time” of a module advanceswhen the module receives a message. The message can arrive fromanother module or from the same module (self-messages are usedto implement timers).
Dott. Ing. Carlo Crociani; Dott. Ing. Luca Filipponi Introduzione a OMNeT++

Intro TicToc tutorial Collecting results Visualizing the results
Gates connections
Gates are the input and output interfaces of modules; messages aresent out through output gates and arrive through input gates.Each connection (also called link) is created within a single level ofthe module hierarchy: within a compound module, one canconnect the corresponding gates of two submodules, or a gate ofone submodule and a gate of the compound module.
Dott. Ing. Carlo Crociani; Dott. Ing. Luca Filipponi Introduzione a OMNeT++
Intro TicToc tutorial Collecting results Visualizing the results
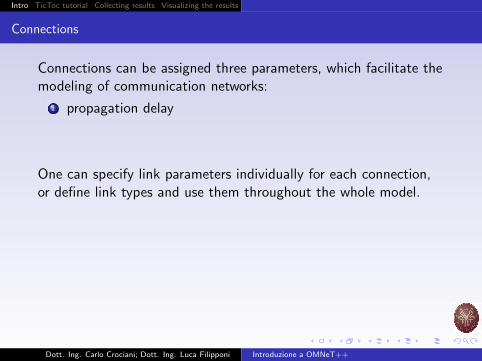
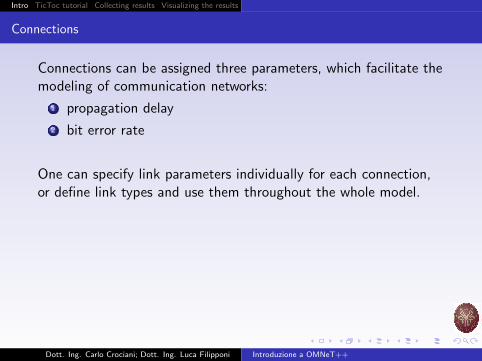
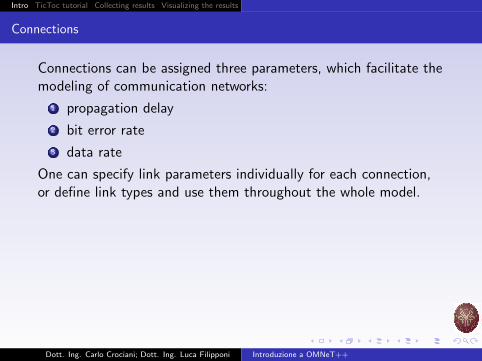
Connections
Connections can be assigned three parameters, which facilitate themodeling of communication networks:
1 propagation delay
2 bit error rate
3 data rate
One can specify link parameters individually for each connection,or define link types and use them throughout the whole model.
Dott. Ing. Carlo Crociani; Dott. Ing. Luca Filipponi Introduzione a OMNeT++
Intro TicToc tutorial Collecting results Visualizing the results
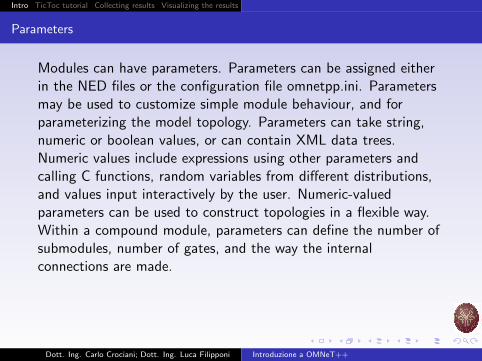
Parameters
Modules can have parameters. Parameters can be assigned eitherin the NED files or the configuration file omnetpp.ini. Parametersmay be used to customize simple module behaviour, and forparameterizing the model topology. Parameters can take string,numeric or boolean values, or can contain XML data trees.Numeric values include expressions using other parameters andcalling C functions, random variables from different distributions,and values input interactively by the user. Numeric-valuedparameters can be used to construct topologies in a flexible way.Within a compound module, parameters can define the number ofsubmodules, number of gates, and the way the internalconnections are made.
Dott. Ing. Carlo Crociani; Dott. Ing. Luca Filipponi Introduzione a OMNeT++
Intro TicToc tutorial Collecting results Visualizing the results
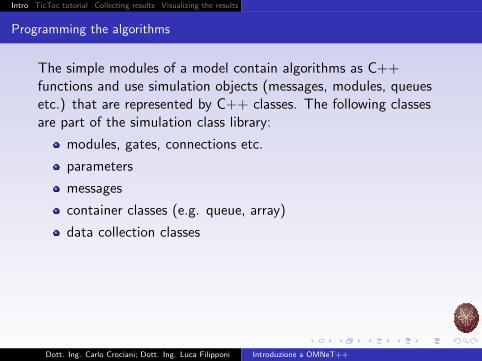
Programming the algorithms
The simple modules of a model contain algorithms as C++functions and use simulation objects (messages, modules, queuesetc.) that are represented by C++ classes. The following classesare part of the simulation class library:
modules, gates, connections etc.
parameters
messages
container classes (e.g. queue, array)
data collection classes
Dott. Ing. Carlo Crociani; Dott. Ing. Luca Filipponi Introduzione a OMNeT++
Intro TicToc tutorial Collecting results Visualizing the results
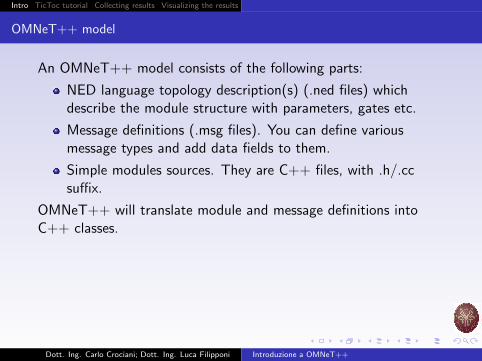
OMNeT++ model
An OMNeT++ model consists of the following parts:
NED language topology description(s) (.ned files) whichdescribe the module structure with parameters, gates etc.
Message definitions (.msg files). You can define variousmessage types and add data fields to them.
Simple modules sources. They are C++ files, with .h/.ccsuffix.
OMNeT++ will translate module and message definitions intoC++ classes.
Dott. Ing. Carlo Crociani; Dott. Ing. Luca Filipponi Introduzione a OMNeT++
Intro TicToc tutorial Collecting results Visualizing the results
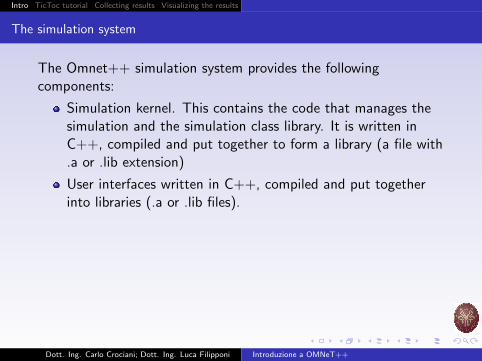
The simulation system
The Omnet++ simulation system provides the followingcomponents:
Simulation kernel. This contains the code that manages thesimulation and the simulation class library. It is written inC++, compiled and put together to form a library (a file with.a or .lib extension)
User interfaces written in C++, compiled and put togetherinto libraries (.a or .lib files).
Dott. Ing. Carlo Crociani; Dott. Ing. Luca Filipponi Introduzione a OMNeT++
Intro TicToc tutorial Collecting results Visualizing the results
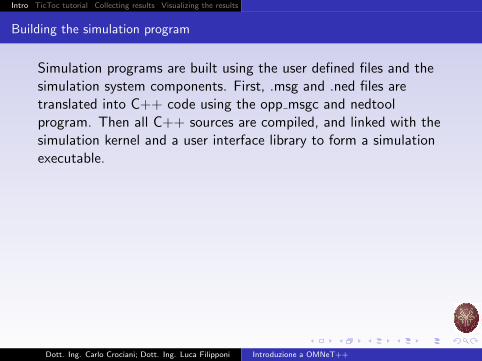
Building the simulation program
Simulation programs are built using the user defined files and thesimulation system components. First, .msg and .ned files aretranslated into C++ code using the opp msgc and nedtoolprogram. Then all C++ sources are compiled, and linked with thesimulation kernel and a user interface library to form a simulationexecutable.
Dott. Ing. Carlo Crociani; Dott. Ing. Luca Filipponi Introduzione a OMNeT++
Intro TicToc tutorial Collecting results Visualizing the results
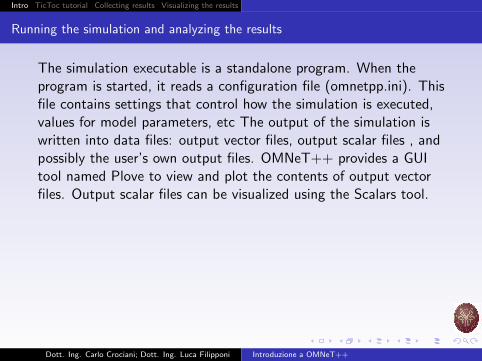
Running the simulation and analyzing the results
The simulation executable is a standalone program. When theprogram is started, it reads a configuration file (omnetpp.ini). Thisfile contains settings that control how the simulation is executed,values for model parameters, etc The output of the simulation iswritten into data files: output vector files, output scalar files , andpossibly the user’s own output files. OMNeT++ provides a GUItool named Plove to view and plot the contents of output vectorfiles. Output scalar files can be visualized using the Scalars tool.
Dott. Ing. Carlo Crociani; Dott. Ing. Luca Filipponi Introduzione a OMNeT++
Intro TicToc tutorial Collecting results Visualizing the results
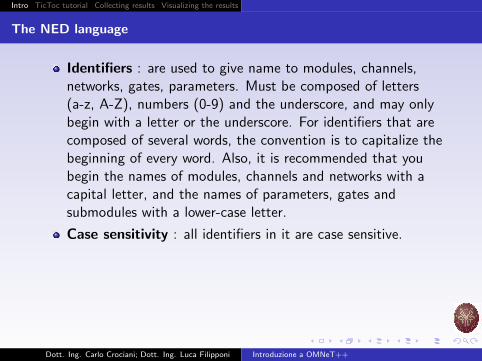
The NED language
Identifiers : are used to give name to modules, channels,networks, gates, parameters. Must be composed of letters(a-z, A-Z), numbers (0-9) and the underscore, and may onlybegin with a letter or the underscore. For identifiers that arecomposed of several words, the convention is to capitalize thebeginning of every word. Also, it is recommended that youbegin the names of modules, channels and networks with acapital letter, and the names of parameters, gates andsubmodules with a lower-case letter.
Case sensitivity : all identifiers in it are case sensitive.
Dott. Ing. Carlo Crociani; Dott. Ing. Luca Filipponi Introduzione a OMNeT++
Intro TicToc tutorial Collecting results Visualizing the results
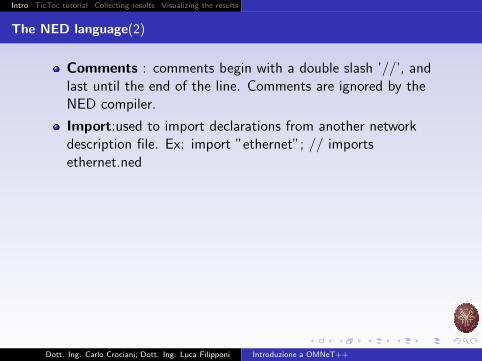
The NED language(2)
Comments : comments begin with a double slash ’//’, andlast until the end of the line. Comments are ignored by theNED compiler.
Import:used to import declarations from another networkdescription file. Ex: import ”ethernet”; // importsethernet.ned
Dott. Ing. Carlo Crociani; Dott. Ing. Luca Filipponi Introduzione a OMNeT++
Intro TicToc tutorial Collecting results Visualizing the results
TicToc Tutorial for OMNeT++
This short tutorial to OMNeT++ guides you through an exampleof modeling and simulation, showing you along the way some ofthe commonly used OMNeT++ features. You’ll find the tutorialmuch more useful if you actually carry out at least the first stepsdescribed here.
Dott. Ing. Carlo Crociani; Dott. Ing. Luca Filipponi Introduzione a OMNeT++
Intro TicToc tutorial Collecting results Visualizing the results
Note: We assume here that you have a working OMNeT++installation. We also assume that you have a good C++knowledge, and you are in general familiar with C/C++development (editing source files, compiling, debugging etc.) onyour operating system. To make the examples easier to follow, allsource code in here is cross-linked to the OMNeT++ APIdocumentation.This document and the TicToc model are an expanded version ofthe original TicToc tutorial from Ahmet Sekercioglu (MonashUniversity).
Dott. Ing. Carlo Crociani; Dott. Ing. Luca Filipponi Introduzione a OMNeT++
Intro TicToc tutorial Collecting results Visualizing the results
Getting started
Since the most common application area of OMNeT++ is thesimulation of telecommunications networks, we’ll borrow our topicfrom there. For a start, let us begin with a ”network” that consistsof two nodes. The nodes will do something simple: one the nodeswill create a packet, and the two nodes will keep passing the samepacket back and forth. We’ll call the nodes ”tic” and ”toc”. Hereare the steps you take to implement your first simulation fromscratch:
1 Create a working directory called tictoc, and cd to thisdirectory.
2 Describe your example network by creating a topology file. Atopology file is a text file that identifies the network’s nodesand the links between them. You can create it with yourfavourite text editor. Let’s call it tictoc1.ned:
Dott. Ing. Carlo Crociani; Dott. Ing. Luca Filipponi Introduzione a OMNeT++
Intro TicToc tutorial Collecting results Visualizing the results
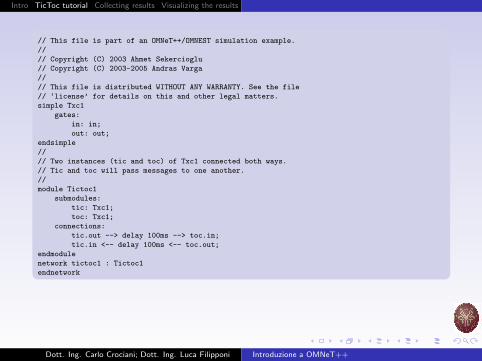
// This file is part of an OMNeT++/OMNEST simulation example.
//
// Copyright (C) 2003 Ahmet Sekercioglu
// Copyright (C) 2003-2005 Andras Varga
//
// This file is distributed WITHOUT ANY WARRANTY. See the file
// ‘license’ for details on this and other legal matters.
simple Txc1
gates:
in: in;
out: out;
endsimple
//
// Two instances (tic and toc) of Txc1 connected both ways.
// Tic and toc will pass messages to one another.
//
module Tictoc1
submodules:
tic: Txc1;
toc: Txc1;
connections:
tic.out --> delay 100ms --> toc.in;
tic.in <-- delay 100ms <-- toc.out;
endmodule
network tictoc1 : Tictoc1
endnetwork
Dott. Ing. Carlo Crociani; Dott. Ing. Luca Filipponi Introduzione a OMNeT++
Intro TicToc tutorial Collecting results Visualizing the results
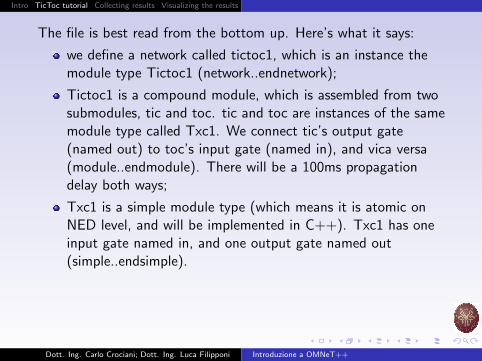
The file is best read from the bottom up. Here’s what it says:
we define a network called tictoc1, which is an instance themodule type Tictoc1 (network..endnetwork);
Tictoc1 is a compound module, which is assembled from twosubmodules, tic and toc. tic and toc are instances of the samemodule type called Txc1. We connect tic’s output gate(named out) to toc’s input gate (named in), and vica versa(module..endmodule). There will be a 100ms propagationdelay both ways;
Txc1 is a simple module type (which means it is atomic onNED level, and will be implemented in C++). Txc1 has oneinput gate named in, and one output gate named out(simple..endsimple).
Dott. Ing. Carlo Crociani; Dott. Ing. Luca Filipponi Introduzione a OMNeT++
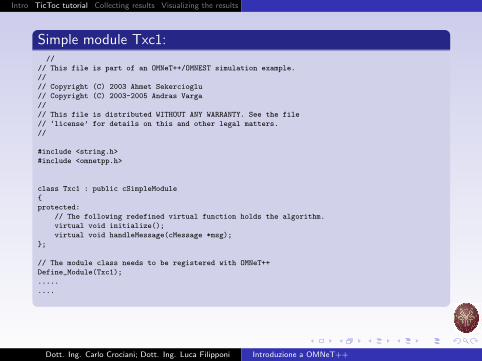
Intro TicToc tutorial Collecting results Visualizing the results
Simple module Txc1://
// This file is part of an OMNeT++/OMNEST simulation example.
//
// Copyright (C) 2003 Ahmet Sekercioglu
// Copyright (C) 2003-2005 Andras Varga
//
// This file is distributed WITHOUT ANY WARRANTY. See the file
// ‘license’ for details on this and other legal matters.
//
#include <string.h>
#include <omnetpp.h>
class Txc1 : public cSimpleModule
{
protected:
// The following redefined virtual function holds the algorithm.
virtual void initialize();
virtual void handleMessage(cMessage *msg);
};
// The module class needs to be registered with OMNeT++
Define_Module(Txc1);
.....
....
Dott. Ing. Carlo Crociani; Dott. Ing. Luca Filipponi Introduzione a OMNeT++
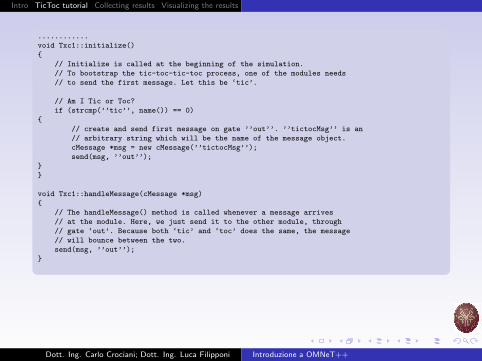
Intro TicToc tutorial Collecting results Visualizing the results
............
void Txc1::initialize()
{
// Initialize is called at the beginning of the simulation.
// To bootstrap the tic-toc-tic-toc process, one of the modules needs
// to send the first message. Let this be ‘tic’.
// Am I Tic or Toc?
if (strcmp(’’tic’’, name()) == 0)
{
// create and send first message on gate ’’out’’. ’’tictocMsg’’ is an
// arbitrary string which will be the name of the message object.
cMessage *msg = new cMessage(’’tictocMsg’’);
send(msg, ’’out’’);
}
}
void Txc1::handleMessage(cMessage *msg)
{
// The handleMessage() method is called whenever a message arrives
// at the module. Here, we just send it to the other module, through
// gate ‘out’. Because both ‘tic’ and ‘toc’ does the same, the message
// will bounce between the two.
send(msg, ’’out’’);
}
Dott. Ing. Carlo Crociani; Dott. Ing. Luca Filipponi Introduzione a OMNeT++
Intro TicToc tutorial Collecting results Visualizing the results
The Txc1 simple module type is represented by the C++ classTxc1, which has to be subclassed from cSimpleModule, andregistered in OMNeT++ with the Define Module() macro. Weredefine two methods from cSimpleModule: initialize() andhandleMessage(). They are invoked from the simulation kernel:the first one only once, and the second one whenever a messagearrives at the module.In initialize() we create a message object (cMessage), and send itout on gate out. Since this gate is connected to the othermodule’s input gate, the simulation kernel will deliver this messageto the other module in the argument to handleMessage() after a100ms propagation delay assigned to the link in the NED file.
Dott. Ing. Carlo Crociani; Dott. Ing. Luca Filipponi Introduzione a OMNeT++
Intro TicToc tutorial Collecting results Visualizing the results
The other module just sends it back (another 100ms delay), so itwill result in a continuous ping-pong.Messages (packets, frames, jobs, etc) and events (timers,timeouts) are all represented by cMessage objects (or itssubclasses) in OMNeT++. After you send or schedule them, theywill be held by the simulation kernel in the ”scheduled events” or”future events” list until their time comes and they are delivered tothe modules via handleMessage(). Note that there is no stoppingcondition built into this simulation: it would continue forever. Youwill be able to stop it from the GUI. (You could also specify asimulation time limit or CPU time limit in the configuration file,but we don’t do that in the tutorial.)
Dott. Ing. Carlo Crociani; Dott. Ing. Luca Filipponi Introduzione a OMNeT++
Intro TicToc tutorial Collecting results Visualizing the results
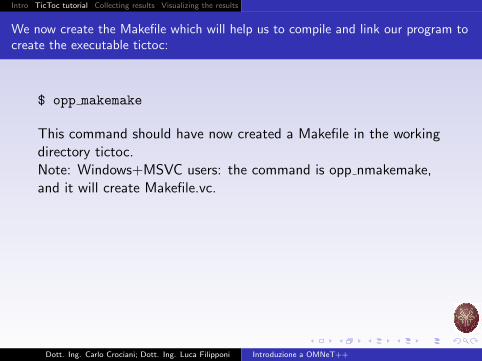
We now create the Makefile which will help us to compile and link our program tocreate the executable tictoc:
$ opp makemake
This command should have now created a Makefile in the workingdirectory tictoc.Note: Windows+MSVC users: the command is opp nmakemake,and it will create Makefile.vc.
Dott. Ing. Carlo Crociani; Dott. Ing. Luca Filipponi Introduzione a OMNeT++
Intro TicToc tutorial Collecting results Visualizing the results
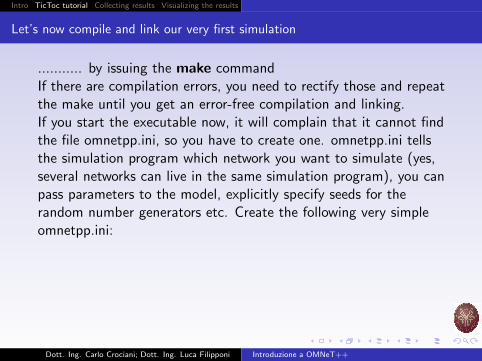
Let’s now compile and link our very first simulation
........... by issuing the make commandIf there are compilation errors, you need to rectify those and repeatthe make until you get an error-free compilation and linking.If you start the executable now, it will complain that it cannot findthe file omnetpp.ini, so you have to create one. omnetpp.ini tellsthe simulation program which network you want to simulate (yes,several networks can live in the same simulation program), you canpass parameters to the model, explicitly specify seeds for therandom number generators etc. Create the following very simpleomnetpp.ini:
Dott. Ing. Carlo Crociani; Dott. Ing. Luca Filipponi Introduzione a OMNeT++
Intro TicToc tutorial Collecting results Visualizing the results
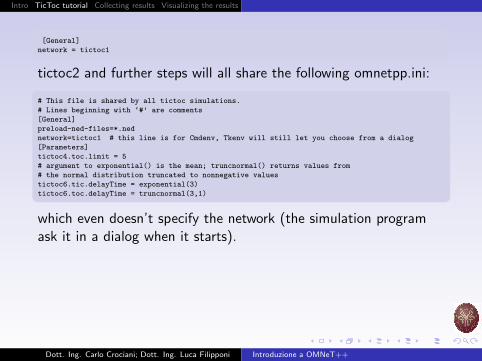
[General]
network = tictoc1
tictoc2 and further steps will all share the following omnetpp.ini:
# This file is shared by all tictoc simulations.
# Lines beginning with ‘#’ are comments
[General]
preload-ned-files=*.ned
network=tictoc1 # this line is for Cmdenv, Tkenv will still let you choose from a dialog
[Parameters]
tictoc4.toc.limit = 5
# argument to exponential() is the mean; truncnormal() returns values from
# the normal distribution truncated to nonnegative values
tictoc6.tic.delayTime = exponential(3)
tictoc6.toc.delayTime = truncnormal(3,1)
which even doesn’t specify the network (the simulation programask it in a dialog when it starts).
Dott. Ing. Carlo Crociani; Dott. Ing. Luca Filipponi Introduzione a OMNeT++
Intro TicToc tutorial Collecting results Visualizing the results
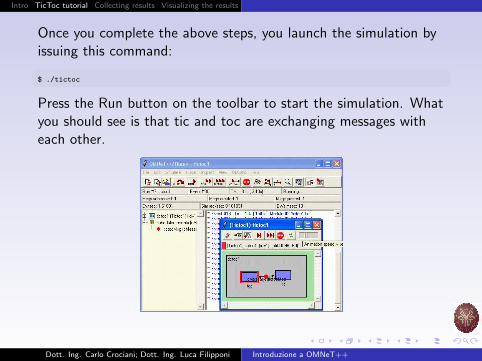
Once you complete the above steps, you launch the simulation byissuing this command:
$ ./tictoc
Press the Run button on the toolbar to start the simulation. Whatyou should see is that tic and toc are exchanging messages witheach other.
Dott. Ing. Carlo Crociani; Dott. Ing. Luca Filipponi Introduzione a OMNeT++
Intro TicToc tutorial Collecting results Visualizing the results
Simulator GUI
The main window toolbar displays the simulated time. This isvirtual time, it has nothing to do with the actual (or wall-clock)time that the program takes to execute. Actually, how manyseconds you can simulate in one real-world second depends highlyon the speed of your hardware and even more on the nature andcomplexity of the simulation model itself. Note that it takes zerosimulation time for a node to process the message. The only thingthat makes the simulation time pass in this model is thepropagation delay on the connections.
Dott. Ing. Carlo Crociani; Dott. Ing. Luca Filipponi Introduzione a OMNeT++
Intro TicToc tutorial Collecting results Visualizing the results
You can play with slowing down the animation or making it fasterwith the slider at the top of the graphics window. You can stopthe simulation by hitting F8 (equivalent to the STOP button onthe toolbar), single-step through it (F4), run it with (F5) orwithout (F6) animation. F7 (express mode) completely turns offtracing features for maximum speed. Note the event/sec andsimsec/sec gauges on the status bar of the main window. You canexit the simulation program by clicking its Close icon or choosingFile—Exit.
Dott. Ing. Carlo Crociani; Dott. Ing. Luca Filipponi Introduzione a OMNeT++
Intro TicToc tutorial Collecting results Visualizing the results
Refining the graphics, and adding debugging output
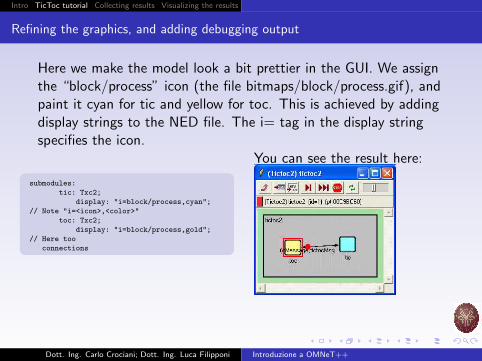
Here we make the model look a bit prettier in the GUI. We assignthe “block/process” icon (the file bitmaps/block/process.gif), andpaint it cyan for tic and yellow for toc. This is achieved by addingdisplay strings to the NED file. The i= tag in the display stringspecifies the icon.
submodules:
tic: Txc2;
display: "i=block/process,cyan";
// Note "i=<icon>,<color>"
toc: Txc2;
display: "i=block/process,gold";
// Here too
connections
You can see the result here:
Dott. Ing. Carlo Crociani; Dott. Ing. Luca Filipponi Introduzione a OMNeT++
Intro TicToc tutorial Collecting results Visualizing the results
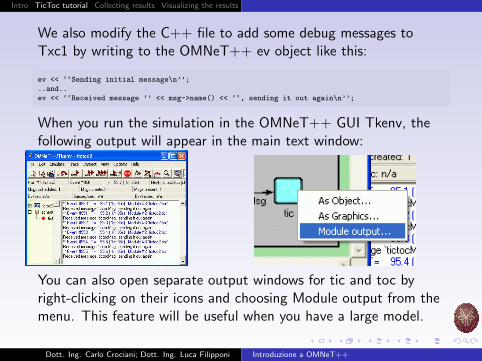
We also modify the C++ file to add some debug messages toTxc1 by writing to the OMNeT++ ev object like this:
ev << ‘‘Sending initial message\n’’;
..and..
ev << ‘‘Received message ’’ << msg->name() << ‘‘, sending it out again\n’’;
When you run the simulation in the OMNeT++ GUI Tkenv, thefollowing output will appear in the main text window:
You can also open separate output windows for tic and toc byright-clicking on their icons and choosing Module output from themenu. This feature will be useful when you have a large model.
Dott. Ing. Carlo Crociani; Dott. Ing. Luca Filipponi Introduzione a OMNeT++
Intro TicToc tutorial Collecting results Visualizing the results
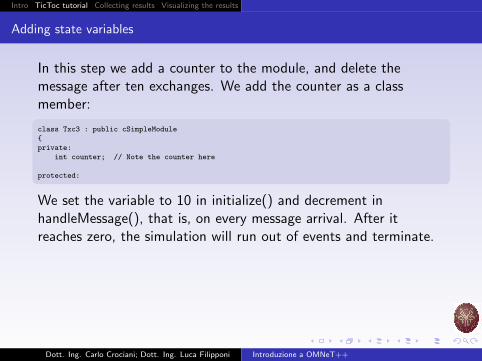
Adding state variables
In this step we add a counter to the module, and delete themessage after ten exchanges. We add the counter as a classmember:
class Txc3 : public cSimpleModule
{
private:
int counter; // Note the counter here
protected:
We set the variable to 10 in initialize() and decrement inhandleMessage(), that is, on every message arrival. After itreaches zero, the simulation will run out of events and terminate.
Dott. Ing. Carlo Crociani; Dott. Ing. Luca Filipponi Introduzione a OMNeT++
Intro TicToc tutorial Collecting results Visualizing the results
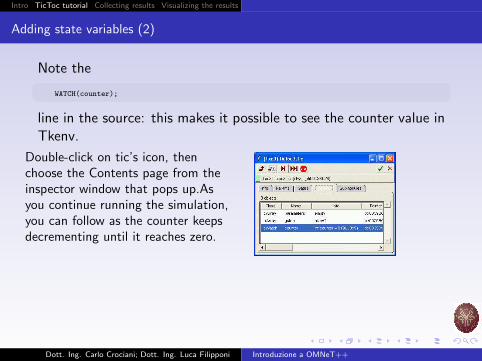
Adding state variables (2)
Note the
WATCH(counter);
line in the source: this makes it possible to see the counter value inTkenv.
Double-click on tic’s icon, thenchoose the Contents page from theinspector window that pops up.Asyou continue running the simulation,you can follow as the counter keepsdecrementing until it reaches zero.
Dott. Ing. Carlo Crociani; Dott. Ing. Luca Filipponi Introduzione a OMNeT++
Intro TicToc tutorial Collecting results Visualizing the results
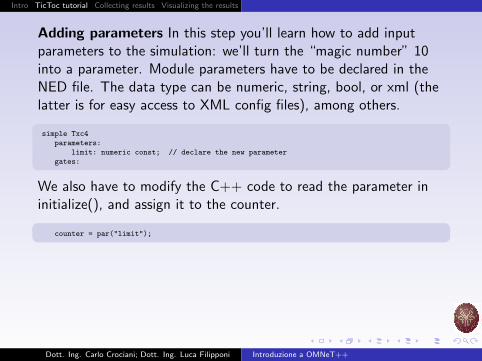
Adding parameters In this step you’ll learn how to add inputparameters to the simulation: we’ll turn the “magic number” 10into a parameter. Module parameters have to be declared in theNED file. The data type can be numeric, string, bool, or xml (thelatter is for easy access to XML config files), among others.
simple Txc4
parameters:
limit: numeric const; // declare the new parameter
gates:
We also have to modify the C++ code to read the parameter ininitialize(), and assign it to the counter.
counter = par("limit");
Dott. Ing. Carlo Crociani; Dott. Ing. Luca Filipponi Introduzione a OMNeT++
Intro TicToc tutorial Collecting results Visualizing the results
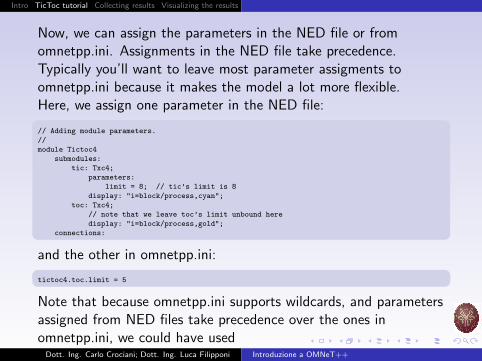
Now, we can assign the parameters in the NED file or fromomnetpp.ini. Assignments in the NED file take precedence.Typically you’ll want to leave most parameter assigments toomnetpp.ini because it makes the model a lot more flexible.Here, we assign one parameter in the NED file:
// Adding module parameters.
//
module Tictoc4
submodules:
tic: Txc4;
parameters:
limit = 8; // tic’s limit is 8
display: "i=block/process,cyan";
toc: Txc4;
// note that we leave toc’s limit unbound here
display: "i=block/process,gold";
connections:
and the other in omnetpp.ini:
tictoc4.toc.limit = 5
Note that because omnetpp.ini supports wildcards, and parametersassigned from NED files take precedence over the ones inomnetpp.ini, we could have used
tictoc4.t*c.limit=5
or
tictoc4.*.limit=5
or even
**.limit=5
with the same effect. (The difference between * and ** is that *will not match a dot and ** will.)In Tkenv, you can inspect module parameters either in the objecttree on the left-hand side of the main window, or in theParameters page of the module inspector (opened viadouble-clicking on the module icon).The module with the smaller limit will delete the message andthereby conclude the simulation.
Dott. Ing. Carlo Crociani; Dott. Ing. Luca Filipponi Introduzione a OMNeT++

Intro TicToc tutorial Collecting results Visualizing the results
Modelling processing delay
In the previous models, tic and toc immediately sent back thereceived message. Here we’ll add some timing: tic and toc willhold the message for 1 simulated second before sending it back. InOMNeT++ such timing is achieved by the module sending amessage to itself. Such messages are called self-messages (but onlybecause of the way they are used, otherwise they are ordinarymessage objects).We added two cMessage * variables, event and tictocMsg to theclass, to remember the message we use for timing and messagewhose processing delay we are simulating.
Dott. Ing. Carlo Crociani; Dott. Ing. Luca Filipponi Introduzione a OMNeT++

Intro TicToc tutorial Collecting results Visualizing the results
Modelling processing delay(2)
class Txc5 : public cSimpleModule
{
private:
cMessage *event; // pointer to the event object which we’ll use for timing
cMessage *tictocMsg; // variable to remember the message until we send it back
public:
We ”send” the self-messages with the scheduleAt() function,specifying when it should be delivered back to the module.
scheduleAt(simTime()+1.0, event);
In handleMessage() now we have to differentiate whether a newmessage has arrived via the input gate or the self-message cameback (timer expired). Here we are using
if (msg==event)
Dott. Ing. Carlo Crociani; Dott. Ing. Luca Filipponi Introduzione a OMNeT++
Intro TicToc tutorial Collecting results Visualizing the results
but we could have written
if (msg->isSelfMessage())
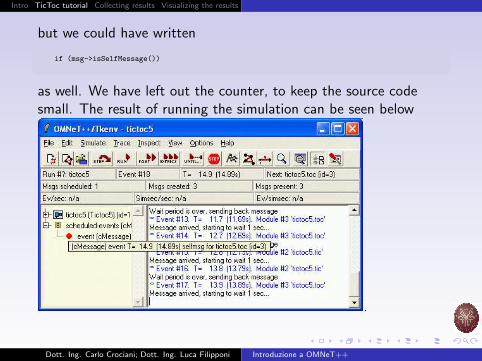
as well. We have left out the counter, to keep the source codesmall. The result of running the simulation can be seen below
.
Dott. Ing. Carlo Crociani; Dott. Ing. Luca Filipponi Introduzione a OMNeT++
Intro TicToc tutorial Collecting results Visualizing the results
Random numbers and parameters
In this step we’ll introduce random numbers. We change the delayfrom 1s to a random value which can be set from the NED file orfrom omnetpp.ini. Module parameters are able to return randomvariates; however, to make use of this feature we have to read theparameter in handleMessage() every time we use it.
// The "delayTime" module parameter can be set to values like
// "exponential(5)" (tictoc6.ned, omnetpp.ini), and then here
// we’ll get a different delay every time.
double delay = par("delayTime");
ev << "Message arrived, starting to wait " << delay << " secs...\n";
tictocMsg = msg;
scheduleAt(simTime()+delay, event);
Dott. Ing. Carlo Crociani; Dott. Ing. Luca Filipponi Introduzione a OMNeT++
Intro TicToc tutorial Collecting results Visualizing the results
In addition, we’ll “lose” (delete) the packet with a small(hardcoded) probability.
if (uniform(0,1) < 0.1)
{
ev << "\"Losing\" message\n";
delete msg;
}
We’ll assign the parameters in omnetpp.ini:
tictoc6.tic.delayTime = exponential(3)
tictoc6.toc.delayTime = truncnormal(3,1)
You can try that no matter how many times you re-run thesimulation (or restart it, Simulate—Rebuild network menu item),you’ll get exactly the same results. This is because OMNeT++uses a deterministic algorithm (by default the Mersenne TwisterRNG) to generate random numbers, and initializes it to the sameseed. This is important for reproducible simulations.
Dott. Ing. Carlo Crociani; Dott. Ing. Luca Filipponi Introduzione a OMNeT++
Intro TicToc tutorial Collecting results Visualizing the results
You can experiment with different seeds if you add the followinglines to omnetpp.ini:
[General]
seed-0-mt=532569 # or any other 32-bit value
From the syntax you have probably guessed that OMNeT++supports more than one RNGs. That’s right, however, all models inthis tutorial use RNG 0.
Dott. Ing. Carlo Crociani; Dott. Ing. Luca Filipponi Introduzione a OMNeT++
Intro TicToc tutorial Collecting results Visualizing the results
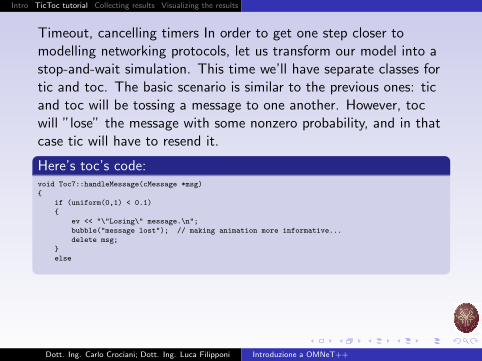
Timeout, cancelling timers In order to get one step closer tomodelling networking protocols, let us transform our model into astop-and-wait simulation. This time we’ll have separate classes fortic and toc. The basic scenario is similar to the previous ones: ticand toc will be tossing a message to one another. However, tocwill ”lose” the message with some nonzero probability, and in thatcase tic will have to resend it.
Here’s toc’s code:void Toc7::handleMessage(cMessage *msg)
{
if (uniform(0,1) < 0.1)
{
ev << "\"Losing\" message.\n";
bubble("message lost"); // making animation more informative...
delete msg;
}
else
Dott. Ing. Carlo Crociani; Dott. Ing. Luca Filipponi Introduzione a OMNeT++
Intro TicToc tutorial Collecting results Visualizing the results
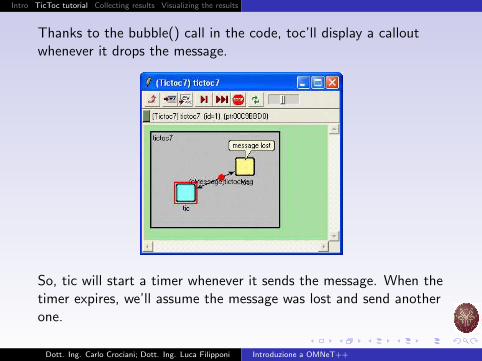
Thanks to the bubble() call in the code, toc’ll display a calloutwhenever it drops the message.
So, tic will start a timer whenever it sends the message. When thetimer expires, we’ll assume the message was lost and send anotherone.
Dott. Ing. Carlo Crociani; Dott. Ing. Luca Filipponi Introduzione a OMNeT++
Intro TicToc tutorial Collecting results Visualizing the results
If toc’s reply arrives, the timer has to be cancelled. The timer willbe (what else?) a self-message.
scheduleAt(simTime()+timeout, timeoutEvent);
Cancelling the timer will be done with the cancelEvent() call. Notethat this does not prevent us from being able to reuse the sametimeout message over and over.
cancelEvent(timeoutEvent);
Dott. Ing. Carlo Crociani; Dott. Ing. Luca Filipponi Introduzione a OMNeT++
Intro TicToc tutorial Collecting results Visualizing the results
Retransmitting the same message
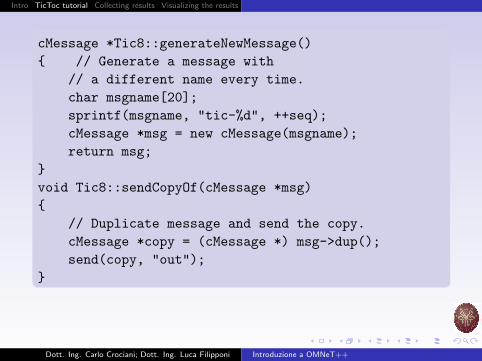
In this step we refine the previous model. There we just createdanother packet if we needed to retransmit. This is OK because thepacket didn’t contain much, but in real life it’s usually morepractical to keep a copy of the original packet so that we canre-send it without the need to build it again. What we do here iskeep the original packet and send only copies of it. We delete theoriginal when toc’s acknowledgement arrives. To make it easier tovisually verify the model, we’ll include a message sequence numberthe message names. In order to avoid handleMessage() growingtoo large, we’ll put the corresponding code into two new functions,generateNewMessage() and sendCopyOf() and call them fromhandleMessage().
Dott. Ing. Carlo Crociani; Dott. Ing. Luca Filipponi Introduzione a OMNeT++
Intro TicToc tutorial Collecting results Visualizing the results
cMessage *Tic8::generateNewMessage(){ // Generate a message with
// a different name every time.char msgname[20];sprintf(msgname, "tic-%d", ++seq);cMessage *msg = new cMessage(msgname);return msg;
}void Tic8::sendCopyOf(cMessage *msg){
// Duplicate message and send the copy.cMessage *copy = (cMessage *) msg->dup();send(copy, "out");
}
Dott. Ing. Carlo Crociani; Dott. Ing. Luca Filipponi Introduzione a OMNeT++
Intro TicToc tutorial Collecting results Visualizing the results
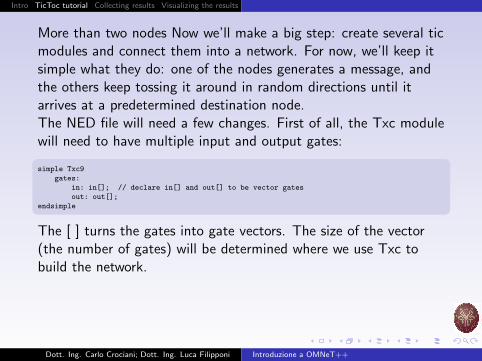
More than two nodes Now we’ll make a big step: create several ticmodules and connect them into a network. For now, we’ll keep itsimple what they do: one of the nodes generates a message, andthe others keep tossing it around in random directions until itarrives at a predetermined destination node.The NED file will need a few changes. First of all, the Txc modulewill need to have multiple input and output gates:
simple Txc9
gates:
in: in[]; // declare in[] and out[] to be vector gates
out: out[];
endsimple
The [ ] turns the gates into gate vectors. The size of the vector(the number of gates) will be determined where we use Txc tobuild the network.
Dott. Ing. Carlo Crociani; Dott. Ing. Luca Filipponi Introduzione a OMNeT++
Intro TicToc tutorial Collecting results Visualizing the results
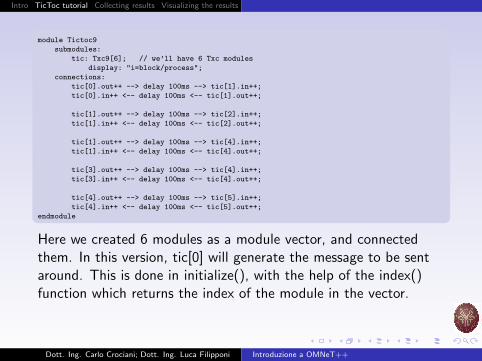
module Tictoc9
submodules:
tic: Txc9[6]; // we’ll have 6 Txc modules
display: "i=block/process";
connections:
tic[0].out++ --> delay 100ms --> tic[1].in++;
tic[0].in++ <-- delay 100ms <-- tic[1].out++;
tic[1].out++ --> delay 100ms --> tic[2].in++;
tic[1].in++ <-- delay 100ms <-- tic[2].out++;
tic[1].out++ --> delay 100ms --> tic[4].in++;
tic[1].in++ <-- delay 100ms <-- tic[4].out++;
tic[3].out++ --> delay 100ms --> tic[4].in++;
tic[3].in++ <-- delay 100ms <-- tic[4].out++;
tic[4].out++ --> delay 100ms --> tic[5].in++;
tic[4].in++ <-- delay 100ms <-- tic[5].out++;
endmodule
Here we created 6 modules as a module vector, and connectedthem. In this version, tic[0] will generate the message to be sentaround. This is done in initialize(), with the help of the index()function which returns the index of the module in the vector.
Dott. Ing. Carlo Crociani; Dott. Ing. Luca Filipponi Introduzione a OMNeT++
Intro TicToc tutorial Collecting results Visualizing the results
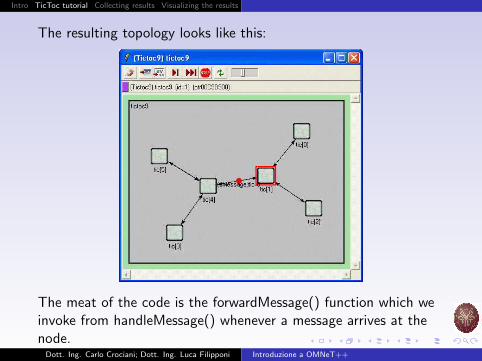
The resulting topology looks like this:
The meat of the code is the forwardMessage() function which weinvoke from handleMessage() whenever a message arrives at thenode.
Dott. Ing. Carlo Crociani; Dott. Ing. Luca Filipponi Introduzione a OMNeT++
Intro TicToc tutorial Collecting results Visualizing the results
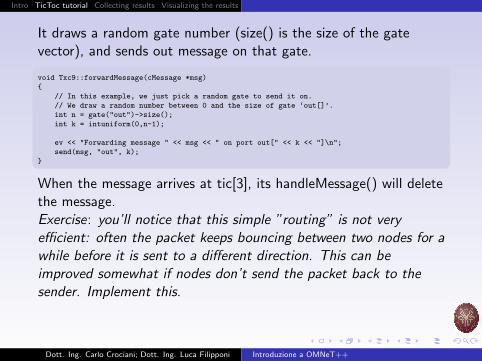
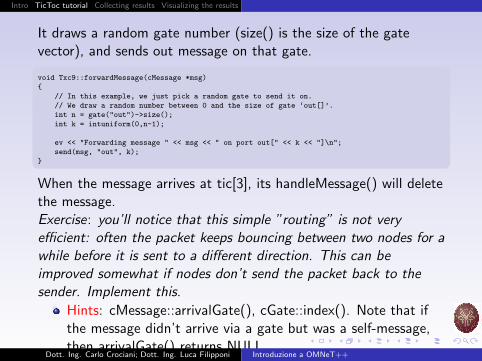
It draws a random gate number (size() is the size of the gatevector), and sends out message on that gate.
void Txc9::forwardMessage(cMessage *msg)
{
// In this example, we just pick a random gate to send it on.
// We draw a random number between 0 and the size of gate ‘out[]’.
int n = gate("out")->size();
int k = intuniform(0,n-1);
ev << "Forwarding message " << msg << " on port out[" << k << "]\n";
send(msg, "out", k);
}
When the message arrives at tic[3], its handleMessage() will deletethe message.Exercise: you’ll notice that this simple ”routing” is not veryefficient: often the packet keeps bouncing between two nodes for awhile before it is sent to a different direction. This can beimproved somewhat if nodes don’t send the packet back to thesender. Implement this.
Hints: cMessage::arrivalGate(), cGate::index(). Note that ifthe message didn’t arrive via a gate but was a self-message,then arrivalGate() returns NULL.
Dott. Ing. Carlo Crociani; Dott. Ing. Luca Filipponi Introduzione a OMNeT++
Intro TicToc tutorial Collecting results Visualizing the results
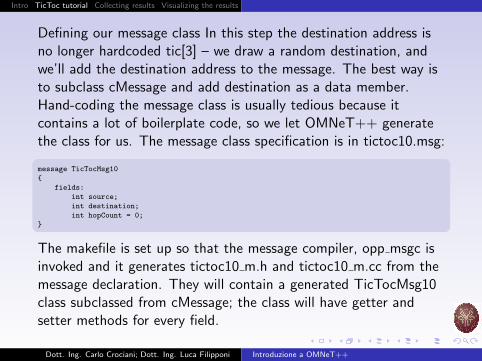
Defining our message class In this step the destination address isno longer hardcoded tic[3] – we draw a random destination, andwe’ll add the destination address to the message. The best way isto subclass cMessage and add destination as a data member.Hand-coding the message class is usually tedious because itcontains a lot of boilerplate code, so we let OMNeT++ generatethe class for us. The message class specification is in tictoc10.msg:
message TicTocMsg10
{
fields:
int source;
int destination;
int hopCount = 0;
}
The makefile is set up so that the message compiler, opp msgc isinvoked and it generates tictoc10 m.h and tictoc10 m.cc from themessage declaration. They will contain a generated TicTocMsg10class subclassed from cMessage; the class will have getter andsetter methods for every field.
Dott. Ing. Carlo Crociani; Dott. Ing. Luca Filipponi Introduzione a OMNeT++
Intro TicToc tutorial Collecting results Visualizing the results
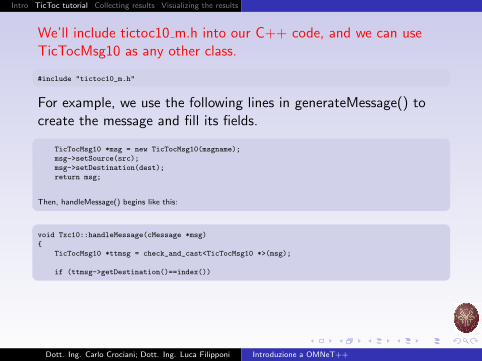
We’ll include tictoc10 m.h into our C++ code, and we can useTicTocMsg10 as any other class.
#include "tictoc10_m.h"
For example, we use the following lines in generateMessage() tocreate the message and fill its fields.
TicTocMsg10 *msg = new TicTocMsg10(msgname);
msg->setSource(src);
msg->setDestination(dest);
return msg;
Then, handleMessage() begins like this:
void Txc10::handleMessage(cMessage *msg)
{
TicTocMsg10 *ttmsg = check_and_cast<TicTocMsg10 *>(msg);
if (ttmsg->getDestination()==index())
Dott. Ing. Carlo Crociani; Dott. Ing. Luca Filipponi Introduzione a OMNeT++
Intro TicToc tutorial Collecting results Visualizing the results
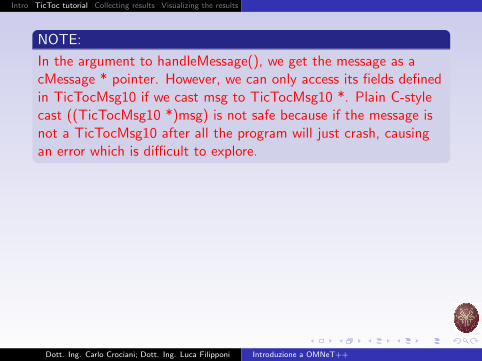
NOTE:
In the argument to handleMessage(), we get the message as acMessage * pointer. However, we can only access its fields definedin TicTocMsg10 if we cast msg to TicTocMsg10 *. Plain C-stylecast ((TicTocMsg10 *)msg) is not safe because if the message isnot a TicTocMsg10 after all the program will just crash, causingan error which is difficult to explore.
Dott. Ing. Carlo Crociani; Dott. Ing. Luca Filipponi Introduzione a OMNeT++
Intro TicToc tutorial Collecting results Visualizing the results
Errors
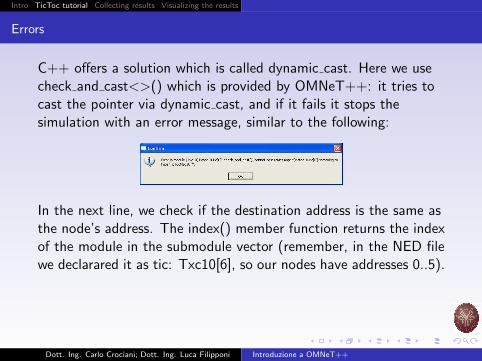
C++ offers a solution which is called dynamic cast. Here we usecheck and cast<>() which is provided by OMNeT++: it tries tocast the pointer via dynamic cast, and if it fails it stops thesimulation with an error message, similar to the following:
In the next line, we check if the destination address is the same asthe node’s address. The index() member function returns the indexof the module in the submodule vector (remember, in the NED filewe declarared it as tic: Txc10[6], so our nodes have addresses 0..5).
Dott. Ing. Carlo Crociani; Dott. Ing. Luca Filipponi Introduzione a OMNeT++
Intro TicToc tutorial Collecting results Visualizing the results
Errors(2)
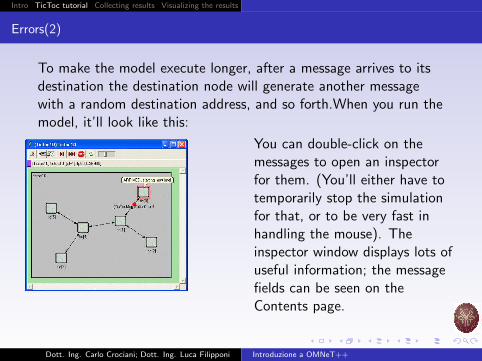
To make the model execute longer, after a message arrives to itsdestination the destination node will generate another messagewith a random destination address, and so forth.When you run themodel, it’ll look like this:
You can double-click on themessages to open an inspectorfor them. (You’ll either have totemporarily stop the simulationfor that, or to be very fast inhandling the mouse). Theinspector window displays lots ofuseful information; the messagefields can be seen on theContents page.
Dott. Ing. Carlo Crociani; Dott. Ing. Luca Filipponi Introduzione a OMNeT++
Intro TicToc tutorial Collecting results Visualizing the results
Exercise: In this model, there is only one message underway at anygiven moment: nodes only generate a message when anothermessage arrives at them. We did it this way to make it easier tofollow the simulation. Change the module class so that instead, itgenerates messages periodically. The interval between messagesshould be a module parameter, returning exponentially distributedrandom numbers.
Dott. Ing. Carlo Crociani; Dott. Ing. Luca Filipponi Introduzione a OMNeT++
Intro TicToc tutorial Collecting results Visualizing the results
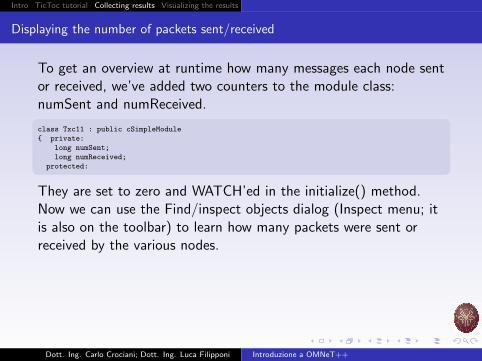
Displaying the number of packets sent/received
To get an overview at runtime how many messages each node sentor received, we’ve added two counters to the module class:numSent and numReceived.
class Txc11 : public cSimpleModule
{ private:
long numSent;
long numReceived;
protected:
They are set to zero and WATCH’ed in the initialize() method.Now we can use the Find/inspect objects dialog (Inspect menu; itis also on the toolbar) to learn how many packets were sent orreceived by the various nodes.
Dott. Ing. Carlo Crociani; Dott. Ing. Luca Filipponi Introduzione a OMNeT++
Intro TicToc tutorial Collecting results Visualizing the results
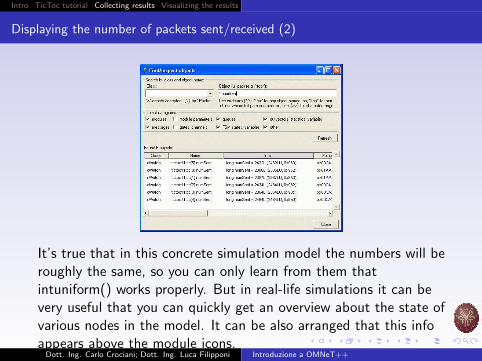
Displaying the number of packets sent/received (2)
It’s true that in this concrete simulation model the numbers will beroughly the same, so you can only learn from them thatintuniform() works properly. But in real-life simulations it can bevery useful that you can quickly get an overview about the state ofvarious nodes in the model. It can be also arranged that this infoappears above the module icons.
Dott. Ing. Carlo Crociani; Dott. Ing. Luca Filipponi Introduzione a OMNeT++
Intro TicToc tutorial Collecting results Visualizing the results
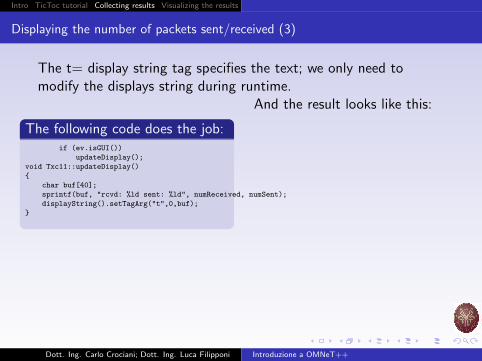
Displaying the number of packets sent/received (3)
The t= display string tag specifies the text; we only need tomodify the displays string during runtime.
The following code does the job:if (ev.isGUI())
updateDisplay();
void Txc11::updateDisplay()
{
char buf[40];
sprintf(buf, "rcvd: %ld sent: %ld", numReceived, numSent);
displayString().setTagArg("t",0,buf);
}
And the result looks like this:
Dott. Ing. Carlo Crociani; Dott. Ing. Luca Filipponi Introduzione a OMNeT++
Intro TicToc tutorial Collecting results Visualizing the results
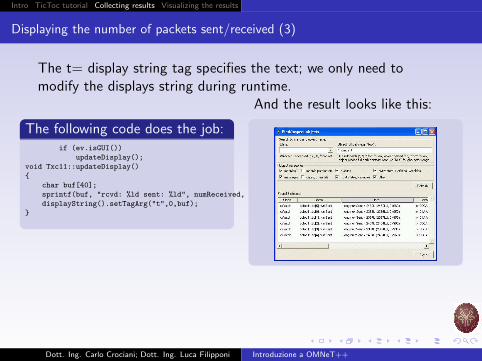
Displaying the number of packets sent/received (3)
The t= display string tag specifies the text; we only need tomodify the displays string during runtime.
The following code does the job:if (ev.isGUI())
updateDisplay();
void Txc11::updateDisplay()
{
char buf[40];
sprintf(buf, "rcvd: %ld sent: %ld", numReceived, numSent);
displayString().setTagArg("t",0,buf);
}
And the result looks like this:
Dott. Ing. Carlo Crociani; Dott. Ing. Luca Filipponi Introduzione a OMNeT++
Intro TicToc tutorial Collecting results Visualizing the results
Adding statistics collection
The previous simulation model does something interesting enoughso that we can collect some statistics. For example, you may beinterested in the average hop count a message has to travel beforereaching its destination. We’ll record in the hop count of everymessage upon arrival into an output vector (a sequence of(time,value) pairs, sort of a time series). We also calculate mean,standard deviation, minimum, maximum values per node, and writethem into a file at the end of the simulation. Then we’ll use off-linetools to analyse the output files. For that, we add an output vectorobject (which will record the data into omnetpp.vec) and ahistogram object (which also calculates mean, etc) to the class.
Dott. Ing. Carlo Crociani; Dott. Ing. Luca Filipponi Introduzione a OMNeT++
Intro TicToc tutorial Collecting results Visualizing the results
Adding statistics collection(2)
class Txc12 : public cSimpleModule
{
private:
long numSent;
long numReceived;
cLongHistogram hopCountStats;
cOutVector hopCountVector;
protected:
When a message arrives at the destination node, we update thestatistics. The following code has been added to handleMessage():
hopCountVector.record(hopcount);
hopCountStats.collect(hopcount);
hopCountVector.record() call writes the data into omnetpp.vec.With a large simulation model or long execution time, theomnetpp.vec file may grow very large.
Dott. Ing. Carlo Crociani; Dott. Ing. Luca Filipponi Introduzione a OMNeT++
Intro TicToc tutorial Collecting results Visualizing the results
Adding statistics collection(3)
To handle this situation, you can specifically disable/enable vectorin omnetpp.ini, and you can also specify a simulation time intervalin which you’re interested (data recorded outside this interval willbe discarded.)When you begin a new simulation, the existing omnetpp.vec filegets deleted.Scalar data (collected by the histogram object in this simulation)have to be recorded manually, in the finish() function. finish() getsinvoked on successful completion of the simulation, i.e. not whenit’s stopped with an error. The recordScalar() calls in the codebelow write into the omnetpp.sca file.
Dott. Ing. Carlo Crociani; Dott. Ing. Luca Filipponi Introduzione a OMNeT++
Intro TicToc tutorial Collecting results Visualizing the results
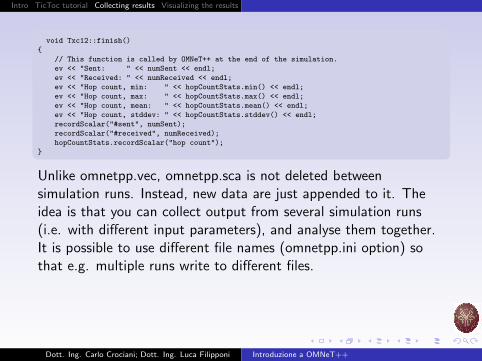
void Txc12::finish()
{
// This function is called by OMNeT++ at the end of the simulation.
ev << "Sent: " << numSent << endl;
ev << "Received: " << numReceived << endl;
ev << "Hop count, min: " << hopCountStats.min() << endl;
ev << "Hop count, max: " << hopCountStats.max() << endl;
ev << "Hop count, mean: " << hopCountStats.mean() << endl;
ev << "Hop count, stddev: " << hopCountStats.stddev() << endl;
recordScalar("#sent", numSent);
recordScalar("#received", numReceived);
hopCountStats.recordScalar("hop count");
}
Unlike omnetpp.vec, omnetpp.sca is not deleted betweensimulation runs. Instead, new data are just appended to it. Theidea is that you can collect output from several simulation runs(i.e. with different input parameters), and analyse them together.It is possible to use different file names (omnetpp.ini option) sothat e.g. multiple runs write to different files.
Dott. Ing. Carlo Crociani; Dott. Ing. Luca Filipponi Introduzione a OMNeT++
Intro TicToc tutorial Collecting results Visualizing the results
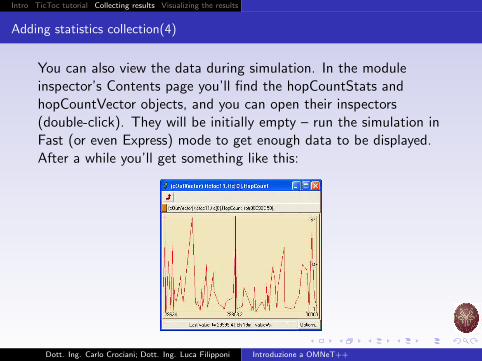
Adding statistics collection(4)
You can also view the data during simulation. In the moduleinspector’s Contents page you’ll find the hopCountStats andhopCountVector objects, and you can open their inspectors(double-click). They will be initially empty – run the simulation inFast (or even Express) mode to get enough data to be displayed.After a while you’ll get something like this:
Dott. Ing. Carlo Crociani; Dott. Ing. Luca Filipponi Introduzione a OMNeT++
Intro TicToc tutorial Collecting results Visualizing the results
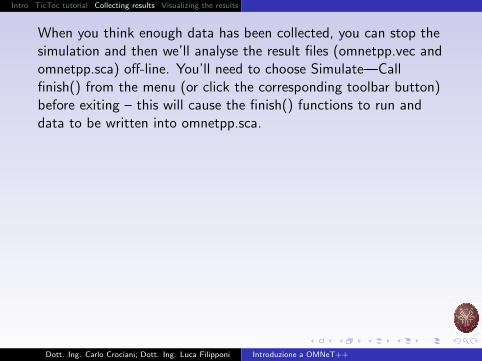
When you think enough data has been collected, you can stop thesimulation and then we’ll analyse the result files (omnetpp.vec andomnetpp.sca) off-line. You’ll need to choose Simulate—Callfinish() from the menu (or click the corresponding toolbar button)before exiting – this will cause the finish() functions to run anddata to be written into omnetpp.sca.
Dott. Ing. Carlo Crociani; Dott. Ing. Luca Filipponi Introduzione a OMNeT++
Intro TicToc tutorial Collecting results Visualizing the results
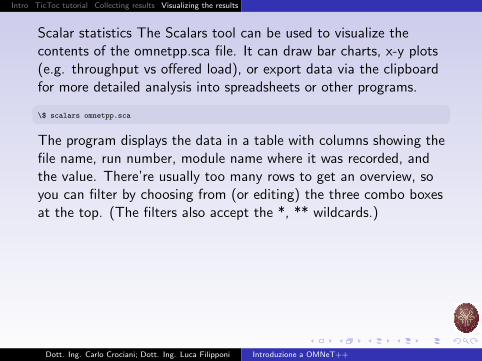
Scalar statistics The Scalars tool can be used to visualize thecontents of the omnetpp.sca file. It can draw bar charts, x-y plots(e.g. throughput vs offered load), or export data via the clipboardfor more detailed analysis into spreadsheets or other programs.
\$ scalars omnetpp.sca
The program displays the data in a table with columns showing thefile name, run number, module name where it was recorded, andthe value. There’re usually too many rows to get an overview, soyou can filter by choosing from (or editing) the three combo boxesat the top. (The filters also accept the *, ** wildcards.)
Dott. Ing. Carlo Crociani; Dott. Ing. Luca Filipponi Introduzione a OMNeT++
Intro TicToc tutorial Collecting results Visualizing the results
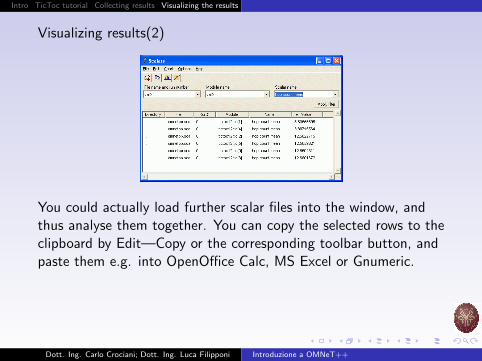
Visualizing results(2)
You could actually load further scalar files into the window, andthus analyse them together. You can copy the selected rows to theclipboard by Edit—Copy or the corresponding toolbar button, andpaste them e.g. into OpenOffice Calc, MS Excel or Gnumeric.
Dott. Ing. Carlo Crociani; Dott. Ing. Luca Filipponi Introduzione a OMNeT++

Intro TicToc tutorial Collecting results Visualizing the results
Visualizing results(3)The bar chart toolbar button creates – well – a bar chart in a newwindow. You can customize the chart by right-clicking on it andchoosing from the context menu. It can also be exported to EPS,GIF, or as metafile via the Windows clipboard (the latter is notavailable on Unix of course).
Dott. Ing. Carlo Crociani; Dott. Ing. Luca Filipponi Introduzione a OMNeT++
Intro TicToc tutorial Collecting results Visualizing the results
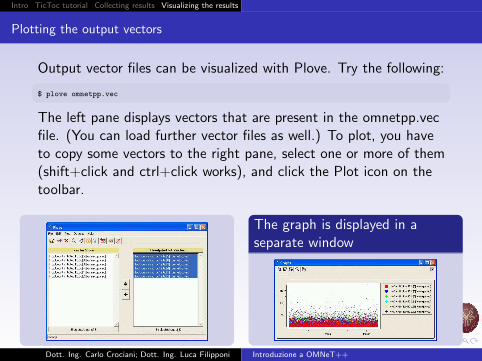
Plotting the output vectors
Output vector files can be visualized with Plove. Try the following:
$ plove omnetpp.vec
The left pane displays vectors that are present in the omnetpp.vecfile. (You can load further vector files as well.) To plot, you haveto copy some vectors to the right pane, select one or more of them(shift+click and ctrl+click works), and click the Plot icon on thetoolbar.
The graph is displayed in aseparate window
Dott. Ing. Carlo Crociani; Dott. Ing. Luca Filipponi Introduzione a OMNeT++
Intro TicToc tutorial Collecting results Visualizing the results
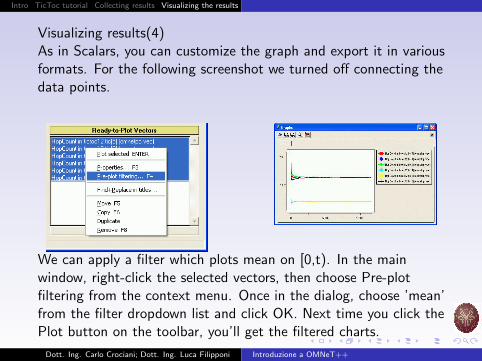
Visualizing results(4)As in Scalars, you can customize the graph and export it in variousformats. For the following screenshot we turned off connecting thedata points.
We can apply a filter which plots mean on [0,t). In the mainwindow, right-click the selected vectors, then choose Pre-plotfiltering from the context menu. Once in the dialog, choose ’mean’from the filter dropdown list and click OK. Next time you click thePlot button on the toolbar, you’ll get the filtered charts.
Dott. Ing. Carlo Crociani; Dott. Ing. Luca Filipponi Introduzione a OMNeT++
Intro TicToc tutorial Collecting results Visualizing the results
Thanks for your attention!
Dott. Ing. Carlo Crociani; Dott. Ing. Luca Filipponi Introduzione a OMNeT++