INSTALLING THE SAAB MOONROOF IN THE BMW E28e28-535i.com/upload/saab_moonroof_install_rev_b.pdf ·...
28
1 of 28 INSTALLING THE SAAB MOONROOF IN THE BMW E28 A STEP-BY-STEP INSTRUCTIONAL PROCEEDURE WITH TEXT AND PICTURES BY: JBORT PART 1…REQUIRED PIECES PART 2…DISASSEMBLY PART 3…PRIVACY SHADE PREPERATION PART 4…REASSEMBLY INTRODUCTION One of the most desirable options for the e28 is the glass moonroof. Although it could have been ordered and dealer installed, it’s a rare option on U.S. version e28’s, and not too common on the Euro cars. Until recently, used BMW moonroof assemblies had become increasingly rare and expensive; some of the pieces have become unavailable (new), and the remaining used assemblies are looking pretty shabby. Well, someone figured out that the moonroofs installed into the Saab 9000 sedans, 1987-1994, were manufactured by the same company (Webasto) as the BMW units. They are dimensionally similar, and can be retrofitted into the e28 sedan. The Saab moonroofs can sometimes be found at the “Pick- N-Pull” auto dismantlers, Saab specialty dismantlers, and from enthusiasts on the internet. PART 1…REQUIRED PIECES The following pictures show the actual Saab moonroof parts required for the transformation to e28 residence: The moonroof panel. Check the inside surface for missing reflective coating.
Transcript of INSTALLING THE SAAB MOONROOF IN THE BMW E28e28-535i.com/upload/saab_moonroof_install_rev_b.pdf ·...

1 of 28
INSTALLING THE SAAB MOONROOF IN THE BMW E28 A STEP-BY-STEP INSTRUCTIONAL PROCEEDURE WITH TEXT AND PICTURES
BY: JBORT
PART 1…REQUIRED PIECES PART 2…DISASSEMBLY PART 3…PRIVACY SHADE PREPERATION PART 4…REASSEMBLY INTRODUCTION One of the most desirable options for the e28 is the glass moonroof. Although it could have been ordered and dealer installed, it’s a rare option on U.S. version e28’s, and not too common on the Euro cars. Until recently, used BMW moonroof assemblies had become increasingly rare and expensive; some of the pieces have become unavailable (new), and the remaining used assemblies are looking pretty shabby. Well, someone figured out that the moonroofs installed into the Saab 9000 sedans, 1987-1994, were manufactured by the same company (Webasto) as the BMW units. They are dimensionally similar, and can be retrofitted into the e28 sedan. The Saab moonroofs can sometimes be found at the “Pick-N-Pull” auto dismantlers, Saab specialty dismantlers, and from enthusiasts on the internet.
PART 1…REQUIRED PIECES The following pictures show the actual Saab moonroof parts required for the transformation to e28 residence:
The moonroof panel. Check the inside surface for missing reflective coating.
2 of 28
The plastic perimeter frame. Check for breaks, cracks. Repair any defects.
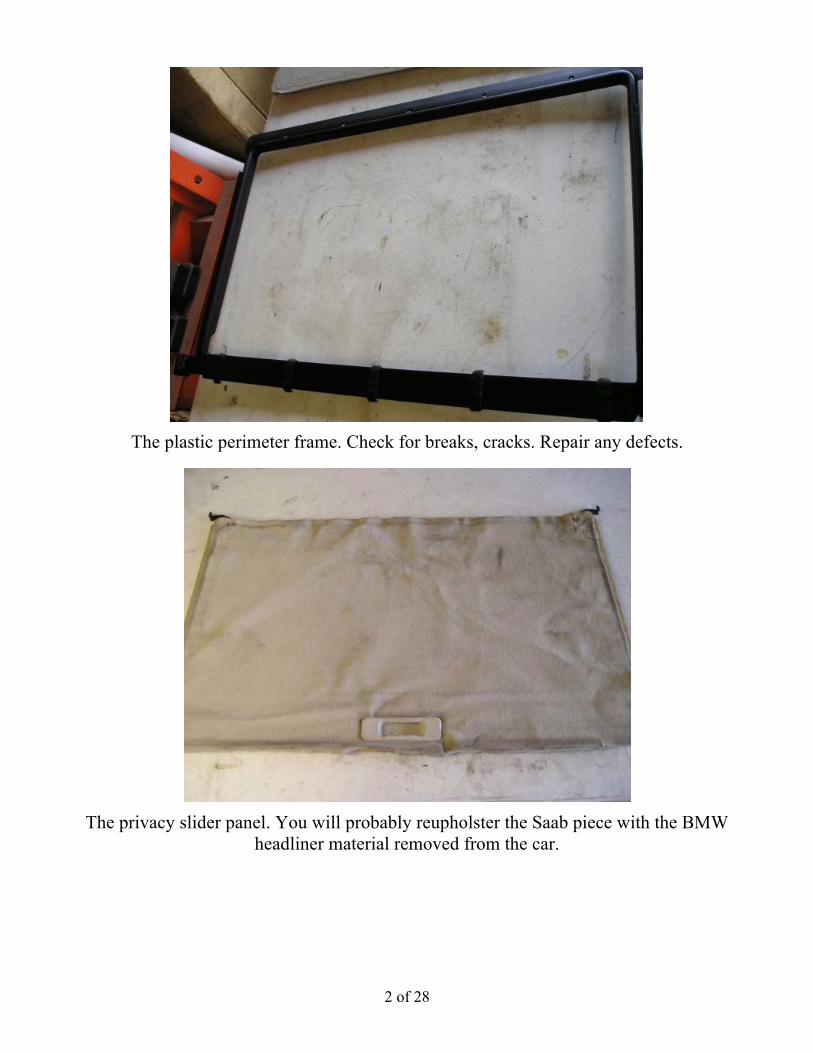
The privacy slider panel. You will probably reupholster the Saab piece with the BMW
headliner material removed from the car.

3 of 28
OPTIONAL PARTS: There are additional parts which aid in the function and/or looks of the Saab-to-BMW moonroof transformation.
The cable cover plates; Saab moonroof version shown on the left, and the U.S. sunroof on the right. Either
get the Saab pieces or you must trim the U.S. parts to a similar shape.
The helper springs are used on the BMW moonroofs but not found on the Saab assemblies. Are they
necessary? No. Do they help? Don’t know.
The above trim piece is from an early e28, before they started installing the flip-up wind deflectors. Since the deflector won’t work with the moonroof, you can either cut-up the wind deflector or replace with the
early trim piece.

4 of 28
You probably noticed that the Saab privacy slider comes with a white-colored slider handle. Here is the BMW black handle. New. From Germany.
The tools for installation. A Phillips screw driver (or gun), a Torx-25 driver, and an upholstery clip removal tool. Maybe pliers if you got helper springs. Knife, contact cement
and a bondo-spreader for panel reupholstry.

5 of 28
PART 2… DISASSEMBLY
Out with the old; in with the new.
Open the sunroof about 8”
Using the upholstery tool, unclip the sunroof inside cover and slide all the way back into
the roof.

6 of 28
Now open the sunroof to “vent” position.
Here are the Torx-25 attaching screws (3-each side). Remove them all.
7 of 28
Carefully lift out the roof panel, and set aside. It makes a nice end table (mounted to TRX
wheels)!!
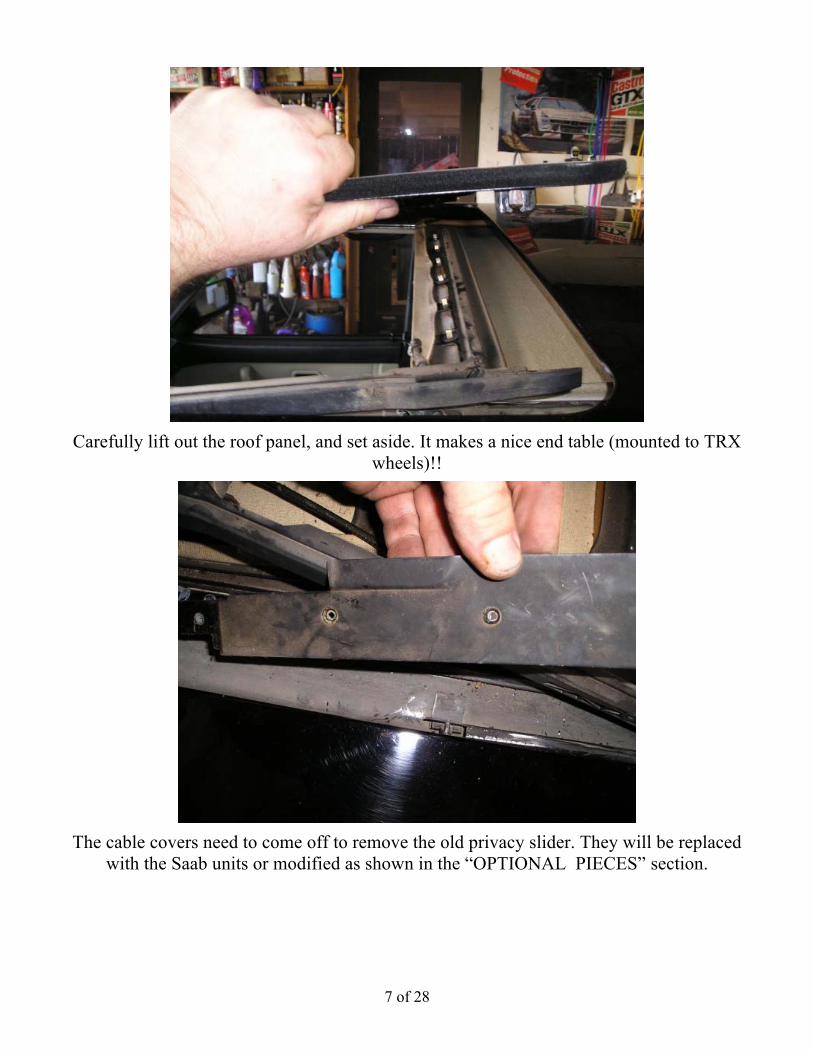
The cable covers need to come off to remove the old privacy slider. They will be replaced
with the Saab units or modified as shown in the “OPTIONAL PIECES” section.
8 of 28
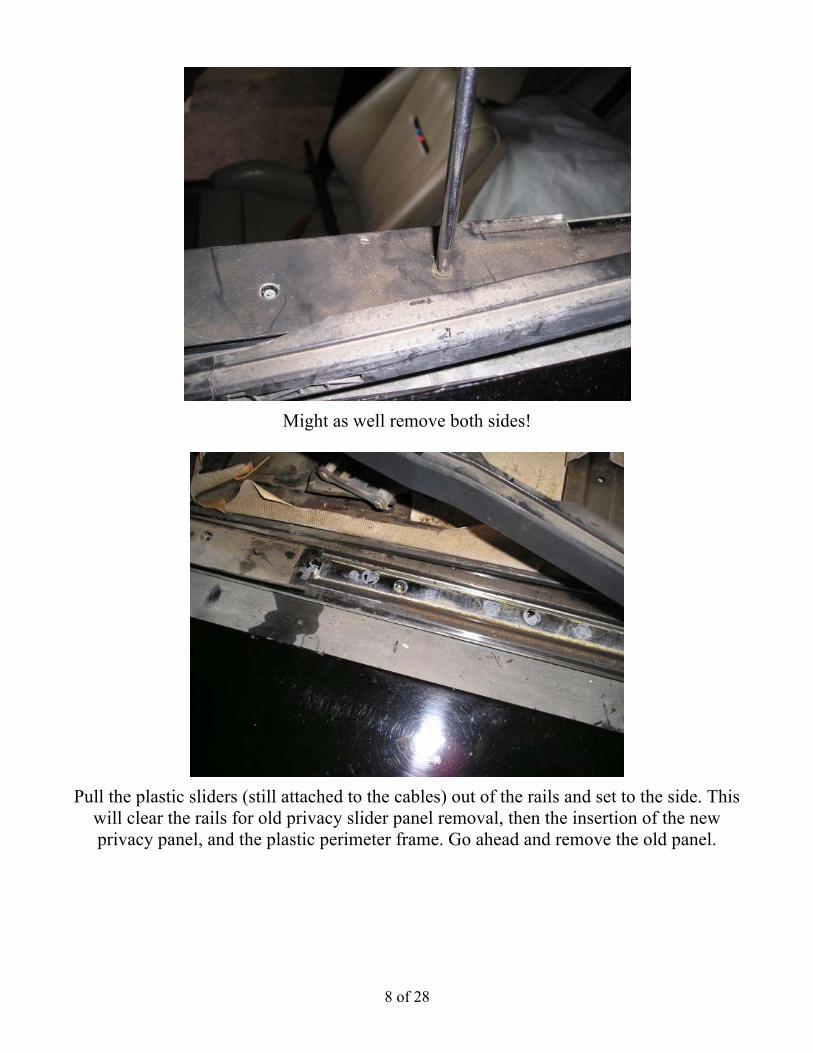
Might as well remove both sides!
Pull the plastic sliders (still attached to the cables) out of the rails and set to the side. This
will clear the rails for old privacy slider panel removal, then the insertion of the new privacy panel, and the plastic perimeter frame. Go ahead and remove the old panel.

9 of 28
If your car is so equipped, and you haven’t already done so, pop-up the arms for the built-in wind deflector (both sides).
Unscrew the forward trim piece/wind deflector and remove. Again, you cannot keep the “flip-up” wind deflector. BMW says no. The ETK says no. I say “maybe” (with extensive
modification…). But for now, NO!

10 of 28
Here is the wind deflector “flip-up” piece. Either remove the flipper part or replace the assembly with the previously mentioned “early BMW” forward trim part (much cleaner look).

11 of 28
PART 3…PRIVACY SHADE PREPARATION
The Saab privacy slider shade (we’ll call it the “slider” for now) is a different, but interchangeable design from the Euro BMW moonroof slider. The Saab part is a one-piece fiberglass panel, while the BMW part is a frame and plastic 2-piece, riveted together assembly. However, the Saab part is upholstered in a felt-like material which does not match the BMW headliner. In addition, most of the used Saab sliders are pretty ratty… I actually removed the upholstery material from a “donor” BMW and reupholstered the Saab fiberglass slider ahead of time, since you have to wait for the glue to dry. At this point, you’ll have access to that material from the old panel, or you could go with something really wild (stars, flowers, M-Fleck pattern (it’s being considered as we speak!!), etc…)!
Here again is the old Saab slider (privacy panel). Definite “yuck”!! This one begs to be reupholstered.

12 of 28
Remove the handle and strip off the old material. Set aside.
Here is the old interior panel from the sunroof. We’ll reuse this material.
13 of 28
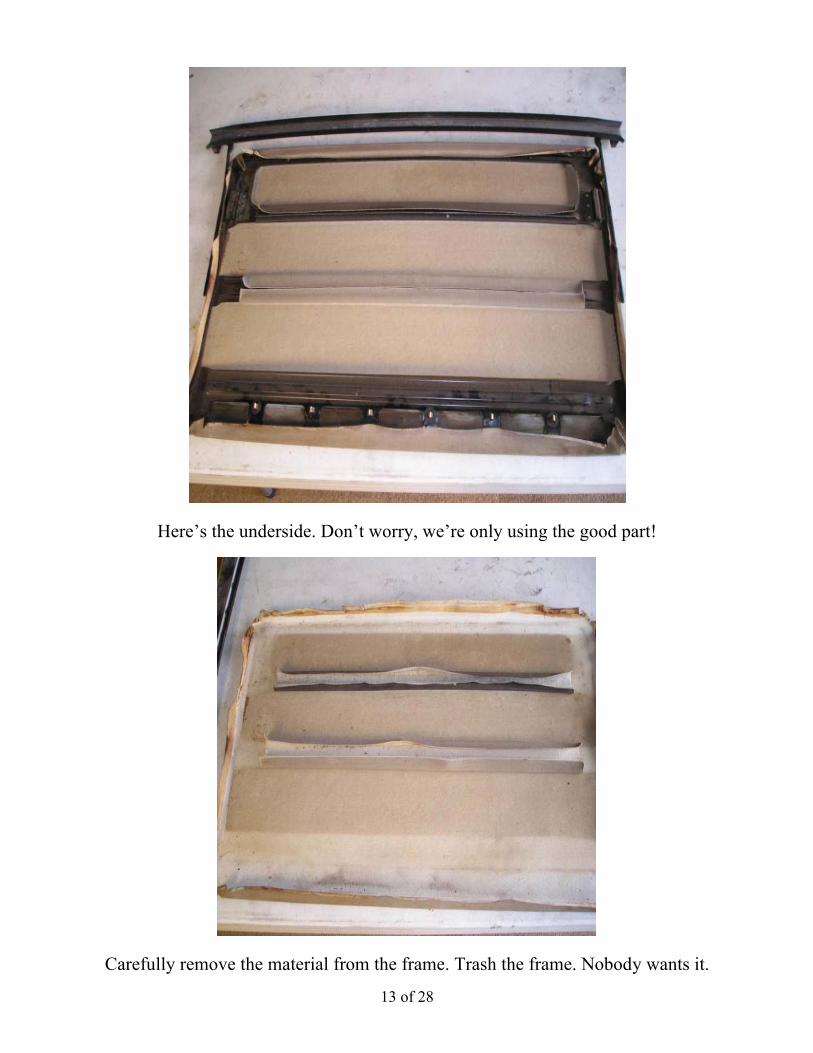
Here’s the underside. Don’t worry, we’re only using the good part!
Carefully remove the material from the frame. Trash the frame. Nobody wants it.

14 of 28
Slowly remove the attaching straps. It’s the only way to get the material to lie flat.
The underside; we won’t see this!

15 of 28
I found it best to pre-fit and trim before gluing. The sides and back should be trimmed back about 1/8”. The front (handle edge) gets wrapped around the panel.
Here’s the final pre-fit. You won’t see the sides or back.

16 of 28
Here’s the cleaned Saab panel, ready for glue.
Big ‘ole slab of contact cee-ment!
17 of 28
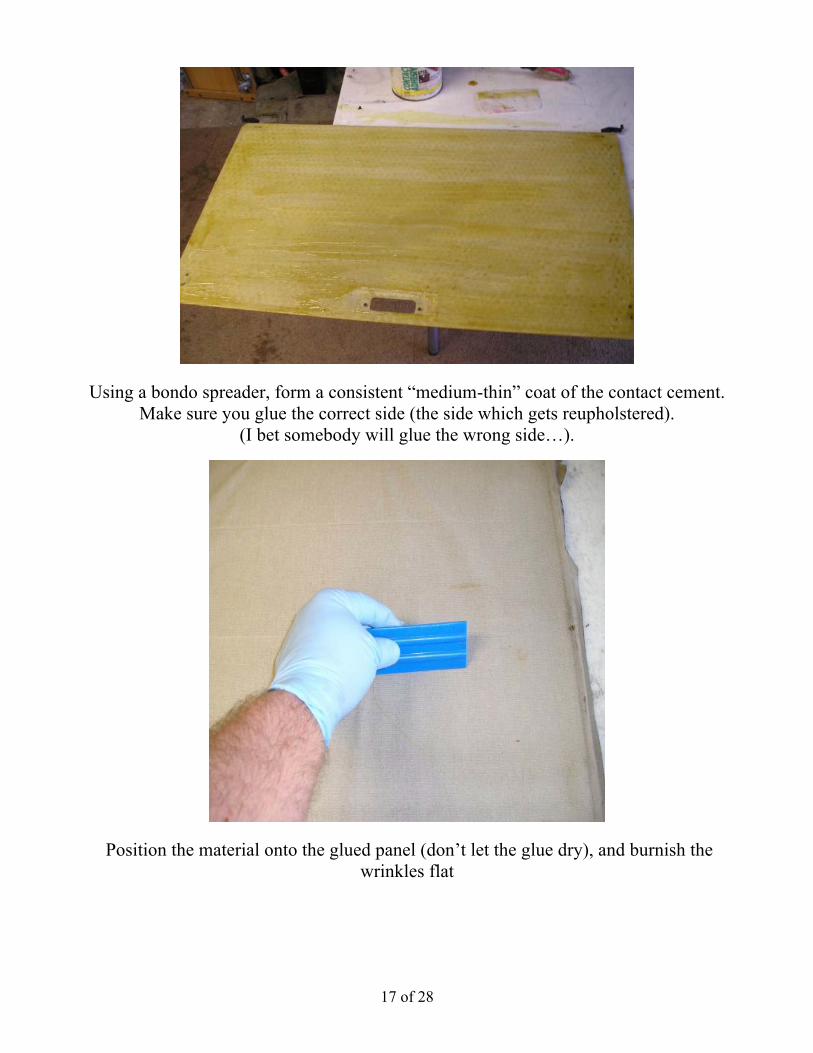
Using a bondo spreader, form a consistent “medium-thin” coat of the contact cement. Make sure you glue the correct side (the side which gets reupholstered).
(I bet somebody will glue the wrong side…).
Position the material onto the glued panel (don’t let the glue dry), and burnish the wrinkles flat
18 of 28
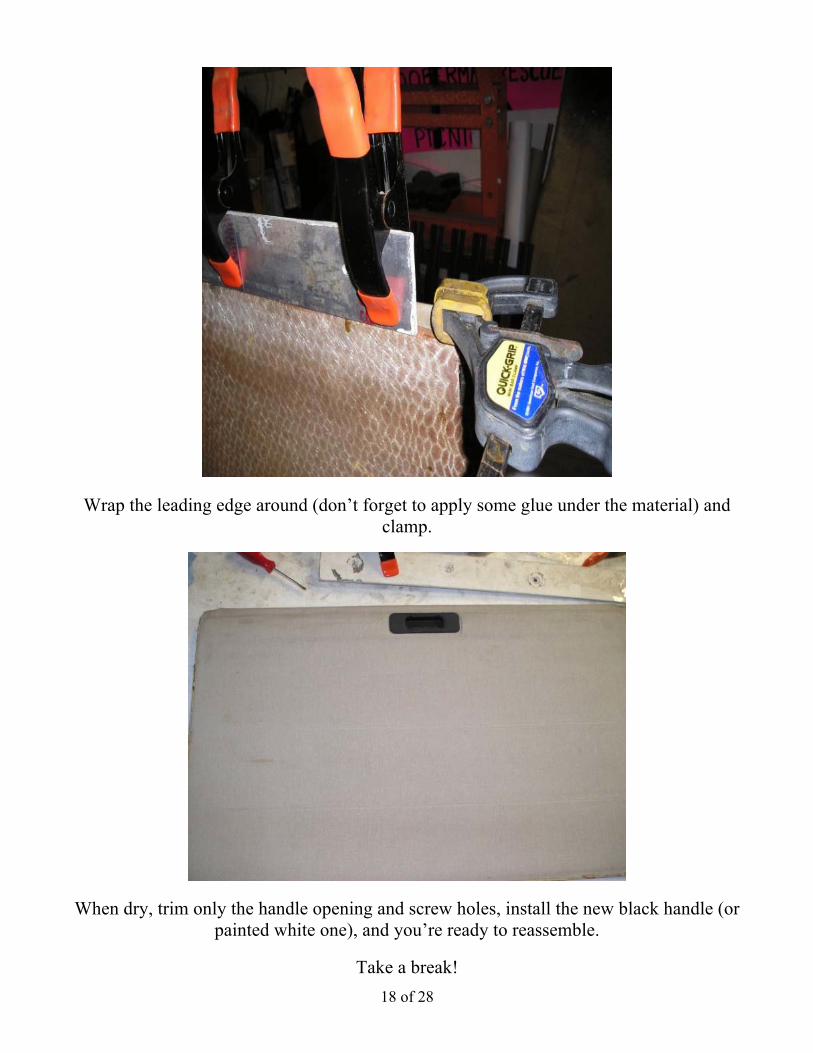
Wrap the leading edge around (don’t forget to apply some glue under the material) and clamp.
When dry, trim only the handle opening and screw holes, install the new black handle (or painted white one), and you’re ready to reassemble.
Take a break!

19 of 28
PART 4…REASSEMBLY
Install the early (or late-modified) leading edge trim piece, replacing the once functional flip-up deflector.
Install the Saab privacy slider by inserting the guide tabs into the channel grooves. You may need to move the cables and plastic slide rails out of the way.

20 of 28
With the privacy slider installed, move it all the way back into the roof.
Here’s a detail of how the frame installs around the outside of the slider rails.
21 of 28
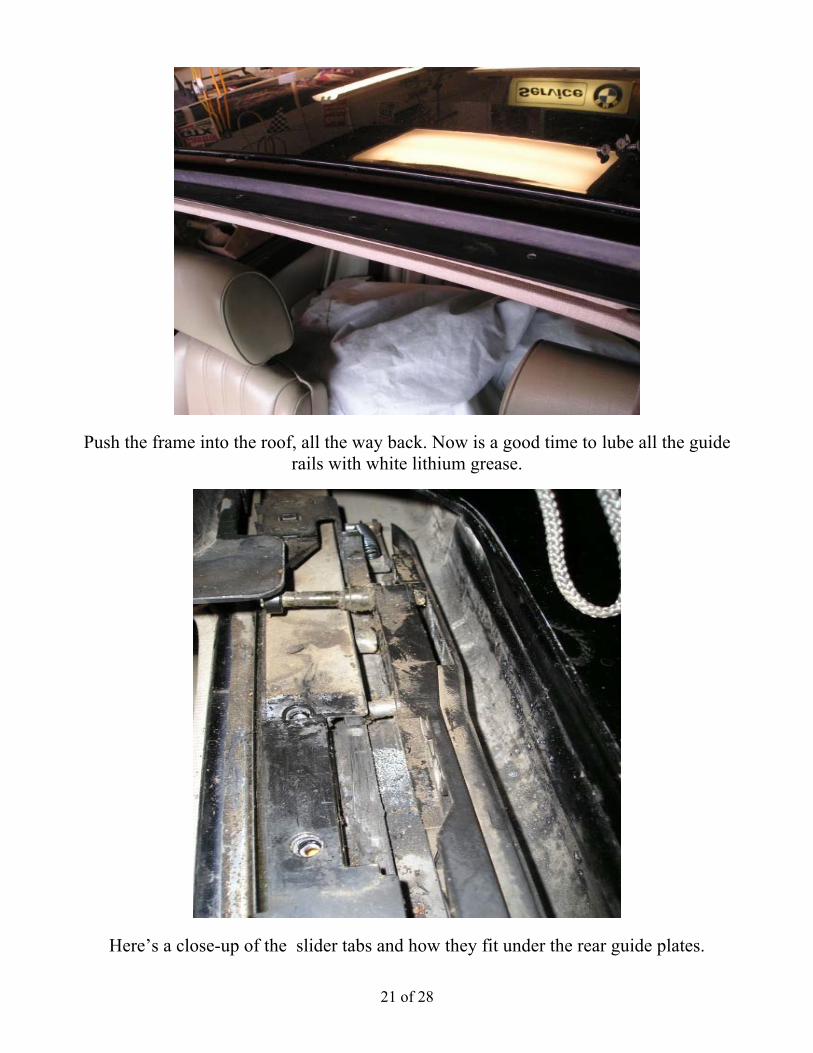
Push the frame into the roof, all the way back. Now is a good time to lube all the guide rails with white lithium grease.
Here’s a close-up of the slider tabs and how they fit under the rear guide plates.

22 of 28
After the plastic slide rails and cables are re-positioned, reinstall the cover plates (don’t forget to use the Saab plates or the modified original ones (see “OPTIONAL PIECES”).
Move the attaching slide rails to the “rear-vent” position.

23 of 28
For those using the springs (see “OPTIONAL PIECES”), this is how they attach. (The best I can figure, the springs help “flip-up” the roof panel into “rear-vent” position, but Saab
didn’t use them…I guess it’s more of a German-Engineering thing…)
Here’s another close-up of the springs. It seems they were used prior to 1984. (Orwell directive??)

24 of 28
(For many of you, this is the only “machining modification” necessary in the entire project).
Trim the “flip-up” pins as shown, using a cut-off disc, hack saw, or Dremel tool.
Here’s the finished modified pins.

25 of 28
This is the alignment procedure as outlined in the BMW assembly manual (and “Bentley”); install two 4-mm allen wrenches into the slots shown on both sides (or move the slide rails until you can
insert the wrenches). This will “square-up” the slide rails in preparation for installing the glass roof panel.
Set the roof into position and start all (6) Torx screws (3-each side).
26 of 28
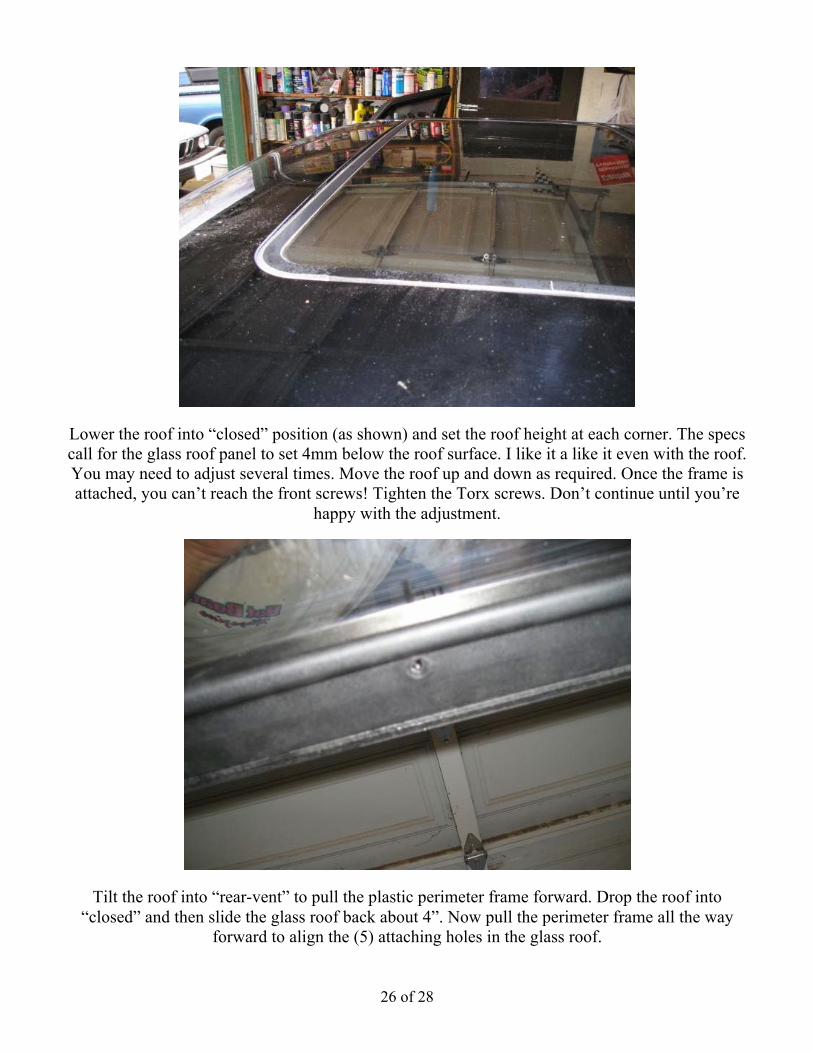
Lower the roof into “closed” position (as shown) and set the roof height at each corner. The specs call for the glass roof panel to set 4mm below the roof surface. I like it a like it even with the roof. You may need to adjust several times. Move the roof up and down as required. Once the frame is attached, you can’t reach the front screws! Tighten the Torx screws. Don’t continue until you’re
happy with the adjustment.
Tilt the roof into “rear-vent” to pull the plastic perimeter frame forward. Drop the roof into “closed” and then slide the glass roof back about 4”. Now pull the perimeter frame all the way
forward to align the (5) attaching holes in the glass roof.
27 of 28
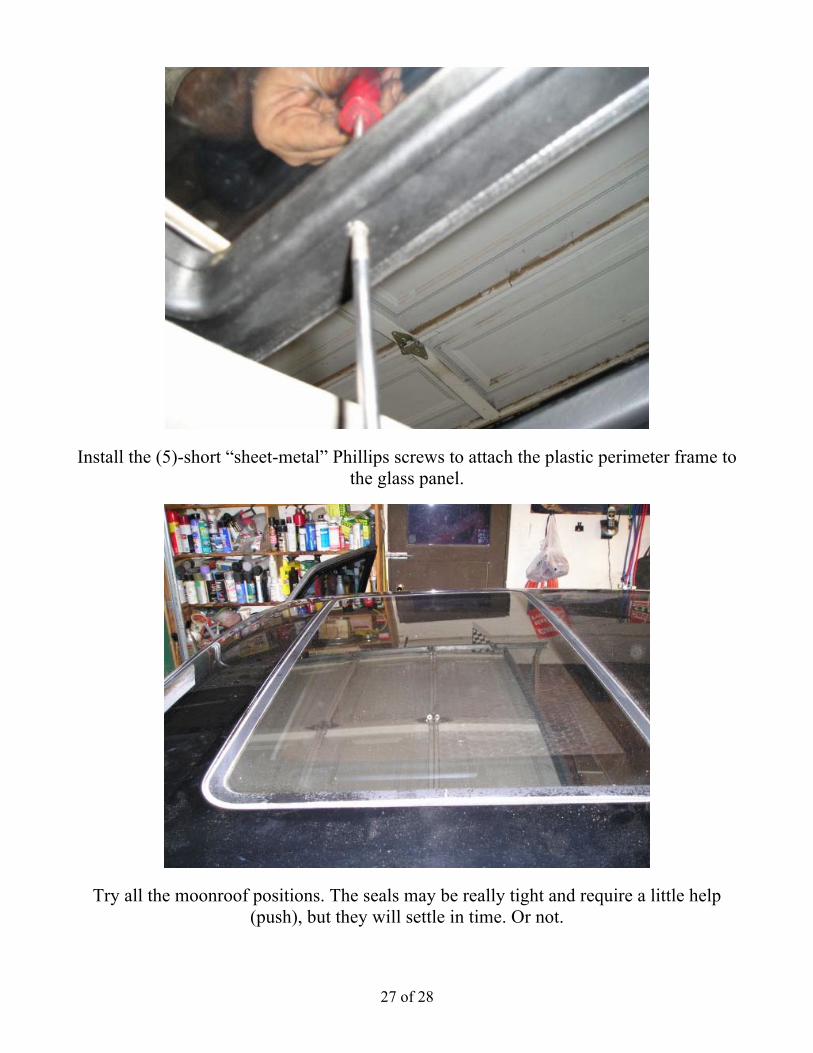
Install the (5)-short “sheet-metal” Phillips screws to attach the plastic perimeter frame to the glass panel.
Try all the moonroof positions. The seals may be really tight and require a little help (push), but they will settle in time. Or not.
28 of 28
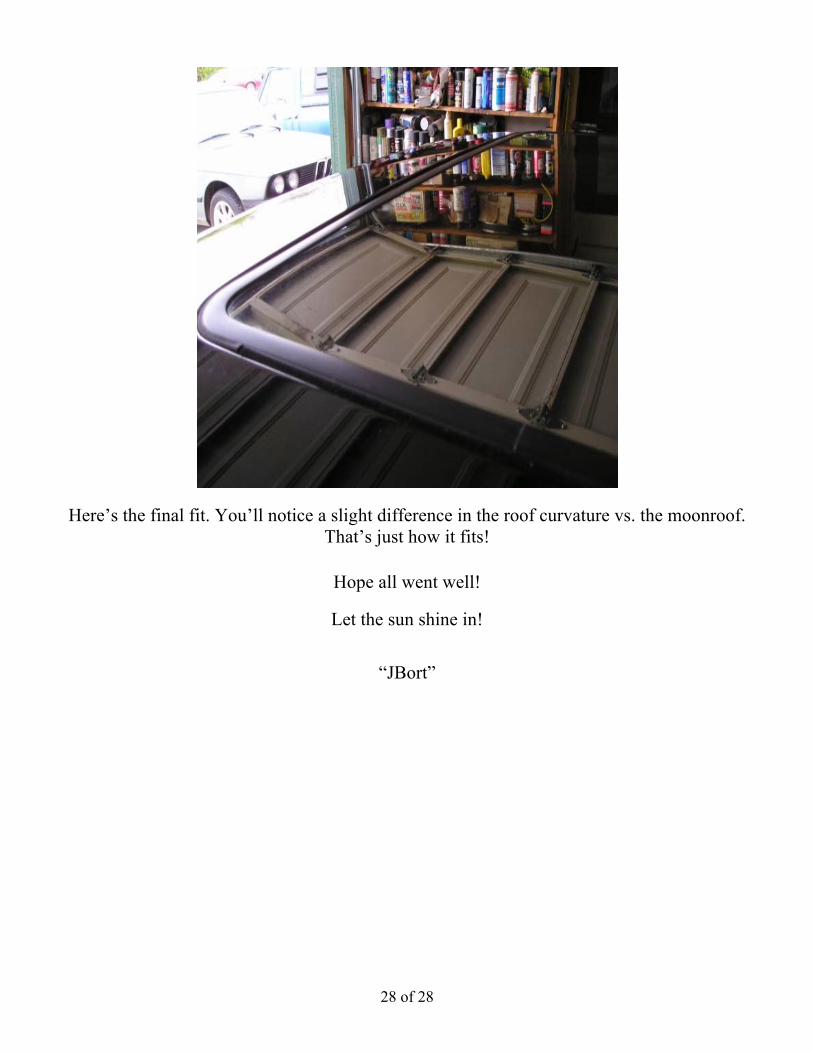
Here’s the final fit. You’ll notice a slight difference in the roof curvature vs. the moonroof. That’s just how it fits!
Hope all went well!
Let the sun shine in!
“JBort”