How to Import a Background Step 1.msaito/CE662MS/Labs/Importing a...How to Import a Background Step...
5
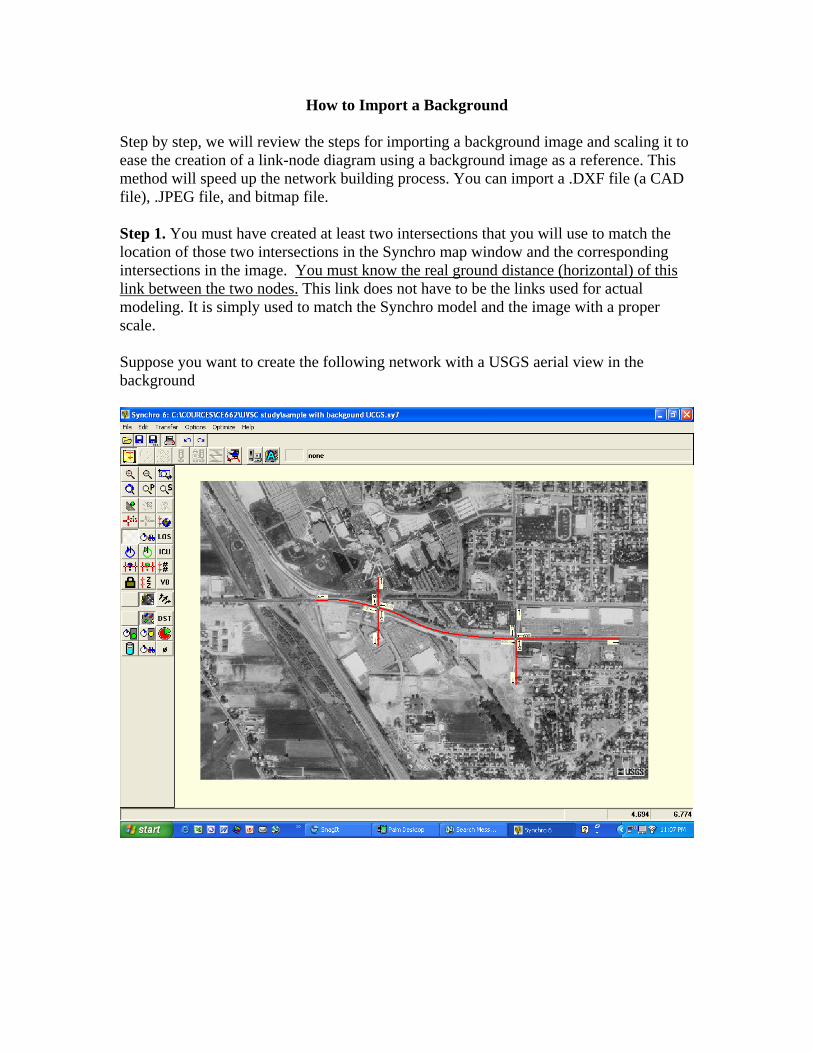
How to Import a Background Step by step, we will review the steps for importing a background image and scaling it to ease the creation of a link-node diagram using a background image as a reference. This method will speed up the network building process. You can import a .DXF file (a CAD file), .JPEG file, and bitmap file. Step 1. You must have created at least two intersections that you will use to match the location of those two intersections in the Synchro map window and the corresponding intersections in the image. You must know the real ground distance (horizontal) of this link between the two nodes. This link does not have to be the links used for actual modeling. It is simply used to match the Synchro model and the image with a proper scale. Suppose you want to create the following network with a USGS aerial view in the background
Transcript of How to Import a Background Step 1.msaito/CE662MS/Labs/Importing a...How to Import a Background Step...
How to Import a Background Step by step, we will review the steps for importing a background image and scaling it to ease the creation of a link-node diagram using a background image as a reference. This method will speed up the network building process. You can import a .DXF file (a CAD file), .JPEG file, and bitmap file. Step 1. You must have created at least two intersections that you will use to match the location of those two intersections in the Synchro map window and the corresponding intersections in the image. You must know the real ground distance (horizontal) of this link between the two nodes. This link does not have to be the links used for actual modeling. It is simply used to match the Synchro model and the image with a proper scale. Suppose you want to create the following network with a USGS aerial view in the background

Step 2. Select the File>Graphics>Import Background…option
Step 3. You will get the Select Graphics File for Background dialog box. Go to the folder that has the image you want to use and select it.
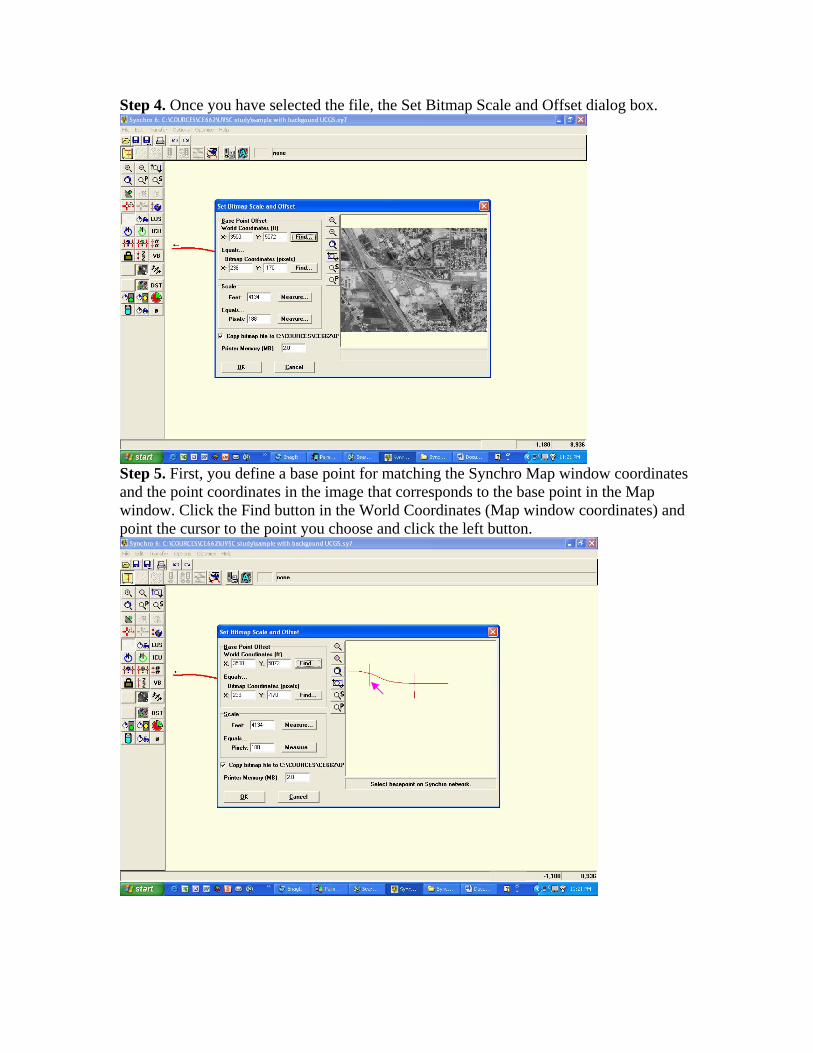
Step 4. Once you have selected the file, the Set Bitmap Scale and Offset dialog box.
Step 5. First, you define a base point for matching the Synchro Map window coordinates and the point coordinates in the image that corresponds to the base point in the Map window. Click the Find button in the World Coordinates (Map window coordinates) and point the cursor to the point you choose and click the left button.
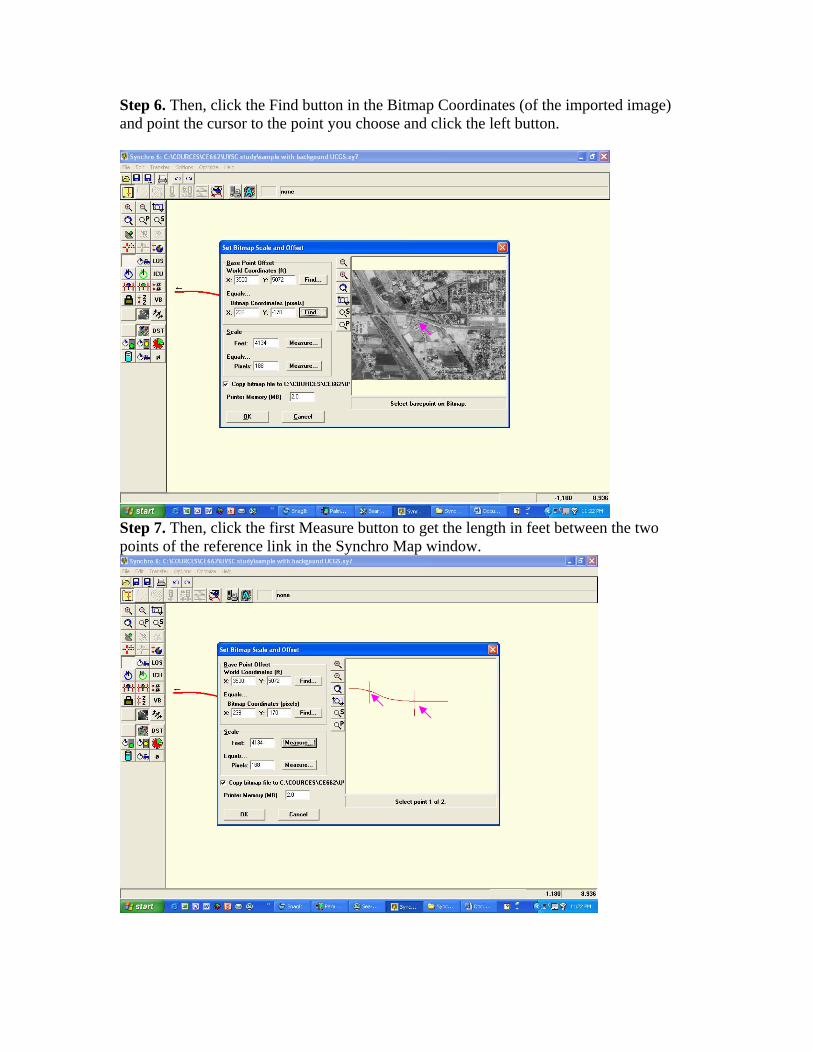
Step 6. Then, click the Find button in the Bitmap Coordinates (of the imported image) and point the cursor to the point you choose and click the left button.
Step 7. Then, click the first Measure button to get the length in feet between the two points of the reference link in the Synchro Map window.
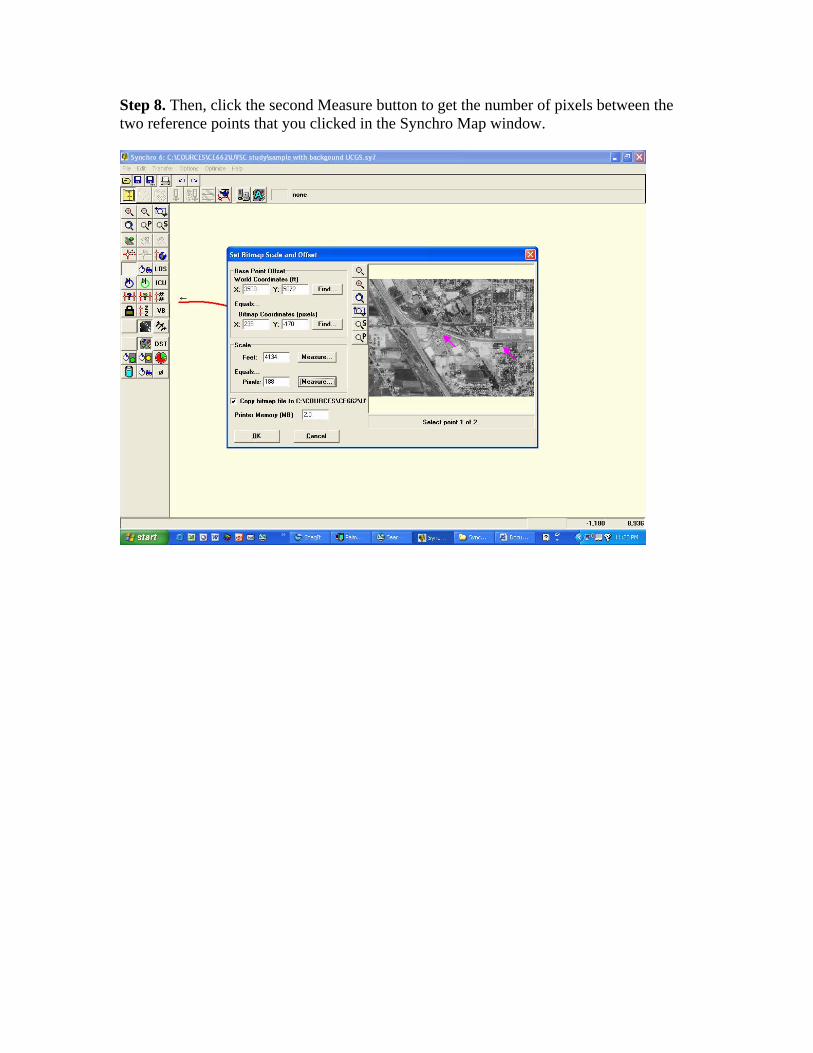
Step 8. Then, click the second Measure button to get the number of pixels between the two reference points that you clicked in the Synchro Map window.


![A STEP BY STEP GUIDE IMPORTING - tfocanada.ca1].pdf · A STEP BY STEP GUIDE TO IMPORTING A Guide for Canadian Entrepreneurs . 2 ... particular, links to websites may have changed.](https://static.fdocuments.us/doc/165x107/600f802976e27127e257bd78/a-step-by-step-guide-importing-1pdf-a-step-by-step-guide-to-importing-a-guide.jpg)