How To Add Space Bars To Your Images
15
How To Add Scale Bars To Your Images Kim Peifley 02/20/15
Transcript of How To Add Space Bars To Your Images
How To Add Scale Bars To Your Images
Kim Peifley
02/20/15

Published images will need to include scale bars. It is pretty
quick and easy to do when the image is in it’s original acquired
format [for example: .lsm, .czi] before converting the image to a
.tif or .jpeg.

ZEISS AIM SOFTWARE
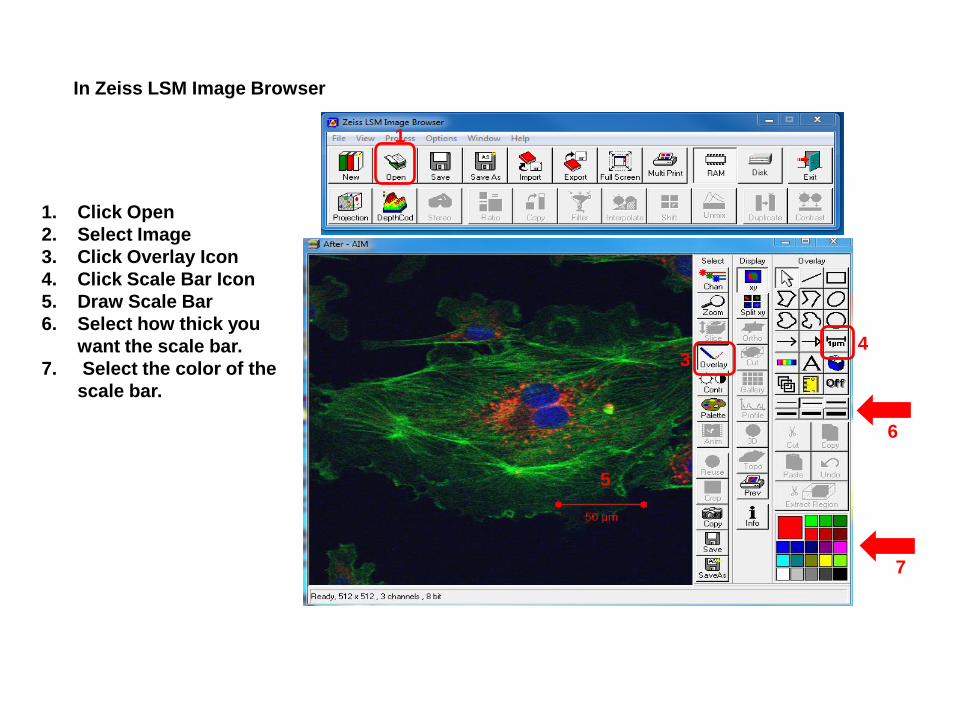
In Zeiss LSM Image Browser
1. Click Open
2. Select Image
3. Click Overlay Icon
4. Click Scale Bar Icon
5. Draw Scale Bar
6. Select how thick you
want the scale bar.
7. Select the color of the
scale bar.
1
3
5
4
6
7

To Save Scale Bar Image:
1. Click Export
2. In Image Type select Full Resolution Image Window
3. Select Where to Save Image.
4. In File Name box give image name.
5. Select Image Type.
6. Click Save.
2
3
1
4
5
6

ZEISS ZEN SOFTWARE
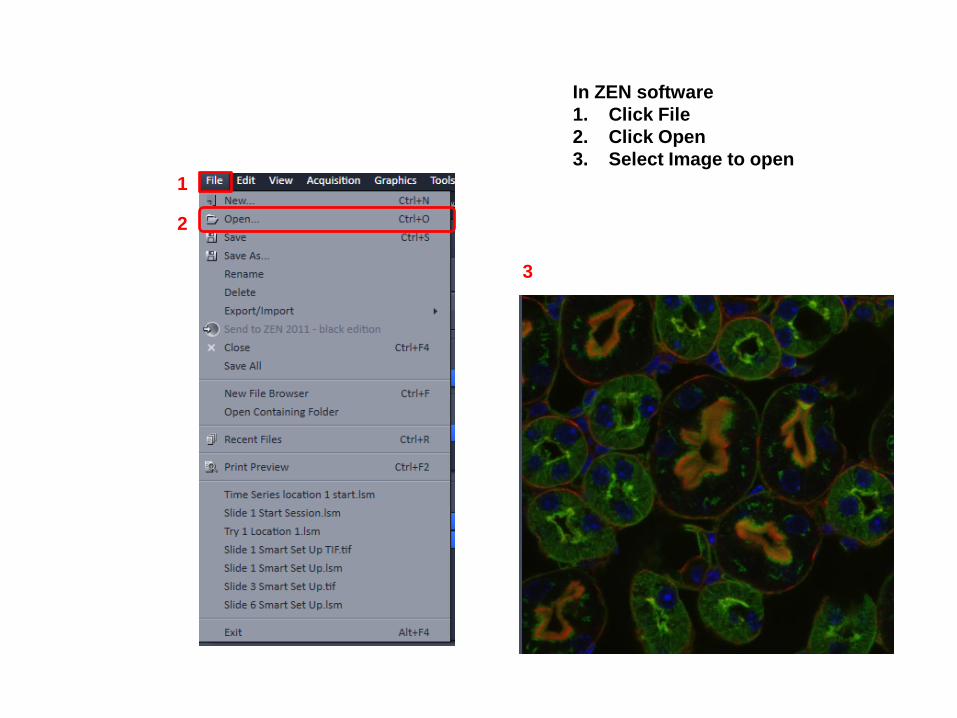
In ZEN software
1. Click File
2. Click Open
3. Select Image to open
1
2
3
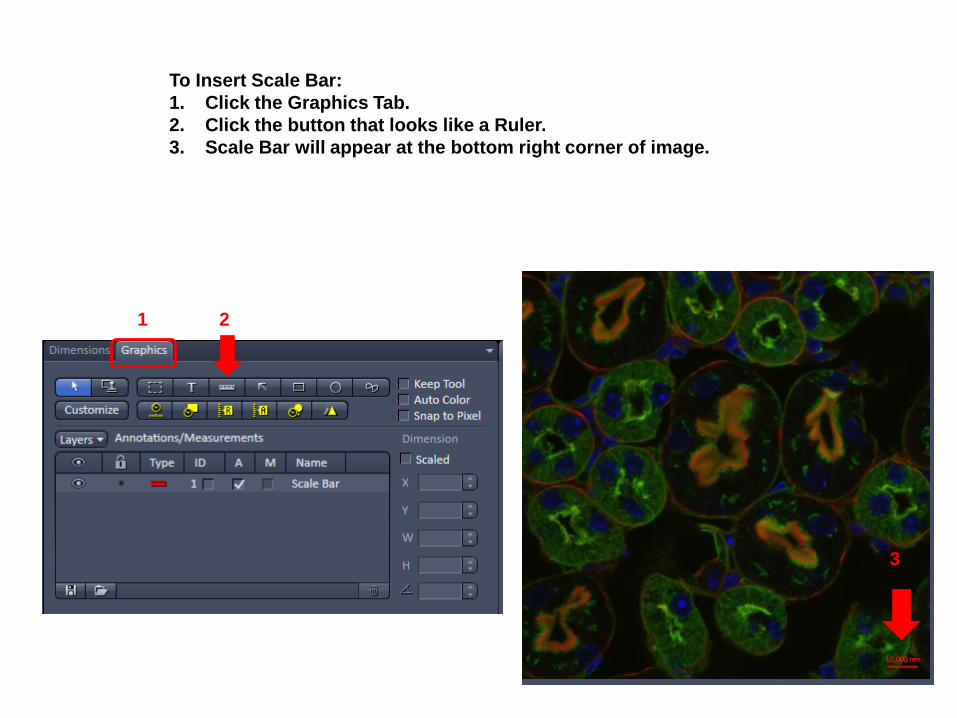
To Insert Scale Bar:
1. Click the Graphics Tab.
2. Click the button that looks like a Ruler.
3. Scale Bar will appear at the bottom right corner of image.
1 2
3

1. Click File
2. Click Export/Import
3. Click Export which opens up the
processing window.
To Save the Image with Scale Bar:
1
2
4
5
6 3
In the Processing Tab:
4. Select File Type.
5. Select the location you
wish to export the image.
6. Click Apply.
IMAGE J SOFTWARE
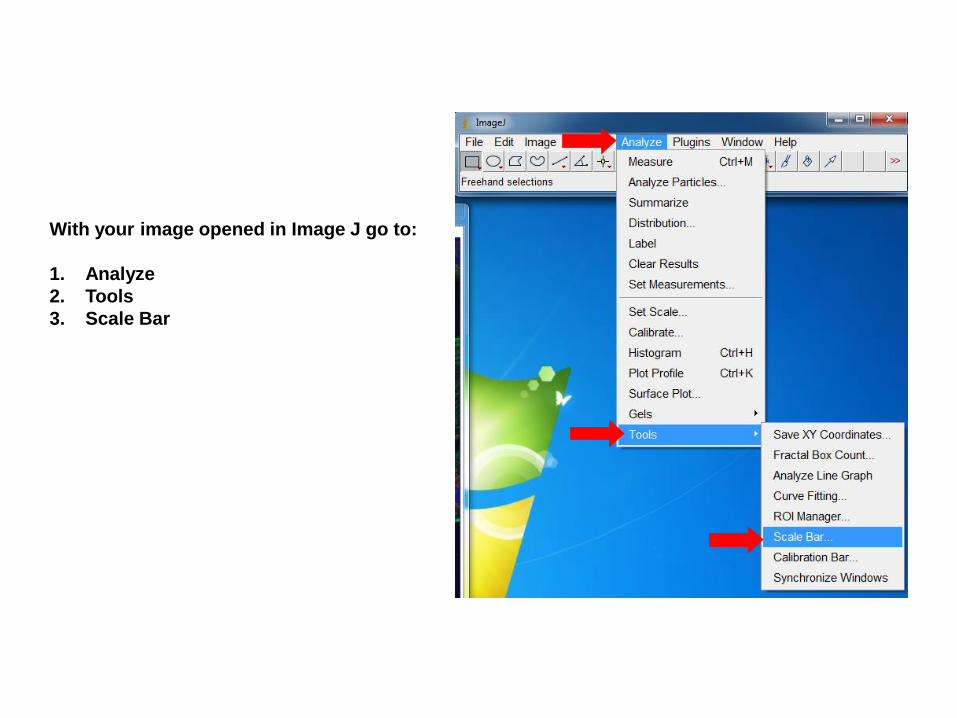
With your image opened in Image J go to:
1. Analyze
2. Tools
3. Scale Bar
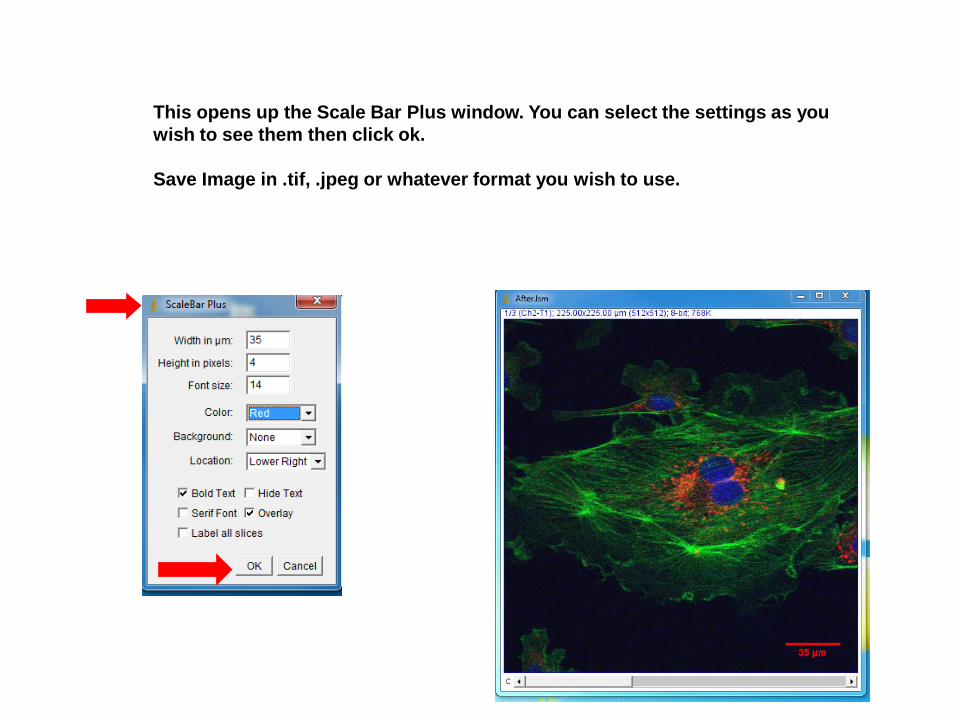
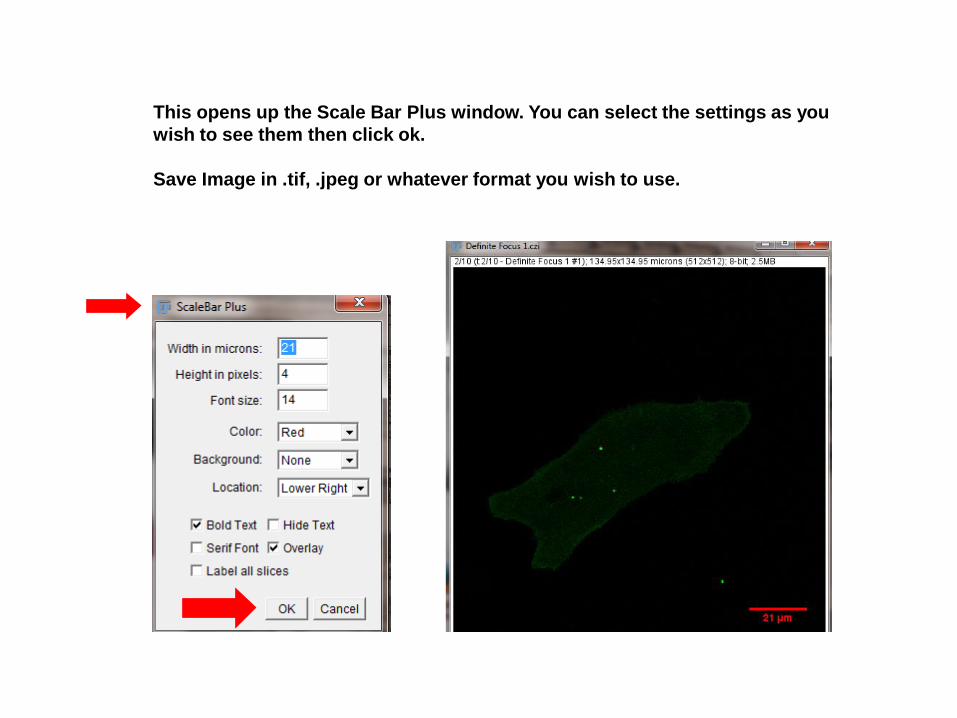
This opens up the Scale Bar Plus window. You can select the settings as you
wish to see them then click ok.
Save Image in .tif, .jpeg or whatever format you wish to use.

FIJI SOFTWARE

Images acquired on the LSM780 in the .czi file format cannot be opened in
ImageJ or MIPAV. ZEN 2012 and FIJI will work for this.
With your image opened in Fiji go to:
1. Analyze
2. Tools
3. Scale Bar
This opens up the Scale Bar Plus window. You can select the settings as you
wish to see them then click ok.
Save Image in .tif, .jpeg or whatever format you wish to use.