GROUPBOX SYSTEM QUICKSTART MANUAL - IDEC1).pdf1 GROUPBOX SYSTEM QUICKSTART MANUAL Prepared by : Mohd...
24
GROUPBOX SYSTEM QUICKSTART MANUAL Prepared by : Mohd Arif bin Idris Siti Syazwina Mohd Yusof V2
Transcript of GROUPBOX SYSTEM QUICKSTART MANUAL - IDEC1).pdf1 GROUPBOX SYSTEM QUICKSTART MANUAL Prepared by : Mohd...

1
GROUPBOX SYSTEM
QUICKSTART MANUAL Prepared by :
Mohd Arif bin Idris
Siti Syazwina Mohd Yusof
V2

2
Content
1. Accessing Groupbox
2. Getting Familiar with Action Button
3. Password Changing
4. Creating Folder and Uploading Files
Basic upload
Upload using WebDAV method
5. Sharing folder/document
Share
Ticket
Version check and Log info
Adding Tag and Locking the folder/document
Subscribe to any change to the folder/files
Email documents straight to user
6. Searching for your folder/documents
7. Bookmark for quick location of the folder/documents 8. Creating Wiki
Creating Wiki Panel
9. Sharing Wiki
10. Summarized
11. Creating Group

3
Step 1 – Accessing Groupbox
1. Groupbox can be easily access using Internet browser available in your Windows desktop
2. just key-in url address http://putra.edu.my and click GROUPBOX or
http://groupbox.upm.my
3. Once connected, key-in your username and password.
4. Press OK to login into the GROUPBOX

4
1. Upon log-in, you will find a familiar 'file manager' interface with list folders and documents listed. Folder may contain sub-folders in it and more documents in it.
2. At the top-right-side, you will see Action Buttons - to create new folder Upload Document
3. On the top-left-side are for you to manage and set the properties/behaviour of the folder/documents that you choose to work on.
4. Above this Action Buttons on the left-side, you will see your name appearing under the department, the faculty or the organization you belonged to. This screen (workspace) is also called your Home folder (directory); starting locations for all your folders and document files that belong to you, as the owner.
5. The first small folder beside your organization name in this panel is the GROUPBOX Admin folder that may contain resources for your references as provided by GROUPBOX Administrator to all GROUPBOX users.
6. Further left beside this small Admin Folder, there is an UP arrow button. Use it to move one layer up from wherever location you are currently situated in your directory tree (hierarchy).
7. Finally, at the left-most side beside the UP arrow, is the Star Button, which will list all Bookmarks (a short cut link pointing straight to some folder or documents locations that you have access to the resources in it. This is similar concept with the Internet Bookmark where you save its pointer to bring you straight to the favourites and frequently visited sites!
GROUPBOX Action Button can also be triggered by pressing your right-click button of
your mouse while pointing at the particular folder or documents
Step 2 – Getting familiar with Action Buttons

5
Step 3 – Change Password
1. Change your password after the first time you login into GROUPBOX
2. To change your password, press Setup at the top-right-side and click password
3. Change your old password and then Apply

6
1. Click on the Create Folder action button and a window will pop-up asking you to give a name to the folder. Click Finish and its done!.
2. The system also offers you option to continue straight to the next step of uploading files etc etc.
3. You will then notice a new folder has been added to your home workspace.
Step 4 – Creating Folder and uploading
files

7
(i) Basic upload
1. To add files into this new folder, click on the folder and its content will be displayed. Obviously for now, there are none as yet. Click on the Upload action
2. Depending on how many files you want to upload, click on Add Files button as many times as you need.
3. You may then press the Browse button in this Add Files box to see the list of files available. The name of the files will appear in the Add Files box
4. Click on Start Upload button below the Add Files box to starting transferring the files into the folder. Xythos.
5. Once the uploading (transferring) of the files completed, GROUPBOX will immediately display the files in the folder from which you start the upload function.
Step 4 – Creating Folder and uploading files

8
Step 4 – Creating Folder and uploading
files
(ii) Advanced Upload
1. If you want to upload one folder or more, you can use advanced upload.
2. Click Advanced Upload, choose the folder that you want to upload. Then drag and drop the folder. The name of the files in the folder will appear in the Add File box.
3. Click on Start Upload button
9
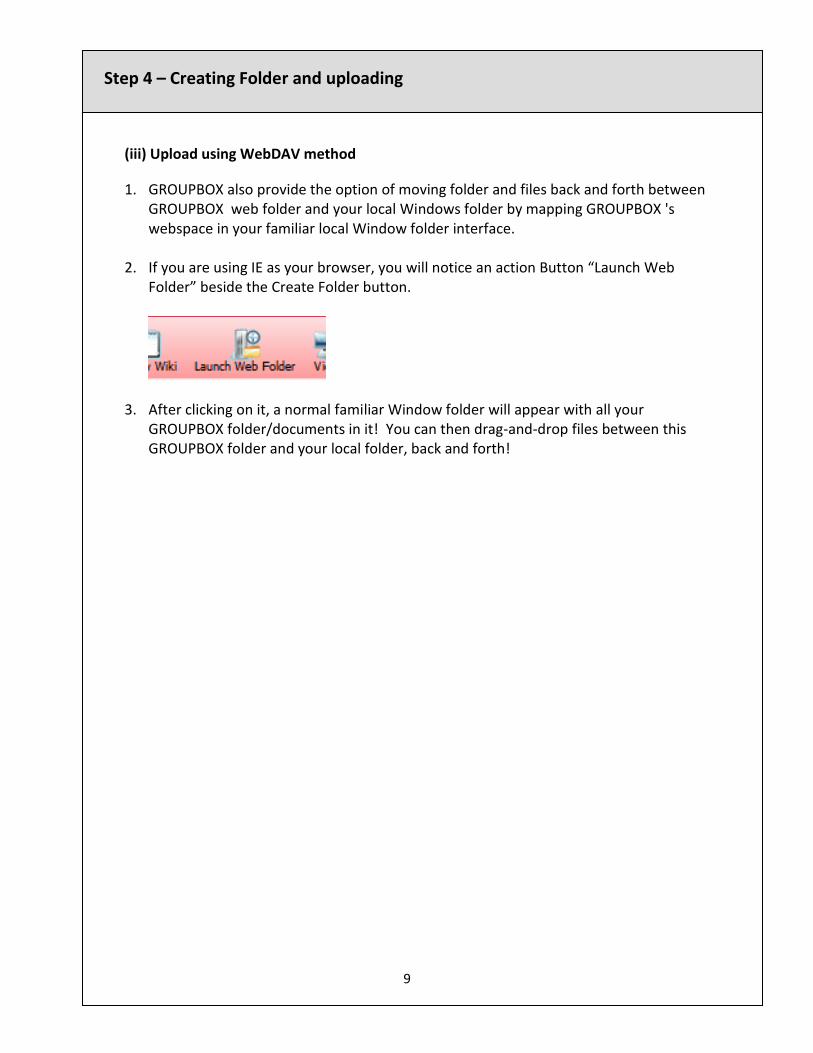
(iii) Upload using WebDAV method
1. GROUPBOX also provide the option of moving folder and files back and forth between GROUPBOX web folder and your local Windows folder by mapping GROUPBOX 's webspace in your familiar local Window folder interface.
2. If you are using IE as your browser, you will notice an action Button “Launch Web Folder” beside the Create Folder button.
3. After clicking on it, a normal familiar Window folder will appear with all your GROUPBOX folder/documents in it! You can then drag-and-drop files between this GROUPBOX folder and your local folder, back and forth!
Step 4 – Creating Folder and uploading
files
10
Step 5 – Sharing folder/documents
1. To share a folder (which may contain many documents) or a particular file, just select it and click the Share action button.
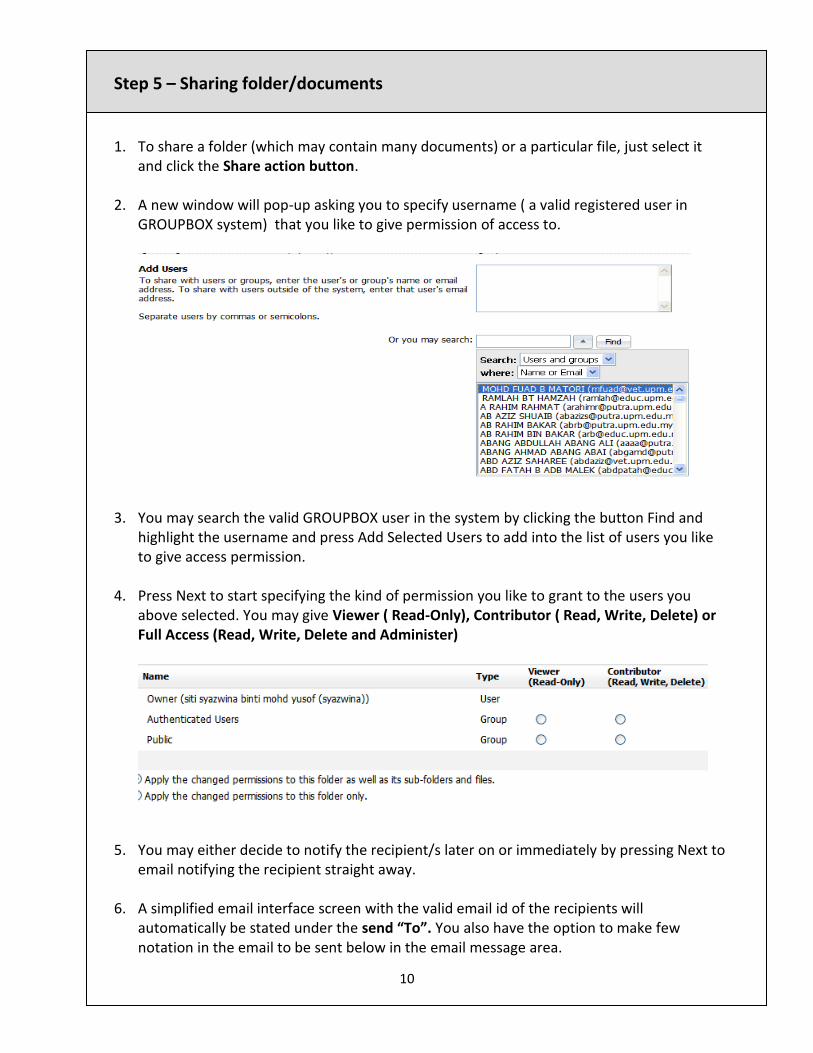
2. A new window will pop-up asking you to specify username ( a valid registered user in GROUPBOX system) that you like to give permission of access to.
3. You may search the valid GROUPBOX user in the system by clicking the button Find and highlight the username and press Add Selected Users to add into the list of users you like to give access permission.
4. Press Next to start specifying the kind of permission you like to grant to the users you above selected. You may give Viewer ( Read-Only), Contributor ( Read, Write, Delete) or Full Access (Read, Write, Delete and Administer)
5. You may either decide to notify the recipient/s later on or immediately by pressing Next to email notifying the recipient straight away.
6. A simplified email interface screen with the valid email id of the recipients will automatically be stated under the send “To”. You also have the option to make few notation in the email to be sent below in the email message area.
7. Click Finish to start sending the email notification to the specified recipients.

11
7. A simplified email interface screen with the valid email id of the recipients will
automatically be stated under the send “To”. You also have the option to make few notation in the email to be sent below in the email message area.
8. Click Finish to start sending the email notification to the specified recipients.
Step 5 – Sharing folder/documents
12
Sharing folder/documents with user/s outside of GROUPBOX system using ticket
1. To share a folder and documents with people outside your organization, you may create ticket for those particular folder/documents and email the ticket to the person.
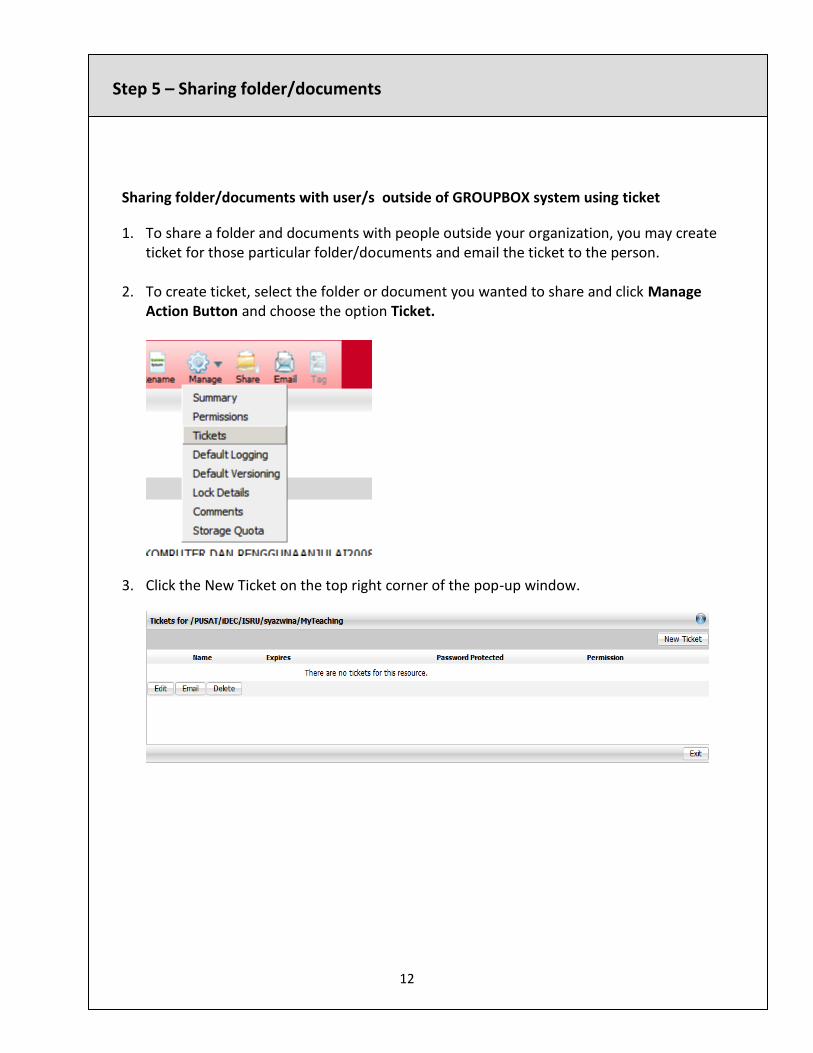
2. To create ticket, select the folder or document you wanted to share and click Manage Action Button and choose the option Ticket.
3. Click the New Ticket on the top right corner of the pop-up window.
Step 5 – Sharing folder/documents

13
4. You may then specify few parameters for the ticket such as Share Permission Level, Lifetime validity period or even specify a password requirement for the recipient to open the folder/document.
5. You may then email the ticket to the recipient by typing in their full email id and address ( such as [email protected])
Step 5 – Sharing folder/documents
14
More functions to manage folder & files:
Version check and Log info
1. They are few other features that user can carry out about the folder and documents such as keeping track of the folder/document version and keeping track of the document's log, which is history information of what has actually taken place on the folder/documents, such as who read/access it, when it is access and w
2. hat actions being done on it.
Adding Tag and Locking the folder/document
1. Add few other keywords to be associated with the particular folder/files. This is to provide user with a much quicker search of the documents/folder should later on there are just too many folders and sub-folders and files all over places in your webspace.
2. You may also decide the lock a particular folder/ for a certain period.
Subscribe to any change of events to the folder/files
1. To be informed of what has taken place on particular folder/documents, you may subscribe to the change of events that has taken place on the folder/files.
2. Just select the folder/document you want to be notified of any changes happening, and click on the Manage action button and further select the Subscribe item to set the notification request.
3. You may then select different kind of info to be notified to you. These notification messages will be emailed to you every time some events take place on the folder/document.
Step 5 – Sharing folder/documents
15
More functions to manage folder & files: Email documents straight to user
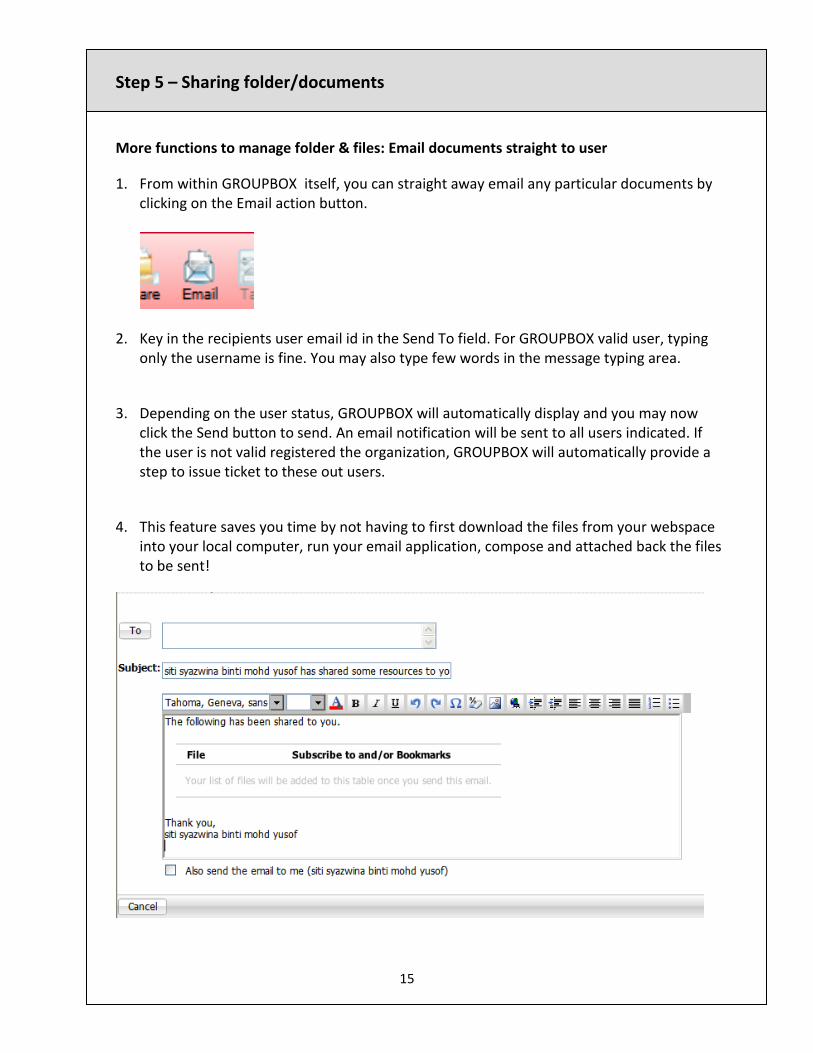
1. From within GROUPBOX itself, you can straight away email any particular documents by clicking on the Email action button.
2. Key in the recipients user email id in the Send To field. For GROUPBOX valid user, typing only the username is fine. You may also type few words in the message typing area.
3. Depending on the user status, GROUPBOX will automatically display and you may now click the Send button to send. An email notification will be sent to all users indicated. If the user is not valid registered the organization, GROUPBOX will automatically provide a step to issue ticket to these out users.
4. This feature saves you time by not having to first download the files from your webspace into your local computer, run your email application, compose and attached back the files to be sent!
Step 5 – Sharing folder/documents

16
1. To search for folder/files of your interest, you may key-in the keyword in the search bar at the top right corner of your GROUPBOX window with the magnifying glass by click on it.
2. GROUPBOX will then list all the folder and files with that folder/filename. It will also list documents with that keyword available in the body of the document.
3. To add more criteria to your search string, you may click the small pointing downwards arrow which will pop-up a more detail search window to fill-up.
4. This search window panel also allow you to save your Search String for your future quick search that will be listed when you click the Star button on the top-left-side of your GROUPBOX window.
Step 6 – Searching for your folder/documents
17
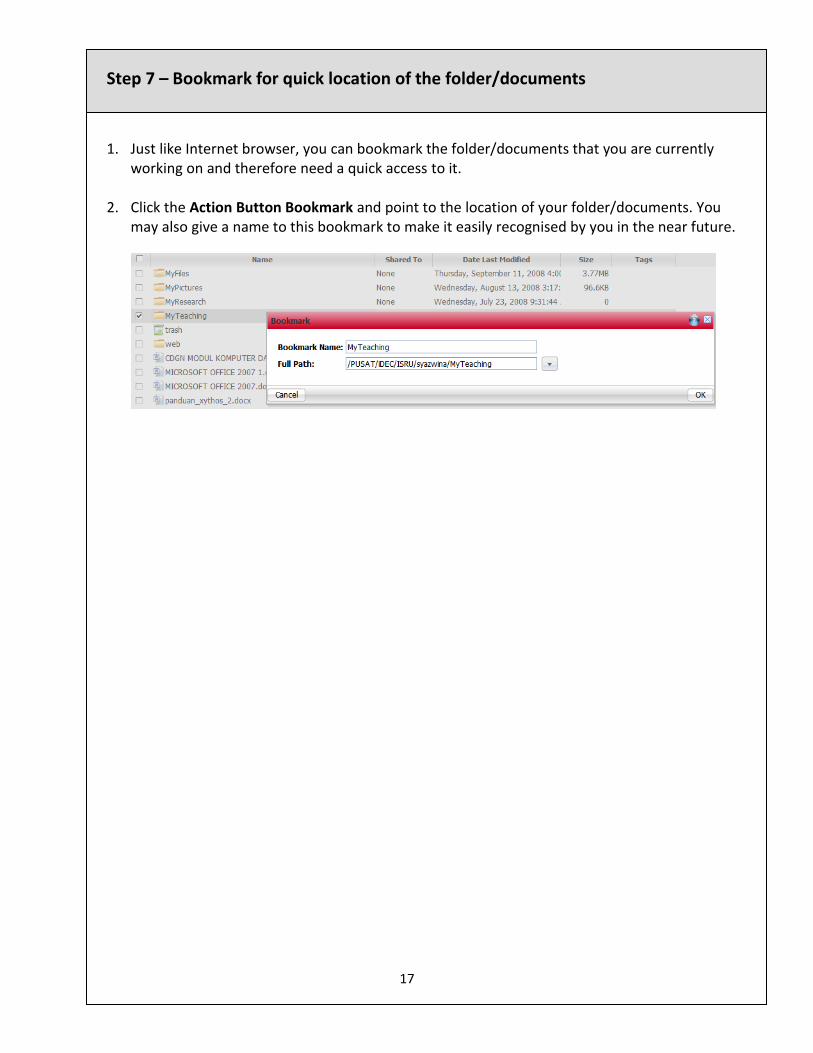
Step 7 – Bookmark for quick location of the folder/documents
1. Just like Internet browser, you can bookmark the folder/documents that you are currently working on and therefore need a quick access to it.
2. Click the Action Button Bookmark and point to the location of your folder/documents. You may also give a name to this bookmark to make it easily recognised by you in the near future.
18
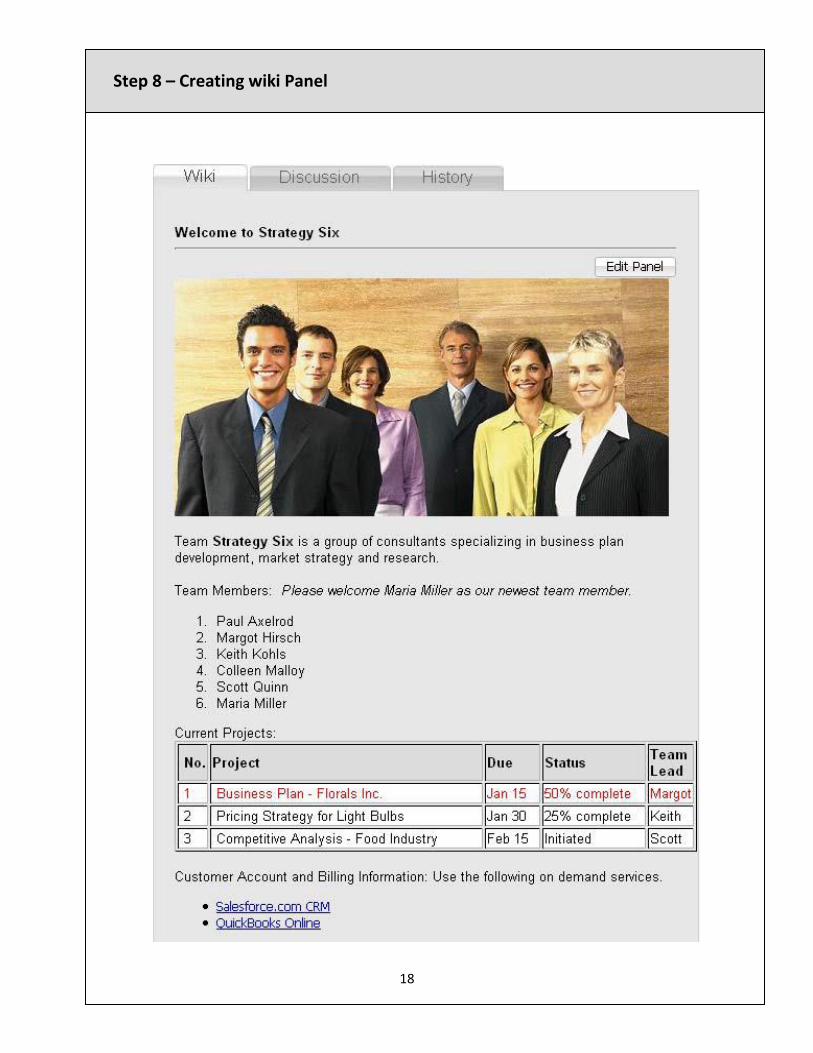
Step 8 – Creating wiki Panel
19
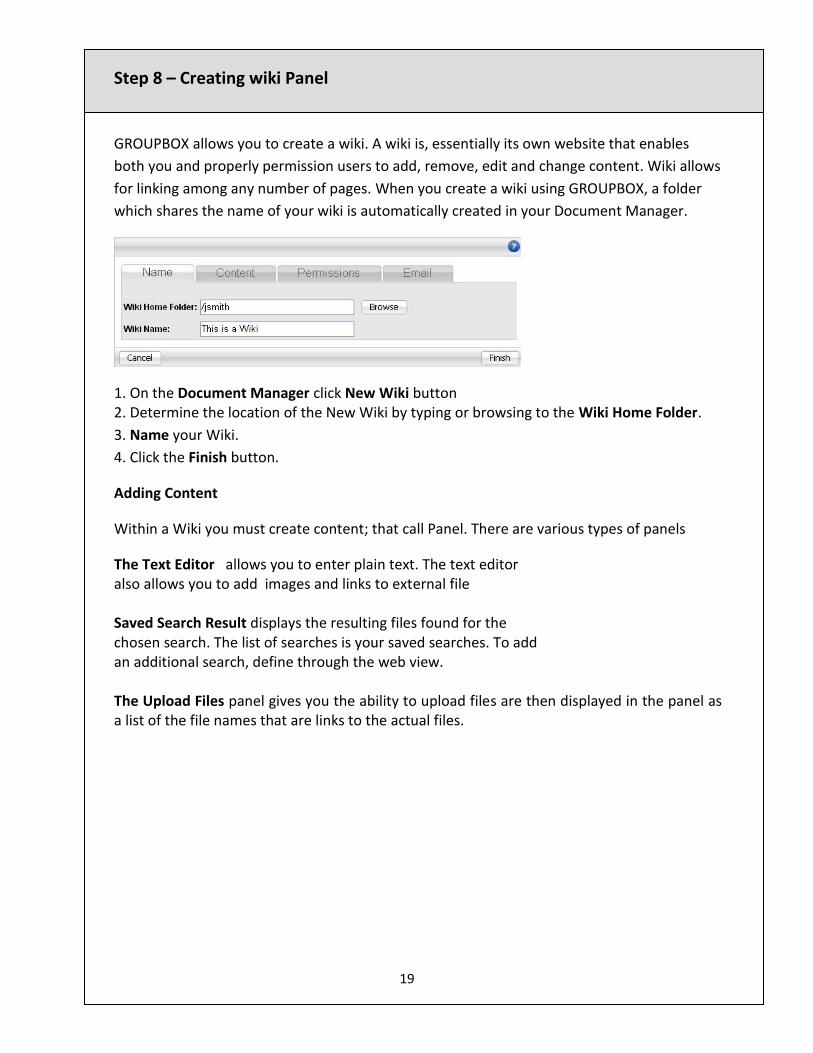
GROUPBOX allows you to create a wiki. A wiki is, essentially its own website that enables
both you and properly permission users to add, remove, edit and change content. Wiki allows
for linking among any number of pages. When you create a wiki using GROUPBOX, a folder
which shares the name of your wiki is automatically created in your Document Manager.
1. On the Document Manager click New Wiki button 2. Determine the location of the New Wiki by typing or browsing to the Wiki Home Folder.
3. Name your Wiki.
4. Click the Finish button.
Adding Content
Within a Wiki you must create content; that call Panel. There are various types of panels
The Text Editor allows you to enter plain text. The text editor also allows you to add images and links to external file Saved Search Result displays the resulting files found for the chosen search. The list of searches is your saved searches. To add an additional search, define through the web view. The Upload Files panel gives you the ability to upload files are then displayed in the panel as a list of the file names that are links to the actual files.
Step 8 – Creating wiki Panel

20
Text Editor Panel
1. After providing a name for the panel, click the Content Tab - Type content into available box.
2. Add Panel to continue adding content, or click Finish
Saved Search Panel
1. After providing a name for the panel, select available saved search from the drop down menu.
2. Add Panel to continue adding content, or click Finish
Upload File Panel
1. After providing a name for the panel, click Add Files 2. Use Upload features in order to add files 3. Add Panel to continue adding content, or click Finish
Sharing
1. Click the Permission tab 2. Add users and groups as Viewers and Contributors 3. Click Finish Button once all sharing configuration is complete Email
1.Click the Email tab
1. Use the To button to add additional users. By default all users with whom you have shared this resource will be list
2. Optionally specify a subject 3. Optionally provide a personalized message. Be certain to leave
the “Wiki Link” item within the email so that it may be automatically generated.
4. Click the Finish button
Step 8 – Creating wiki Panel

21
Sharing
1. Click the Permission tab 2. Add users and groups as Viewers and Contributors
3. Click Finish Button once all sharing configuration is complete
1.Click the Email ta
1. Use the To button to add additional users. By default all users with whom you
have shared this resource will be list
2. Optionally specify a subject
3. Optionally provide a personalized message. Be certain to leave the “Wiki Link” item within the email so that it may be automatically generated.
4. Click the Finish button
Step 9 – Sharing wiki
22
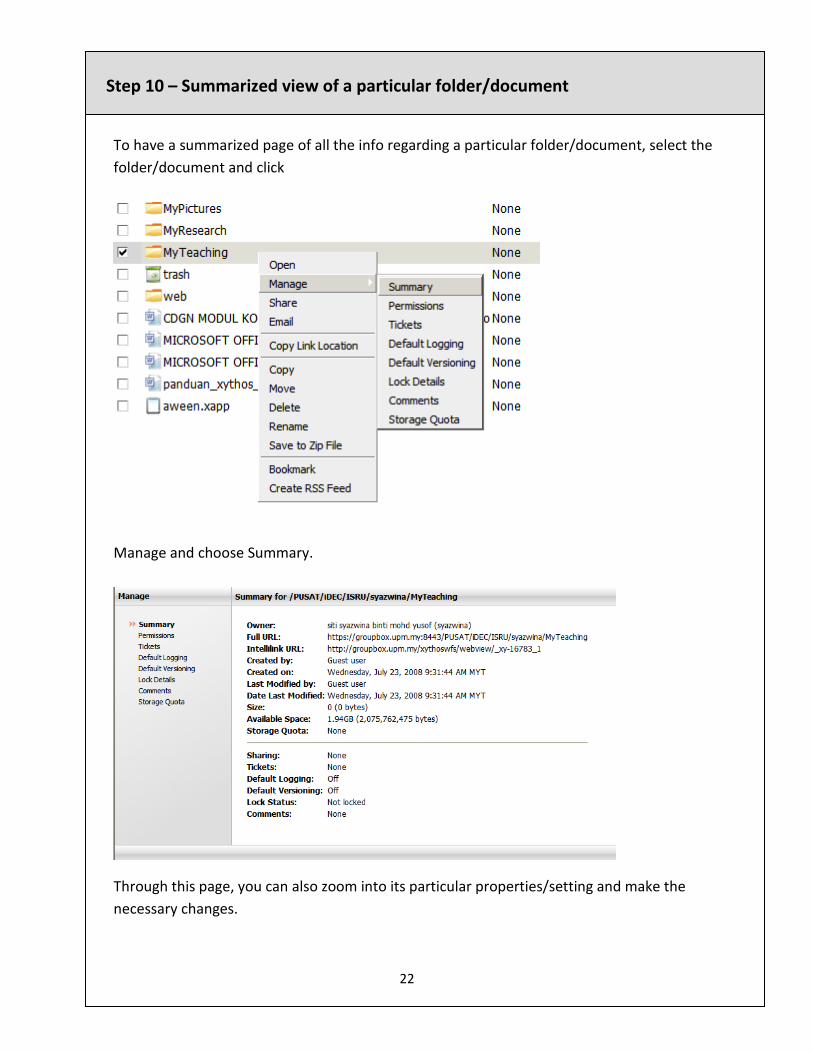
To have a summarized page of all the info regarding a particular folder/document, select the
folder/document and click
Manage and choose Summary.
Through this page, you can also zoom into its particular properties/setting and make the
necessary changes.
Step 10 – Summarized view of a particular folder/document
23
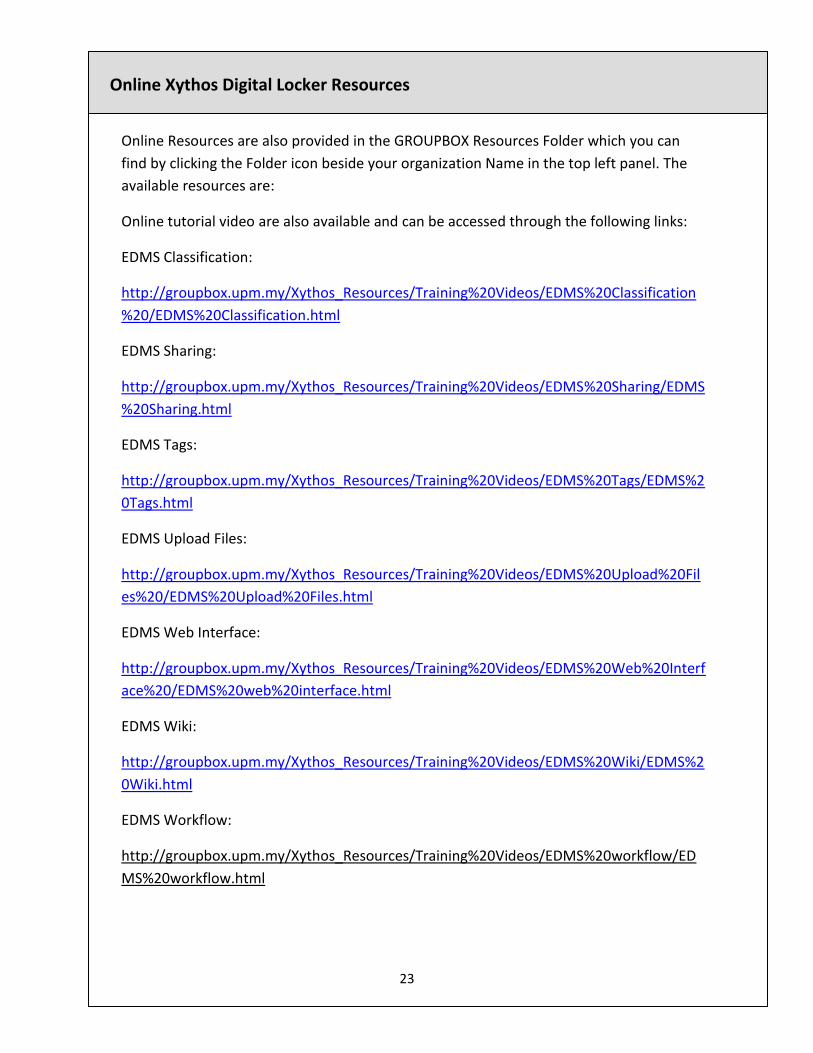
Online Resources are also provided in the GROUPBOX Resources Folder which you can
find by clicking the Folder icon beside your organization Name in the top left panel. The
available resources are:
Online tutorial video are also available and can be accessed through the following links:
EDMS Classification:
http://groupbox.upm.my/Xythos_Resources/Training%20Videos/EDMS%20Classification
%20/EDMS%20Classification.html
EDMS Sharing:
http://groupbox.upm.my/Xythos_Resources/Training%20Videos/EDMS%20Sharing/EDMS
%20Sharing.html
EDMS Tags:
http://groupbox.upm.my/Xythos_Resources/Training%20Videos/EDMS%20Tags/EDMS%2
0Tags.html
EDMS Upload Files:
http://groupbox.upm.my/Xythos_Resources/Training%20Videos/EDMS%20Upload%20Fil
es%20/EDMS%20Upload%20Files.html
EDMS Web Interface:
http://groupbox.upm.my/Xythos_Resources/Training%20Videos/EDMS%20Web%20Interf
ace%20/EDMS%20web%20interface.html
EDMS Wiki:
http://groupbox.upm.my/Xythos_Resources/Training%20Videos/EDMS%20Wiki/EDMS%2
0Wiki.html
EDMS Workflow:
http://groupbox.upm.my/Xythos_Resources/Training%20Videos/EDMS%20workflow/ED
MS%20workflow.html
Online Xythos Digital Locker Resources
24
Online Xythos Digital Locker Resources
Contact Person
1. En. Mohd Zul Mohd Yusoff
03-8947 1210
2. Cik Siti Syazwina Mohd Yusof
03-8947 1219
3. Pn. Huraizah Yusoff
03-8947 1668