
Getting Started Guide for Organizations
2
TM 1. Setup Account Groups Classify members into account groups based on their status in the organization. Account groups will allow you to setup different access levels to edit different modules & make it easier to target communications to members within your organization. To manage account groups, click Settings at the bottom of the organization tool bar & click on the Account Groups tab at the top. Note: Default account groups include: Administrators, Members & Officers. New members of your organization will fall under Members upon joining. Register Your Organization To create an organization, click on the Join an Organization tab & click on “Register New Organization” at the top right. Complete the registration form, which will be sent to your campus administrator for review; you will be notified when your organization has been approved. Note: You can control your privacy, notification and account settings at anytime under Manage Account. Getting Started For Organizations 2. 3. Set Group Permissions Permissions allow organization administrators to dictate which tools each account group will have access to. Grant members any of the following four access levels for each module: • Manage: Full admivnistrative capabilities • Contribute: Members may post content but cannot modify content posted by another user. • View: Members may view content but cannot edit or create. • Hide: Members are unable to interact with a module. Note: Tools can be turned off & on to fit the needs of your organization The following steps may only be completed after you have registered with OrgSync.
-
Upload
orgsync -
Category
Technology
-
view
220 -
download
3
Transcript of Getting Started Guide for Organizations

TM
1.
Setup Account GroupsClassify members into account groups based on their status in the organization. Account groups will allow you to setup different access levels to edit different modules & make it easier to target communications to members within your organization.
To manage account groups, click Settings at the bottom of the organization tool bar & click on the Account Groups tab at the top.
Note: Default account groups include: Administrators, Members & Officers. New members of your organization will fall under Members upon joining.
Register Your OrganizationTo create an organization, click on the Join an Organization tab & click on “Register New Organization” at the top right. Complete the registration form, which will be sent to your campus administrator for review; you will be notified when your organization has been approved.
Note: You can control your privacy, notification and account settings at anytime under Manage Account.
Getting Started For Organizations
2.
3.Set Group PermissionsPermissions allow organization administrators to dictate which tools each account group will have access to. Grant members any of the following four access levels for each module:
• Manage: Full admivnistrative capabilities
• Contribute: Members may post content but cannot modify content posted by another user.
• View: Members may view content but cannot edit or create.
• Hide: Members are unable to interact with a module.
Note: Tools can be turned off & on to fit the needs of your organization
The following steps may only be completed after you have registered with OrgSync.
TM
6.
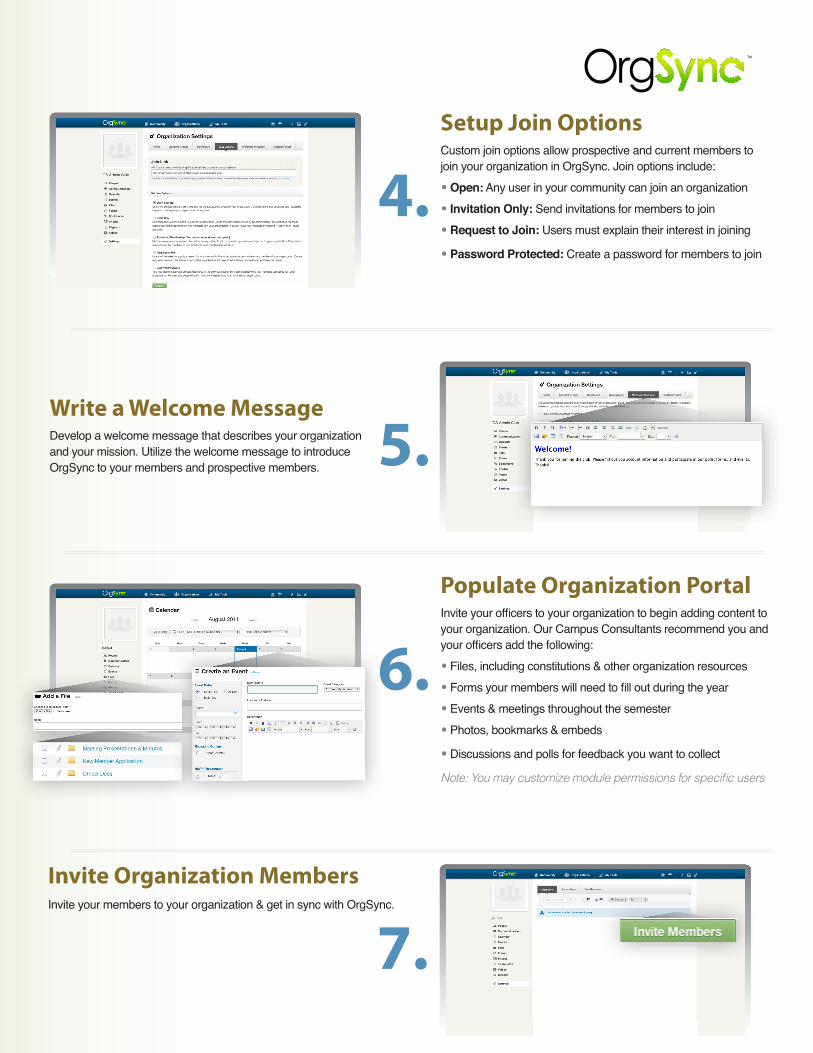
Invite Organization MembersInvite your members to your organization & get in sync with OrgSync.
Populate Organization PortalInvite your officers to your organization to begin adding content to your organization. Our Campus Consultants recommend you and your officers add the following:
• Files, including constitutions & other organization resources
• Forms your members will need to fill out during the year
• Events & meetings throughout the semester
• Photos, bookmarks & embeds
• Discussions and polls for feedback you want to collect
Note: You may customize module permissions for specific users
7.
Write a Welcome MessageDevelop a welcome message that describes your organization and your mission. Utilize the welcome message to introduce OrgSync to your members and prospective members. 5.
Setup Join OptionsCustom join options allow prospective and current members to join your organization in OrgSync. Join options include:
• Open: Any user in your community can join an organization
• Invitation Only: Send invitations for members to join
• Request to Join: Users must explain their interest in joining
• Password Protected: Create a password for members to join
4.


![Skaffold - storage.googleapis.com · [getting-started getting-started] Hello world! [getting-started getting-started] Hello world! [getting-started getting-started] Hello world! 5.](https://static.fdocuments.us/doc/165x107/5ec939f2a76a033f091c5ac7/skaffold-getting-started-getting-started-hello-world-getting-started-getting-started.jpg)