GE Healthcare IT Centricity Practice Solution · Proprietary Information GE Healthcare IT ... This...
22
1 Copyright 2014 General Electric Company. All rights reserved. Proprietary Information GE Healthcare IT Centricity® Practice Solution CPS 12 Companion Guide Administration Module Centricity® Services
Transcript of GE Healthcare IT Centricity Practice Solution · Proprietary Information GE Healthcare IT ... This...

1 Copyright 2014 General Electric Company. All rights reserved. Proprietary Information
GE Healthcare IT
Centricity® Practice Solution CPS 12 Companion Guide Administration Module
Centricity® Services

2 Copyright 2014 General Electric Company. All rights reserved. Proprietary Information
Proprietary Rights and Limitations and Conditions of Use This document is the property of GE Healthcare, a division of General Electric Company (“GE Healthcare”) and is furnished to you, a current GE Healthcare customer, pursuant to an agreement between you and GE Healthcare. If you are not (i) a current GE Healthcare customer, and (ii) subject to a non disclosure obligations pursuant to an agreement with GE Healthcare, you are not authorized to access this document. No part of this document may be reproduced in any form, by photostat, microfilm, xerography, or any other means, or incorporated into any information retrieval system, electronic or mechanical, without the written permission of GE Healthcare. Contact your GE Healthcare representative with any inquiries regarding copying and/or using the materials contained in this document outside of the limited scope described herein. GE Healthcare reminds you that there may be legal, ethical, and moral obligations for medical care providers to protect sensitive patient information when dealing with vendors such as GE Healthcare. You should obtain explicit written consent from both the patient and GE Healthcare before you disclose sensitive patient information to GE Healthcare. Trademarks GE, the GE Monogram, and Centricity are trademarks of General Electric Company. All other product names and logos are trademarks or registered trademarks of their respective companies Copyright Notice Copyright 2014 General Electric Company. All rights reserved. Disclaimers Any information related to clinical functionality is intended for clinical professionals. Clinical professionals are expected to know the medical procedures, practices and terminology required to monitor patients. Operation of the product should neither circumvent nor take precedence over required patient care, nor should it impede the human intervention of attending nurses, physicians or other medical personnel in a manner that would have a negative impact on patient health. General Electric Company reserves the right to make changes in specifications and features shown herein, or discontinue the products described at any time without notice or obligation. This does not constitute a representation or warranty regarding the product or service featured. All illustrations or examples are provided for informational or reference purposes and/or as fictional examples only. Your product features and configuration may be different than those shown. GE Healthcare IT 540 West Northwest Highway Barrington, IL 60010 U.S.A. www.gehealthcare.com

3 Copyright 2014 General Electric Company. All rights reserved. Proprietary Information
How to Use This Companion Guide:
This Companion Guide is provided as an ancillary instructional guide to be used in conjunction with the CPS Computer Based Tutorials (CBT's), CPS Help Guides (F1), and CPS New Version What’s New Guide and Release Notes available to you with the purchase of the CPS product(s). Additionally, during your CPS Implementation or Upgrade, you will have GE Healthcare professionals available to assist you as designed by your purchase. For field-by-field explanation of the product or for point-and-click functionality explanation, please reference the CBTs, Help Guides, and/or New Version What’s New Guide and Release Notes. This Companion Guide is a compilation of “best practices” obtained from multiple healthcare practice workflows, which are combined with the functionality of the CPS software, to provide the most commonly used workflows within an ambulatory physician office. The workflows described in this Companion Guide are recommendations ONLY and do not necessarily reflect mandatory setup/settings. The Companion Guide should be used as a reference in determining the best workflow designs for your specific medical practice needs. The Companion Guide is divided into sections that represent major functionality areas and/or workflows of the CPS product. Please note that topics affecting more than one area of functionality may be cross-referenced. Also, at the end of each section, you will find a Notes area available for your own customized notes. For more information on customer education services and tools concerning the CPS products, please visit the Centricity Customer Portal, http://centricityportal.gen21.com/knav/nav and/or the Customer Education website: www.cpstraining-gehc.com.

4 Copyright 2014 General Electric Company. All rights reserved. Proprietary Information
Table of Contents Administration Setup – Process Map .................................................................................................... 5 List Editor Items ............................................................................................................................................... 6
Visit Owner ..................................................................................................................... 6 Allocation Types ............................................................................................................. 7 Setting Up Collection Status Parameters ..................................................................... 8 Security/User Management .......................................................................................... 9
Ribbon Menu Items .....................................................................................................................................10 Allocation Sets .............................................................................................................. 10 Company ...................................................................................................................... 11 Fee Schedules .............................................................................................................. 12 Insurance Carriers ........................................................................................................ 13 Procedures ................................................................................................................... 14 Referring Providers ...................................................................................................... 15 Responsible Providers .................................................................................................. 16 Schedule Templates ..................................................................................................... 17
Statement Criteria ........................................................................................................................................18 End of Day Processes .................................................................................................................................20 End of Month Processes ............................................................................................................................21

5 Copyright 2014 General Electric Company. All rights reserved. Proprietary Information
Scenario: Your practice has just purchased CPS and needs to setup Administration items to customize the software for your needs. Let’s review the various areas of Administration that may need further explanation and/or special attention. Typical Staff Responsible : Administrative Staff, Billing Administrative Staff, Schedule Administrative Staff
Administration Setup – Process Map Use this general setup process map as a guide as you plan and implement the application in your clinic or enterprise. This Companion Guide will focus on the areas that are highlighted below.

6 Copyright 2014 General Electric Company. All rights reserved. Proprietary Information
List Editor Items
Visit Owner
The first item to review is Visit Owner. Visit Owner allows you to create a category identification that you can then assign to a visit for sorting purposes in addition to other criteria. The Billing, Payment Entry/Transaction Distribution, Accounts Receivable, and Collections modules use this information.
Considerations:
Visit Owners can be created to match staff names or reasons for follow-up. For example, a Visit Owner could be created for Sally (your billing staff member who may be responsible for following up on large write offs that occur during payment entry). On the other hand, a Visit Owner could be created named ‘Large Write Off-Needs Review”. Regardless, the staff member who is responsible for the visit can use Visit Owner in the search criteria to display only those visits that have the specified Visit Owner attached.
Once a Visit Owner is assigned to a visit, the Visit Owner must be MANUALLY modified/removed as the visit progresses through the normal follow-up activities. Failure to remove/edit the Visit Owner accordingly will result in multiple visits that have an erroneous or non-applicable visit owner.
When you first begin to set up visit owners, the first item on the list should be ‘unknown’. Once you create the owners, you may need to re-order the listing to be sure that Unknown remains FIRST on the list. The application will then assign this owner to all new visits by default. Closing date rules do not restrict the visit owner. You can change the visit owner designation at any time and in any location in which it appears in the application.

7 Copyright 2014 General Electric Company. All rights reserved. Proprietary Information
Allocation Types Allocation types identify the breakdown of charges between the patient and the insurance carrier responsibility, and are the required building blocks for allocation sets (discussed later in this guide). Once created, the application uses allocation types to create allocation sets, which are then required for patient visits.
Considerations:
When creating allocation types, keep in mind that percentages (80/20, 70/30, etc.) can only work well if your practice is diligent on maintaining the carrier’s fee schedules within your database. As an example, if you assign an 80/20 allocation to a patient that has Cigna, the patient can/will be charged 20% of the Allowed amount for that procedure code. This would work as long as every code has Cigna’s Allowed amount attached in the Procedure table. Multiply this across your entire procedure table to determine if it will be feasible to maintain that many procedure code Allowed amounts. You would also multiply this effort times the number of Fee Schedules (carrier Allowed amounts) that you maintain. For this reason, typical setup is to use only Co-pay amounts, Private Pay or 100% Insurance as an allocation assignment to the patients.
Once an Allocation Type is created, it cannot be deleted. For this reason, exercise caution when creating them!
8 Copyright 2014 General Electric Company. All rights reserved. Proprietary Information
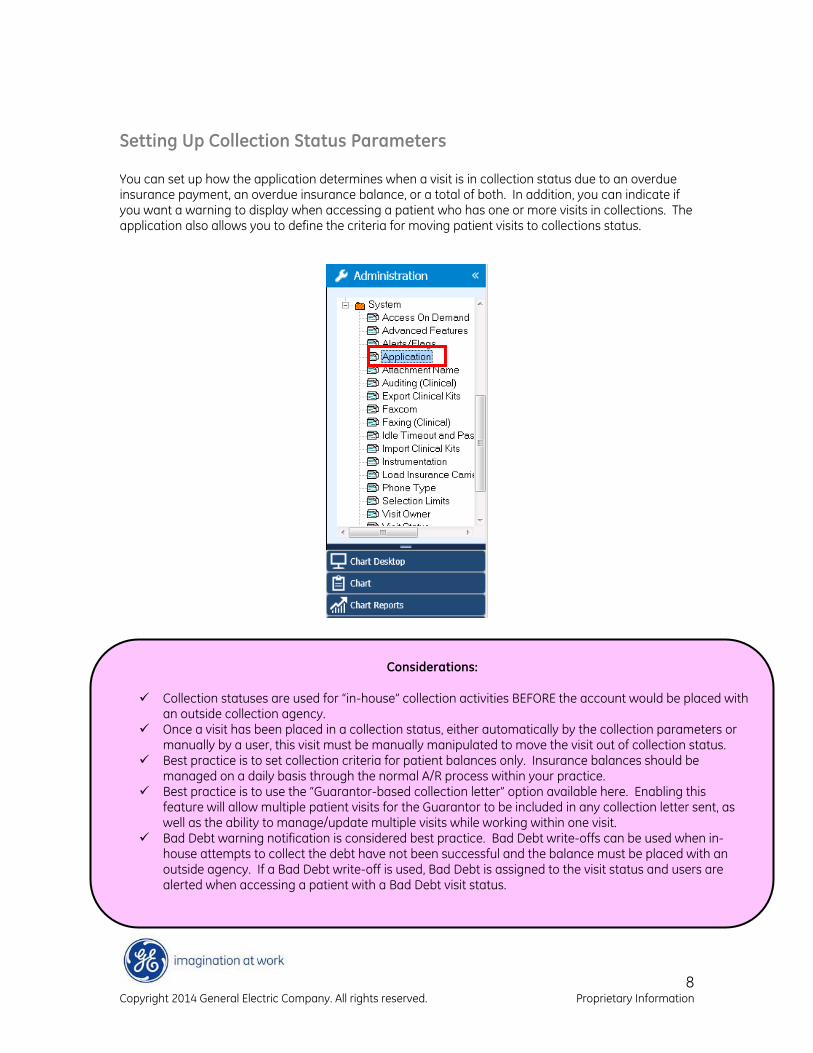
Setting Up Collection Status Parameters You can set up how the application determines when a visit is in collection status due to an overdue insurance payment, an overdue insurance balance, or a total of both. In addition, you can indicate if you want a warning to display when accessing a patient who has one or more visits in collections. The application also allows you to define the criteria for moving patient visits to collections status.
Considerations:
Collection statuses are used for “in-house” collection activities BEFORE the account would be placed with an outside collection agency.
Once a visit has been placed in a collection status, either automatically by the collection parameters or manually by a user, this visit must be manually manipulated to move the visit out of collection status.
Best practice is to set collection criteria for patient balances only. Insurance balances should be managed on a daily basis through the normal A/R process within your practice.
Best practice is to use the “Guarantor-based collection letter” option available here. Enabling this feature will allow multiple patient visits for the Guarantor to be included in any collection letter sent, as well as the ability to manage/update multiple visits while working within one visit.
Bad Debt warning notification is considered best practice. Bad Debt write-offs can be used when in-house attempts to collect the debt have not been successful and the balance must be placed with an outside agency. If a Bad Debt write-off is used, Bad Debt is assigned to the visit status and users are alerted when accessing a patient with a Bad Debt visit status.

9 Copyright 2014 General Electric Company. All rights reserved. Proprietary Information
Security/User Management If your practice authenticates users in Active Directory, you will need Administration rights on the database server. To set up users in Administration, you need all Administration rights. Assigning security rights to individual users allows you to assign users to security groups, and allow or deny explicit (override) permissions that supersede security group settings.
Considerations:
It is best practice to use security groups as your primary method for assigning rights to users. Avoid managing security permissions on individual users whenever possible.
Any security changes performed on an individual user are considered explicit permissions, or an override. Explicit permissions override all security group settings and must be manually removed from the user, or from the selected permission.
Checking a component node assigns all permissions beneath that node. Use the Shift or Ctrl key to select multiple permissions.
Security rights in Centricity Practice Solution can be classified into 2 groups: o Inherited rights — rights granted to users by security groups. o Explicit or Override rights — rights granted or denied to users on the user level that override all
other security settings.
10 Copyright 2014 General Electric Company. All rights reserved. Proprietary Information
Ribbon Menu Items
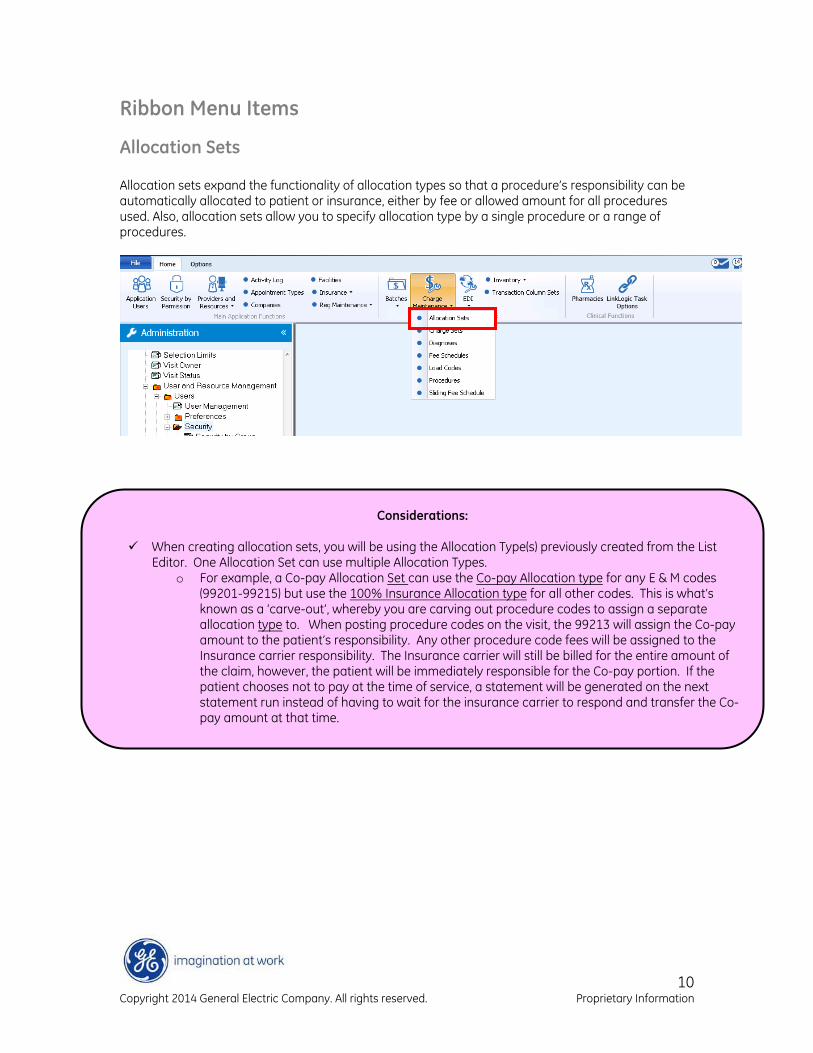
Allocation Sets Allocation sets expand the functionality of allocation types so that a procedure’s responsibility can be automatically allocated to patient or insurance, either by fee or allowed amount for all procedures used. Also, allocation sets allow you to specify allocation type by a single procedure or a range of procedures.
Considerations:
When creating allocation sets, you will be using the Allocation Type(s) previously created from the List Editor. One Allocation Set can use multiple Allocation Types.
o For example, a Co-pay Allocation Set can use the Co-pay Allocation type for any E & M codes (99201-99215) but use the 100% Insurance Allocation type for all other codes. This is what’s known as a ‘carve-out’, whereby you are carving out procedure codes to assign a separate allocation type to. When posting procedure codes on the visit, the 99213 will assign the Co-pay amount to the patient’s responsibility. Any other procedure code fees will be assigned to the Insurance carrier responsibility. The Insurance carrier will still be billed for the entire amount of the claim, however, the patient will be immediately responsible for the Co-pay portion. If the patient chooses not to pay at the time of service, a statement will be generated on the next statement run instead of having to wait for the insurance carrier to respond and transfer the Co-pay amount at that time.
11 Copyright 2014 General Electric Company. All rights reserved. Proprietary Information
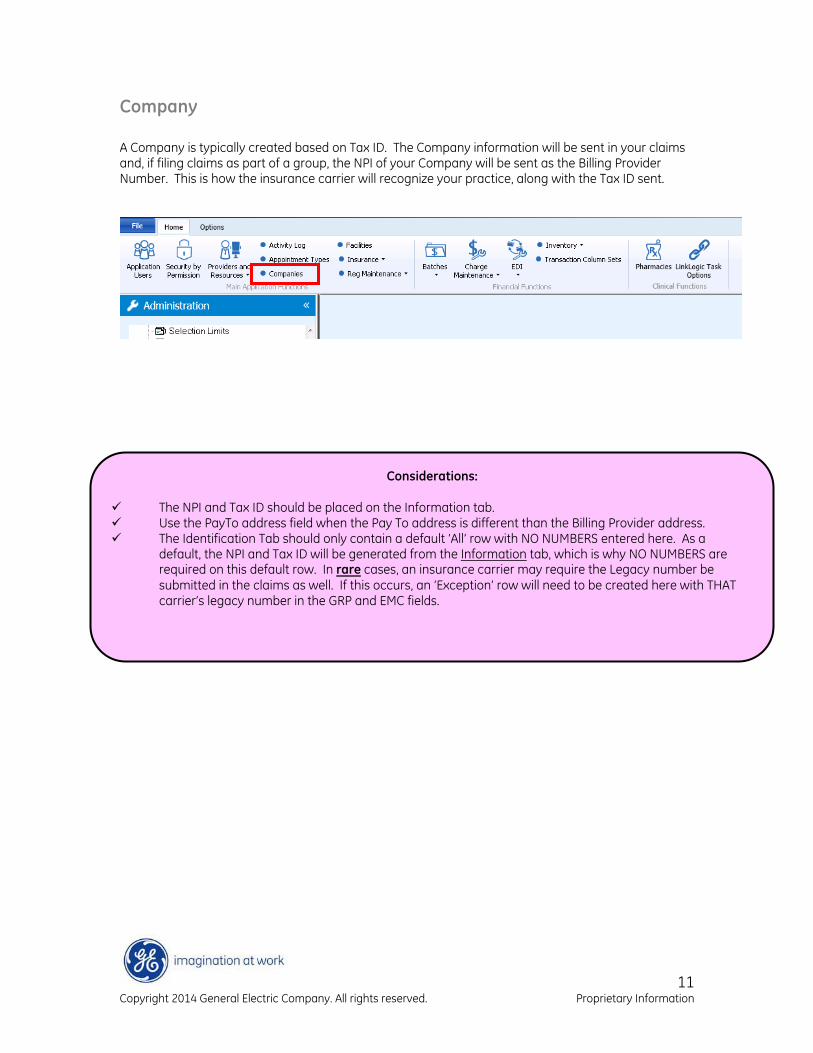
Company A Company is typically created based on Tax ID. The Company information will be sent in your claims and, if filing claims as part of a group, the NPI of your Company will be sent as the Billing Provider Number. This is how the insurance carrier will recognize your practice, along with the Tax ID sent.
Considerations:
The NPI and Tax ID should be placed on the Information tab. Use the PayTo address field when the Pay To address is different than the Billing Provider address. The Identification Tab should only contain a default ‘All’ row with NO NUMBERS entered here. As a
default, the NPI and Tax ID will be generated from the Information tab, which is why NO NUMBERS are required on this default row. In rare cases, an insurance carrier may require the Legacy number be submitted in the claims as well. If this occurs, an ‘Exception’ row will need to be created here with THAT carrier’s legacy number in the GRP and EMC fields.

12 Copyright 2014 General Electric Company. All rights reserved. Proprietary Information
Fee Schedules
Fee schedules are designed to set up the general rules for calculating charges for procedures. A fee schedule tracks fees, RVUs, costs, and allowed amounts for a procedure. These items can be associated with the responsible provider, facility, company, and financial class of a patient. Fee schedules can be stored within the application for access throughout the system. You can create multiple fee schedules based on carrier reimbursements. The application allows you the flexibility to set up fee schedules using either a flat fee or RVU (Relative Value Unit). With the application, you have the ability to increase an entire fee schedule by a percentage (%) amount, copy and rename an existing fee schedule and set effective dates for fee schedules.
Considerations: Best practice is to set up Fee Schedules for only those carriers that can be maintained on
an ongoing basis. For example, you may wish to create Fee Schedules for all carriers, but maintaining the Allowed amounts for ALL carriers may not be practical. For this reason, typical practice setup is to enter Allowed amounts for the top 5 payers in your practice, as long as those 5 can be maintained.
At least one Fee Schedule must be created. Typically, a “Standard Fee Schedule” is created to reflect the usual and customary Fees for each procedure code. It is also recommended that the base fee be included as the Allowed amount on this fee schedule, from the Fee Schedules tab of the procedure code. Placing the base fee in the Allowed amount field will allow calculating patient portions from this Allowed amount. For example, if your practice decides to offer a cash discount for self-pay patients, the Standard Fee Schedule would be copied and the Allowed amount could be adjusted to 80% (giving the patient a 20% discount). If the Allowed amount field is blank, the Copy feature for Fee Schedules would not be available and each procedure code would need to be manually edited.
Naming the Fee Schedule with the year included in the name is best practice. This will help manage your fee schedules from year to year with regard to effective and expiration dates.
Modifiers can be used in determining the fee for a performed service. For example, if a modifier 50 is posted, (bilateral procedure), the Fee Schedule could automatically reduce the fee and/or allowed amount by 50% for this procedure code when posted.
If creating a Fee Schedule based on RVU, remember that conversion factors can ONLY be setup on the Department of the procedure code. In addition, the RVU itself must be manually entered for each procedure code in the procedure code table.

13 Copyright 2014 General Electric Company. All rights reserved. Proprietary Information
Insurance Carriers While most databases installed will have insurance carriers preloaded, it is still sometimes necessary to add insurance carriers to the database. Insurance carriers have required fields in order to be able to file electronically and/or on paper. (Insurance Carriers are not preloaded with addresses. If mailing addresses are needed, these will need to be added).
Considerations:
When creating insurance carriers, the following items are REQUIRED for EVERY carrier: o Information tab: Name, Carrier Type, Transaction Column Set, Policy Type and Filing Method
(2 parts-type and method). o Identification Tab: Required for ALL payers (paper AND electronic)
Default All row with Payer ID only, no other criteria entered here. EDI tab is required ONLY if Information tab states “Electronic for the filing type”.
Default All row including Clearinghouse/Payer ID/Plug-In for the File Creators It is NOT necessary to create a carrier for Medicare Secondary, as long as Policy Type for Medicare
carrier is set to “Other”. Further, it is best practice to set Policy Type to Other for ALL carriers, with the exception of Worker’s Compensation.
Optional setup on the insurance carriers that may be helpful include Financial Class, Allocation Set, Insurance Group and Collections Group. Caution! If the Allocation Set attached to the carrier will NOT be the allocation set for ALL patients that have this insurance, it is best practice NOT to select the Allocation Set on the insurance carrier. The allocation set would be selected at the time the patient is registered, according to their specific plan’s requirements.
Caution! It is NOT recommended to change the Insurance Carrier ID that is automatically assigned. The original ID is needed when setting up Remittance Processing.

14 Copyright 2014 General Electric Company. All rights reserved. Proprietary Information
Procedures Although your database will most likely come pre-loaded with the procedure codes specified on your spreadsheets, some modification may be necessary and new codes added.
Considerations:
When adding procedure codes, the Code field will be used during charge entry. The CPT code field will be billed to the insurance carrier.
In-house codes, i.e. NSF check fees, Postoperative visit codes (99024) can be created as well. If a code will never be billed to any insurance carrier, leaving the CPT code field blank will remove the checkmark from the code when it is posted in Billing. In addition, any Fee associated with the code will automatically default to the patient’s responsibility. Examples of when this setup would be beneficial: NSF fees, Retail products sold in your office, i.e. Dermatology products, etc.
Required fields for the procedure codes are Code, HCFA qualifier, Description, Department, Specialty and Fee. CAUTION! If the visit Doctor’s specialty is not attached to the procedure code, the procedure code will not display when posting charges!
Place of Service should be left blank as some procedure codes could be performed in multiple places of services. The Facility used on the visit when this procedure code is posted will determine the Place of Service Code sent.
Type of Service Code can be left blank, UNLESS it is required on a PAPER claim. Electronically, this field is NOT used.
On the Fee Schedule setup, there are multiple optional fields available per procedure code and fee schedule combination, as well as overrides available. Some of the most commonly used options are:
o Laboratory is marked for all Laboratory procedure codes (this will send a CLIA #, if applicable) o Use Responsible Provider as Referring (used when a referring doctor is required, BUT can also
be the same Doctor listed as the Responsible Provider on the Visit. Typically used for Medicare when there is a Laboratory, Procedure or X-ray performed in the Office that requires a referring, but the Responsible Doctor can be sent as the Referring Doctor as well).
o Referring Provider Required (Typically used for Consult codes and when the Responsible Doctor CANNOT also be the Referring Doctor).

15 Copyright 2014 General Electric Company. All rights reserved. Proprietary Information
Referring Providers The referring provider table should contain all providers that refer patients to your practice. Reports can also be generated by Referring Provider for statistical data.
Considerations: A BLANK default row is required for every Referring Provider. DO NOT enter your practice’s Responsible Providers in this table. They will not appear in this
table, however, when your own Responsible Provider can also be the Referring Provider, he/she WILL appear in the Referring Provider table search on the Visit Info tab of the visit.
Specialties and Organization are not required for the Referring Providers, but may be entered, if desired.
16 Copyright 2014 General Electric Company. All rights reserved. Proprietary Information
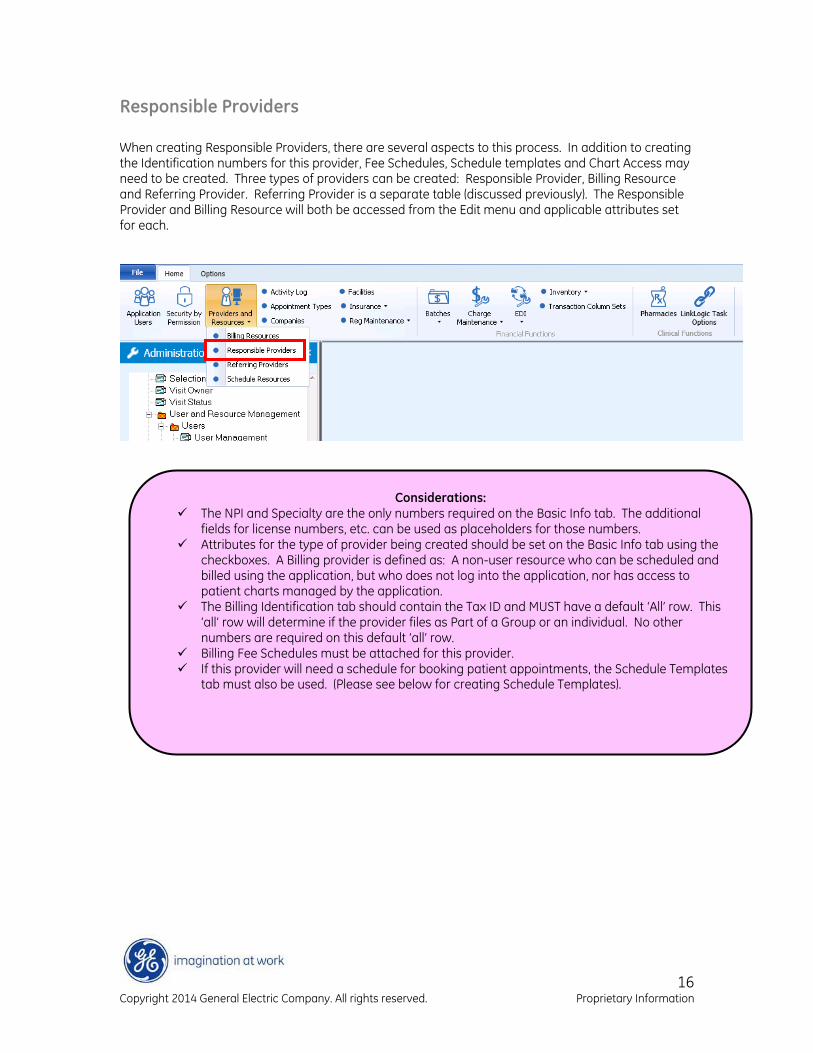
Responsible Providers When creating Responsible Providers, there are several aspects to this process. In addition to creating the Identification numbers for this provider, Fee Schedules, Schedule templates and Chart Access may need to be created. Three types of providers can be created: Responsible Provider, Billing Resource and Referring Provider. Referring Provider is a separate table (discussed previously). The Responsible Provider and Billing Resource will both be accessed from the Edit menu and applicable attributes set for each.
Considerations: The NPI and Specialty are the only numbers required on the Basic Info tab. The additional
fields for license numbers, etc. can be used as placeholders for those numbers. Attributes for the type of provider being created should be set on the Basic Info tab using the
checkboxes. A Billing provider is defined as: A non-user resource who can be scheduled and billed using the application, but who does not log into the application, nor has access to patient charts managed by the application.
The Billing Identification tab should contain the Tax ID and MUST have a default ‘All’ row. This ‘all’ row will determine if the provider files as Part of a Group or an individual. No other numbers are required on this default ‘all’ row.
Billing Fee Schedules must be attached for this provider. If this provider will need a schedule for booking patient appointments, the Schedule Templates
tab must also be used. (Please see below for creating Schedule Templates).

17 Copyright 2014 General Electric Company. All rights reserved. Proprietary Information
Schedule Templates Whether creating schedule templates for Responsible Providers or Schedule Resources, the steps are exactly the same. It is recommended that Appointment Types be created first and assigned to all applicable schedule resources and responsible providers BEFORE creating the schedule templates. Sometimes, allocating a specific appointment type to a specific time slot is needed and this can only be accomplished when appointment types are created first.
Considerations:
Schedule templates can be copied from and to Responsible Providers and Schedule Resources by using the Copy feature of the Schedule template. This may help eliminate some of the setup process.
When naming the schedule templates, be specific so that other users will understand what the template is used for. For example: Bailey M-W-F 9-5 Main means: Dr Bailey, every Monday, Wednesday and Friday from 9:00 am to 5:00 pm at the Main Office. If this template is copied, it can be renamed for the specific Resource or Provider that will be using it.

18 Copyright 2014 General Electric Company. All rights reserved. Proprietary Information
Statement Criteria Statement criteria setup is accomplished in two different sections; One is the Administration module/System folder/Application menu/Statement Options (1). The second step is in the Reports module/File menu (2). When creating the statement setup, remember that statements are generated by the Guarantor, not the patient.
Then from the Reports Module, File menu/Statements:
1
2

19 Copyright 2014 General Electric Company. All rights reserved. Proprietary Information
Considerations: Statements can be generated by Company, Doctor or Database. Typical setup is to generate
statements by Company. For Statement Options, it is not recommended to select “Include patients with transactions
since their last statement date”. This option will override the minimum balance criteria and send 0.00 statements when the patient makes a full payment from the previous statement.
For Statement Criteria, best practice is to use the Weekly A-Z setup, using ‘Interval days’ of 7 and ‘Days Between statements’ at 28. This means that each week, the guarantors will be checked for any minimum balance set. If this guarantor has NOT had a statement within 28 days, CPS will generate a statement at this time. This setup helps to streamline the process and generate statements for guarantors that may have had a large transfer within the past 7 days.

20 Copyright 2014 General Electric Company. All rights reserved. Proprietary Information
End of Day Processes Balancing all financial data at the end of each day should be performed. The usual method for accomplishing this task is to use an adding machine to run a tape of the charges, payments, and/or adjustments totaled on the Superbills. Next, compare these figures against the Daily Balance and Deposit Slip reports. These numbers should balance. If the numbers do not balance, compare each individual Superbill’s total against the reports. Locate any discrepancies. Correct the necessary visits in the Billing module. Re-run the reports. Verify your figures again. Repeat these steps until you balance. (Another method to balancing Charges is to use Charge Management and hash totals. This is a more accurate way to balance charges). The Daily Balance and Deposit Slip reports (See the Reports and Statements Companion Guide) are the recommended reports for your daily activities, however, other reports can be generated for your practice specific needs, if desired. After all batches have been balanced, closing the batch(es) should be a daily activity as well. This is accomplished from the Administration Module/Edit menu/Batch Closing.
Considerations: The Daily Balance report can be generated by each user, however, it can also be generated for the
practice as a whole. For example, running the Daily Balance for today’s date and grouping by User will provide an overall daily total for the practice by User data entered. Using this method, each user can simply preview the Daily Balance for their own totals to balance. The practice Administrator can then print one Daily Balance for all users for the day.
Creating static dates can also help to streamline the end of day activities. For example, a copy of the Daily Balance and Deposit Slip reports can be created with “today” in the From and To Dates. These reports can then be placed into a new folder named “Daily Reports”. All reports that live in a folder can then be printed with one click instead of running each report separately. (Please see the Reports Companion Guide for additional instructions).
Closing the batch(es) (soft close) is HIGHLY recommended as a DAILY activity. This step helps to eliminate adding/deleting transactions in error.

21 Copyright 2014 General Electric Company. All rights reserved. Proprietary Information
End of Month Processes The first step in balancing your monthly financial data is to perform a Hard Close of the system (Closing Date). This step is CRUCIAL to retain the financial data’s integrity in your database. Failure to set the Closing Date each month can result in mismatched financial data from month to month. Since some of the reports depend on a Hard Close, this step must NOT be avoided. Once the system closing date is set, the financial data up to that date cannot be manipulated without tracking. This is the sole purpose of setting the Closing Date. It is recommended that the system’s Closing Date be set at LEAST ONCE PER MONTH. After the Closing Date is set to last day of the prior month, monthly reports can be generated. Some of the recommended monthly reports include Daily Financial Summary, Monthly Financial Summary, Monthly Transaction Summary, Monthly Production Analysis, Aging Summary by Financial Class, Aging Summary by Responsible Provider, Aging Totals by Patient, and Practice Aging. Of course, other reports can be generated according to your practice specific needs.

22 Copyright 2014 General Electric Company. All rights reserved. Proprietary Information
Notes: ______________________________________________________________________________________________________________________________________________________________________________________________________________________________________________________________________________________________________________________________________________________________________________________________________________________________________________ ______________________________________________________________________________________________________________________________________________________________________________________________________________________________________________________________________________________________________________________________________________________________________________________________________________________________________________ ______________________________________________________________________________________________________________________________________________________________________________________________________________________________________________________________________________________________________________________________________________________________________________________________________________________________________________ ______________________________________________________________________________________________________________________________________________________________________________________________________________________________________________________________________________________________________________________________________________________________________________________________________________________________________________ ______________________________________________________________________________________________________________________________________________________________________________________________________________________________________________________________________________________________________________________________________________________________________________________________________________________________________________ ______________________________________________________________________________________________________________________________________________________________________________________________________________________________________________________________________________________________________________________________________________________________________________________________________________________________________________ ______________________________________________________________________________________________________________________________________________________________________________________________________________________________________________________________________________________________________________________________________________________________________________________________________________________________________________ ______________________________________________________________________________________________________________________________________________________________________________________________________________________________________________________________________________________________________________________________________________________________________________________________________________________________________________ ______________________________________________________________________________________________________________________________________________________________________________________________________________________________________________________________________________________________________________________________________________________________________________________________________________________________________________ ______________________________________________________________________________________________________________________________________________________________________________________________________________________________________________________________________________________________________________________________________________________________________________________________________________________________________________